 |
Dana 20 32 Spline Output Shaft Kit By Bill "BillaVista" Ansell |
IntroductionThe Jeep Dana 20 transfer case is a fine, strong, compact transfer-case. That's why it lies in the heart of my extreme rock buggy, the WOLF. But, like so many good things, it has one great Achilles heel - the weak, coarse splined output shaft. No match for big tires, brutal terrain, and super-low gearing, the weak stock output has no place at the heart the Wolf. Enter Advance Adapters, the legendary 4x4 drivetrain specialists. They make the perfect solution - a Heavy Duty 1-3/8" 32 spline Output Shaft Kit that includes a custom machined housing able to accept different Jeep speedometer drive gears for speedo calibration. This replaces the notoriously weak, and silly-splined 1-1/8" 10 spline stock output. |
 |
Follow along, as I unpack, examine, critique, install, and eventually thrash this kit as an upgrade to the Wolf. Advance Adapters Inc. Jeep and Scout Dana 20 T/C Tailhousing 32 Spline Output Part Number: 50-3020 |
|
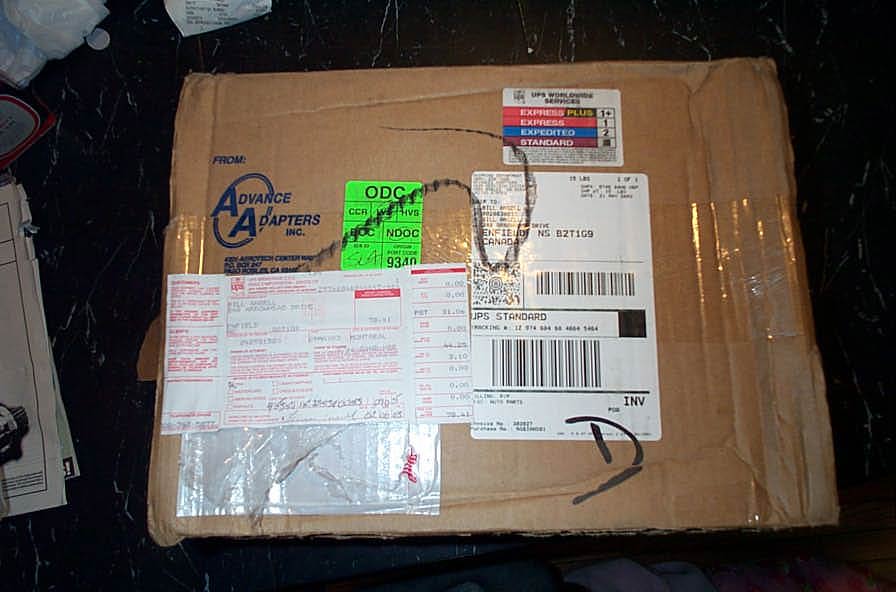 |
Is there anything better than getting home from a hard days work to find a package from your favourite 4x4 parts manufacturer sitting there waiting for you? Your pulse quickens, your mouth goes a little dry, you can't wait to rip it open... |
||||||
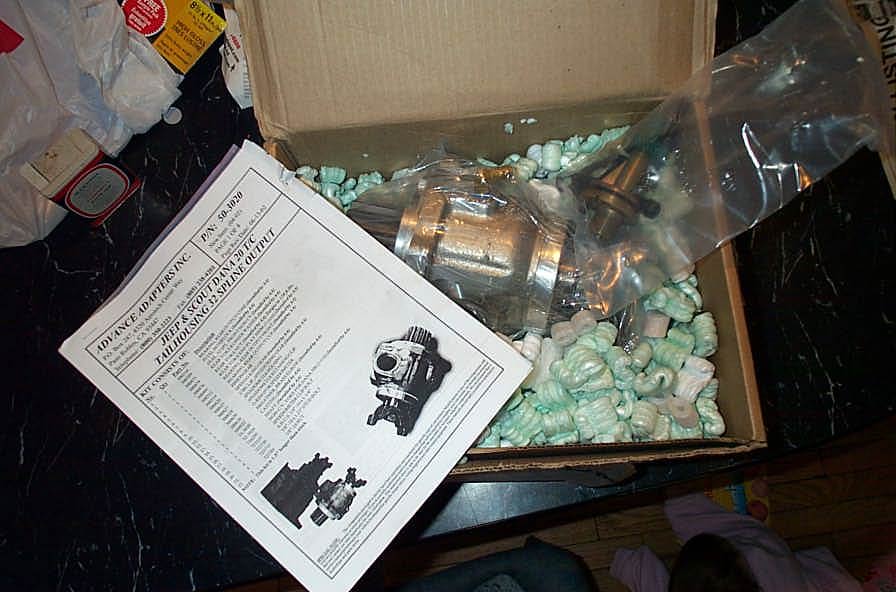 |
...This is how it looks inside. | ||||||
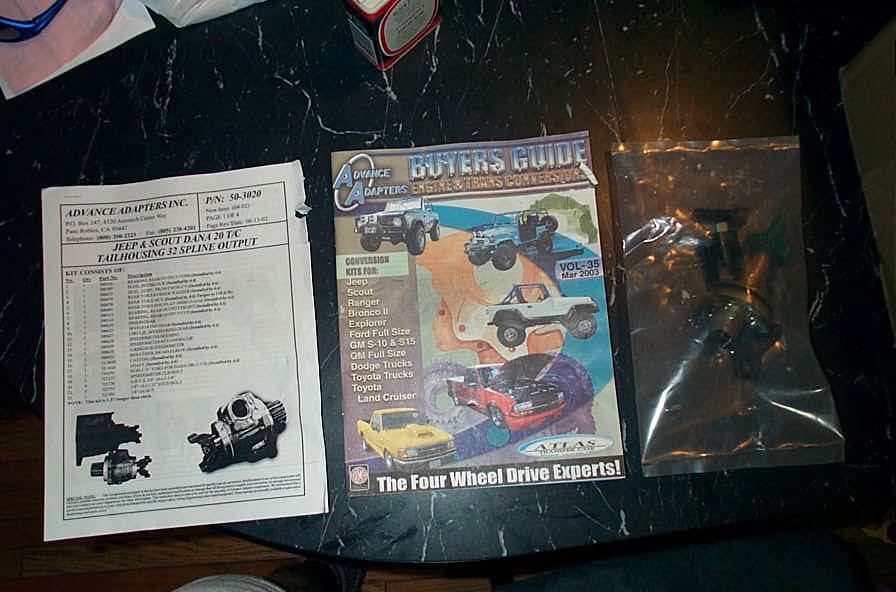 |
You get a set of printed instructions with pictures. The instructions are pretty good (the installation is actually very easy) but this article is much better :-) You also get The Advance Adapters "Engine and Trans Conversions Buyers Guide" which is part colour catalogue, and part technical fact book. Lots of great products and tech info in here. HERE is the relevant page from the catalogue in .pdf format. There's also a bag of small parts included. |
||||||
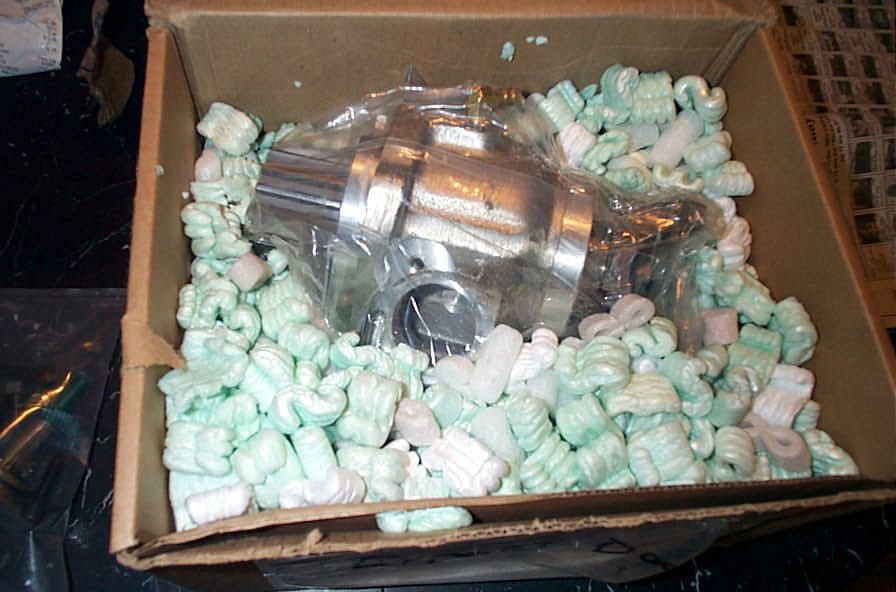 |
But this is what it's really all about. If you're like me, you really appreciate good packaging...it shows pride and care in the product. The AA kit is very well packaged - sealed in plastic and surrounded by packing chips. | ||||||
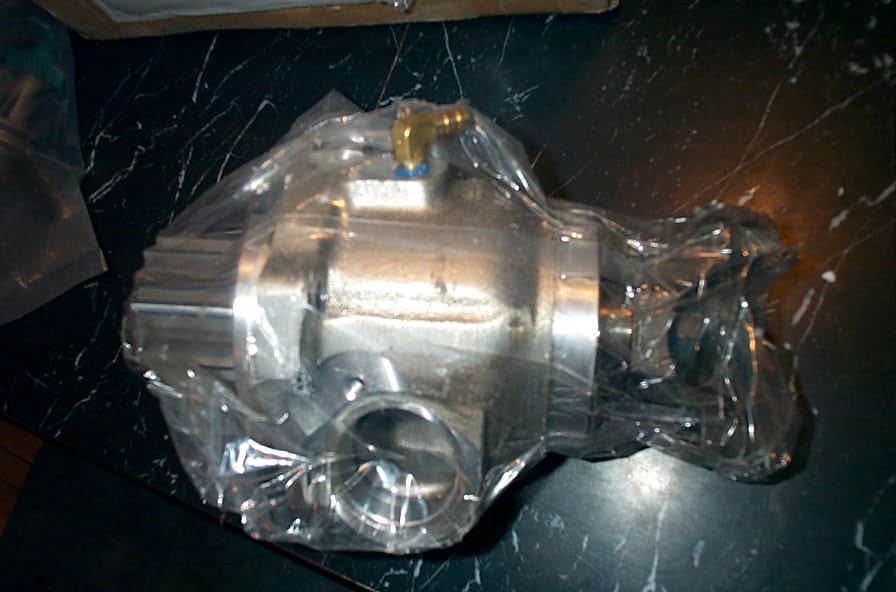 |
A nice touch - it being all wrapped up. | ||||||
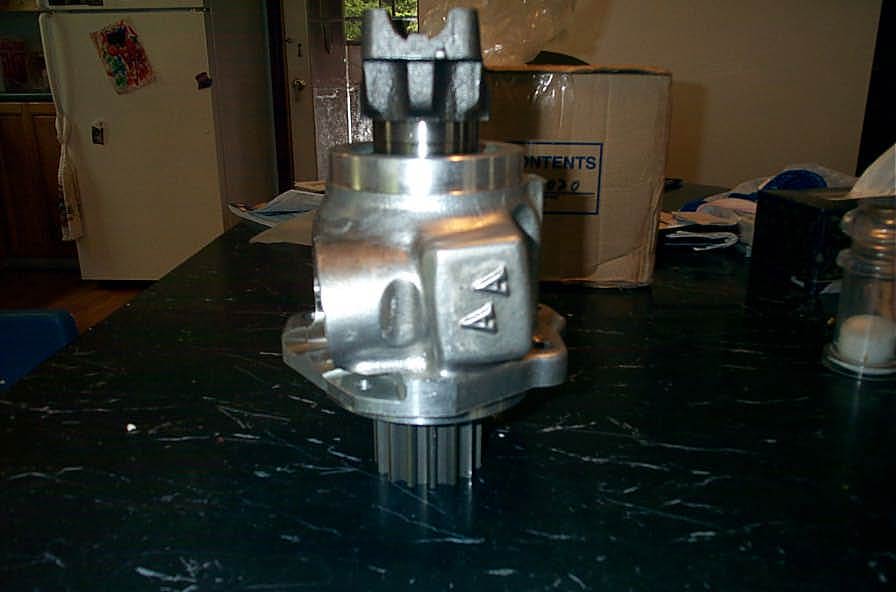 |
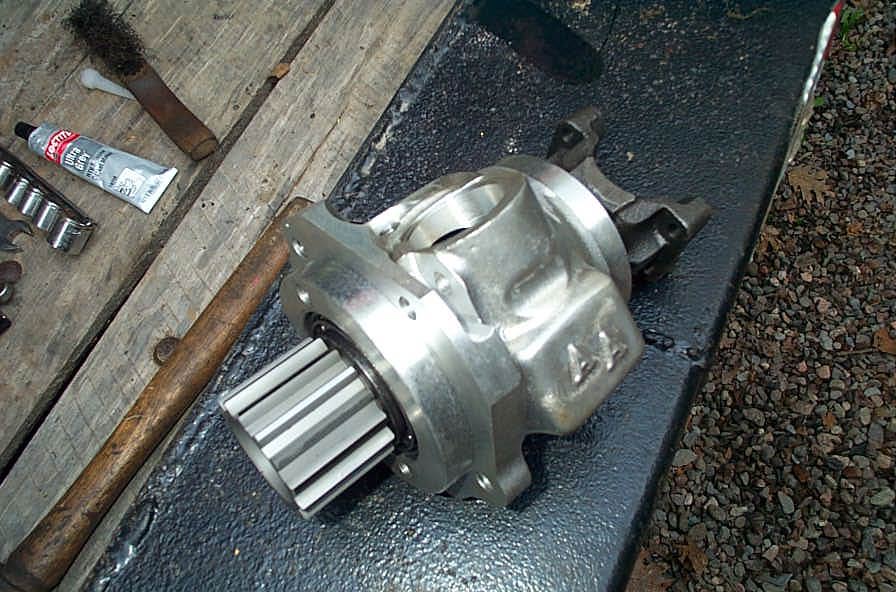
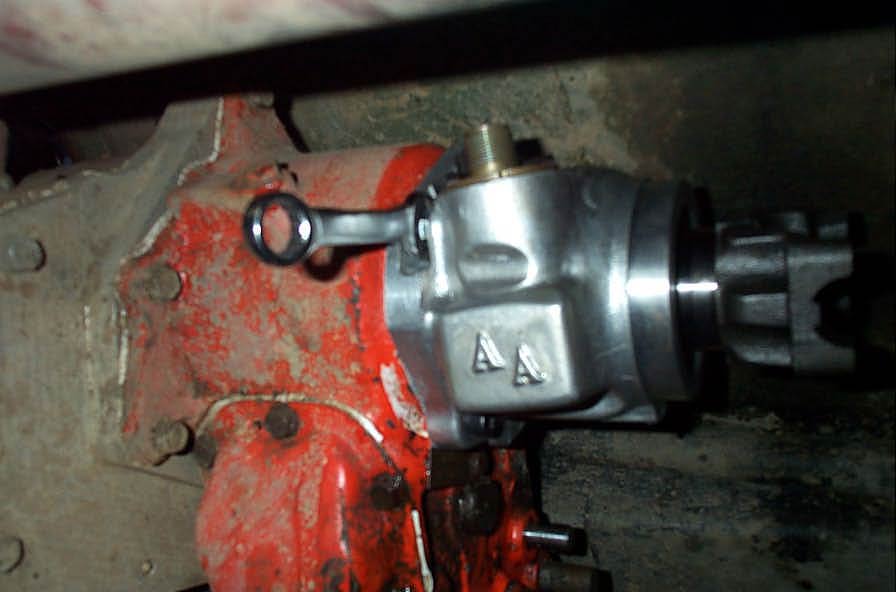
Here it is, free at last. This is one of those great pieces of machinery that a lot of us think of as art work. If I were super-rich I'd have a house decorated with cool machinery instead of vases and stuffy antiques! The AA logo cast into the case is a cool touch! |
||||||
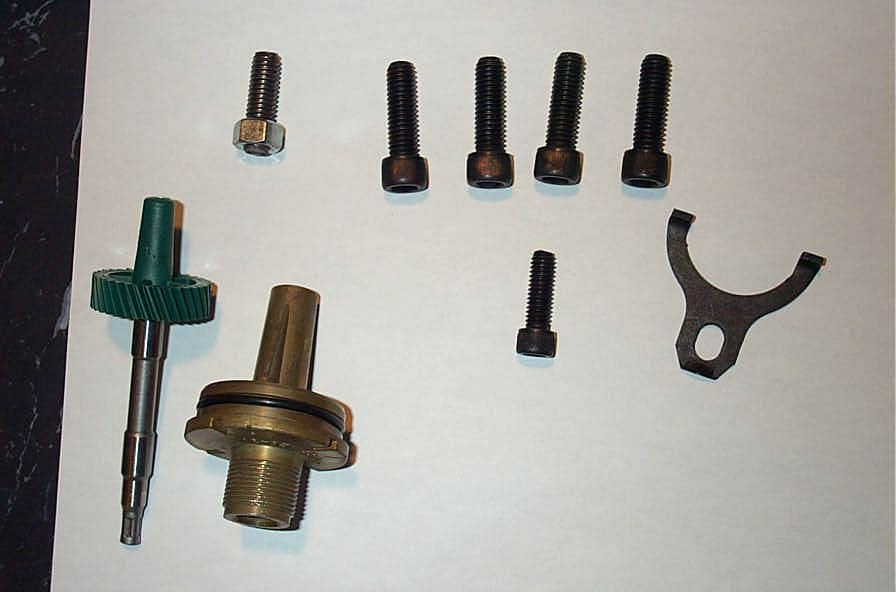 |
Here's a close-up of what's included in the small-parts pack. Note on the left, the late=model Jeep standard type speedometer drive gear and housing. When I ordered the kit, I hadn't realized this was a feature (I was just after brute strength) But it's actually a really nice feature. Using different tooth-count speedo drive gears, it's easy to calibrate your speedo for various gear/tire combos. I don't actually run a speedo in the Wolf, as I had no provision in my old junkyard Dana 20. But I think I just might now. |
||||||
|
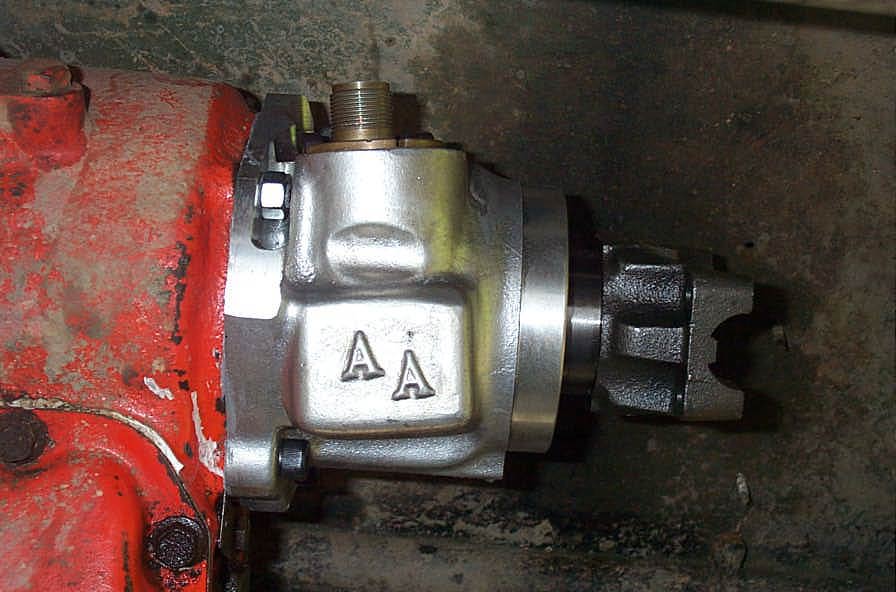
Here's a close-up of the unit. The lighting isn't great in this shot - but it does show the quality of the machining and finish. Top quality gear from a well established and reputable manufacturer. As you all know if you've been reading my articles for any length of time, I'm a "budget-challenged", cheap, homebrew kinda guy. That means, when I do need to spend $$ on parts, they need to be the best value - that means top quality for fair price. Buying the cheapest gear possible for your rig is no way to go - especially when you're dealing with the heart of your drivetrain. |
||||||
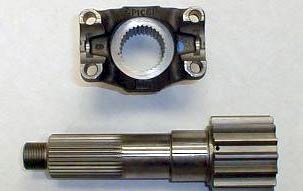 |
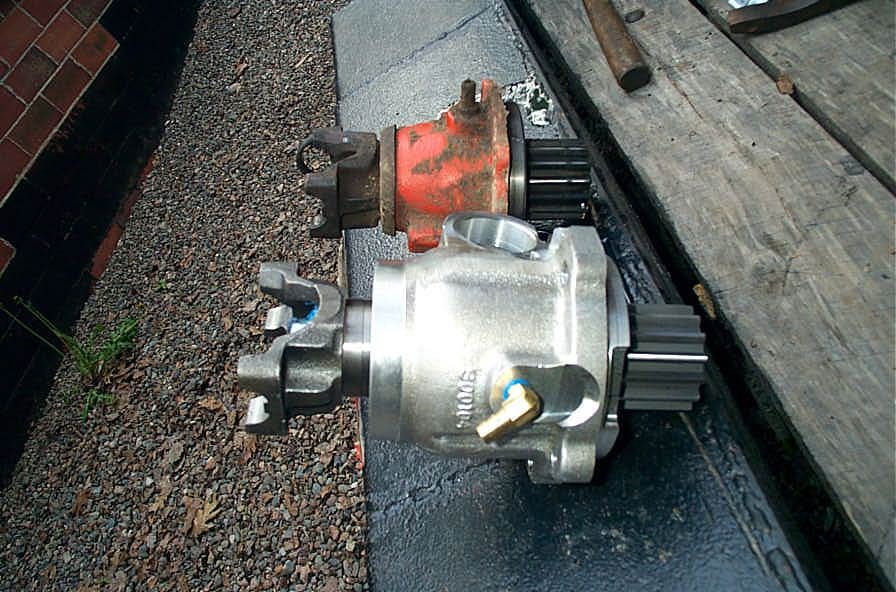
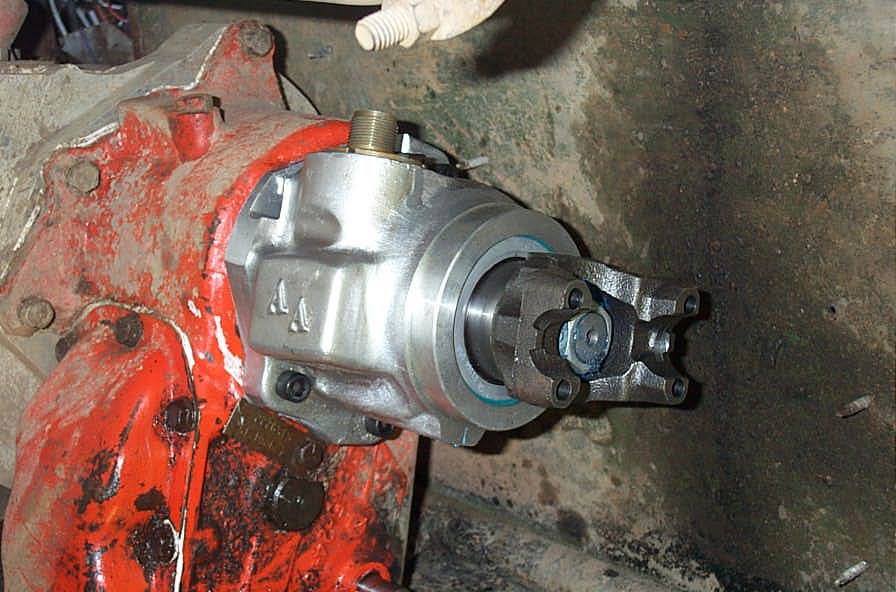
On that note - check out the shaft and yoke that are the heart of the kit. By my rough calculations, this shaft is approximately 50% stronger than the stock 10 spline unit. The yoke pictured that is included in the kit is a 1310 Series U-joint non-CV yoke. This means that you can retain and re-use your existing 1310 Series driveshaft if you are not upgrading it. However, as the AA kit is 1.5" longer than stock - you may well need to shorten your driveshaft. Pic courtesy of Rich Monahan from partsmikeparts.com |
||||||
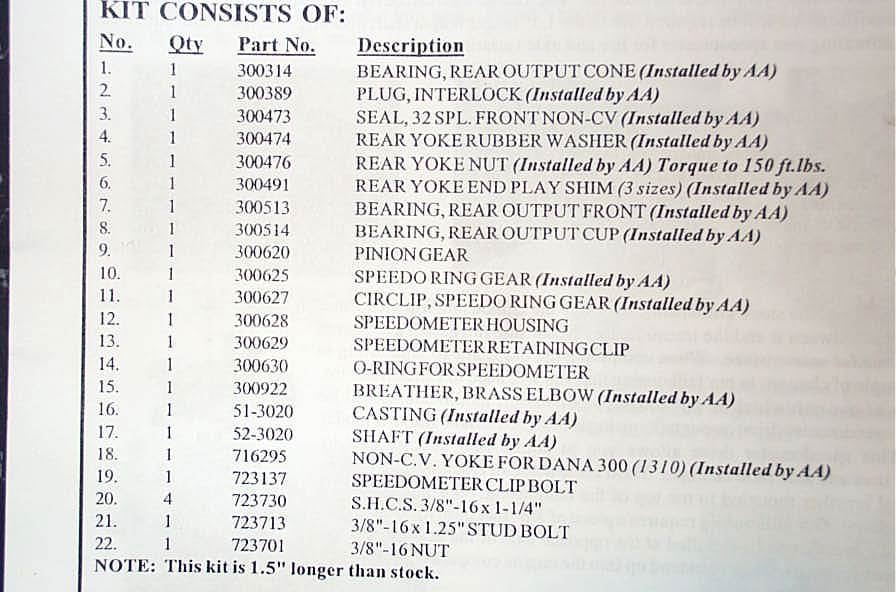 |
Here's the parts list that is part of the installation instructions... | ||||||
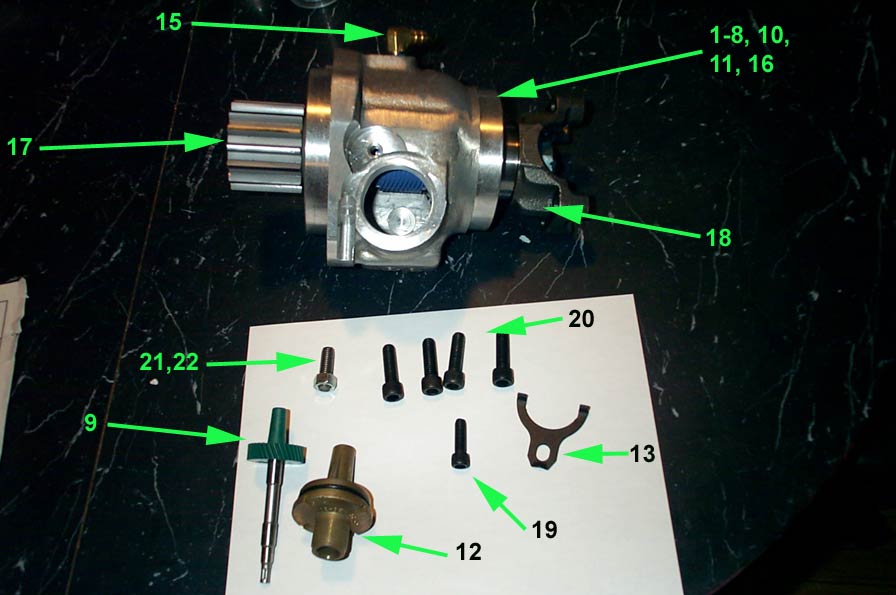 |
...and here is a pic of the entire kit contents with numbers corresponding to the parts list. The kit is complete - including the installation hardware. Personally, that's a feature I always enjoy. Nothing worse than bolting on cool, shiny new parts with rusty, greasy old hardware, and it's a royal PITA to have to stop and go get new hardware halfway through the install. |
||||||
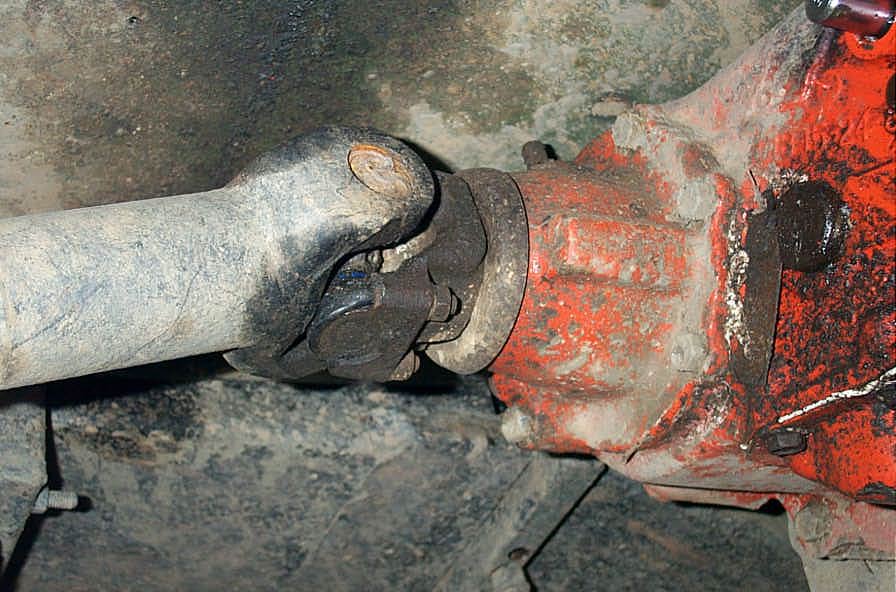 |
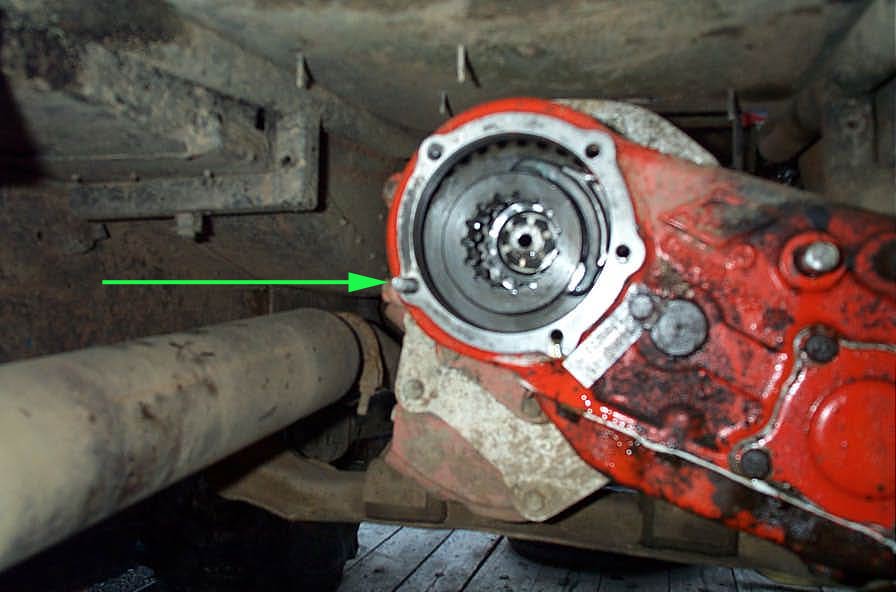
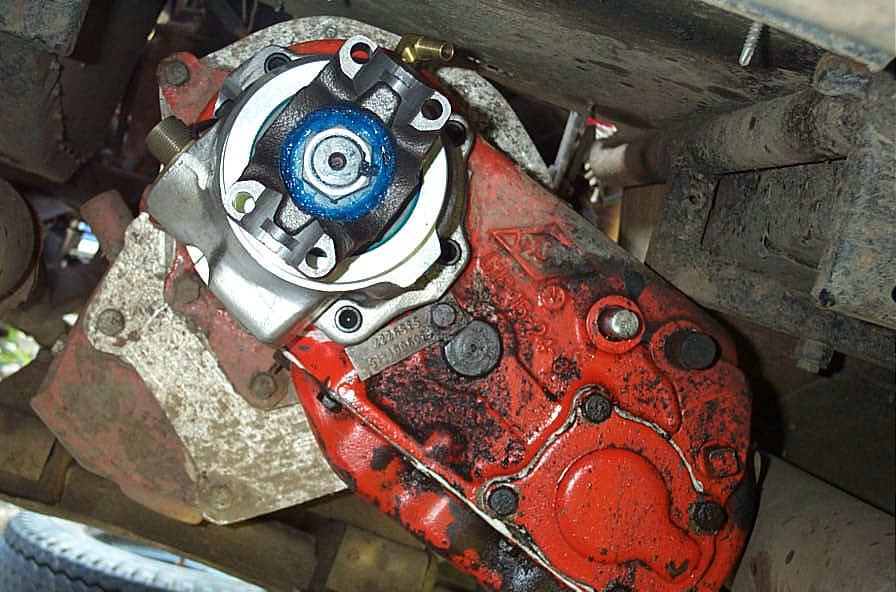
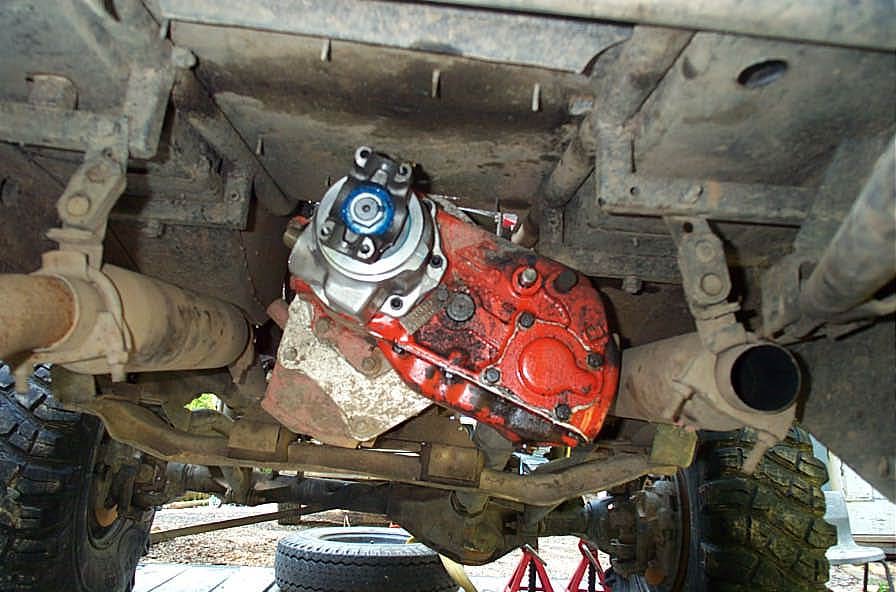
Here's a pic showing the old stock '79 Jeep CJ-7 Dana 20 output I'm replacing. | ||||||
 |
If you look closely, you can see that my Dana 20 is a second transfer case - bolted behind an NP 203 low-range reduction box. This is a key reason for needing to beef the output.....it has to be able to handle the torque of my doubler, as well as my very healthy SBC 350 and 38" (one day to be 42") military tires. | ||||||
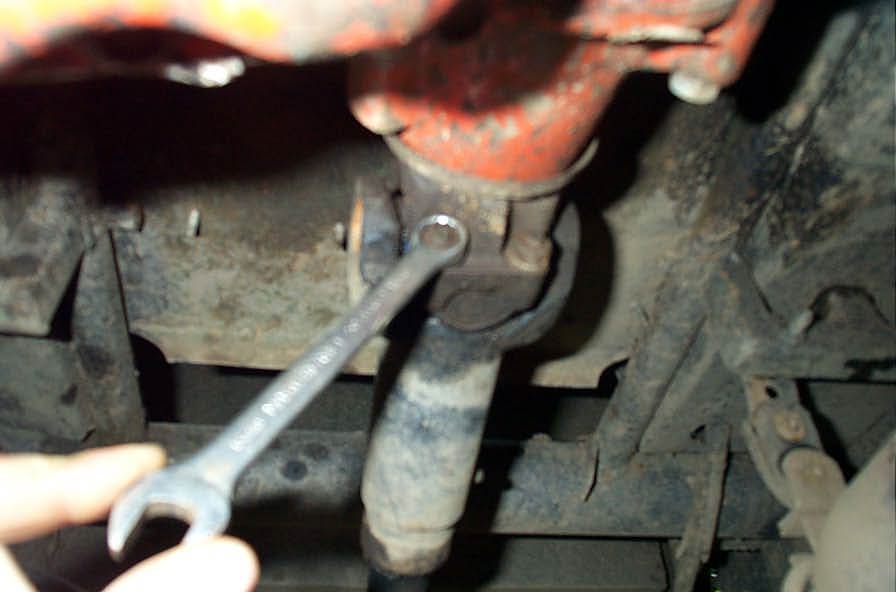 |
Installation begins with removing the driveshaft. At the front, it's just the four 1/2" nuts holding the U-joint U-bolts on. |
||||||
 |
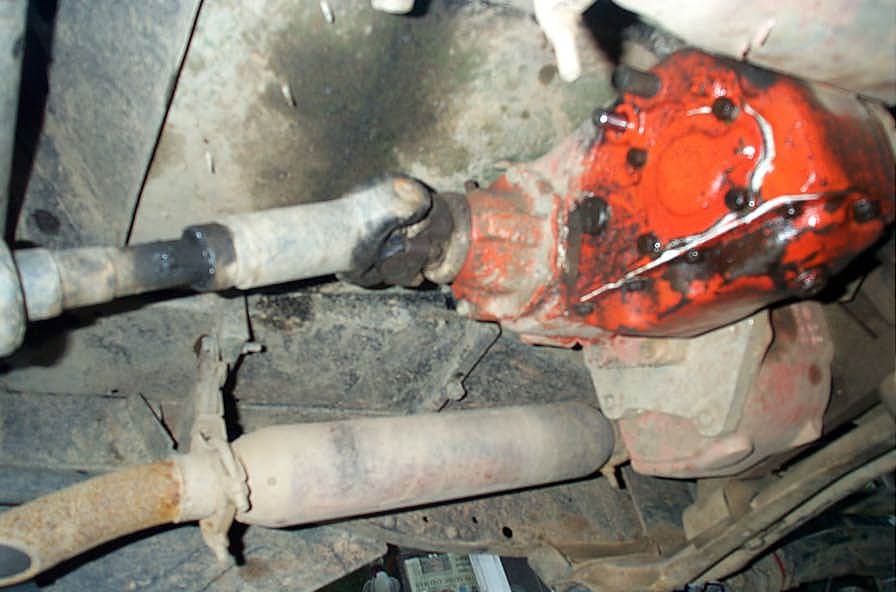
With the driveshaft removed - you simply remove the old output housing. There are five 9/16" bolts. Four are shown - the other is hidden behind the yoke in this pic. Have a drain pan in place to catch any escaping gear oil. In my case - there was just a tiny bit from the lowest bolt hole - but I may have been a little low on fluid. |
||||||
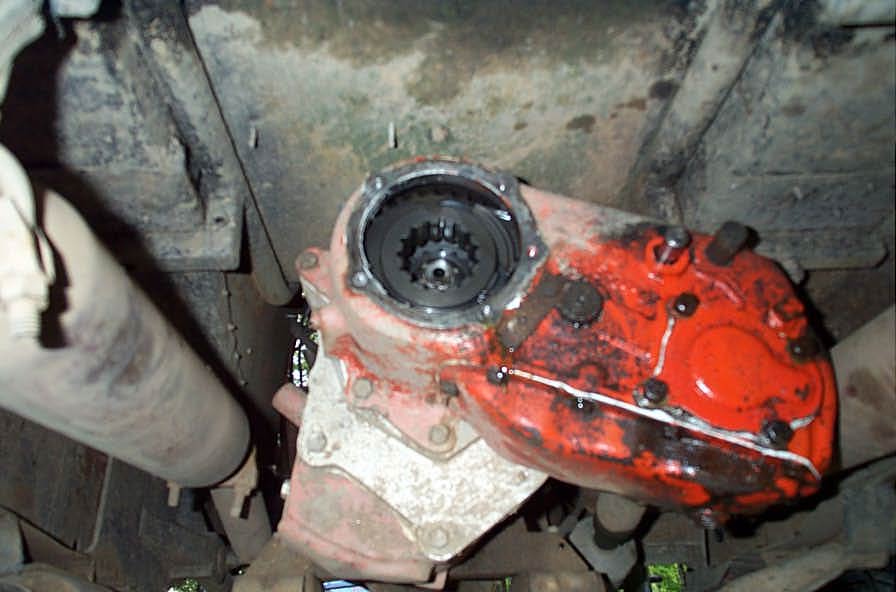 |
After removing the old housing by tapping it loose with a soft-faced hammer, here is what you are left with. | ||||||
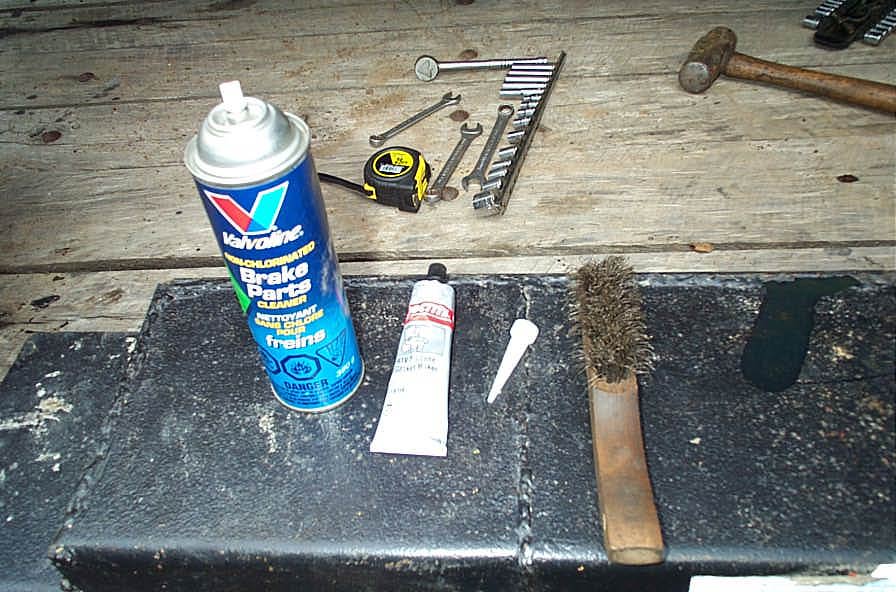 |
The next step is to clean the mating surface on the transfer case. I use brake cleaner, a wire brush, and a rag. Wear your safety glasses folks ! |
||||||
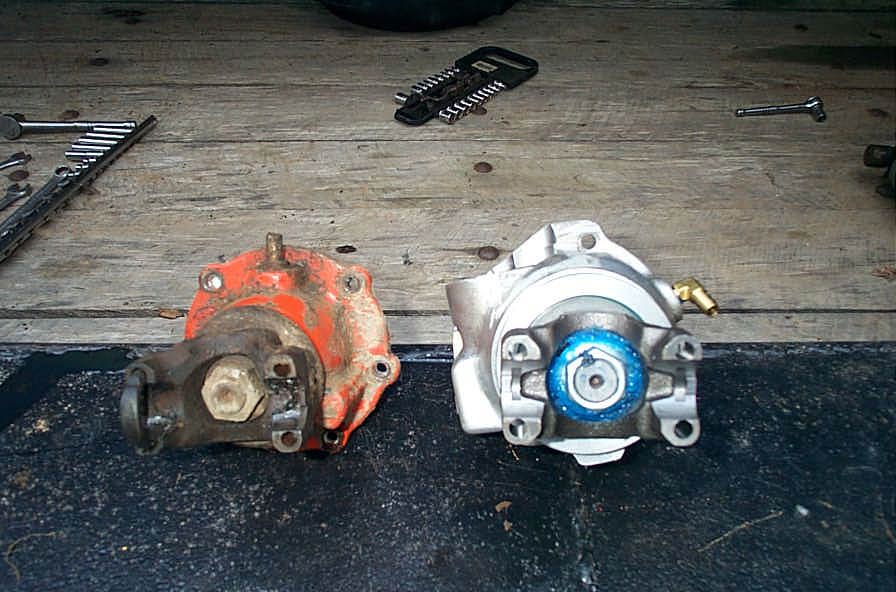
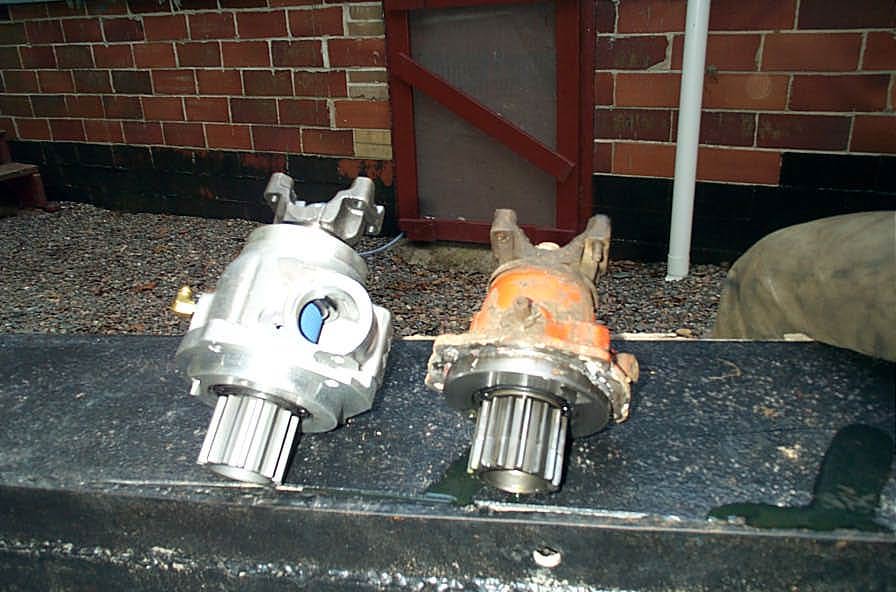
With the old removed - we can now compare the stock output to the Advance Adapters Heavy Duty 32 spline version. The pics speak for themselves. No question what I want handling all the torque to my welded 14bolt rear axle!
|
|||||||
 |
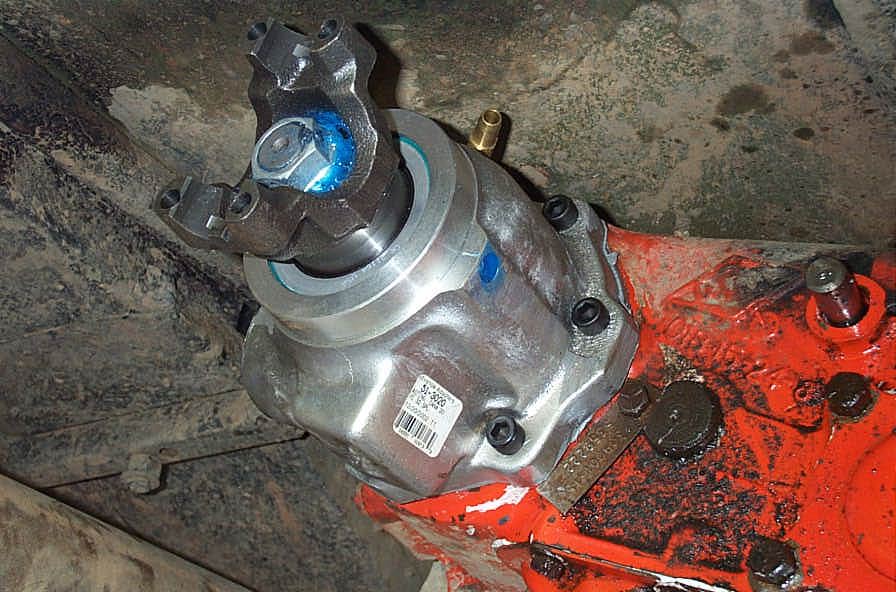
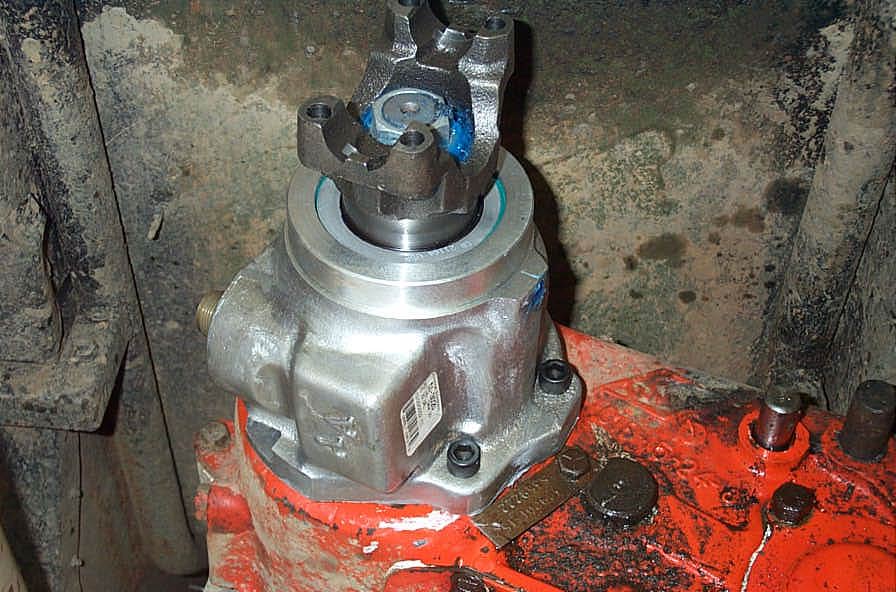
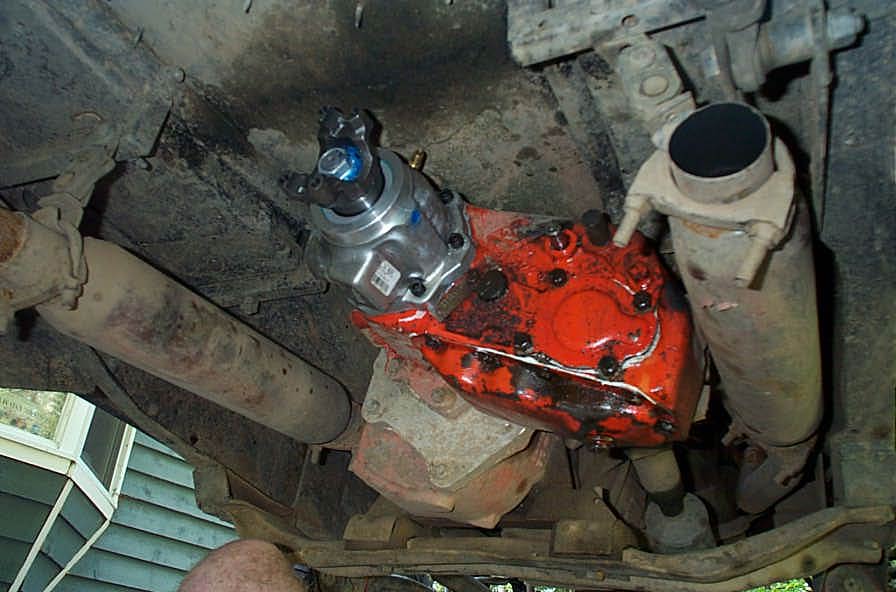
One last pic of the art, before I slap it in. | ||||||
 |
The installation instructions state: "We designed our kit to bolt to the Dana 20 without a gasket. We recommend using a very thin film of RTV blue silicone. Apply a small dab and smooth it out with your finger." Well - I didn't have any blue, just some gray leftover from another project. BUT - when you're the Senior Tech Editor of the world's largest 4x4 site....you get to make some radical calls from time to time - so I went ahead and used it. Yeeeeah! Livin' on the edge baby!! ;-) The pic shows my interpretation of what's required. |
||||||
 |
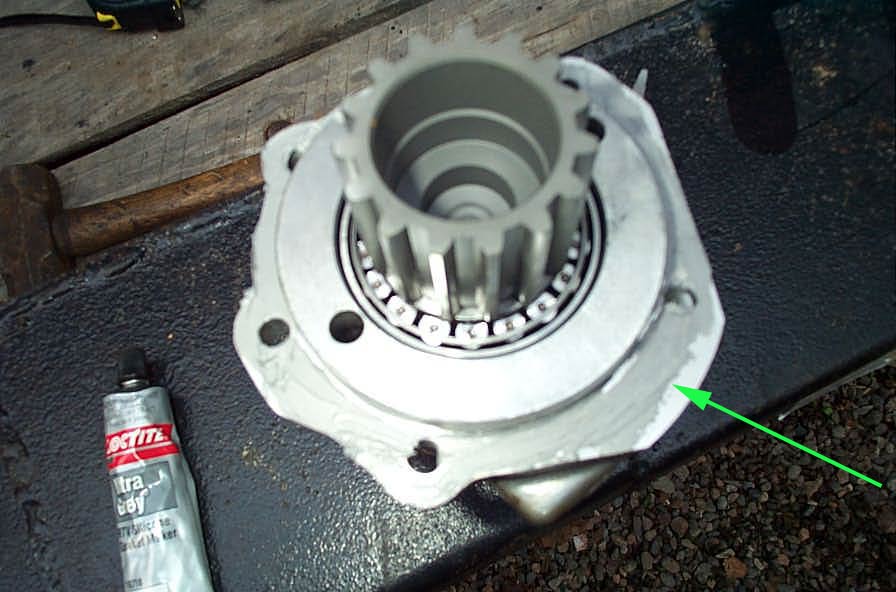
The instructions made no note of this - but I felt it was good insurance anyway. Before I installed the housing I drizzled a little gear oil into the bearing. | ||||||
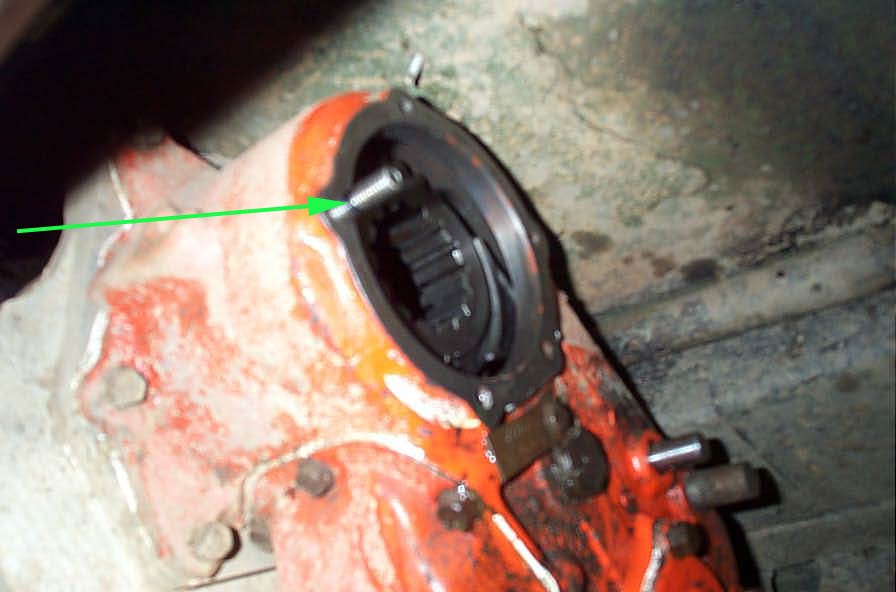 |
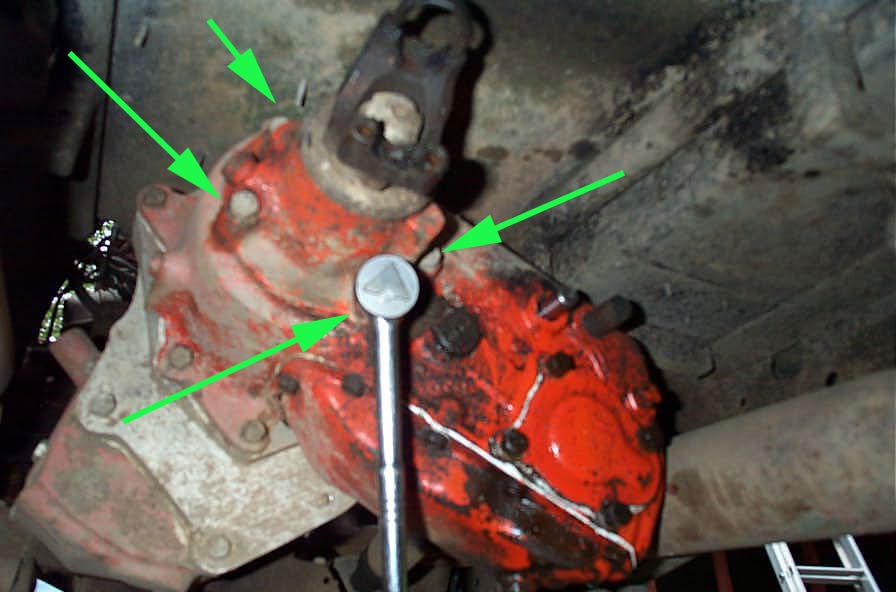
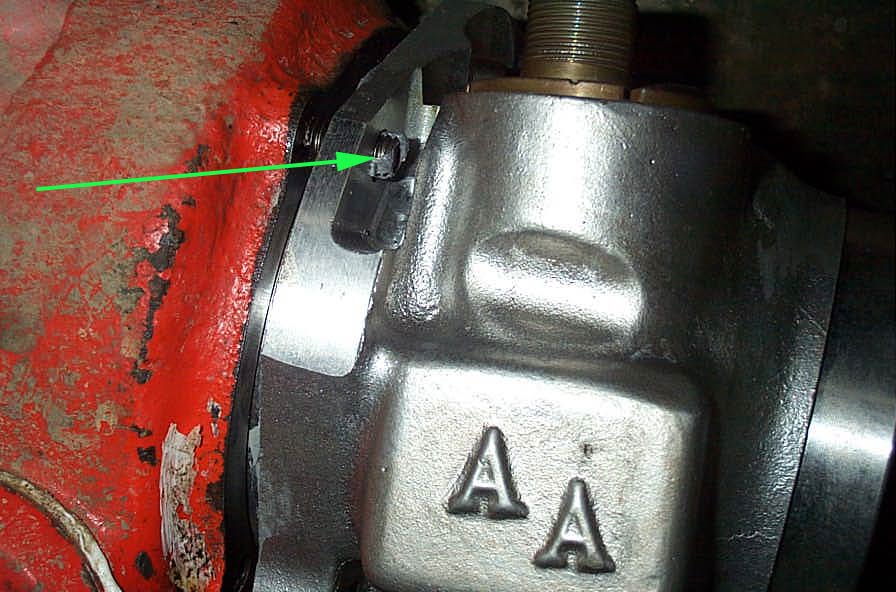
The kit installs with 4 Allen head bolts (technically, socket-head cap screws) and one stud/nut combination. This is because the speedo gear housing casting is in the way where one of the stock mounting holes is. This shows the stud installed in the case. |
||||||
 |
When facing the rear of the case, it is the hole in approximately the 8 o'clock position that requires the stud and nut. The instructions clearly state to thread the stud into the case, leaving no more than 0.600" exposed. This is so that the stud doesn't bottom on the output housing. I simply measured 0.600" stickout with my digital calipers. |
||||||
 |
This shows clearly why the stud/nut is needed instead of a regular bolt. You simply fit the output housing over the stud (green arrow), allowing the stud to just protrude into the "pocket"... | ||||||
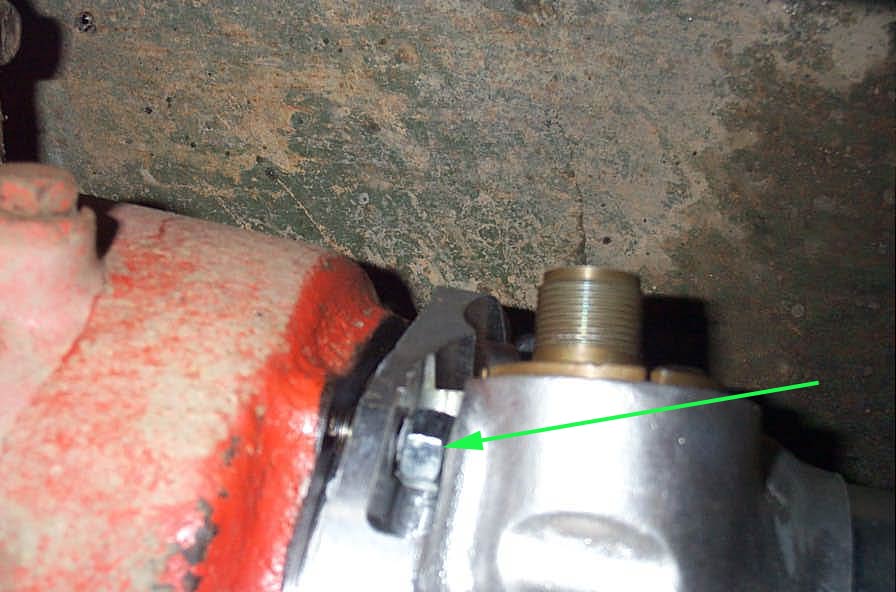 |
...then start the nut on the stud. | ||||||
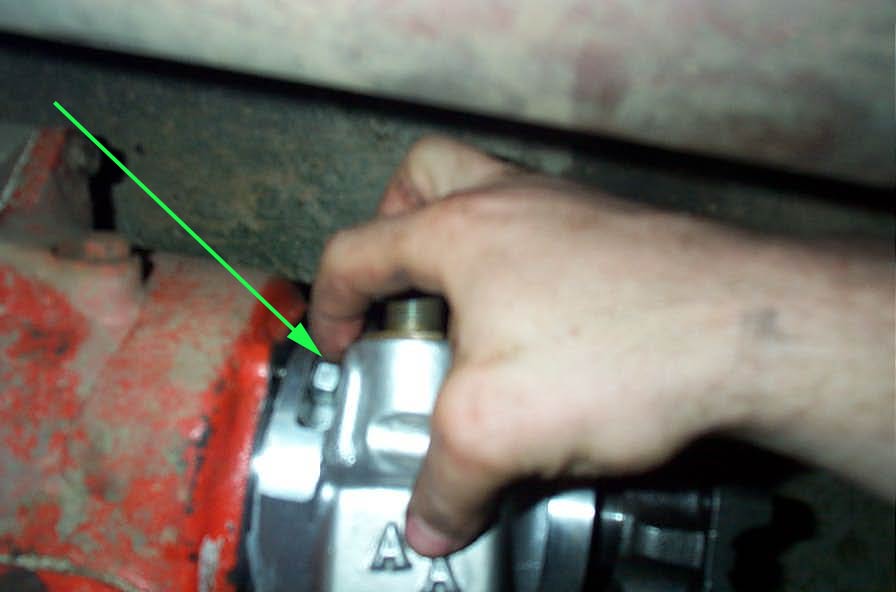 |
Here you can see me using a finger-tip to begin running the nut onto the stud. Before doing it up tight, start the other 4 mounting bolts to ensure everything is square and true. Then simply tighten them all down a bit at a time in a star-like pattern, same as you would for anything. |
||||||
 |
Due to clearance, I had to use a stubby 1/2" wrench to tighten the nut. | ||||||
 |
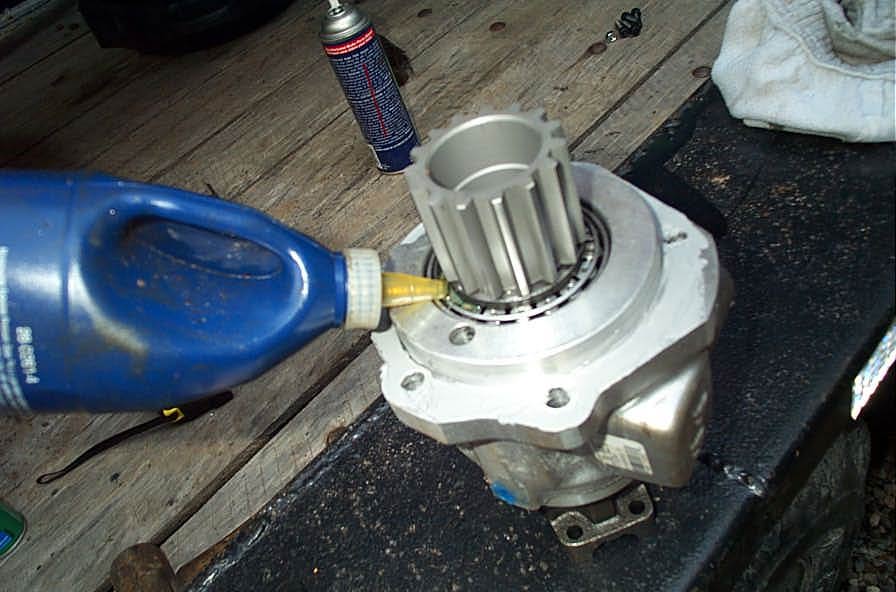
Final torque on the mounting fasteners is 30 ft/lbs. Don't forget to rotate the yoke (transfer case in neutral) to make sure there is no binding or misalignment, then top up the case with gear oil - I use 85w140. |
||||||
 |
The final step is to attach a 3/8" rubber fuel hose to the brass breather elbow (shown in pic) with a hose clamp. This allows you to run the breather as high as you like, out of the water and mud, instead of the stock breather cap thingey just sitting on top of the output case. | ||||||
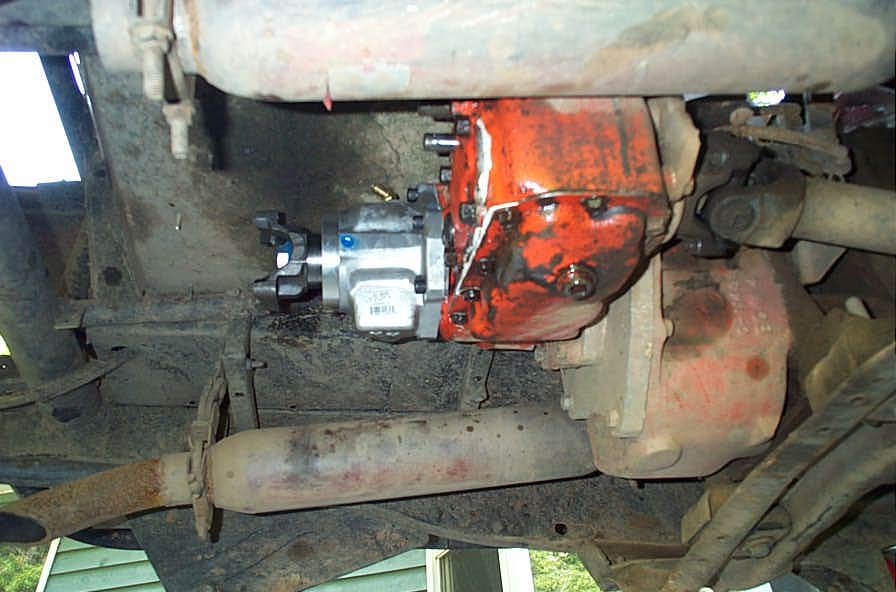
The last photo series shows the housing installed, ready to go.
NOTE: The AA 32 spline output kit is 1.5" LONGER than the stock setup, so driveshaft modifications will very likely be required. I simply hacked 1.5" out of my rear shaft and welded it back together, since I shall not be using it for very long. My next plan is to junk the old 1310 non-cv shaft in favour of the famed 1 ton 1350 CV shaft from High Angle Driveline. This is a perfect match for the AA 32 spline output for strength and durability. It is also an important benefit of the AA output kit - as you cannot hang the 1350 CV shaft from the old stock 10 spline output shaft and 1310 yoke. In fact before I re-installed the old shaft I took measurements and called Jesse at High Angle to order my new driveshaft. ConclusionI can tell from the quality of the materials and machine-work that the Advance Adapters 32 spline output kit is up to the task of powering the rear of the Wolf. It gives me great peace-of-mind to have upgraded the Dana20's notorious weak-point, especially with my doubler. Not only that, but I'm all ready to hang my new 1350 High Angle CV driveshaft! I may be a cheap SOB, but I never mind spending money when the goods are of the highest quality. This kit is a beautiful piece of machine work. It's the perfect upgrade for any Dana 20. References: |
|||||||

|
Sources: Advance Adapters (805) 238-7000 / (800) 350-2223 |
|