 |
Atlas Shifter Conversion By Bill "BillaVista" Ansell |
IntroductionWhen I first installed my Atlas-4SP, back in 2007 (has it really been 5 years!) I did so using the Advance Adapters cable shifters. The reason was: I was doing a lot of other modifications at the same time, and wasn't sure where everything would lay out, so I figured the cable shifters would offer the greatest flexibility. And they did - layout and placement was easy...
|
 |
| ...but I never did like the feel of the shifts they gave. So, when the next round of mods arrived, I knew I wanted to switch to a more conventional direct shifting mechanism. BUT I was short of three things - budget, time, and especially space to fit things. So I needed a solution that would be quick, easy, and cheap to make...and also that would fit in the small space I had available. | |
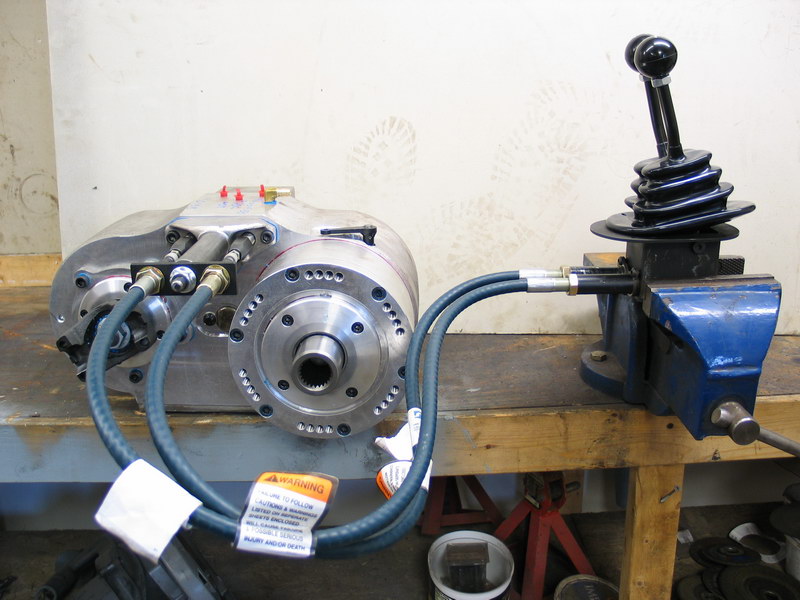 |
This is what the original cable-shifter setup looked like out of the vehicle. Obviously the cables would go, but in keeping with the cheap / quick / easy theme I decided to reuse as much as possible of the original setup. |
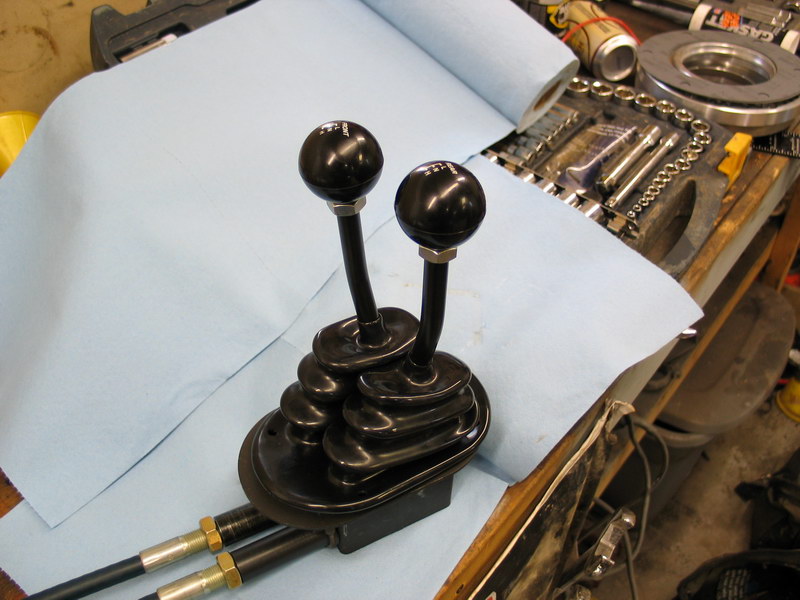 |
The original cable-shift shifters. I wanted to re-use the original boot, shift levers, and knobs. |
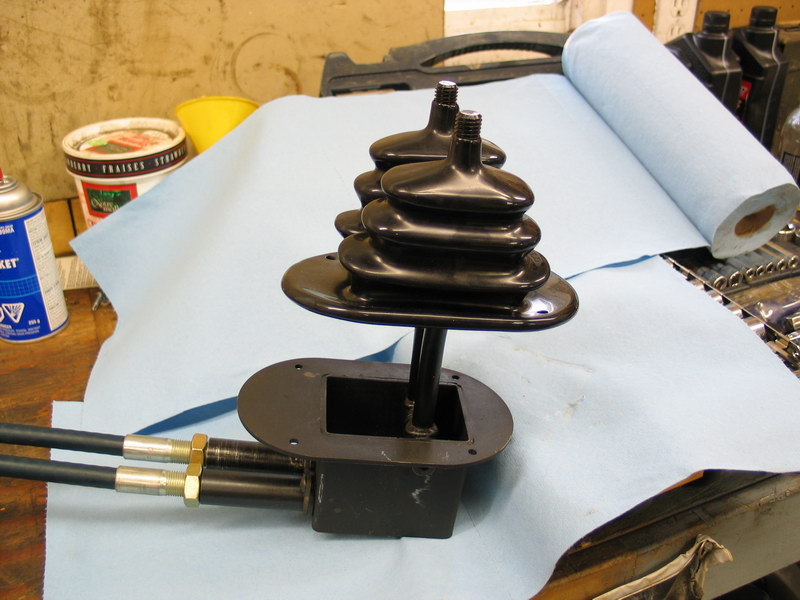 |
So the knobs and boot came off to be reused, but the shifter housing seen here would not be re-used. |
 |
The original shift levers in the original housing. You can see the nice bend in the levers that keeps them close, but clear enough to shift independently with ease. This is one of the features I wanted to retain, along with... |
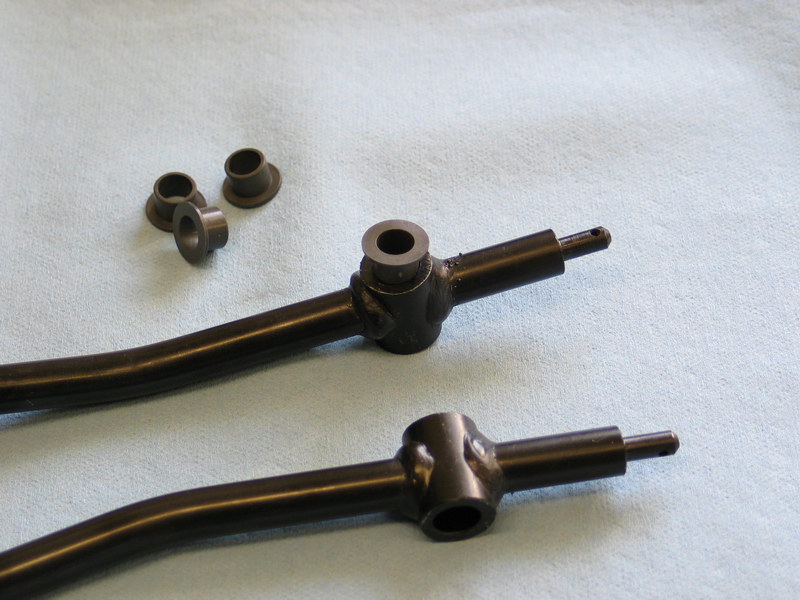 |
... the bushings, and the nice little studs on the ends that... |
 |
...fit perfectly into the Heim joints that originally attached to the ends of the cables. They even have a tiny hole for the little cotter pins. No use re-inventing the wheel, right? Anyway, I removed the the cotter pins and slipped the Heim joints free, |
 |
Then removed the locknut and pivot shoulder bolt from the housing and removed the shift levers. |
 |
Then detached the cable barrel retainer plate(A) and cable barrels (B) from the housing... |
 |
... and pulled the cables free from the housing. The housing is discarded, and the Heim joints I unthreaded from the cables and set aside for later. |
 |
At the other end of the cables, it looks like this. |
 |
I loosened the cables from the extension tube bracket (C)... |
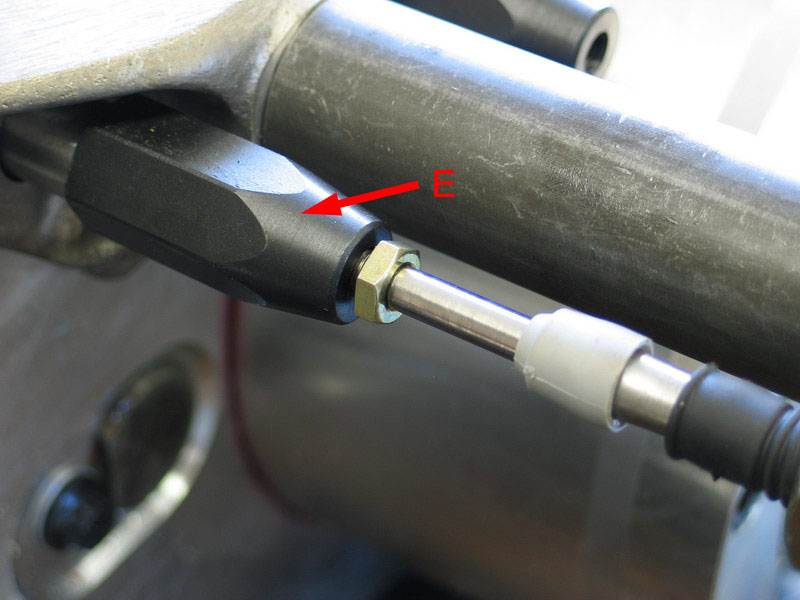 |
...and unthreaded them from the shift rail adapters (E). Then I discarded the cables. |
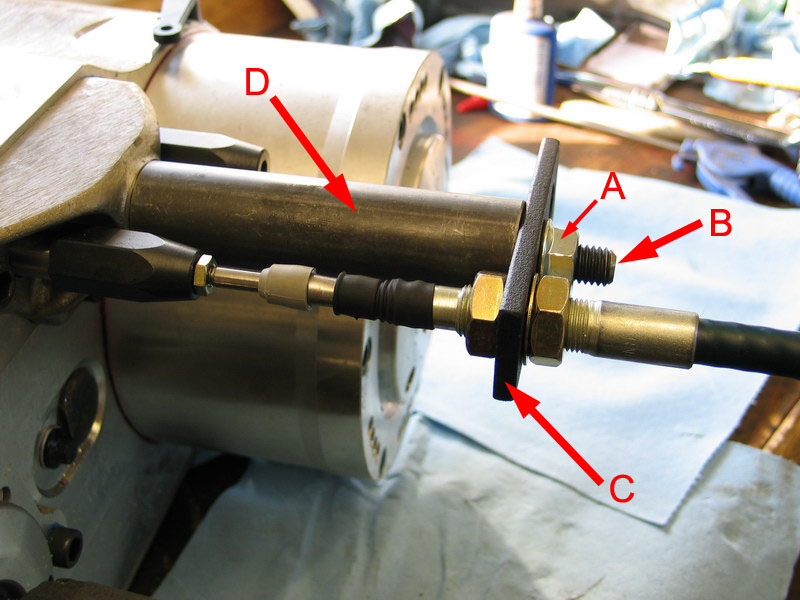 |
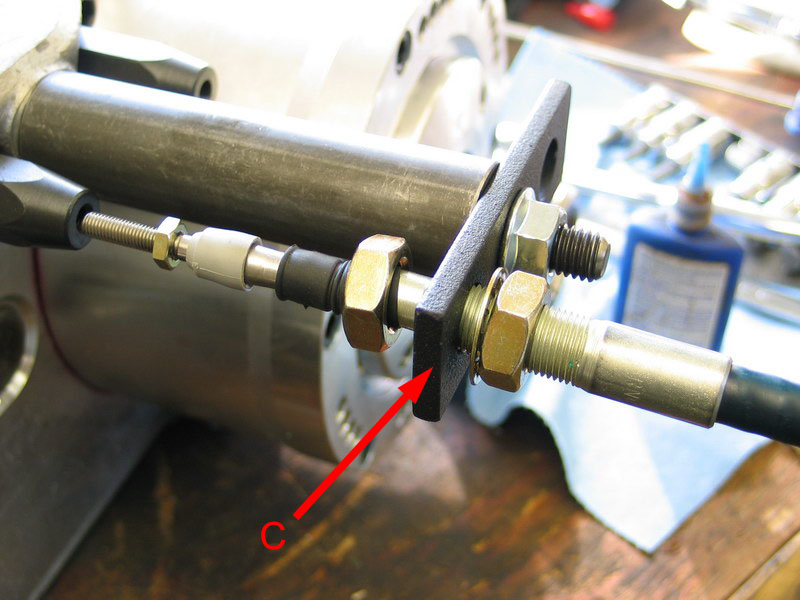
Here, one cable has been removed. Once both had been removed I removed the locknut (A) from the threaded rod (B), took off the extension tube bracket (C) and set it aside for incorporation into the new design, and then removed and set aside the extension tube (D) that will also be used in the new design. |
 |
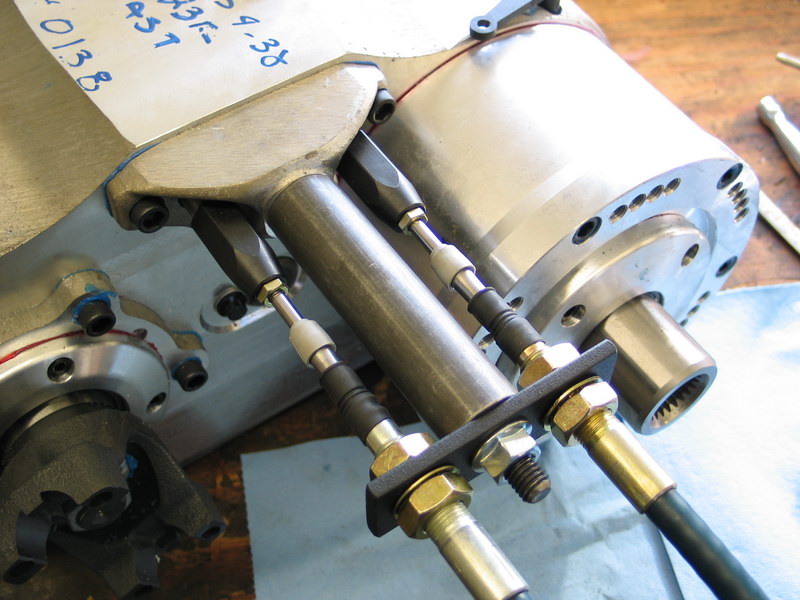
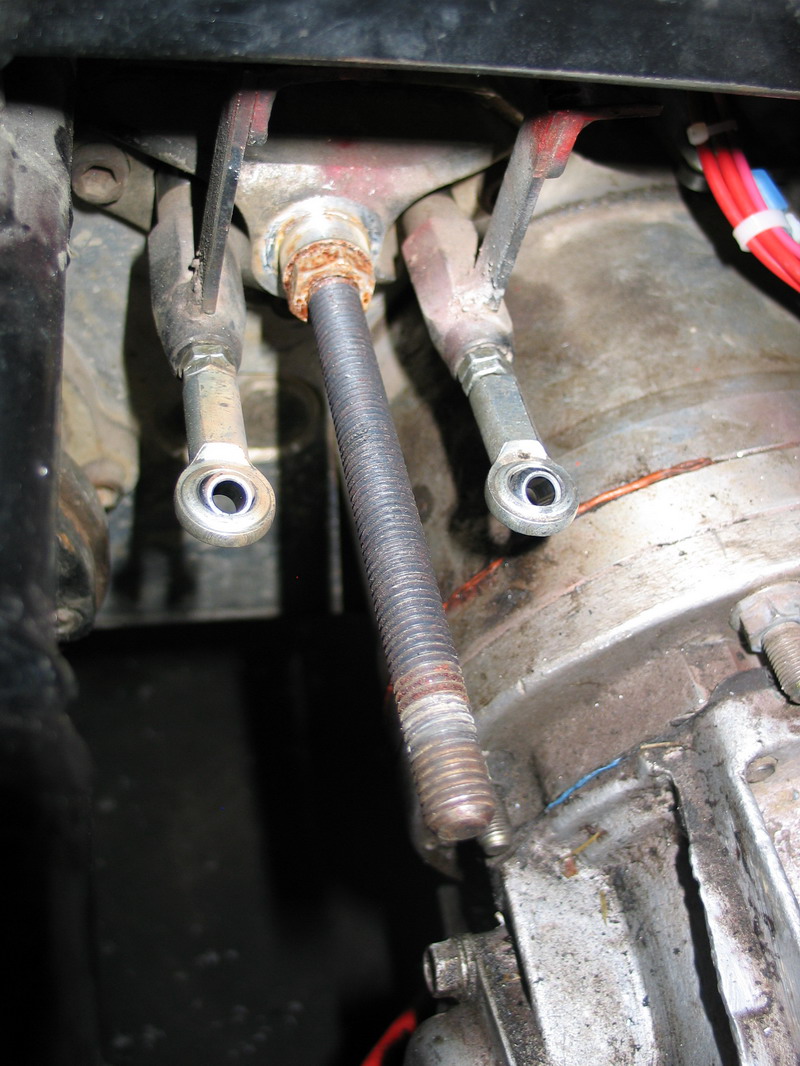
With that done, I was left with just the two shift rail adapters and the threaded rod attached to the case. |
| I should note: You can do this whole conversion quite easily without removing the Atlas transfer case from the vehicle, as I in fact did. These pictures of the transfer case out of the buggy just help to illustrate things more clearly. | |
 |
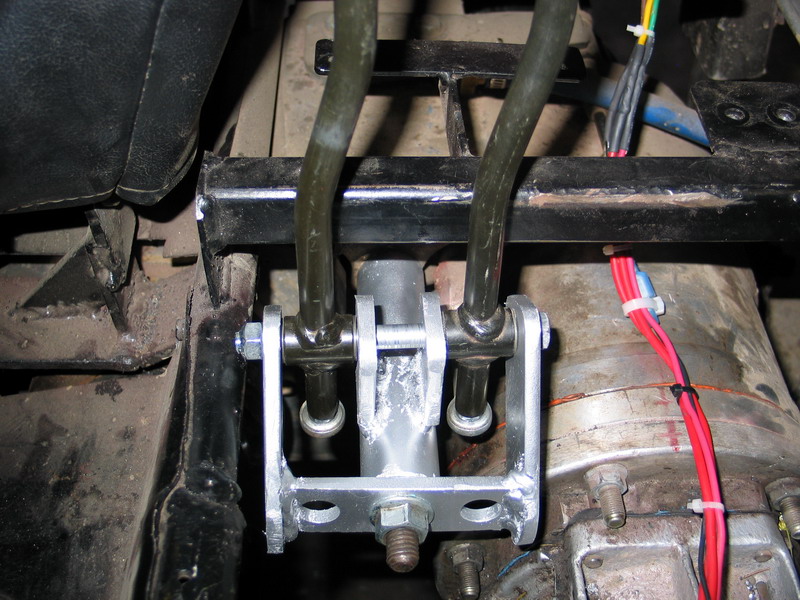
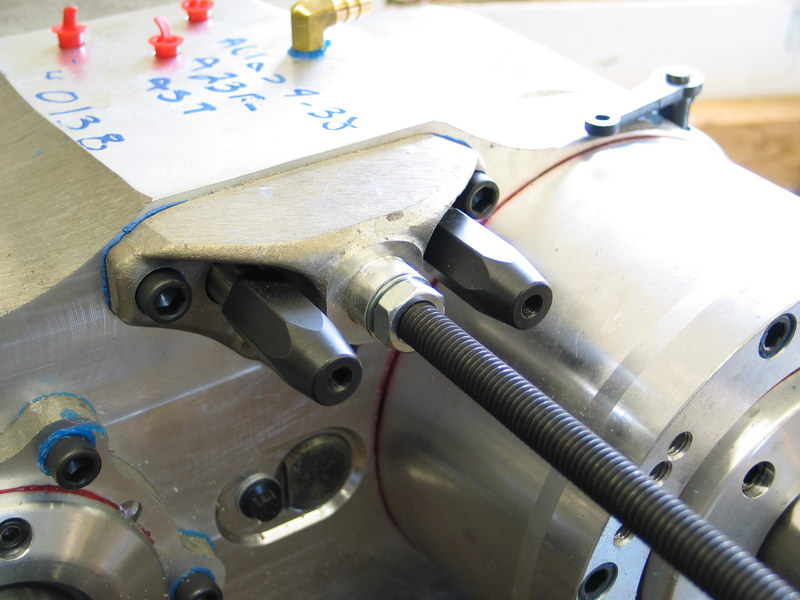
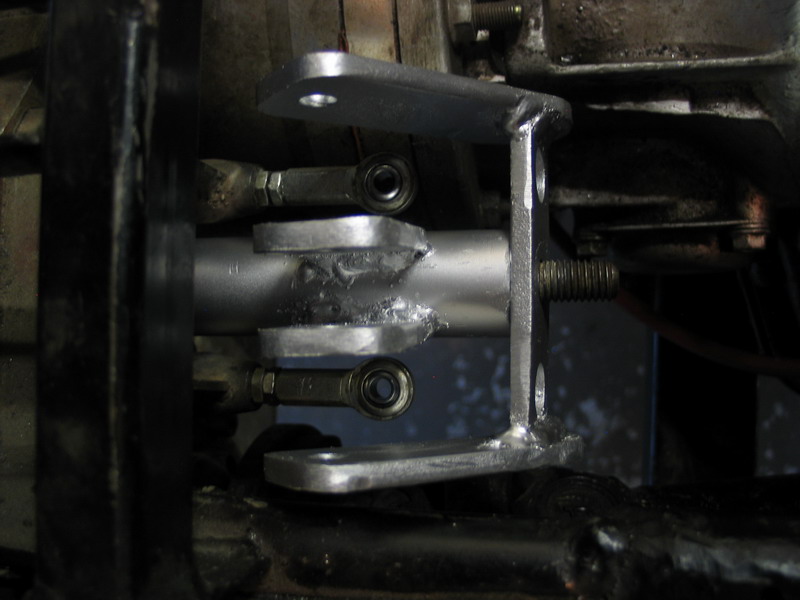
Next, I took a couple of fairly long bolts that would thread into the shift rail adapters (sorry, I didn't note the thread at the time), cut threads the whole length, then cut the heads off. I then threaded these into the shift rail adapters, spun on a pair of nuts to act as locknuts, and then threaded on the Heim joints that were previously removed from the cables. |
 |
So now, the shift rails can be actuated by pulling or pushing on the Heim joints. (The vertical tabs you see on the shift rail adapters are indicators I welded on with little pointers on top to show what position that shifter is in.) |
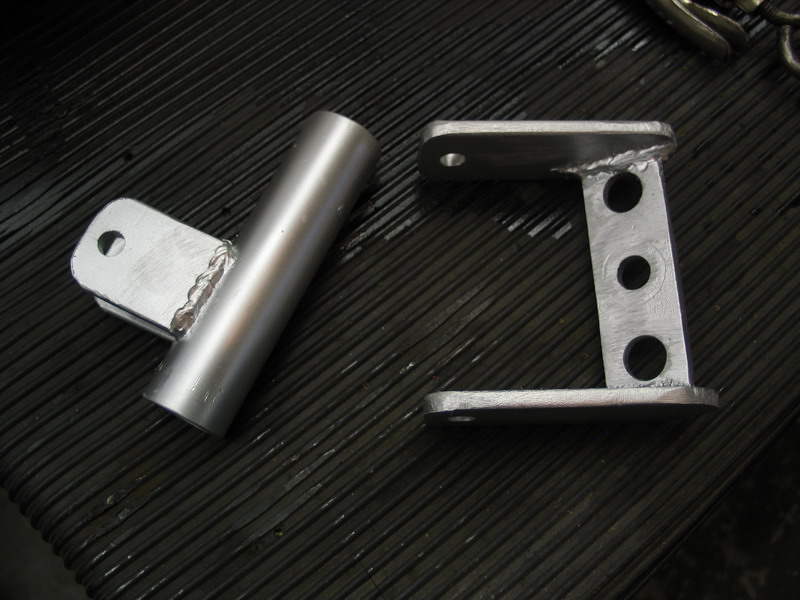 |
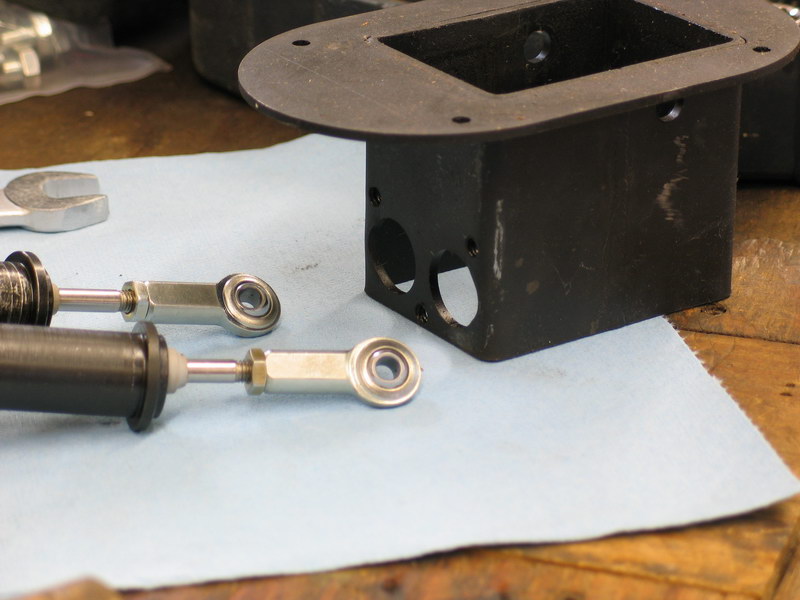
Next I modified the extension tube bracket and the extension tube by adding to each a couple of tabs with holes the same size as the ID of the bushings in the shift levers. |
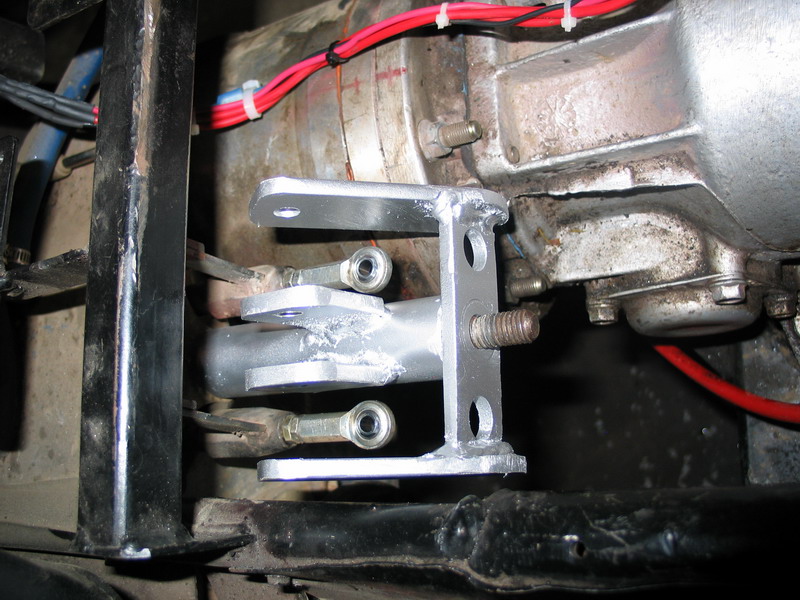 |
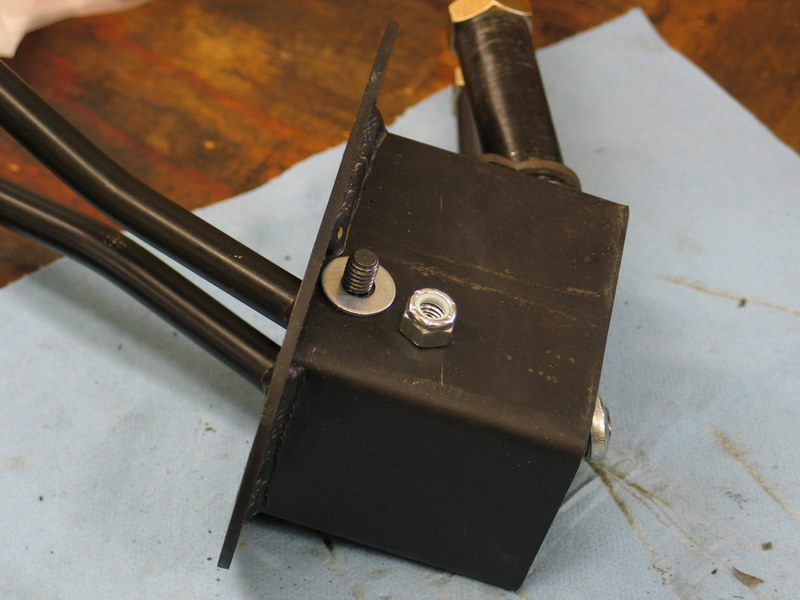
Here the modified parts are in position on the threaded rod. |
 |
Slightly different view of modified extension tube and extension tube bracket. |
|
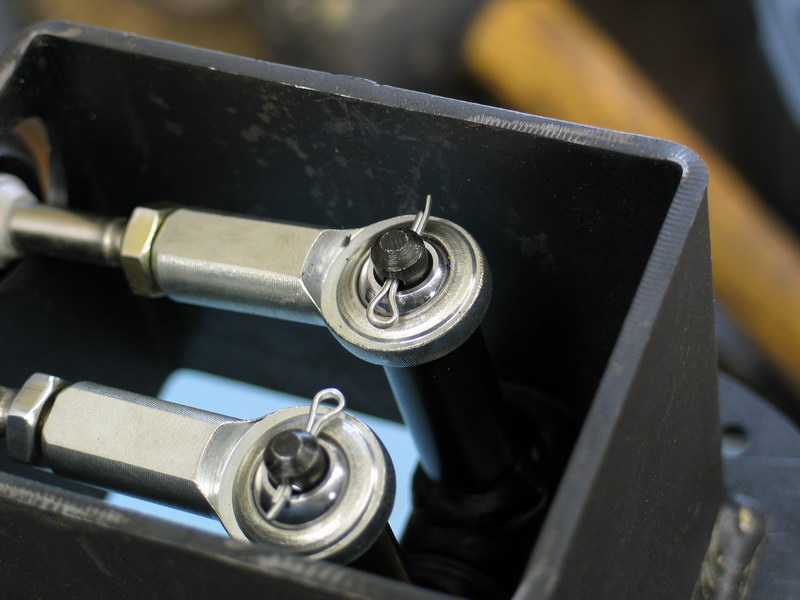
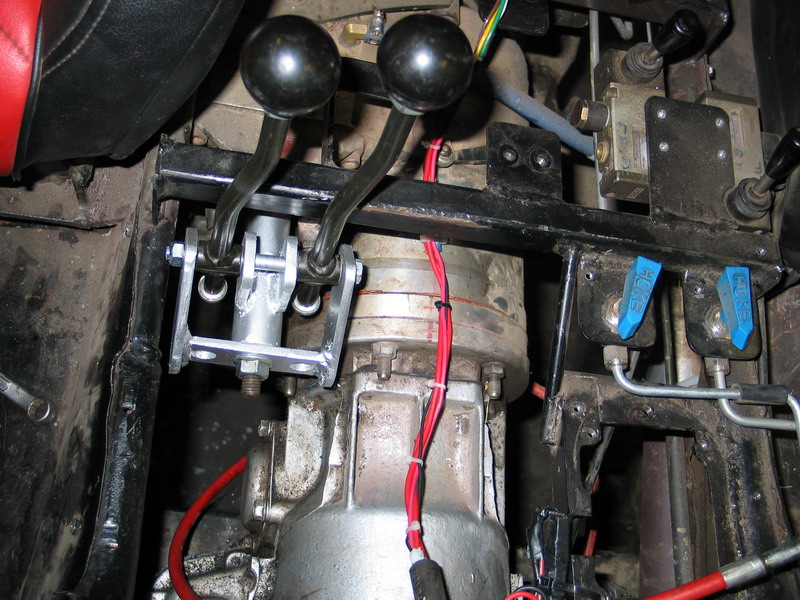
Next, I inserted the ends of the shift levers in the Heim joint bearings and secured them with the tiny cotter pins. Then, by installing a long bolt through the bushings in the shift lever and through the holes in the tabs on the modified extension tube and extension tube bracket I have a sturdy pivot for the shift levers. Note I have both levers installed so that they bend to the left to bring them closer to my hand. |
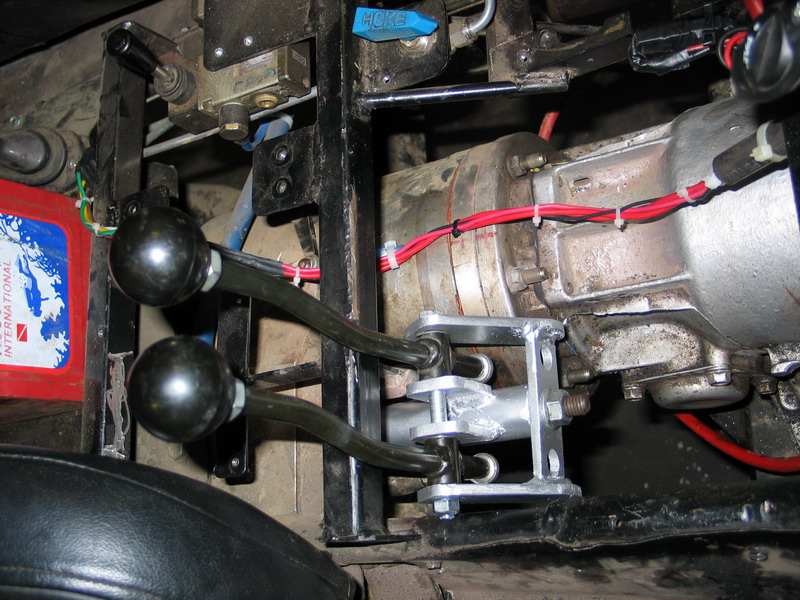 |
This is a view from the front left of the buggy. |
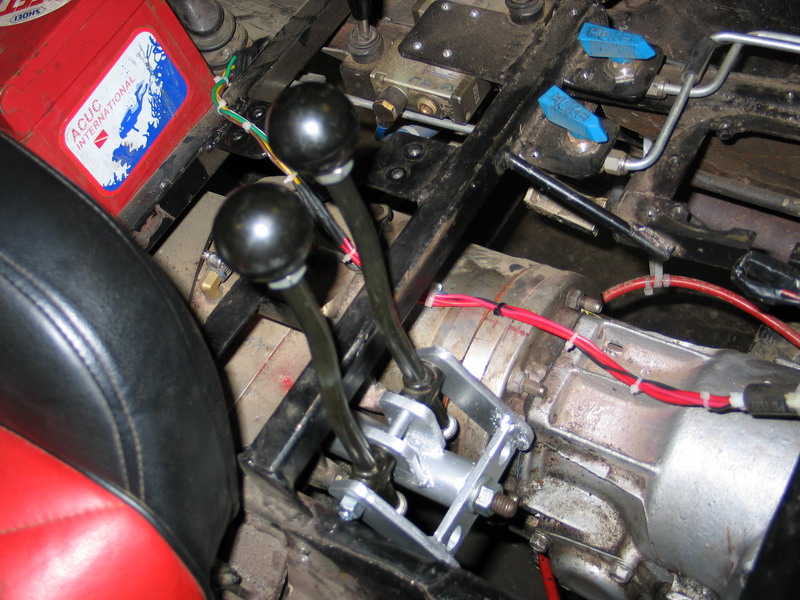 |
So now I have simple, effective shifters directly attached to the shift rails. To finish up the shifters, I simply cut appropriate slots in the new floor for them, and then reinstalled the boot back over the shifters and screwed it to the floor. |
 |
This project was actually two years ago, and the design is still holding up. And while I wouldn't describe the shifting as suddenly silky-smooth - the improvement, to my feel, was substantial and I'm quite happy with the results. Best of all - it nailed my four main criteria -quick, easy, cheap to make...and fit in the small space I had available! |
|