 |
Dana 60 front Axle Kingpin Rebuild By Bill "BillaVista" Ansell |
IntroductionRebuilding Dana 60 Front Axle Kingpins. Not one of the most glamorous upgrades, but nonetheless an important aspect of front axle maintenance, especially with the punishment a front axle takes with big tires, locked/welded diff's, and high horsepower. This year it was well past time I bit the bullet and tore into the heart of Chevy Dana 60's knuckles. I had been talking to Greg at 4WDFACTORY.com about a dana 60 35 Spline stub shaft upgrade kit, when he mentioned that they also carry a complete kingpin rebuild kit for the very reasonable price of. This is a great kit that is 100% complete, including different seals for Dodge, Ford, or GM front dana 60's. 4WDFACTORY.com are also a great place to do business with. they are the dana 60 specialists, and carry everything you would ever need for a front 60: from gears, lockers, bearings, seals, 35 spline kits to manual hubs, drive flanges, CTM U-joints, and especially the elusive, and previously outrageously expensive front hub assemblies. |
 |
What follows is not a particularly easy job, especially if ,like me, you're working on a 23 year old axle that's spent a hard life in a salty, atlantic, winter environment. Hopefully, my pictures and descriptions will help you, or at very least let you know exactly what you are in for. And the great kit from 4WDFACTORY makes the job a heck of a lot easier than it otherwise would be if you had to hunt down all the individual parts - some of which (like the upper kingpin seal) are usually only sold in packs of 10. Kit Contents |
|
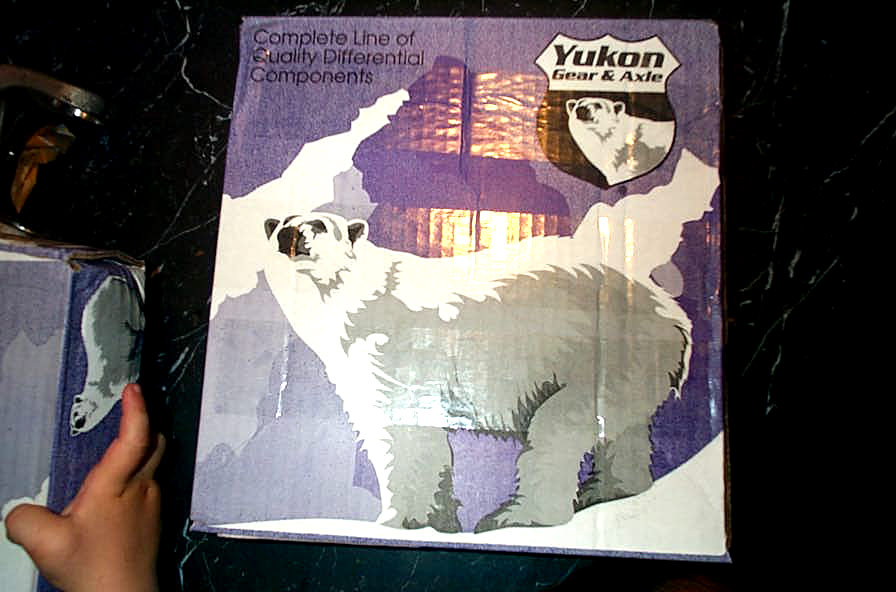 |
The kit comes in a Yukon brand box. Yukon remain a bit of a mystery to me - I have never ben quite able to figure out exactly what there gig is - but as near as I can figure, they themselves don't actually manufacture anything - they are a mass buy and re-badge company. This works out very well for me here - as the kits I got from 4WDFACTORY were 100% genuine Dana/Spicer parts. | ||||||||||||||||||||||||||||||||||||||||||||||||||||||||||||||||||||
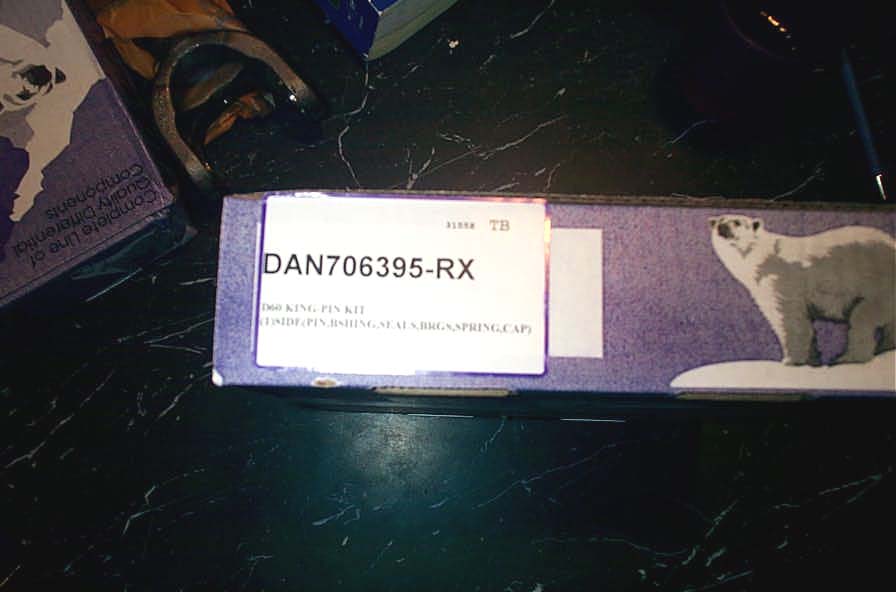 |
The Yukon boxes are even marked with the Dana/Spicer part number - DAN706395-RX | ||||||||||||||||||||||||||||||||||||||||||||||||||||||||||||||||||||
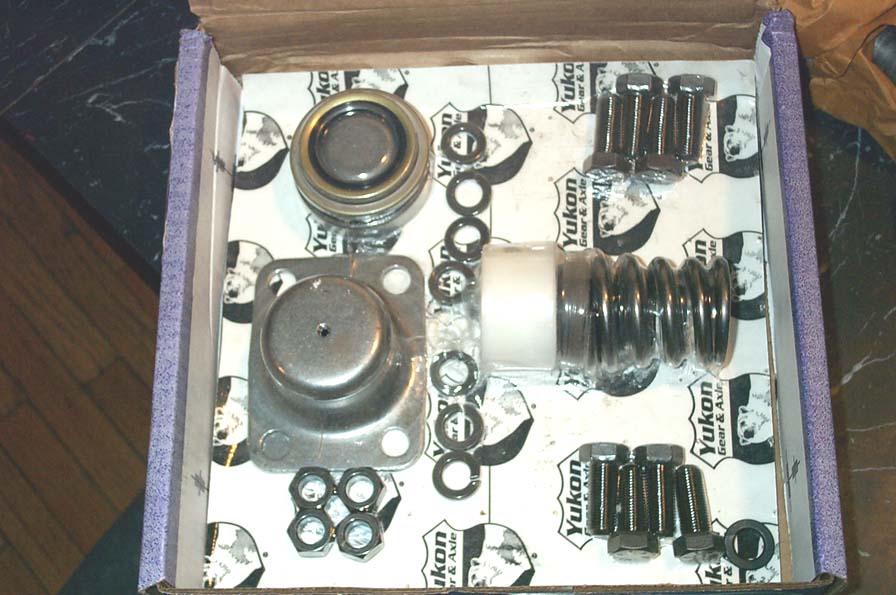 |
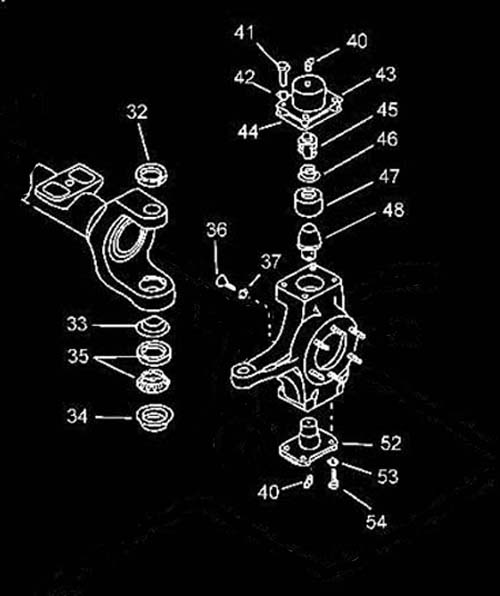
Inside, there is absolutely everything you need, neatly shrink wrapped on a piece of card. All parts interchange between all kingpin Dana 60 front axles, be they GM, Dodge, or Ford. The only difference is that the 85-91 Ford use a different upper kingpin seal (#32) than all the rest - but both seals are included in the kit. The complete listing, with numbered diagram is below: | ||||||||||||||||||||||||||||||||||||||||||||||||||||||||||||||||||||
 |
|
||||||||||||||||||||||||||||||||||||||||||||||||||||||||||||||||||||
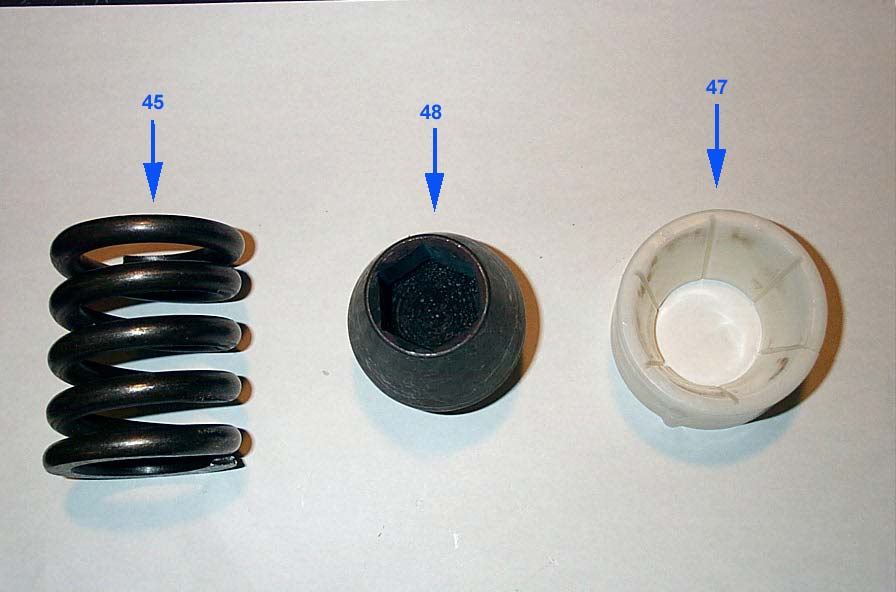 |
From L to R this is the kingpin spring, Kingpin, and kingpin bushing. | ||||||||||||||||||||||||||||||||||||||||||||||||||||||||||||||||||||
 |
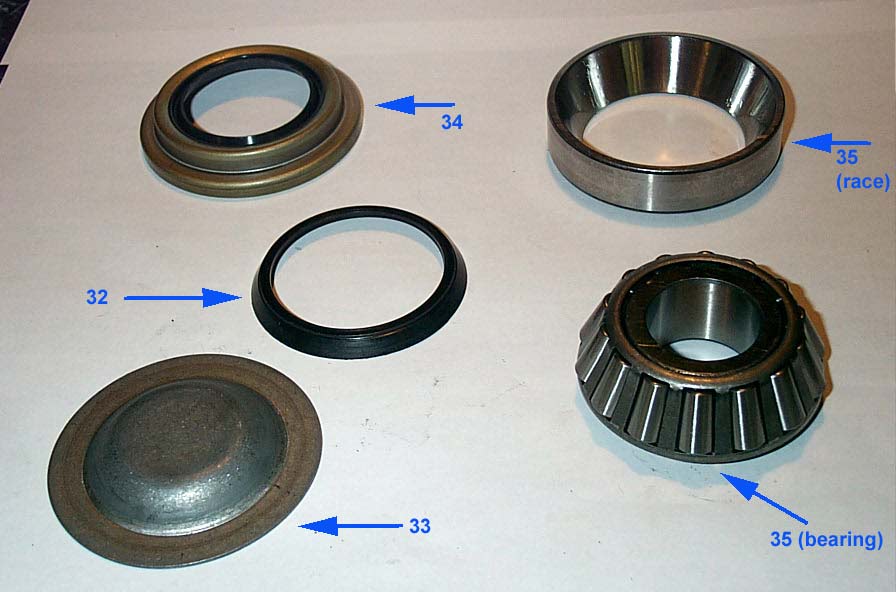
This pic shows the bottom lower kingpin oil seal (#34) [a confusing name, as there is no oil present, just grease] , upper kingpin seal (#32), lower kingpin seal (#33) [again, a slightly confusing name, as it is a metal dust cap more than a seal], and the lower kingpin bearing and race (also called cone and cup). The kit from $WDFACTORY.com includes Timkin Made in U.S.A. Bearing and race. |
||||||||||||||||||||||||||||||||||||||||||||||||||||||||||||||||||||
|
Another view of the parts, you can see how the lower kingpin seal (lower left) is actually a metal cap. | ||||||||||||||||||||||||||||||||||||||||||||||||||||||||||||||||||||
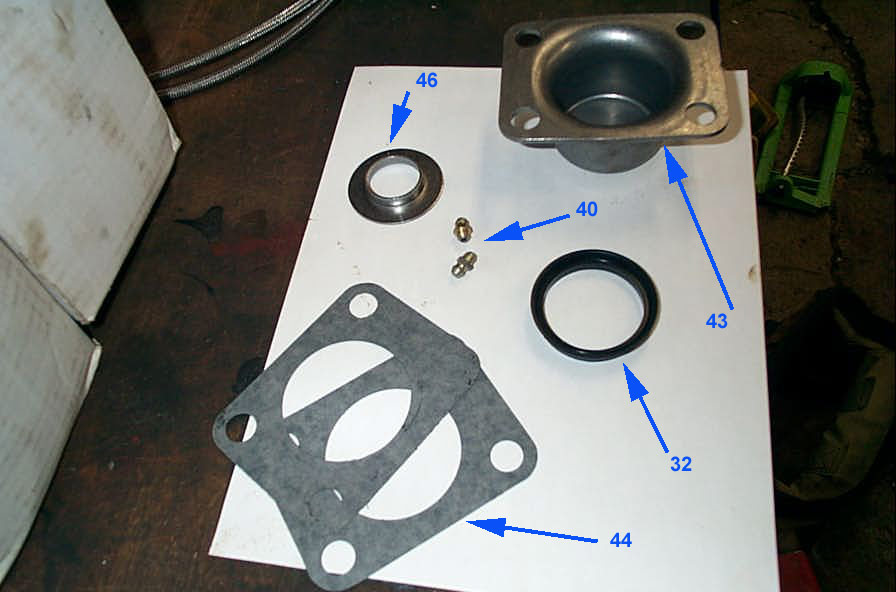 |
The remainder of the parts in the kit, including the kingpin spring retainer (#46) , grease fittings (#40), upper kingpin cap gaskets (#44 ), upper kingpin cap (#43 ), and upper kingpin seal (#32 ). Not pictured are the 8 SAE Grade 8 bolts and lock-washers included in the kit. |
||||||||||||||||||||||||||||||||||||||||||||||||||||||||||||||||||||
Kingpin Disassembly |
|||||||||||||||||||||||||||||||||||||||||||||||||||||||||||||||||||||
 |
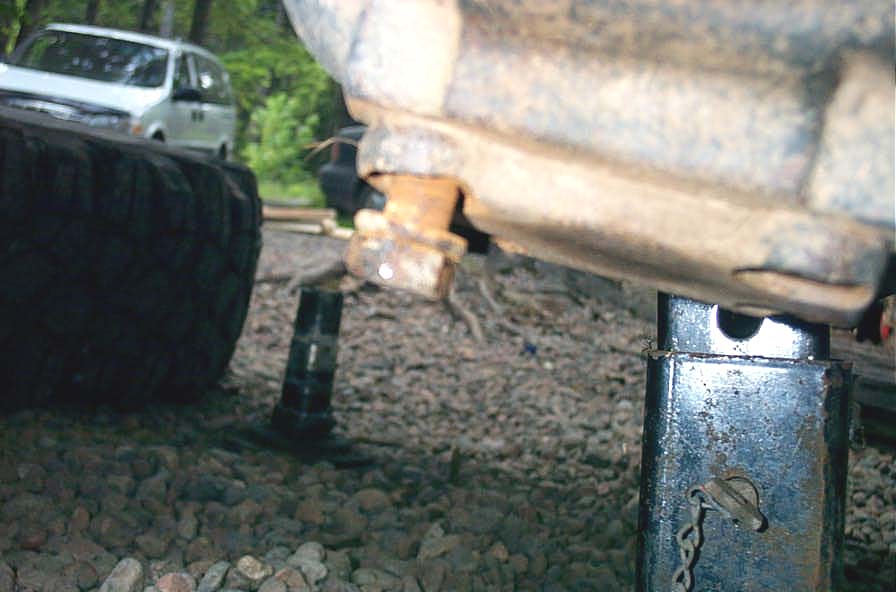
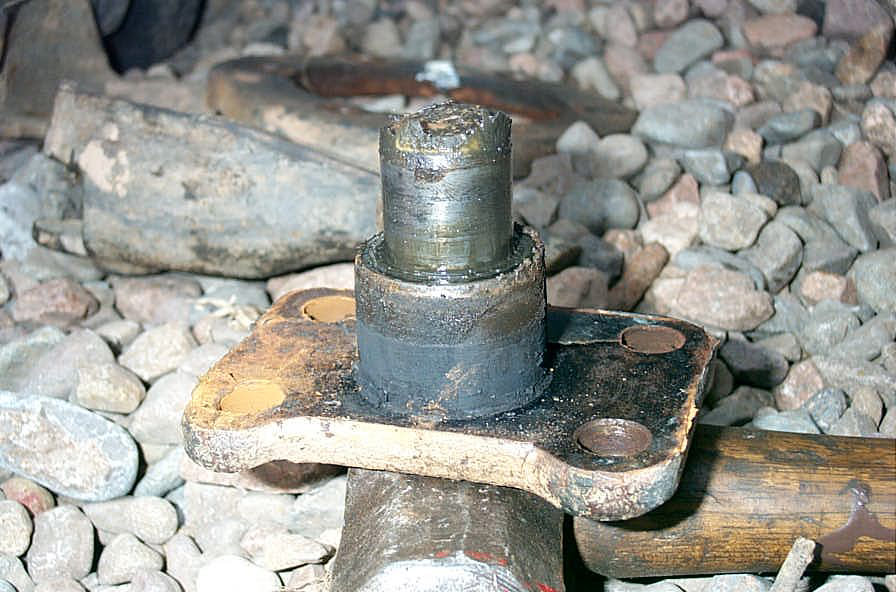
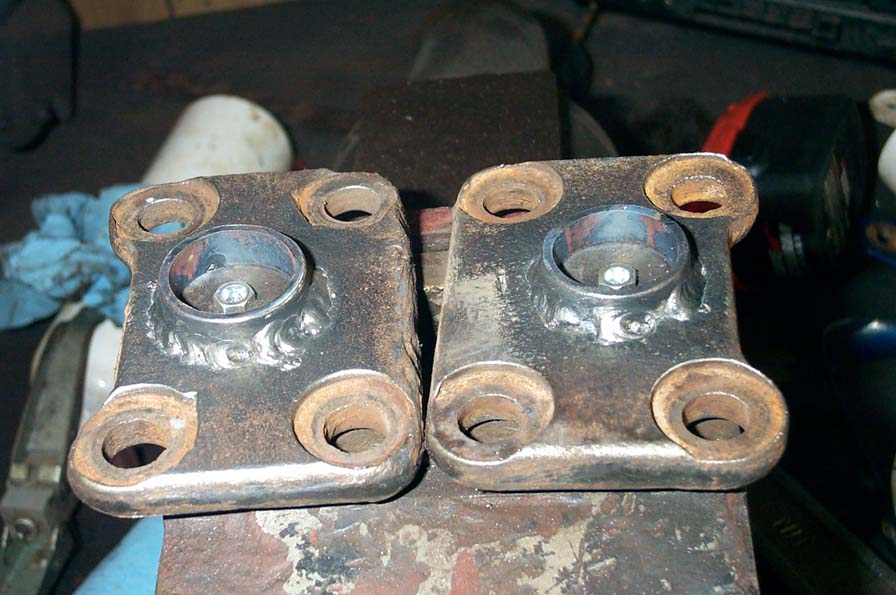
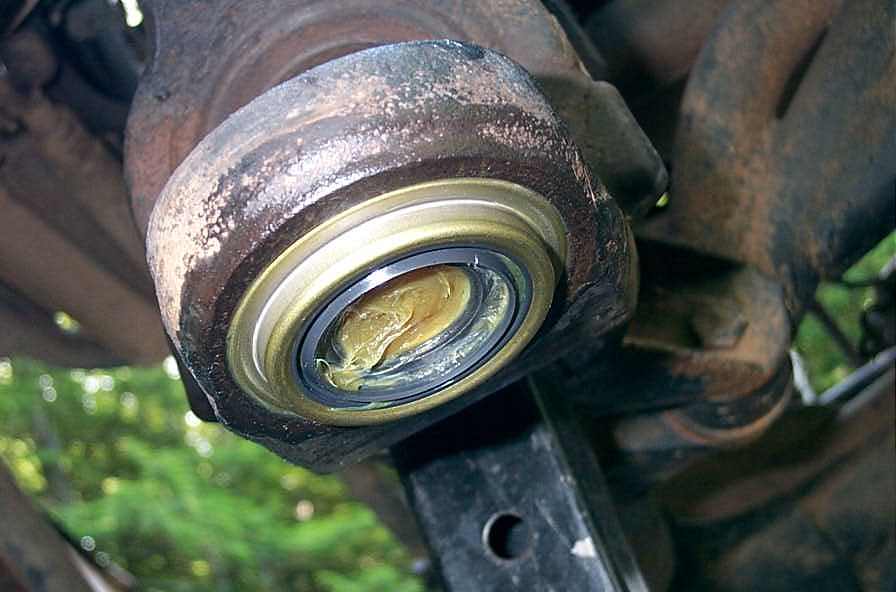
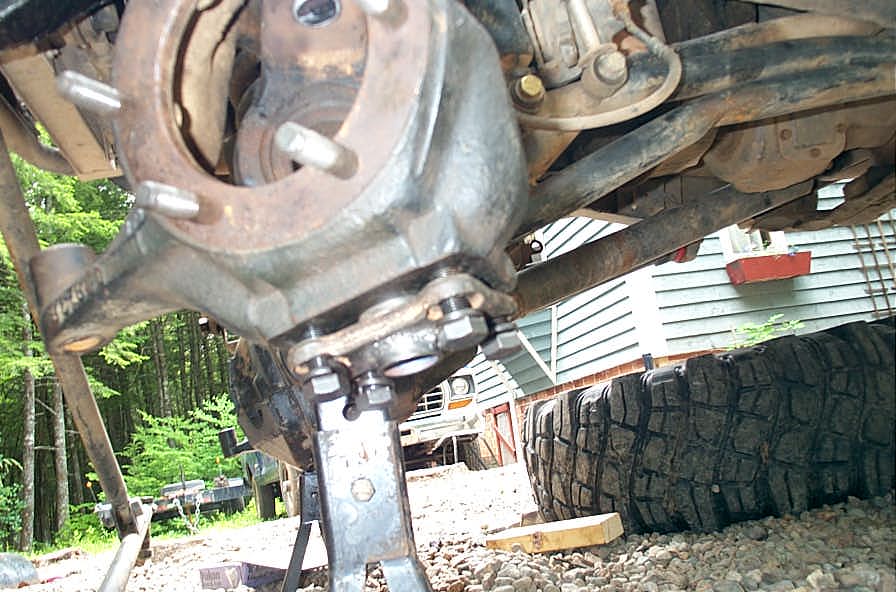
Step one is to raise the vehicle, set the axle on jack-stands, and remove the front wheels. Begin by removing the 4 bolts from the upper kingpin cap. Loosen each one a little at a time, as the cap is under tension from the large spring inside. Note that on most drivers (left) side knuckles, the cap may be part of the steering arm, and is held on by 4 studs and tapered nuts. These parts are NOT included in the kit, so if your setup includes this, you will have to re-use the old hardware or acquire new studs, washers, and nuts ahead of time. |
||||||||||||||||||||||||||||||||||||||||||||||||||||||||||||||||||||
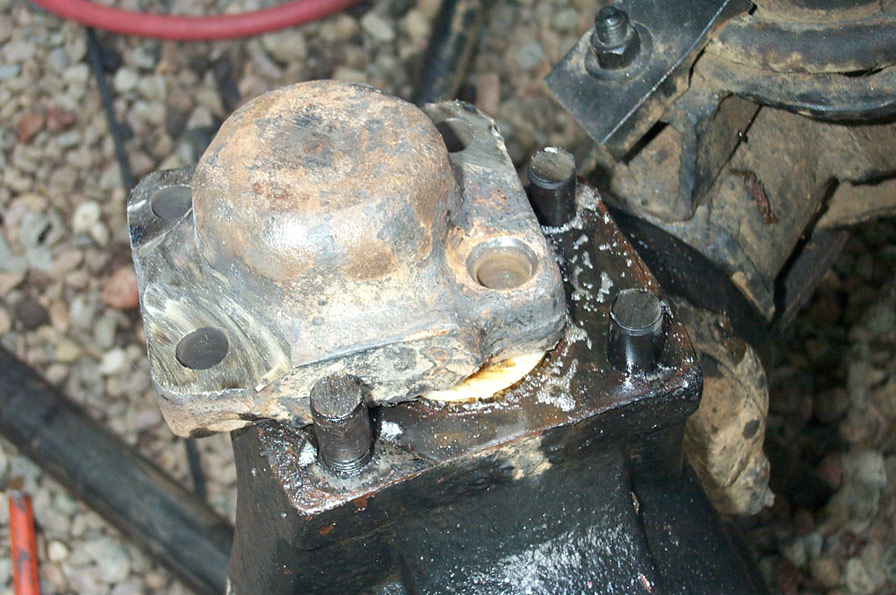 |
Note that the fun can start right here! If you're working on a well abused older truck like me, just saying "remove the bolts" can be a 3 hour job. The torched studs and ground cap should attest to the fun I had getting this side off. It seems any job I do that requires a wrench or socket, I end up using a torch and grinder! | ||||||||||||||||||||||||||||||||||||||||||||||||||||||||||||||||||||
 |
Once you get the cap off, remove the spring and spring retainer from on top of the kingpin bushing. | ||||||||||||||||||||||||||||||||||||||||||||||||||||||||||||||||||||
 |
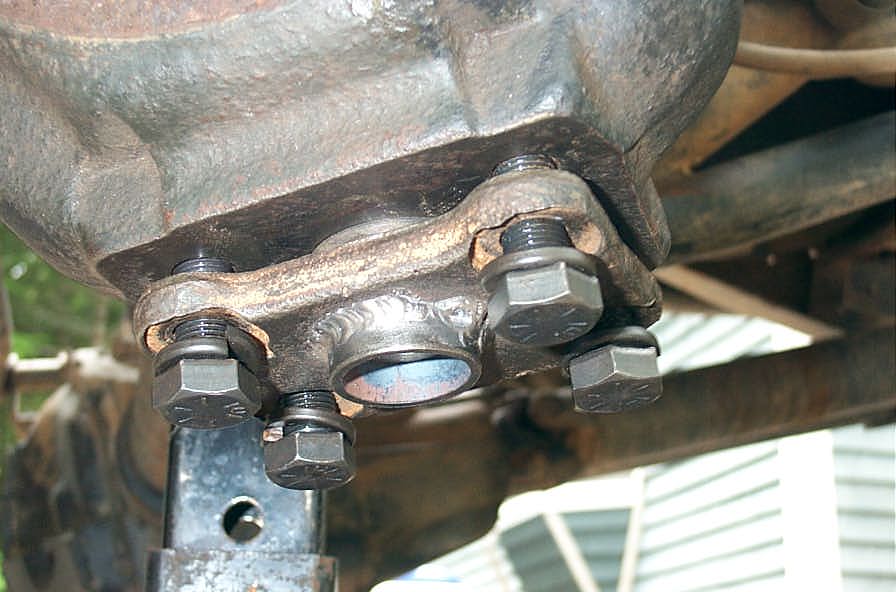
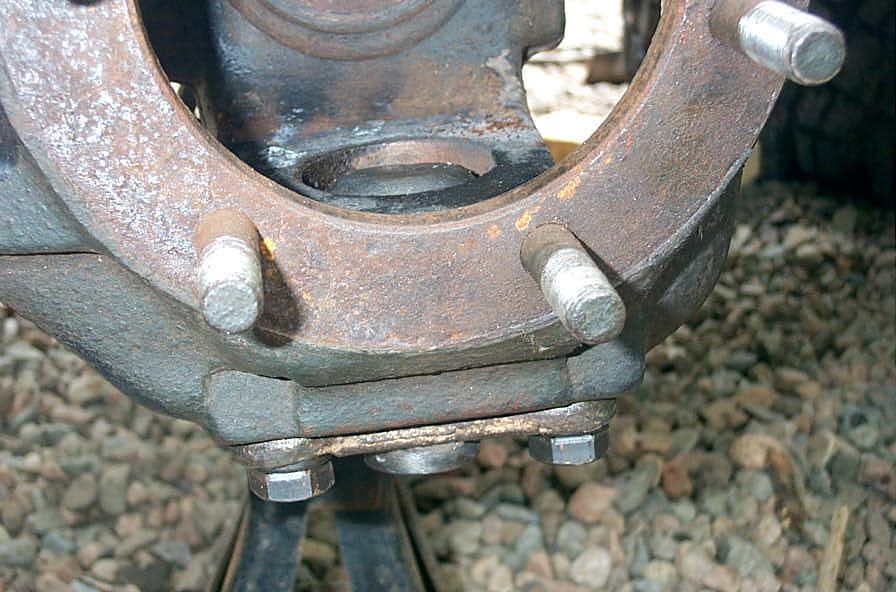
Next, remove the 4 bolts and lock washers holding on the lower kingpin bearing cap. You can discard the old bolts and washers as new ones are included in the kit. | ||||||||||||||||||||||||||||||||||||||||||||||||||||||||||||||||||||
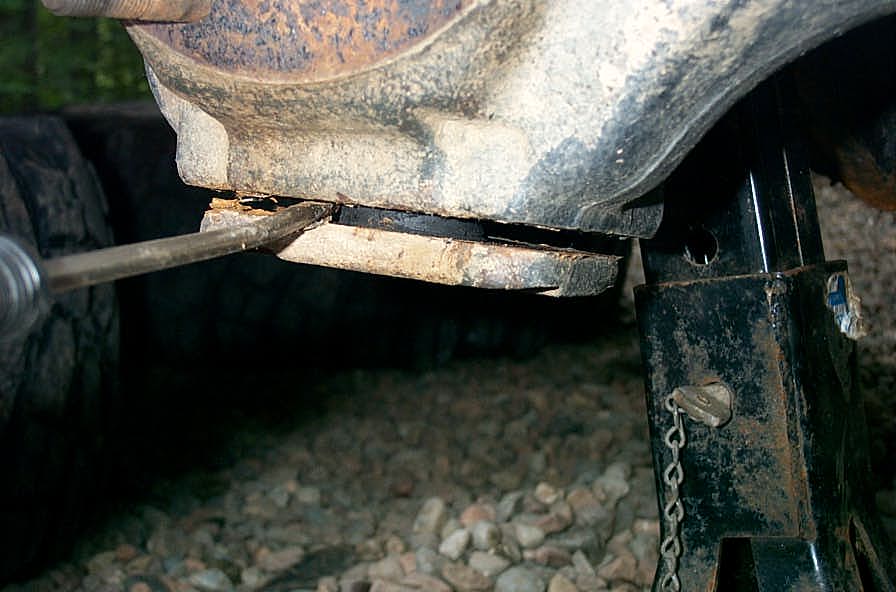 |
With the bolts removed, pry the cap down with a screwdriver. Try not to hammer a chisel in there and mar the machined surfaces where the bearing cap and knuckle mate. | ||||||||||||||||||||||||||||||||||||||||||||||||||||||||||||||||||||
 |
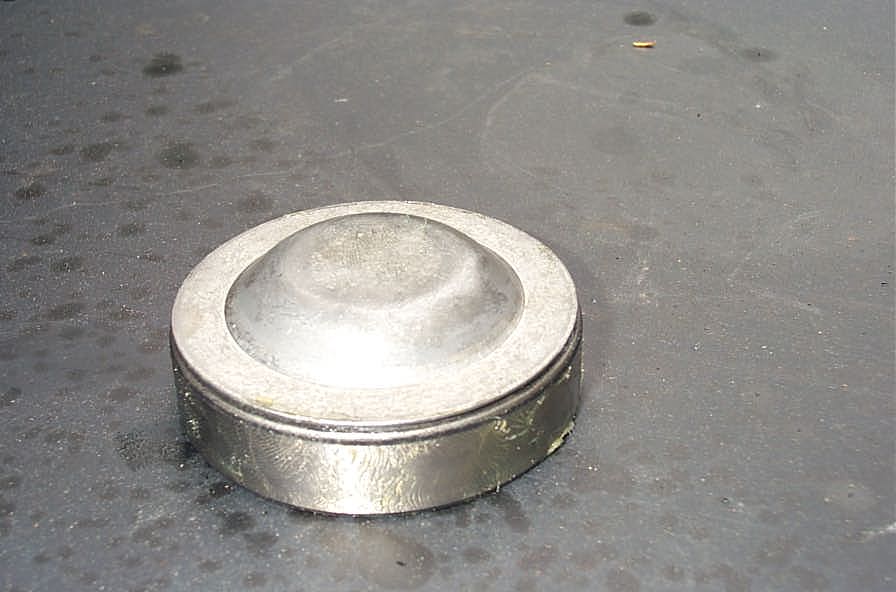
When the cap is removed it looks like this. | ||||||||||||||||||||||||||||||||||||||||||||||||||||||||||||||||||||
 |
Pry up the upper kingpin bushing. | ||||||||||||||||||||||||||||||||||||||||||||||||||||||||||||||||||||
 |
And remove it from on top of the kingpin. | ||||||||||||||||||||||||||||||||||||||||||||||||||||||||||||||||||||
 |
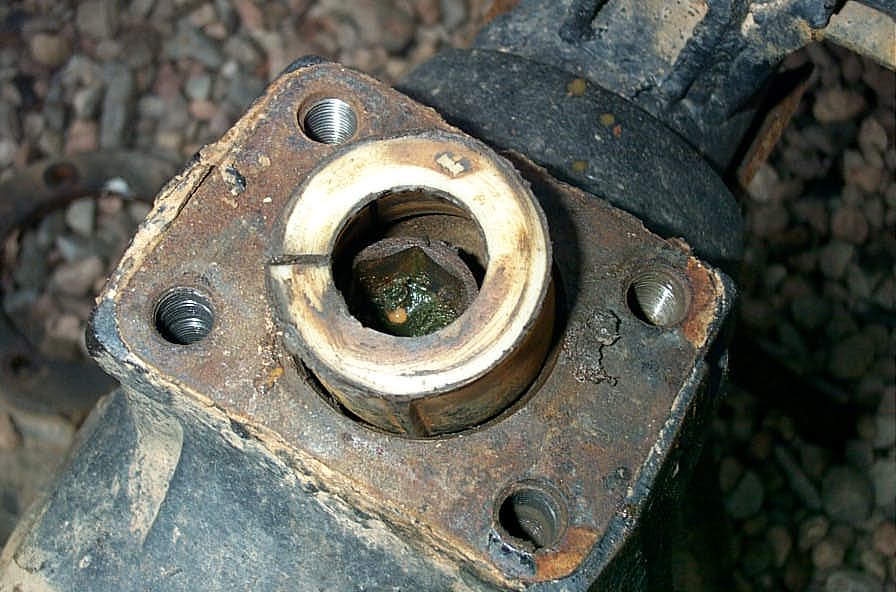
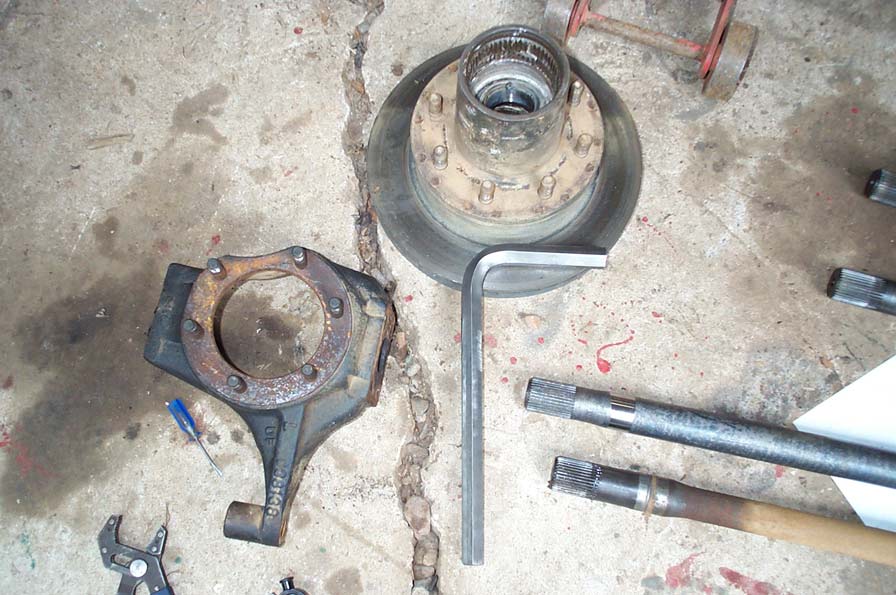
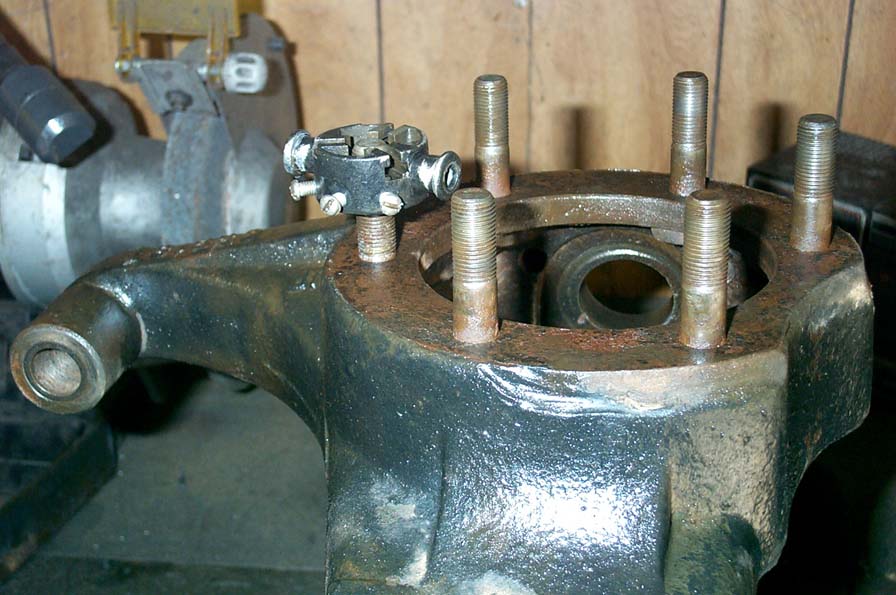
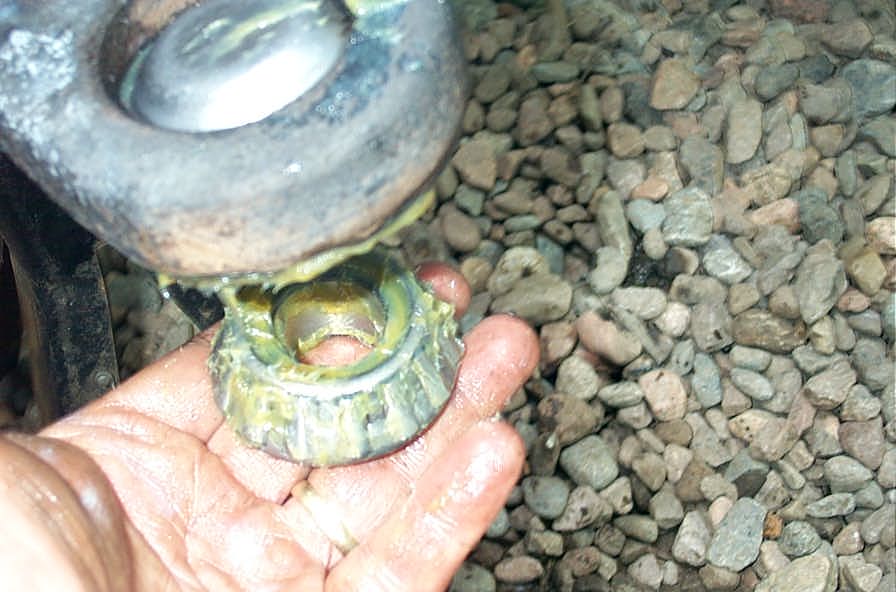
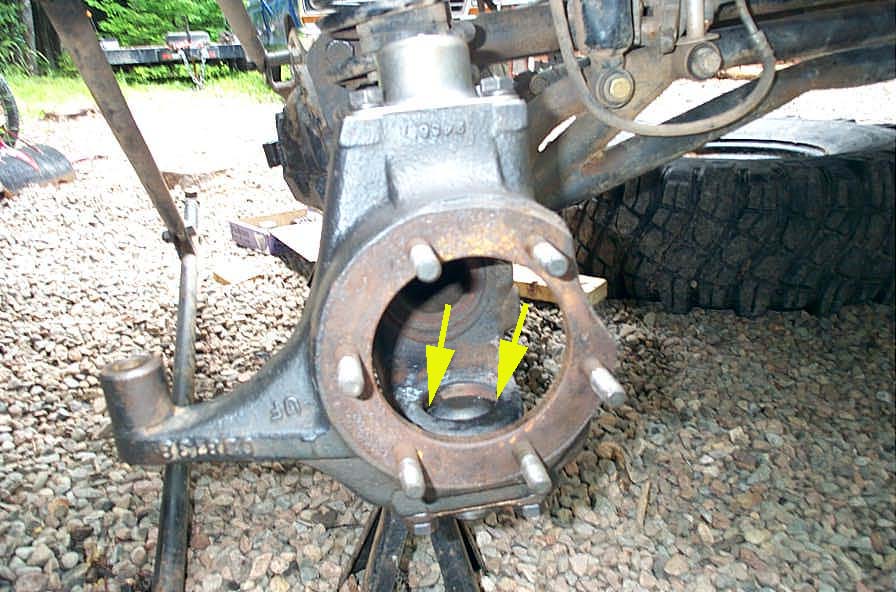
You can now grab the knuckle firmly by the steering arm and tilt it inboard, tipping it over the kingpin, and remove it from the axle. You will be left with the axle with a bare end forging ("C" or "inner knuckle") with the kingpin in the top, and the lower grease seal, bearing, race, and dust cap in the bottom bore. |
||||||||||||||||||||||||||||||||||||||||||||||||||||||||||||||||||||
 |
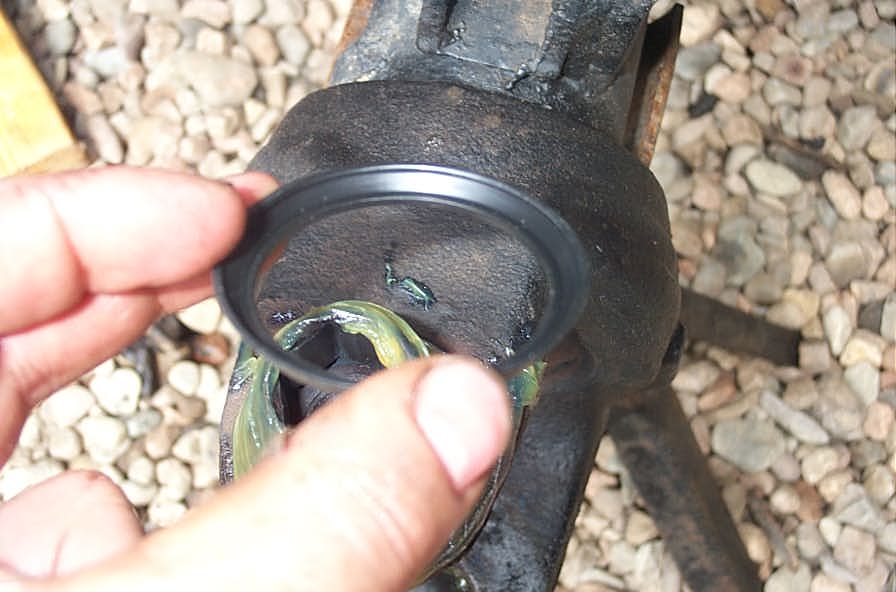
First remove the lower grease seal, bearing, race, and dust cap from the lower bore of the end forging by striking it around the edge with hammer and chisel. Don't worry about using excessive force, there isn't anything in here to damage that you won't be replacing. That's another nice thing about ordering a complete kit - use force at will ;-). Don't just hammer the center of the dust cap though, as you need to hammer around the edge of the race to press it out. heat always helps - but there's a lot of grease in there. | ||||||||||||||||||||||||||||||||||||||||||||||||||||||||||||||||||||
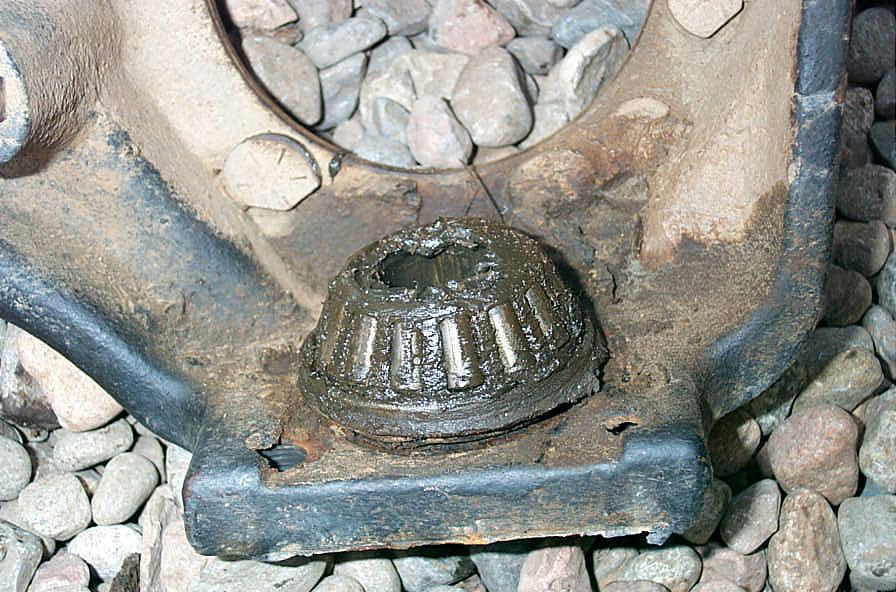 |
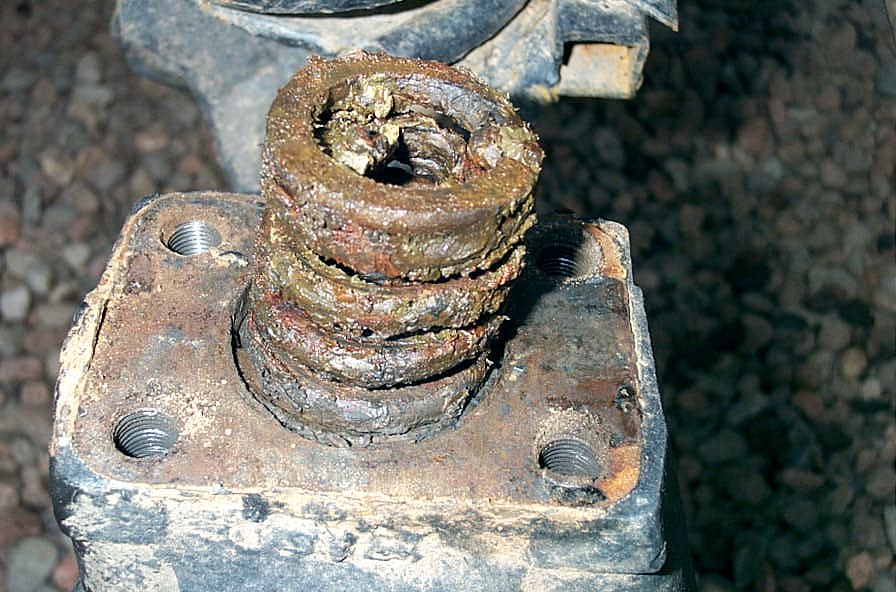
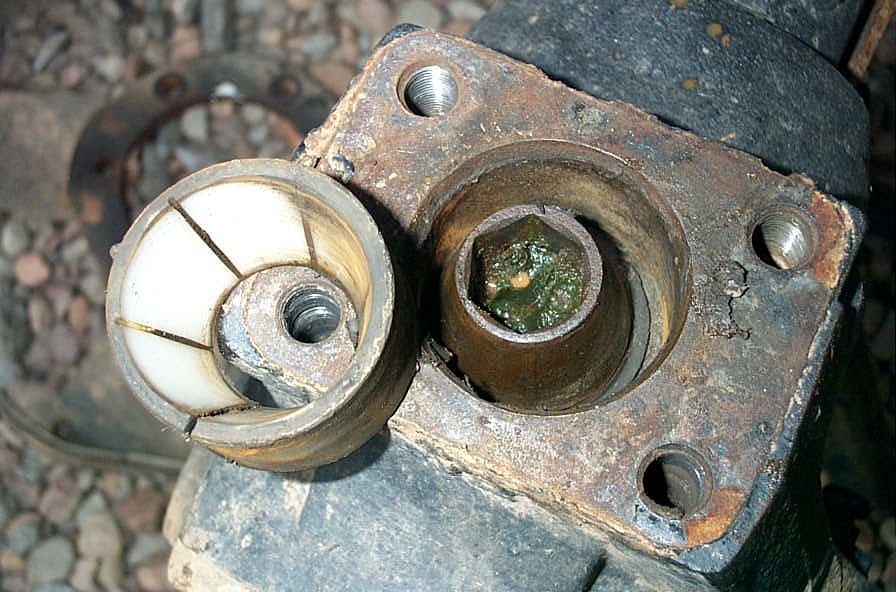
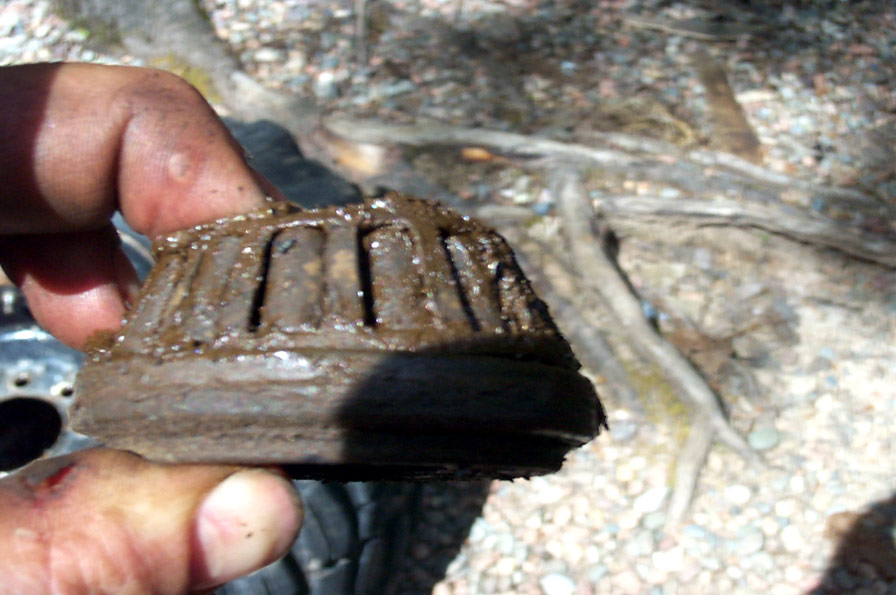
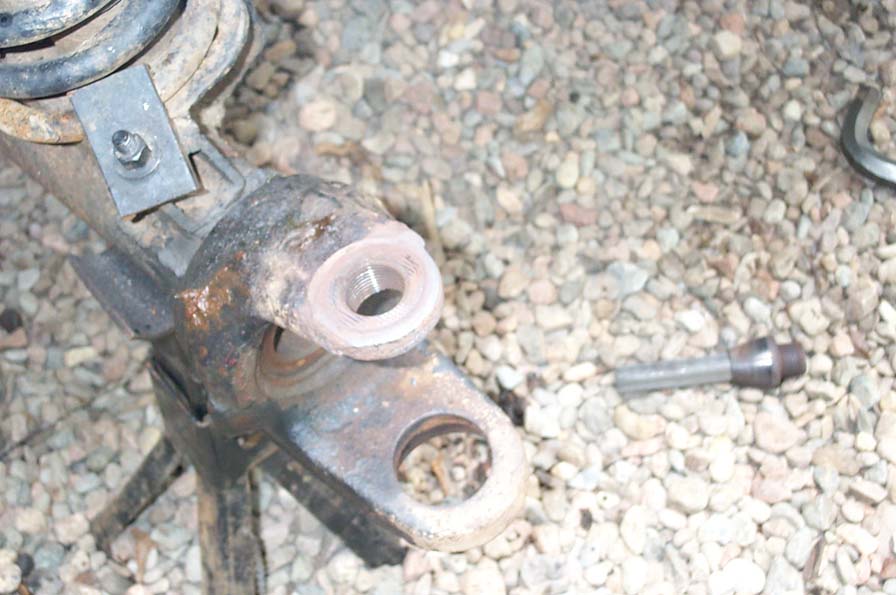
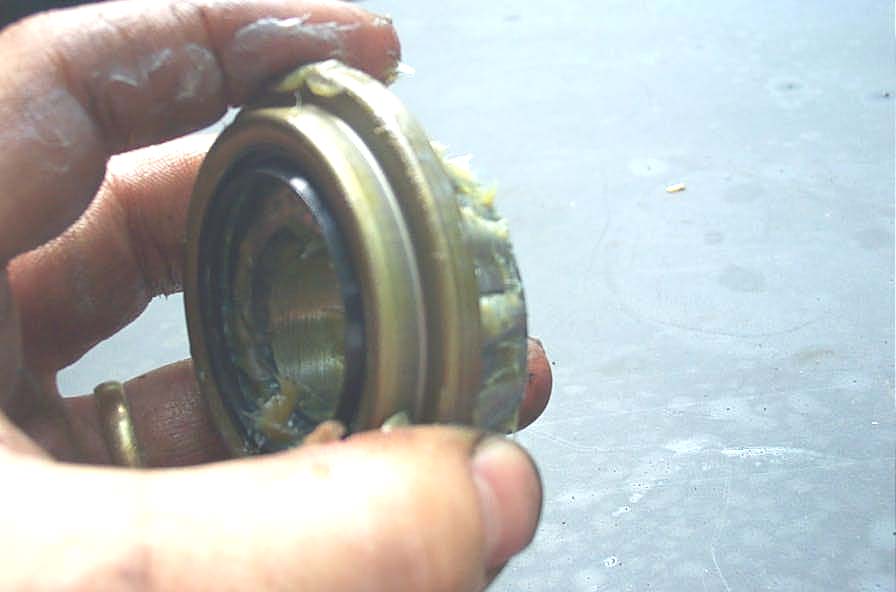
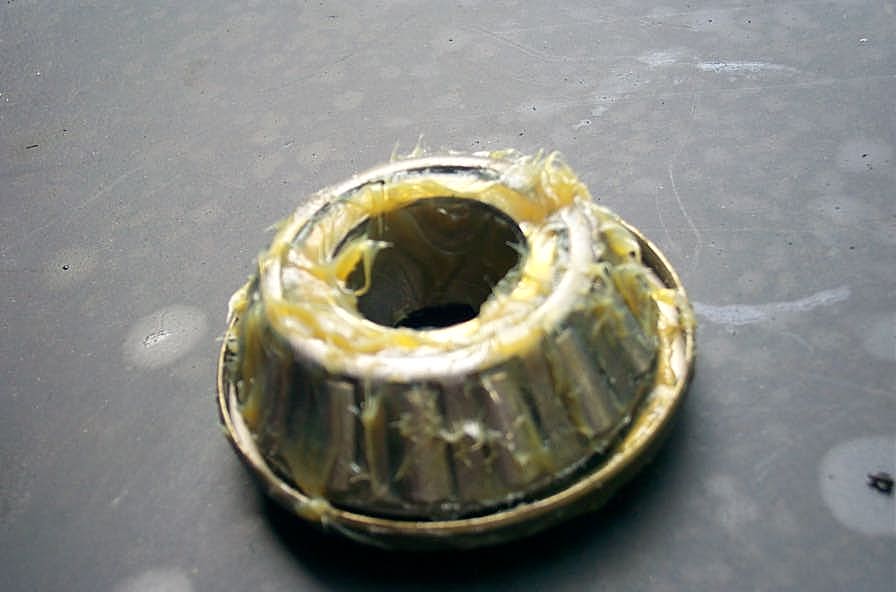
When you drive it all out, you will get the grease seal and bearing out, as well as the race and dust cap. This is how the grease seal and bearing sit when the knuckle is installed! | ||||||||||||||||||||||||||||||||||||||||||||||||||||||||||||||||||||
 |
Gee, do you think I'm replacing this bearing too early? Maybe it's good for another 23 years? :-) | ||||||||||||||||||||||||||||||||||||||||||||||||||||||||||||||||||||
 |
The manuals will tell you to remove the kingpin itself first, so that you can then place a punch / driving tool down through the upper bore of the end forging to drive the lower components out straight. This makes sense, and I'm sure works well, but there is a very good reason I didn't describe it that way - I wanted to prove that it is possible to remove the lower components WITHOUT removing the kingpin at all. Because - removing the kingpin is a humongous bi#ch. I mean, it was really challenging. As such, you may want to carefully inspect it and decide not to replace it. Mince was pitted and corroded, and I'm a sucker for punishment, so I went ahead and replaced it. |
||||||||||||||||||||||||||||||||||||||||||||||||||||||||||||||||||||
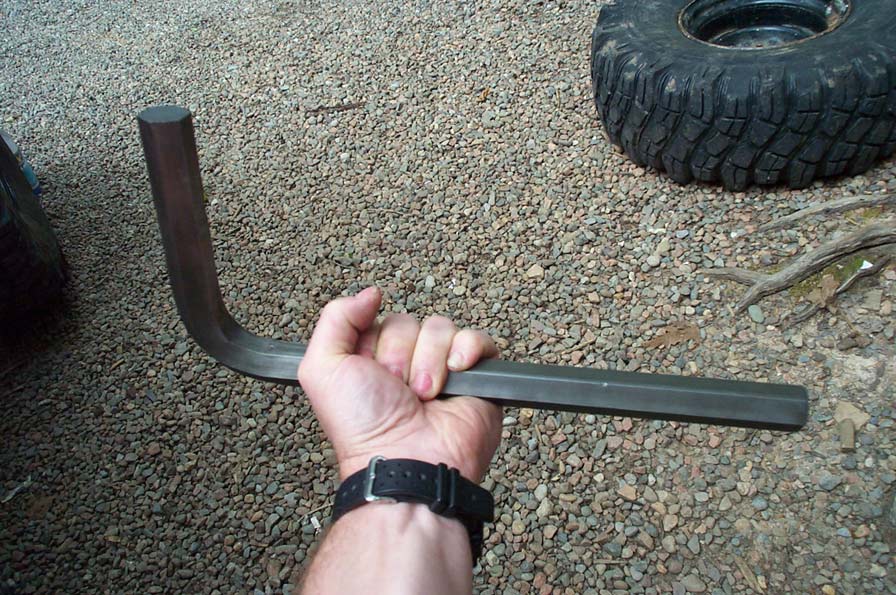 |
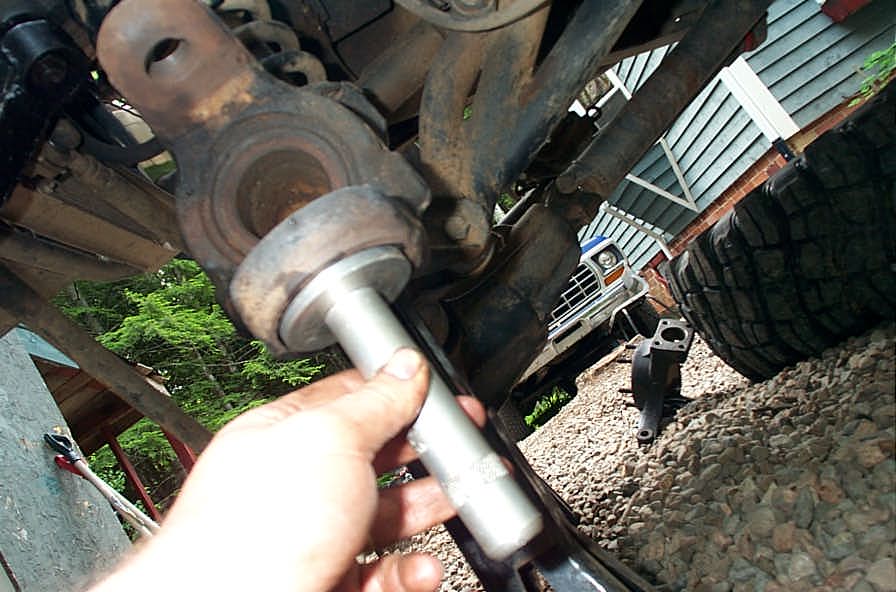
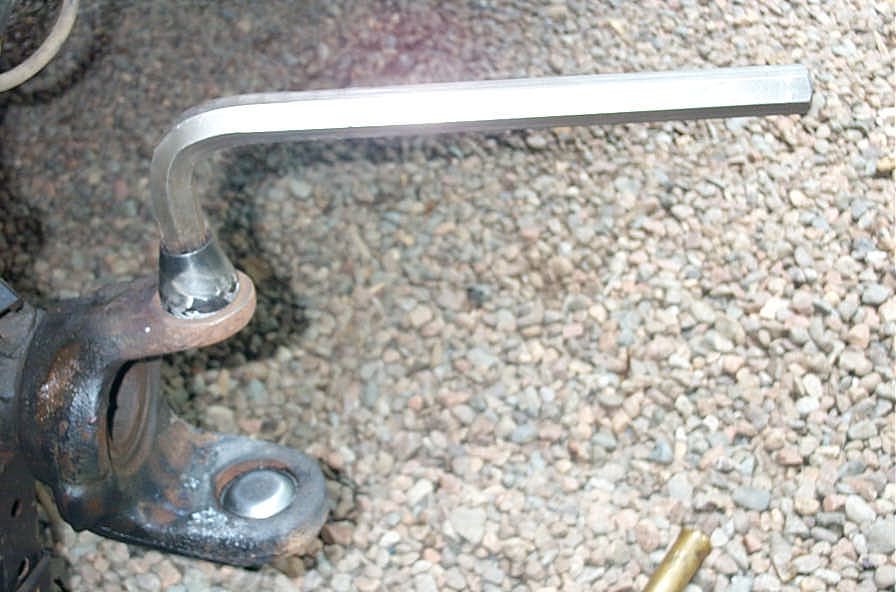
The upper kingpin itself has a 7/8" Allen (hex) key socket head. Meaning you need one big mother of an Allen key to remove it - especially since it will be well rusted in there, and was installed with some 600 ft/lbs of torque!! I tried all the regular tricks, welding nuts together and using an impact, etc. etc. I snapped all kinds of stuff, I swore, I sweat. I checked every tool store in town - nobody had a 7/8" allen key. In the end, I MADE this monster. I believe it may well be the world's largest Allen key! I went to my steel supplier and bought a few feet of 7/8" hex stock. I then went to the local 18 wheeler place, and had the guys bend the hex stock 90°. |
||||||||||||||||||||||||||||||||||||||||||||||||||||||||||||||||||||
 |
Look at the size of it!!! | ||||||||||||||||||||||||||||||||||||||||||||||||||||||||||||||||||||
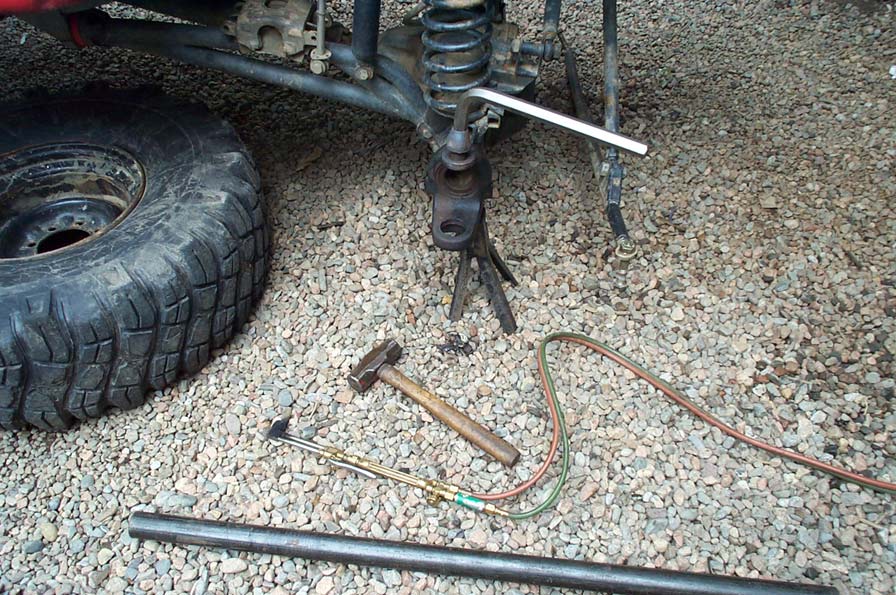 |
Even with this monster tool, I still needed the rest of this gear to remove the kingpins. Pictured are a 4' long cheater bar (Sched 80 pipe), oxy/acetylene torch, BFH, and the monster Allen key. | ||||||||||||||||||||||||||||||||||||||||||||||||||||||||||||||||||||
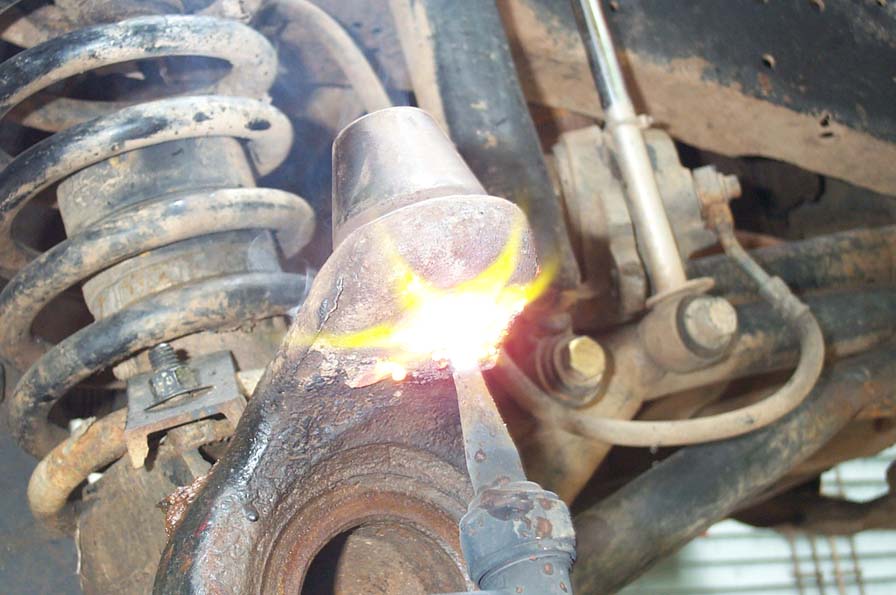 |
The process required heating the wee out of the kingpin (careful not to overdo it and distort the end forging though)... | ||||||||||||||||||||||||||||||||||||||||||||||||||||||||||||||||||||
 |
...hammering the monster Allen key into the kingpin... | ||||||||||||||||||||||||||||||||||||||||||||||||||||||||||||||||||||
 |
...slipping the 4' cheater bar over the monster Allen key and reefing on the end of it. | ||||||||||||||||||||||||||||||||||||||||||||||||||||||||||||||||||||
 |
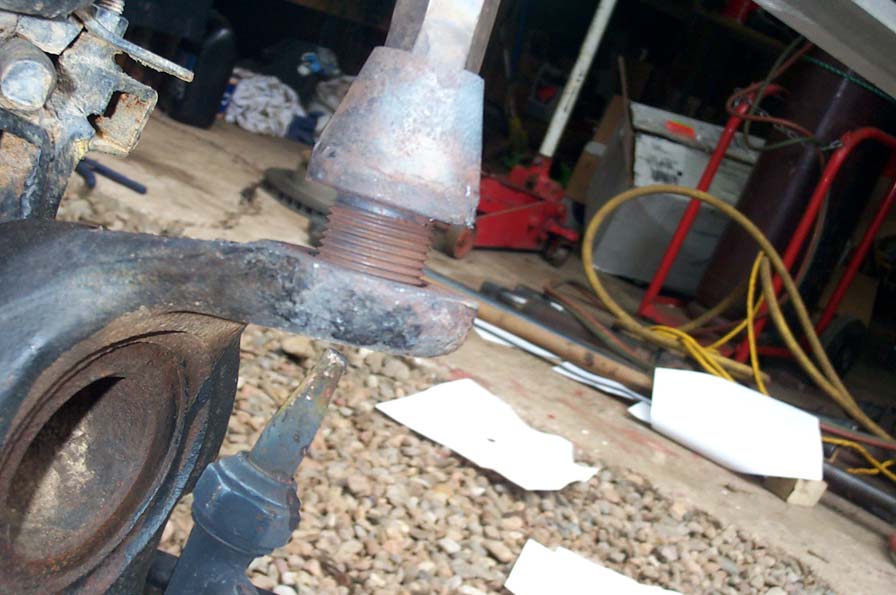
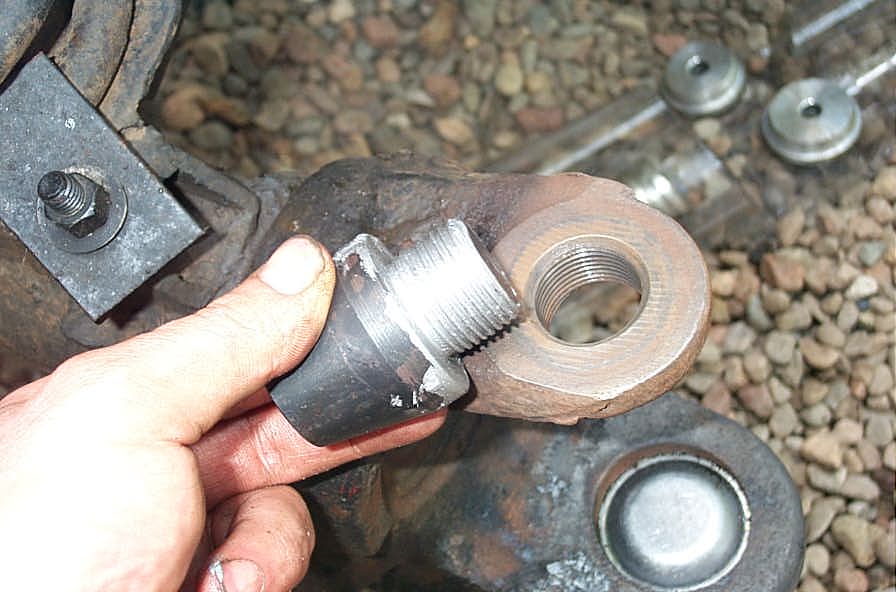
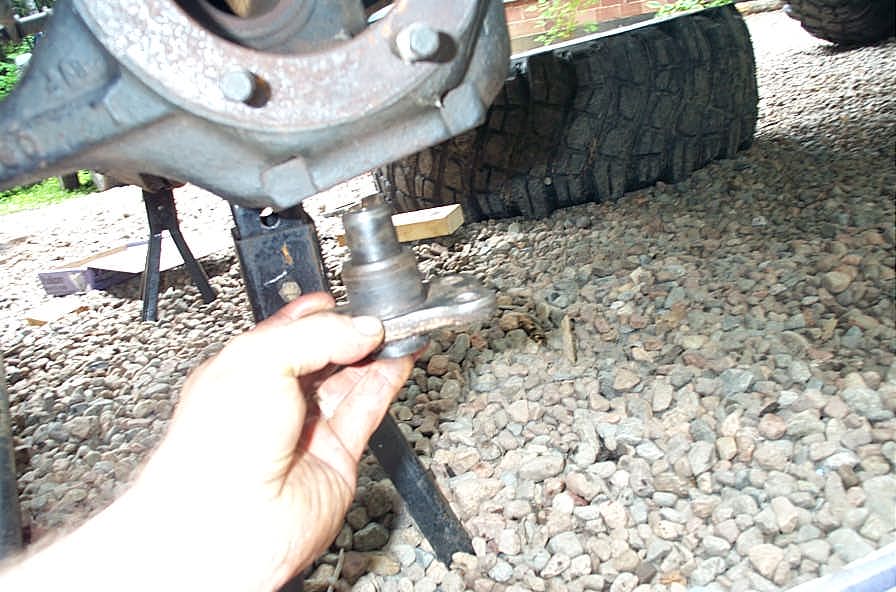
Once it broke free, I whipped out the monster Allen key, dropped in a short straight section of 7/8" hex stock, and slipped a 7/8" deep socket over that so I could wind it out with a ratchet. You can see the removed kingpin with the straight 7/8" hex stock still in it in the pic to the right of the end forging. It stayed there for a long time while it cooled! | ||||||||||||||||||||||||||||||||||||||||||||||||||||||||||||||||||||
Kingpin Re-assembly |
|||||||||||||||||||||||||||||||||||||||||||||||||||||||||||||||||||||
 |
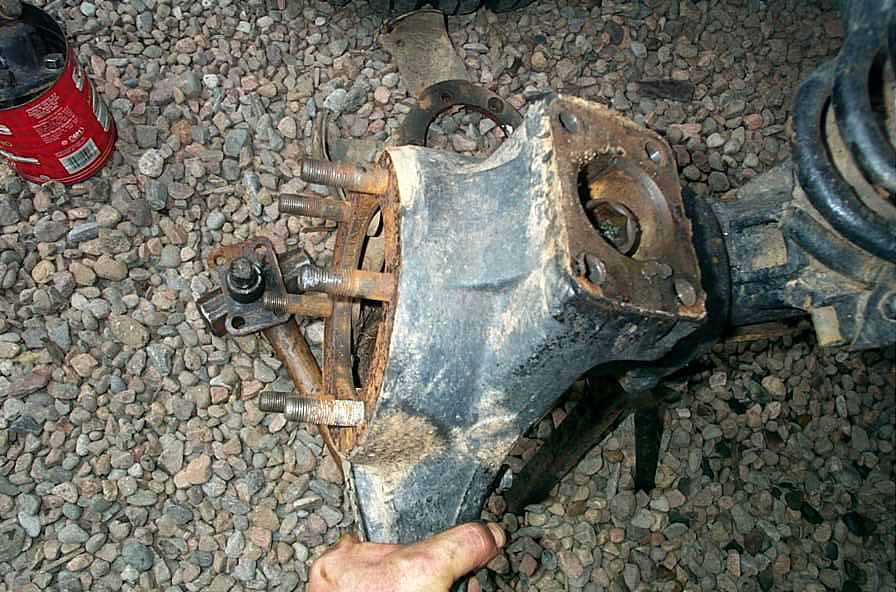
Before I slapped everything back together, while the knuckles were off, I took the time to clean them up a bit, including running a die over the threads of the spindle studs. | ||||||||||||||||||||||||||||||||||||||||||||||||||||||||||||||||||||
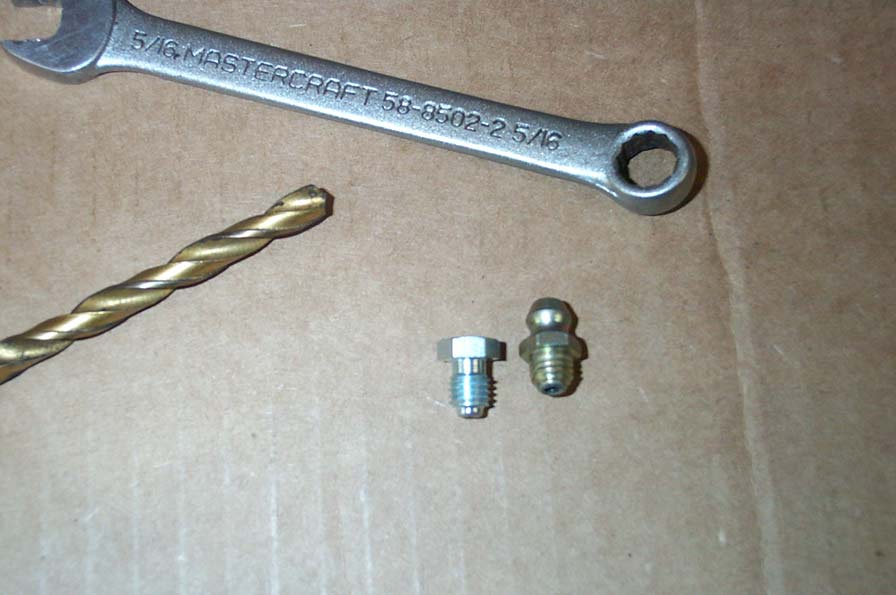 |
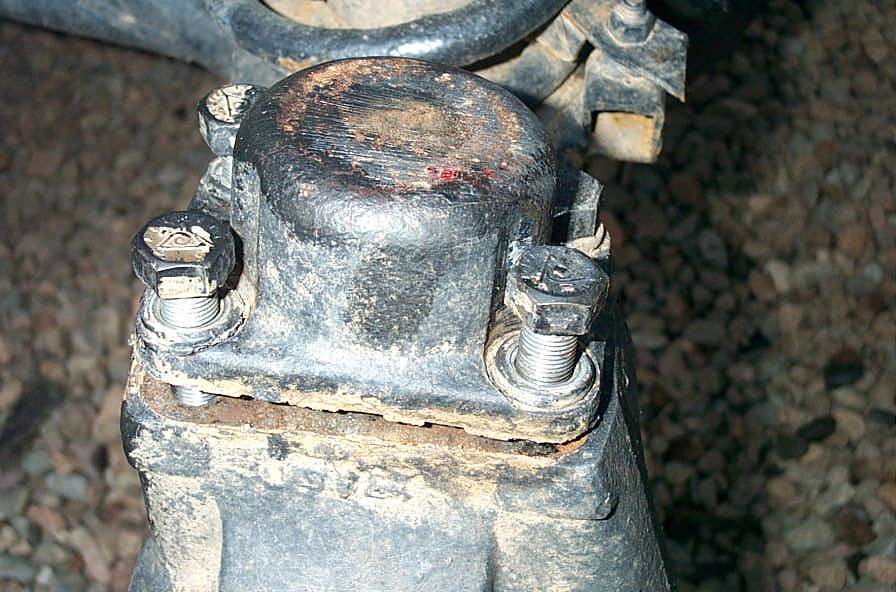
I also decided to make another small, custom modification. All the grease fittings on my original knuckles had been ground or broken off. As a result, maintenance suffers, and you can see the results above! I went to my local 18 wheeler supply house, and sourced these flush-style grease fittings to use instead of the regular-style supplied in the kit. This pic shows how much less the will protrude. | ||||||||||||||||||||||||||||||||||||||||||||||||||||||||||||||||||||
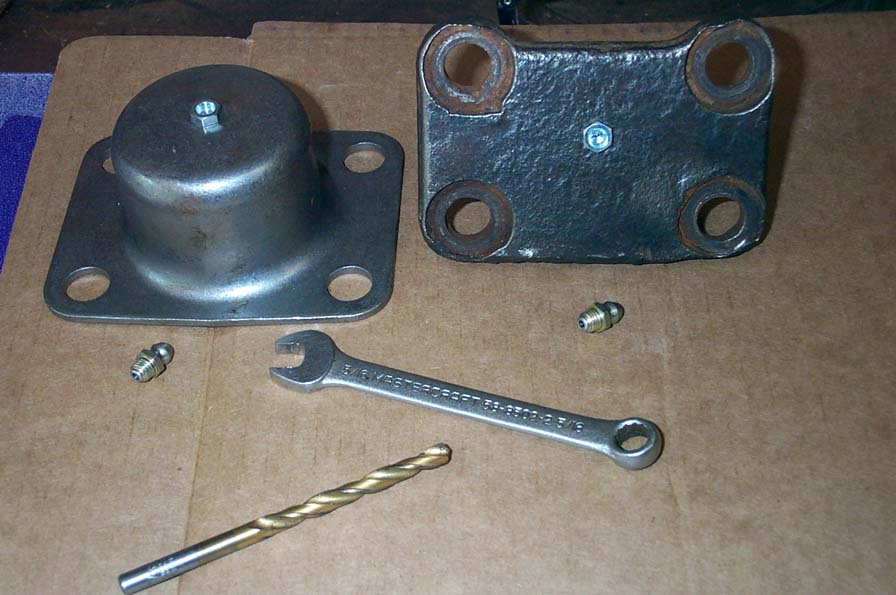 |
Note that the threads are slightly different on the flush style fittings compared to the regular style. This is done intentionally so they are not mixed up in driveline and axle U-joint applications where using the longer regular style where it wasn't intended would cause interference or binding and breakage. In the upper kingpin cap, I just carefully turned the new flush style fittings in anyway, but you have to be very careful not to strip them out completely. In the lower bearing cap, the old fitting was broken off flush in the hole anyway, so I just hit it with a 7/32" drill bit first, then the new grease fittings tightened in nicely. | ||||||||||||||||||||||||||||||||||||||||||||||||||||||||||||||||||||
 |
I still felt the grease fitting was vulnerable on the very bottom of the knuckle like that though, so I but a couple of thin sections from a piece of DOM tube that was lying around, and welded them around the grease fittings for protection. | ||||||||||||||||||||||||||||||||||||||||||||||||||||||||||||||||||||
 |
I got the idea from seeing tractors with steel rings welded around valve stems for protection. | ||||||||||||||||||||||||||||||||||||||||||||||||||||||||||||||||||||
 |
Now that I had finished goofing around, it was time to reinstall everything. First thing to go back is the lower kingpin race and dust cap. When installed in the end forging the dust cap goes on top of the race, the opposite side to where the bearing goes (obviously!), like this. | ||||||||||||||||||||||||||||||||||||||||||||||||||||||||||||||||||||
 |
I placed the dust cap in first, and secured it there with a dab of grease. | ||||||||||||||||||||||||||||||||||||||||||||||||||||||||||||||||||||
 |
Note. If you try this while the end forging is still warm from having used heat to remove things, the grease will melt, and the cap will fall out and into the gravel and the remaining un melted grease will then cause dirt and grit to stick to it that you will then have to clean off before you can reinstall the cap and then it will happen again just as you are trying to line up and carefully drive in the new race while lying on your side on the gravel and you may just get a little annoyed and then you will suddenly figure it out! | ||||||||||||||||||||||||||||||||||||||||||||||||||||||||||||||||||||
 |
Driving the race in nice and square while lying under the truck can be a bit of a challenge. I used a little aluminum race/seal driver kit and ALL of my patience! It would be far easier with the axle upside down on a workbench! | ||||||||||||||||||||||||||||||||||||||||||||||||||||||||||||||||||||
 |
Once the lower kingpin dust cap and race are installed, install the kingpin. I coated the threads with a little anti-seize first. | ||||||||||||||||||||||||||||||||||||||||||||||||||||||||||||||||||||
 |
The book calls for 500-600 lb/ft of torque. I slipped the monster Allen key in, slid the pipe over the end of it, and yanked till she was good and tight! | ||||||||||||||||||||||||||||||||||||||||||||||||||||||||||||||||||||
 |
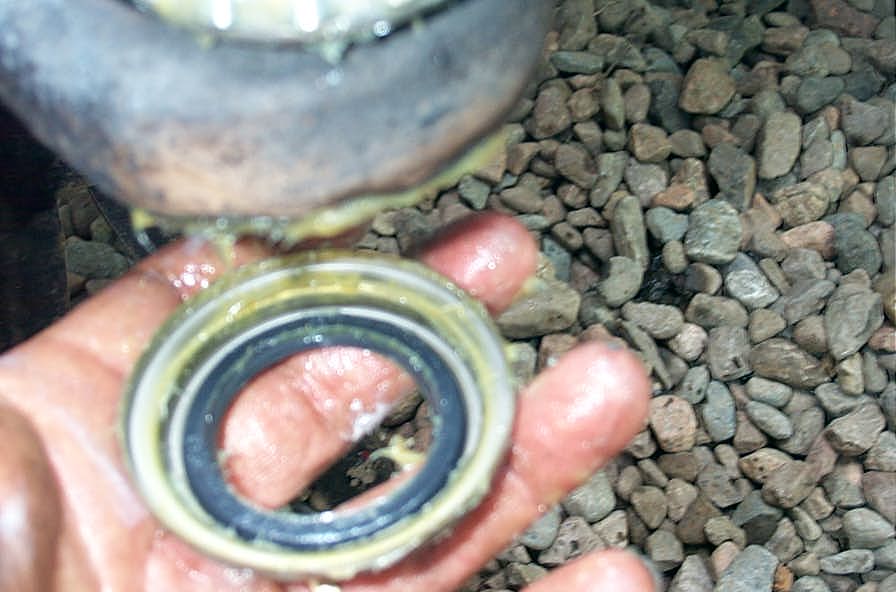
Next go the lower kingpin bearing and grease seal. When installed the bearing sits in the grease seal in this orientation, with the smaller diameter part of the seal to the bottom... | ||||||||||||||||||||||||||||||||||||||||||||||||||||||||||||||||||||
 |
...like this. | ||||||||||||||||||||||||||||||||||||||||||||||||||||||||||||||||||||
 |
After packing the bearing thoroughly with grease (I used a good quality EP Wheel Bearing Grease) I stuck it up in the race... | ||||||||||||||||||||||||||||||||||||||||||||||||||||||||||||||||||||
 |
...and then placed the grease seal in place. | ||||||||||||||||||||||||||||||||||||||||||||||||||||||||||||||||||||
 |
I fit it in place by hand, and then placed a small block of wood over it to tap it into place with a hammer. | ||||||||||||||||||||||||||||||||||||||||||||||||||||||||||||||||||||
 |
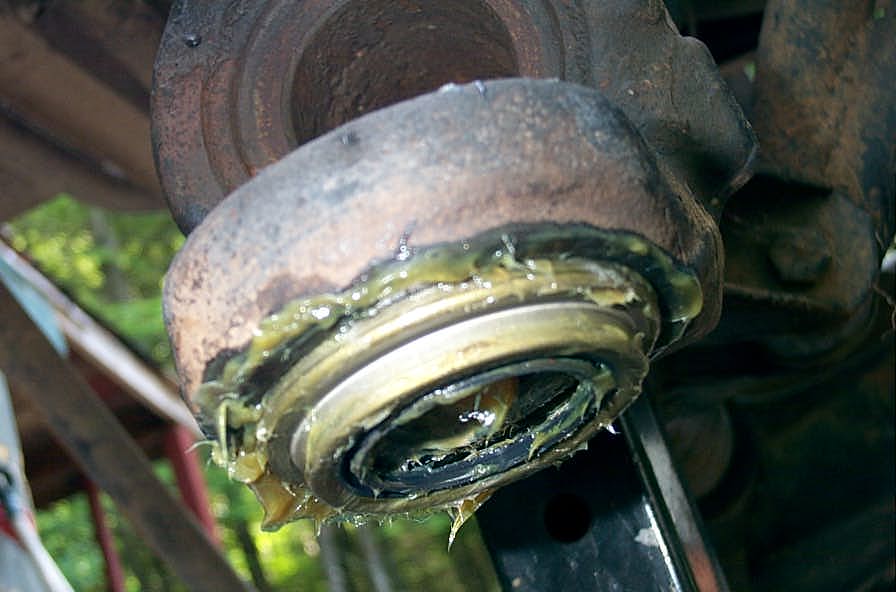
When it's fully seated in place, there will be a short part protruding from the bottom of the end forging, like this. | ||||||||||||||||||||||||||||||||||||||||||||||||||||||||||||||||||||
 |
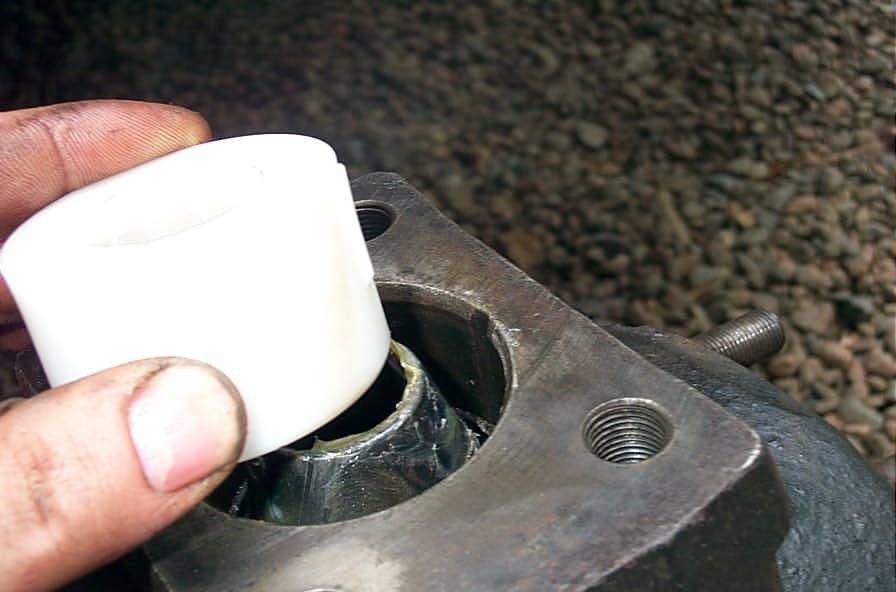
The next step is to install the upper kingpin seal over the kingpin, making sure the lip is facing up. | ||||||||||||||||||||||||||||||||||||||||||||||||||||||||||||||||||||
 |
The kit includes 2 different seal, one for 85-91 Ford Dana60F, and a shorter one for all the rest. Of course I only learned this AFTER I had assembled everything, and so, based on trial fit, I had actually used the taller Ford seal in my Chevy Dana60. I do not see this as a major issue. | ||||||||||||||||||||||||||||||||||||||||||||||||||||||||||||||||||||
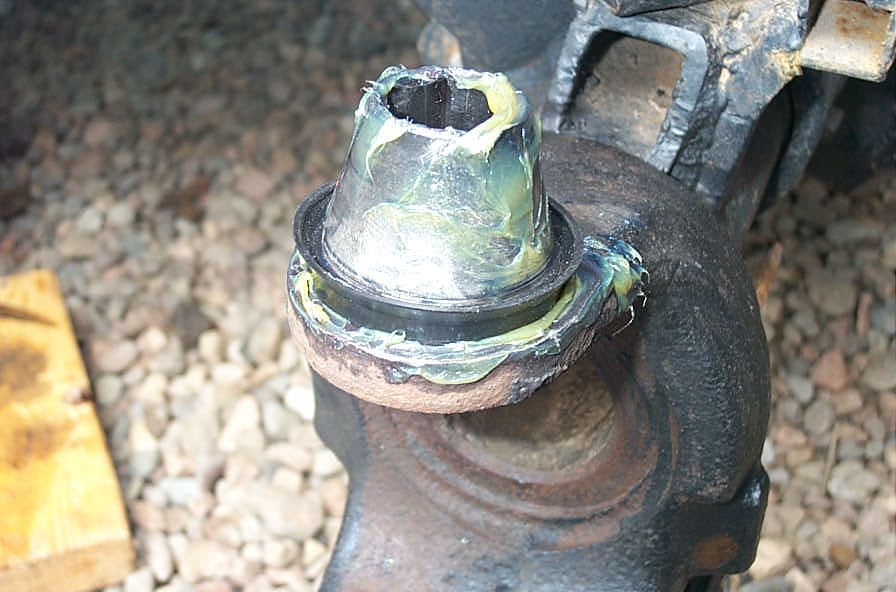 |
It simply slips over the kingpin. When it is in place, fit the knuckle back over the kingpin so that is on the end forging. | ||||||||||||||||||||||||||||||||||||||||||||||||||||||||||||||||||||
 |
Next, the lower kingpin bearing cap is installed to secure the knuckle in place on the end forging. | ||||||||||||||||||||||||||||||||||||||||||||||||||||||||||||||||||||
 |
Make sure the mating surfaces are clean... | ||||||||||||||||||||||||||||||||||||||||||||||||||||||||||||||||||||
 |
...and torque the bolts to 80 ft/lbs. | ||||||||||||||||||||||||||||||||||||||||||||||||||||||||||||||||||||
 |
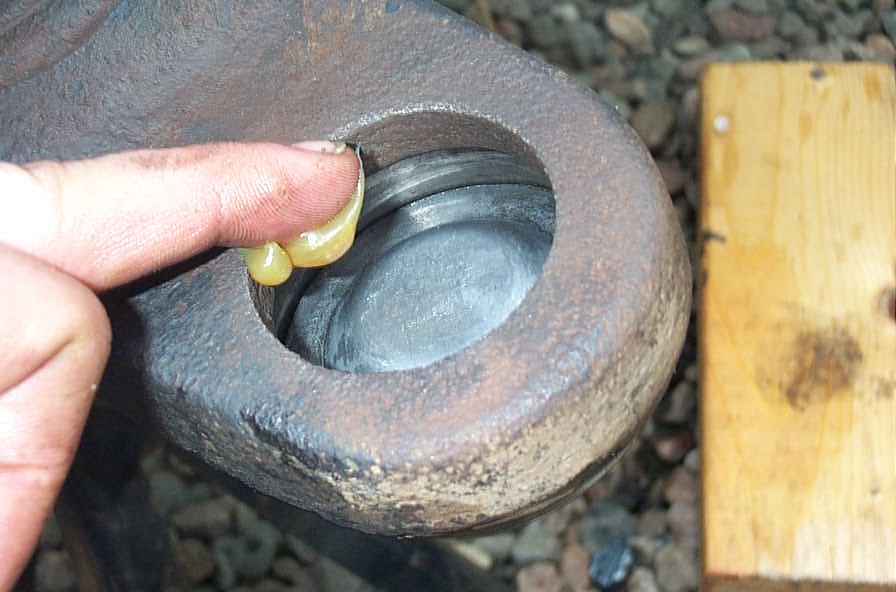
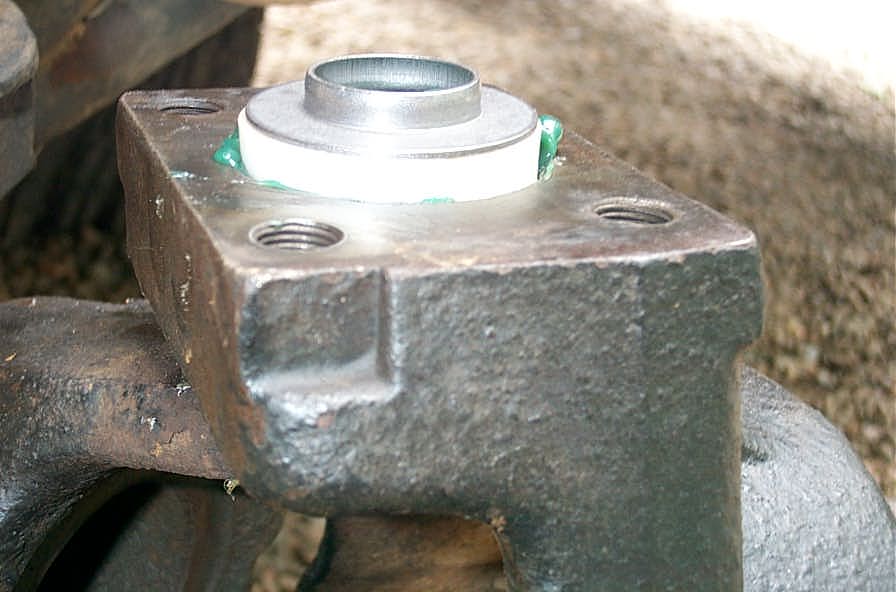
Fill the cavity surrounding the kingpin with grease... | ||||||||||||||||||||||||||||||||||||||||||||||||||||||||||||||||||||
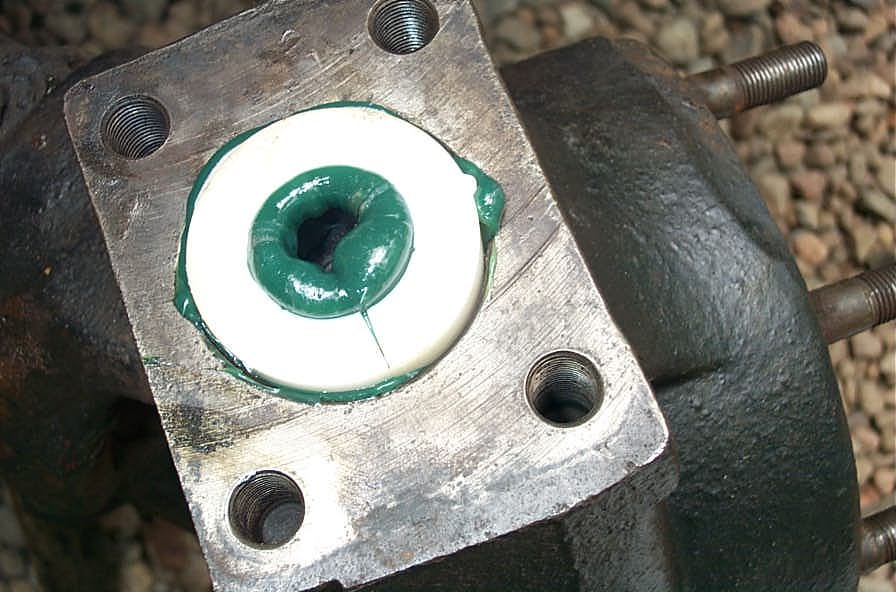 |
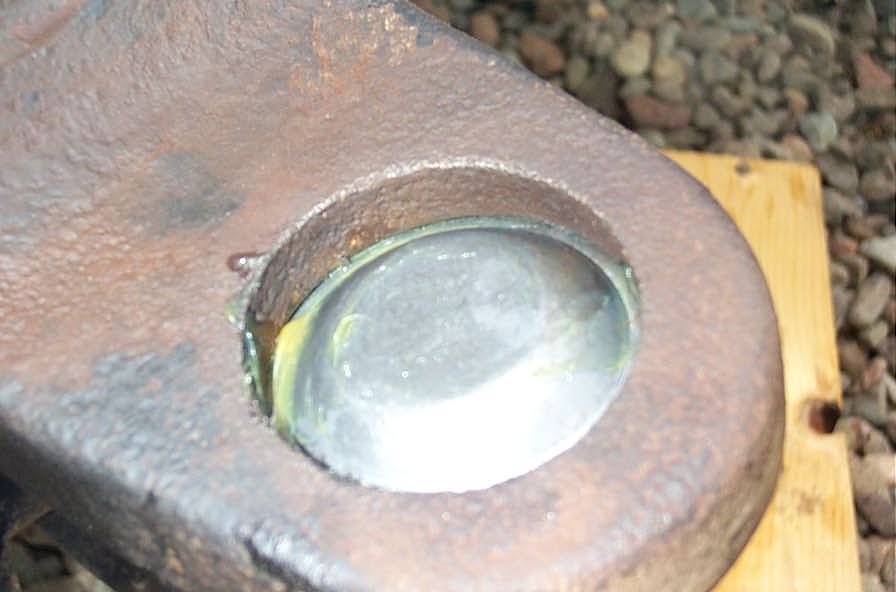
...and install the kingpin bushing over the kingpin. Note that there is a ridge on the bushing that indexes with a slot in the knuckle, so that the bushing only fits one way. | ||||||||||||||||||||||||||||||||||||||||||||||||||||||||||||||||||||
 |
Then place the spring retainer on the bushing... | ||||||||||||||||||||||||||||||||||||||||||||||||||||||||||||||||||||
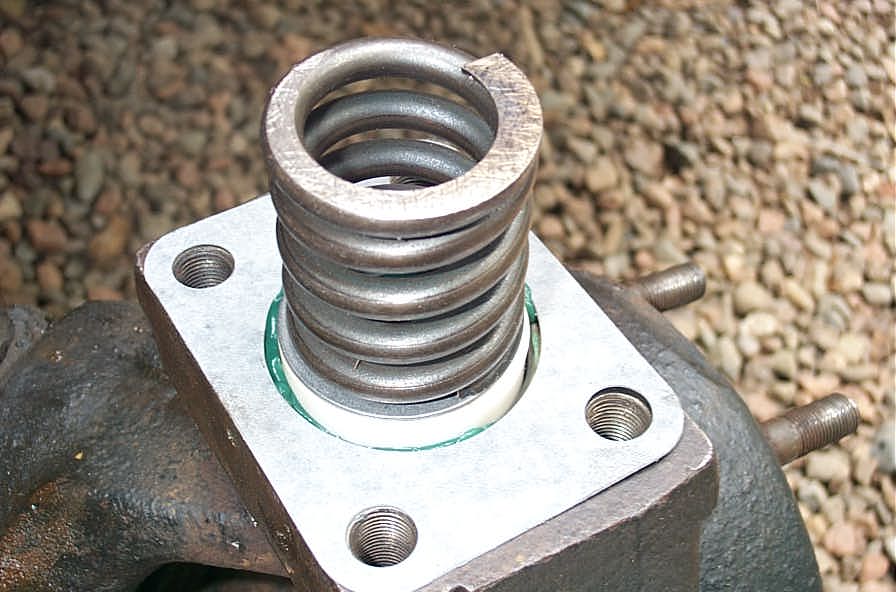 |
...and the spring on the spring retainer. | ||||||||||||||||||||||||||||||||||||||||||||||||||||||||||||||||||||
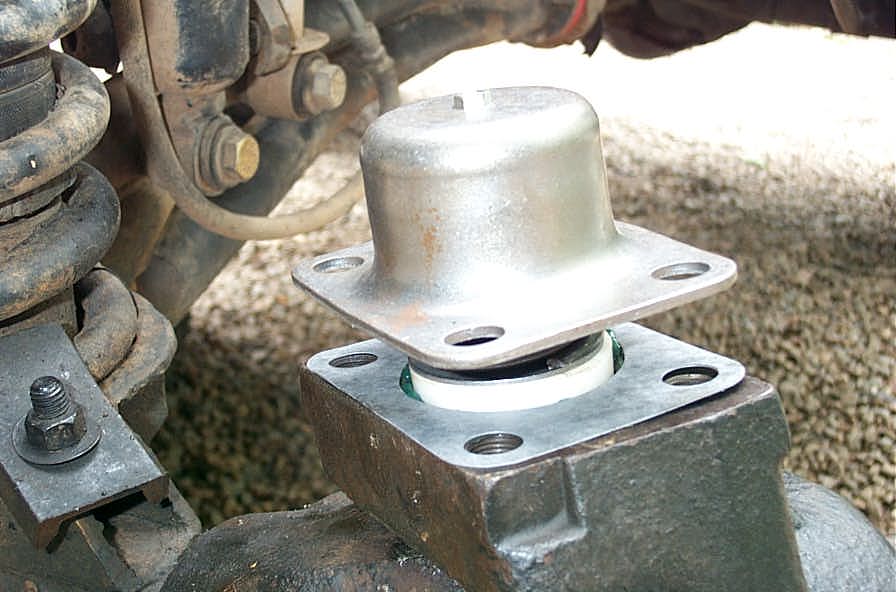 |
Finally, the cap goes on over the spring. | ||||||||||||||||||||||||||||||||||||||||||||||||||||||||||||||||||||
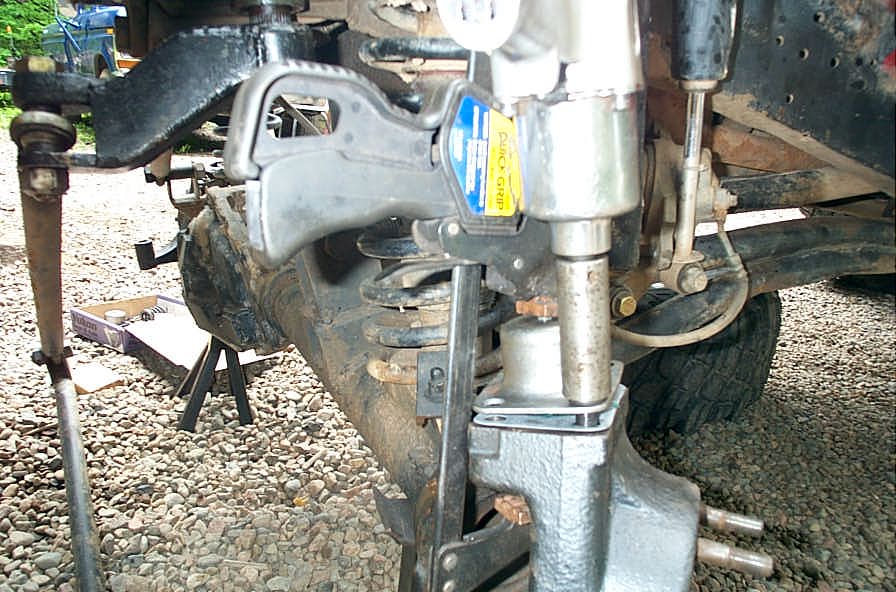 |
I used a clamp to compress the cap down over the spring so that I could tighten the bolts down in stages to 80 ft/lbs. All that is left after that is to fully grease the upper and lower grease fittings. |
||||||||||||||||||||||||||||||||||||||||||||||||||||||||||||||||||||
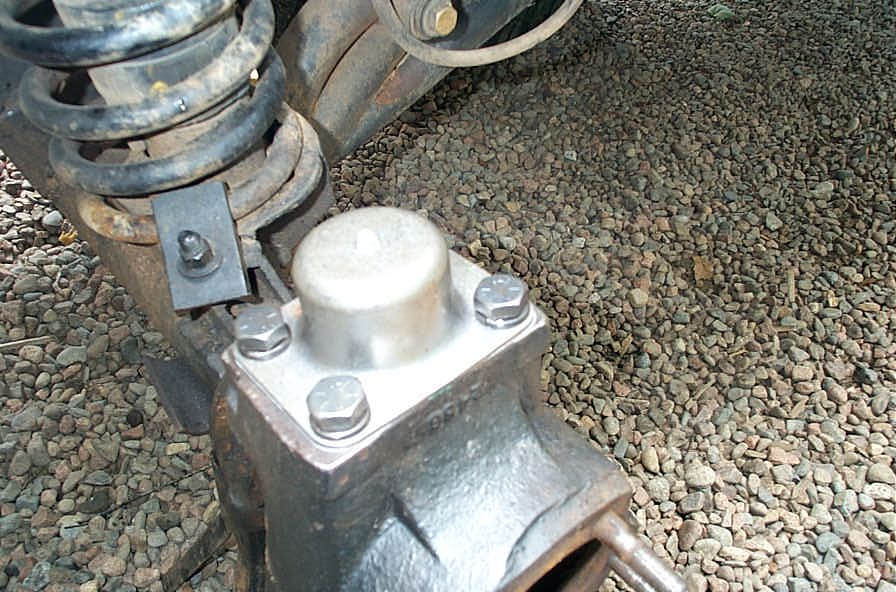 |
The top is all buttoned up... | ||||||||||||||||||||||||||||||||||||||||||||||||||||||||||||||||||||
 |
...and the bottom, with the fancy new grease nipple skidplates! :-) | ||||||||||||||||||||||||||||||||||||||||||||||||||||||||||||||||||||
 |
And that's it. Fully rebuilt kingpins....that should improve steering response and help eliminate / prevent any death wobble that commonly arises from worn kingpin springs, bushings, and bearings. | ||||||||||||||||||||||||||||||||||||||||||||||||||||||||||||||||||||
|
|||||||||||||||||||||||||||||||||||||||||||||||||||||||||||||||||||||
 |
Sources: 4wdfactory.com(512) 759-6267 http://www.4wdfactory.com |
|