 |
Speedi Sleeve Install By Bill "BillaVista" Ansell |
IntroductionSaving a SNAFU Spindle: Follow along as I save the really ratty spindles on my trusty 14Bolt rear axle |
 |
Speedi Sleeve Install |
|
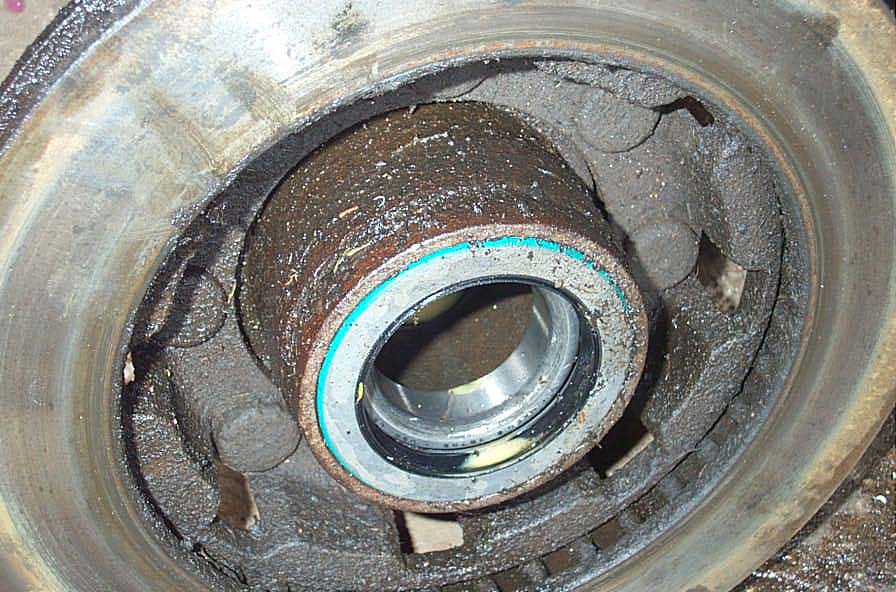 |
Leaking rear wheel hubs are a huge PITA. They're messy, waste a surprising amount of gear oil, and don't do a thing for brake performance as the rotor gets covered in leaking gear oil. | ||||||
 |
It's not exactly a glamorous upgrade or modification, but I eventually HAD to do something about mine. You can see my 25 year-old spindles are pretty beat. I could get a completely new axle and start again, but who wants to redo all the bracketry just to stop a leak. I also didn't want to get into replacing the spindles, because to do that properly requires the right jig and some careful alignment. | ||||||
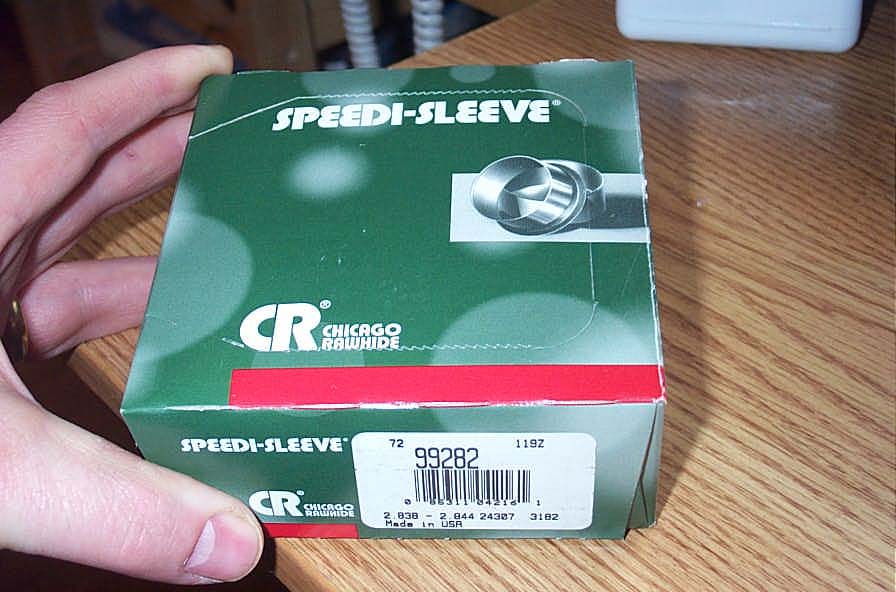 |
The solution is to use a Speedi-Sleeve by CR (Chicago Rawhide). These are clever little devises designed for JUST such a repair. They're very useful, because they avoid the expense and hassle of a replacement. They're not cheap though - I paid about $40 Canadian each. | ||||||
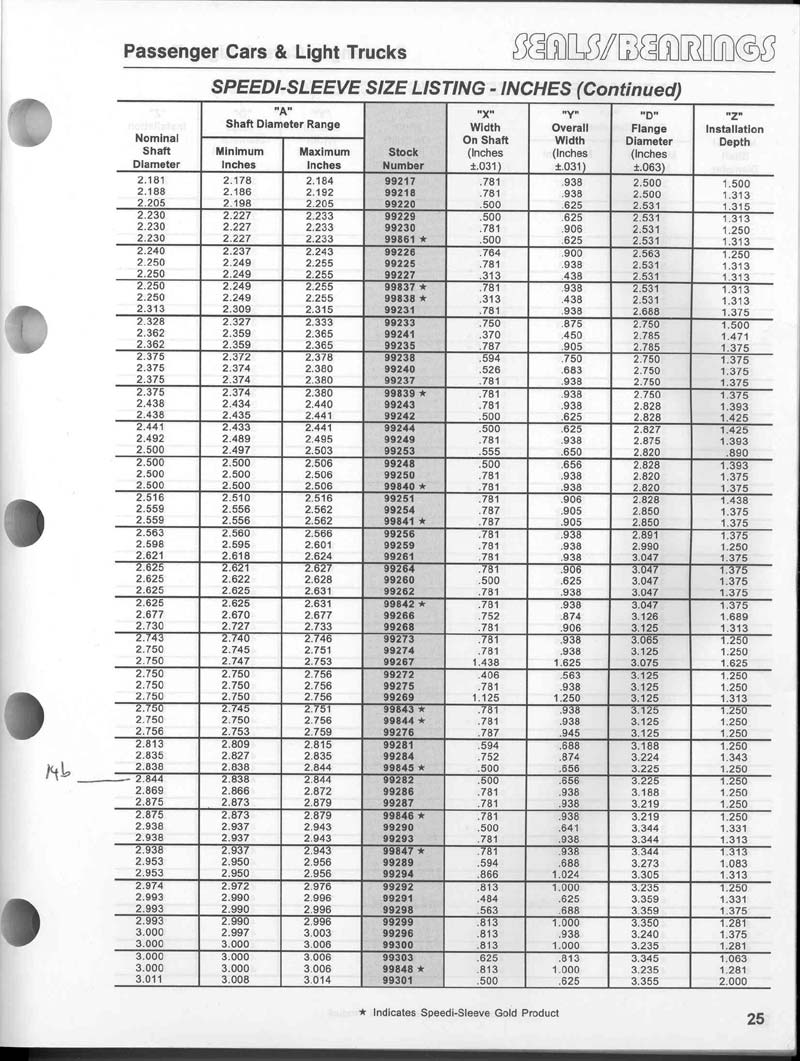 |
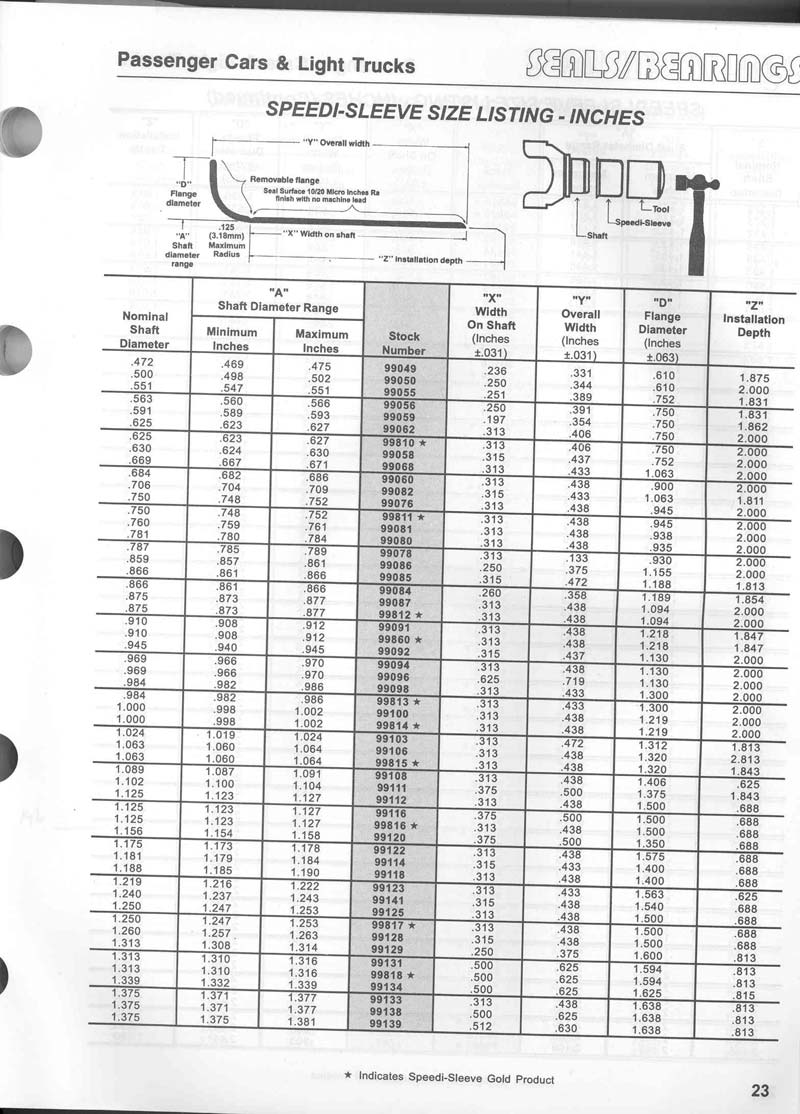
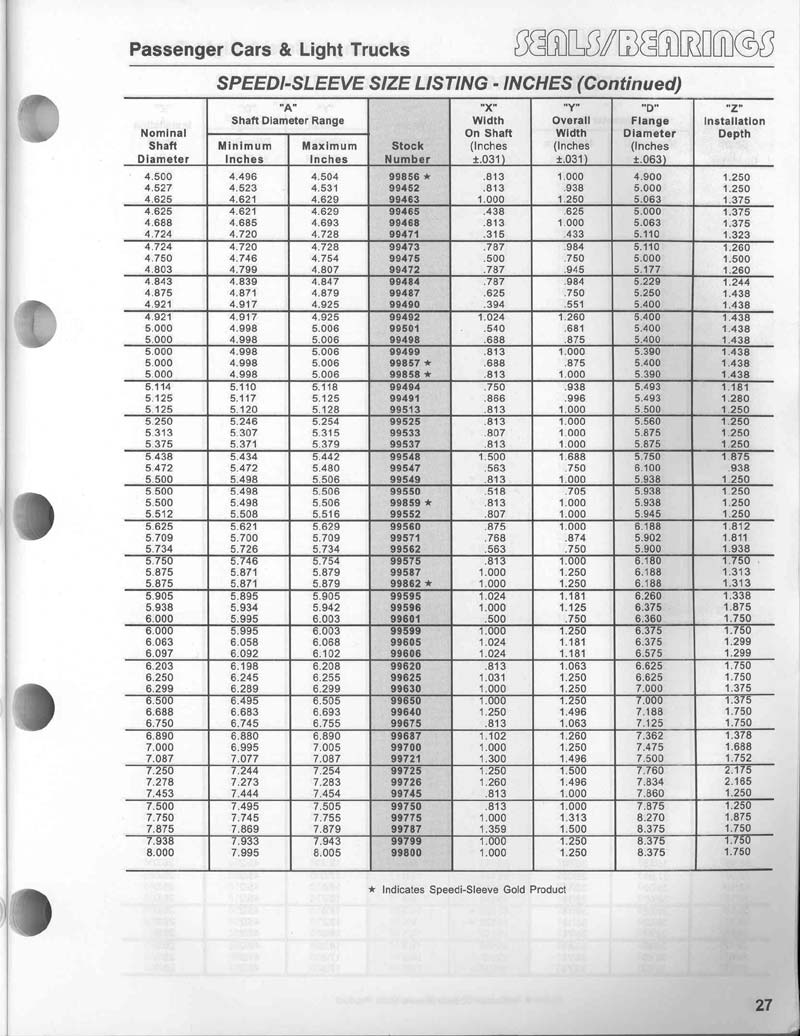
To get the right part number for your spindle, you need to measure the seal surface of your spindle in 3 different places to create an average. You then take this number and go to the tables in the CR catalogue to pick out the part number you need. For the 14Bolt rear axle the part number is CR#99282. |
||||||
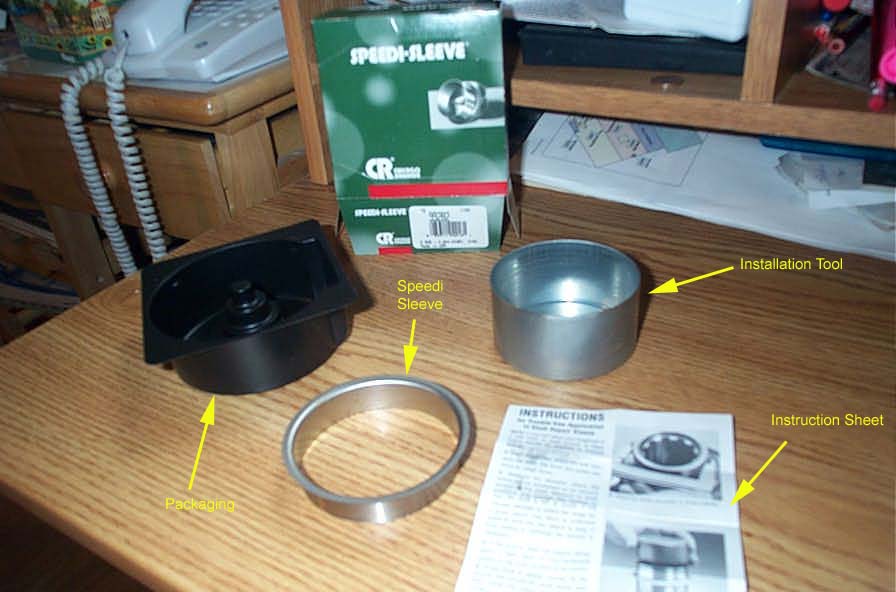 |
Inside the box you get the sleeve itself, an installation tool, and a little instruction sheet, all in a clever little black plastic packaging. The plastic thing protects the sleeve, as it is VERY thin and quite delicate. It is designed to be driven on the spindle to create a fresh seal surface without adding so much thickness that a different seal would have to be used. In other words, you install the sleeve and re-use the original seal part number. |
||||||
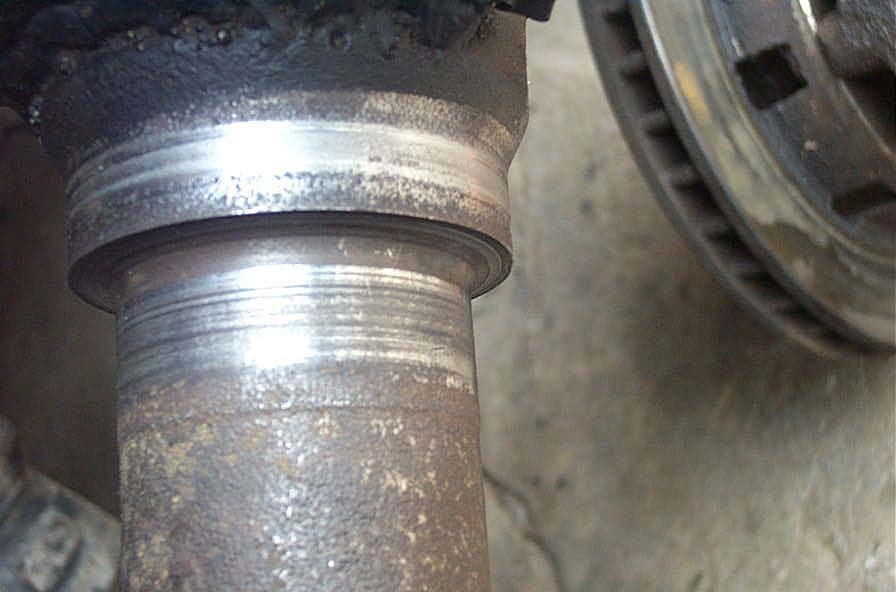 |
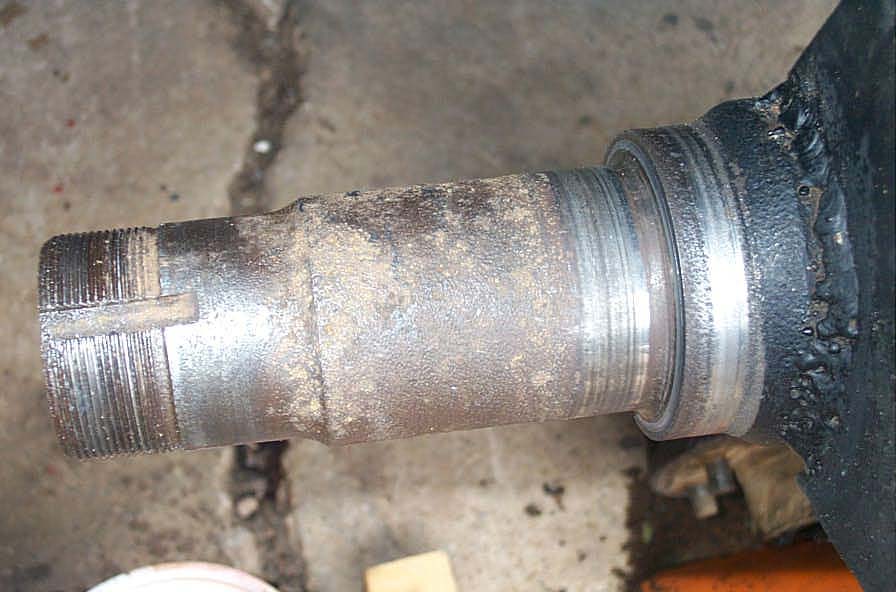
This is the spindle before installation. You can clearly see the corrosion, pitting, seal wear groove and general ratty condition causing my leaks - even with brand new seals in the hubs. The first thing you must do is clean up the seal surface and general area of the repair VERY well. This is because the sleeve is a very tight fit, and any burrs or rust buildup will not allow you to install is straight and square. I used a knotted wire wheel, emery cloth, small very, fine file, and brake cleaner to get mine spiffy. |
||||||
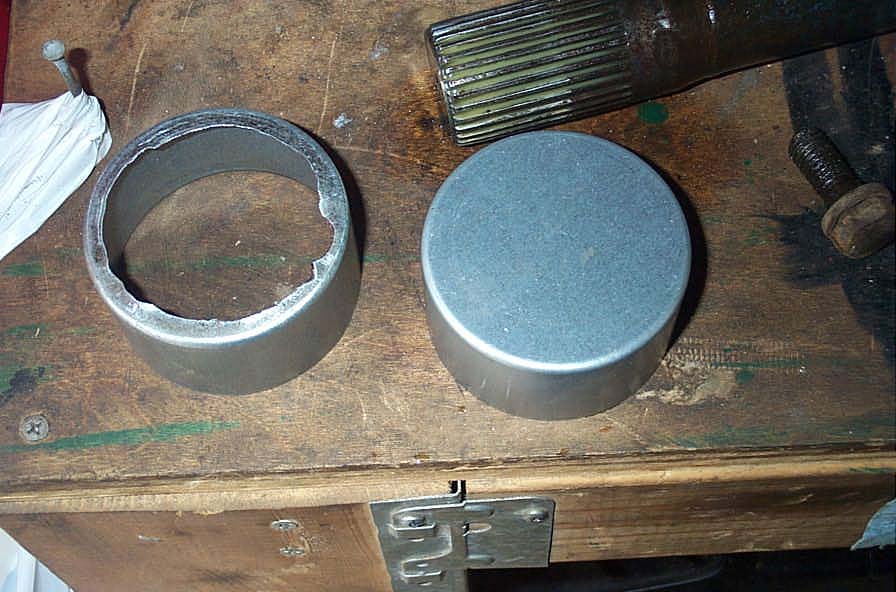 |
You have to modify the installation tool. As supplied (shown on the right), it isn't "deep" enough to drive the sleeve onto the spindle. I cut the middle out with the ol' air nibbler and .... |
||||||
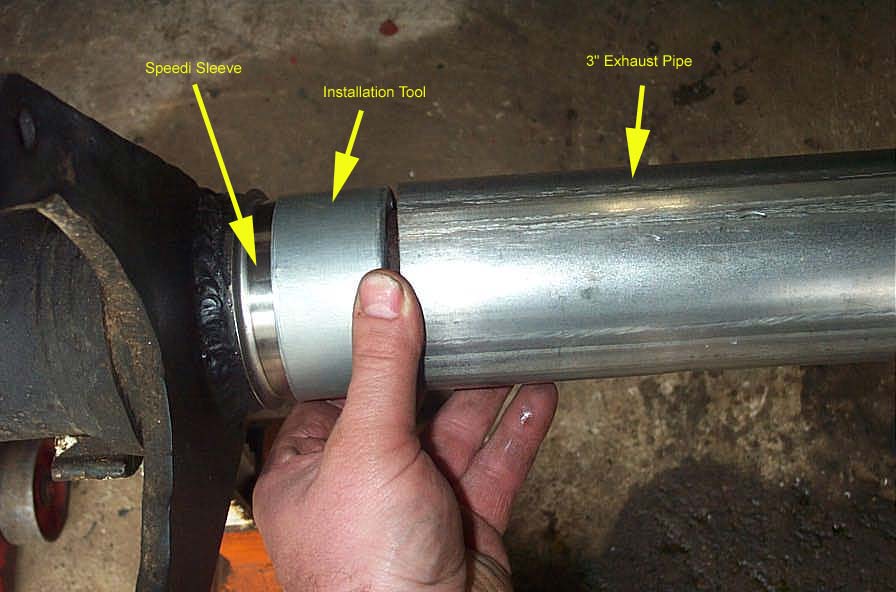 |
... used it in conjunction with a length of 3" exhaust I had lying around. You need to place the sleeve on the spindle carefully (so it is aligned and square) then carefully drive it into place so the new surface covers the wear marks where the seal will ride. |
||||||
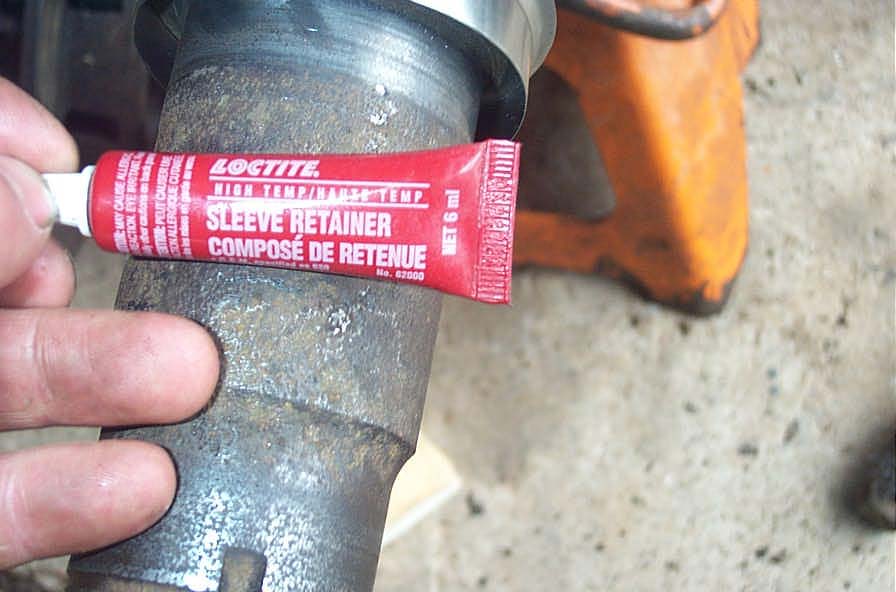 |
Despite the tight fit, I used a little Loctite 620 retaining compound between the sleeve and spindle to make sure they stay put. | ||||||
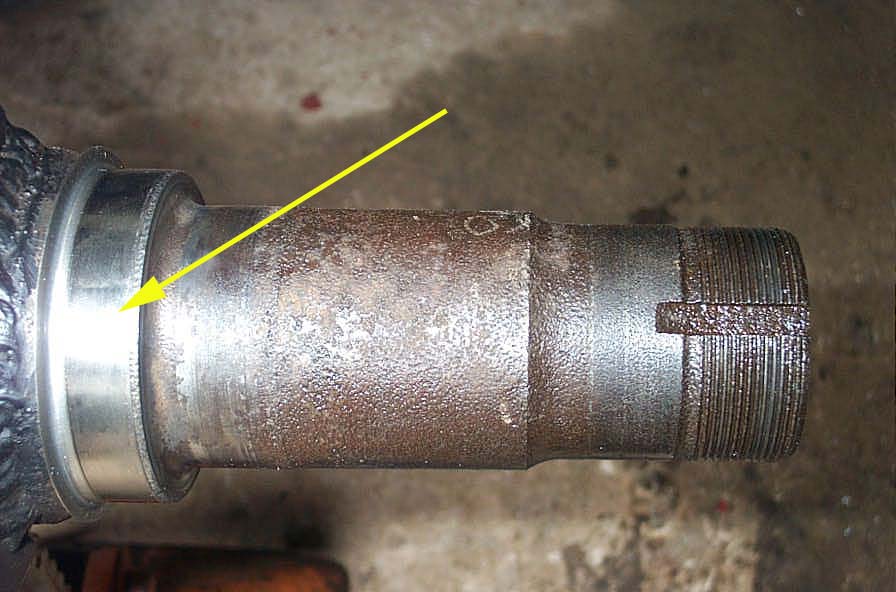 |
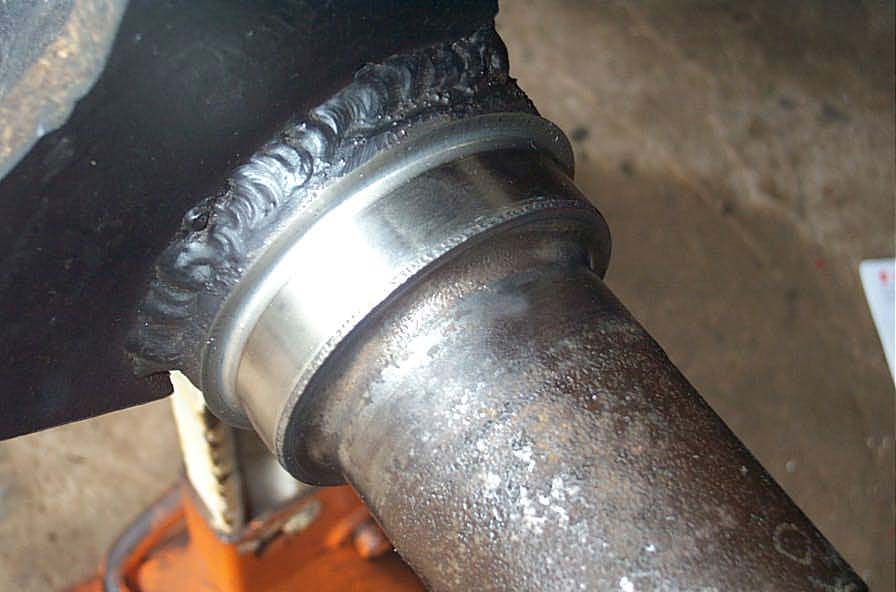
Here is the speedi-sleeve (yellow arrow) driven into place. | ||||||
|
A nice fresh surface for the hub seal. A nice easy fix, that hopefully obviates the need to replace spindles or build a new axle housing. And yea, I've waited ages to use the word "obviates" in a tech article ;-) PS - hey - quit critiquing my welding...don't think I don't feel you doin' it! This aint about welding! :-) |
||||||
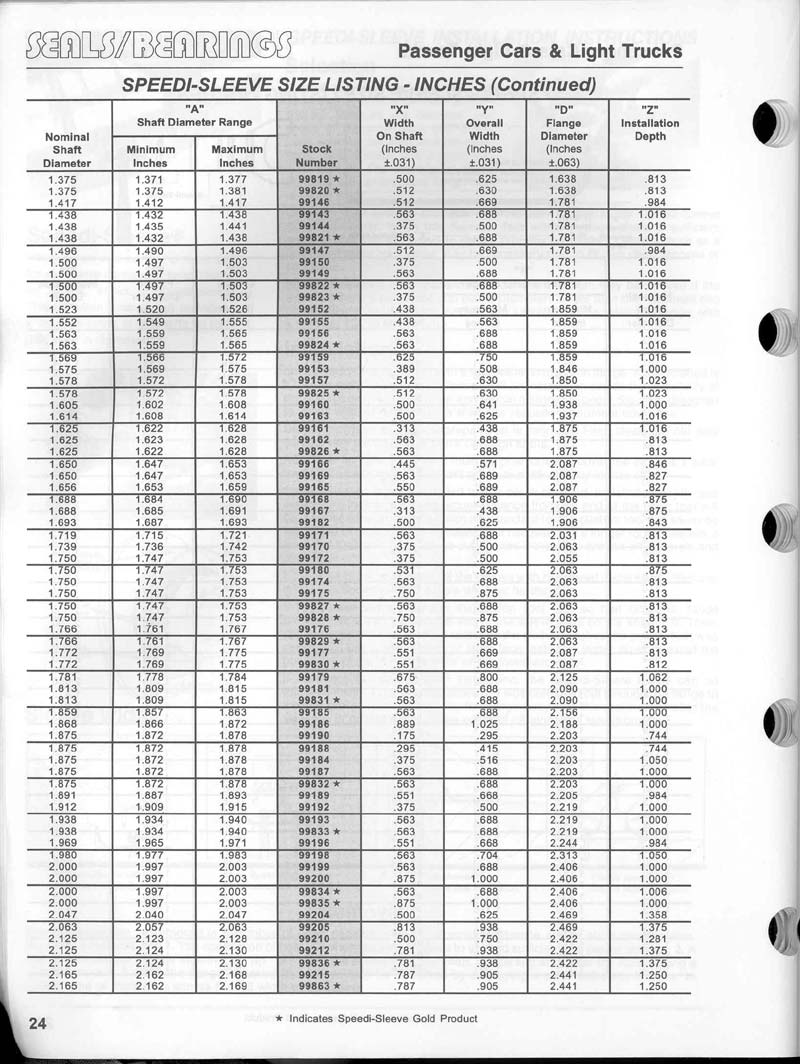
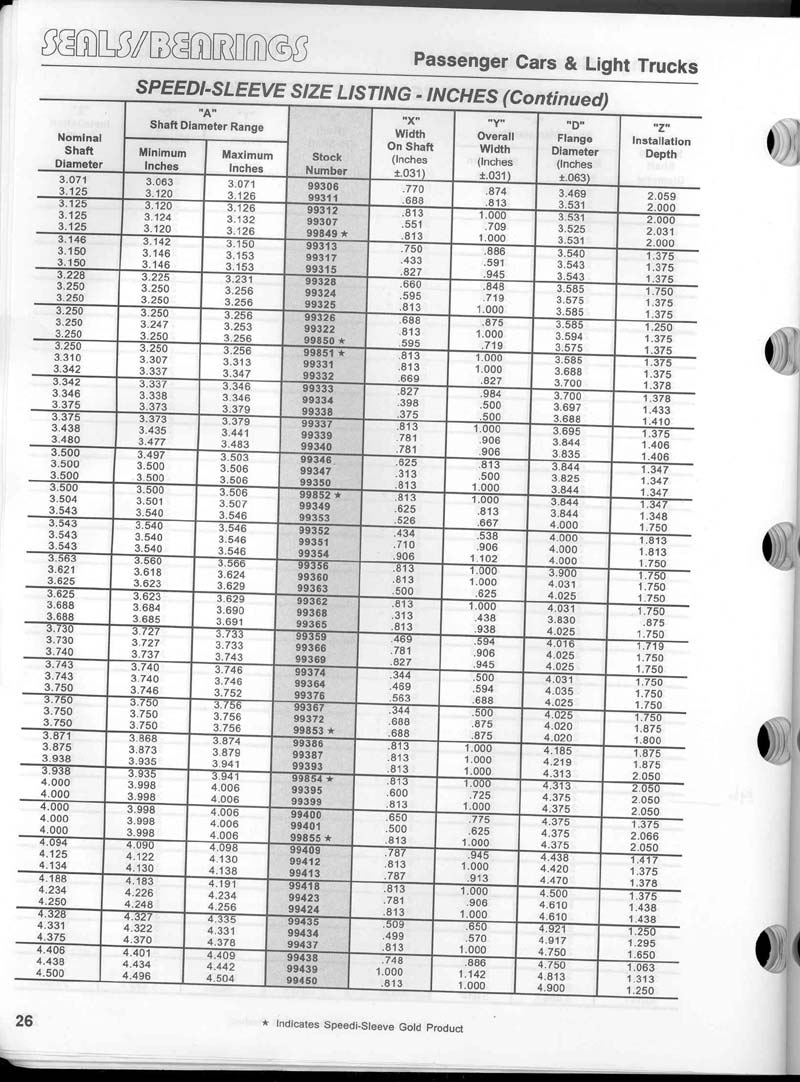
| Here are the appropriate pages from the CR master catalogue. | |||||||
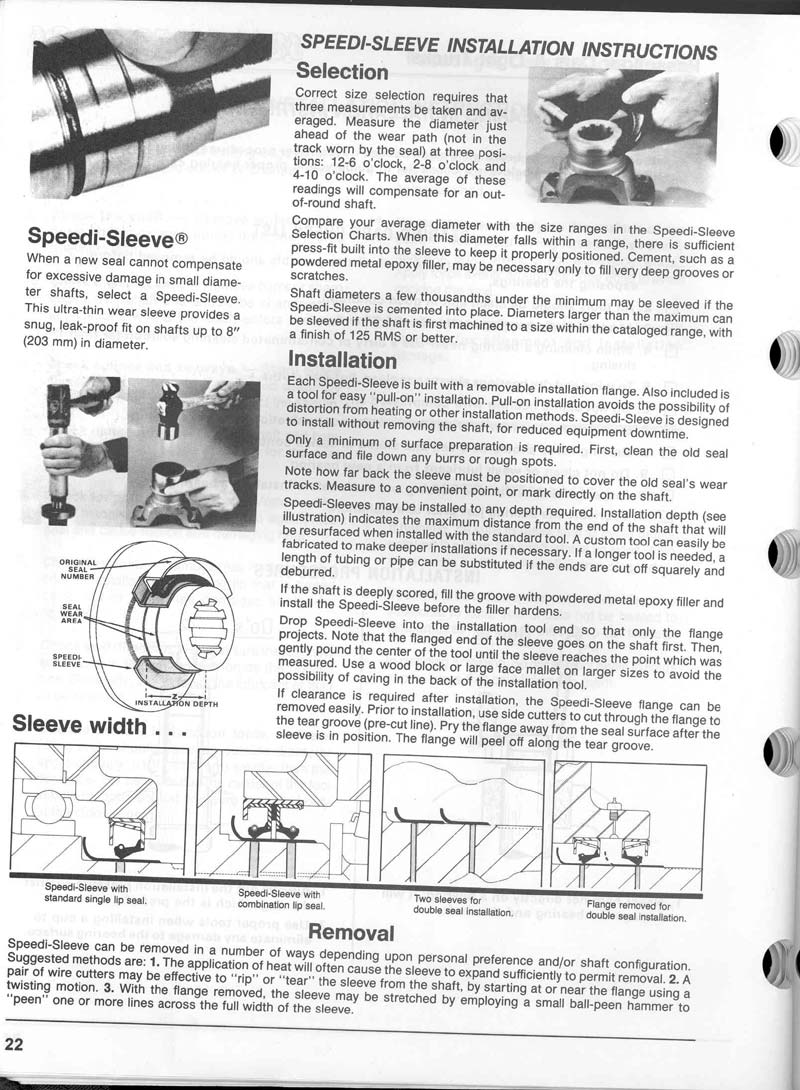 |
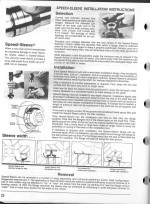
First the detailed measurement and installation instructions: | ||||||
Then the tables of sizes and part numbers:
|
|||||||
 |
And finally the whole thing in pdf format: | ||||||
|