 |
Doubler™ Basics By Bill "BillaVista" Ansell |
ConceptUsing dual transfer cases in a 4WD vehicle to provide super-low gear reduction has several distinct advantages over other methods of achieving very low gearing (namely using an aftermarket transfer case and/or using very low gears in the differentials.) This method of using two transfer cases is often called a “doubler” because of the doubling of the rigs’ low-range. |
 |
The term Doubler™ is a registered trademark of Offroad Design, a Colorado based company who were pioneers in the commercial application of this technology. The advantages of the Doubler™ approach are:
The concept is fairly simple: take the gear reduction portion of one transfer case (the low-range box) and mate it to the front of a regular transfer case. The low-range box serves only to reduce the gear ratio, while the regular transfer case provides its own additional low-range gearing along with front and rear drive. Both mated portions are then mounted in the vehicle as a single unit. Since the low-range box will also have a high-range position (almost always 1:1), the Doubler’s™ low-range gearing (often 2:1) can be invoked only when necessary, saving drive-train wear and tear. ExecutionThe execution is a little more complex. Commercial systems are available, but it is entirely possible to “homebrew” your own – here’s how: The basic components required for a Doubler™ are:
|
|
|
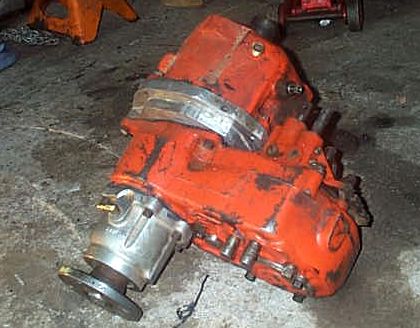
This pic shows the Wolf’s Doubler.™ Components, from left to right:
|
|
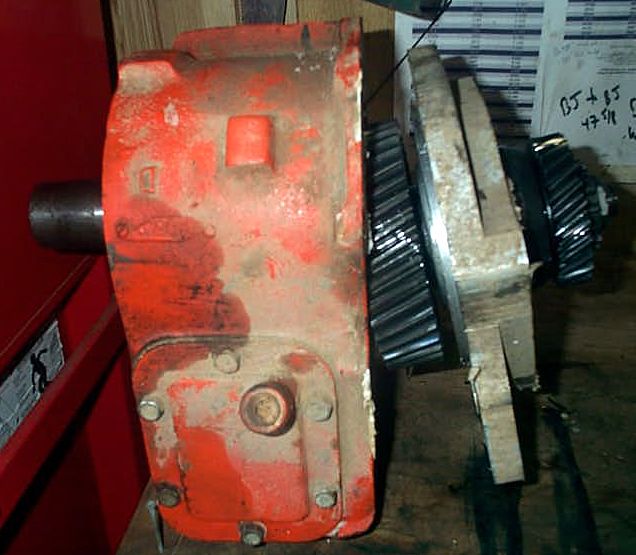
The low-range boxThe NP203 is the clear champion as far as being the donor of the low-range box, and for good reason. The all-gear, heavy-duty, cast-iron NP203 has distinct advantages, namely:
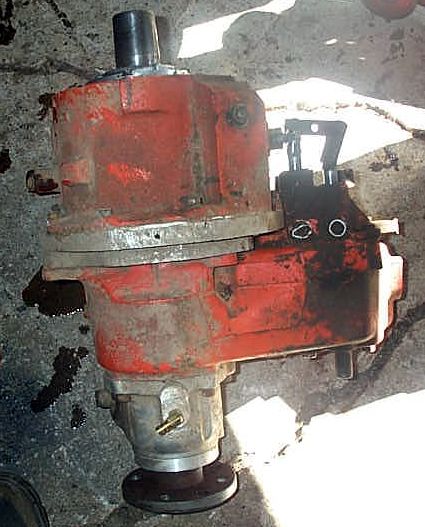
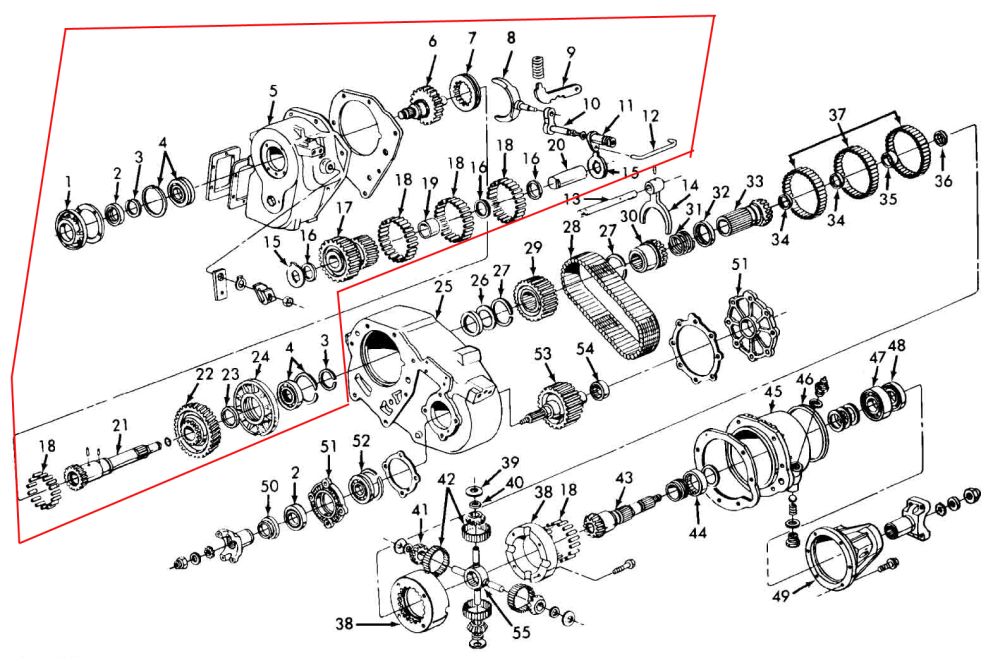
Identifying an NP203The most distinguishing feature of an NP203 is its massive size – it dwarfs even the NP205. Measuring 22” long, 19” wide, 15” high and weighing in at a humongous 165 lbs it is one big beast. The following diagram illustrates an exploded view of the NP203, with the low-range box components used for a Doubler™ outlined in red.
Other features of the NP203 are:
|
||
 |
Figure 3 – large helical gears inside the 203 range box. | |
Details of the NP203 used by each manufacturer are as follows: FordAvailable behind C6 automatic transmissions, the Ford NP203 has a 31-spline input and Ford 6-bolt circular bolt pattern. It will also mate to manual transmissions such as the NP435 that have a 31-spline male output. The Ford NP203 came as an option in:
Note that the '73-’77.5 F-250 may come with an NP203 but it will be divorced and not practical to use for a Doubler™. Chevy
SM465 4-Speed manual – 10-spline female input. |
||
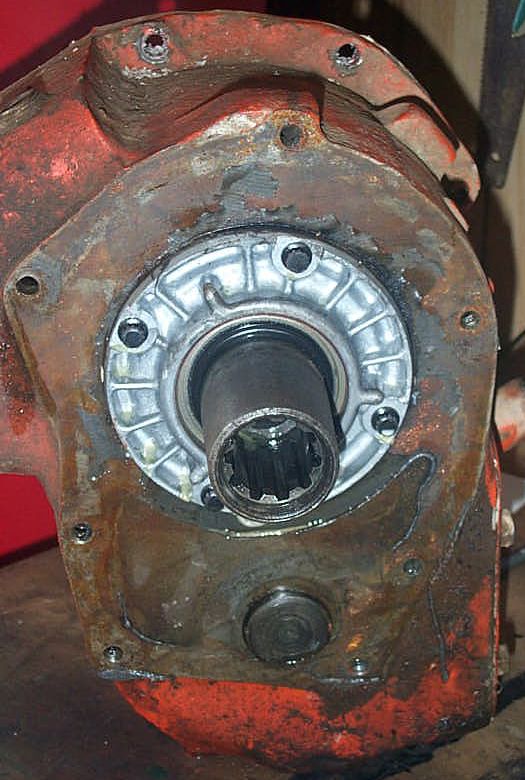 |
Figure 4 – Front input of Chevy NP203 showing asymmetrical 7-bolt pattern and 10-spline input indicating SM465 version. | |
DodgeDodge used the NP203 behind both TF727 autos and NP435 manuals from ‘75 to ‘79. Dodge NP203s have a 23-spline female input and use either a 6-bolt circular bolt pattern (later models) or the Chevy style 7-bolt asymmetrical pattern. Note that in the case of the Chevy and Dodge 7-bolt asymmetrical pattern NP203, it is possible to re-drill the low-range box case so that it fits the 6-bolt circular pattern. TransmissionThe 203 range box can be mated to the following transmissions using a factory adapter: Ford – C6 automatic; NP435 4-speed. |
||
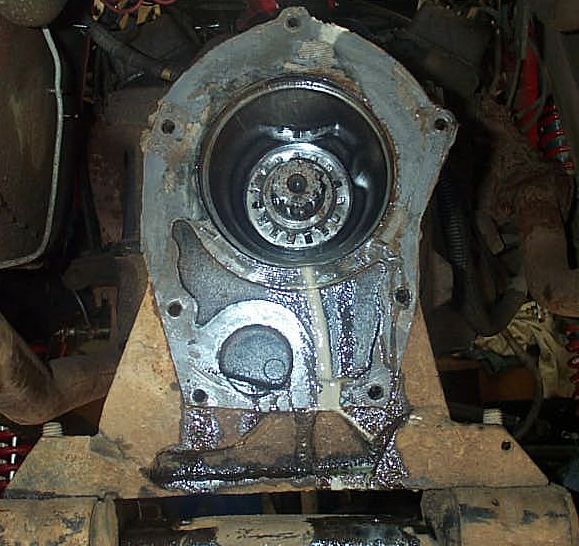 |
Figure 5 – Stock Chevy SM465 to NP203 adapter, showing asymmetrical 7-bolt pattern. |
|
Transfer caseOnce you have the 203 range box mated to your transmission, you need a transfer case to mate to the back. The NP205 is the most popular, chosen for its strength and durability. However, the Dana 300 and Dana 20 also make good choices, especially where size and weight are at a premium; both being compact, all-gear, cast-iron cases. This is particularly true if you already have a D300 or D20 that’s been built up with aftermarket output shafts or low-range gears. The homebrew Doubler™ setup in my rock buggy, The Wolf, uses an NP203 low-range box and a Dana 20 that has been upgraded with an Advance Adapters rear output and Teraflex 3.15:1 gears. It is also possible to mate the 203 range box to an aftermarket transfer case such as the Atlas II. Adapter and ShaftThe key to a Doubler™ setup, and the heart of the system, is the adapter and shaft that mate the 203 range box to the transfer case. The job of the adapter is to mate the 2 cases together and support the shaft that transfers the power from the 203 to the transfer case. In the Wolf, the shaft is simply the stock 203 range box output shaft (that would have driven the chain-drive gears in the stock case) that is cut down and re-splined to accept the Dana 20 input gear. Figure 6 shows the modified shaft. It was cut down on a lathe and re-splined with a vertical mill. It wasn’t heat treated after this surgery because we lacked the facilities to do so. In theory this presents a weakness, but in practice, several years of hard use have failed to result in any problems with the part. |
||
 |
Figure 6 – Cut down and re-splined 203 output shaft. | |
| The adapter itself is a single piece of 6061-T6 aluminum, 1.5 inches thick, that is machined on the front face to accept the large basket-like 203 output bearing retainer. The rear face is machined to accept the output-shaft bearing and retainer from the transmission originally in front of the Dana 20 transfer case, in this case a Jeep™ T150 3 speed manual transmission. Figures 7 and 8 show the adapter. In addition, the bolt pattern from the rear of the 203 range box is drilled into the front of the adapter, and the bolt pattern from the front of the Dana 20 is drilled into the rear face of the adapter. | ||
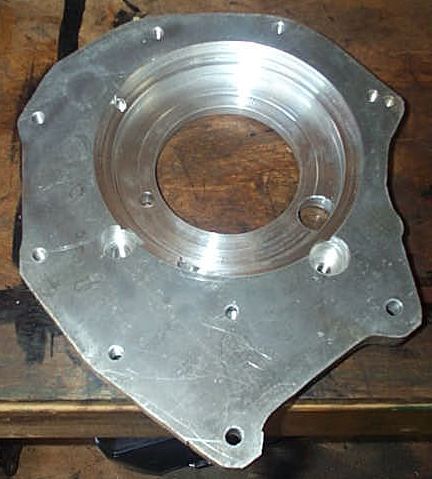 |
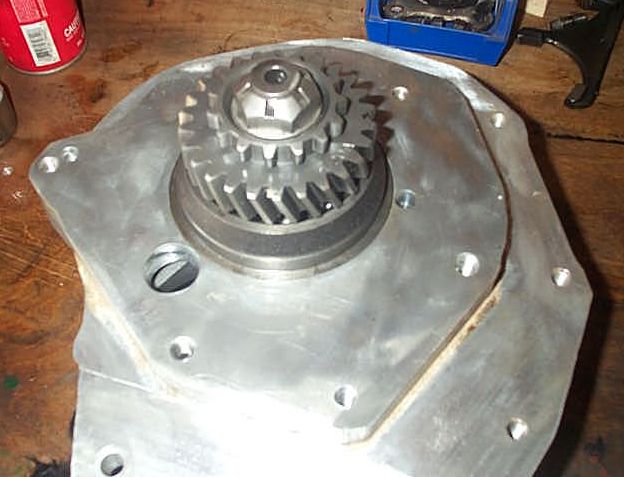
Figure 7 – 203 range box (front) side of adapter. Note multi-step profile of machining to accommodate bearing retainer basket. Also note two counterbored holes on bottom circumference of basket recess. These 2 counterbored holes contain bolts that retain the transfer case onto the rear of the adapter, but that thread from the front of the adapter. | |
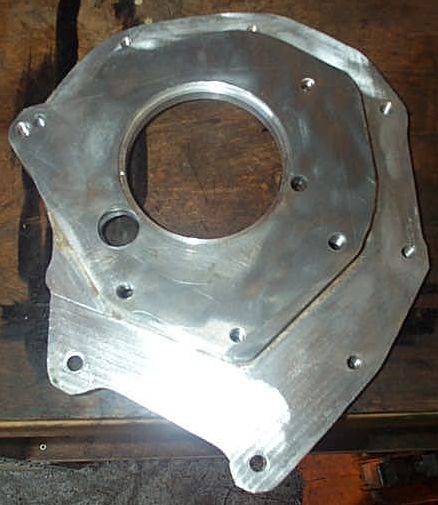 |
Figure 8 – Rear side of adapter, to which the transfer case mounts; machined to accept the T150 3 speed transmission output shaft bearing. Note the large hole that allows gear oil to flow from the 203 range box to the transfer case. This permits filling both cases with 85w gear oil from a single point on top of the 203 range box. | |
Putting it all togetherAs hard as it is for any writer to admit, a picture really is worth a thousand words; and so to save you about half a million of them, the best way to understand how the whole system goes together is to study the following series of pictures that illustrate the disassembly and re-assembly of the Wolf’s Doubler™. |
||
 |
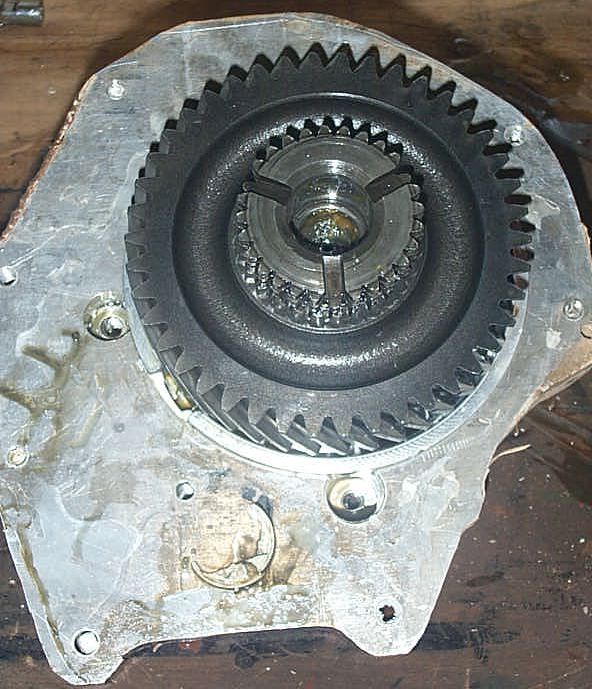
Adapter being removed from 203 range box. Note that the aluminum adapter is sandwiched between the 203 low-range gear and the Dana 20 input gear. | |
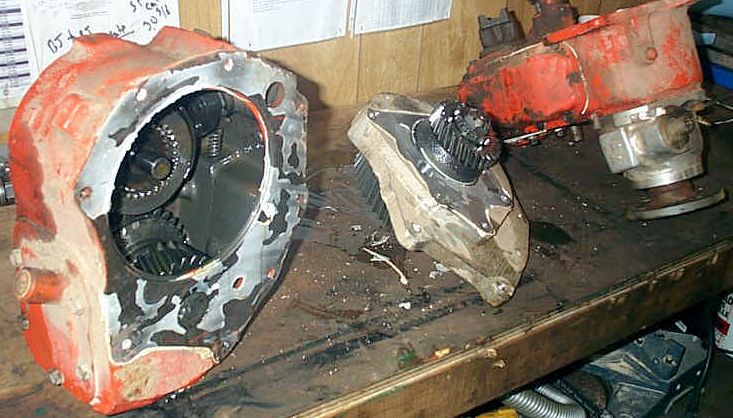 |
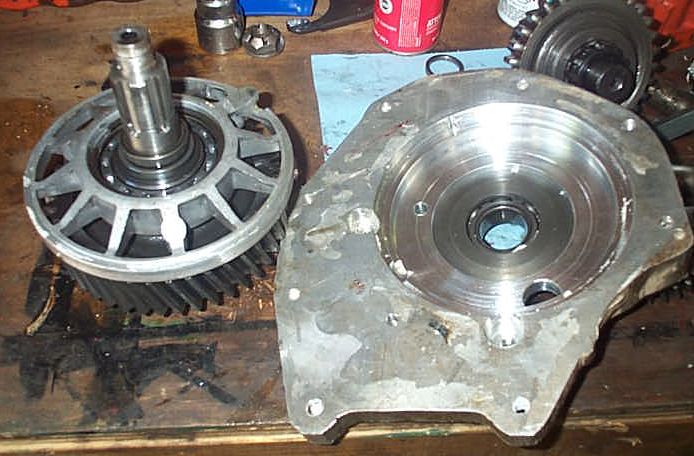
Disassembled components of the Doubler™, from left to right, 203 range box, adapter with shaft, Dana 20. | |
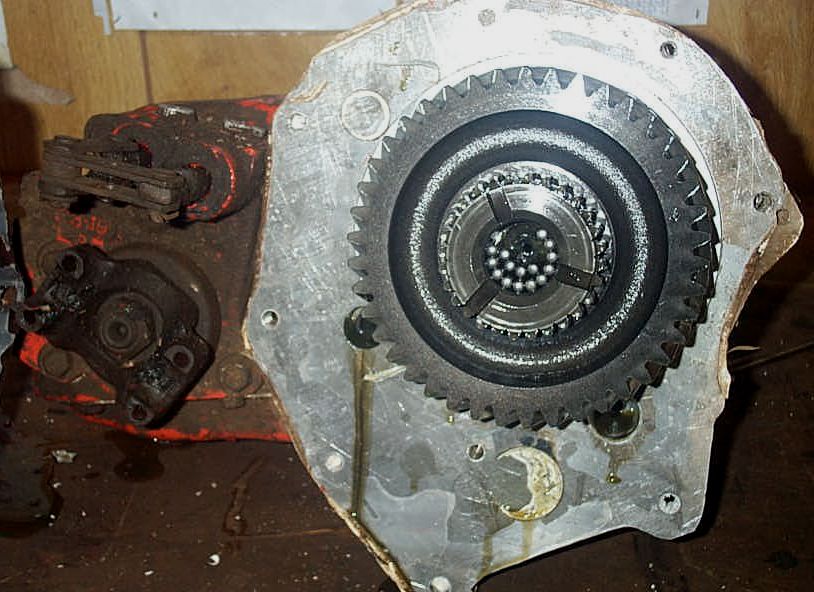 |
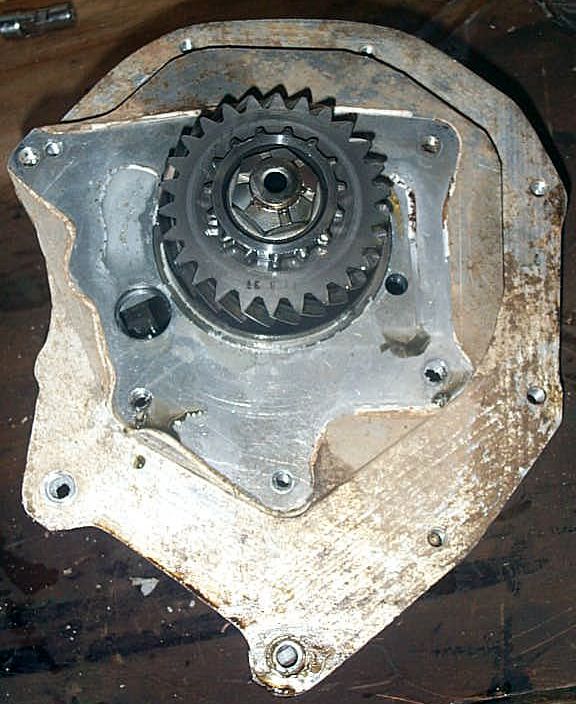
Adapter attached to transfer case. Note the two recessed bolts (just at the circumference of the large gear) that thread into the transfer case. | |
 |
203 range box (front) side of adapter. | |
 |
Transfer case (rear) side of adapter. | |
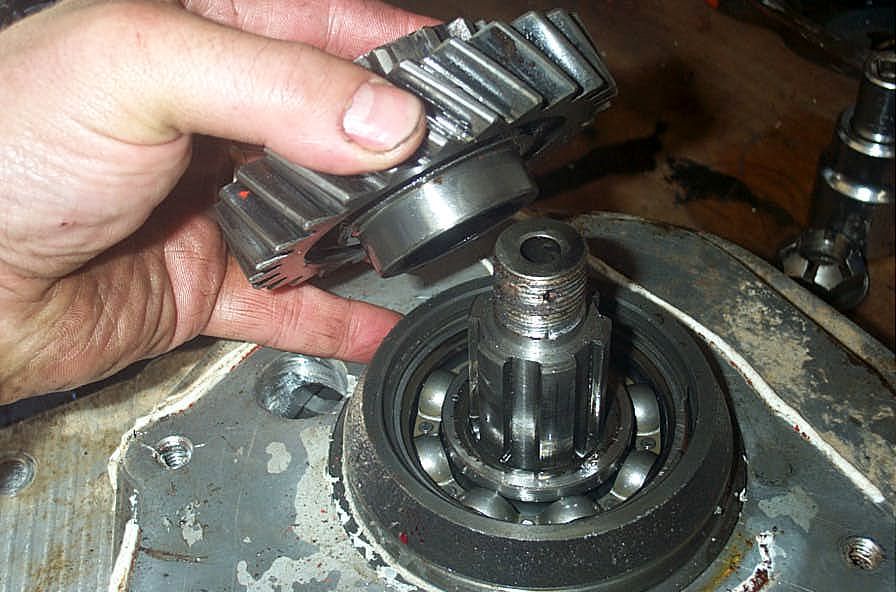 |
Transfer case input gear (main drive gear) being removed from Doubler™ shaft. | |
 |
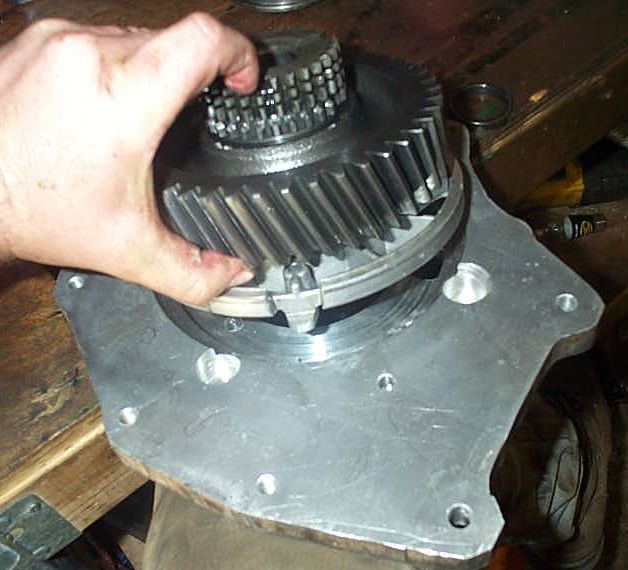
203 low-range gear with shaft, bearing, and bearing retainer “basket” removed from aluminum adapter. | |
 |
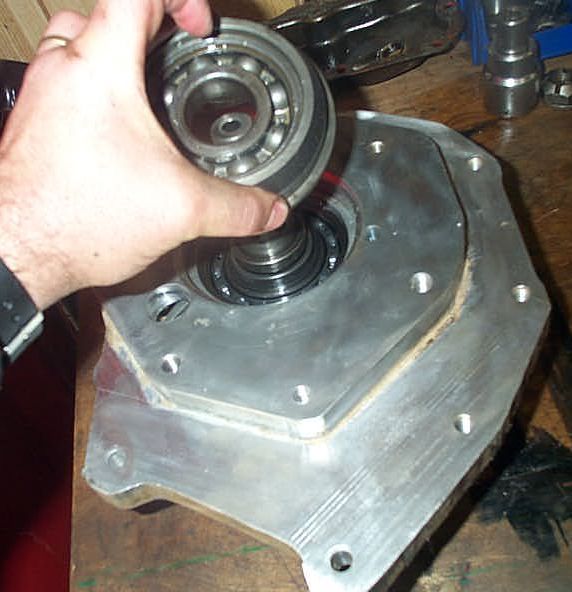
Shaft and gears being replaced in front side of adapter. Note locating tab on bearing retainer basket which fits into corresponding slot machined into adapter. | |
 |
T150 3-speed transmission output bearing and retainer being placed over shaft on rear side of adapter. | |
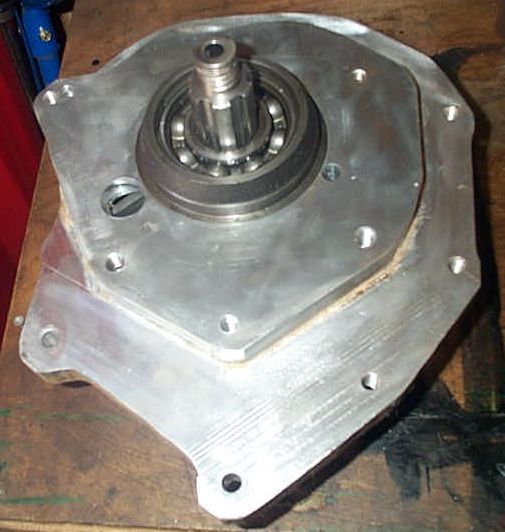 |
Bearing and retainer fit into recess machined into rear side of adapter. | |
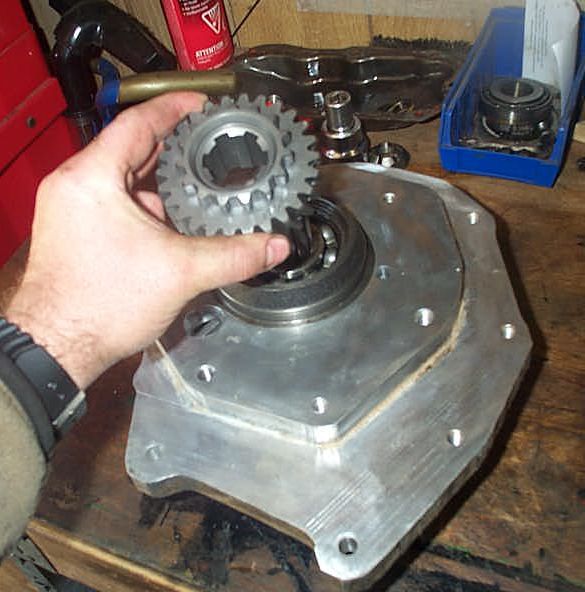 |
Transfer case input gear being installed on Doubler™ shaft. | |
 |
Transfer case input gear secured onto custom Doubler™ shaft with locknut using thread locking compound and torqued to 300 ft-lbs. | |
 |
203 range box, adapter, and transfer case bolted together; ready for installation into the vehicle. | |
|
||

|