 |
JMR TN1000 Tube Notcher By Bill "BillaVista" Ansell |
IntroductionThe ability to bend and notch tube is one of those watershed capabilities in your fabrication arsenal. Second only to the leap you made when you went from not being able to weld to sticking metal together, nothing opens up more possibilities than being able to work with tube. However, when taking the leap into a whole new realm of fabrication it's important to both choose quality tools and to learn how to use them. The aim of this article is to introduce you to the JMR TN1000 tube notcher and demonstrate some of the techniques used in notching tube with a hole-saw notcher. The fact is, the JMR TN1000 tube notcher is a tool so versatile and capable, yet easy to use, it'll have you notching tube like a pro in no time at all. Here's how: |
 |
To start with, the JMR is manufactured without compromise. It is intended to be a high-end, high-quality tool and the design and materials used make it just that. Both of these, design and materials, are not just for show either - they have a huge impact on the ability of the tool to make precise, accurate notches in a variety of materials and in a huge number of different ways - from offset notches to being able to "notch the back side". Ultimately, it is the quality of the tool that will determine your success and satisfaction with it. Unlike others, the JMR is manufactured from bar-stock, not plate, to increase strength and rigidity. It has a 1.125" induction-hardened shaft supported by a bearing block that incorporates sealed double-roller Timken™ bearings. The custom designed shaft-seals prevent bearing and shaft damage and the shaft accepts replaceable hole saw mounting adapters. The pivot-point of the notcher features a Timken™ thrust-bearing which means you can easily achieve huge clamping force (to ensure your angle stays set) without having to use enormous torque on the wrench. Features of the JMR TN1000 include:
The double V-jaw vise, along with the acme screw thread, combine to create a versatile, flexible, multi-use clamping system that:
The entire tool is designed to be incredibly rigid, a property it excels at. This rigidity is extremely important in a tube notcher, and it:
Setting up the TN1000 |
|
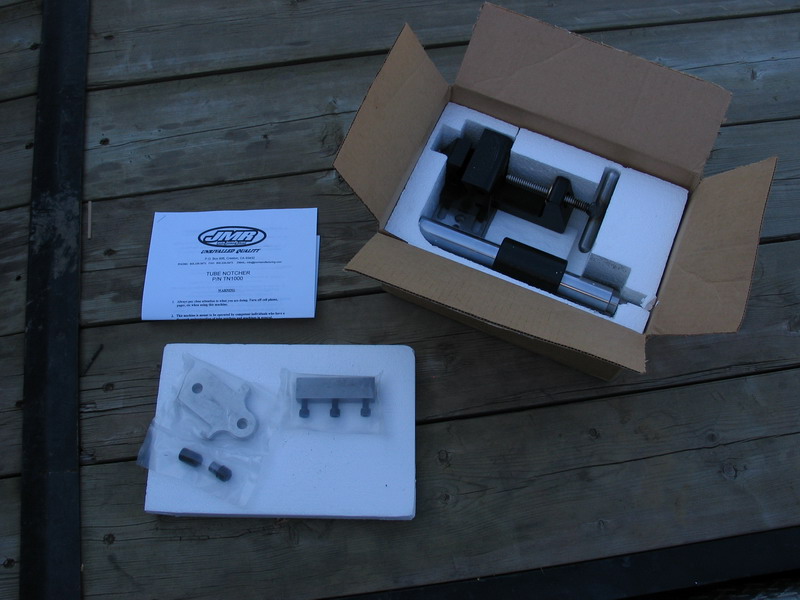 |
This is how my unit shipped. Clockwise from top-right: the notcher, vise-mounting adapter, replaceable hole-saw mounting adapters in two sizes, offset shims, instruction sheet. |
||||
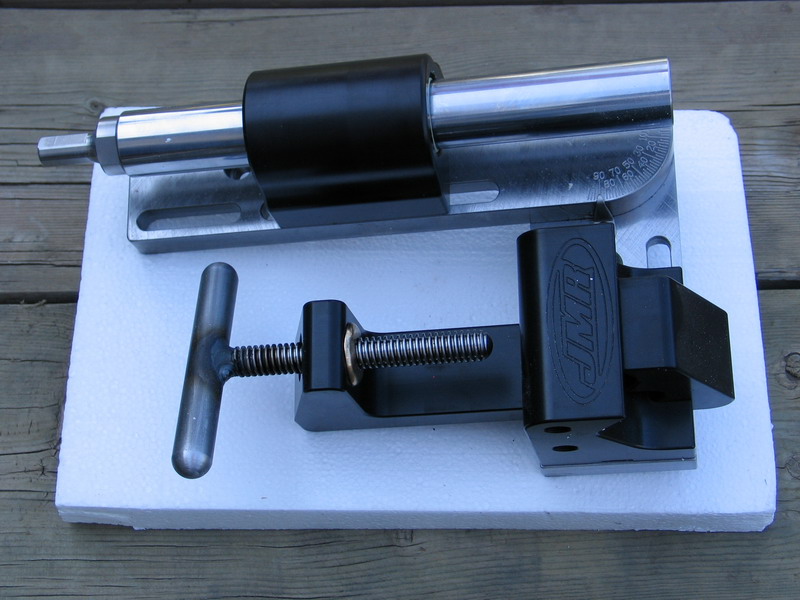 |
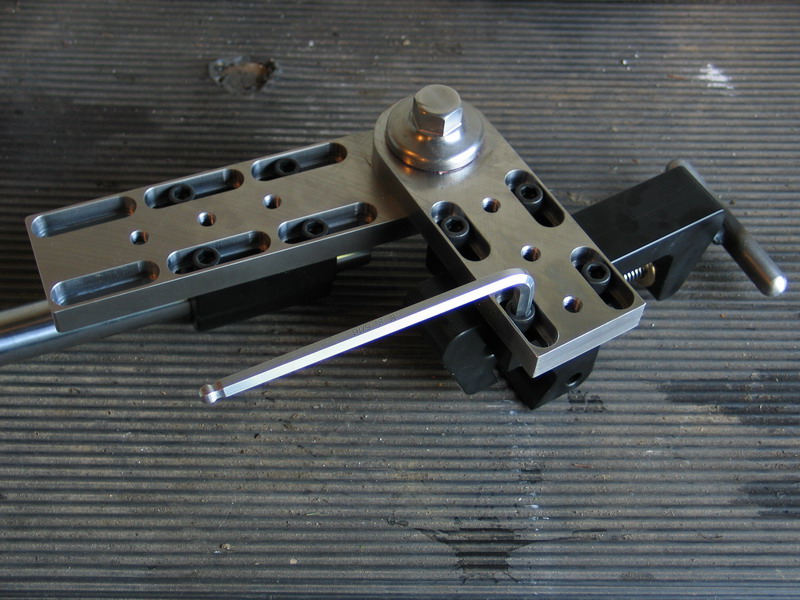
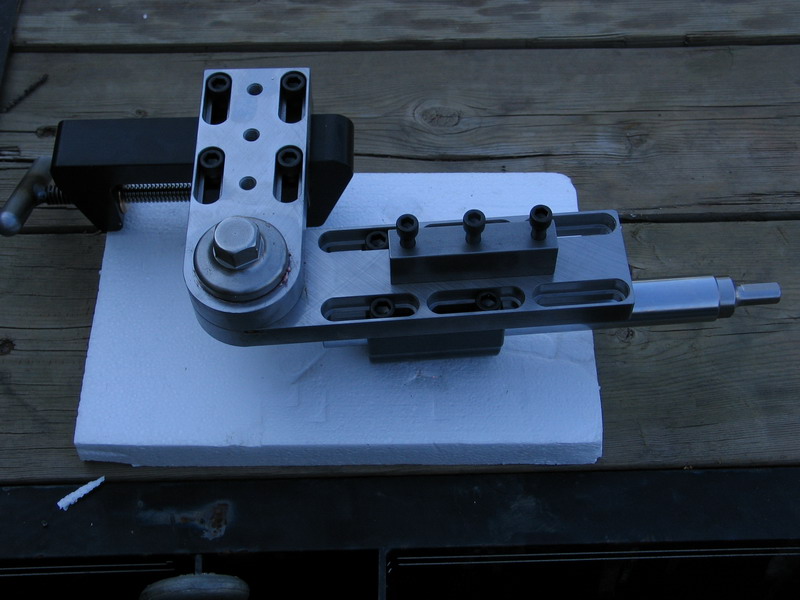
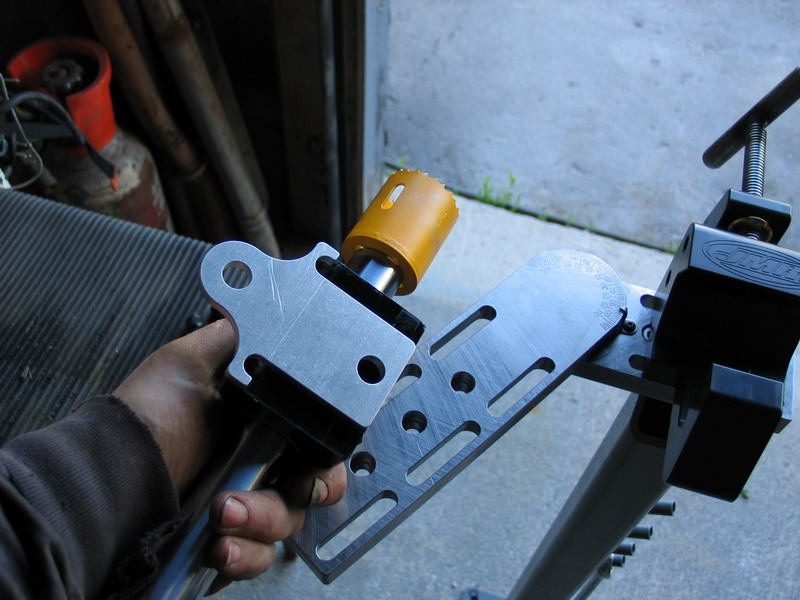
Here's the notcher out of the box. The heavy-duty quality is immediately apparent in the solid-steel arms and the billet aluminum vise and bearing block. The whole thing weighs about 15lbs! At the top of the pic is the "cutting arm" with the shaft mounted in the bearing block. Below is the "clamping arm" with the billet-aluminum double V-jaw vise mounted. |
||||
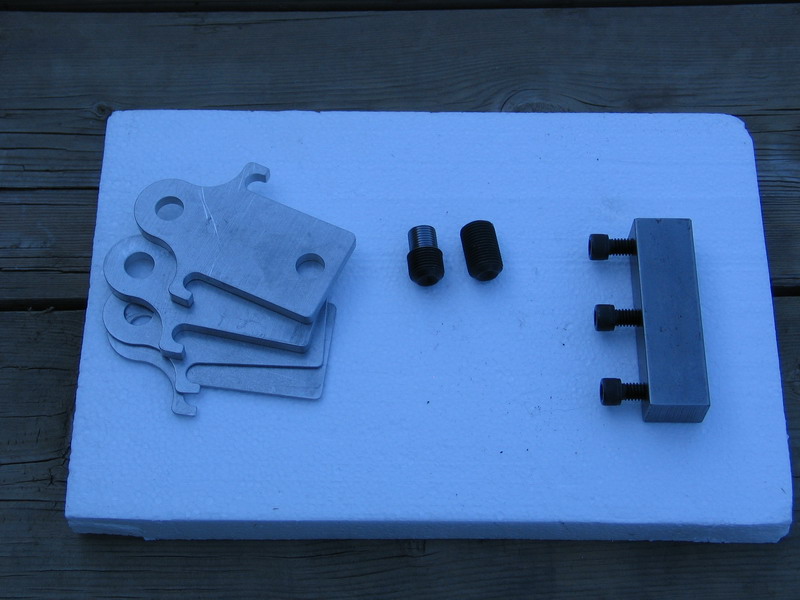 |
On the left is the shim pack used for creating offset notches and copes. There are 2 x 1/4" shims and 2 x 1/16" shims per kit resulting in the ability to combine them for shim stacks of: 1/16", 1/8", 1/4", 5/16", 3/8", 1/2", 9/16", and 5/8". Extra shim kits are available separately making possible an almost limitless number of combinations. In the centre are the two replaceable hole-saw mounting adapters. These thread into the end of the shaft and you then thread the hole saw onto them. The smaller has 1/2"-20TPI threads for mounting smaller hole saws, and the larger provides 5/8"-18TPI threads for mounting larger hole saws. On the right is the bench-vise mounting block which screws into the underside of the notcher using the supplied socket-head cap screws and thereby allows the notcher to be securely clamped in a vise without any damage. This mounting block could also be welded to a home-built stand or even directly to a steel bench top. |
||||
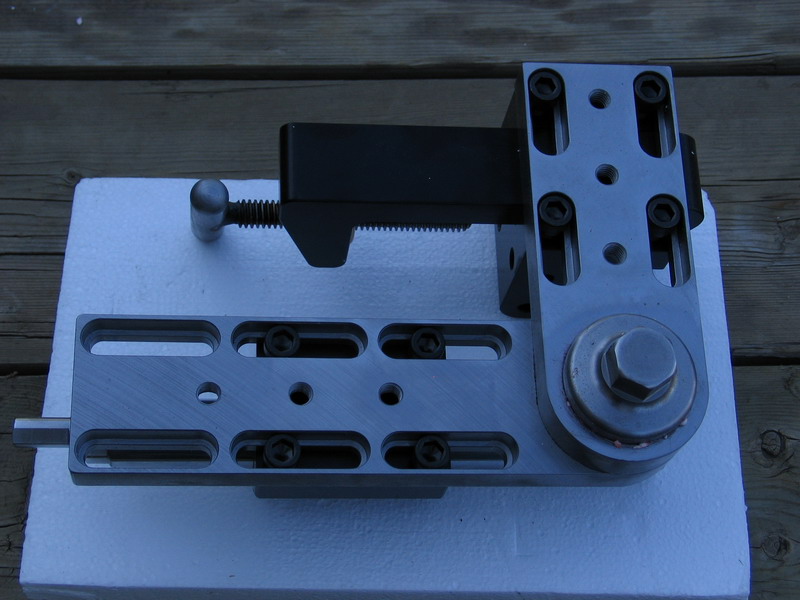 |
This is the underside of the notcher. Visible here are many of the features that make the notcher so versatile. You can see the slotted mounts for both the vise and the bearing block, which provide adjustments for notching different size, shape, and length materials. You can clearly see the Timken™ thrust-bearing pivot-point. Also, on the underside of the clamping arm, you can see the three threaded holes into which you thread the previously mentioned bench-vise mounting-block. |
||||
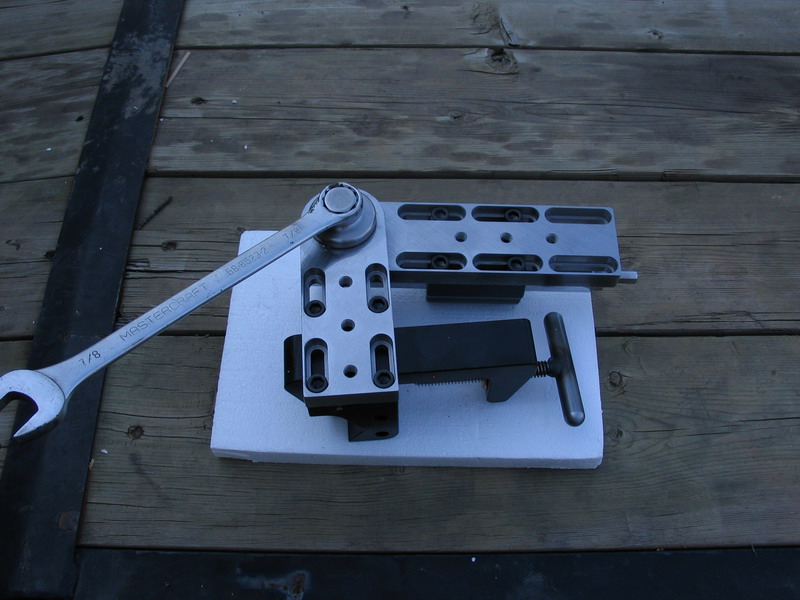 |
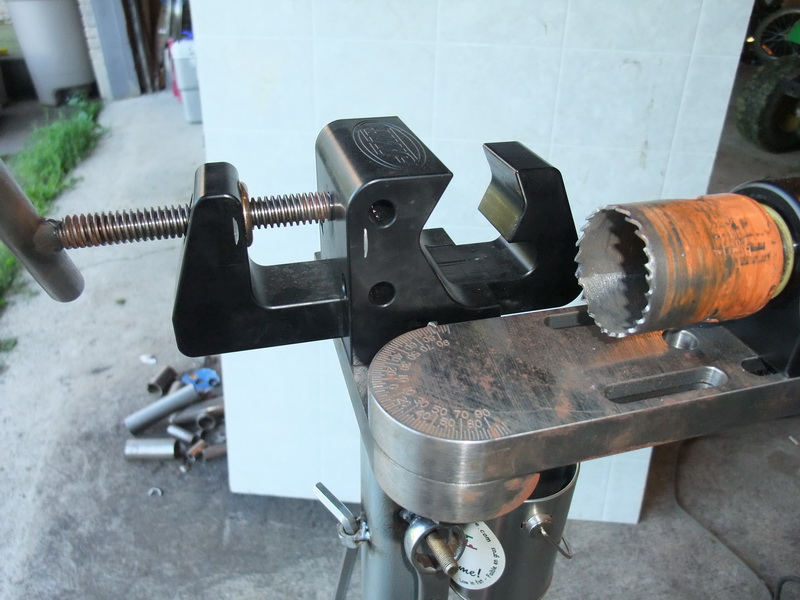
For compact shipping, the notcher arrives with the cutting arm and vise on the same side. This is not the normal notching orientation, so the first step in setting up the notcher is to use a 7/8" wrench to loosen the pivot-point and then rotate the cutting arm 180°. |
||||
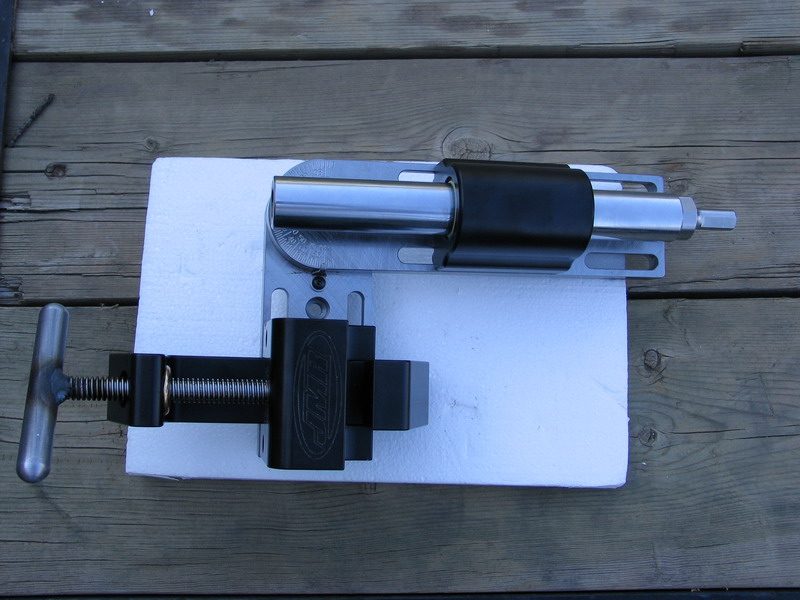 |
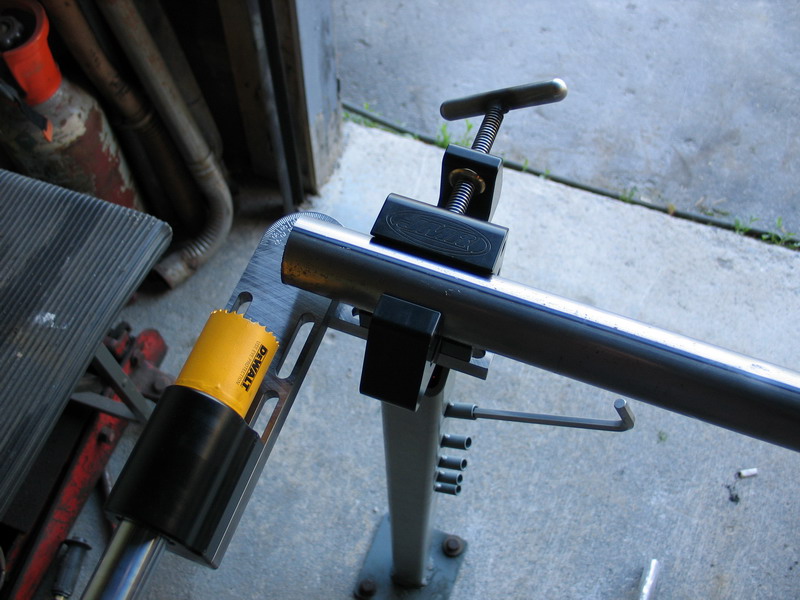
This results in this orientation, which is the normal setup for notching. | ||||
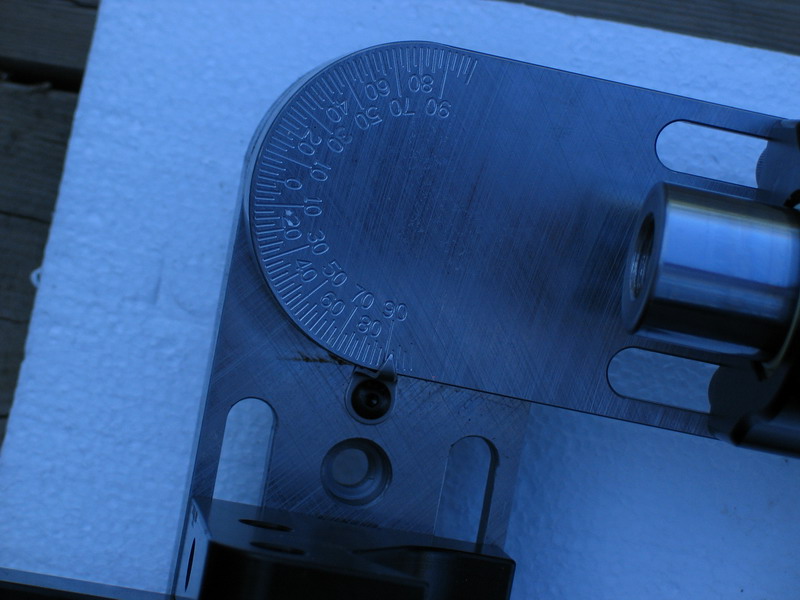 |
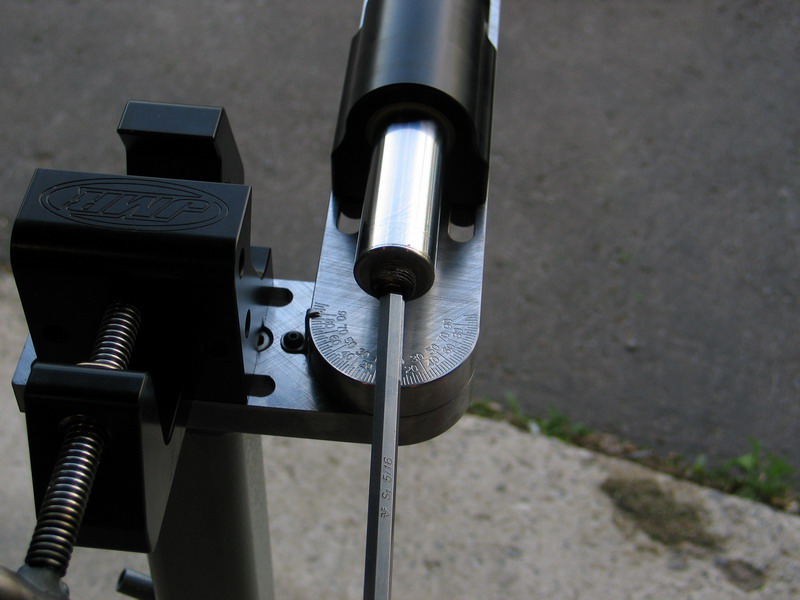
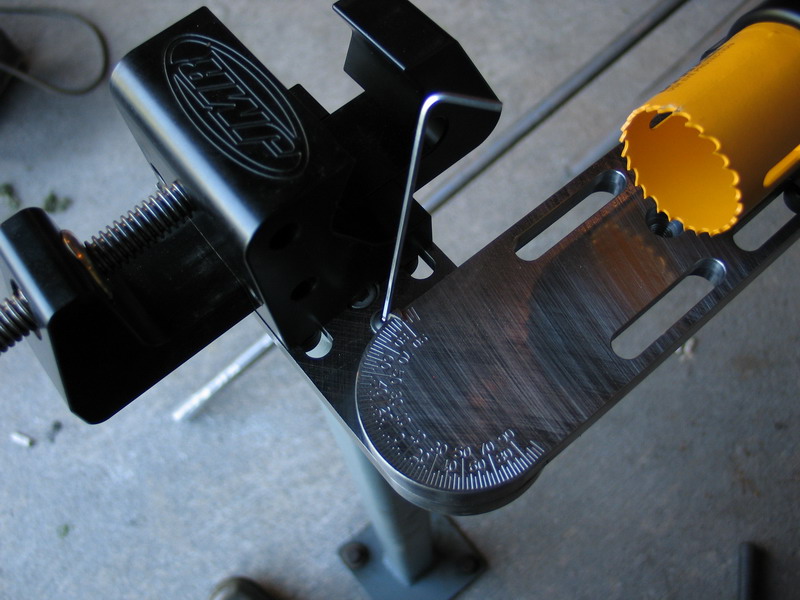
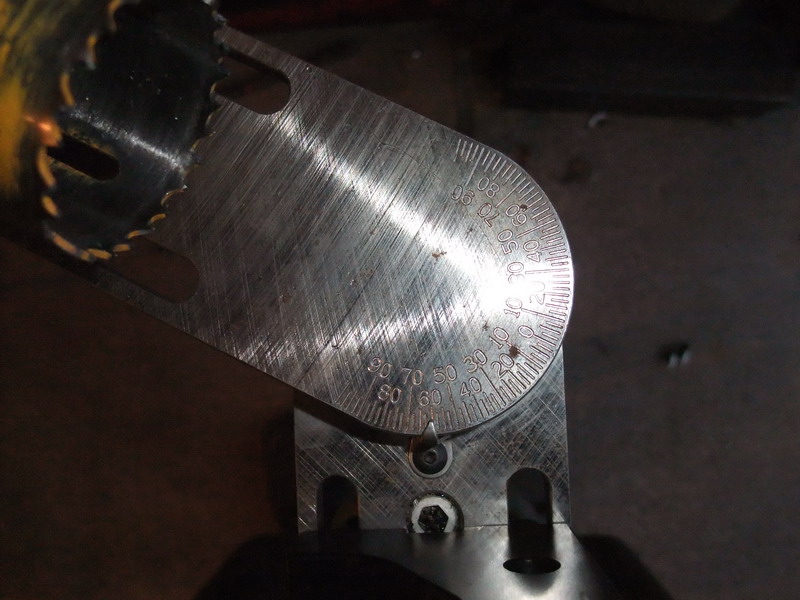
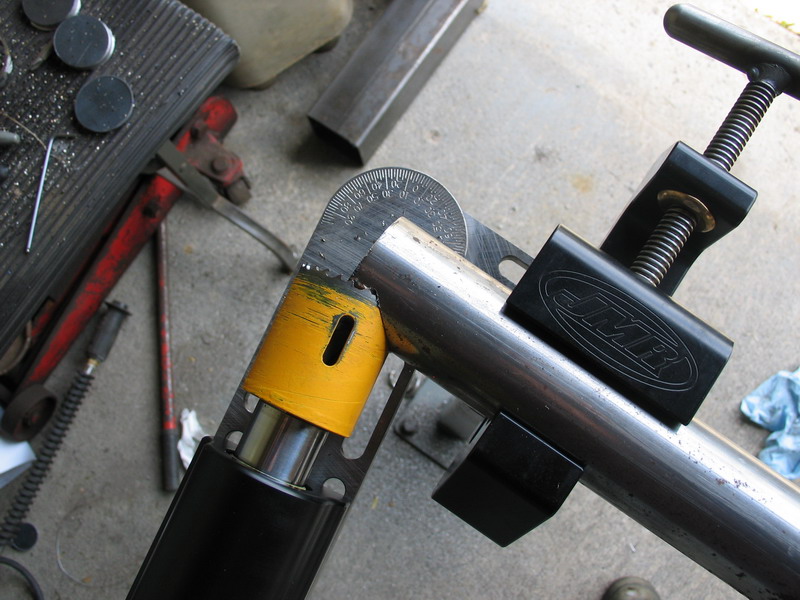
Close-up view of the engraved degree markings and the degree pointer. | ||||
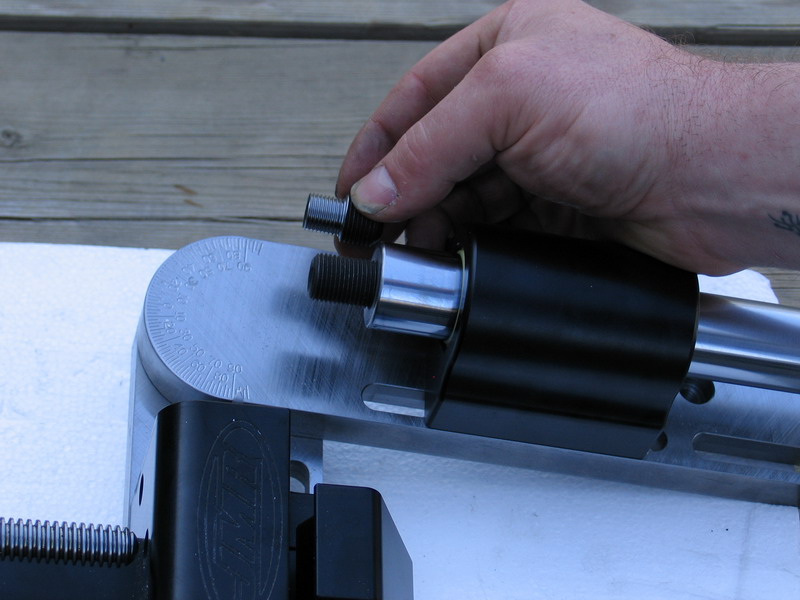 |
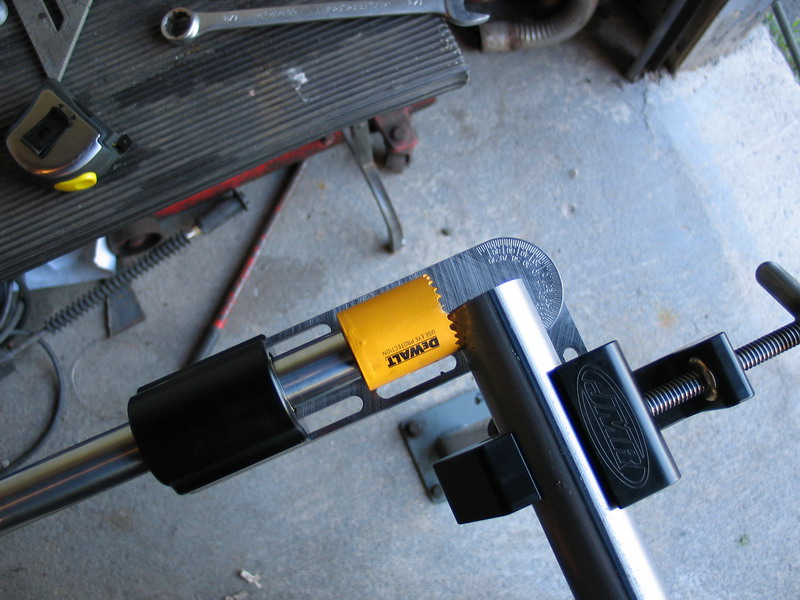
This is how the hole-saw mounting adapter is installed. In this pic I have installed the larger one and am holding the smaller one beside the shaft for reference. Use a little anti-seize on the threads when you install the adapter. |
||||
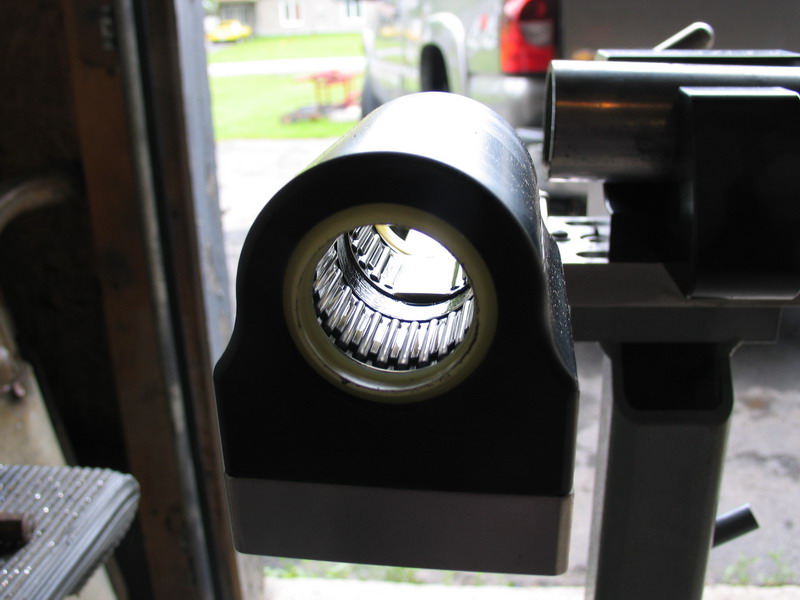 |
A view inside the bearing block showing the double-roller Timken™ bearings that support the shaft. | ||||
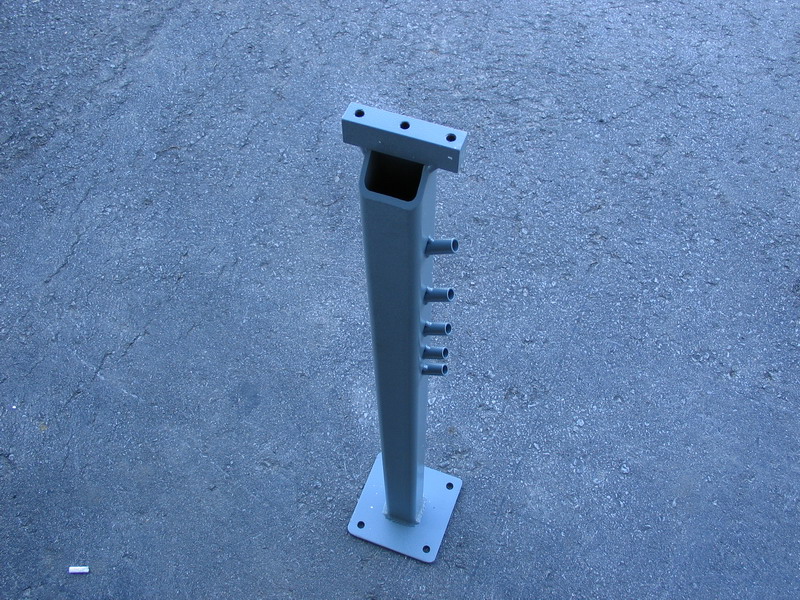 |
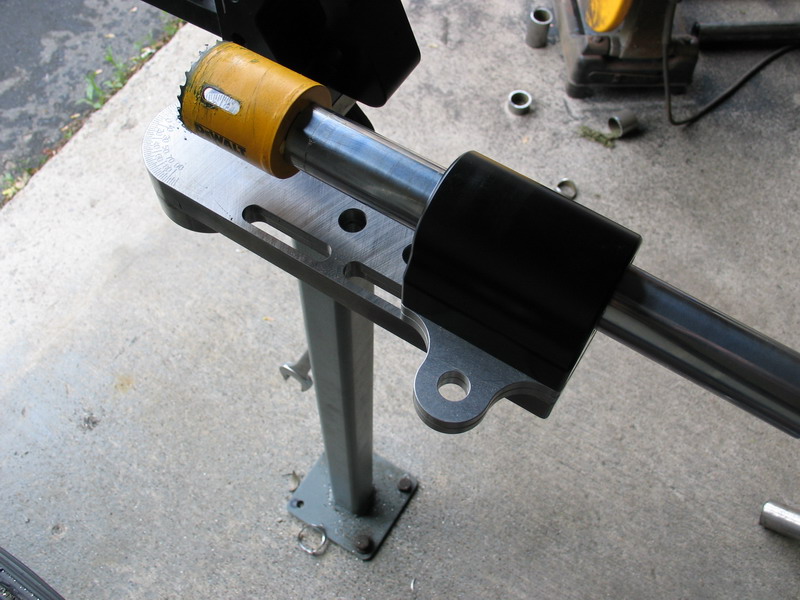
Instead of using the bench-vise mounting block, I chose to order the optional dedicated stand for the notcher. Doing this allows me to create a very rigid mount for the notcher (my bench is a little wobbly) and also gives me freedom in choosing a location for the notcher. It stands 36" tall. |
||||
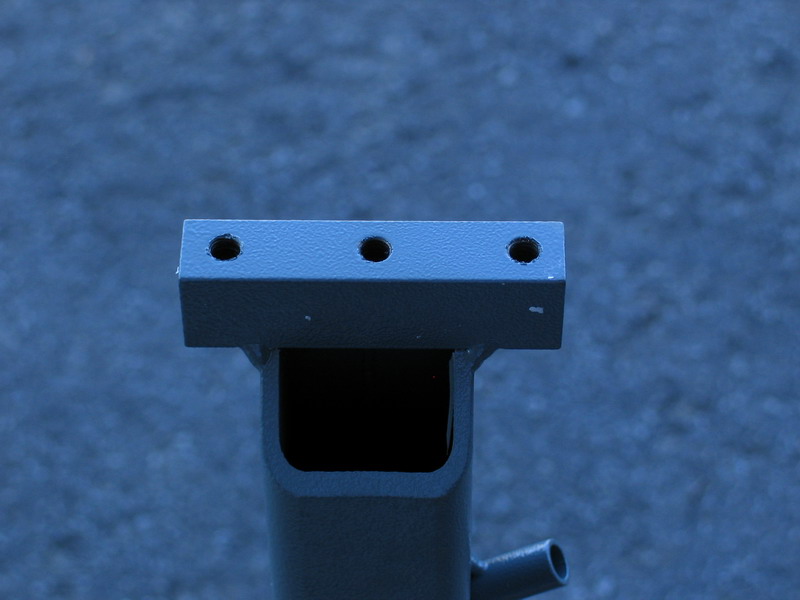 |
The stand has a built-in mounting block to which the notcher mounts... | ||||
 |
... a rack for mounting various size hole saws... | ||||
 |
... and a pre-drilled 4-1/2"-square bolt pattern for bolting the stand down. | ||||
 |
Whether you are mounting the notcher to a stand, or in a bench-vise using the mounting block, the first step is to remove the vise from the clamping arm using a hex key wrench (Allen key). | ||||
 |
With the vise temporarily removed, attach the notcher to the stand (or bench-vise mounting block) using the supplied 5/16-18 socket-head cap screws, and tighten the screws securely. |
||||
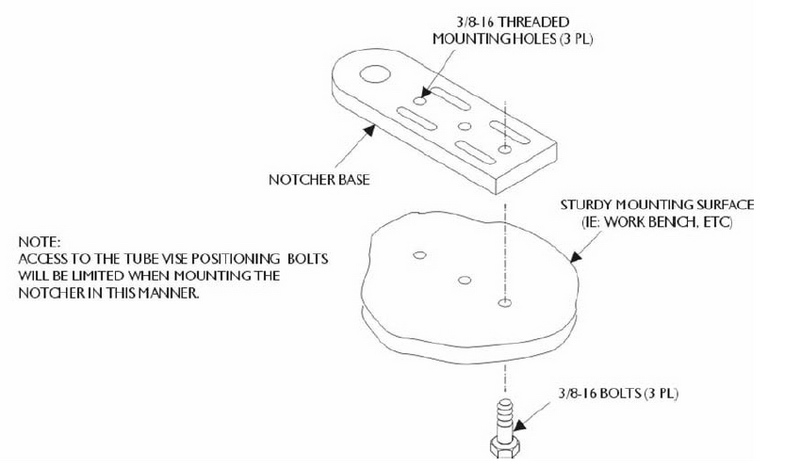 |
Alternatively, instead of using the bench-vise mounting block or a dedicated stand, you can bolt the notcher directly to a sturdy work surface like a steel bench. You would do this by using the 3/8-16 bolts from underneath the cutting arm, as shown in the diagram at right. Be advised though, by mounting it in this fashion you will likely severely limit your access to the tube vise positioning bolts. |
||||
 |
The final option for mounting, is to bolt the bench-vise mounting block to the cutting arm instead of the vise arm. This then gives you a sturdy starting point to fabricate a mount that you can bolt to your existing drill press. Mounted in this fashion, the cutting arm will be bolted rigidly to the drill press table, and the vise arm will pivot to achieve different notching angles - although these will be more limited when the notcher is mounted to a drill press. It is one of the many great features of the JMR that it can be mounted in so many ways, but to get the full benefit of the tool, I highly recommend mounting it to a dedicated stand. |
||||
 |
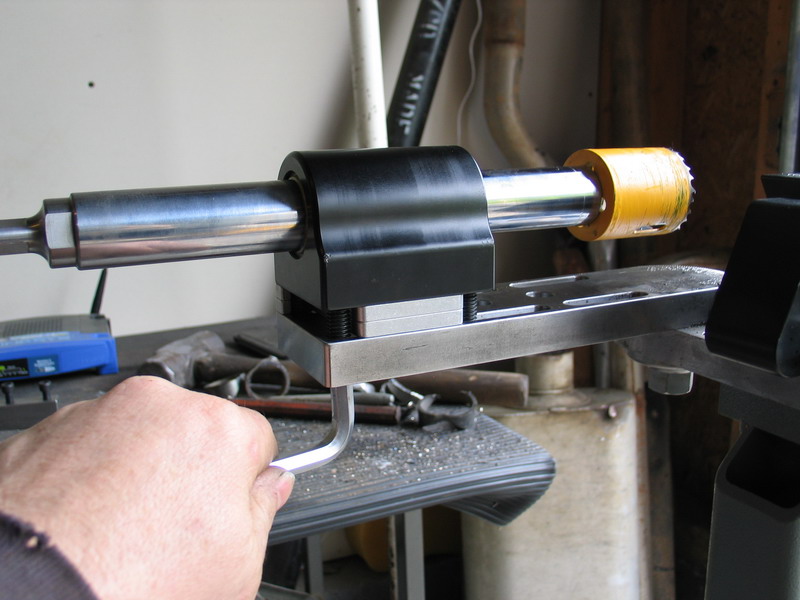
Once you have the notcher mounted, re-install the vise and install the desired hole-saw mounting adapter in the end of the shaft using a little anti-seize. | ||||
 |
Next, install the hole-saw of you choice. When installing the hole-saw, ensure that only one or two threads of the adapter are protruding through into the interior of the hole saw. If you can't get the hole-saw secure in this manner, you will have to adjust the position of the hole-saw mounting adapter in the end of the shaft. |
||||
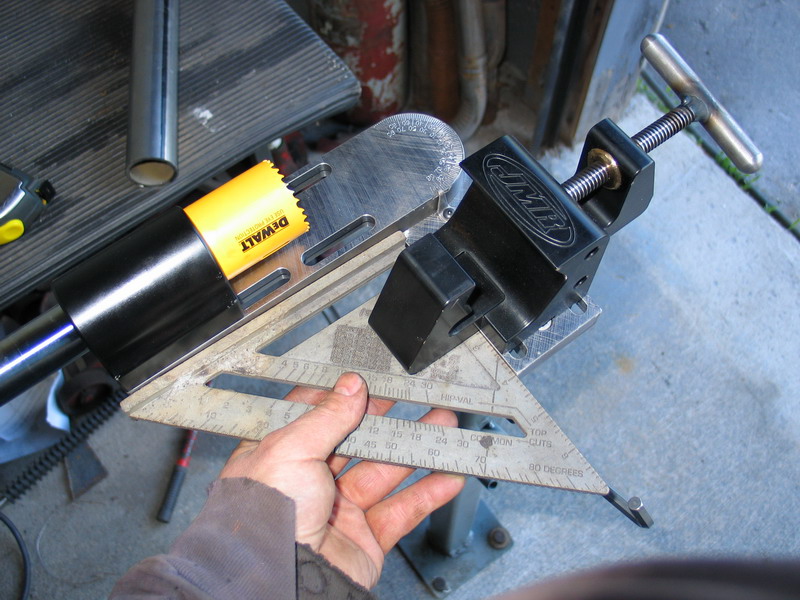 |
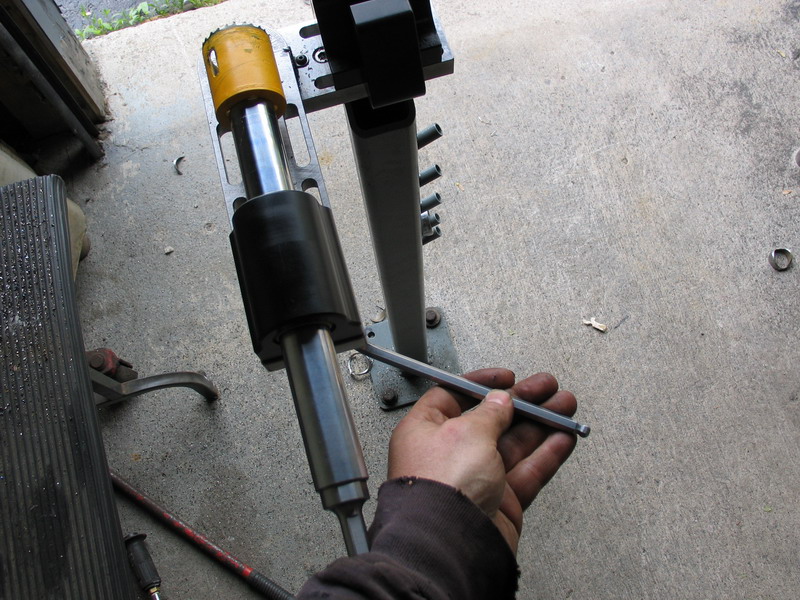
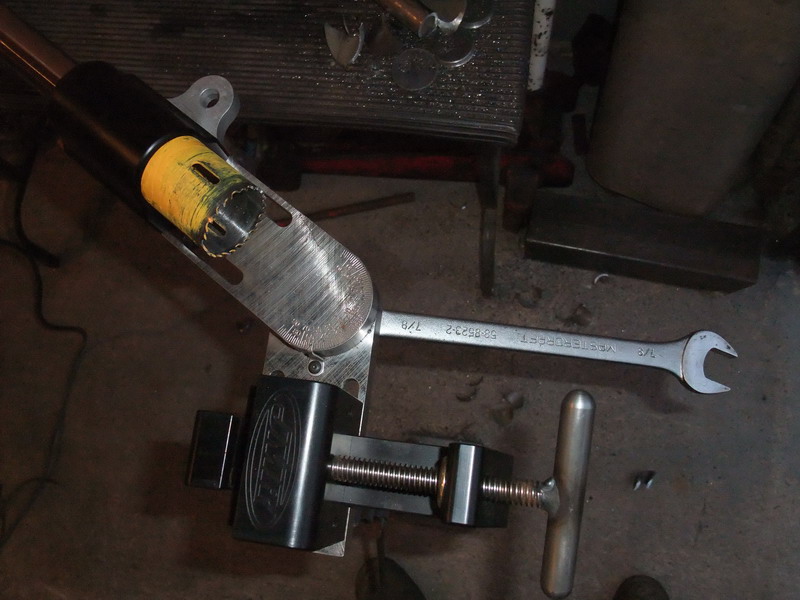
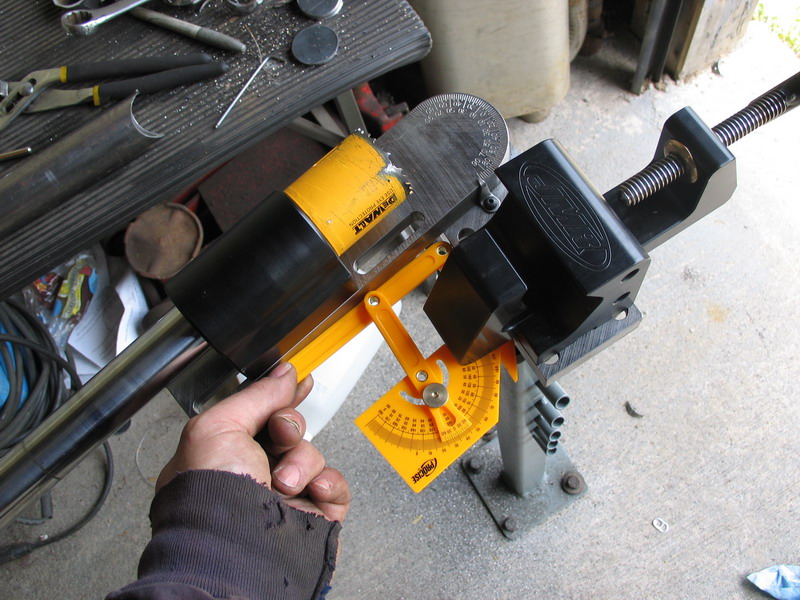
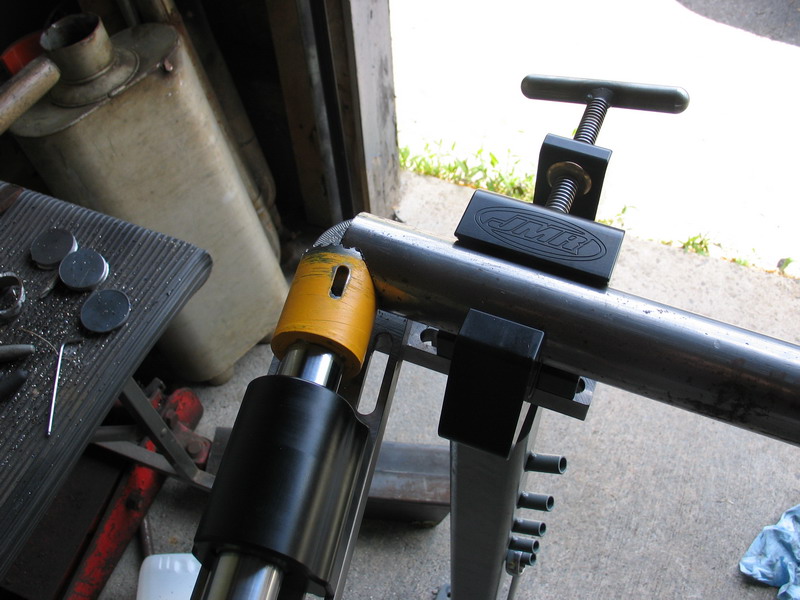
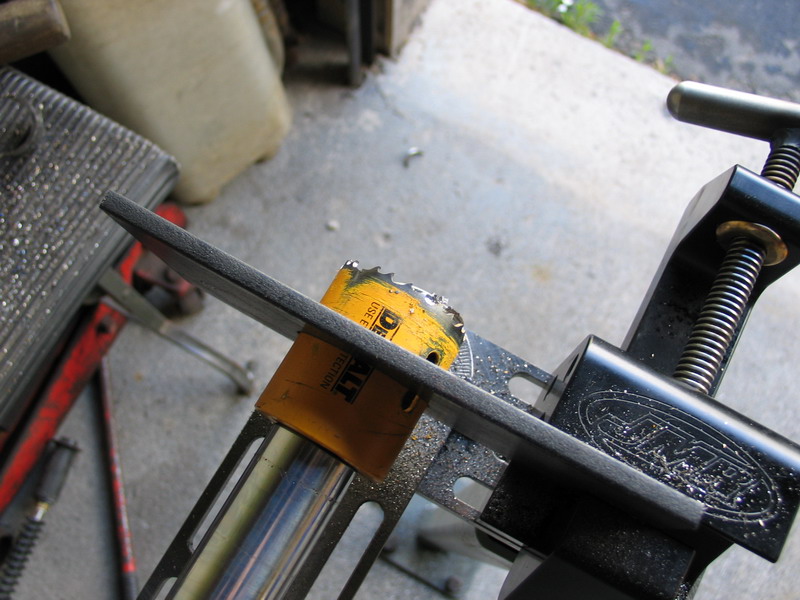
The final step before you start hacking into some tube is to accurately set the degree pointer. Begin by loosening the pivot-point and then using a square to ensure the cutting arm is at precisely 90° to the clamping arm. Hold the arms securely in this orientation and tighten the pivot-point. |
||||
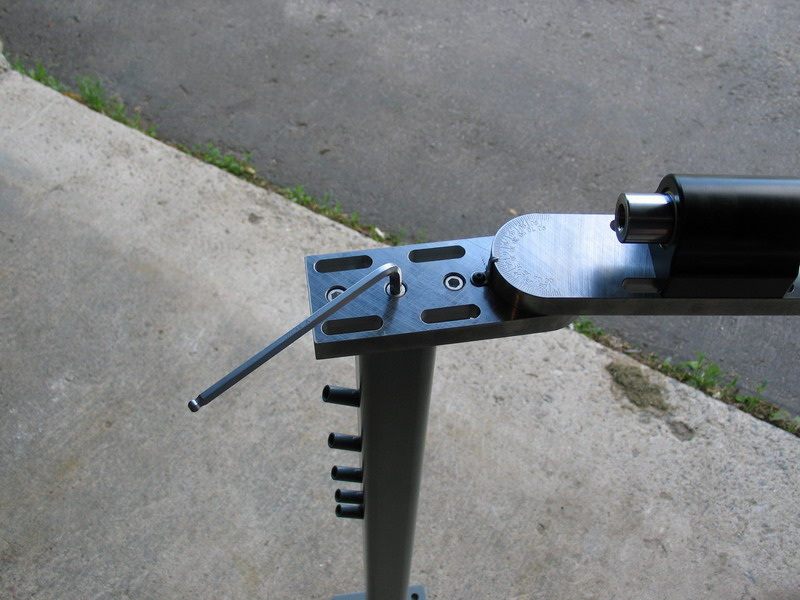
 |
With the arms set at 90°, use an Allen key to loosen the degree-pointer set-screw, align the pointer to read exactly 90°, then tighten the set-screw. | ||||
Making Your First NotchLet's have a look at the basic operation of the notcher by making a simple 1.75" 90° notch in a piece of 1.75" OD round tubing. |
|||||
 |
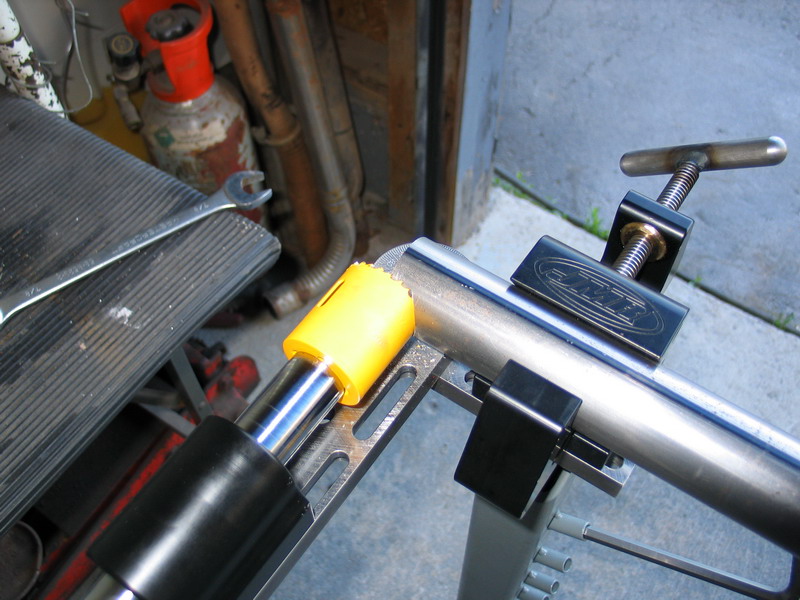
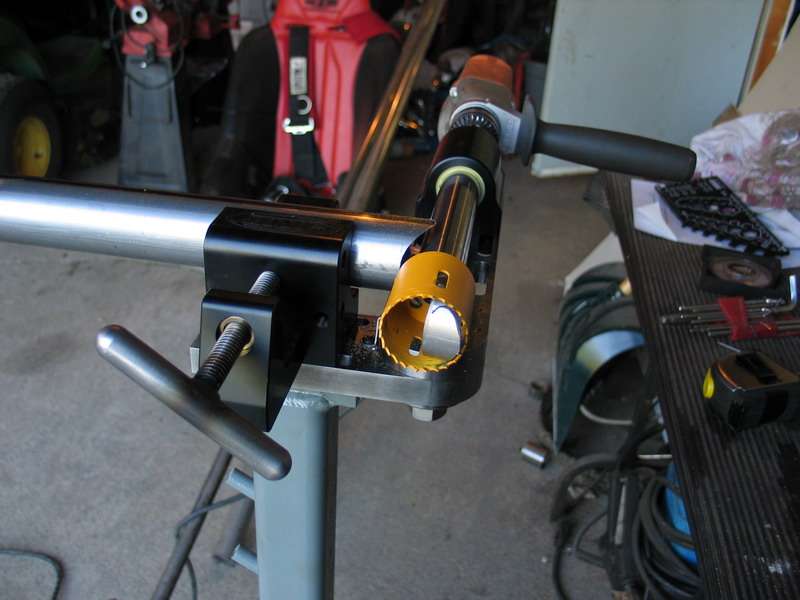
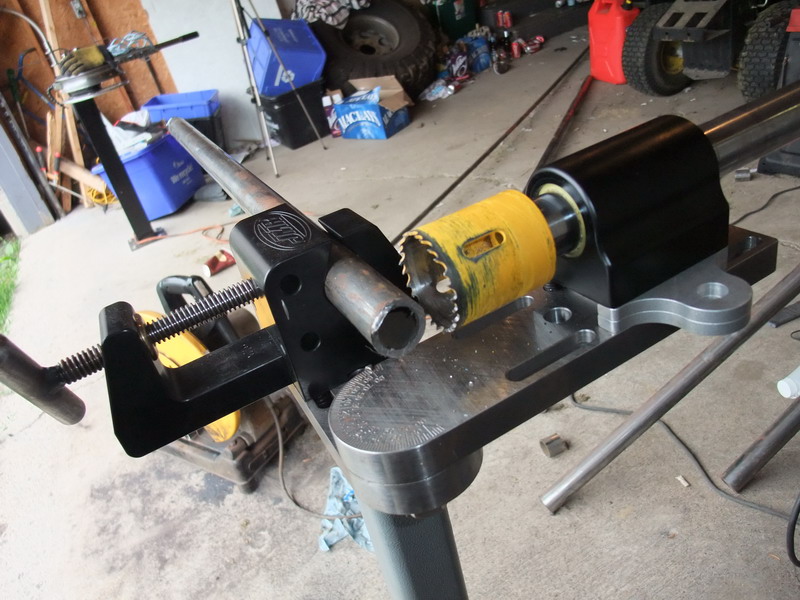
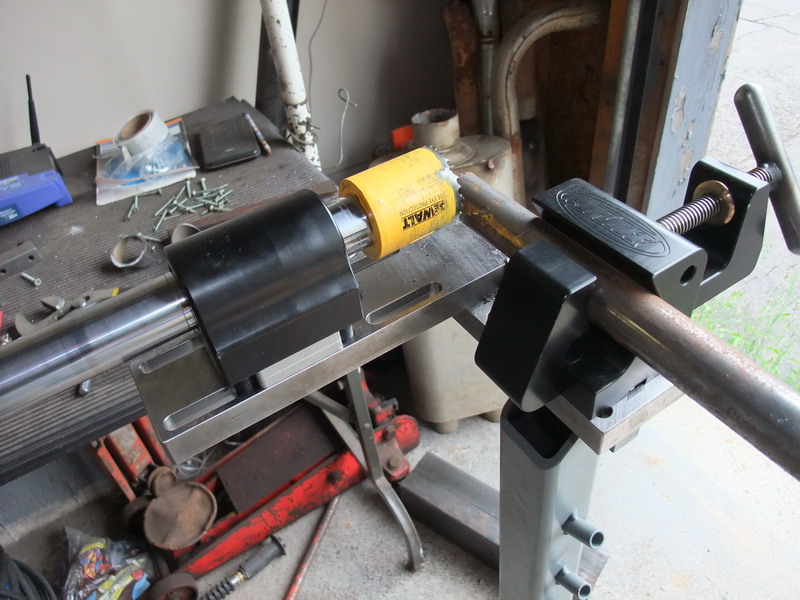
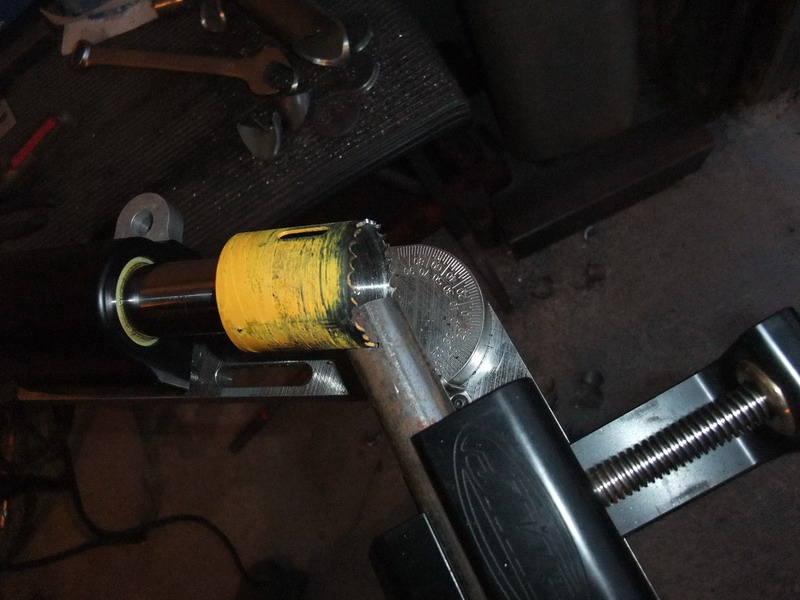
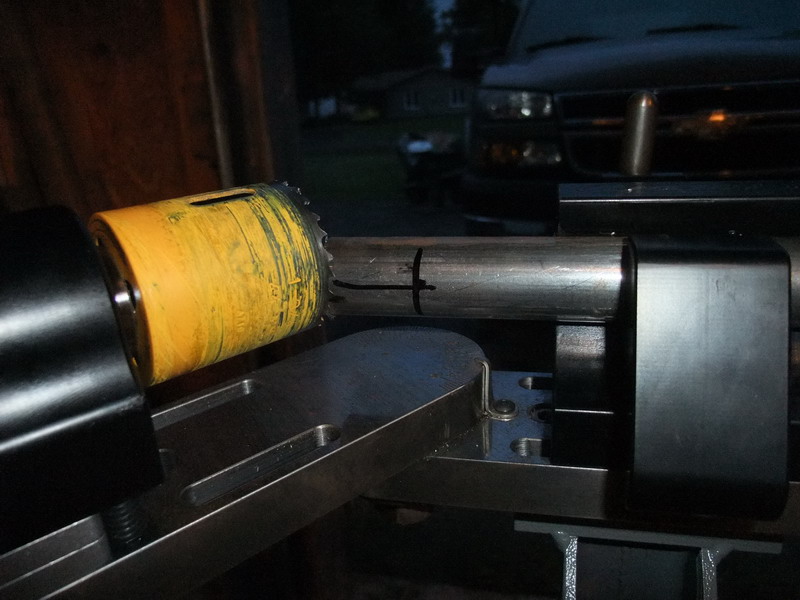
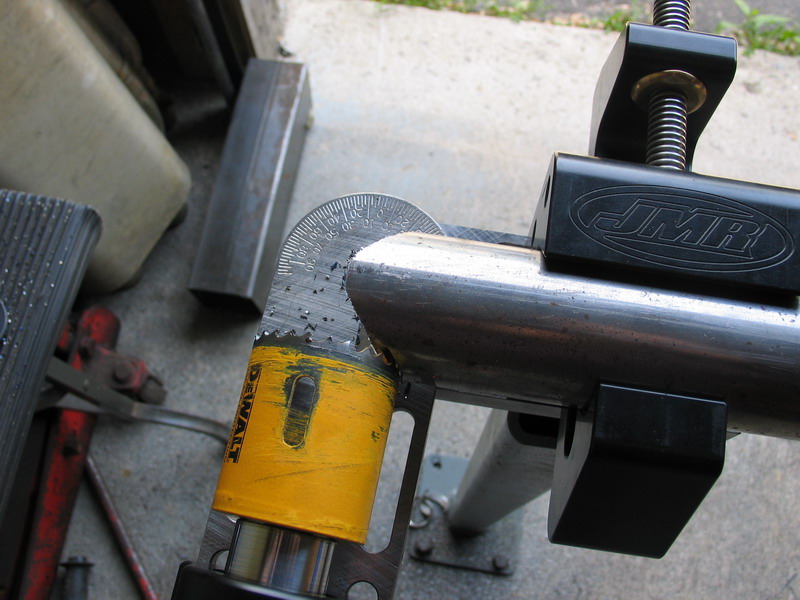
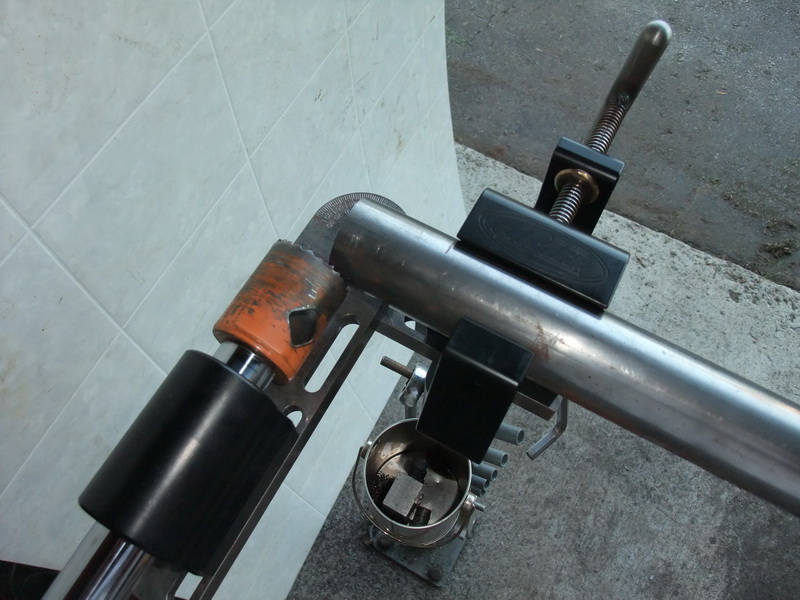
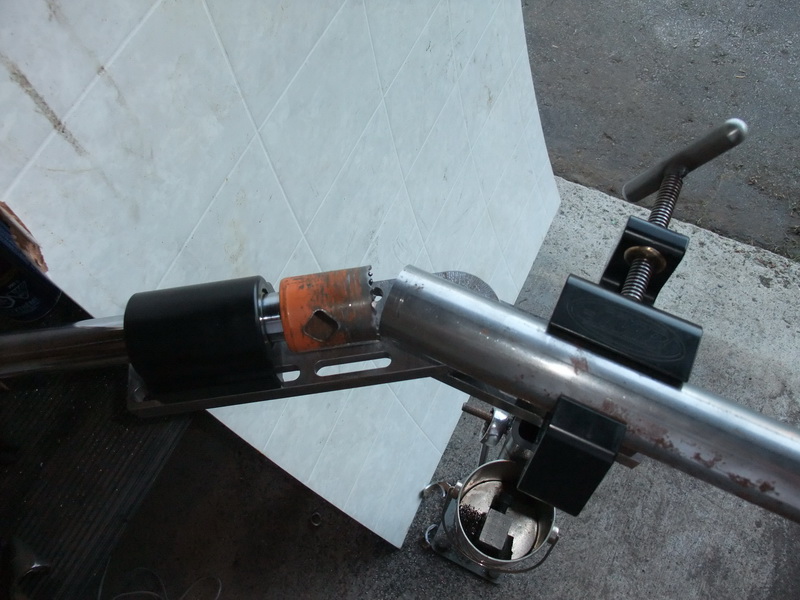
Chuck a piece of tubing in the vise. Depending on the size of the tubing and the size of the hole-saw being used, you may have to adjust the position of the vise and/or the bearing block. In this pic you can see that, due to the length of the 1.75" hole-saw I am using, I have adjusted the bearing-block's position to the rear of the cutting arm. In general, to reduce unnecessary vibration-inducing leverage, you want to keep the vise and bearing block as close together as reasonable possible - i.e. close, but with enough room that you can still easily insert and remove the tube you are using. For this simple 90° notch, the bearing block is probably a little too far back. |
||||
 |
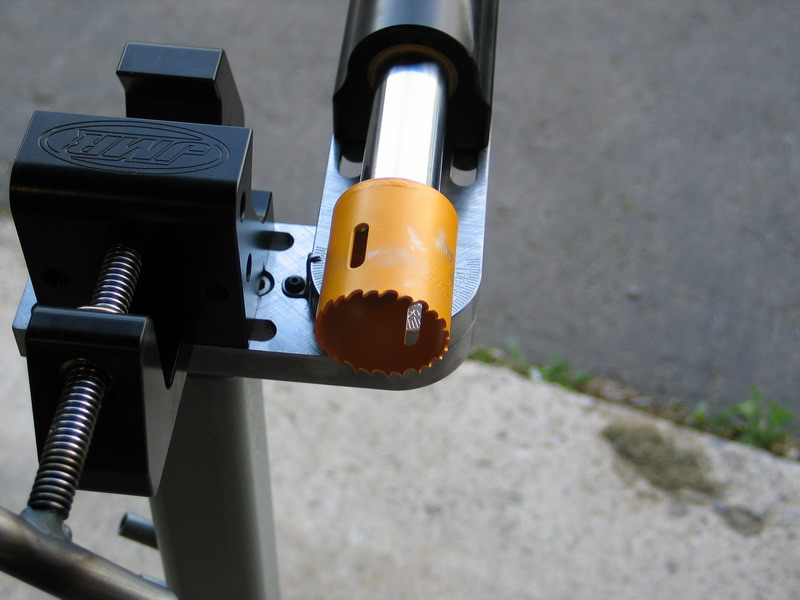
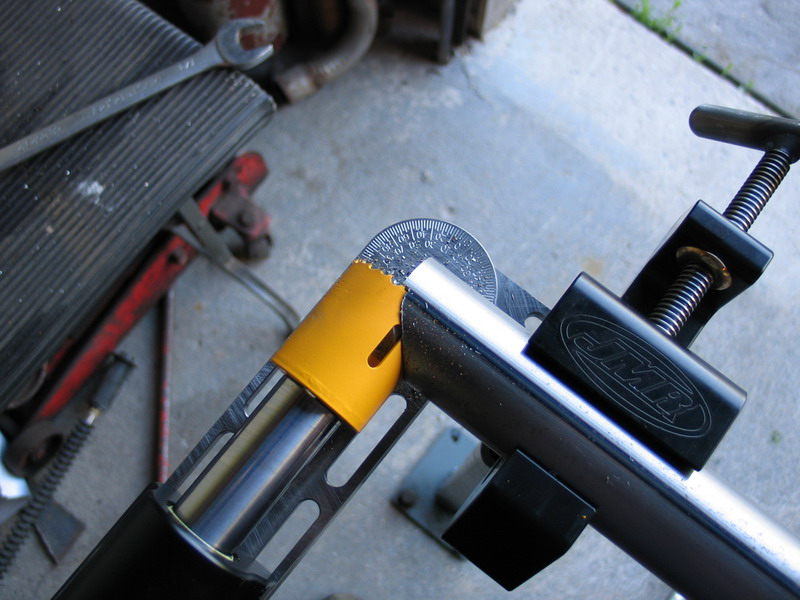
Adjust the position of the tubing in the vise to get the appropriate "depth" of notch. A full-depth notch is achieved by setting the tube in the vise so that the end of the tube aligns with an imaginary line that bisects the longitudinal axis of the hole-saw. In other words - by aligning the end of the tube with the centreline of the hole-saw. Any deeper than this and the saw must do more work for no gain, any shallower than this, and the notch will not be full depth (which is sometimes the desired effect). Always trim the end of the tube being notched so the hole-saw has to do the least amount of work - i.e. keep the "scrap" (the part the saw will cut off) to a minimum and avoid notching through the middle of a tube if possible. |
||||
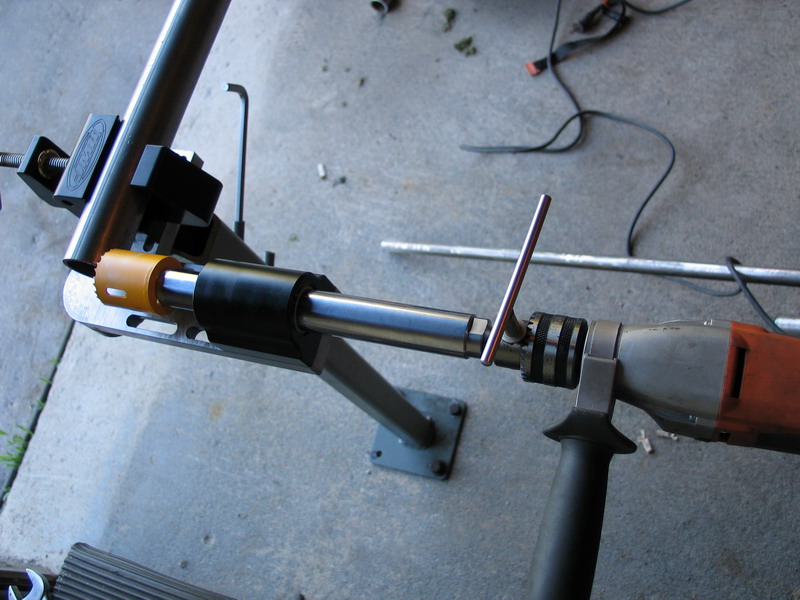 |
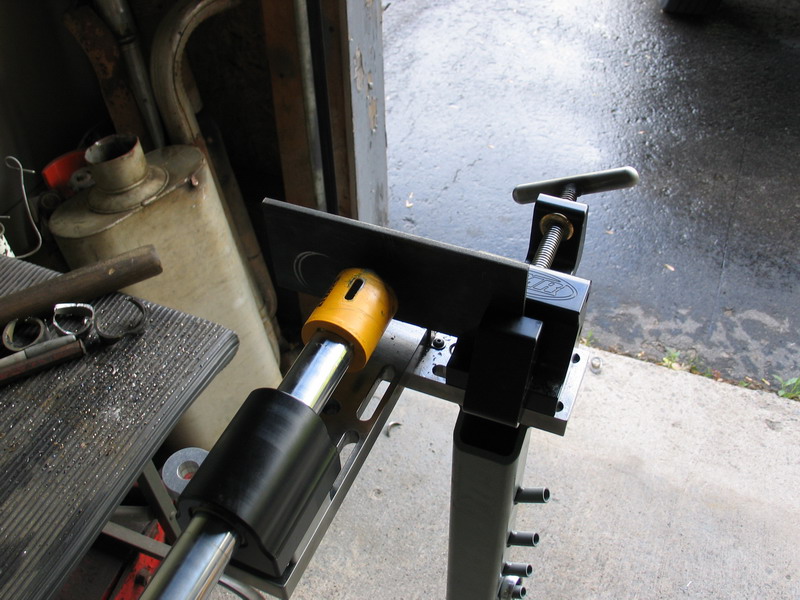
Attach a 1/2" variable-speed drill to the end of the shaft. Obviously, the best results will be achieved with a drill of good quality. I would avoid using a keyless-chuck drill (I hate the damn things anyway). Variable-speed, or at the very least slow-speed, is a must. As a safety item, you should also ALWAYS use a drill with a support handle at the front, as shown here. This is because, if a hole-saw does catch in a tube, the drill will kick with incredible force and can easily break the wrist of the ill-prepared. |
||||
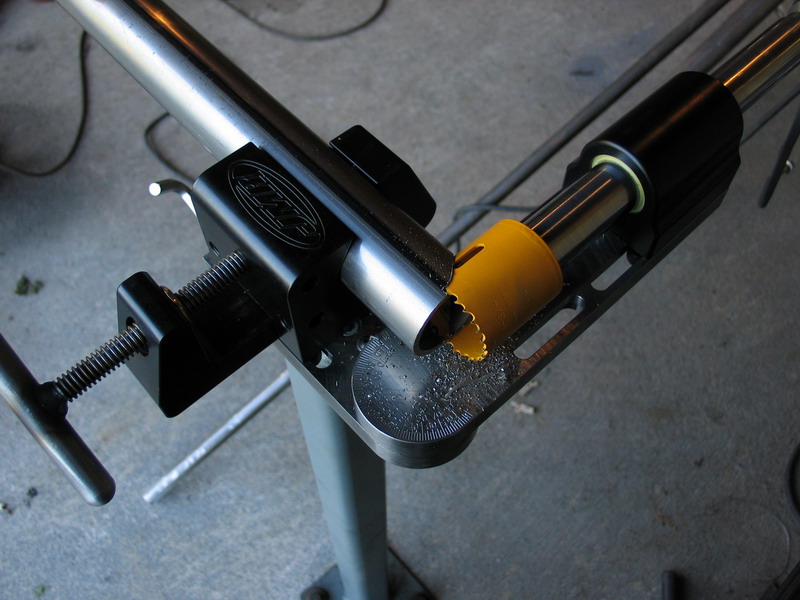
 |
Using slow speed and steady, even pressure, feed the drill into the tube to cut the notch. 200RPM max works well for notching tube with hole saws. Use cutting fluid according to the directions of the manufacturer of your hole saw. |
||||
|
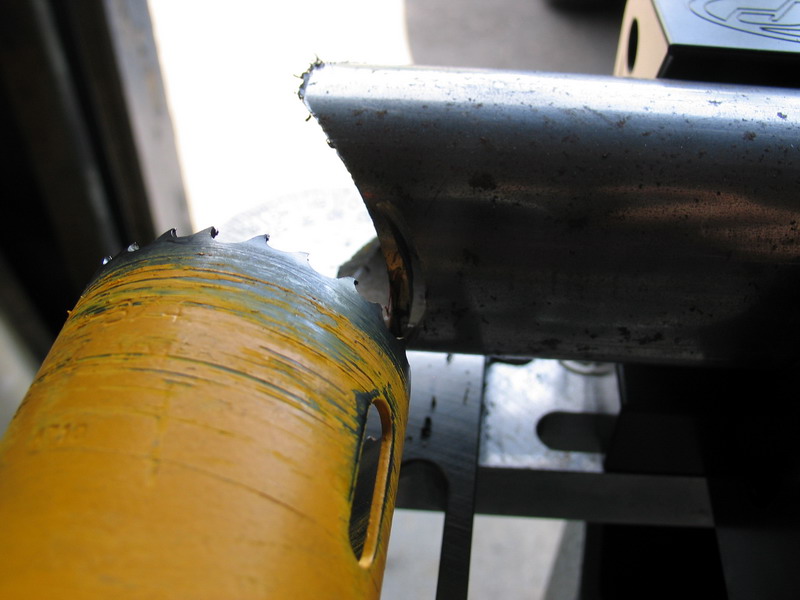
The first time you cut a notch with the JMR, you realize the benefits of all the fancy specs and clever design. Particularly if you have used any of the other style notchers commonly available, you will be amazed at how smooth, steady, and accurate the notching operation is. | ||||
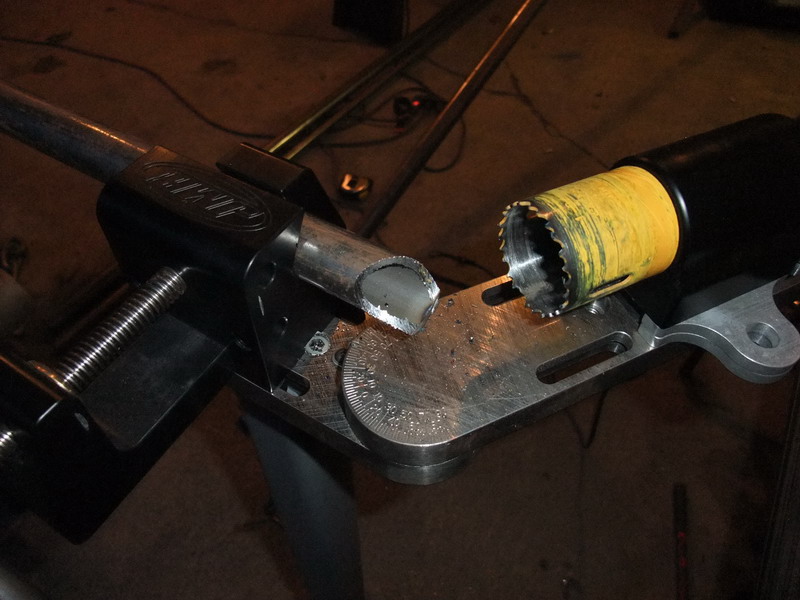
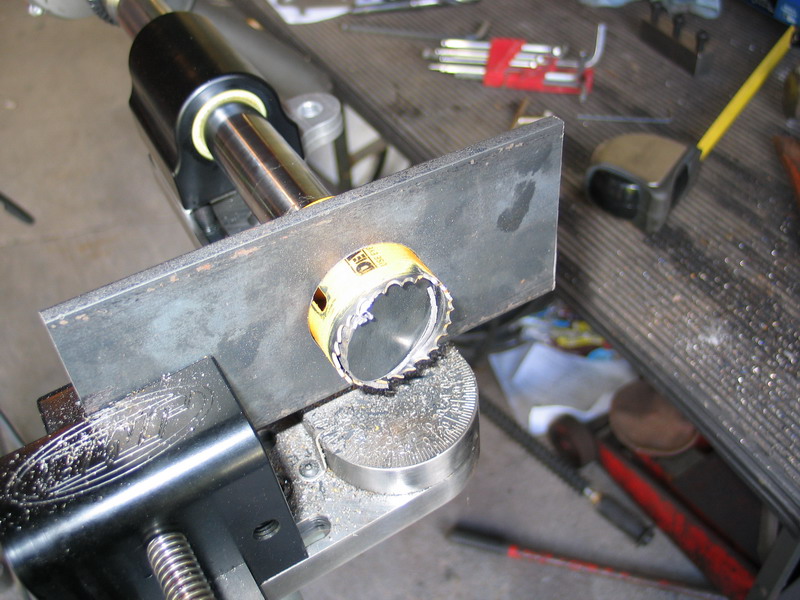
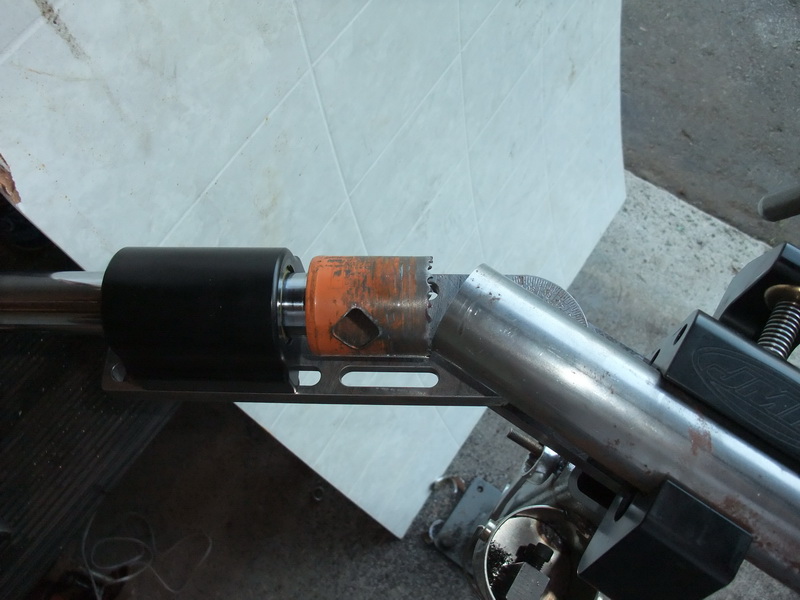
 |
This pic illustrates the concept of "depth of notch" I referred to earlier. You can see how the centreline of the hole-saw meets with the centreline of the tube to provide the maximum-depth notch without any waste or extra work for the saw. |
||||
 |
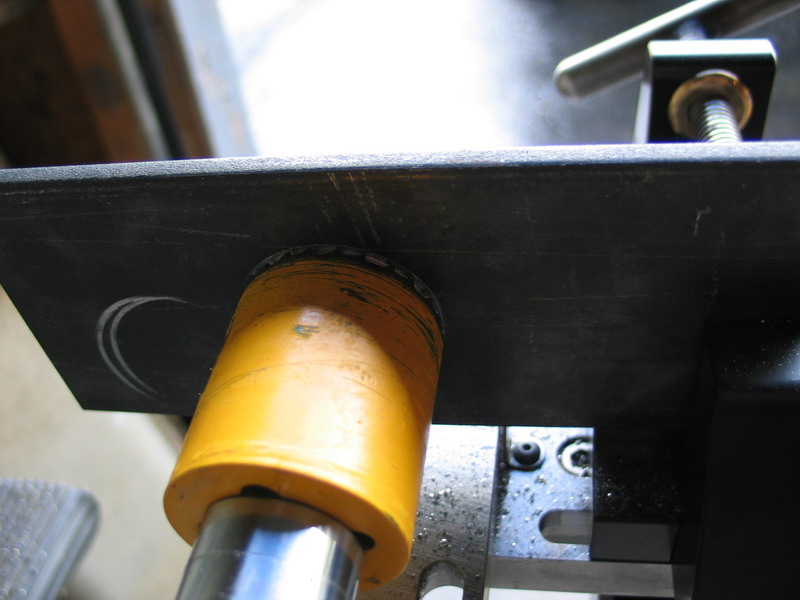
Finished notch. | ||||
 |
It's a good idea to keep a large screwdriver and pair of pliers handy in your notching work are to aid in removing any scrap that may get trapped in the hole-saw during notching. | ||||
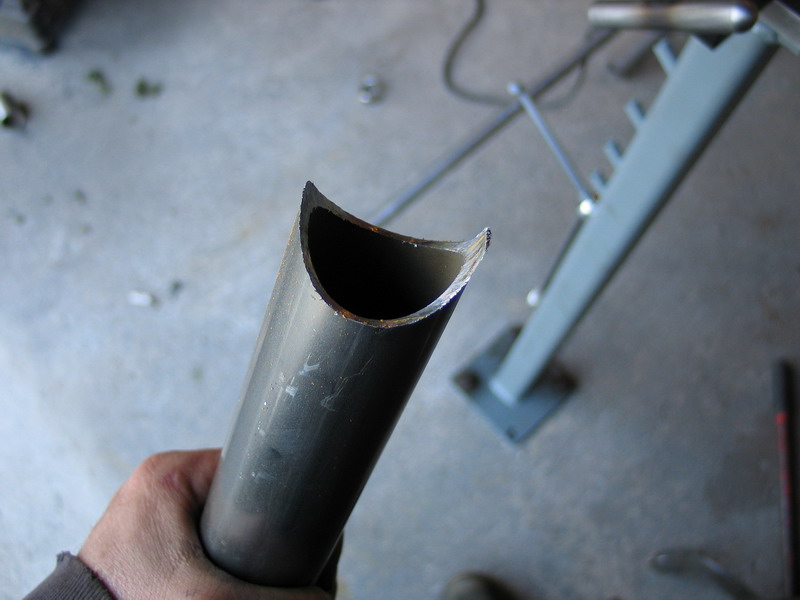 |
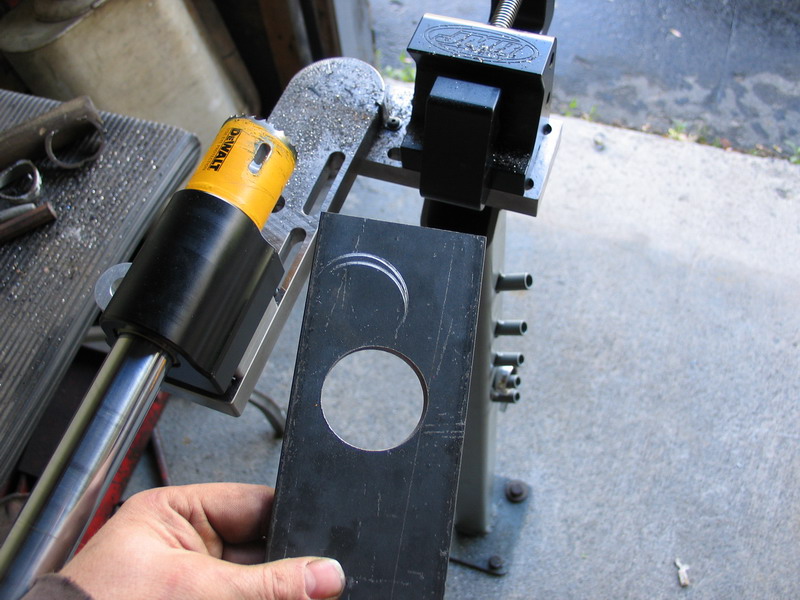
The finished notch is incredibly smooth and accurate. This is what the rigidity of the JMR design is all about. |
||||
 |
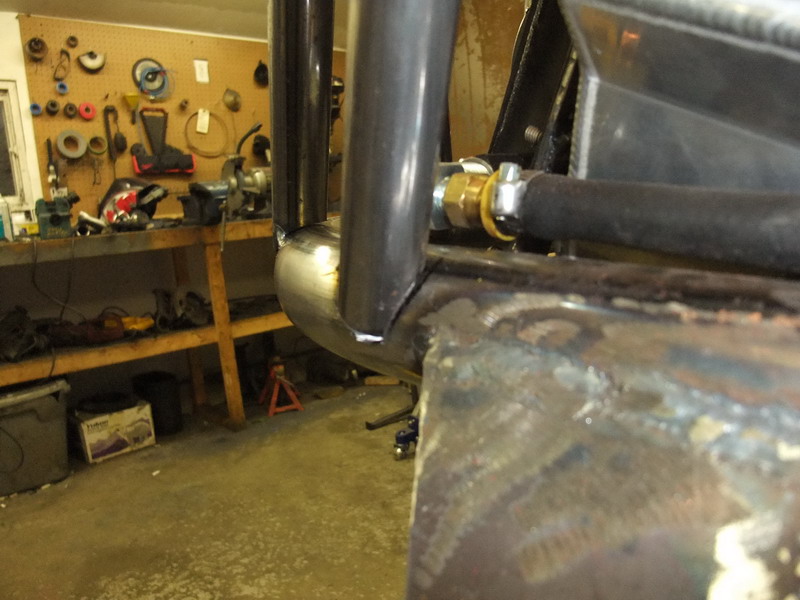
This is the notch fitted in place. If I can produce a perfect notch like this the very first time I ever used the tool, anybody can. Great notches also make for vastly improved welded joints when finished. |
||||
Angled Notching |
|||||
 |
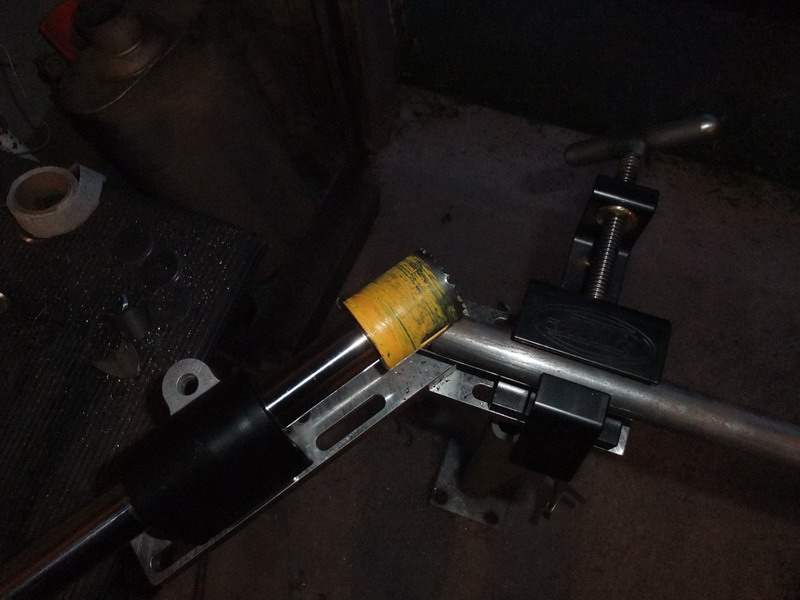
Angled notching is fast and easy with the JMR - in fact, it's no more difficult than making a 90° notch and produces results just as clean and accurate. Begin by loosening the pivot-point with a 7/8" wrench. |
||||
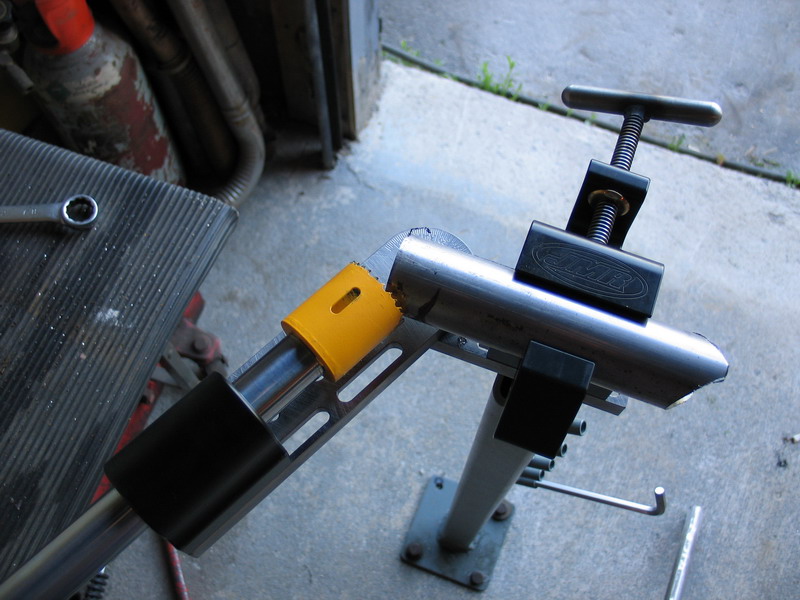 |
Adjust the position of the cutting arm to the desired angle, using the index marks and the degree pointer for reference. For angles up to about 30°, you can just chuck the tube and cut the notch all the way through the tube in a single pass. |
||||
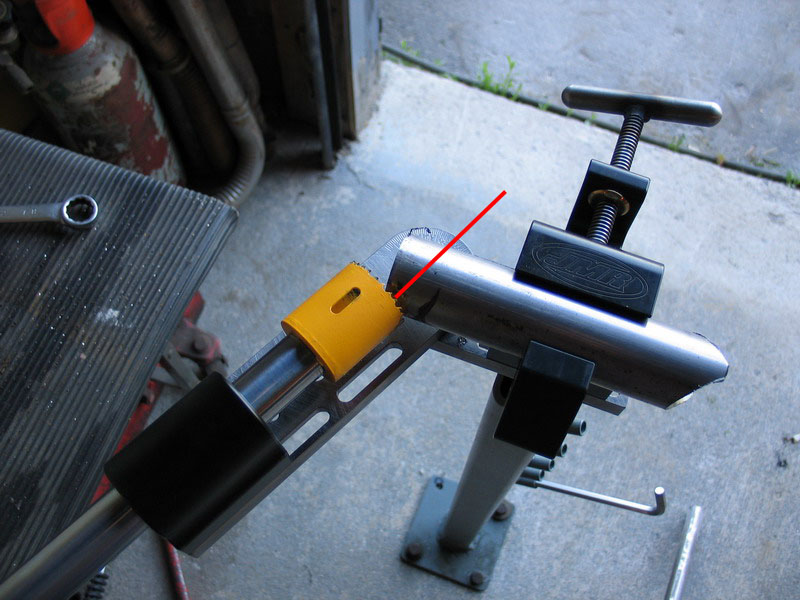 |
For angles greater than about 30°, you can reduce the size of the the scrap piece the hole saw will cut off by first mitreing the end of the tube at the same angle as the notch to be cut. This mitre cut is illustrated by the red line. In this case, it wasn't necessary. |
||||
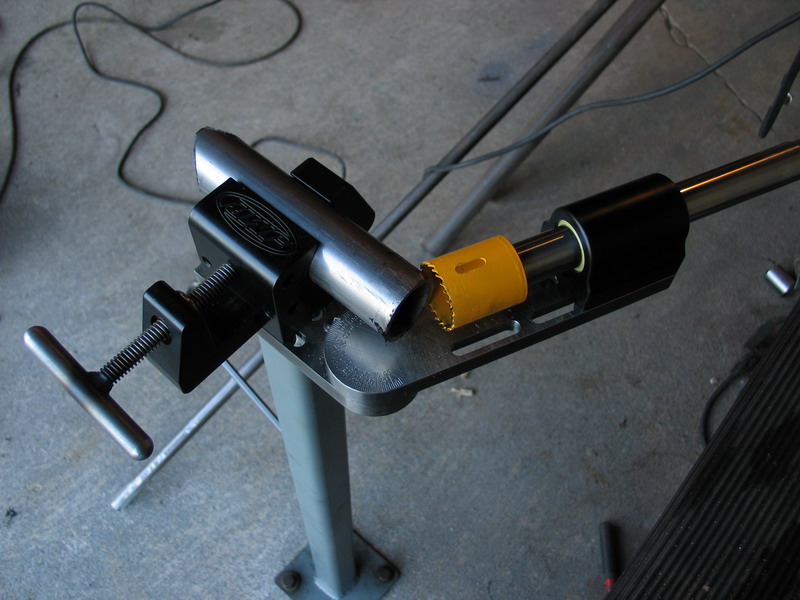 |
As for any other notch, begin with the saw up close to the work. | ||||
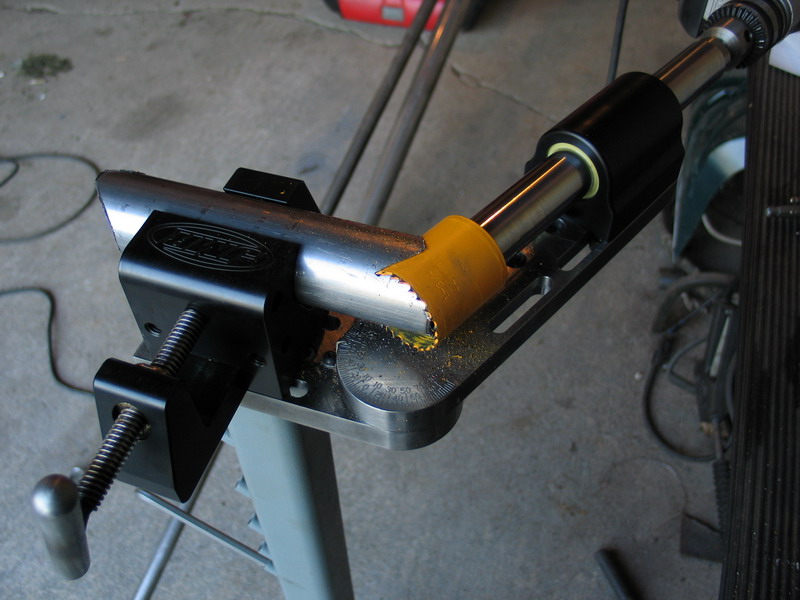 |
And use slow speed and steady, even pressure to cut the notch. | ||||
Offset Notching |
|||||
 |
Once you realize how simple offset notching is with the JMR, you will find yourself thinking of all kinds of places where you can use offset notches. The clever design allows you to quickly and easily insert the required shims, but keeps the entire assembly tight and rigid so that no wobble, chatter, or off-centred cutting is introduced. Begin by loosening the four hex-head cap screws that secure the bearing block... |
||||
 |
... using an Allen key wrench. | ||||
 |
The shims go between the bearing block and the cutting arm. I have removed the bearing block in this pic for illustrative purposes, but it is important to note that you do not need to remove it completely to insert the shims - just loosen the bolts and slip the shims in - the clever little arms on the shims ensure they are perfectly aligned without having to remove the bearing block. |
||||
 |
These are the shims. You can see the little alignment arms clearly. | ||||
 |
This is how the shims are oriented on the cutting arm in relation to the mounting slots... | ||||
 |
... and this is how they are oriented in relation to the bolt holes of the bearing block. The shims also fit underneath the vise as well, in exactly the same fashion. This means that, even with only a few shims, you can create dozens of different combinations to get any number of different offsets in any size tube. For example, a single shim pack consisting of 2 x 1/4" shims and 2 x 1/16" shims, if you install them in combinations under the bearing-block, gives you these offset possibilities: 1/16", 1/8", 1/4", 5/16", 3/8", 1/2", 9/16", and 5/8". But what if you wanted an offset of 7/16"? Easy - install two 1/4" shims under the bearing block and one 1/16" shim under the vise: 8/16" - 1/16" = 7/16"! |
||||
 |
Again, you needn't remove the bearing block to install or remove shims - just loosen the bolts, pull up on the bearing block, and slide in the shims. Then re-tighten the mounting bolts. |
||||
 |
Two 1/4" offset notch shims installed for a total offset of 1/2" | ||||
 |
You can clearly see how the offset notch will be created. Here I am cutting a 1.75" notch, offset 1/2", in a 1" tube. |
||||
 |
With the shims in place, simply set the angle and cut the notch like any other. | ||||
 |
The result is a perfectly centred offset notch. | ||||
 |
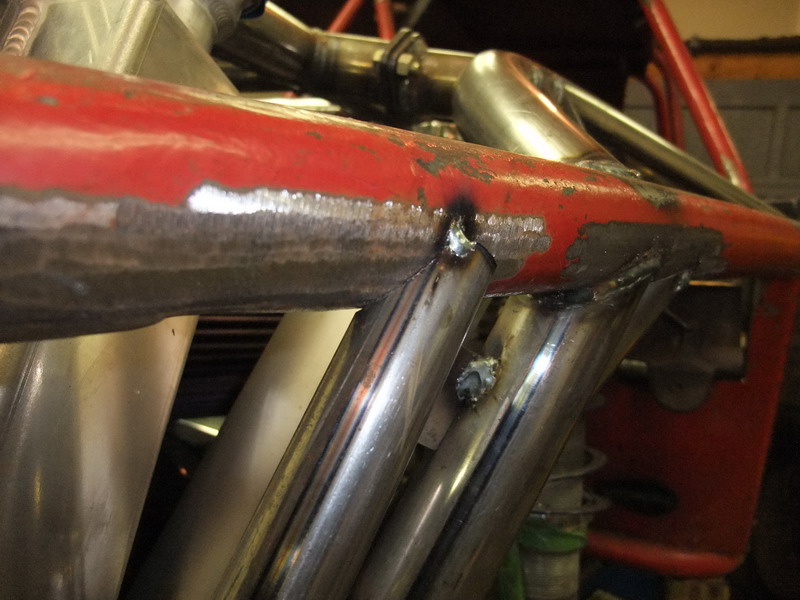
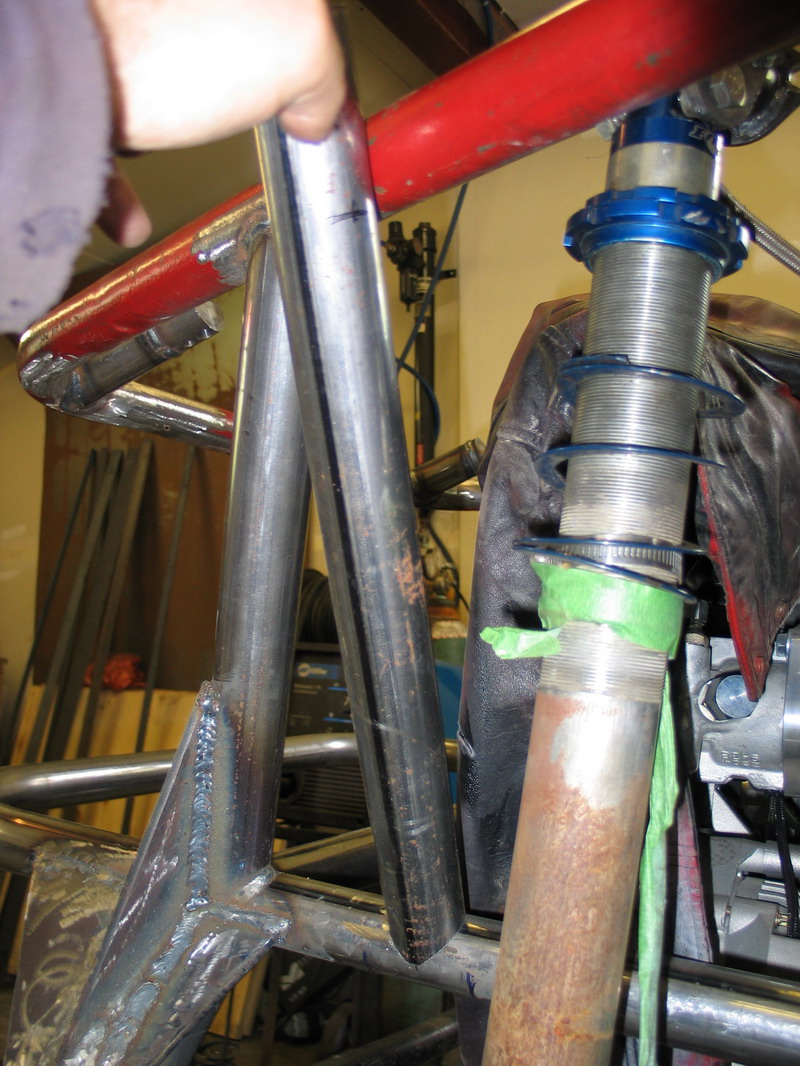
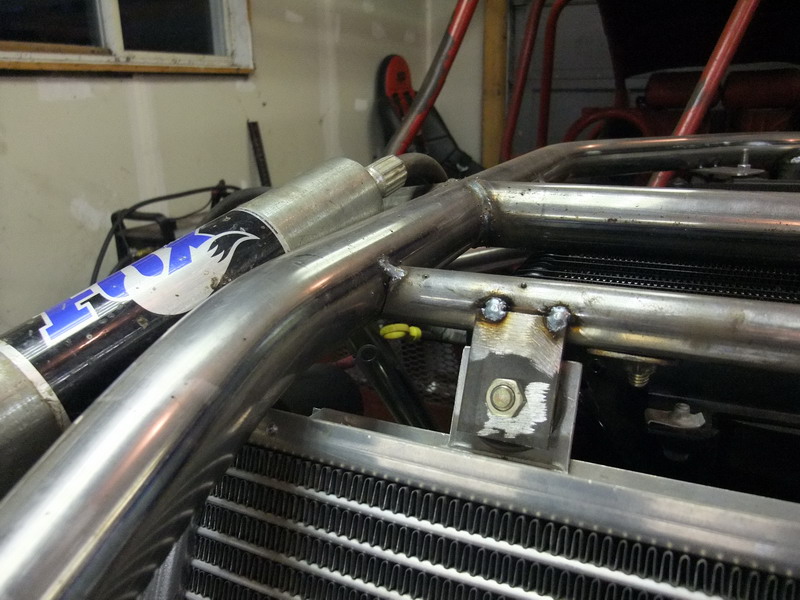
Here you can see the offset notch in practice. In this case it is used to position my 1" rad support tube flush with the bottom of the 1.75" tube to which it attaches. |
||||
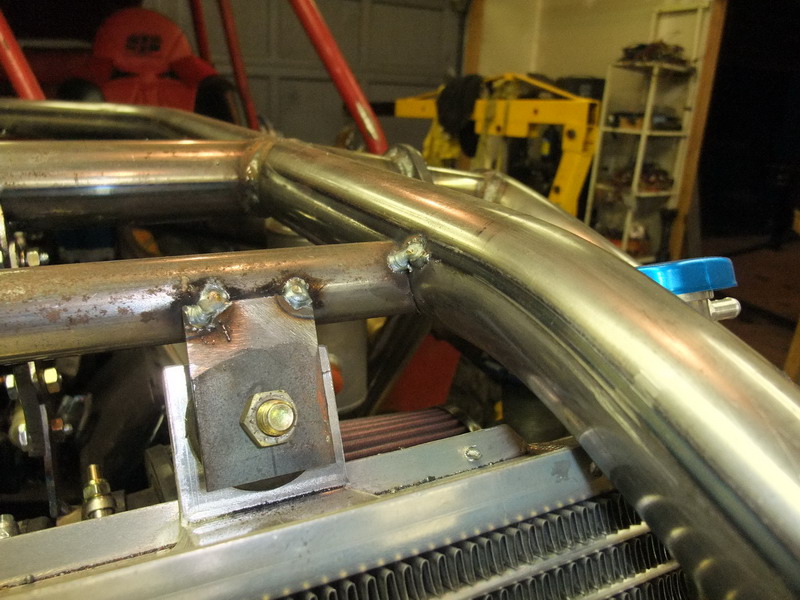 |
Close-up of the offset notch in use. | ||||
Real-world NotchingNow that we've had a look at setting up the notcher and how to make basic, angled, and offset notches, let's run through a complete notching sequence where I will create offset, angled notches in different planes on each end of a tube to install on the front end of my buggy. |
|||||
 |
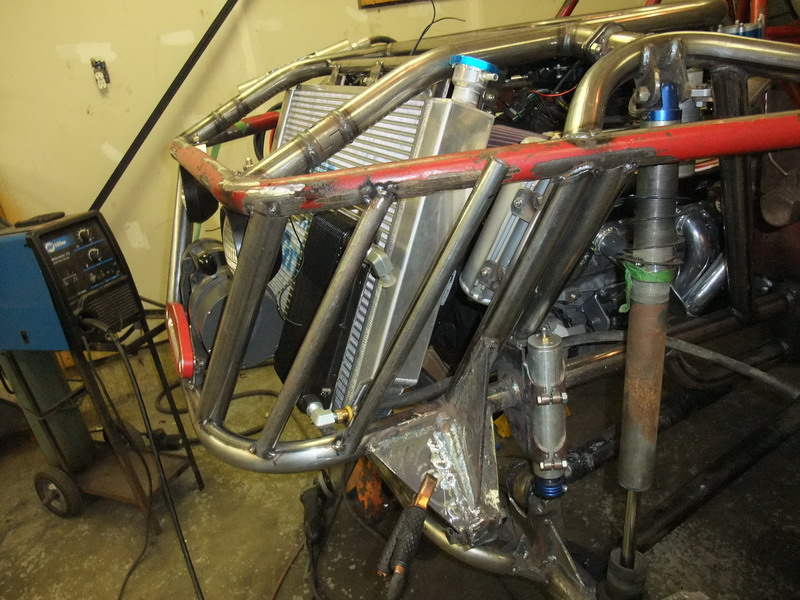
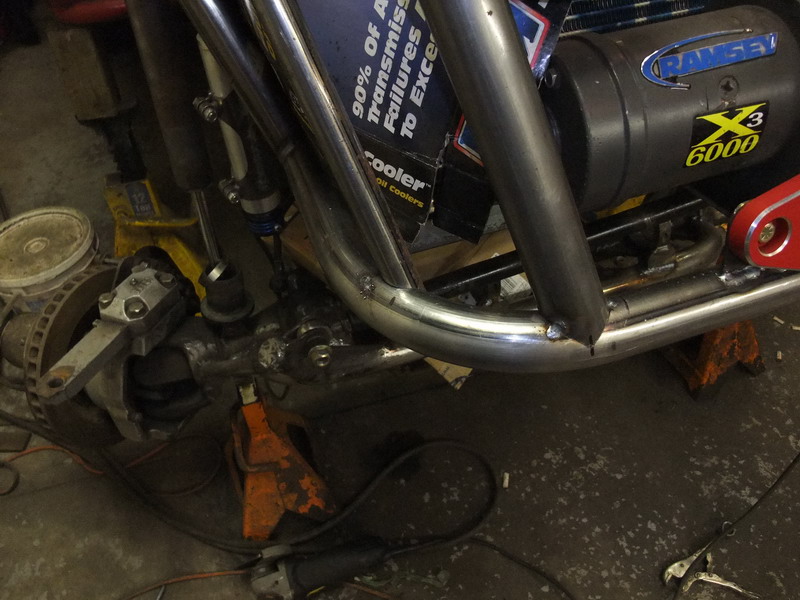
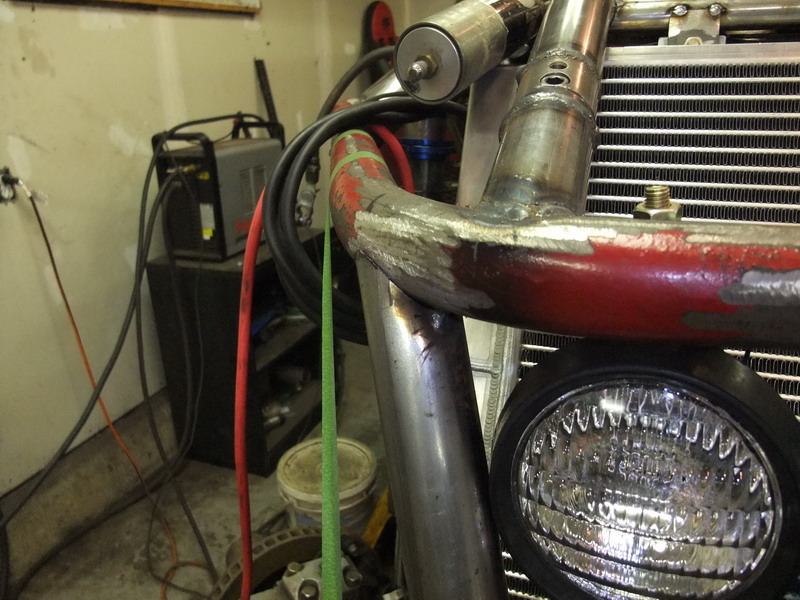
Here's the front end of The Wolf. As you can see, the current arrangement leaves the rad rather exposed from the side. |
||||
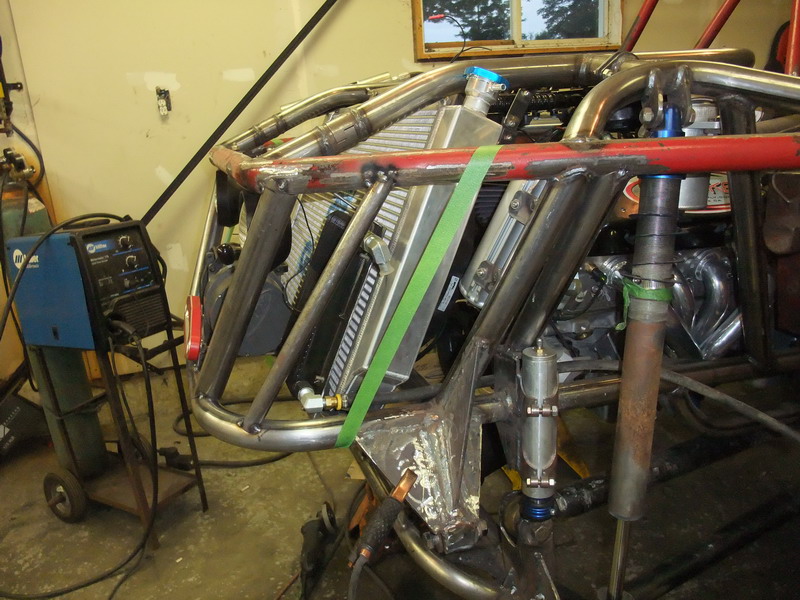 |
What I want to do is install a second 1" tube where the green masking tape is. | ||||
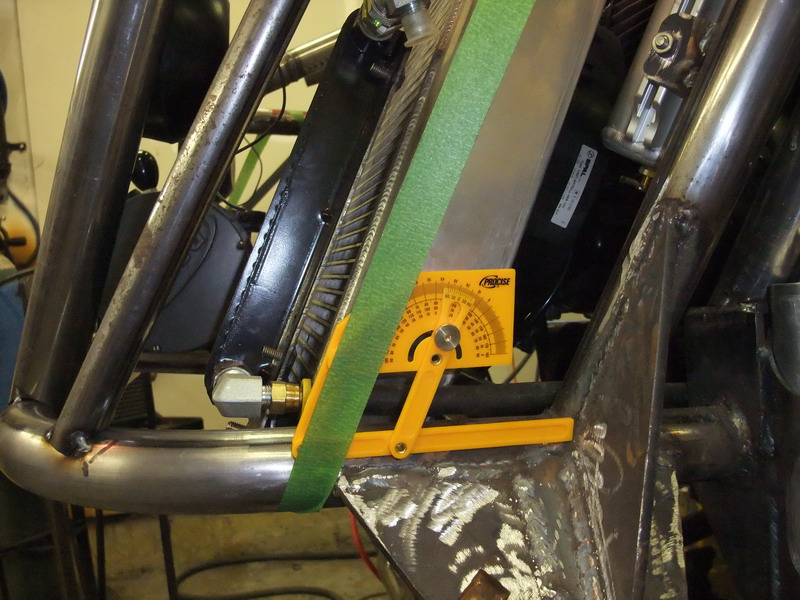 |
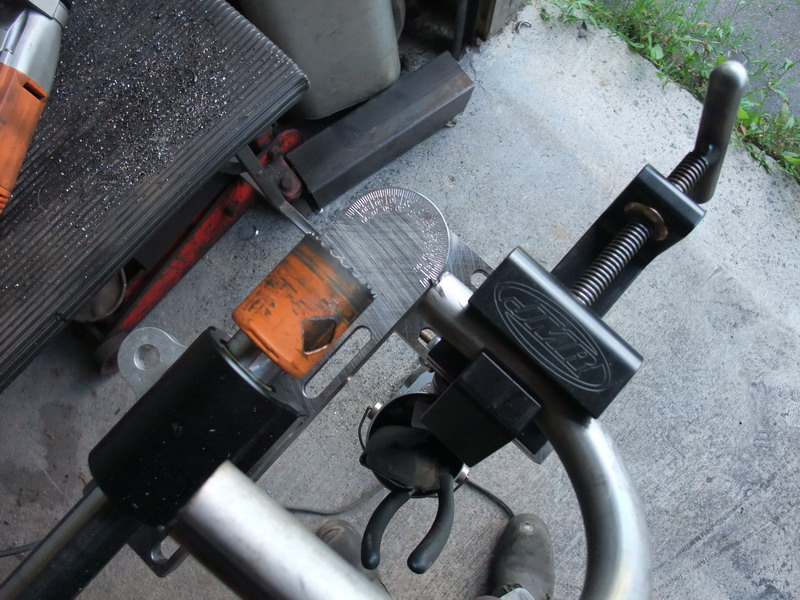
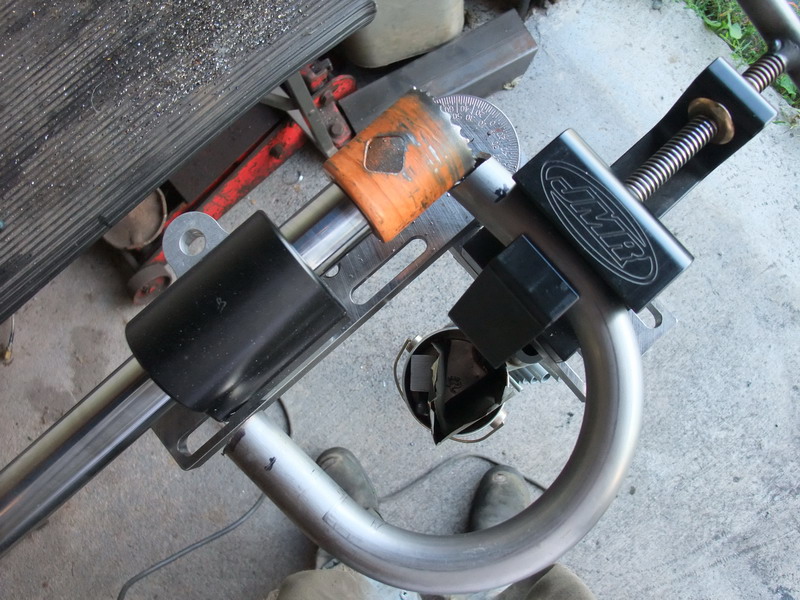
To get the angle for the first notch, measure the angle of the tape with a protractor. I should note that when measuring and cutting angled notches, there are always two angles in question: the acute angle (the one less than 90°) and the obtuse angle (the one greater than 90°). 90% of the time it is the smaller, or acute, angle that you will measure and notch, as shown here. However, one great feature of the JMR is that, when you have to, you can also measure and notch the obtuse angle - more on this later. |
||||
 |
Alternatively, you could also measure the angle of the other tube and match it. | ||||
 |
After making note of the first acute angle, measure the length required and cut a piece of tube, leaving a couple of inches extra in case you mess up a notch and need to re-do it. You can reduce the wastage as your experience and confidence grows. |
||||
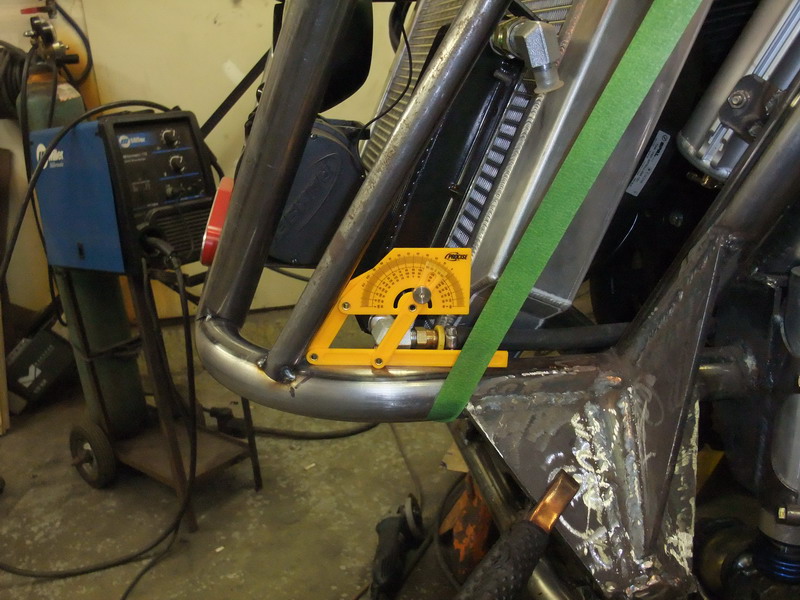
 |
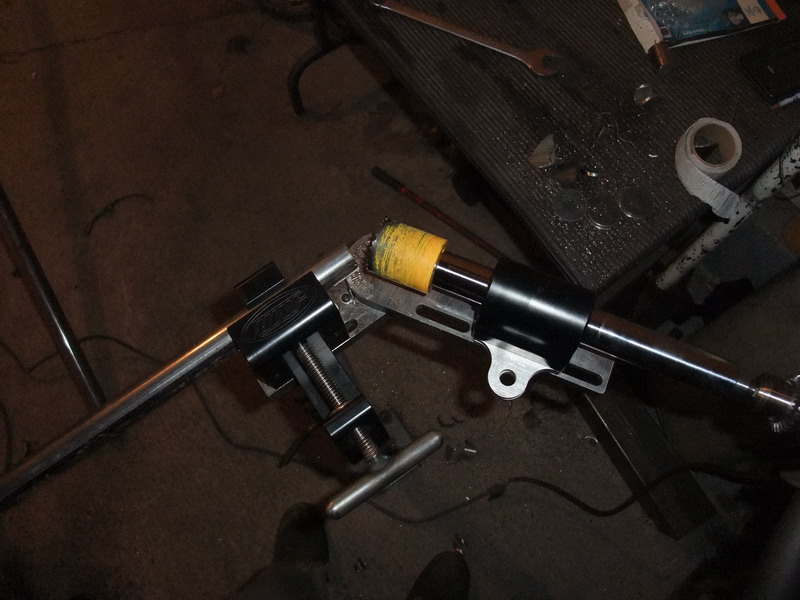
Since the1" tube in question will join 1.75"tubes, and I want the 1" tube to be flush with the outside of the larger tube, the notches will also need to be offset - in this case 1/2". 1/2" worth of shims are installed under the bearing block. |
||||
 |
Then the pivot-point is loosened... | ||||
 |
... and the angle measured with the protractor is set on the indicator scale. | ||||
 |
With the pivot-point re-tightened, the tube is inserted until the far side is about inline with the centreline of the hole saw, and the vise is tightened. | ||||
 |
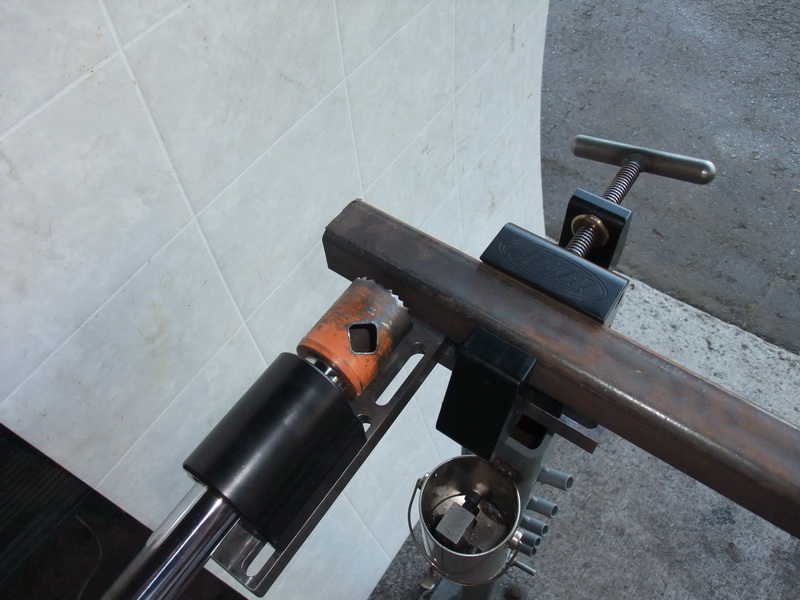
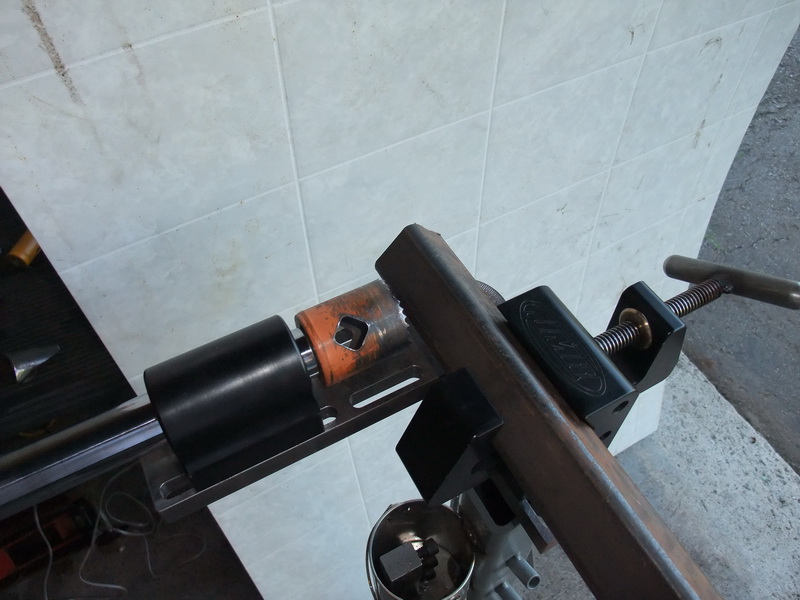
The first notch is cut... | ||||
 |
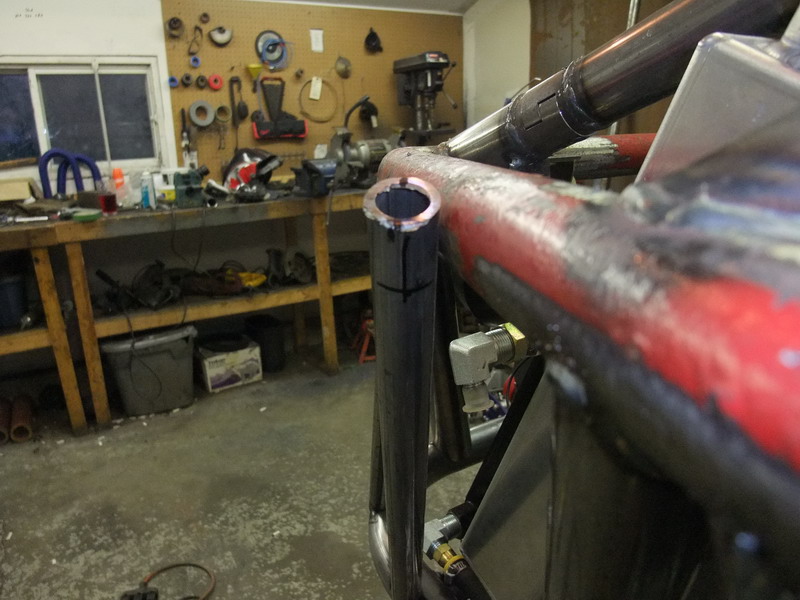
Resulting in an offset and angled notch. | ||||
 |
The tube is then held or tacked in place... | ||||
 |
... while the angle for the second notch is measured. Note how, once again, it is the acute angle that is measured. | ||||
 |
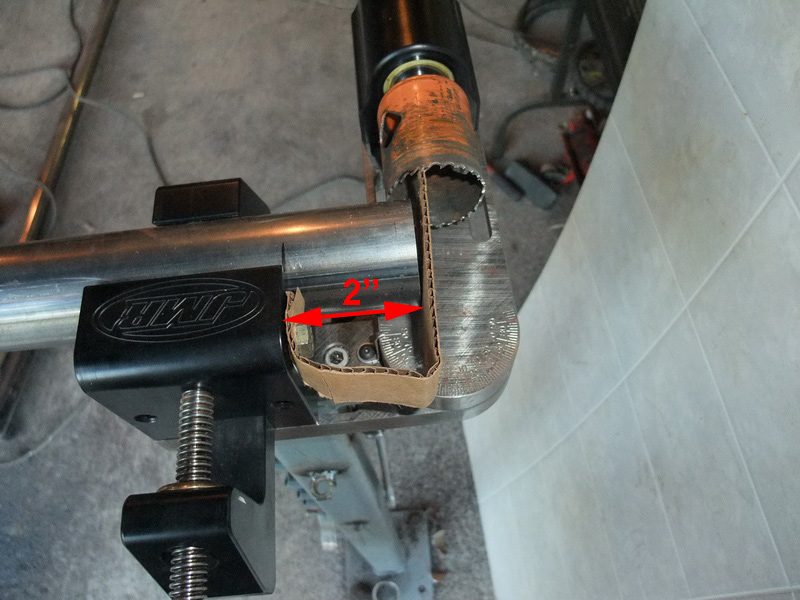
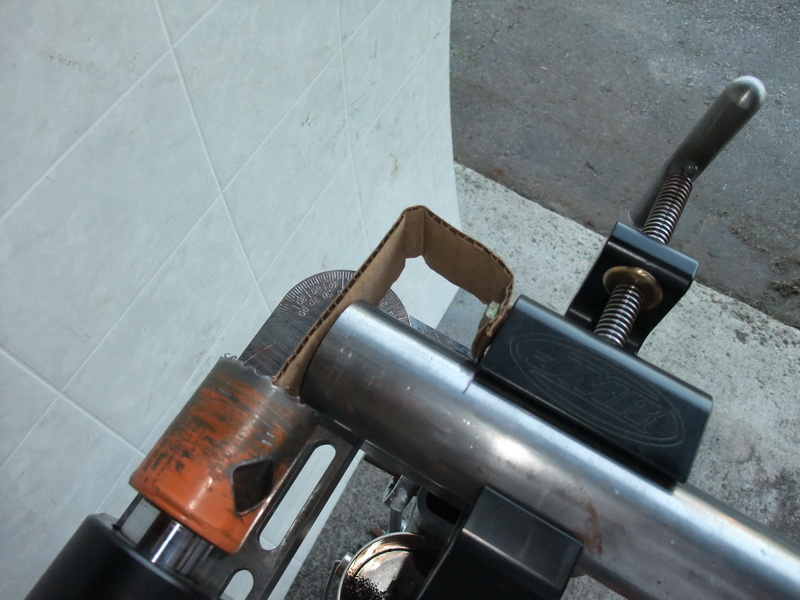
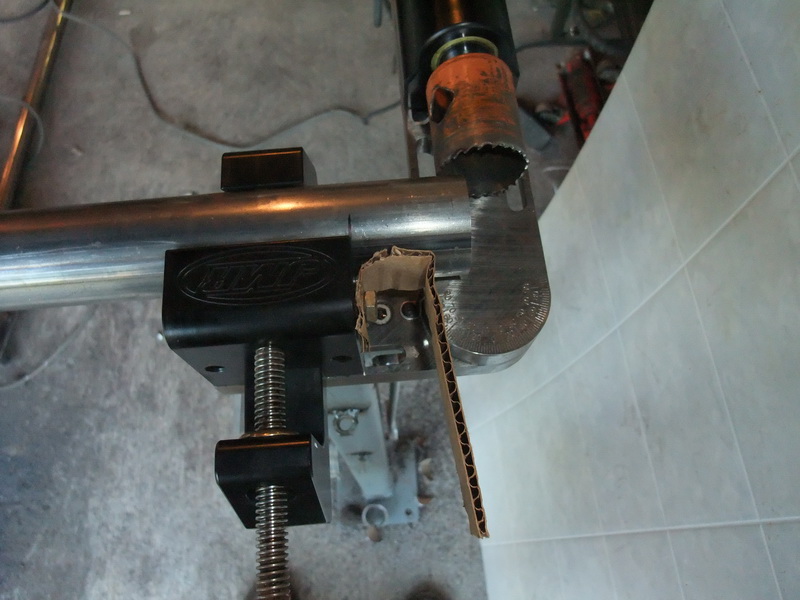
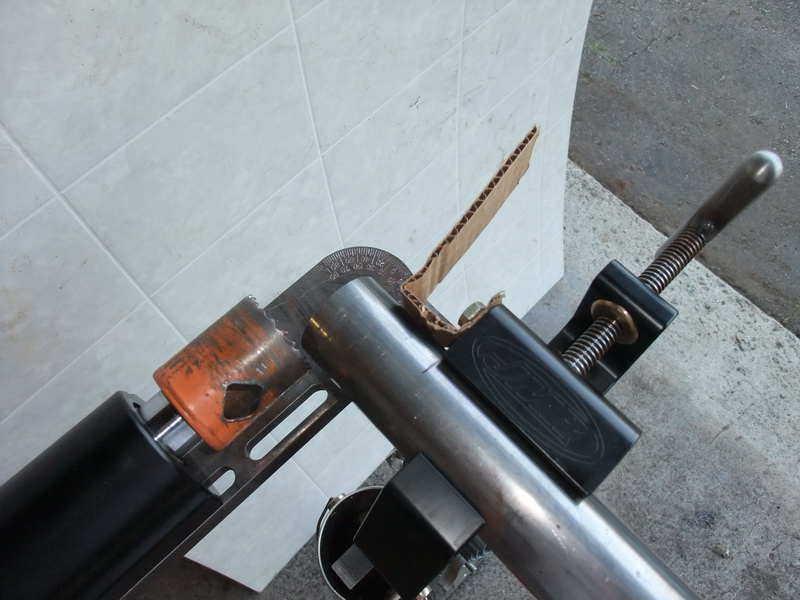
Once the angle is known, the correct location for the notch must be determined. There are probably dozens of ways of accomplishing this - ranging from software programs that print out templates to cutting trial pieces from cardboard. I shall be using a method I call "eye-and-try" which amounts to using the old Mark-I eyeball and trial-and-error (remember why we left the tube a little long when we cut it!) |
||||
 |
Again, with the tube held or tacked in place, sight down the tube which the new piece must attach to. I find it helpful to visualize this existing tube as the hole-saw - showing me where the notch must go. Practice and trial-and-error come into this next part. Draw a line indicating the centreline of the required notch, then add a cross-bar that indicates where the inside "throat" of the notch must be in order for the tube to fit at the desired angle without being too long or too short. When starting out, it's best to err on the side of making the tube a little long, as you can always trim a little off. If you notch the tube too short, you have to start again. |
||||
 |
Set the angle of the notcher using the second acute angle measured. Clamp the tube in the vise so that the marked centreline is level with the horizontal centreline of the hole saw, minus your offset, and so that the teeth of the hole-saw just contact the tube at the cross-bar "throat" that you drew. This step can be something of an art when making offset and angled notches, as obviously the inside throat of the notch will not be a consistent distance from the other end of the tube. |
||||
 |
When you're happy with the alignment, cut the notch. | ||||
 |
The result is a second offset angled notch that, in this case, is also in a different plane than the first notch. This is because, when installed, the tube in question lies back as well as slightly out, and the different plane was accounted for when we marked the centreline for the second notch. Don't worry if it takes a few tries - you will soon learn to mark and align the tube with accuracy. |
||||
 |
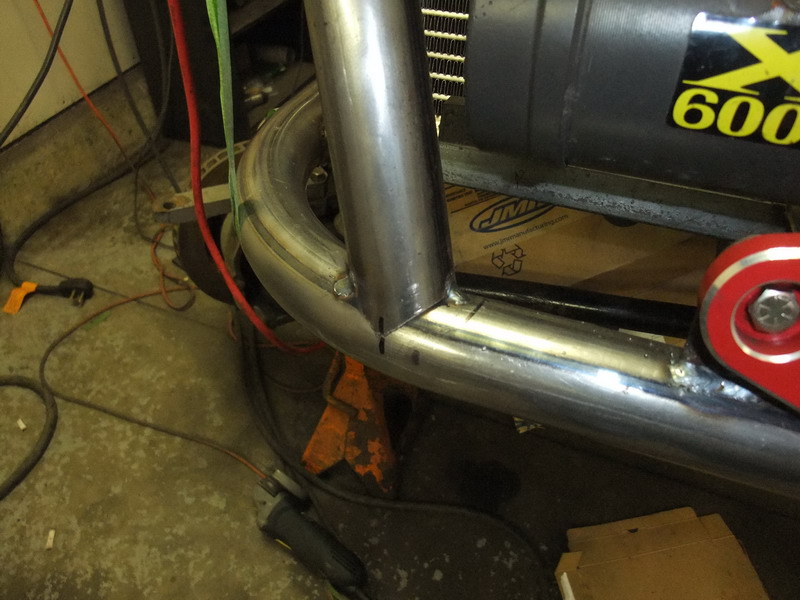
Here the tube is installed and tacked in place, revealing... | ||||
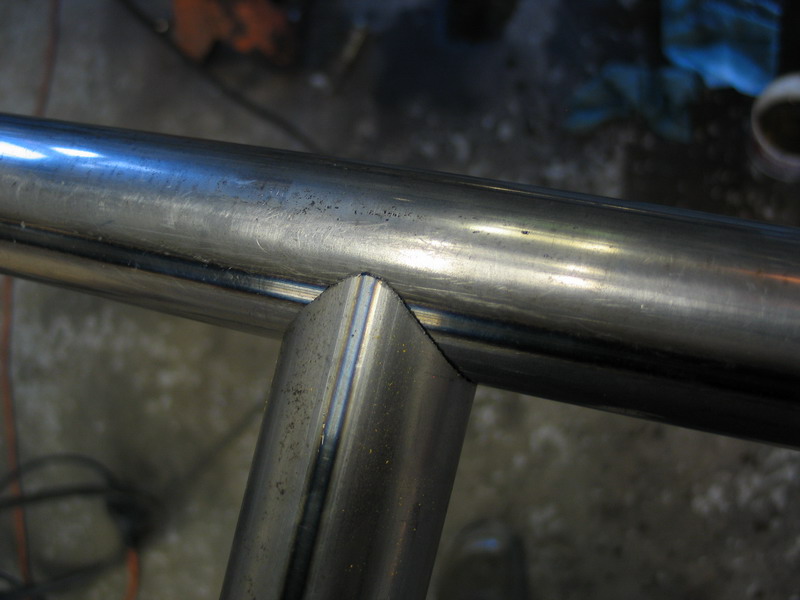
 |
...a perfect notch on the bottom, and... | ||||
 |
... a perfect notch on the top. This is the real testimony to the abilities of the JMR notcher. To cut complicated notches like this, especially for the beginner like me, by any other method or with any other notcher can be incredibly tedious and frustrating... believe me - I've tried. But with the ease of adjustment of the JMR, and particularly with its rigid design that ensures chatter and wobble-free repeatable notches, even in small tube, you will soon find yourself capable of making notches you didn't think possible. And the real beauty of that is, it opens up a whole new world of design possibilities now that you are no longer forced to look at everything you want to build with an eye to "what will be the simplest bend or notch for me to make?" |
||||
Other Features and BenefitsWe've now had a good look at the features and abilities of the JMR notcher, but before we close, I'm going to illustrate a few more of the unique capabilities it has. Short Tube Notches with Moveable Vise |
|||||
 |
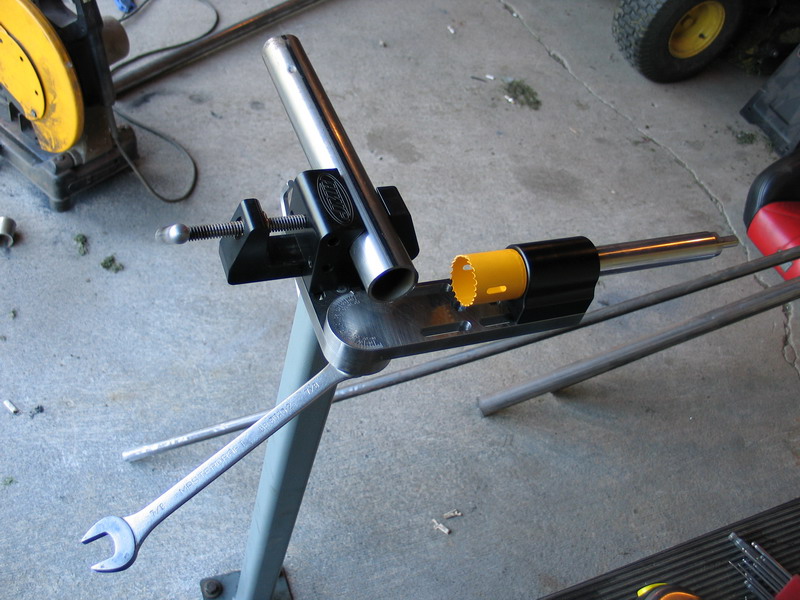
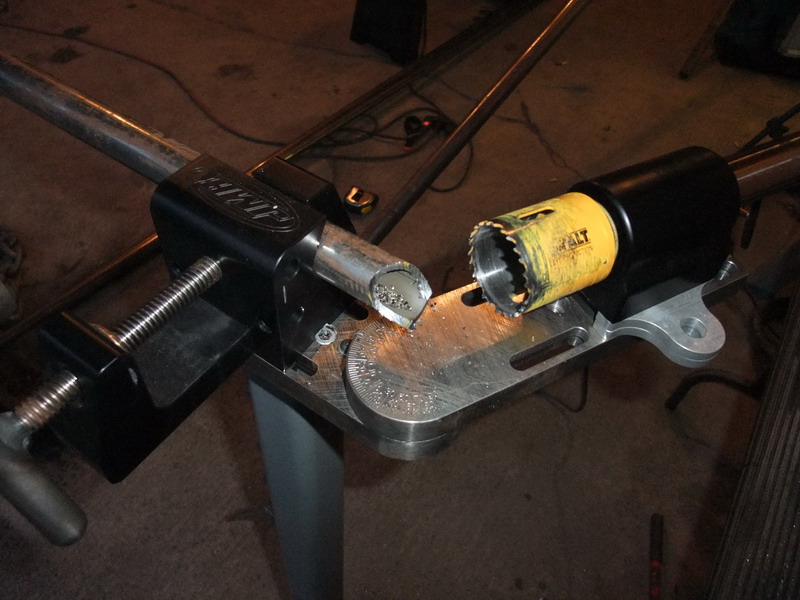
Here I am trying to notch a small U-bend. Because the bend limits where I can clamp the tube, it presents essentially the same problem as when trying to notch a very short piece of tube. With many other notchers, and certainly with the chop-saw method, this can be a real limitation. The moveable vise on the JMR, however, allows you to get the work up close to the saw and therefore leaves you able to notch very short pieces of tube. Note in this pic the visible slots just to the left of the vise... |
||||
 |
... now look at this pic and you can see where I snugged the vise up as close as possible to the saw. This gave me just enough room to notch the piece right where I needed. |
||||
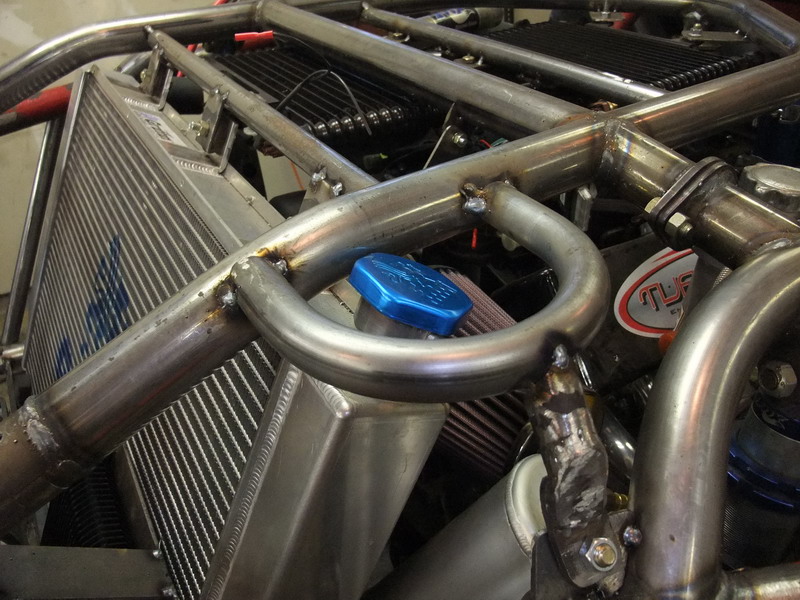 |
Which allowed me to build this trick little "roll cage" for my rad cap. | ||||
Cutting the Obtuse AngleRecall how I mentioned that you normally measure and cut the acute angle for a notch? Well, there are certain circumstances where it is advantageous to be able to cut the obtuse angle. Due to the design of the JMR notcher, this isn't a problem. Here's an example: |
|||||
 |
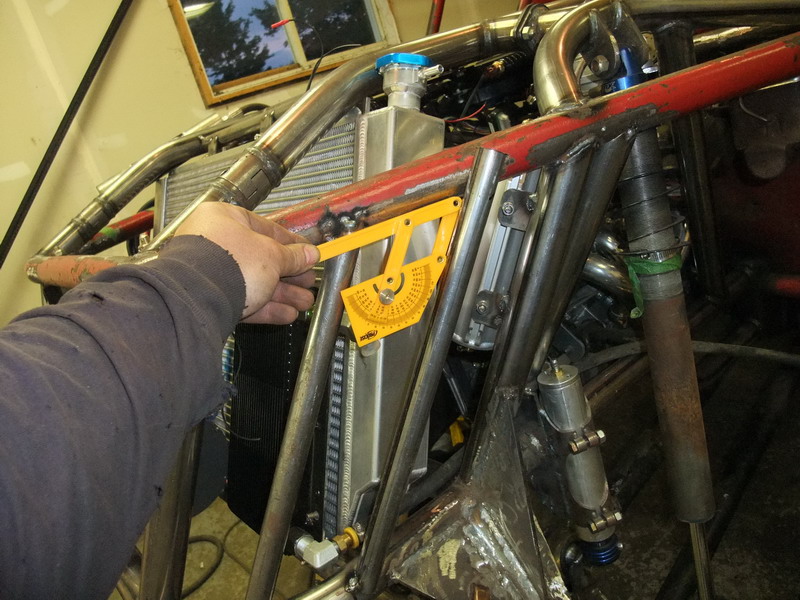
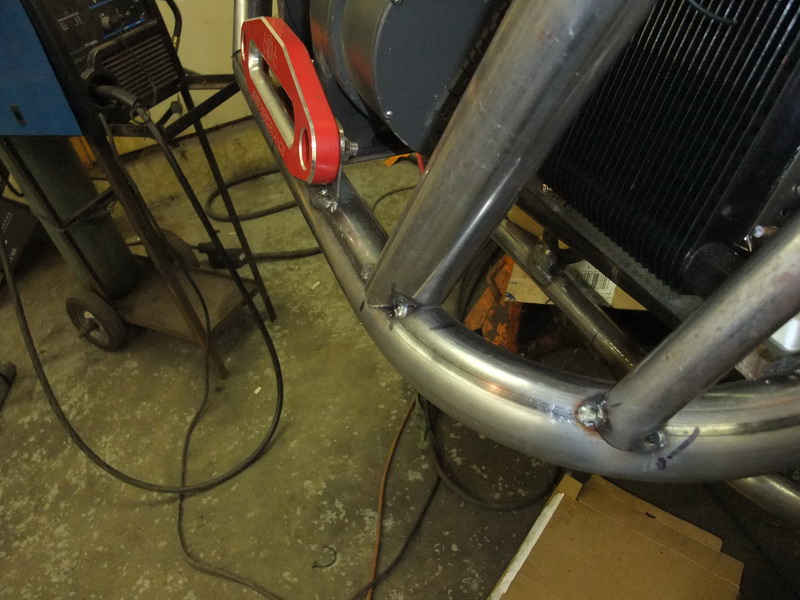
Here, I am placing an angled tube in the frame for structural support. The bottom notch, which I have already cut, is a simple 90° notch. You can also see where I have marked the position for the upper notch. It may not be abundantly clear, but this is something of a tricky notch as the top (red) bar to which this new tube will attach, tapers inwards. Because of the position of the existing vertical tube in front of this new one, and the fact that the engine is installed leaving no room to work from the inside, I was forced to measure the angle and mark the position of the notch using the obtuse angle. |
||||
 |
Fortunately, instead of trying to transfer this mark to the other side of the tube and calculate the acute angle, I can pivot the JMR notcher's cutting arm in the opposite direction from normal. The degree markings are limited in this direction, and if you go more than a few degrees, the side of the cutting arm will bind against the degree pointer. However, it takes only a second to pop off the degree pointer, and then the angle can be set using a protractor, like this. |
||||
 |
This allowed me to easily cut the obtuse angle. | ||||
 |
And once the angle was set and the tube positioned, the notch was as smooth and easy to make as any other. As far as I know, you simply can't do this with any other brand of hole-saw notcher. |
||||
Fine Tuning AdjustmentGreat precision & control are possible because of the rigid design of the JMR notcher. |
|||||
 |
I have gone on and on in this article about "rigidity". This is because I was literally astounded by how rigid and secure the design of this notcher is. I have used other brands before, and always found them somewhat lacking, not least of all in this department. before I got the JMR it wasn't uncommon to have the shaft or mountings flex and the hole-saw bind up during a notch - requiring at best that you hang on for dear life and suffer an inaccurate wallowed-out notch and at worst a trip to emerg with a broken finger or wrist. |
||||
 |
Not so with this machine. The quality and pure beef of the tool allow for minute adjustments and fine-tuning of notches, including taking a sliver off, or a degree or two more out of the notch, all without fear of wobble and binding. | ||||
Rigidity Test |
|||||
 |
In fact, so rigid is the design, that I was even able to successfully bore an offset hole in a piece of flat plate - even with the plate only about half-clamped in the vise!
|
||||
 |
Admittedly, this is not the proper use of a tube notcher. | ||||
 |
Nor is it recommended practice. | ||||
 |
But it got the job done. | ||||
 |
And sure does speak volumes about the quality and versatility of the tool. | ||||
 |
How cool is that?! | ||||
Cutting From the "Back Side" - the 210° ArcAnother exclusive and great feature of the JMR is its ability to notch anywhere in a 210° arc. Not only is this great for cutting that 60, 70 or even 89° notch that other notchers aren't cable of - but it's a real godsend in other circumstances too. |
|||||
 |
Remember the offset, angled notch I cut in the small 1" tube for rad protection that I covered in the section on real-world notching? Well, of course I needed matching bars on the other side. Now, not being the sharpest hole-saw on the shelf, I originally just cut the first lower notch the same way I had done on the other side - offset 1/2" and at about a 30° angle. Of course, as you can see here, this results in beautifully angled notch with the offset on the wrong side! |
||||
 |
The solution was to simply swing the notcher's cutting arm around to the other side and cut the notch from the other direction. No re-measuring or adjustments to the offset were required, I just set the arm at 30° from the other side of 180, tightened the pivot-point down, and cut the notch from the back side! Just try that with the "other" style notchers! |
||||
Square Tube Capability |
|||||
 |
The JMR can easily hold and notch square tubing between the flats... | ||||
 |
... or between the corners (sometimes called "on the diamond"). | ||||
Fixture Mounts |
|||||
 |
The JMR's aluminum vice provides two threaded holes oriented front-to-back, and... | ||||
 |
... two through-holes oriented side-to-side in the vice. They may not initially look like much, but they are one of the most ingenious and useful parts of the design - especially for those doing any repetitive or production work. You see, the holes can be used to mount any number of small accessories or custom fabricated fixtures / jigs that can be used to quickly and easily position tubes for notching with great speed, precision, and accuracy - without the need to measure or eyeball every time. We will see a couple of examples of this shortly. |
||||
Adjustable Vise for Quick, Accurate Notch PositioningWe already saw how the the adjustable vise position can really help with positioning the vice to notch different size pieces - especially short tubes. That isn't half the story though. The real beauty of the positionable vise is that it can be used to very quickly and accurately make notches in tube so that they are precise length without having to measure or carefully position the tube. Here's how: In our example, suppose we already have two parallel tubes that are exactly 10 inches apart and we want to notch a series of tubes to fit exactly between them to create a ladder-like structure. Suppose we are using 1.75" tube, we want our notches to be 1/2" deep, and the two parallel tubes are exactly 10" apart. With the JMR's clever design, we can quickly and easily notch many cross-bars exactly 10" between the notches, all with exact matching notch depths, and with ZERO wastage. |
|||||
 |
First, we pick a tooth on the midline of our hole-saw to measure from and set our vise a precise distance from that tooth. In this case we have chosen 1.5". The precise distance doesn't matter, just that it is exact and we know what it is. |
||||
 |
Now, since we want our cross-bars to be 10" between the notches, and the notches to be 1/2" deep, we cut our tube to exactly 11" long (10" + 1/2" + 1/2" = 11") Also, since we know the vice is exactly 1.5" from the saw, and the notches are to be 1/2" deep, we make a mark on each end of the tube 2" from the end (1.5" for the distance to the vice plus 0.5" for the notch). |
||||
 |
Then, all we have to do is line the marks up with the edge of the vice, cut the notches, and our piece will be exactly 10" long between the notches. The fact that we can vary the saw-to-vice distance means we can accomplish this same procedure for varying lengths and notch depths and always leave ourselves a nice, easy round number to set when mounting the tube in the vise (in this case, 2"). |
||||
 |
But that's not all! Remember the fixturing holes I mentioned? One of the most useful fixtures or jigs we can build is a flip-out length-stop. Here is an example mocked-up in cardboard, but it would be easy to fabricate from scrap steel. Using our previous example, we would build the length-stop so the face is exactly 2" from the edge of the vice, and install it with a bolt so that it is free to rotate. |
||||
 |
Now, all we need do is cut our tube to exactly 11" long, chuck it in the vise and slide it up until it hits the stop... | ||||
 |
...flip the length-stop out of the way... | ||||
 |
... and cut the notch. No extra measuring or marking or eyeballing the tube in the vice required!! With a little ingenuity, you can build fixtures and jigs to help position tubes at different lengths and even different degrees of rotation too. Now that is clever design! |
||||
BIG Angles |
|||||
 |
As previously mentioned, the JMR is not limited to small angles like other notchers - it is capable of big angle notches. | ||||
 |
This is about 70°! | ||||
Completely "Ambidextrous" |
|||||
 |
As mentioned earlier, and graphically illustrated here - the JMR TN1000 is completely "ambidextrous" - meaning it can notch from either side. This can be extremely convenient when notching on a stand...but it can also be a real life-saver if you have the notcher removed and clamped on a chassis. For example, suppose you find you need to mount the notcher on a chassis to cut a hole or make a cope in a tube between the floorboard and the firewall. This would be easy on the driver's side, but when you get to the passenger's side - the motor is in the way! Not a problem for the JMR, simply flip the cutting arm around and you have room to mount the notcher away from obstructions. Genius! |
||||
Sample NotchesHere's a final look at some of the notches I've made with the JMR TN1000 in the very short time I have owned it. This is by no means intended to showcase my fabrication abilities - quite the opposite. What it does, is show that the right tool can vastly improve your abilities and allow even the rookie to make some pretty damn decent notches. |
|||||
 |
Offset notch in 1" rad support bar joining 1.75" tube. | ||||
 |
Angled notch on a curve. | ||||
 |
Simple angled notch. | ||||
 |
Angled notch and offset angled notch. | ||||
|
|||||
|
Sources: JMR Manufacturing, LLCP.O. Box 606 PolyPerformance 245 Tank Farm Rd.
|
|