 |
Yukon Bearing Puller Review By Bill "BillaVista" Ansell |
IntroductionRemoving the carrier bearings from a differential is a real bear of a job at the best of times - and without the proper tools it's almost impossible to do without damaging the bearings in the process. This can be frustrating if you're installing new gears or a new carrier but plan to re-use bearings that are in good shape. Worse - imagine you've just set up the gears in a Dana axle and are running a final pattern and backlash check after having replaced the set-up bearings with the new bearings. What are you going to do if you find you need to adjust the backlash by changing the shims under the carrier bearings? |
 |
| You have two options. | |
 |
One - you can ignore the problem, and leave the setup less than optimal. I can tell you from experience that this is a mighty tempting option after a long day of setting, checking, and re-setting a gear set. Obviously this isn't the smart option though. Two - you can pull the new bearings off the carrier and do the job right. The problem is - how do you get the new bearings off without causing them any damage? Cheap, wobbly, 2-leg pullers, pry-bars, chisels, etc. may be fine for getting off old bearings you plan to replace - but they fully suck at removing a new bearing without damaging it. |
|
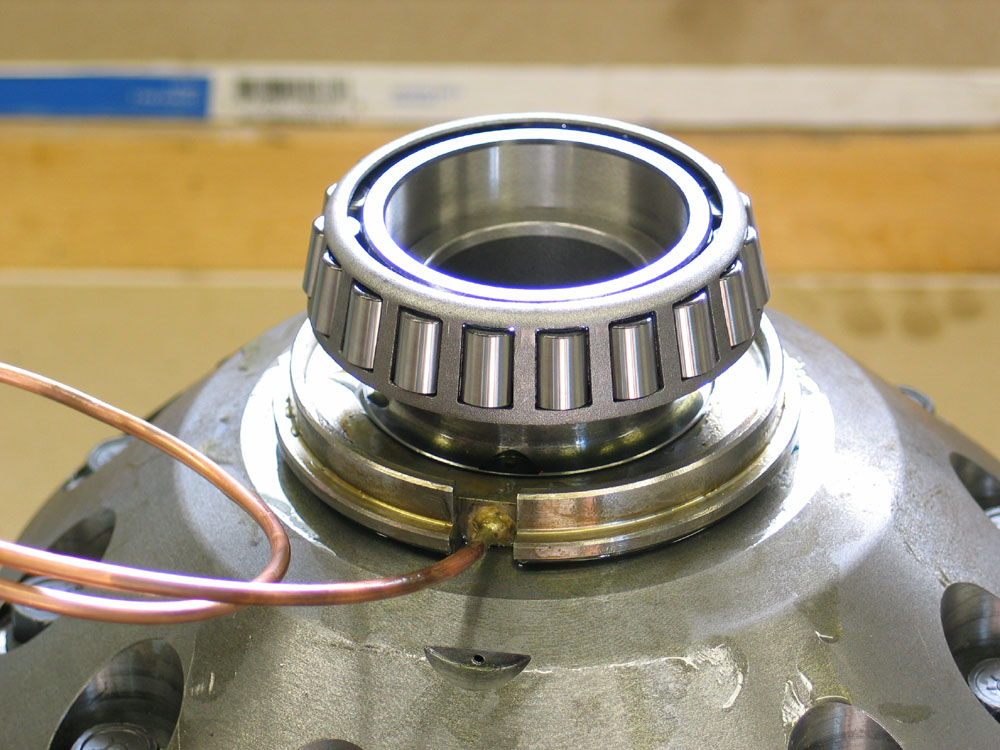 |
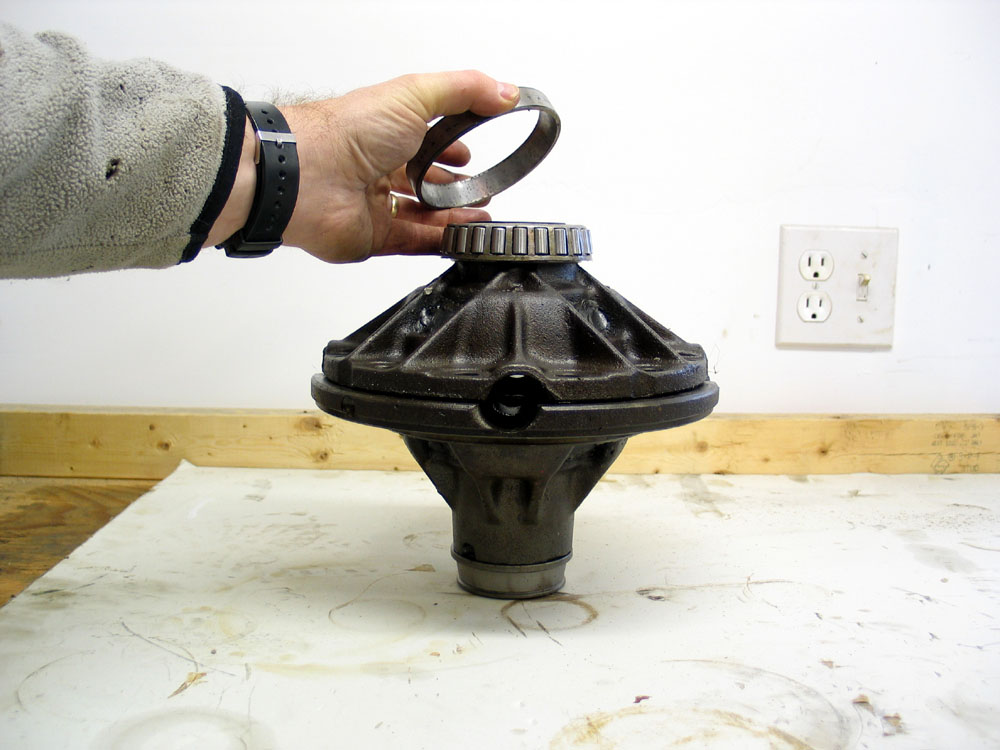
That's where having the right tool really helps - not only to enable you to remove the bearings without damaging them - but also to allow you to do so without damaging the carrier - especially important if you're working with an expensive locker. There are some carriers that, for various reasons, (either they have no reliefs cut in the carrier beneath the carrier bearing seat, or they are too small to actually allow a leg-puller to grip anything) make it virtually impossible to get the carrier bearings off without a clamshell puller. Because of the seal housing between the bearing and carrier, the ARB 14-Bolt Air Locker is just such an example, as can be seen in the pic at left. |
|
 |
For these situations, and also for speed, ease, and just the thrill of having and using the right tool for the job, I recently swore off my usual yank-pound-hammer-and-curse method to check out the Yukon Clamshell Bearing Puller from Randy's Ring & Pinion. | |
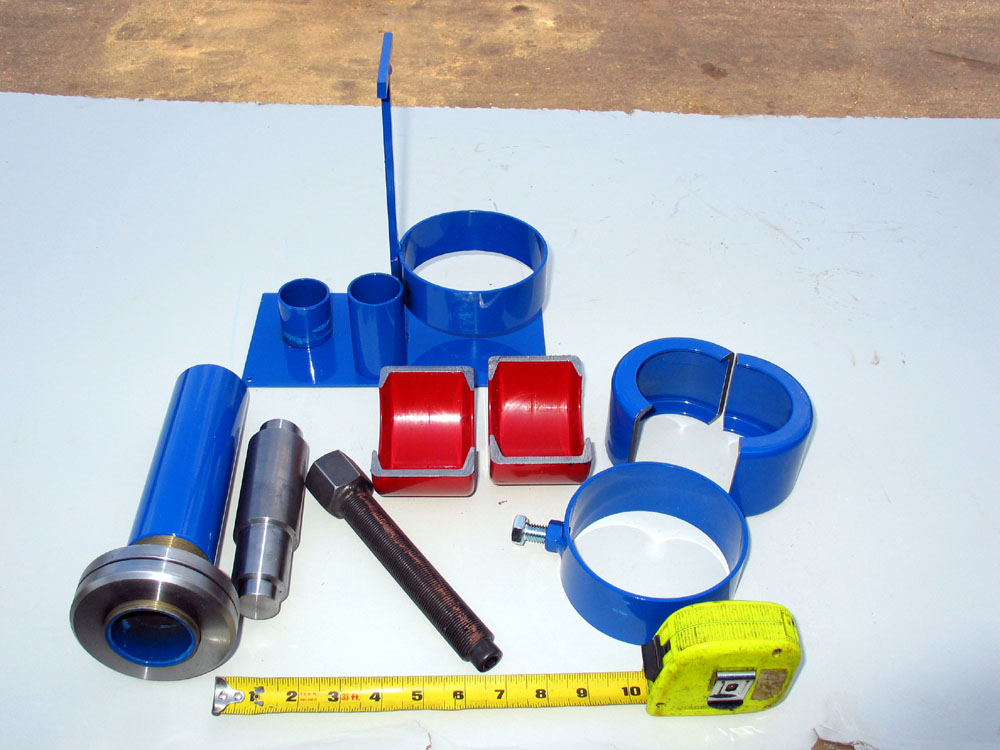 |
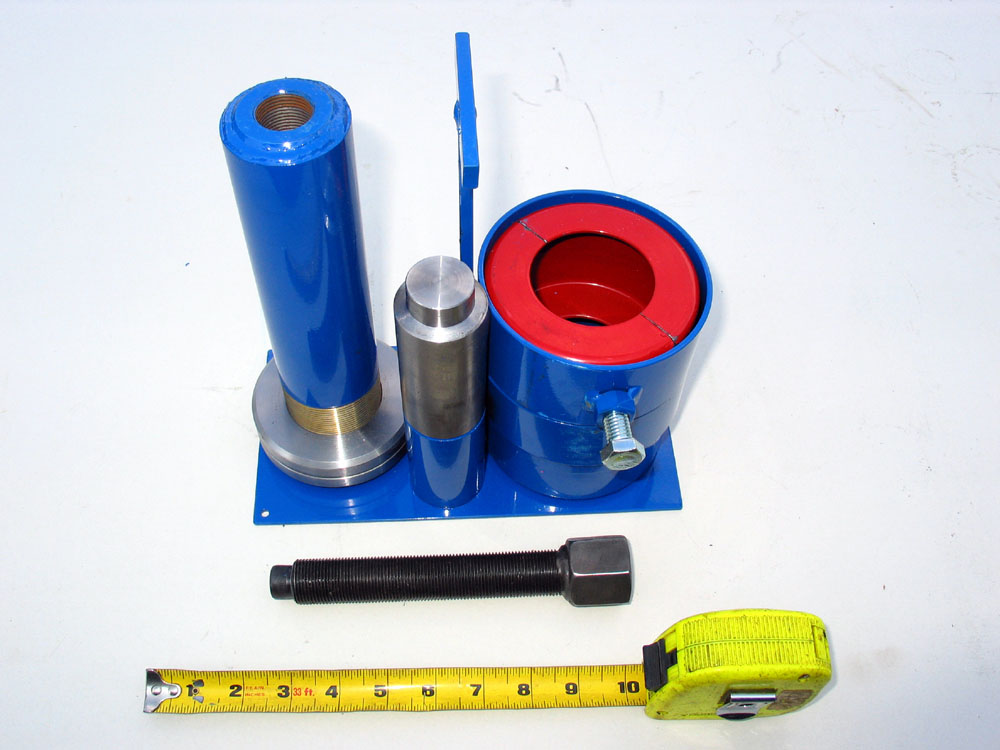
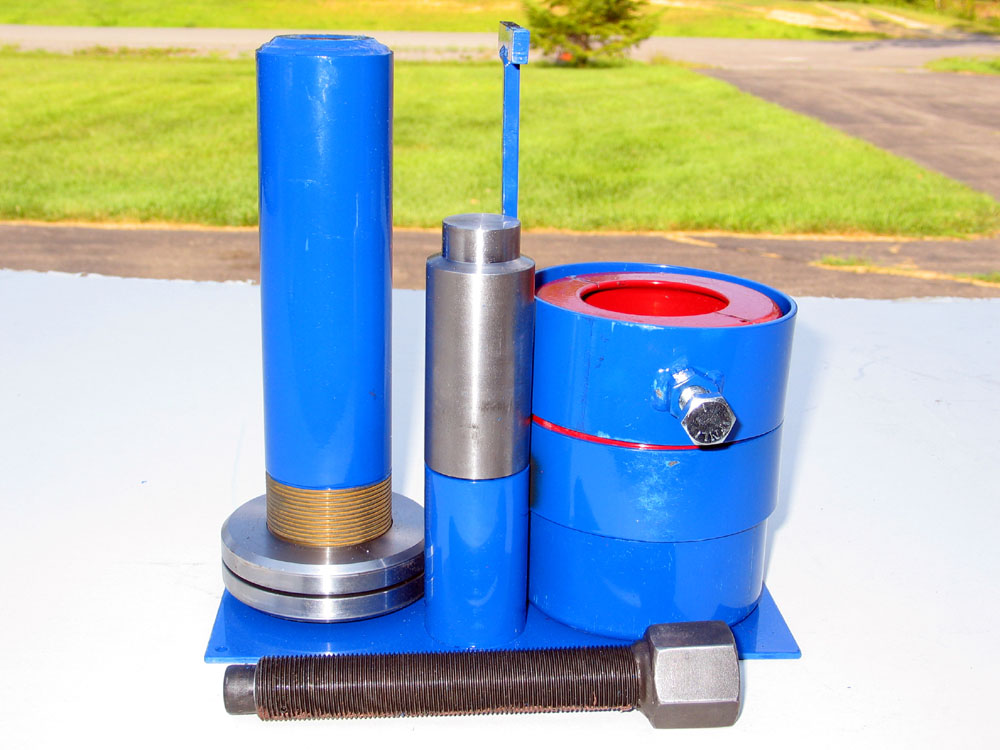
It's a big, beefy tool, as can be seen from these pics, that comes nicely painted in bright colours and with a dandy little stand/carrier to hold all the pieces together when not in use. Best of all - it is really simple to use. |
|
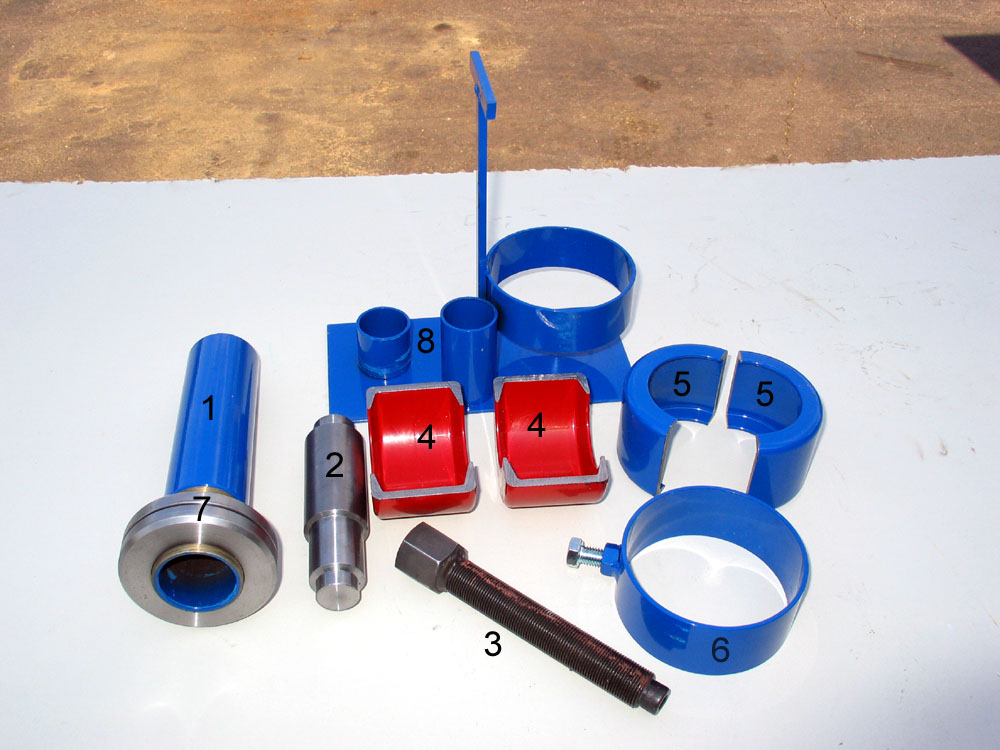 |
The components of the tool are:
|
|
Using the Tool |
||
 |
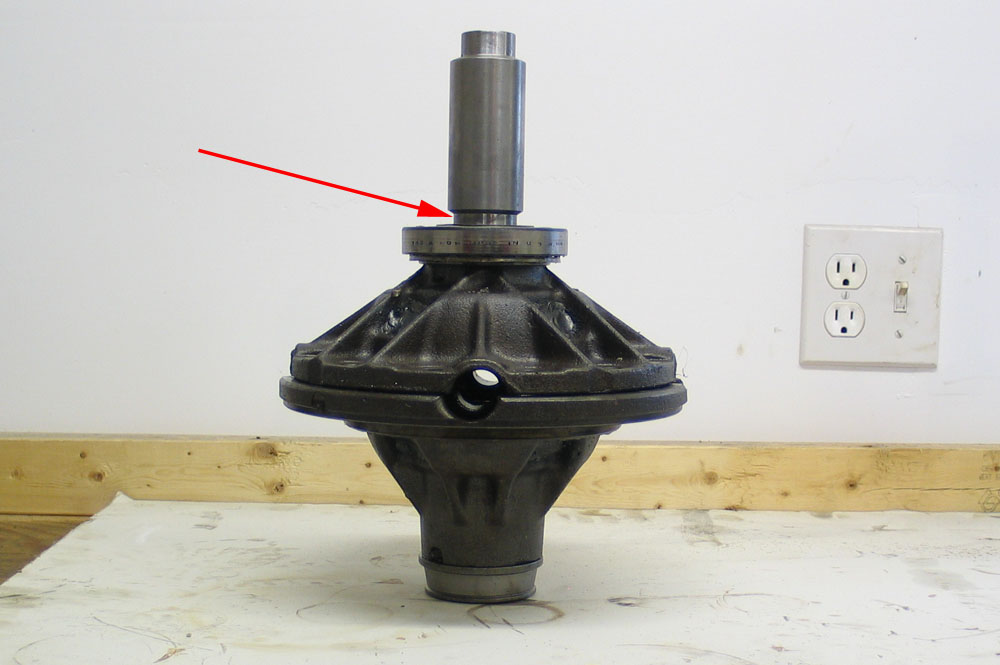
The procedure for using the tool I shall illustrate here depicts the removal of a carrier bearing from a stock 14-Bolt carrier. However, the procedure is the same for any carrier. The first step is to MAKE SURE the race is in place on the bearing. If you leave the race off and attempt to remove the bearing with this tool you will damage the bearing. Note the still-installed inner-part of a destroyed bearing on the bottom journal of the carrier in this pic - evidence of my handiwork before I decided to use the Yukon puller! |
|
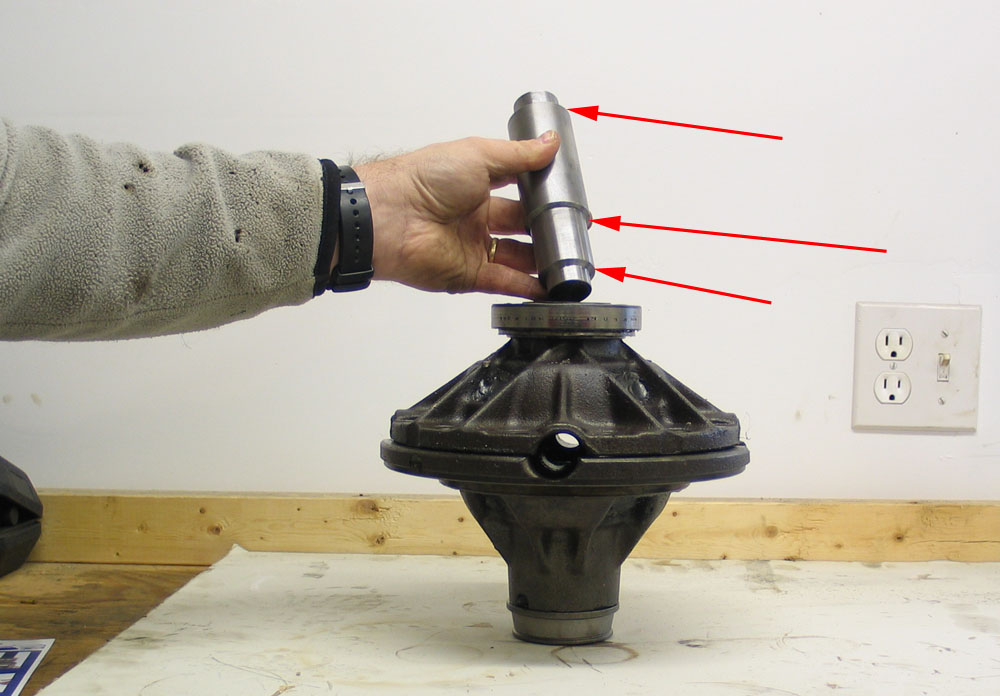 |
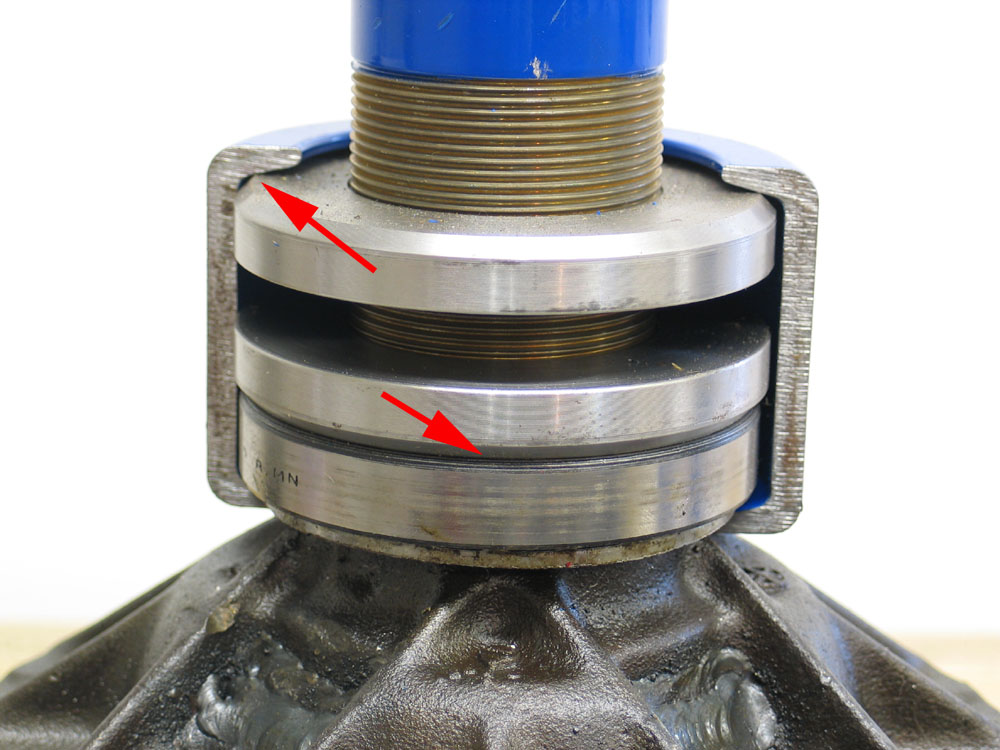
Next, set the plug in place by inserting one end into the carrier bearing journal so that one of its shoulders (red arrows) butts up against the outside end of the journal. The plug has different diameters and shoulders machined into it for use with different carriers. |
|
 |
Here I am test fitting the plug in the 14-Bolt carrier. Note the gap between the plug shoulder and the end of the bearing journal (red arrow) - this is WRONG. The shoulder must butt up against the end of the bearing journal. If it does not, when you use the tool, you will force the plug into the splines of the carrier's side gears. For the 14-Bolt, you must place the "shorter" end of the plug into the carrier (180 degrees from what is shown i this pic). |
|
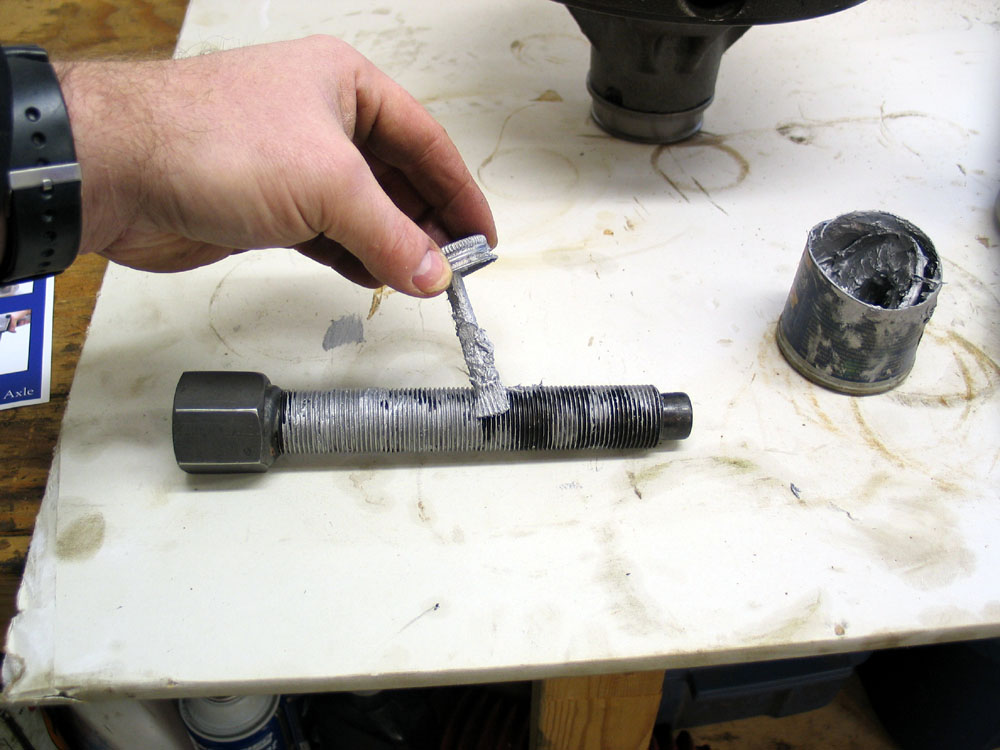 |
Coat the centre bolt generously with anti-seize. This is critical and must be performed every time you use the puller - you're going to be applying some serious force to those threads when you pull the bearing. Failure to do so will result in the centre bolt seizing in the threads of the main puller body. | |
 |
Place the main puller body over the plug... | |
 |
...like so. | |
 |
This is how it now looks. | |
 |
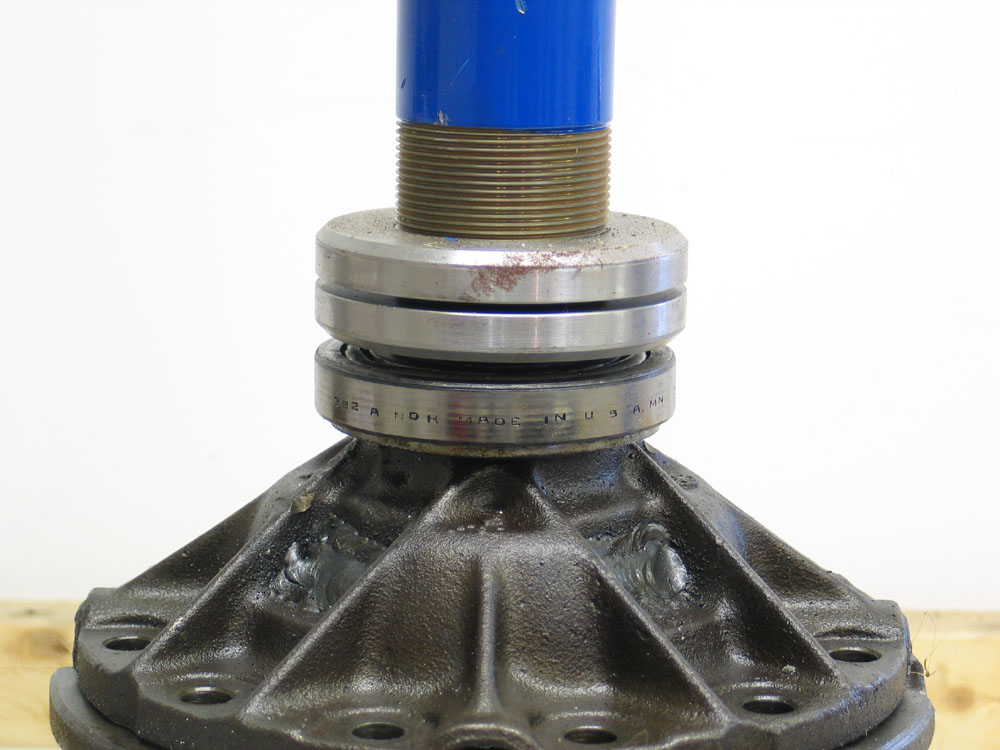
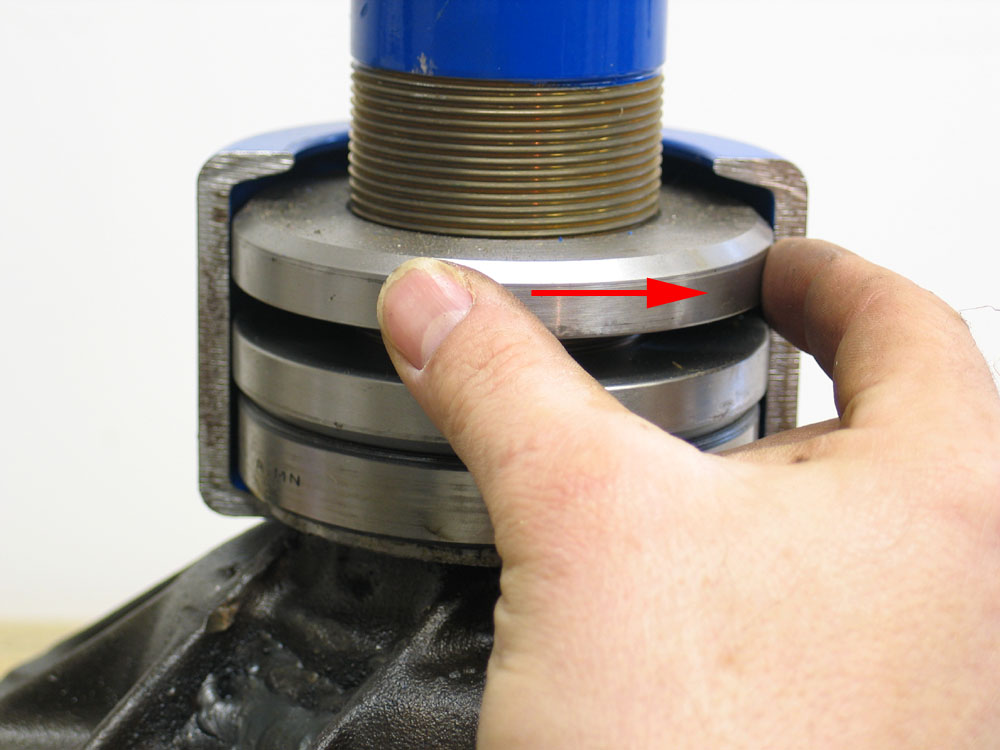
Turn the lower adjusting ring to the left until it seats snugly against the race... | |
 |
...like this. | |
 |
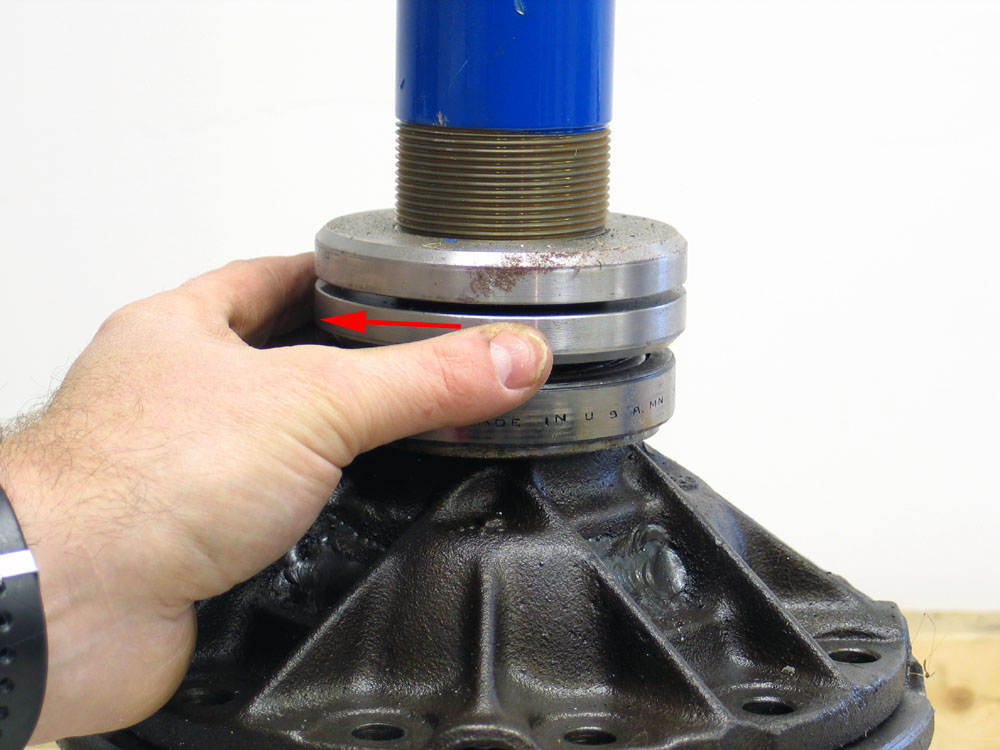
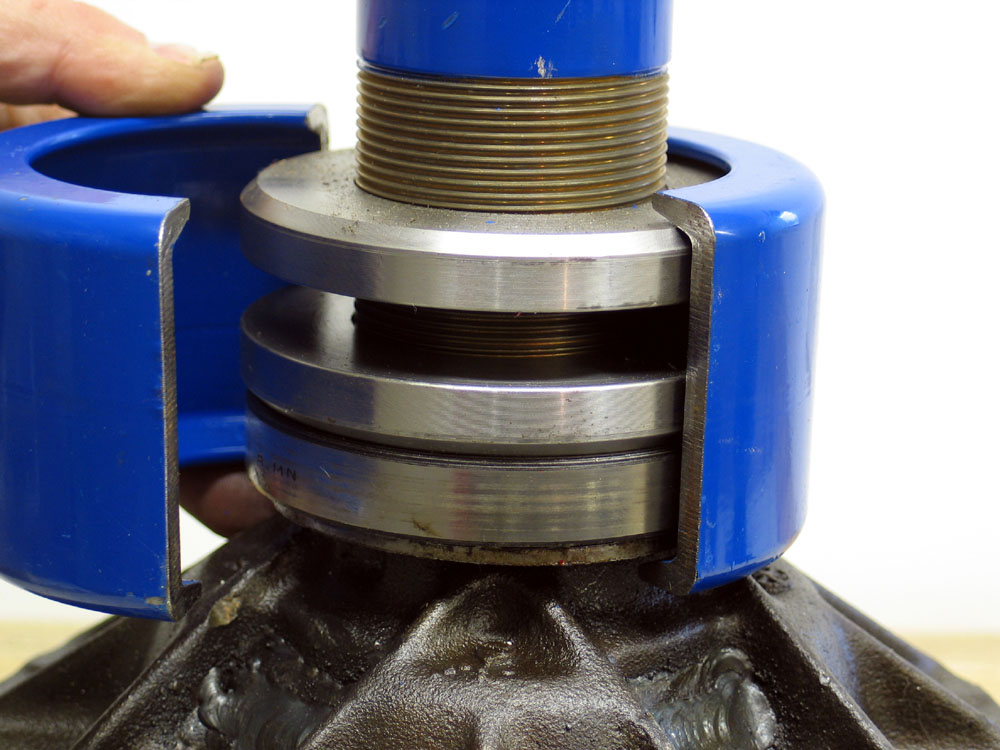
There are two sizes of clamshells that fit over the adjuster rings. The large is blue and the small is red. Select the clamshell that fits most tightly around the race without spreading apart where the two halves meet. Place the first half of the selected clamshell around the bearing and adjuster rings. |
|
 |
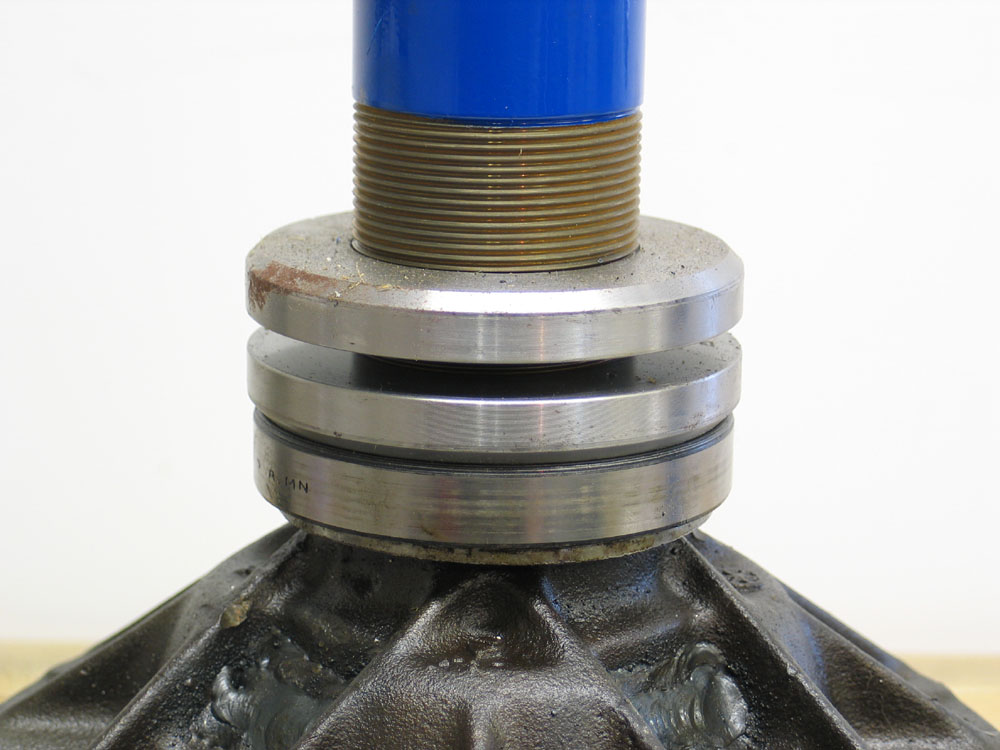
And then turn the top adjuster ring to the right until it fits tightly against the top of the clamshell. | |
 |
When the adjuster rings are properly adjusted:
|
|
 |
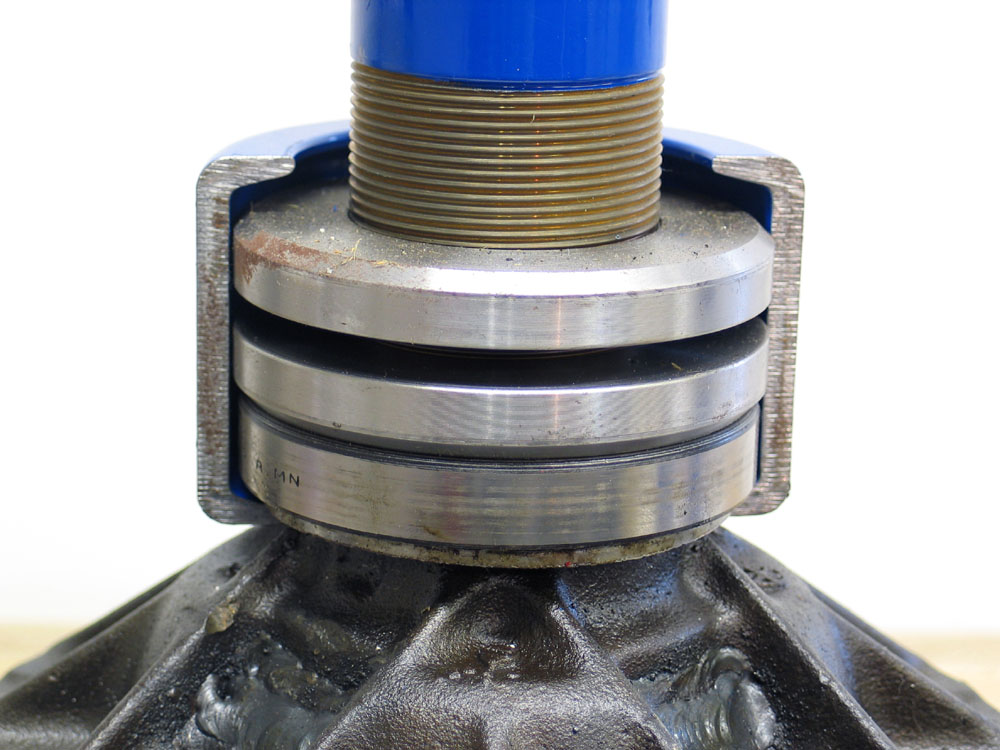
With the rings properly adjusted, install the other half of the clamshell. | |
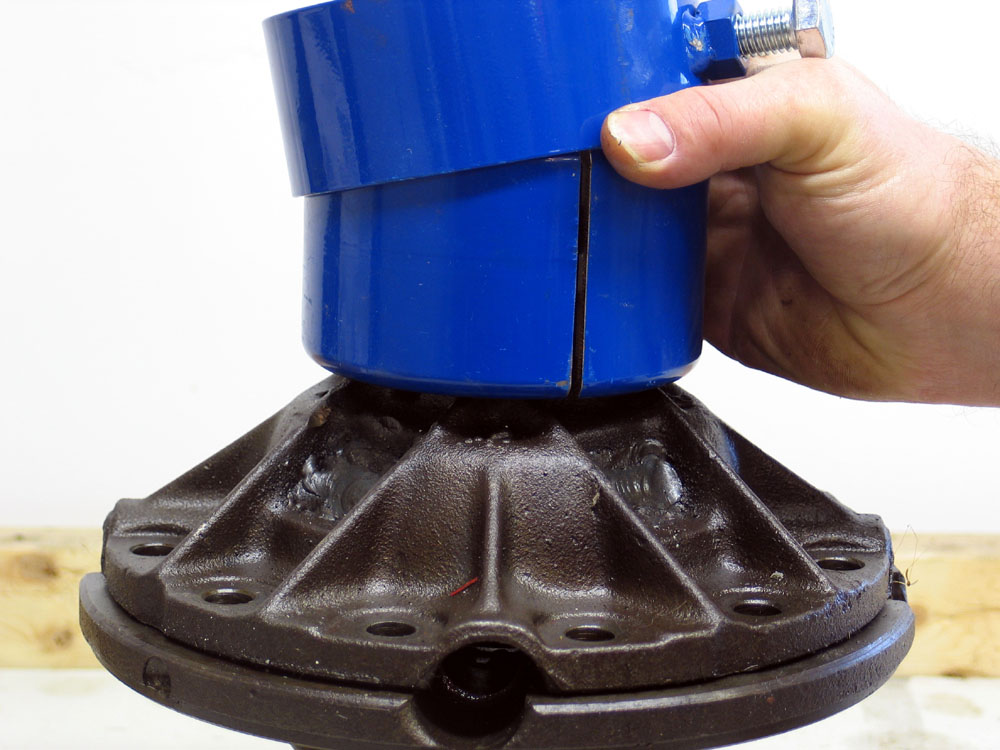 |
Then slide the retaining ring down over the top of the main puller body and over the two halves of the clamshell. | |
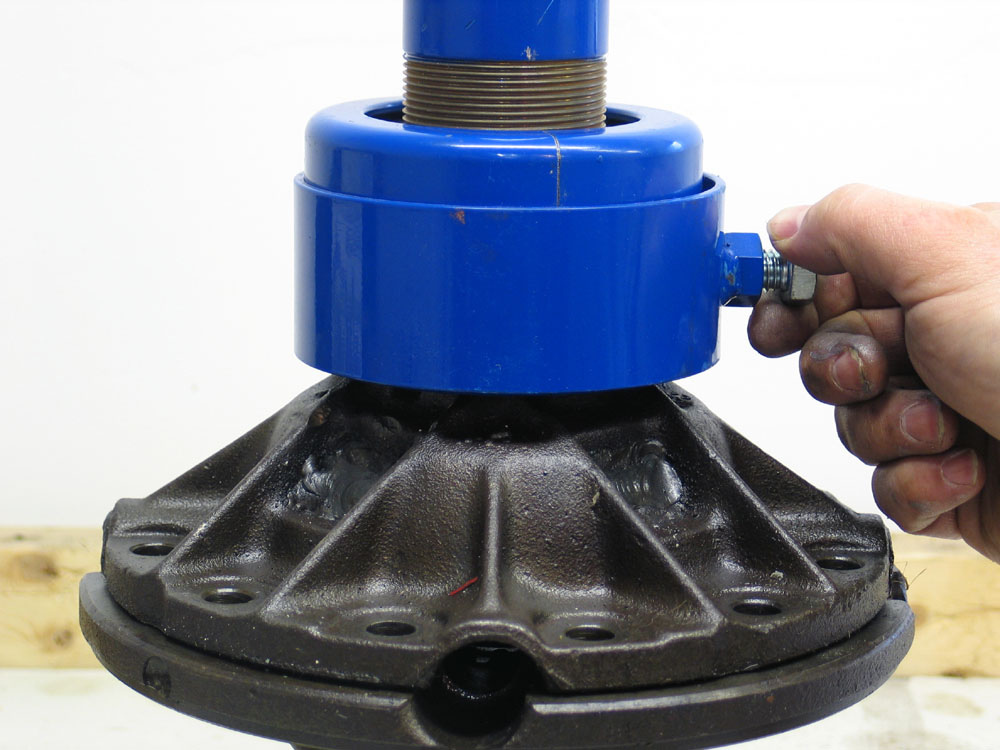 |
Hand- tighten the grub screw on the retaining ring to secure it in place. | |
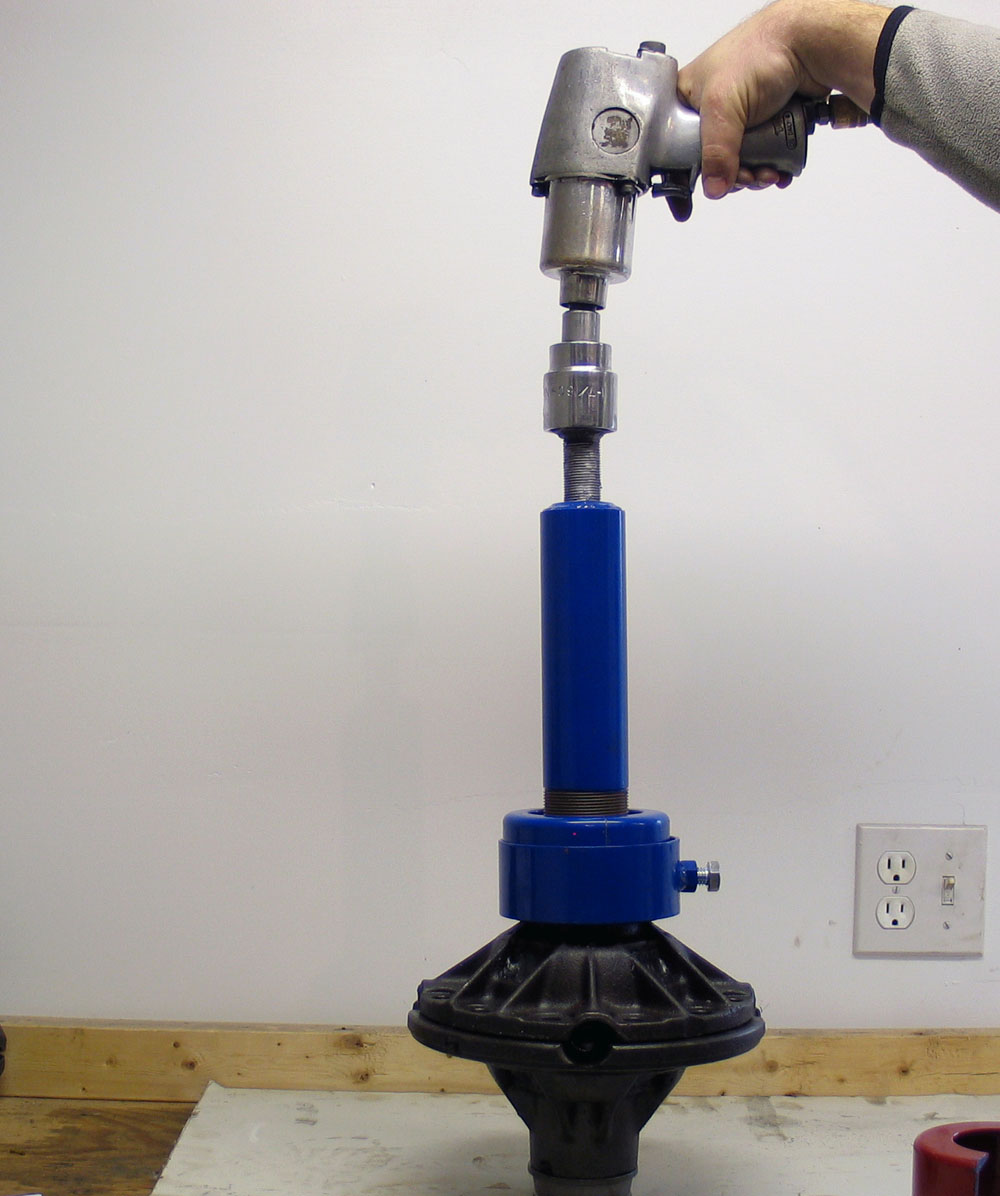 |
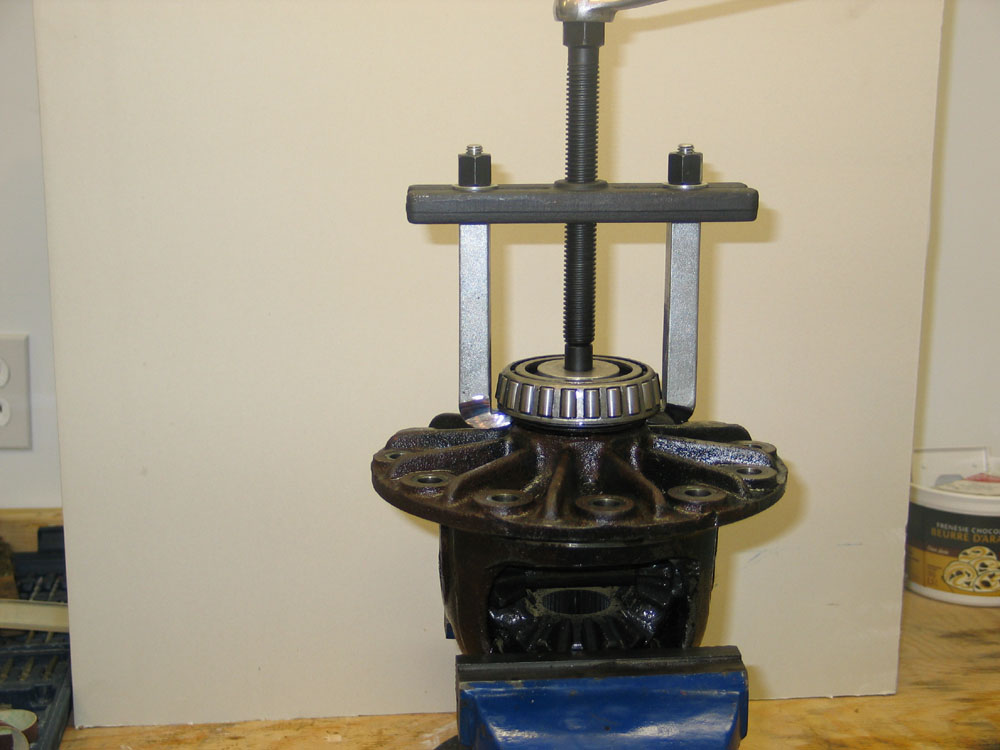
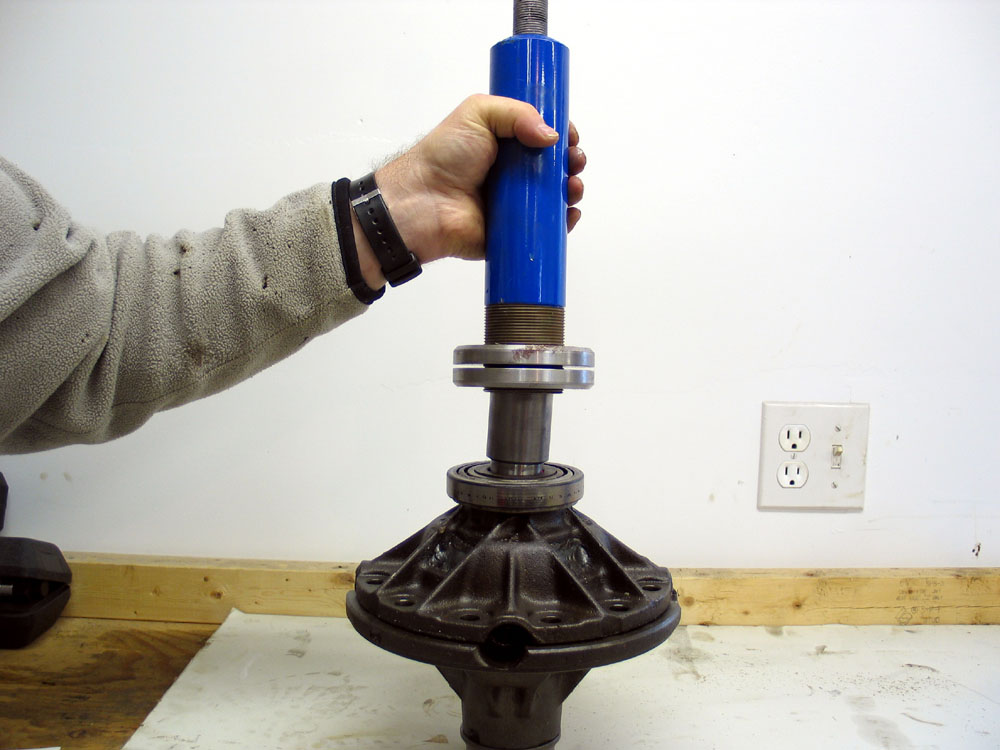
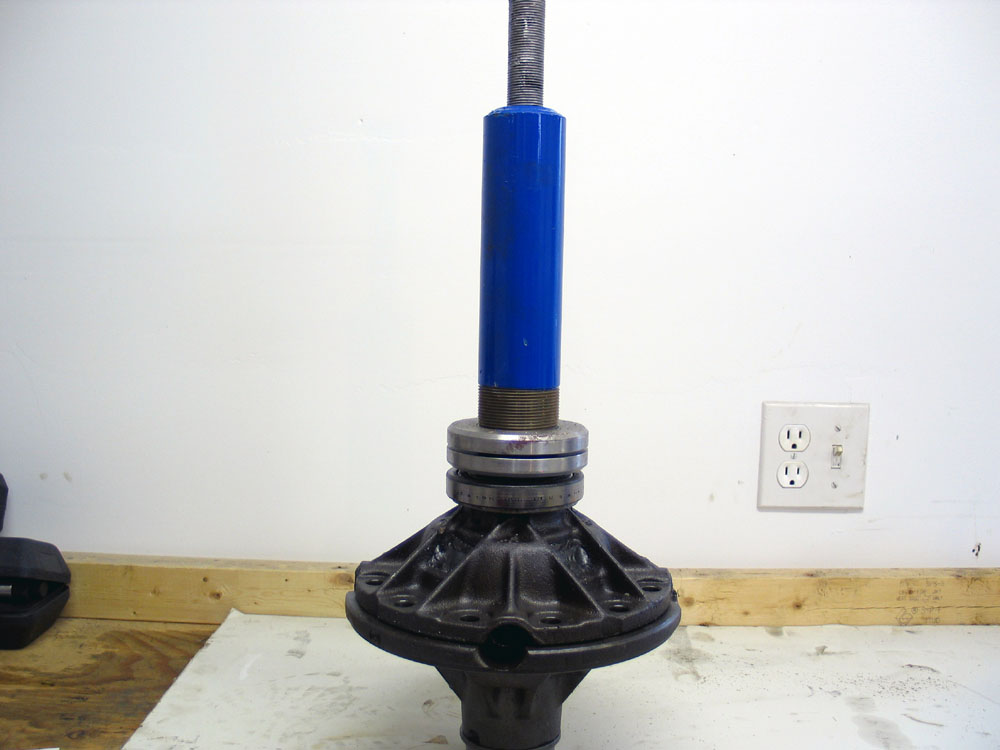
With a 1/2" impact gun, use a 1-7/16" or 36mm socket on the hex head of the centre bolt and drive the centre pin clockwise into the main puller body. The centre pin will drive against the plug, causing the main body, adjuster rings, and clamshell to lift, which will pull the bearing from its journal. |
|
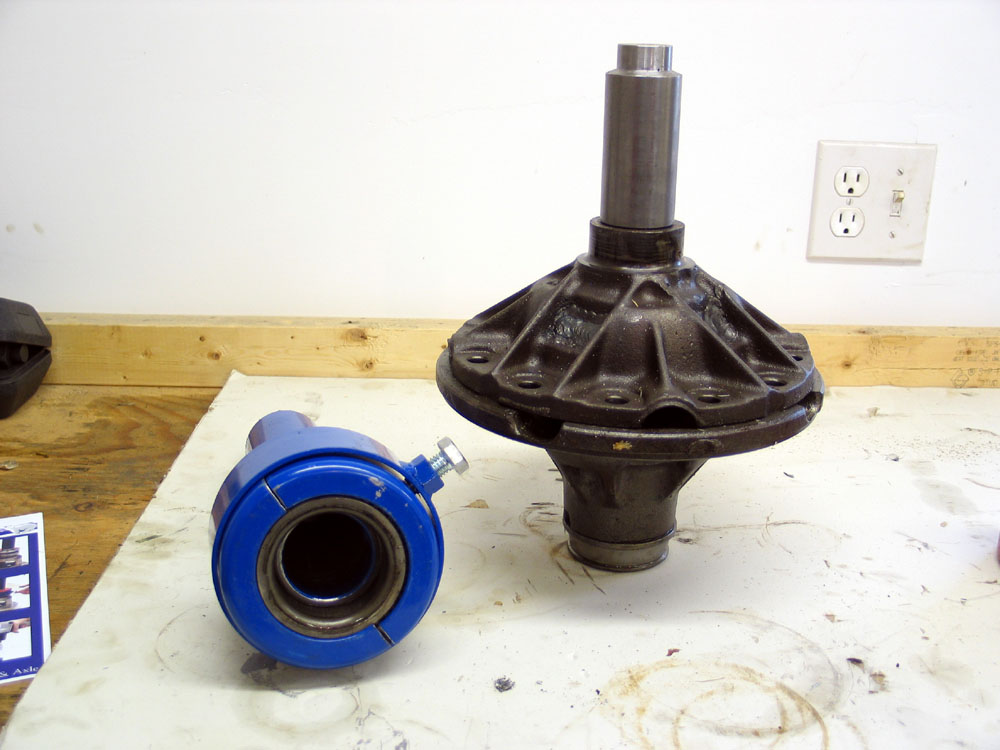 |
When the main body comes loose, simply lift it off the plug. The plug will remain in the carrier and the bearing will be neatly contained in the clamshell. | |
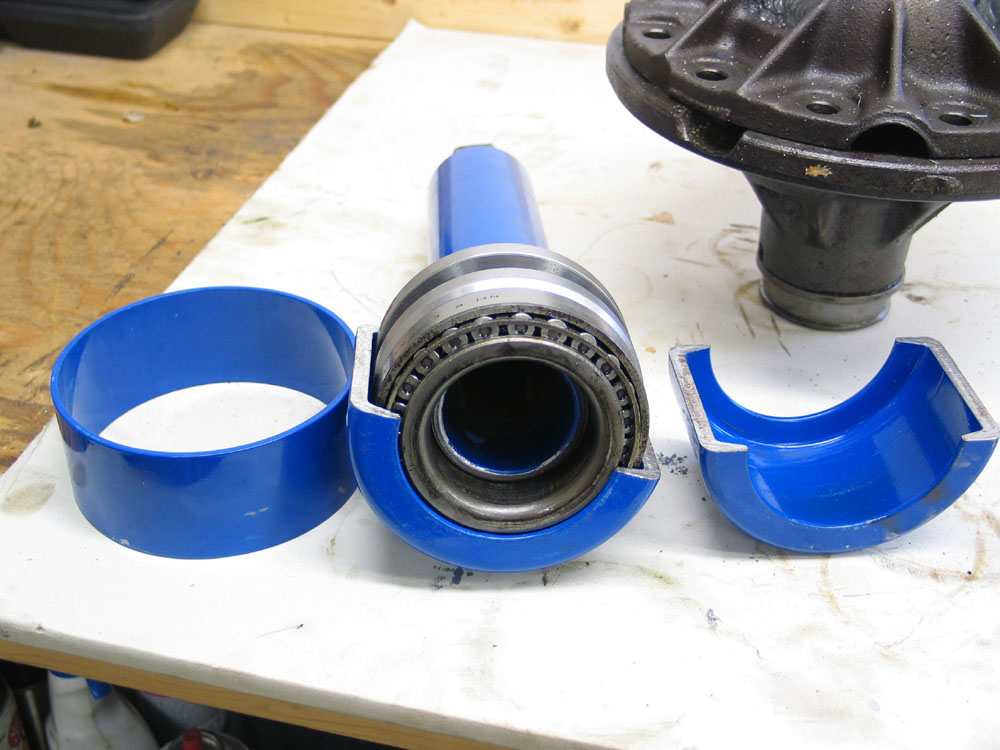 |
Simply loosen the grub screw and slide off the retaining ring to find the bearing removed and resting comfortably in the clamshell. Like buttah! |
|
|
||
|
Sources: Randy's Ring & Pinion 10411 Airport Road |
|