 |
PTP Turbo Blanket Install By Bill "BillaVista" Ansell |
IntroductionCompression generates heat. Ever pump up a bicyle tire with a hand pump and feel the end get really hot? Or place your hand on a compressor tank when the compressor has just finished cycling on? They get hot! Turbos work the same way - and they generate a lot of heat! The purpose of a turbo blanket it to confine that heat to the turbo and thus insulate the surrounding area under the hood from this heat. Heat under the hood causes a number of detrimental effects from speeding the breakdown of rubber, plastic, and even painted metal surfaces to increasing air intake temperatures. |
 |
| In an attempt to mitigate these negative effects of heat, we can install a thermal turbo blanket to insulate the turbo and keep the heat away from surrounding components and slow heat soak of incoming air (because cooler air is more dense and therefore produces more power). Here's how: | |
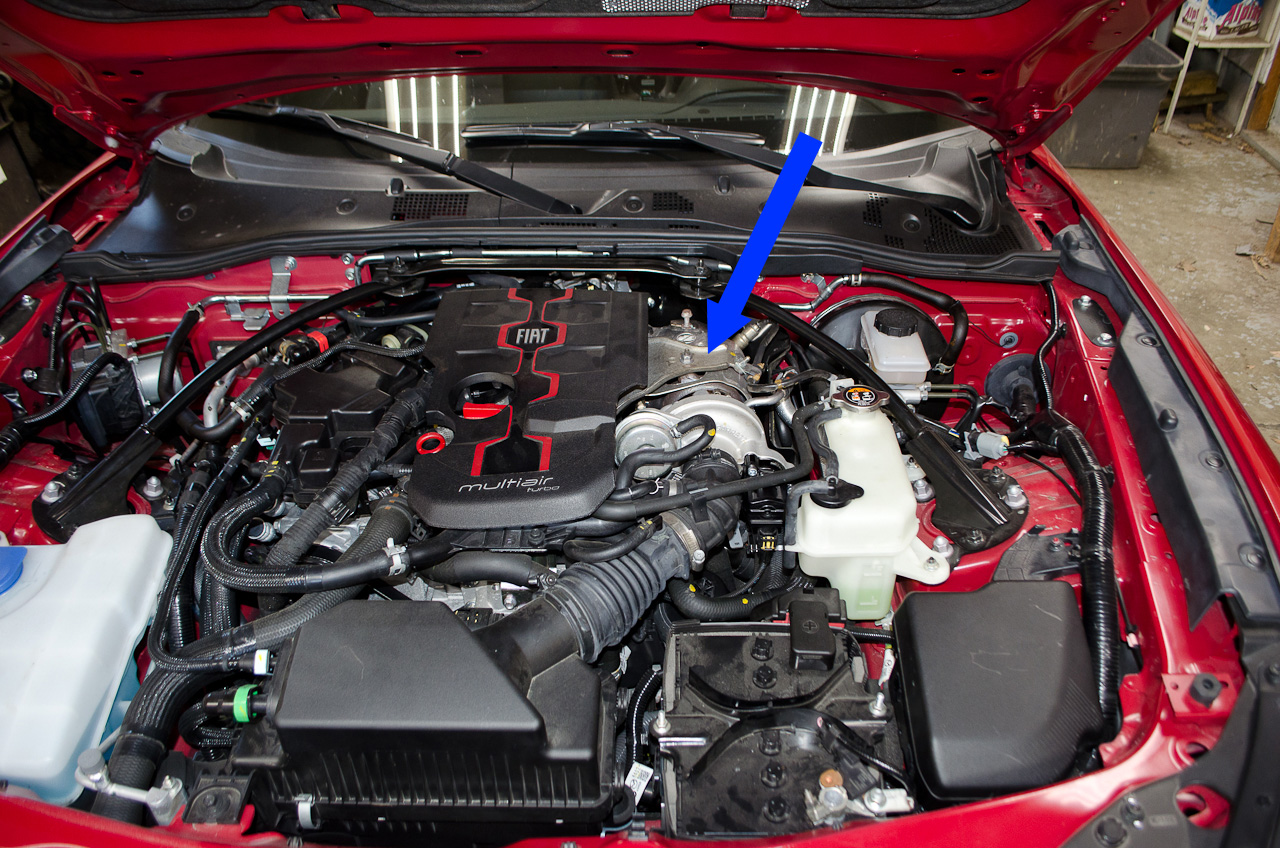 |
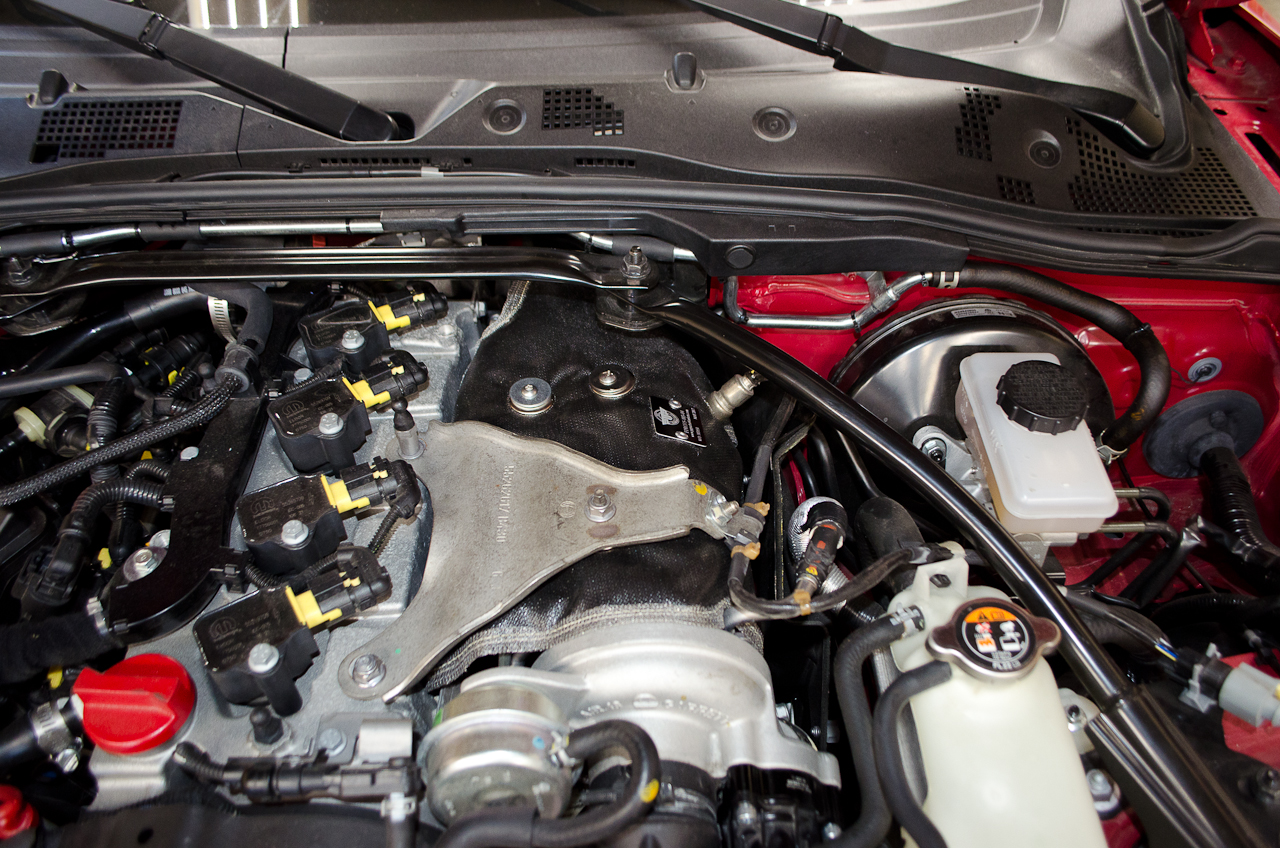
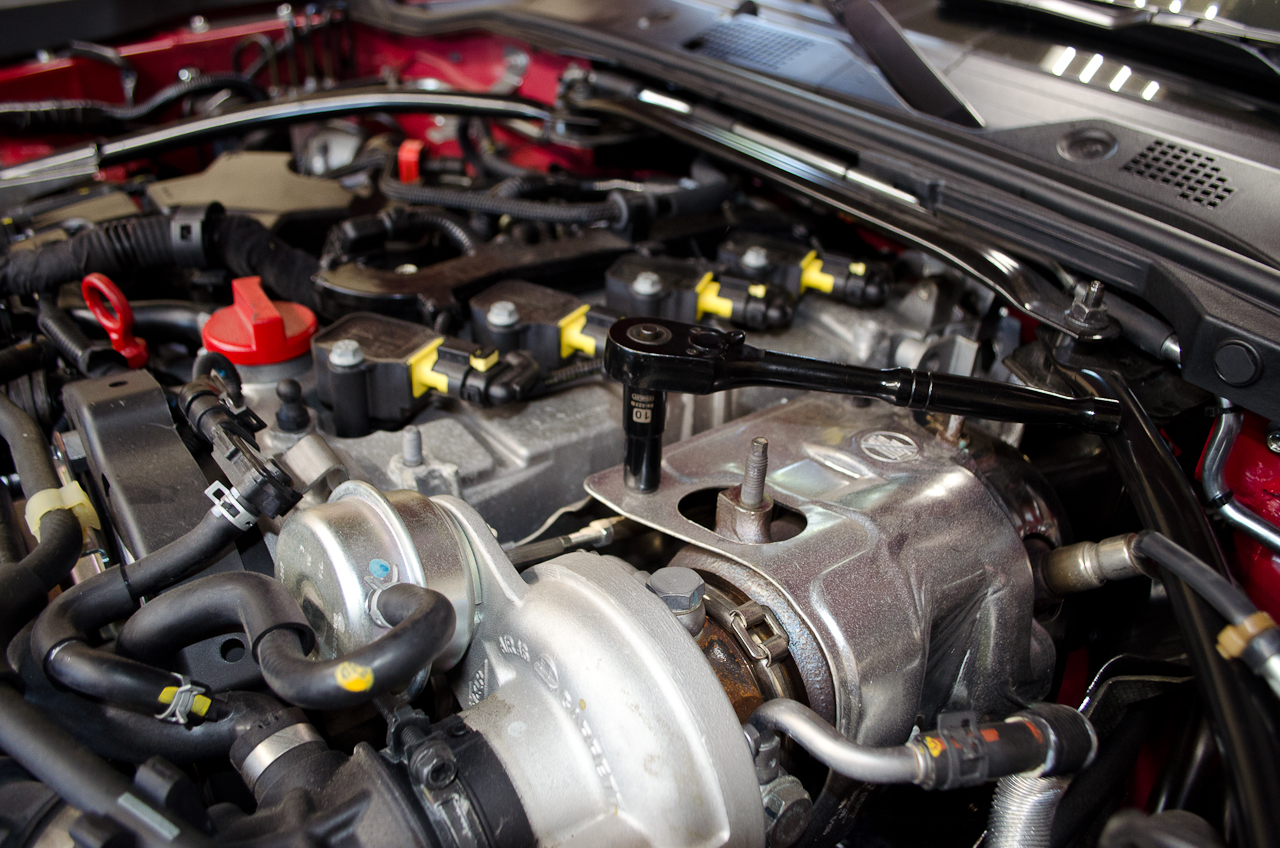
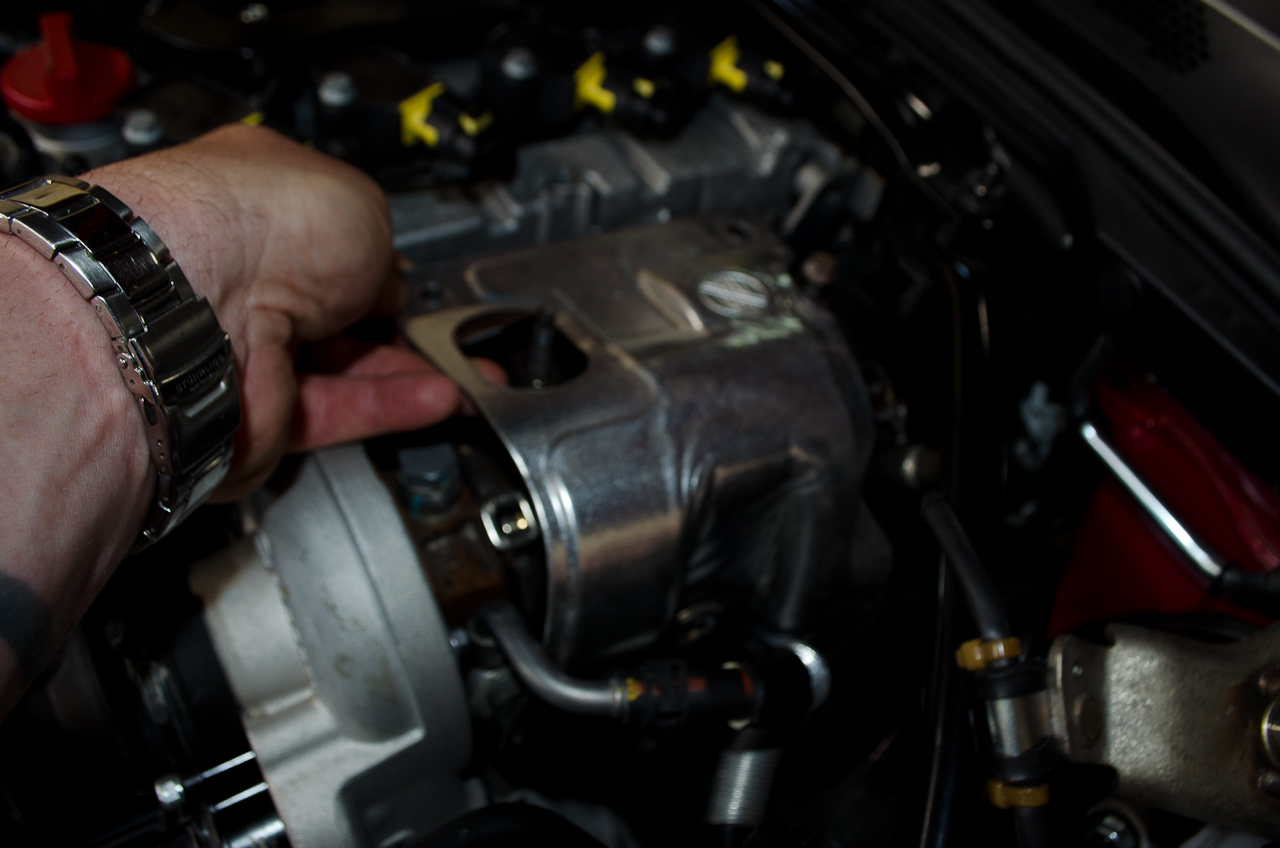
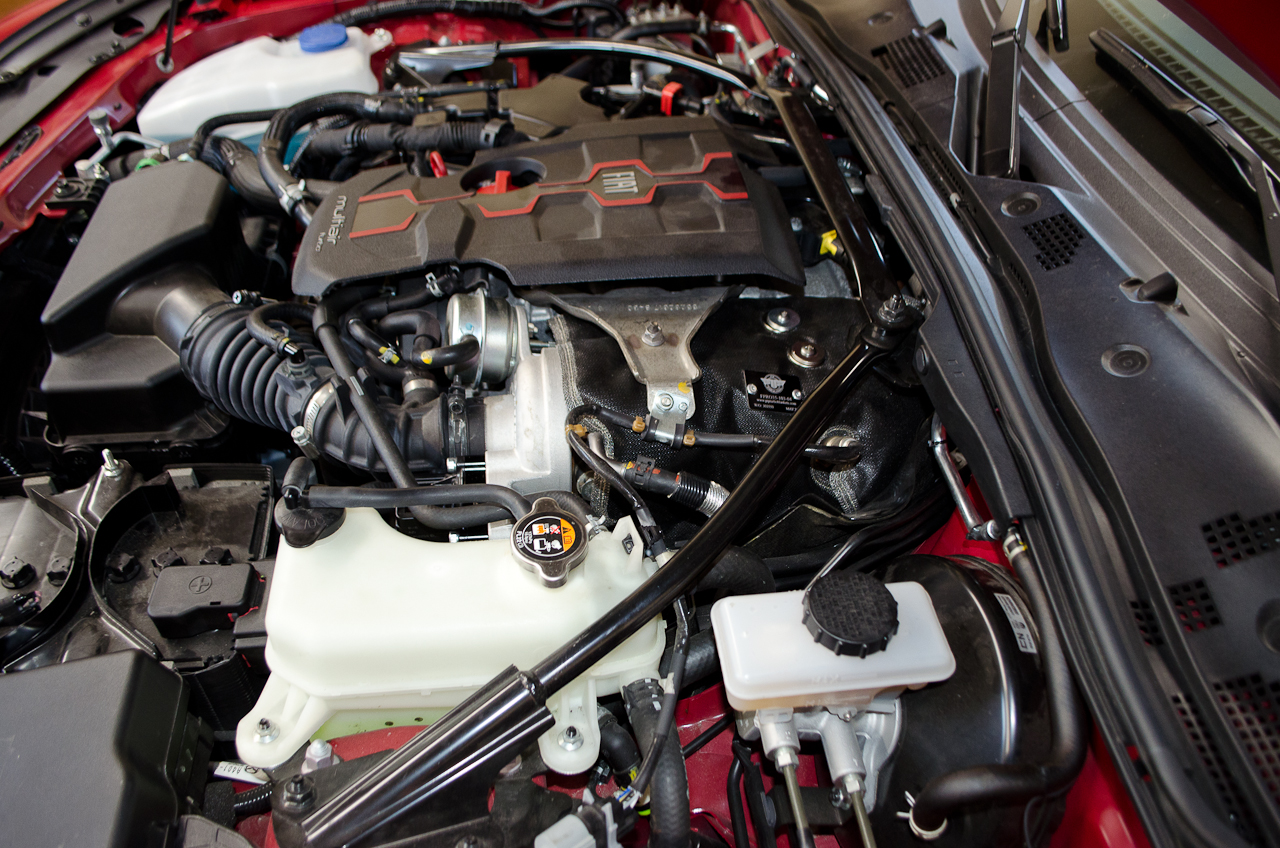
Begin by opening the hood and locating the turbo. Here it is! |
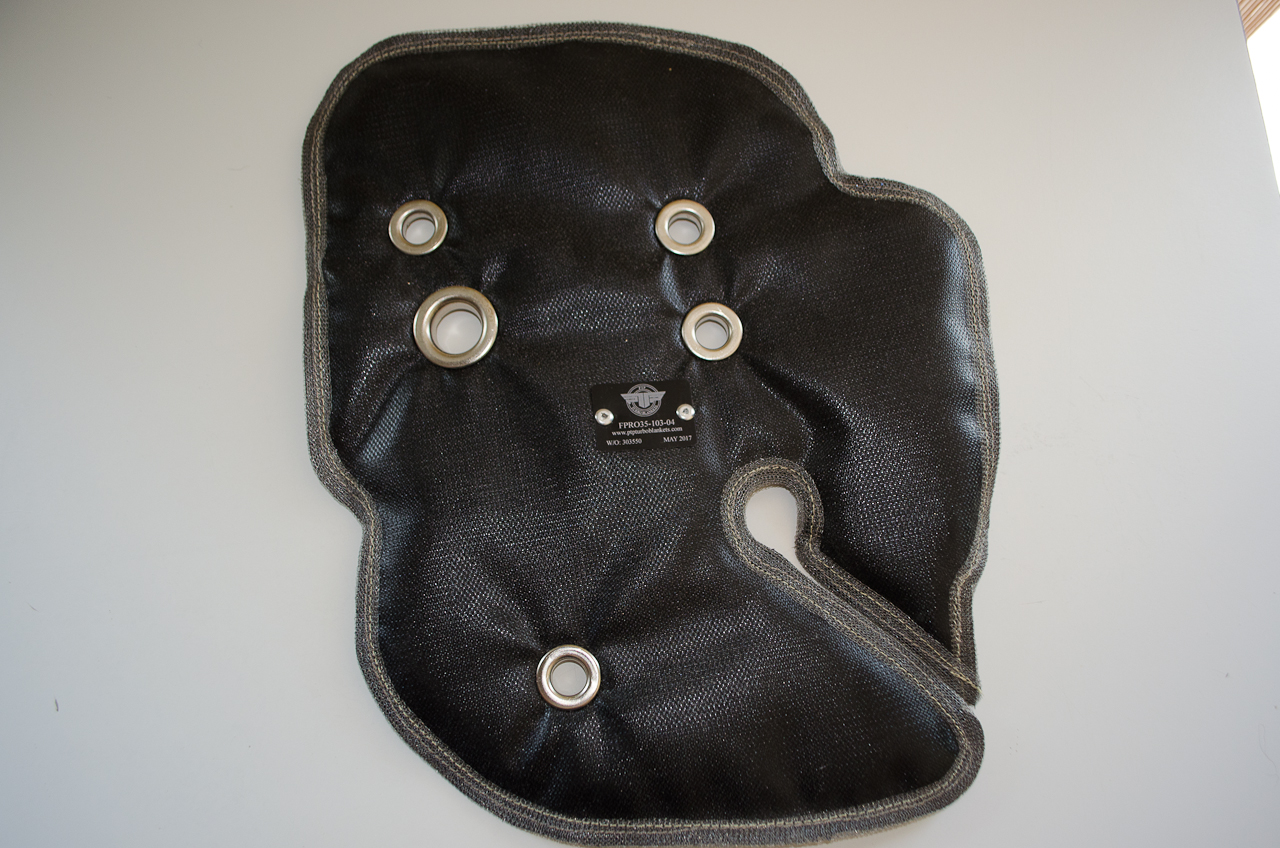 |
This is the PTP Turbo Blanket for the FIAT 124 Spider. |
 |
It comes with some new hardware and a brochure in a plastic bag. |
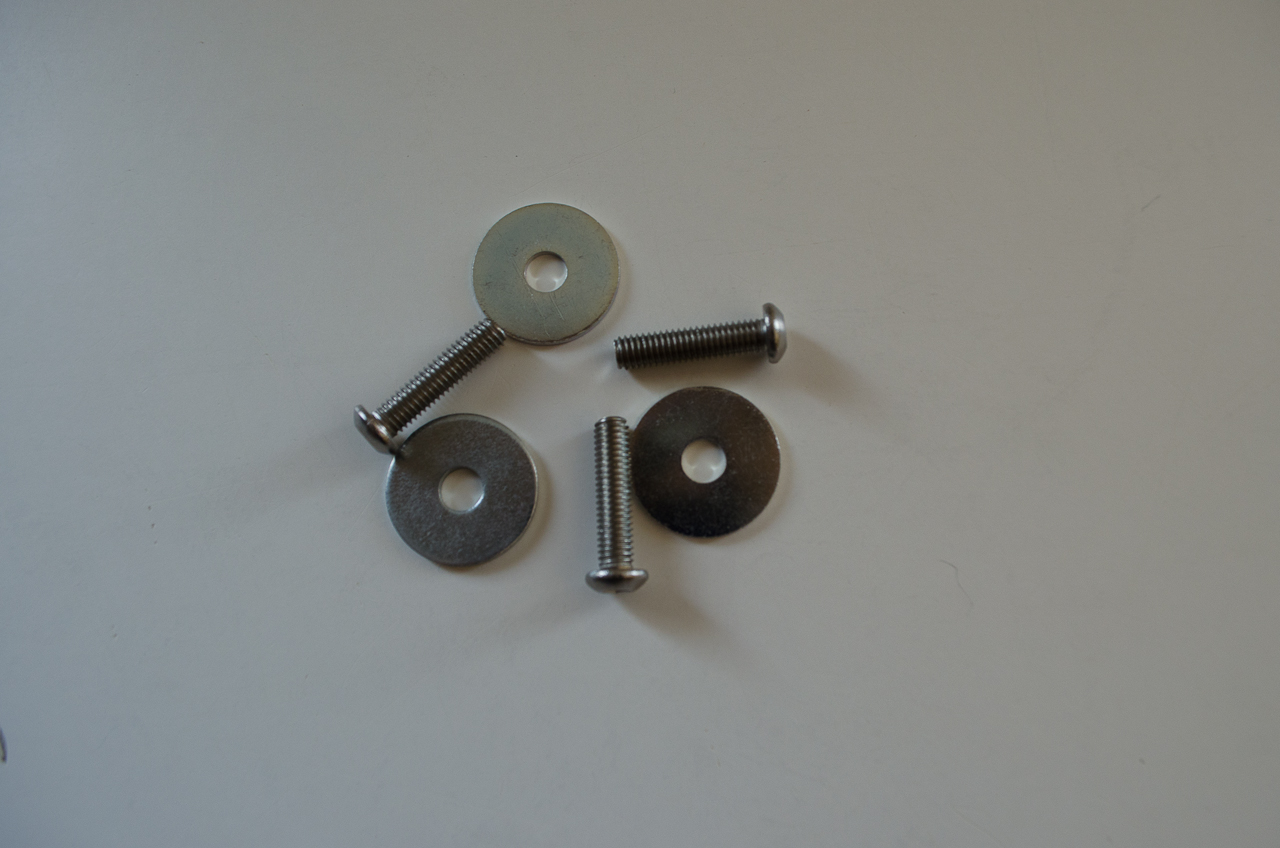 |
The hardware consists of 3 longer screws and 3 large fender washers that will replace stock hardware you remove. It really should come with 4 of each...more on this later... |
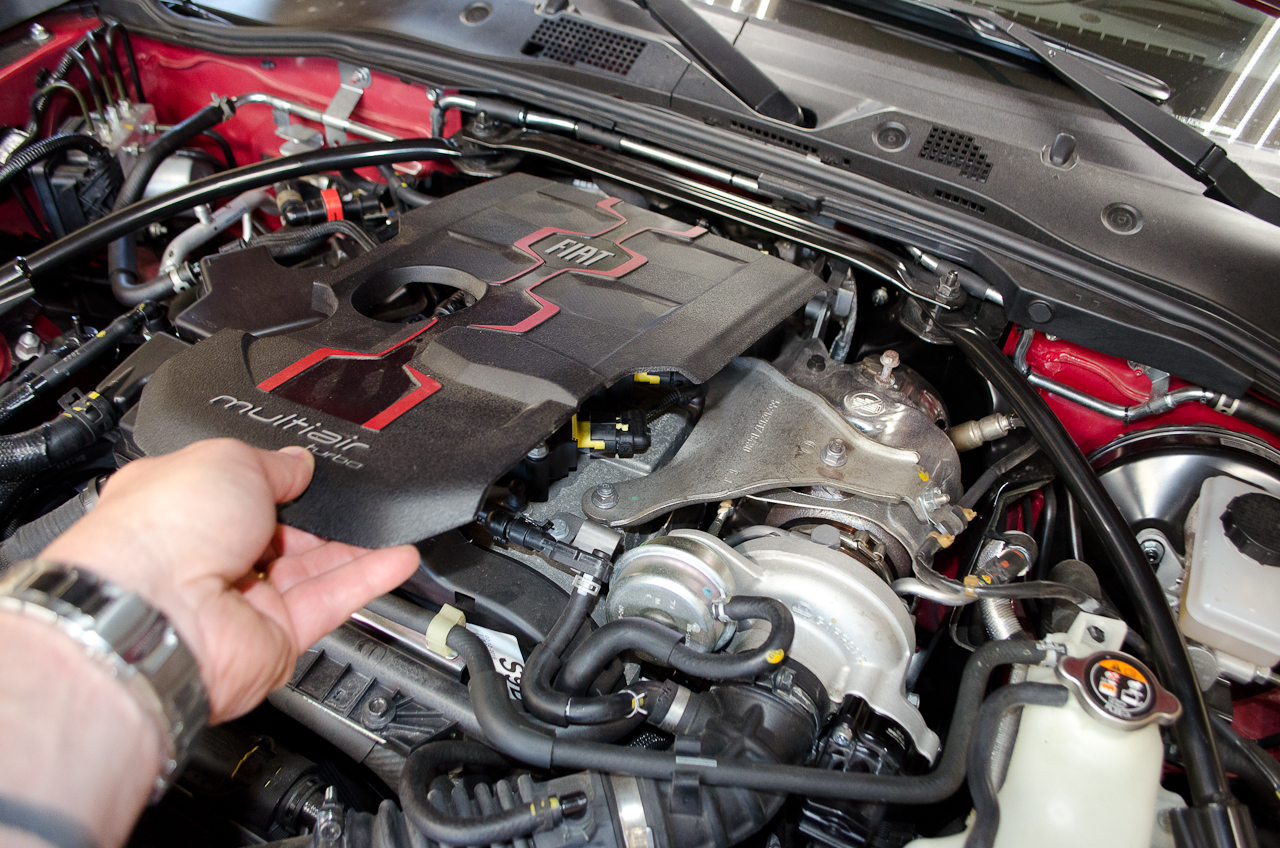 |
Begin by removing the engine cover by simply pulling sharply up to disengage the gromets from the mounting posts. |
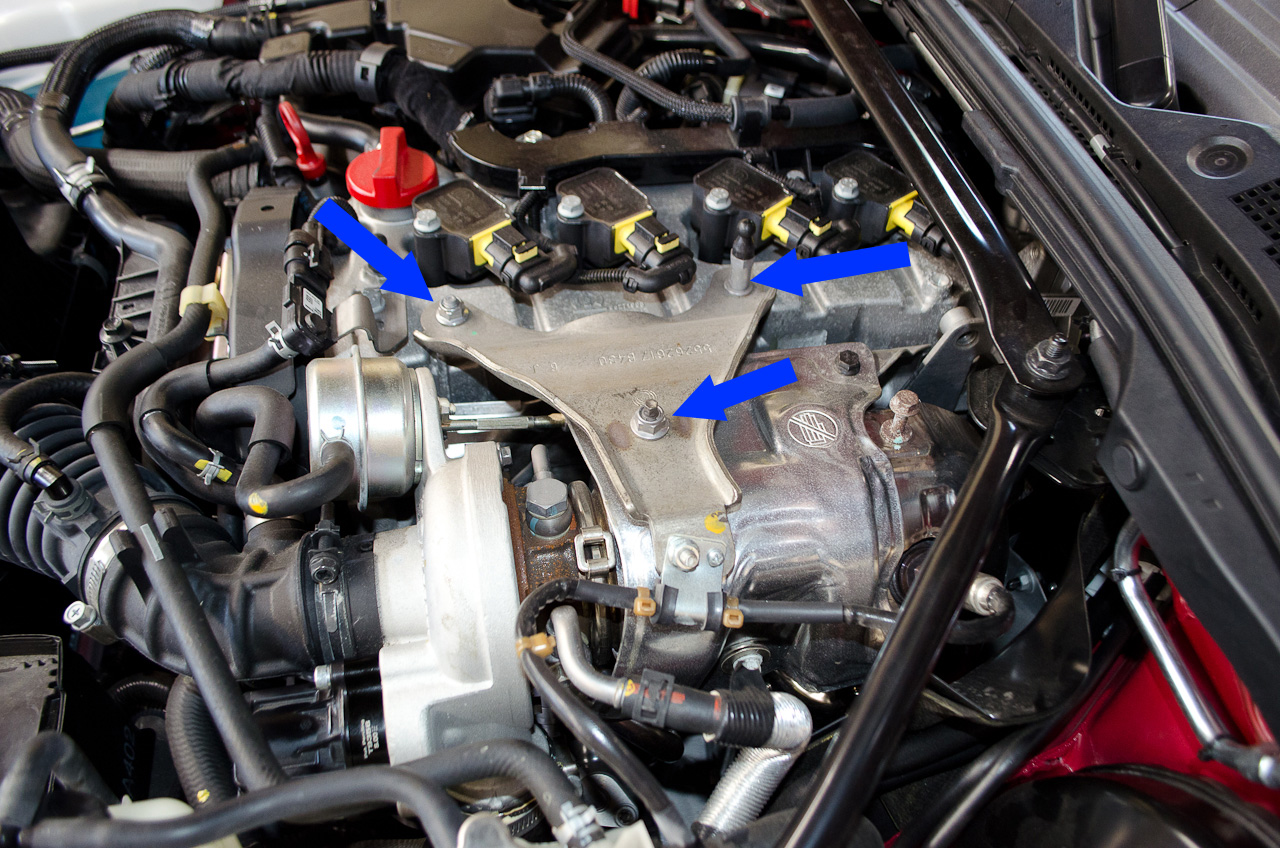 |
Next, remove the two nuts and the engine cover retaining pin, that hold the turbo bracket in place. |
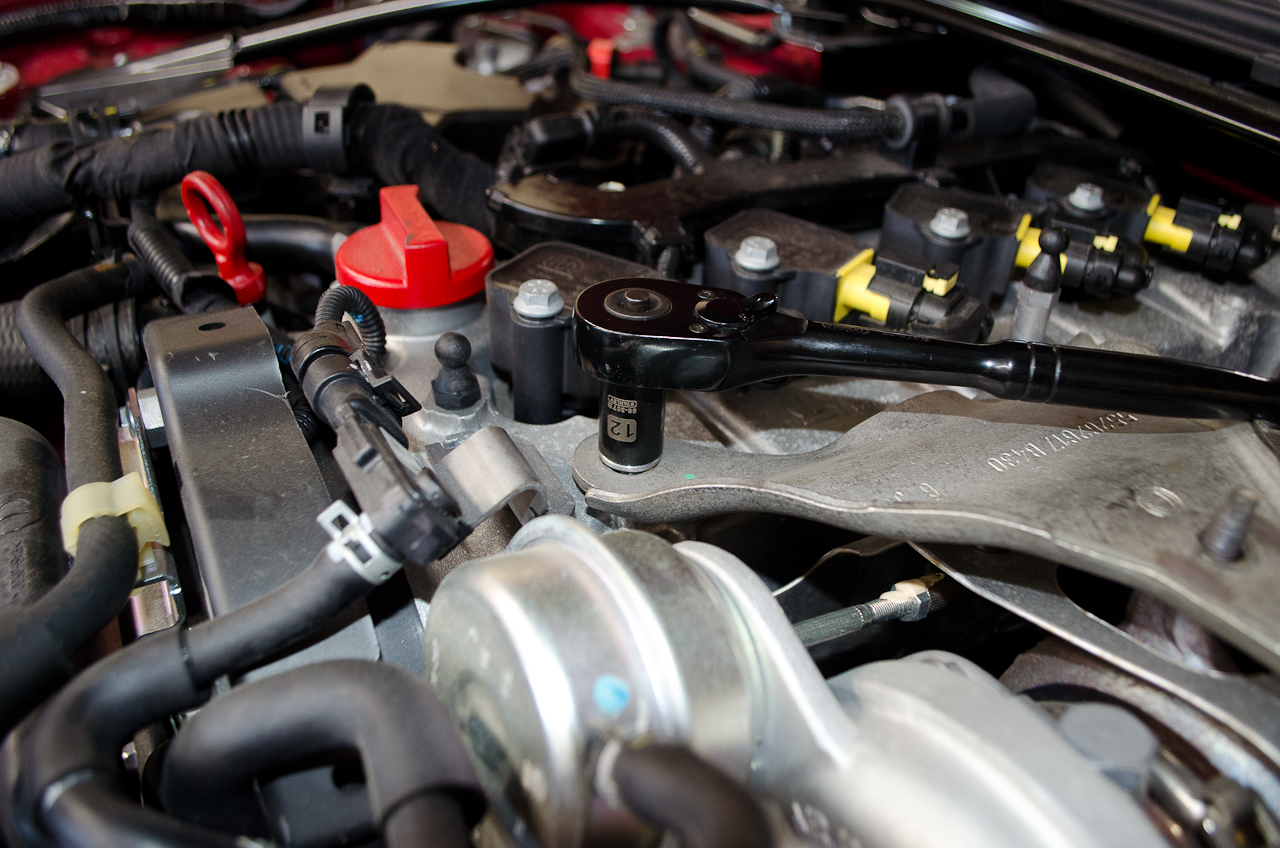 |
The nuts are 12mm... |
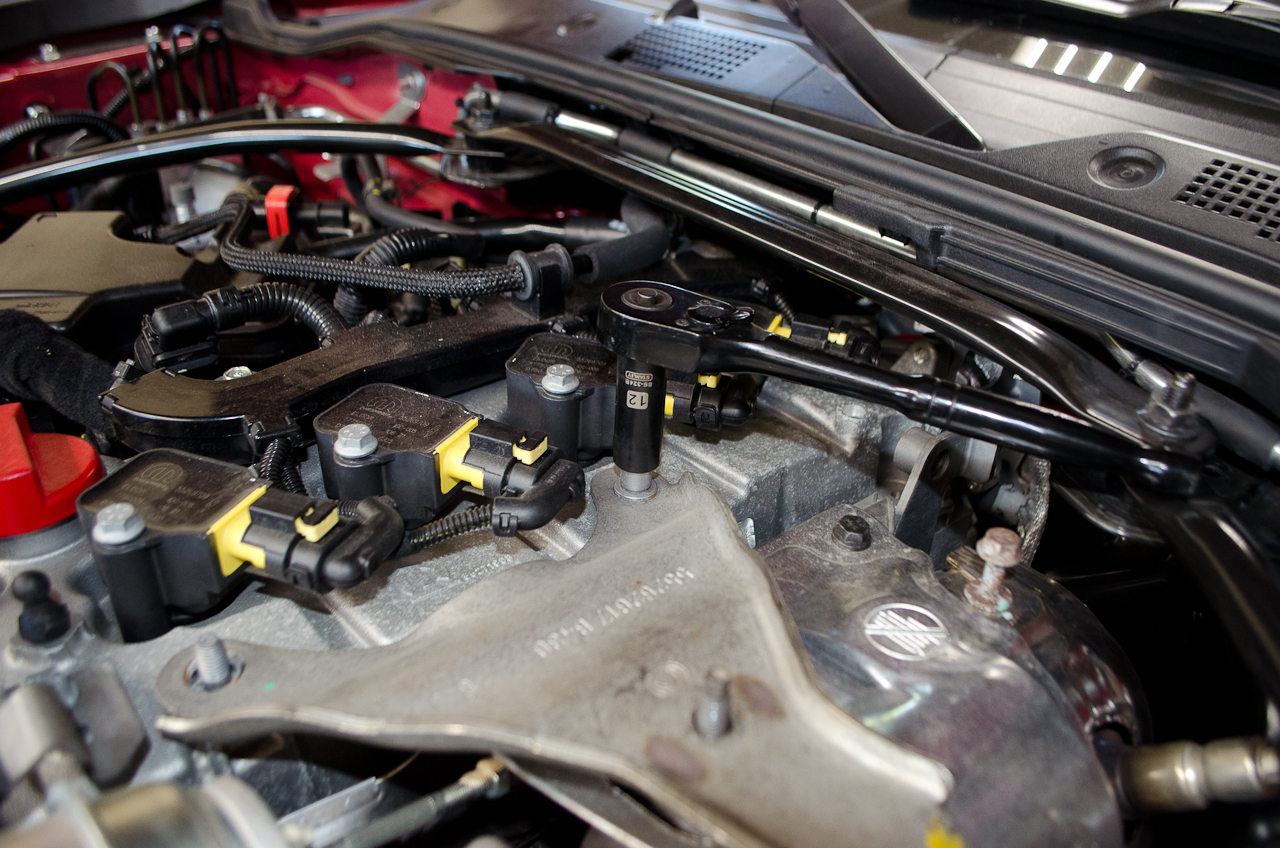 |
...as is the engine cover retaining pin, but you need a deep socket for the pin (or you could use a wrench). |
 |
Engine cover retaining pin removed. Retain the two bolts and the retaining pin for re-installation. |
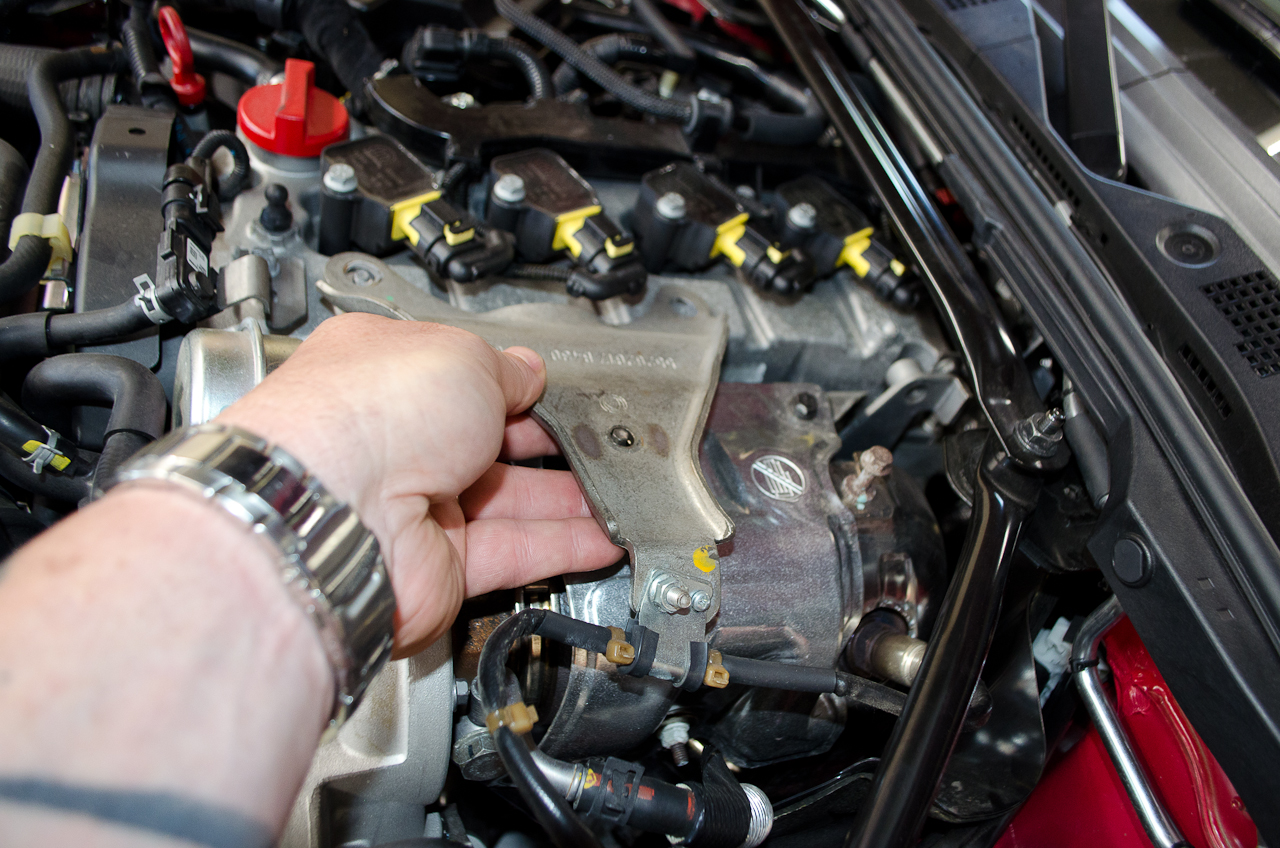 |
Grasp the bracket, lift it off the studs... |
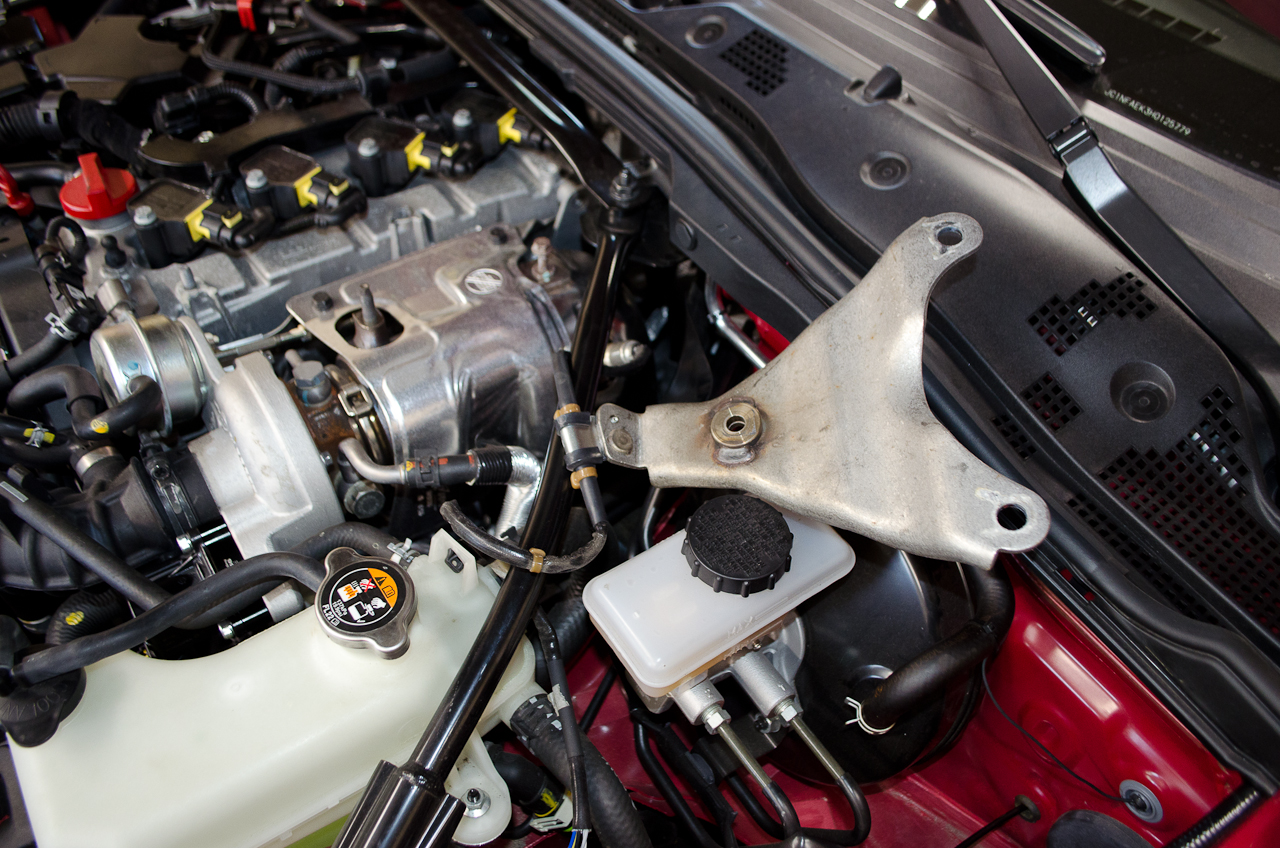 |
...and lay it gently out of the way. There is no need to remove the upper O2 sensor wiring clip. |
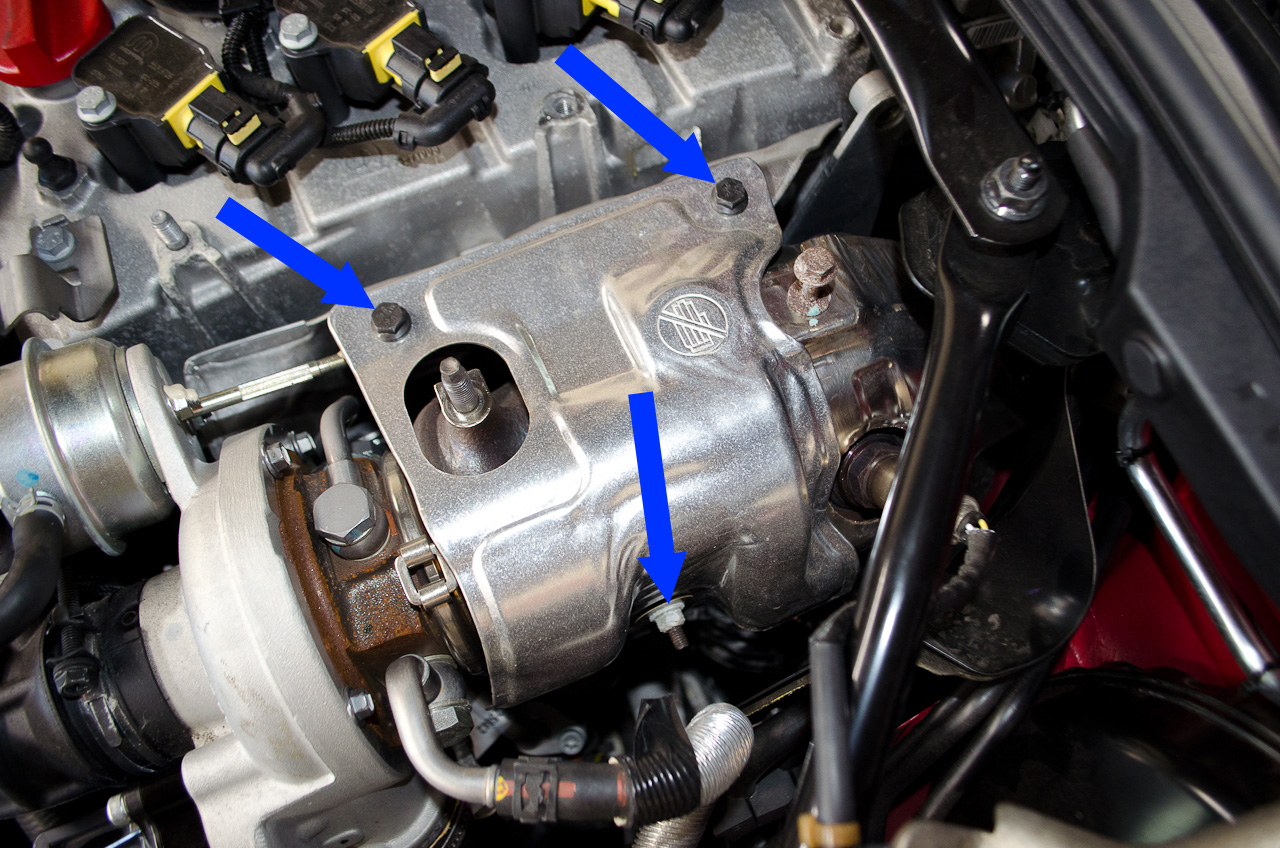 |
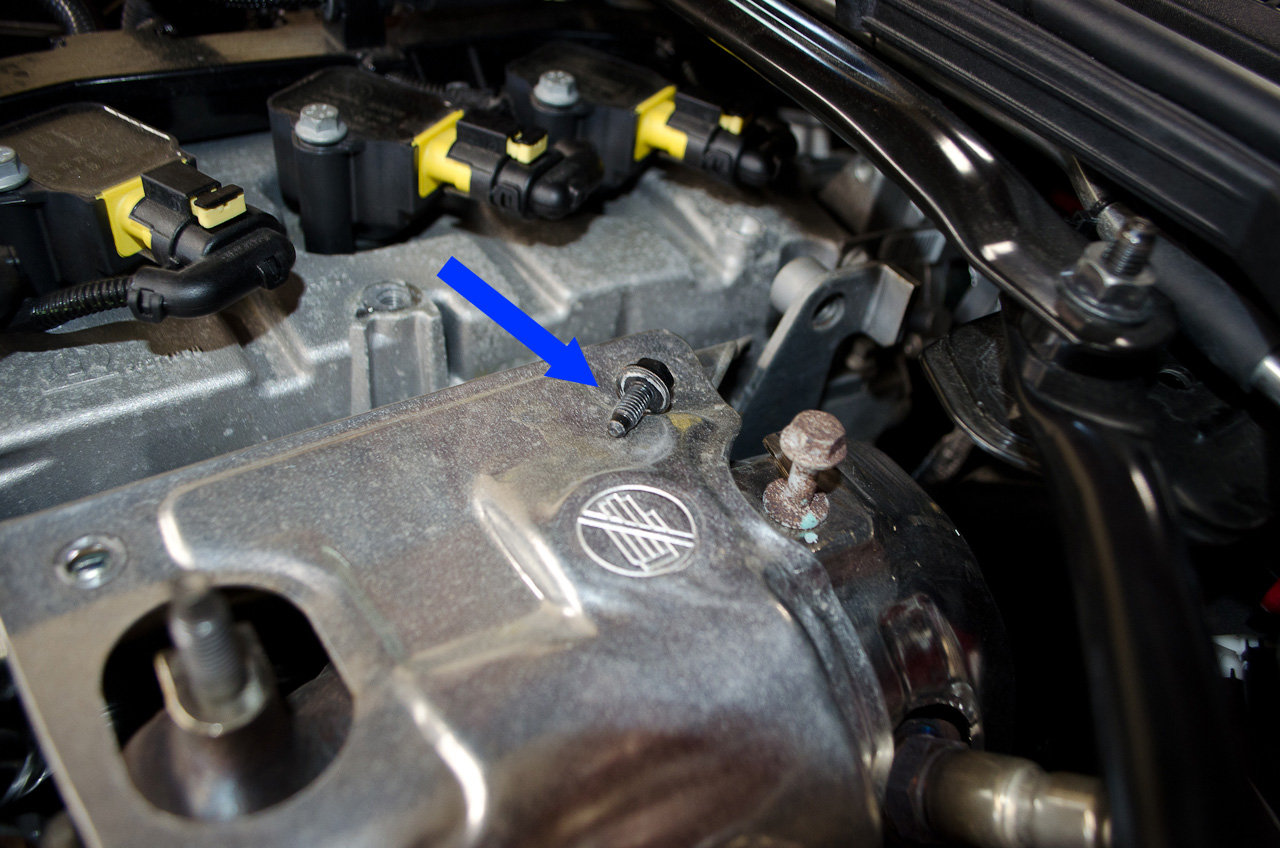
Next we remove the two bolts and the the stud/nut that hold the factory heat shield in place. |
 |
The bolts are 10mm. |
 |
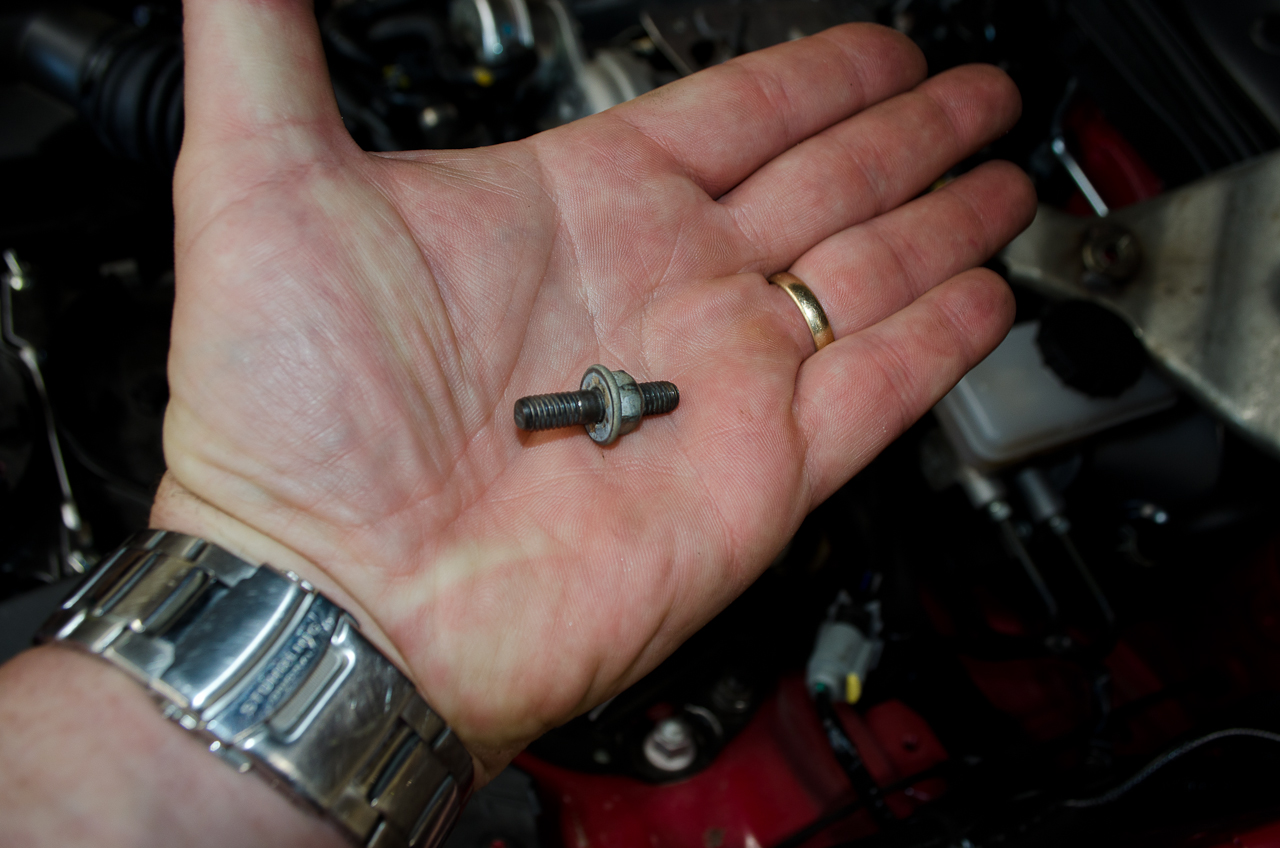
Removed bolt. |
 |
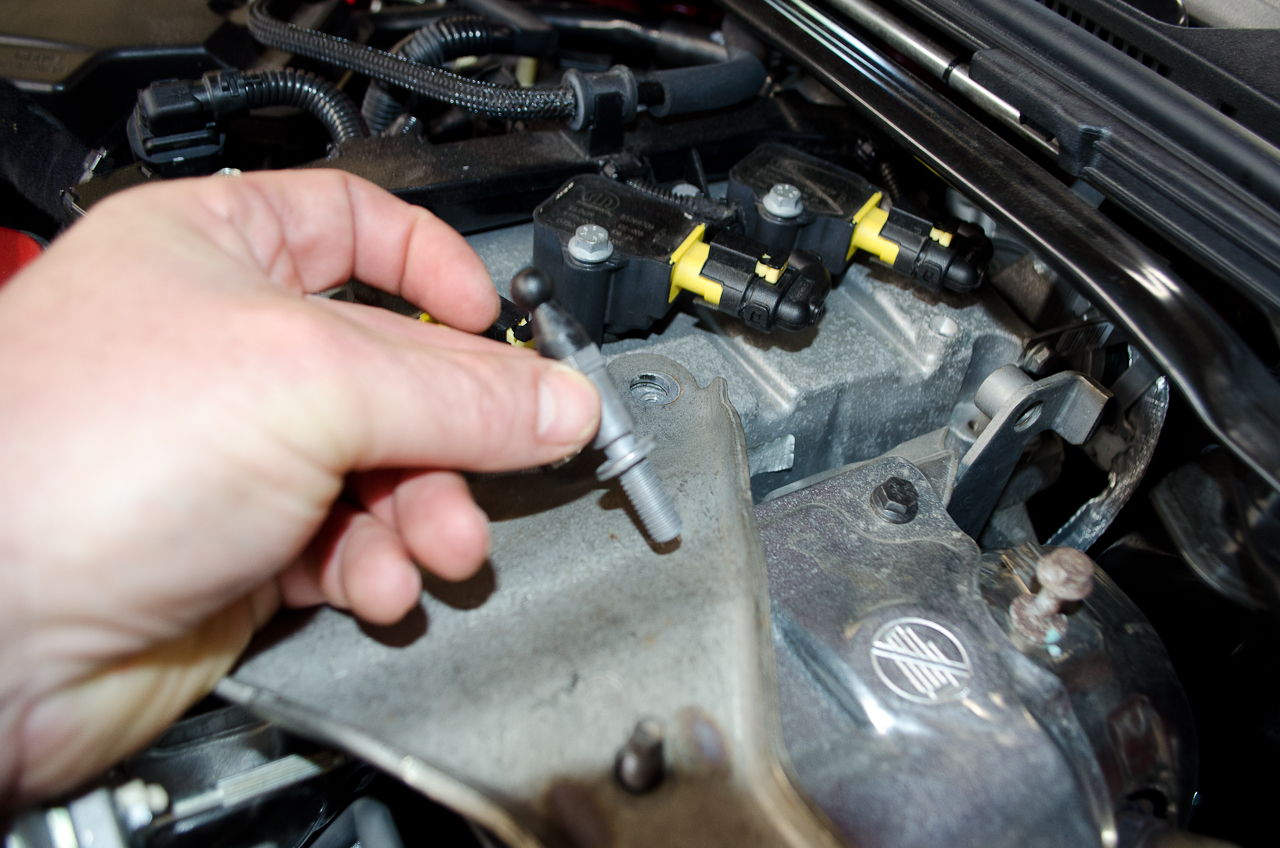
I initially loosened the nut on the stud with a wrench, and then backed it all the way out with a ratcheting wrench. Or I should say, I attempted too... |
 |
...in my case (and I suspect in most cases) the nut and stud came out together...which is actually helpful as it is easier to replace them with one of the provided longer bolts than to try and wrestle the turbo blanket on over the stud. If the stud doesn't come out with the nut for you, you will have to decide whether to remove it or to try and get the blanket to install over the original stud and re-install the nut. |
 |
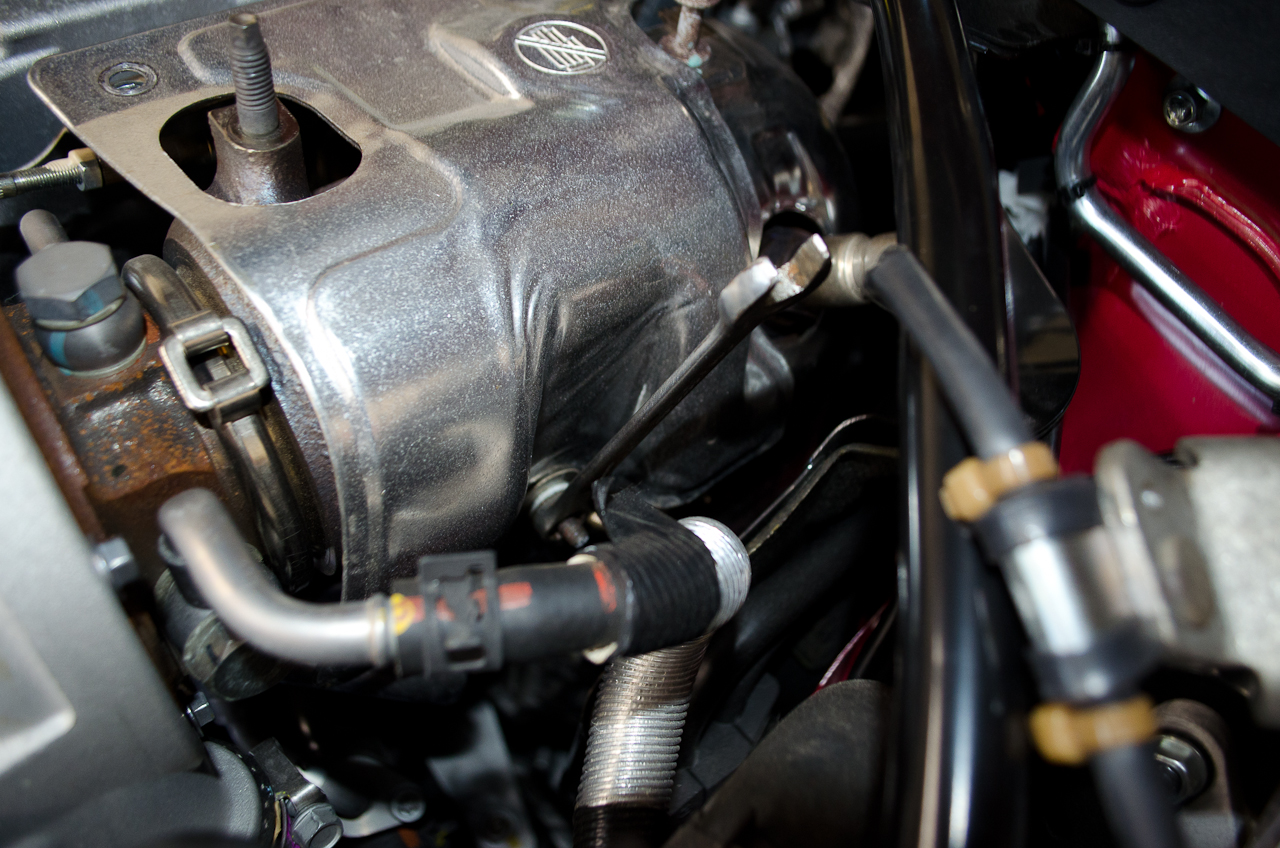
With the hardware removed, grasp the heat shield... |
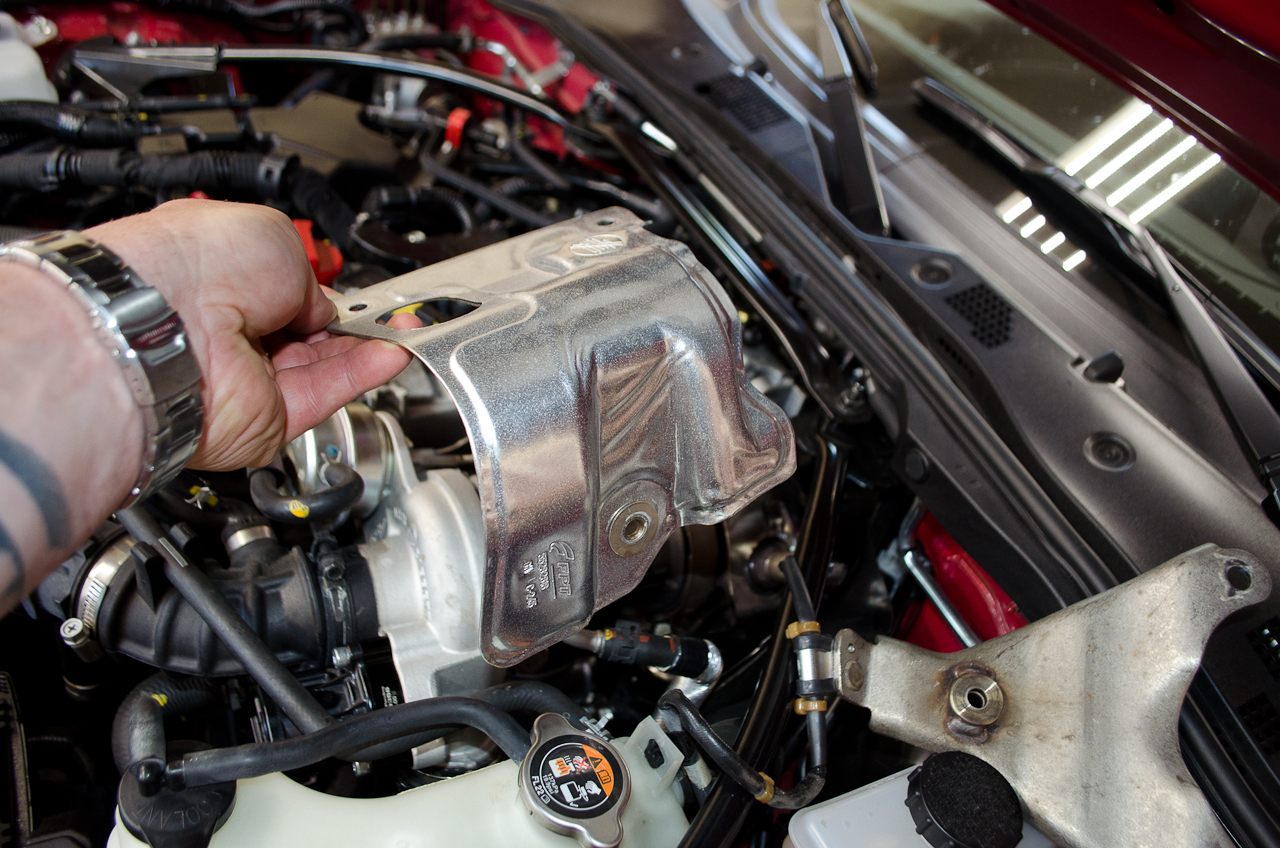 |
...and remove it. Set it aside, throw it in the recycling, whatever you like...we won't be reusing it. |
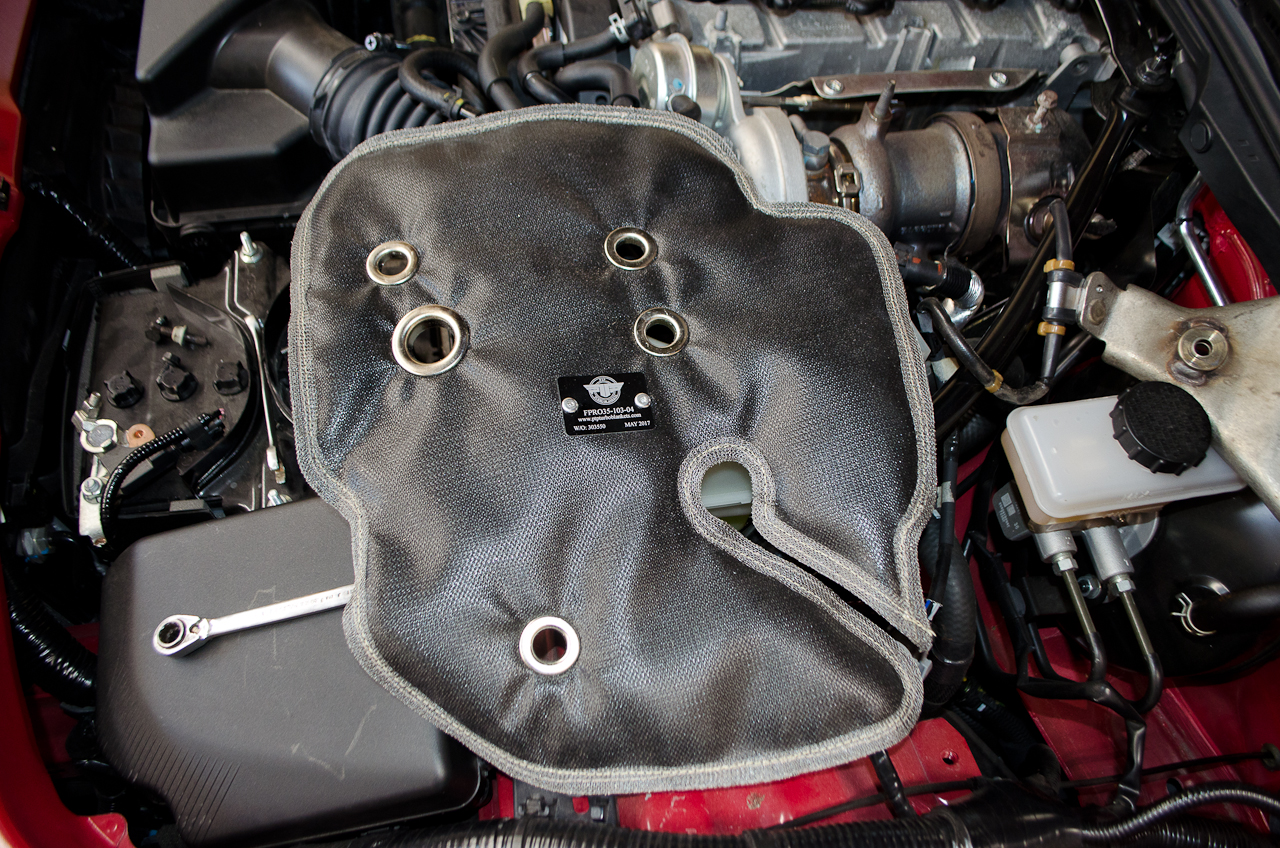 |
This shows the general orientation of the turbo blanket. Note that the slot goes aeound the O2 sensor (it's a slot vice a hole so you don't have to remove the O2 sensor). |
 |
Quick test fit showing how the blanket fits. Note the "turbo mystery bolt" that protrudes through one of the holes. Nobody seems to know what it's for...perhaps some kind of once-only installation use? In any case, it's usually rusty and unsightly, and does nothing to help secure the blamket so we're going to remove it. |
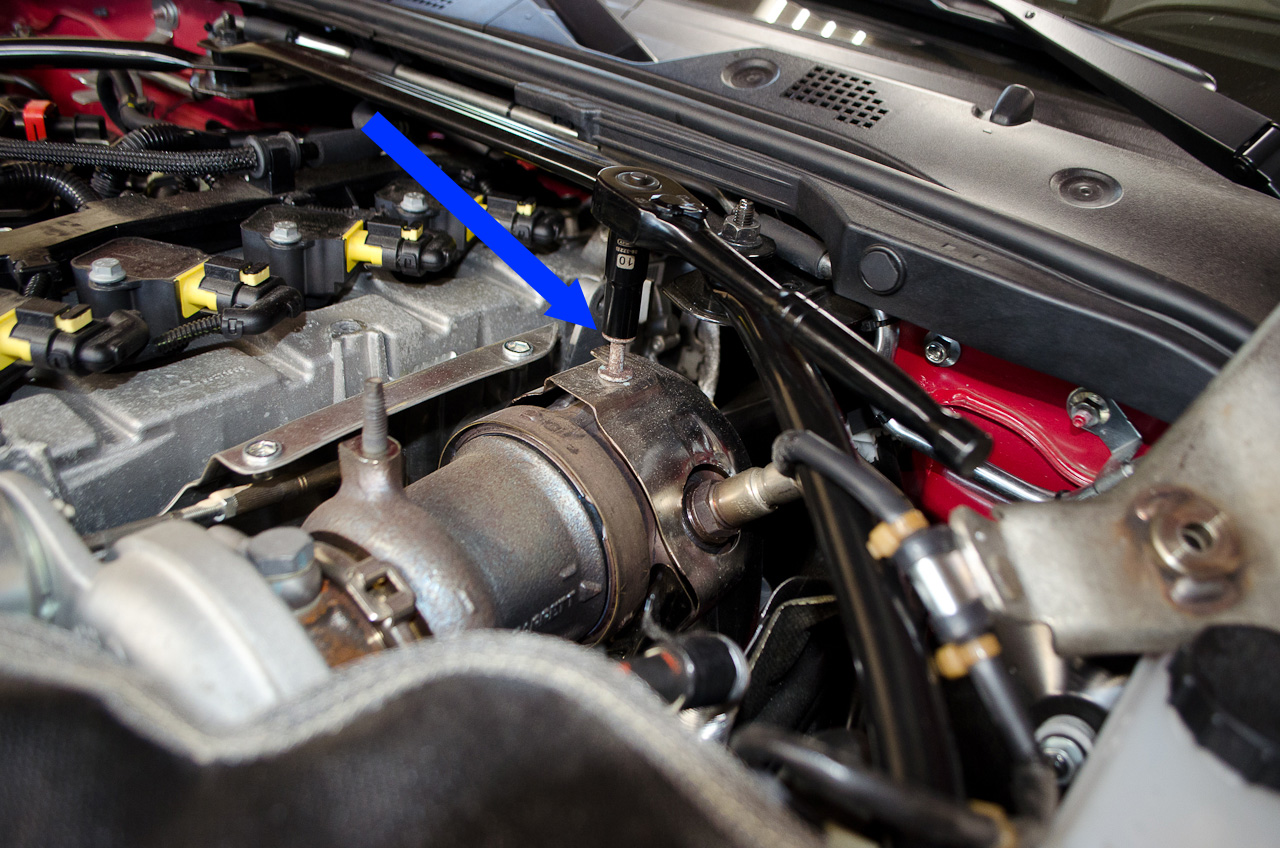 |
It takes a 10mm socket. |
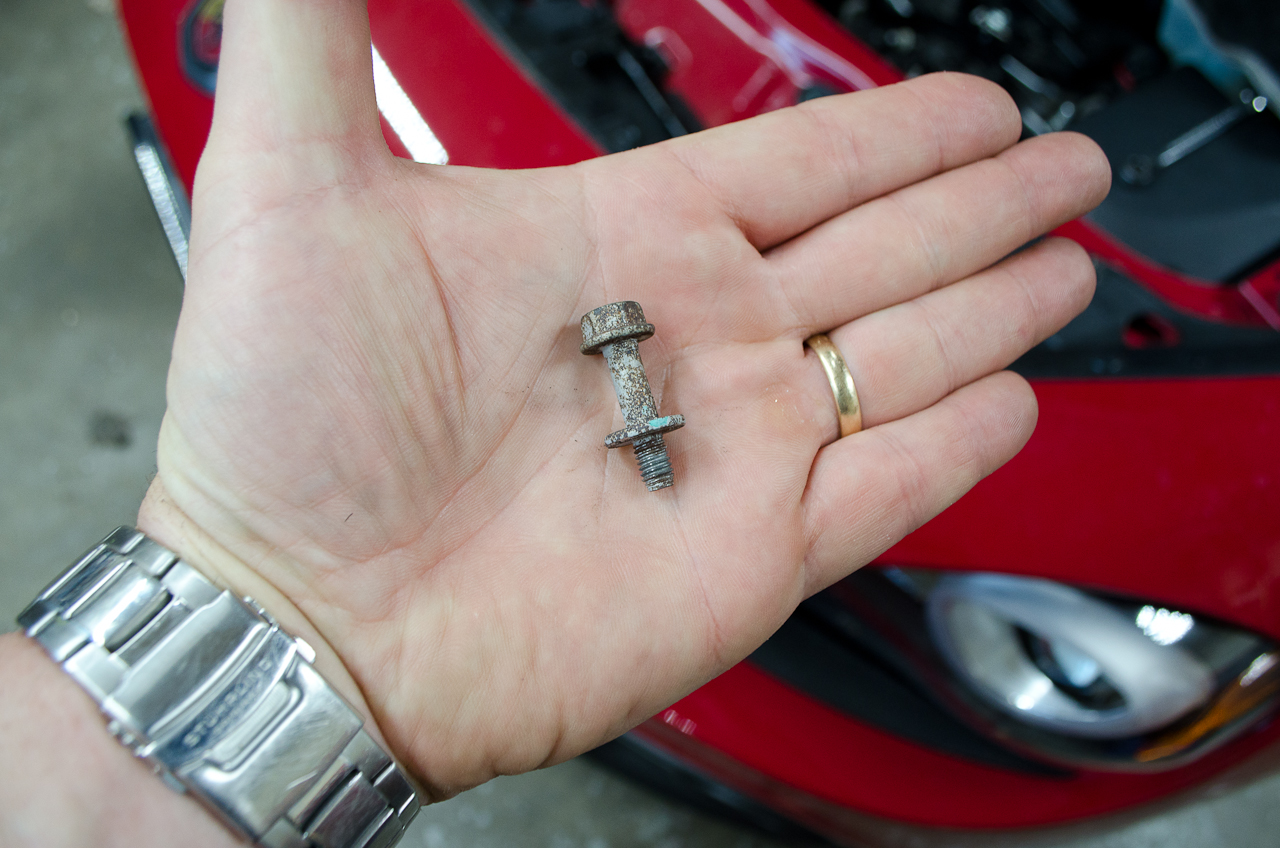 |
Removed. Ugly...in the scrap bin you go! |
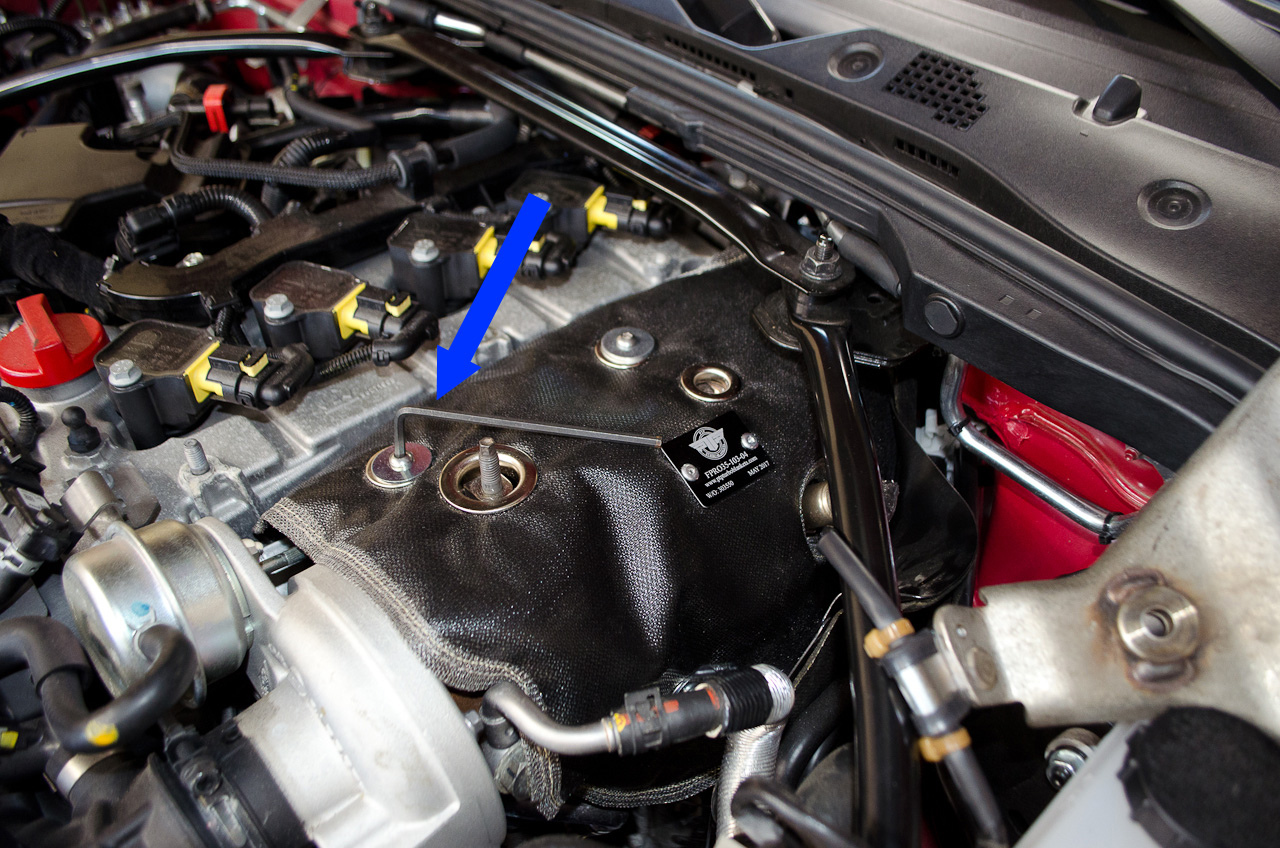 |
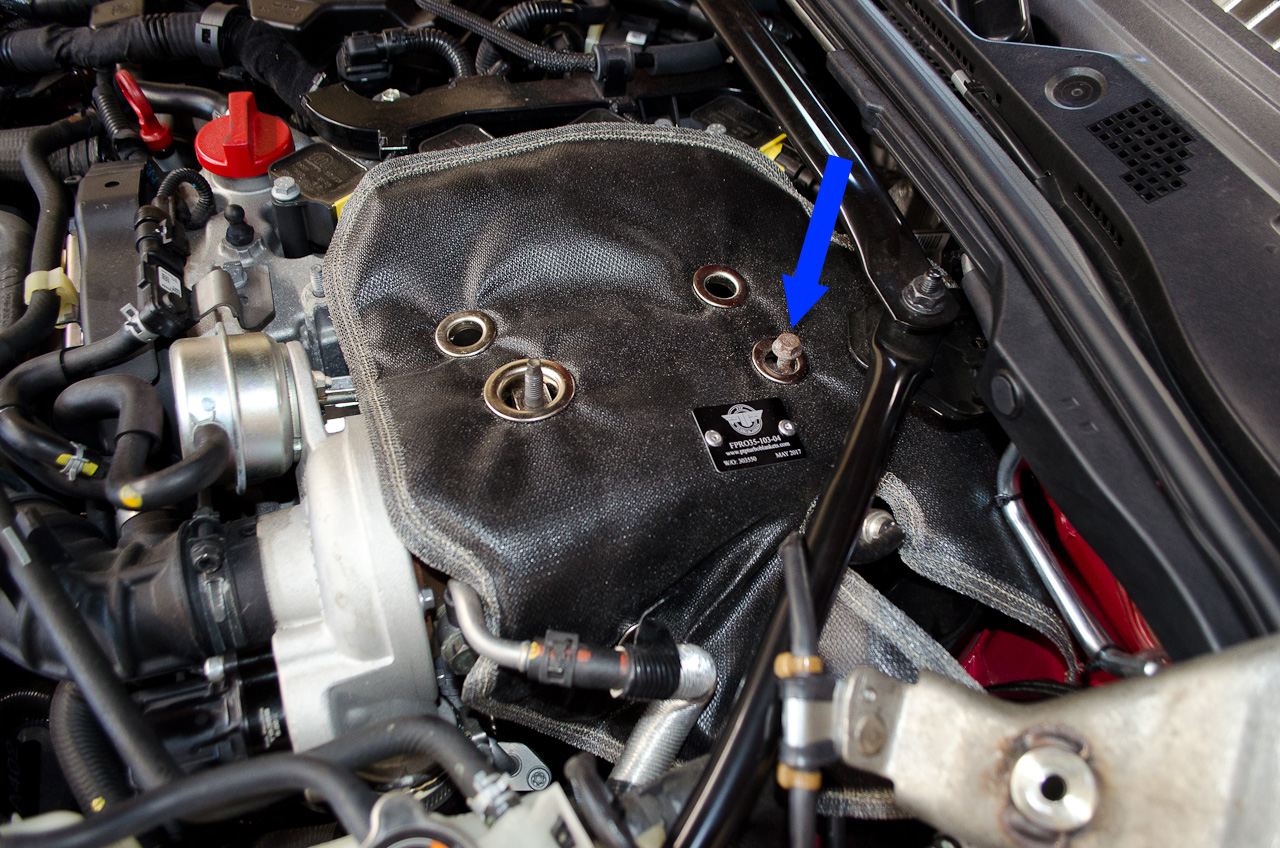
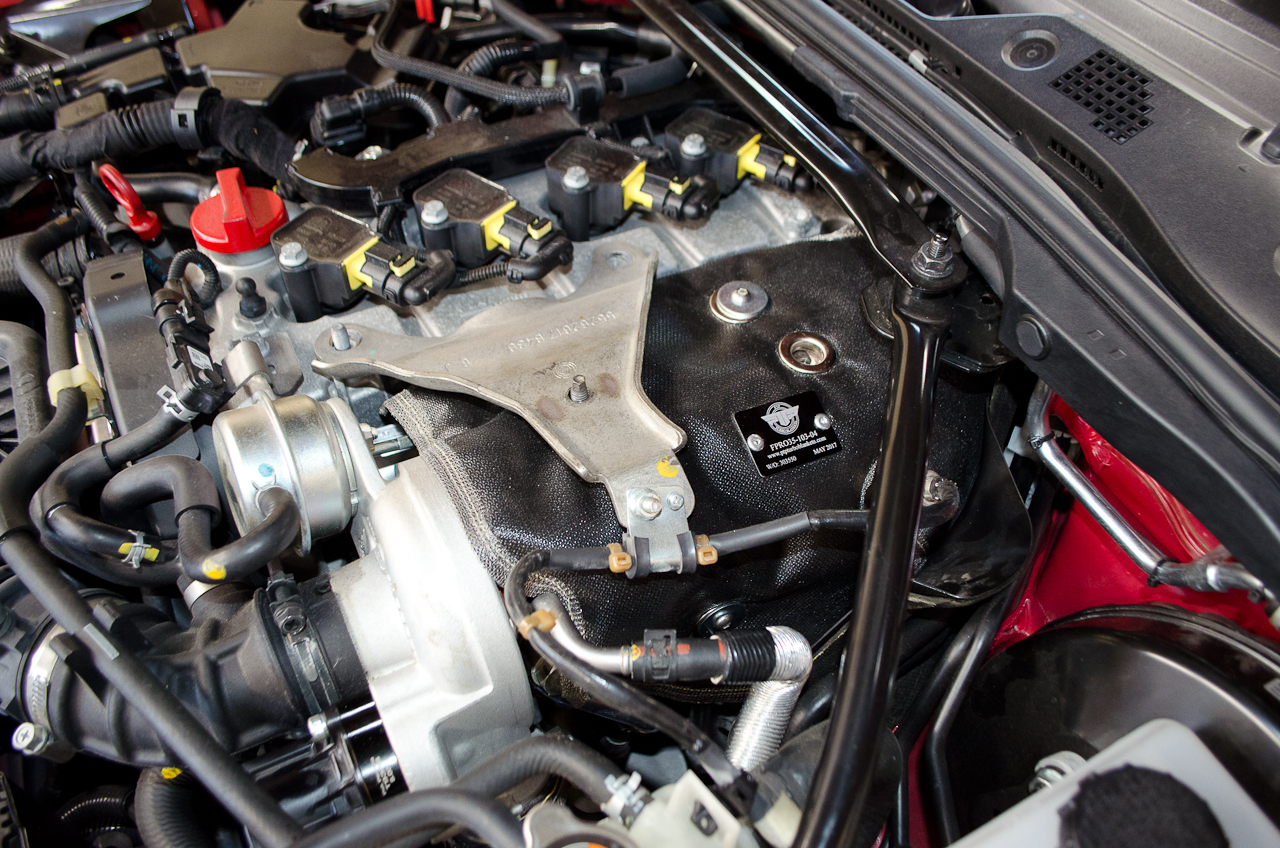
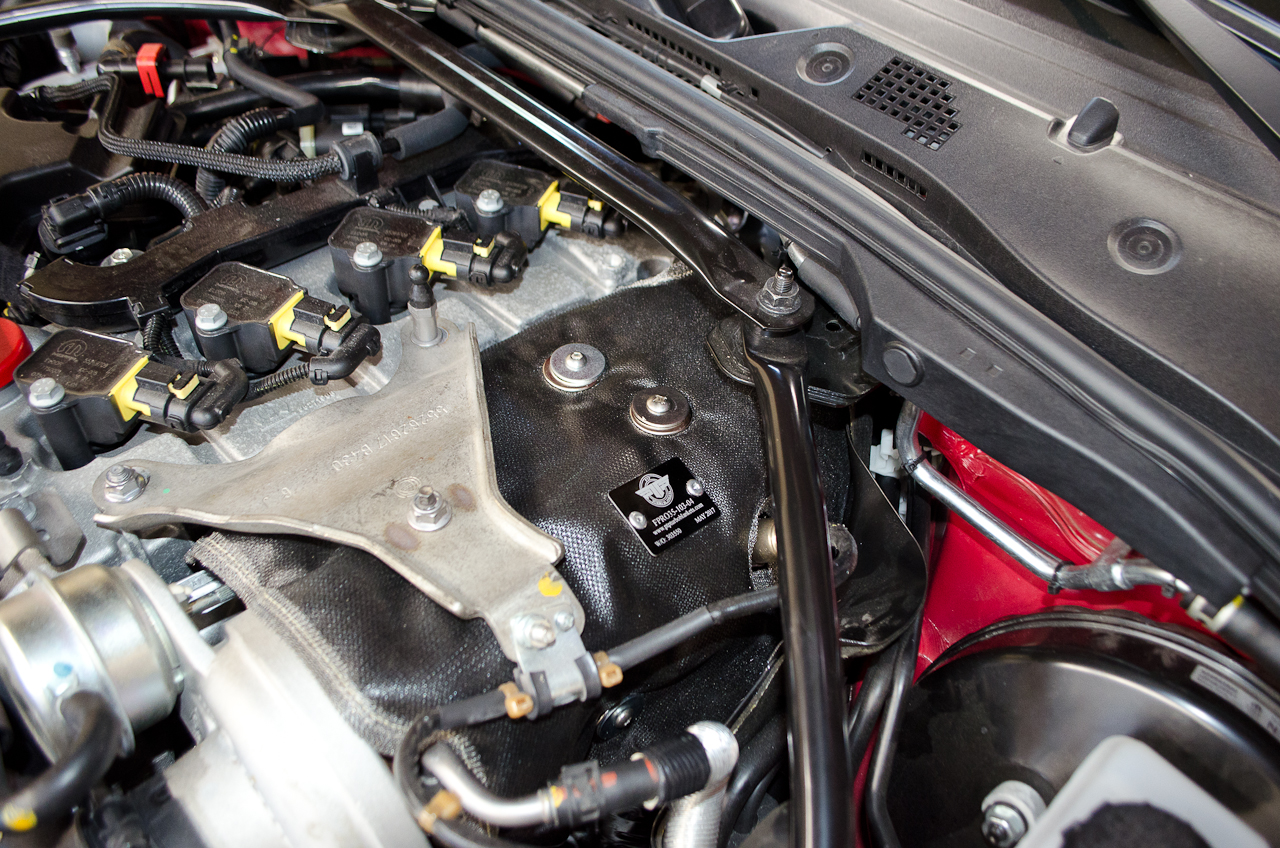
Fit the turbo blanket in place over the turbo, making sure it is well tucked in. Note how the stud for the turbo mounting bracket protrudes through the lower left hole. Then line up the holes on the blanket with the threaded holes from which you removed the 10mm bolts holding on the factory heat shield. Install one fender washer and supplied bolt in each for a total of three...two on the top and the one on the side. The bolts take a 4mm Allen (hex) key. |
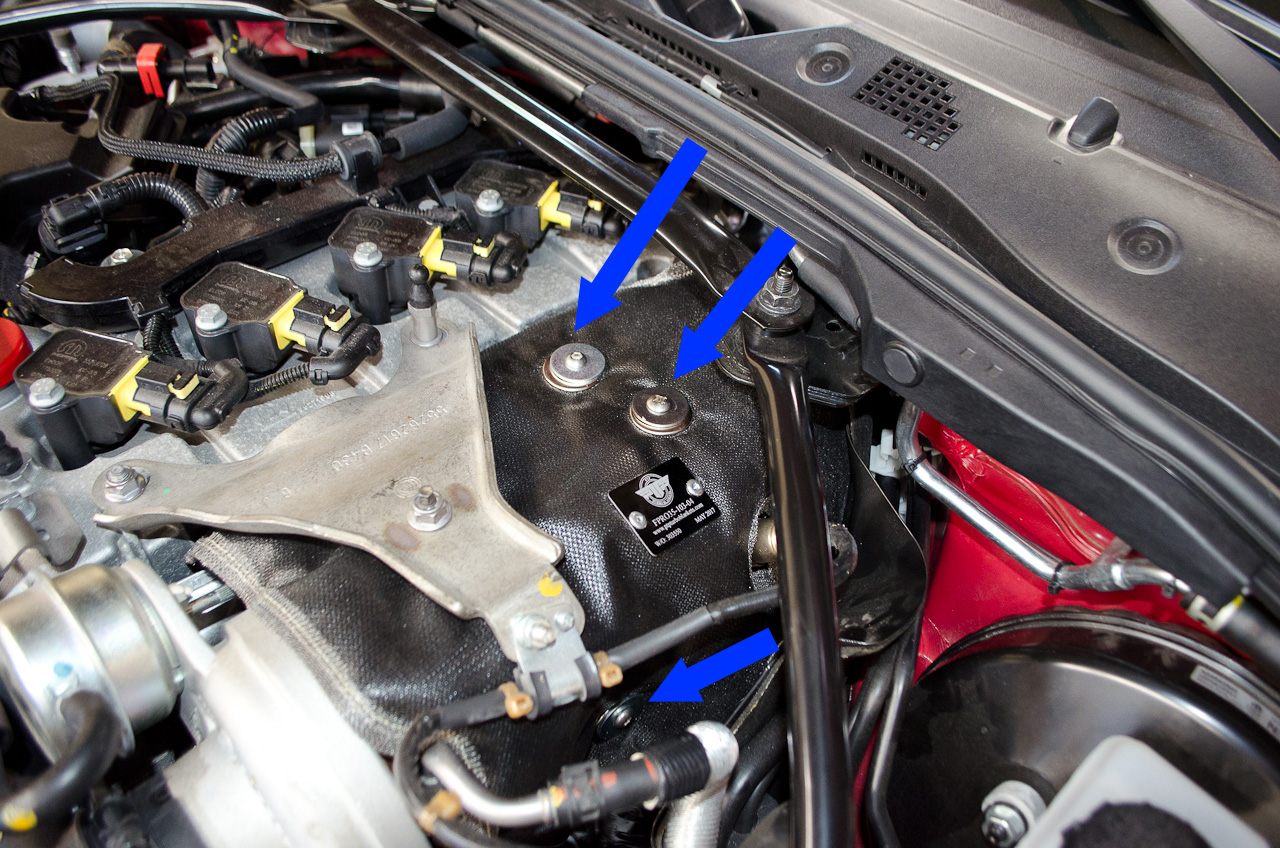 |
The one on the side of the turbo (from where you removed the stud) (lower blue arrow) can be a bit tricky to install and tighten...there's not much room. Take your time - patience is key. Also note that I found a suitable washer and bolt in my junk pile and installed them into the hole from which I had removed the ugly mystery bolt. It makes the blanket that much more secure and tidies up the whole appearance. Note: some readers have suggested using regular bolts as opposed to those supplied with the button-head internal hex. Reason being - these bolts will be subject to a lot of heat and may be difficult to remove in future and therefore the supplied style may be more prone to stripping than regular bolts. If you decide to replace them, I would suggest stainless steel and you need size: M6-1.00 x 20 mm. A dab of high-temp antie-sieze would also be a good idea. |
 |
Place the turbo mounting bracket back in place... |
 |
...and reinstall the two nuts and the engine cover retaining pin. |
|
That's it...you're done! |
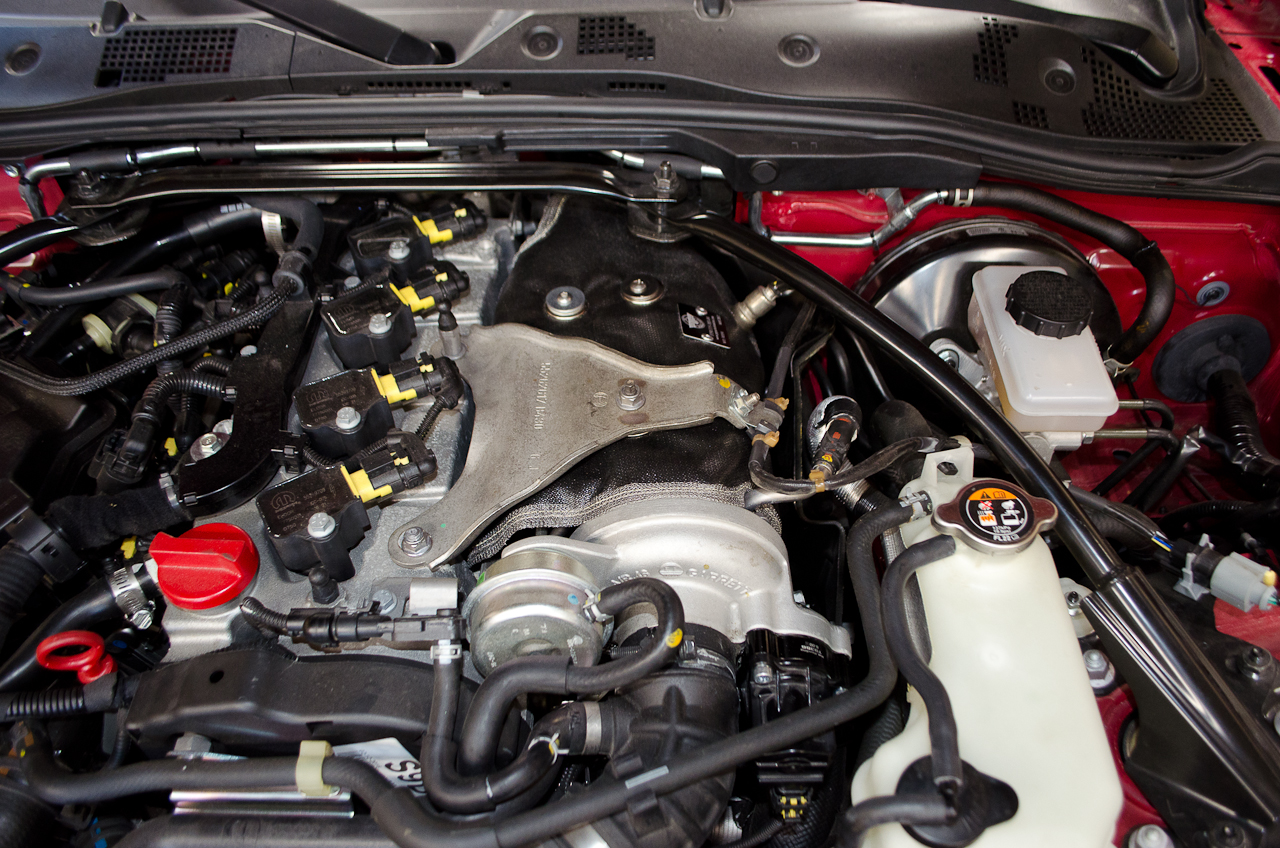 |
Step back, admire your handy work...and double check all the fasteners are installed and tightened. |
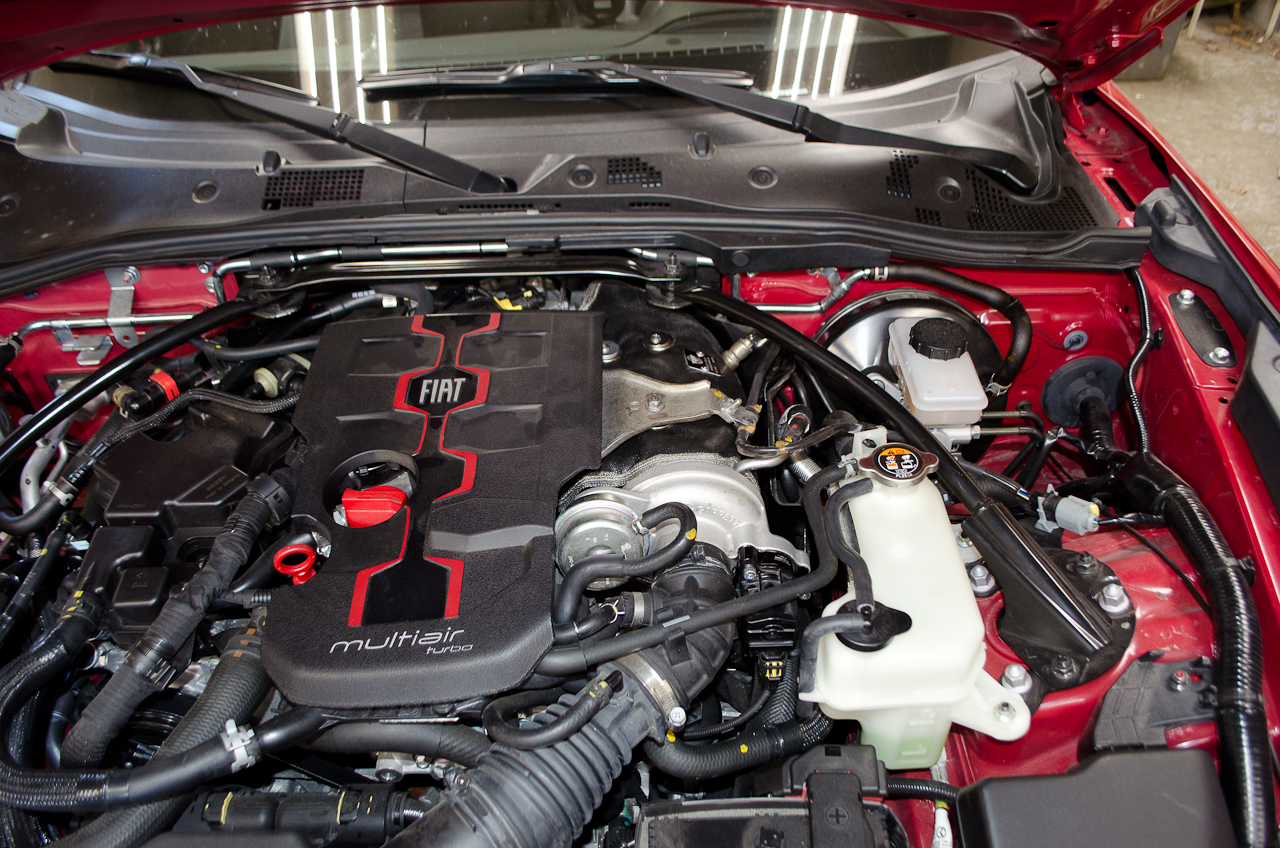 |
Fit the engine cover back in place... |
 |
...and you're ready to hit the road and enjoy cooler underhood temperatures. Note: Some users have reported smelling a smell for anywhere from 1 hour to a week or so as the blanket heats up and "breaks in". I noticed little or no smell, and the difference may be attributable to different brands or versions. Still, a little odour is normal and nothing to worry about. |
|