 |
Custom Hummer Double Beadlocks By Bill "BillaVista" Ansell |
IntroductionQuite a few offroad products pass through my hands in the course of a year - some not-so-good, most pretty good, and some truly outstanding. Dean's rims fall into the latter category. My standards, and by extension my expectations, are pretty high. I aim to review the best products on the market for my readers - and most products I feature either meet my expectations or come pretty close. However, almost none ever exceed my expectations. Dean's rims are an exception. Here's why. Why beadlocks?Beadlock wheels have been a part of the hardcore wheeling scene for many years, and for good reason. |
 |
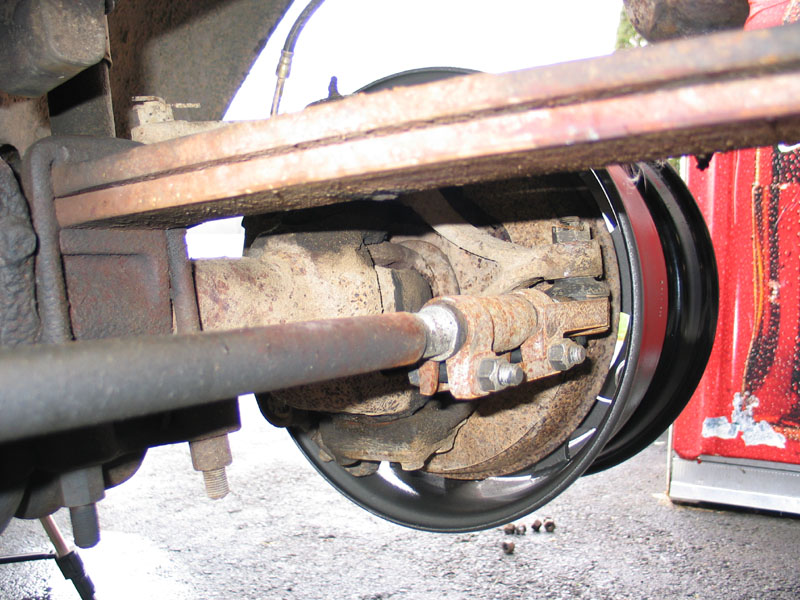
Hardcore wheeling requires running very low tire pressures. Running low tire pressures results in the largest possible contact patch between the tire and ground, maximizing available traction. When rockcrawling, it also allows the tire to conform to the rocks and grab and bite for traction where it otherwise wouldn’t be available. Finally, low tire pressures help provide a softer, more comfortable ride. However, running these low pressures on regular rims frequently results in the tire unseating from the bead. When you blow a bead, further driving will damage the rim, the tire, or even roll the tire completely off the rim. Worse damage is possible if you’re doing some technical rockcrawling. Witness the damage I did to my rear suspension on a trip to Paragon - all as the ultimate result of losing a bead in a bad spot. |
|
 |
Rear suspension FUBAR! | ||||||||||||||||||||
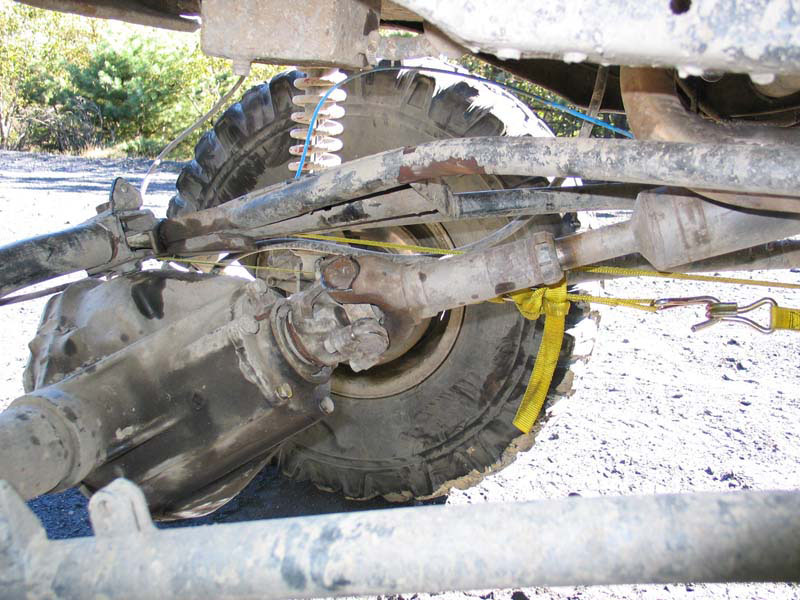 |
Not good! | ||||||||||||||||||||
Temporarily unseating the bead , “burping” some air out, is also a frequent annoyance. In wet and muddy conditions it allows water and crud into the tires and emptying 100 lbs of stinky swamp-water from your rims after a day of wheeling is no fun. The solution is to use a beadlock wheel – a wheel specifically designed to clamp down on the tire’s bead, physically retaining it in place. There are a variety of different methods of accomplishing this bead-locking action, and dozens of different beadlock wheels available on the market. Most, however, have one thing in common – they only lock the outer bead of the tire to the wheel. Why double beadlocks? Granted, when you loose a bead it is most often the outer bead that blows. But inner beads can and do blow as well – I’ve blown plenty myself and even blown both at once. Not only that, but re-seating an inner bead in the field is more of a PITA than an outer bead, often requiring removal of the wheel. Trying to re-seat a rear inner bead with your rig nose-high on a steep, rocky climb, a 60” HI-lift jack max'ed out on an angle, balancing on a rock, is not only a pain but pretty damn dangerous too. Take it from me! |
|||||||||||||||||||||
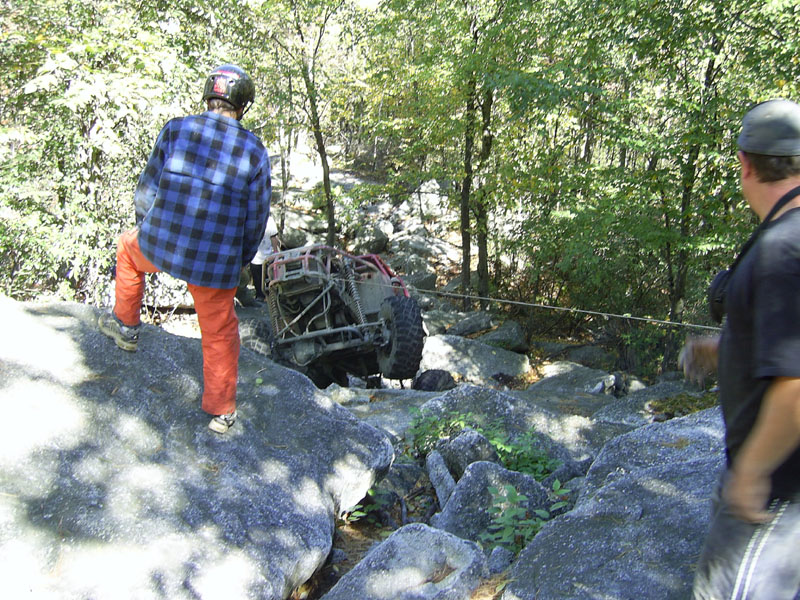 |
On the rope! | ||||||||||||||||||||
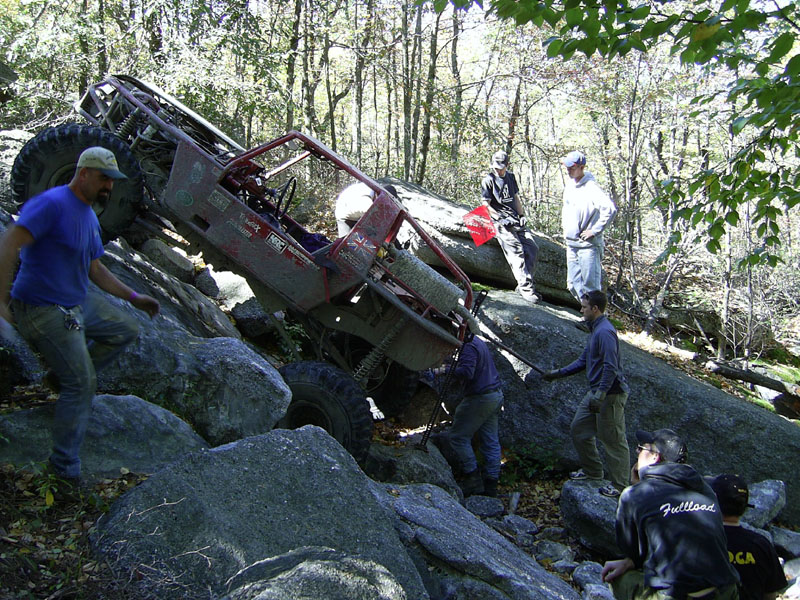 |
A great spot to wheel... | ||||||||||||||||||||
 |
... but not such a great spot to be trying to re-seat a bead! | ||||||||||||||||||||
That’s why I decided that if I was going to invest in beadlock rims, I wanted them to lock both beads. Why "Hummer Style"?Because of the difficulties of fitting a traditional bead-locking ring on the inside of a wheel while clearing brake and steering components , a different approach is required for double beadlocks. This is known as the “internal” beadlock or “Hummer style” (named after the US Military AMG HMMWV or "Hummer" that popularized the design). This approach is completely different from normal, external beadlocks and works like this: |
|||||||||||||||||||||
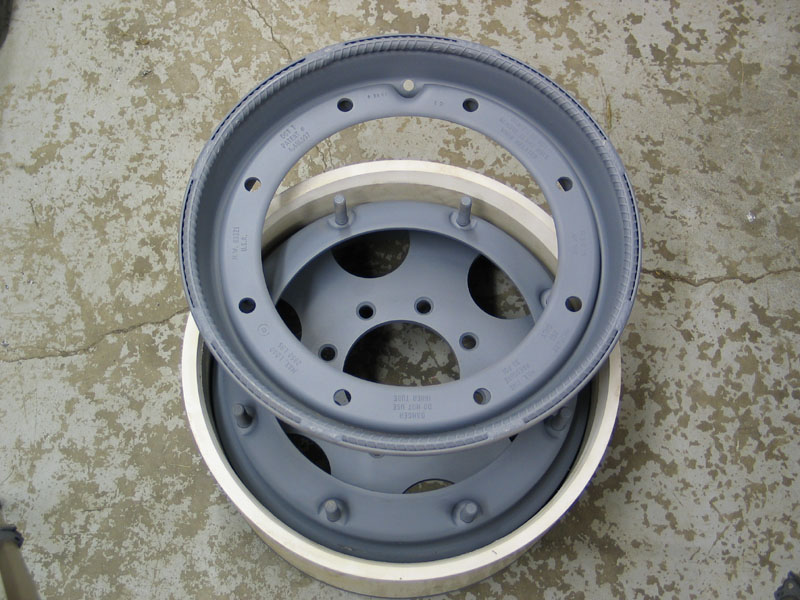 |
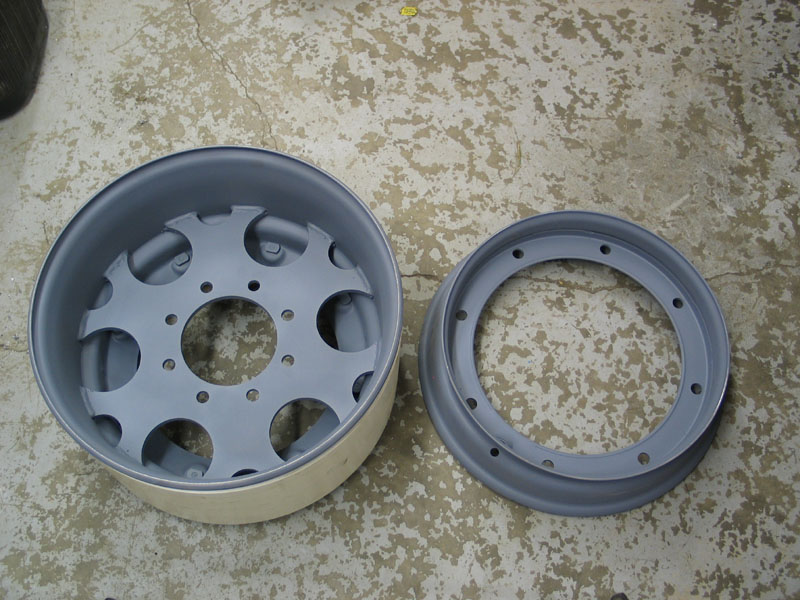
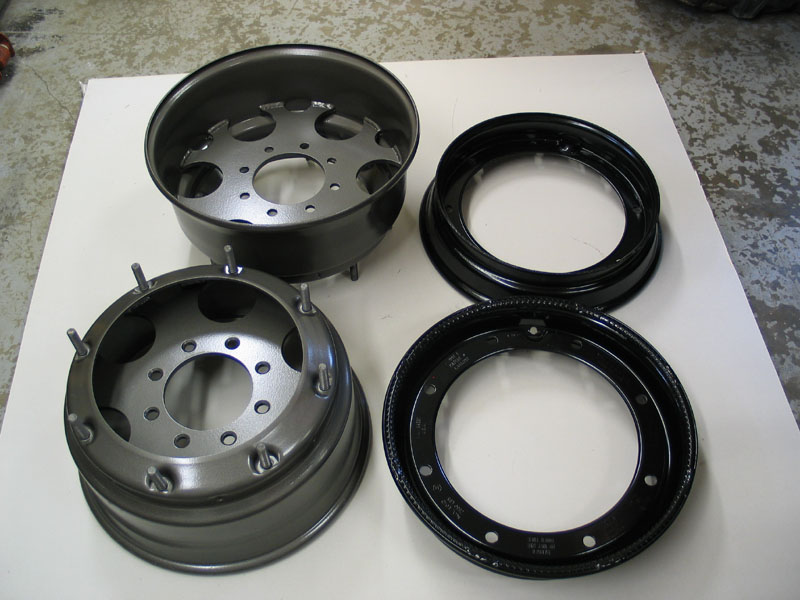
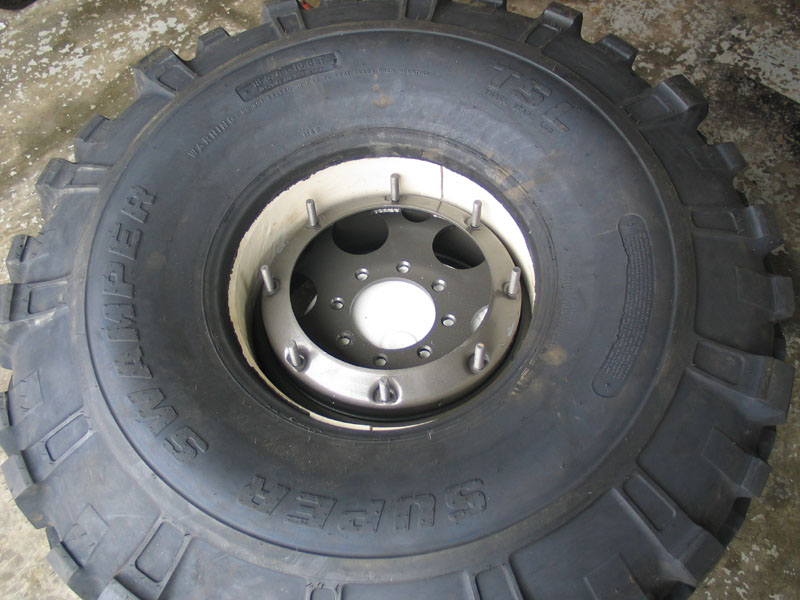
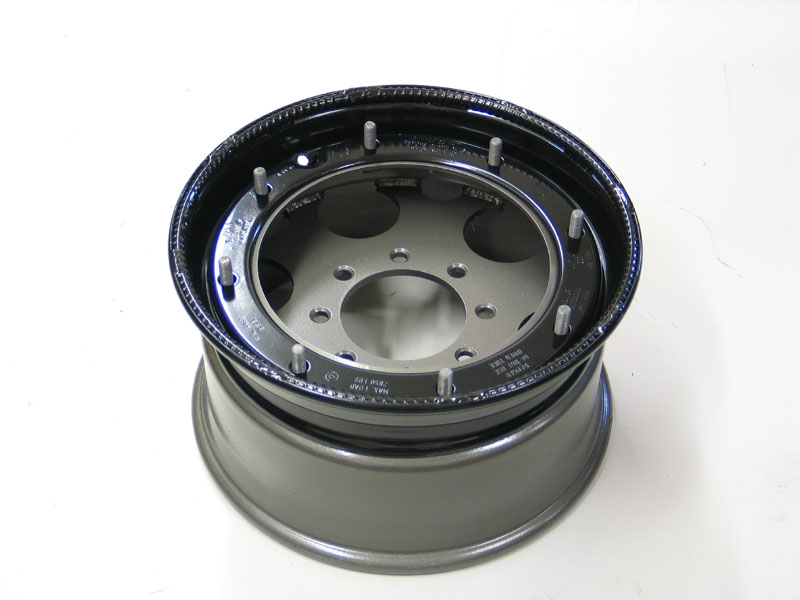
The rim itself comes in 2 pieces - a larger inner-half and a smaller outer-half. The two halves of the rim bolt together using studs and nuts - 8 or 12 depending on the version. | ||||||||||||||||||||
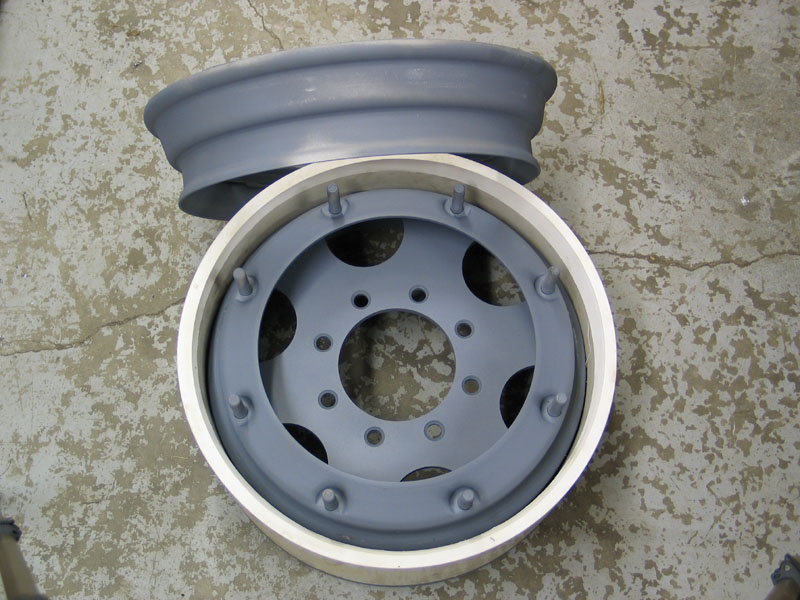 |
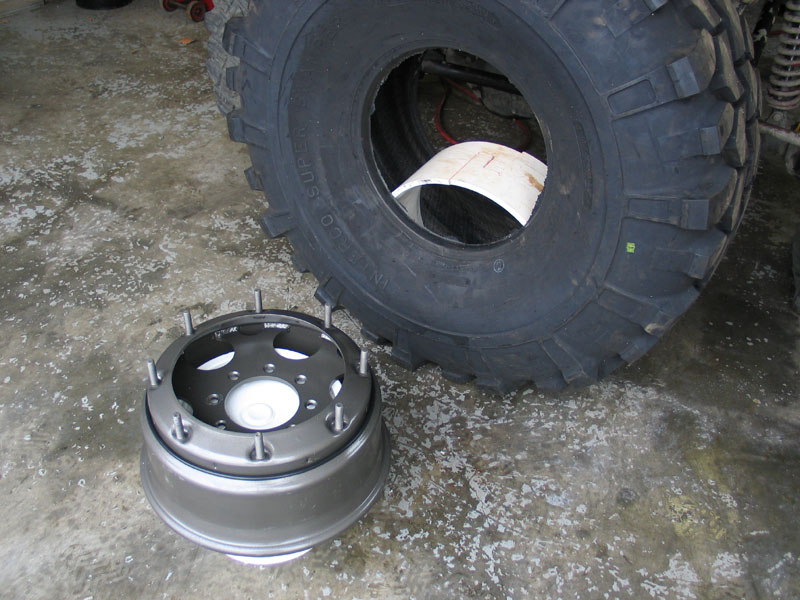
Each half of the rim has a bead seat where the tire's bead seats. Here you can see the outer-half standing up next to the inner-half. | ||||||||||||||||||||
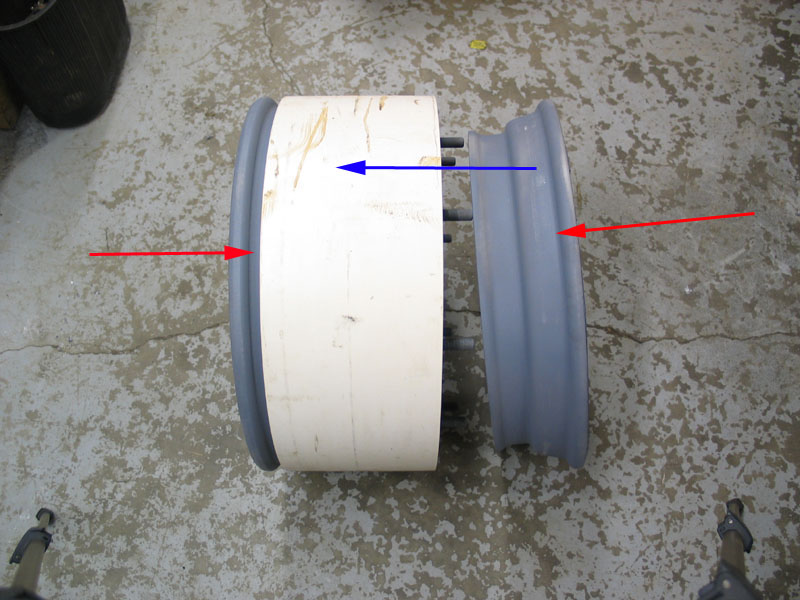 |
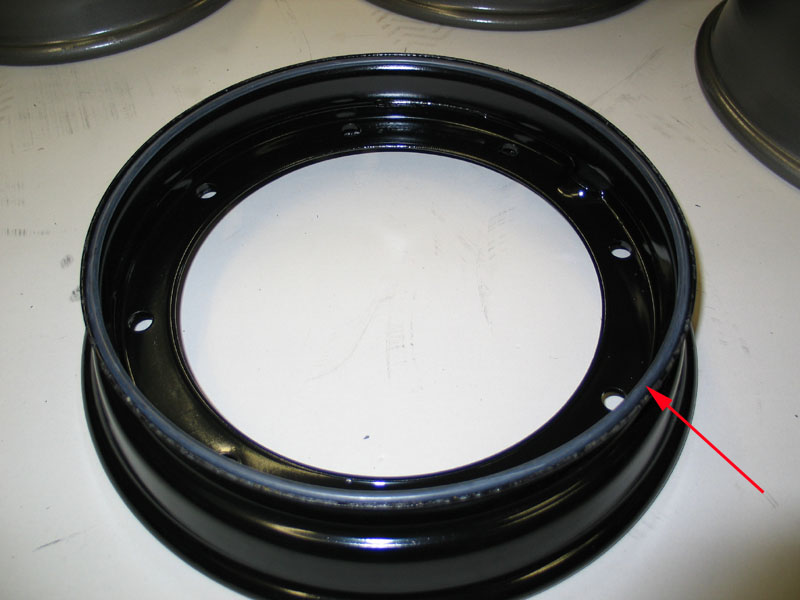
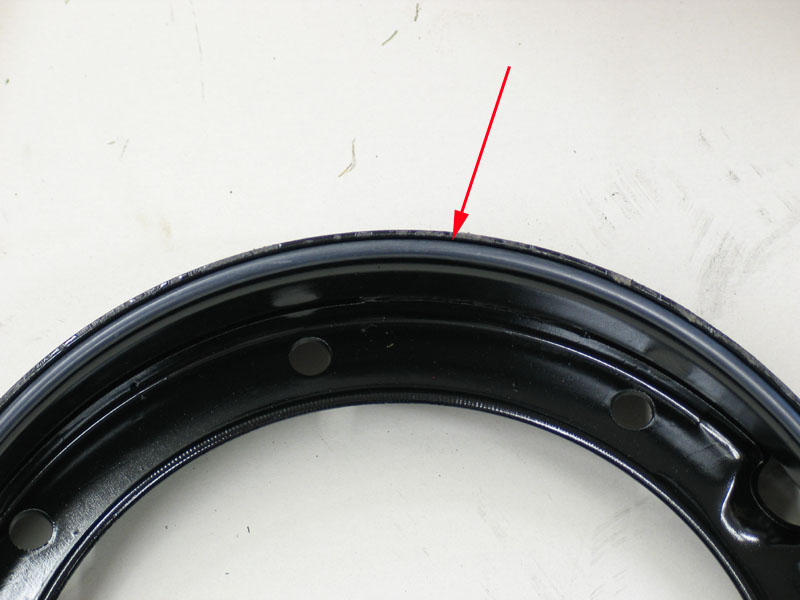
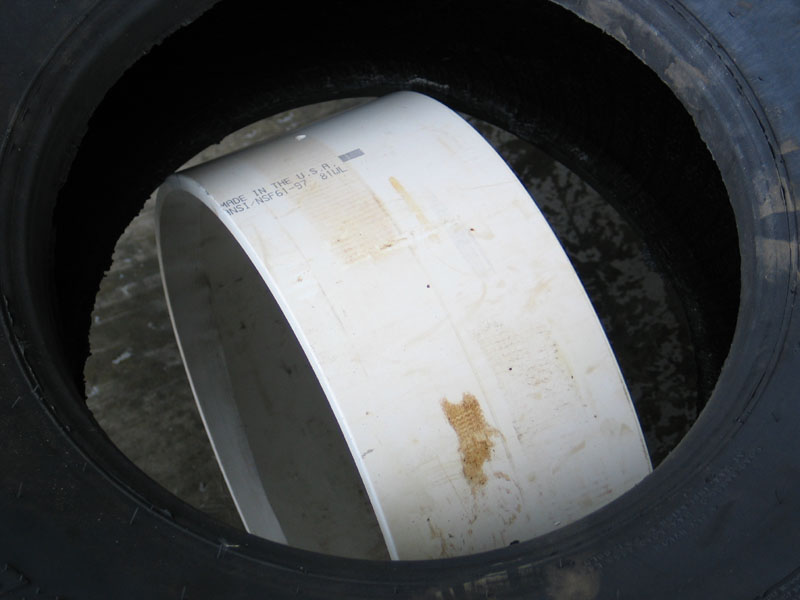
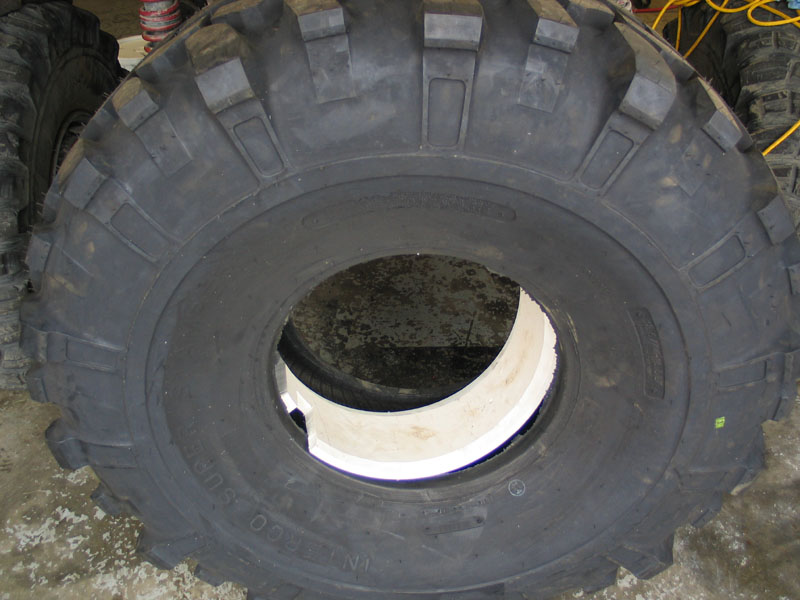
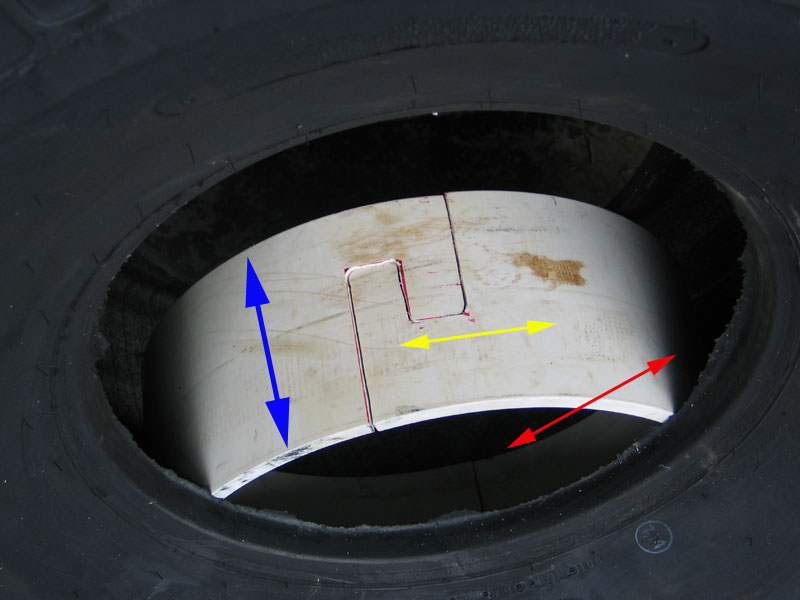
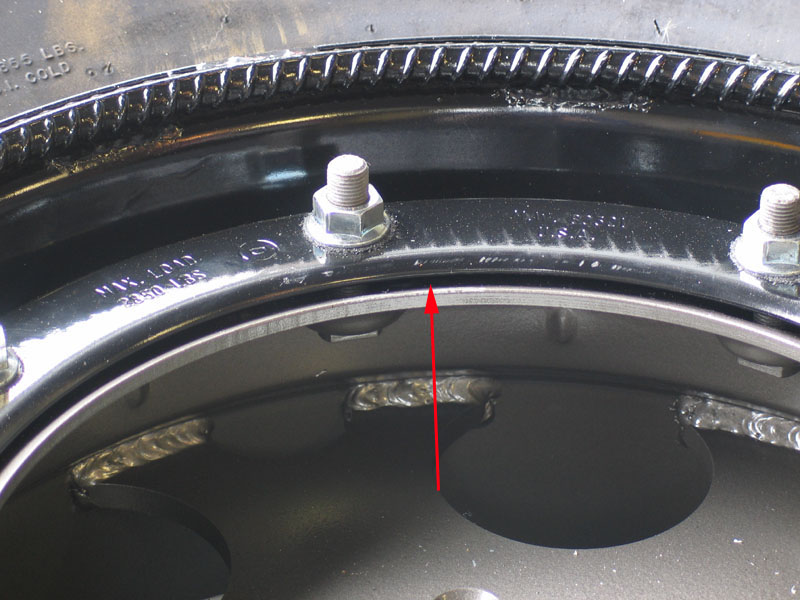
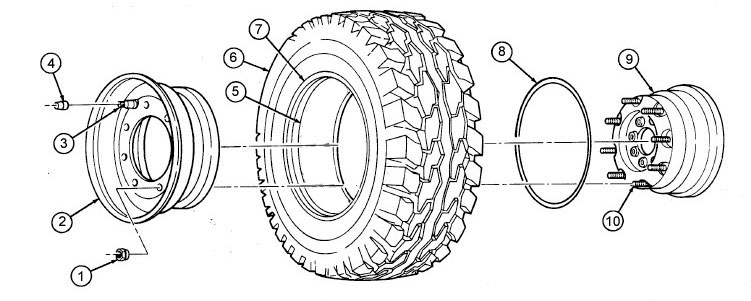
The bead locking action comes from the use of a "beadlock insert". The original Hummer rims used either rubber or magnesium inserts - Dean's version uses a section of PVC pipe. Regardless of the material used, the method is the same. The beadlock insert is placed inside the tire and then the tire-and-insert are slipped over the inner half of the rim. The outer half of the rim is then bolted to the inner half. Each of the tire's beads sits on a bead-seat on one of the halves (as indicated by the red arrows). When the outer half is bolted onto the inner half and tightened down, the two halves are drawn together (as indicated by the blue arrow) sandwiching the rim halves, tire beads, and insert together effectively pinching or trapping the tire's beads between rim and insert. Don't worry if this isn't 100% clear at this time - it will be by the end of the article. |
||||||||||||||||||||
Any Reason Not to Use Hummer rims?So we know the "Hummer" design is a clever and effective way to lock both beads. But are there any reasons we may not want to choose Hummer beadlocks? Well, there are three factors to consider before making a decision - they are:
Rim WidthOriginal Hummer rims are only 8.25" wide bead-seat to bead-seat. That makes them on the narrow side for use with the largest of tires (original Hummer tires were only 36 x 12.50 (bias ply version) or 37 x 12.50 (radial version)). My particular tire of choice is a 42 x 15.00 Super Swamper TSL, which has a recommended rim mounting width of 9.75" - just a little more than the Hummer rim's 8.25 inches. However - many years of experience accumulated by many different folks running up to 44" tires on Hummer rims has proven that there are no disastrous consequences to using rims a little narrower than recommended (for off-road use only - never deviate from manufacturer's recommendations concerning on-road use). The only reported consequence of using a narrower than specified rim is that, at very low (single digit) pressures, the tire may tend to fold under itself more than it would on a wider rim. How much of an issue this is becomes a matter of personal opinion. Many report the result is really only that a large tire on a Hummer rim at 8 0r 9 psi flexes and conforms the way the same tire would at 3psi on a regular, wider rim. I shall be reporting my experience in future updates. Bottom line - this small drawback, for me, did not outweigh the many benefits of using Hummer rims. Rim DiameterOriginal, steel, double-beadlock Hummer rims come in only one diameter - 16.5" If you simply must use a tire with a different diameter they will not work for you. This was a complete non-issue for me as not only do my tires of choice come in 16.5" diameter - but 16.5" is still the rim diameter in which you can get the largest selection of large tires - particularly the Interco tires which I prefer. BackspacingBackspacing on original Hummer rims is a massive 7.0". Running them with this much backspacing will likely lead to problems with the rim clearing brakes and steering, the hubs sticking out and being vulnerable, and tires contacting body and suspension components. Not many folks can get away with using rims with 7.0" backspacing. However - there is a solution. Hummer rims can be re-centred with a wide range of backspacing. Problem solved. Why Dean Reed?So I knew I wanted internal, “Hummer”, double beadlocks – width and diameter weren't going to be a problem - though I would need someone to re-centre them to my specifications. However, stock Hummer rims, either military surplus or civilian “take-offs”, have some serious limitations. Not least of which are the limited availability of the beadlock inserts and the unreliable/unknown condition of used (especially military surplus) parts. That narrowed my choices to manufactures of custom Hummer-style double beadlocks - of which there are perhaps three I'm familiar with. One of these, in my humble opinion, is flat out not worth doing business with at all. Another seems to have a better reputation but still appears to have issues with reliability, timeliness, customer satisfaction and I’m sad to say that my own dealings with this company left me with a distinct impression of unprofessional and unreliable. That only made my decision that much easier – I chose Dean Reed of Performance Cryogenics for the following reasons:
OK - that was the thought process - let's see if what I thought turned out to be true. Review |
|||||||||||||||||||||
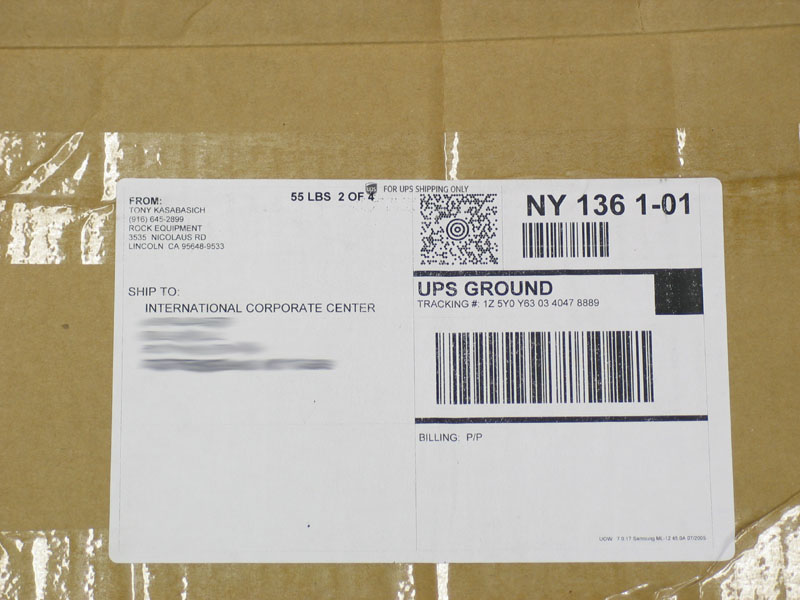 |
They shipped via UPS ground. Note the box weight - 55lbs each. |
||||||||||||||||||||
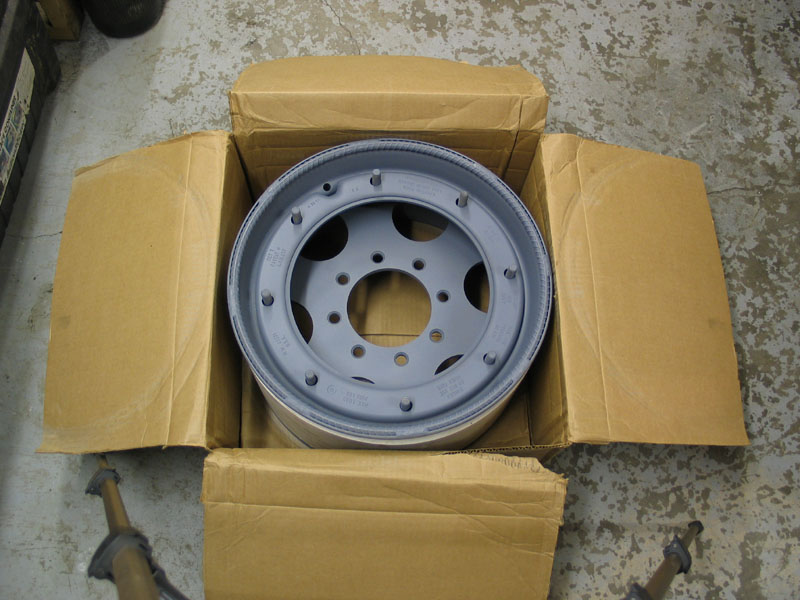 |
Inside the box. | ||||||||||||||||||||
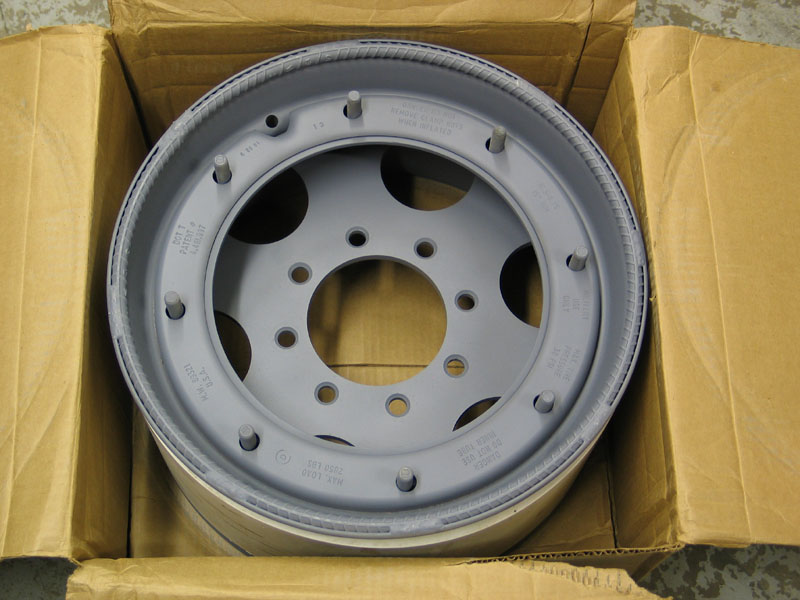 |
Close-up. | ||||||||||||||||||||
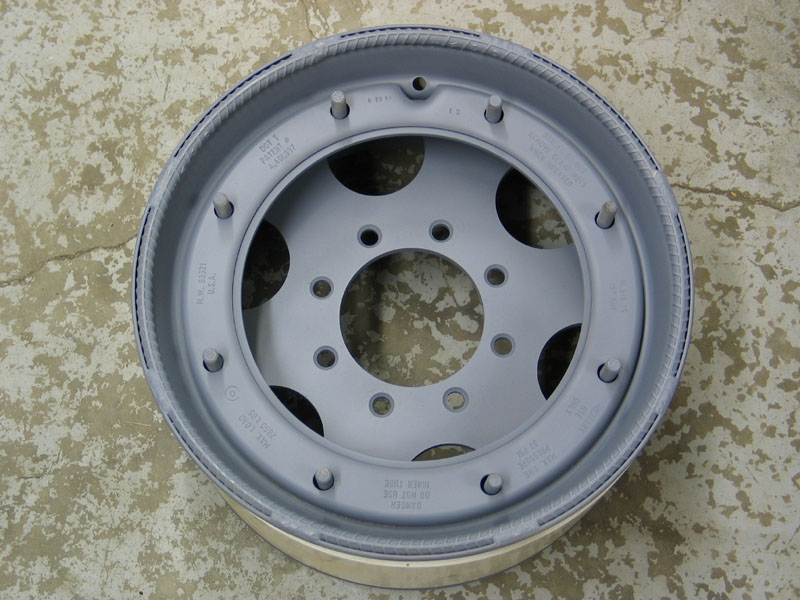 |
As an option I had Dean add his "rebar rock ring". This modification helps to stiffen the outer-most lip of the rim and protect it from rock rash. Rock rings are also available in different cold-rolled steel designs. | ||||||||||||||||||||
|
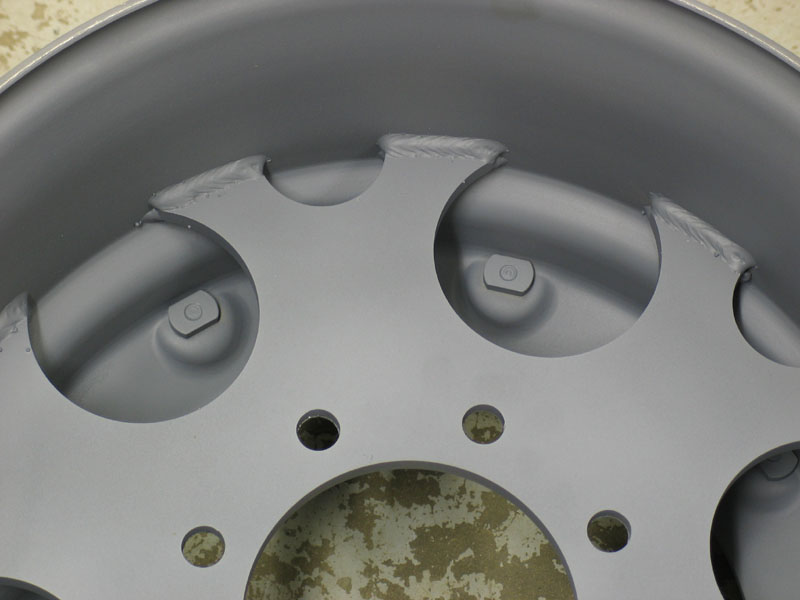
The rims come completely re-furbished, very nicely welded, and primed ready for your choice of paint. The quality is evident right away. Look at the tolerances between the re-bar ring and the rim. Go into your shop and try and bend a length of rebar in a perfect circle like that and see if you don't agree with what a craftsman Dean is. |
||||||||||||||||||||
|
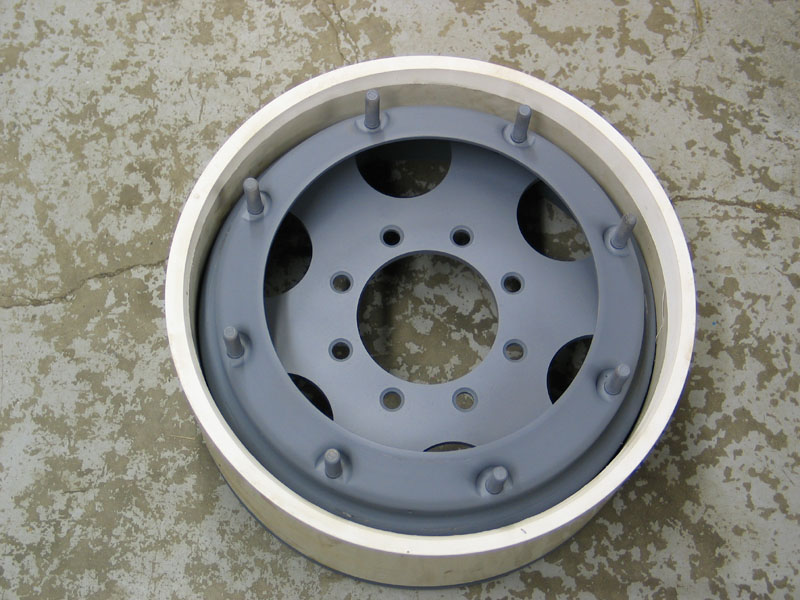
Here the outer-half is removed from the inner-half, leaving the beadlock insert in place on the inner-half. All the hardware you receive is brand new - including the studs that hold the rim halves together. The studs are 1/2"-NF20 and are 2" long. |
||||||||||||||||||||
 |
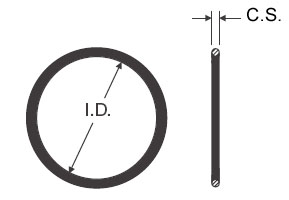
The beadlock inserts are 16" ID, 11/16" thick and 6.75" wide. OEM magnesium inserts are 7" wide but were designed for use with tires having much thinner beads than do the large offroad tires we use. Making the insert a little narrower than stock allows the halves to be bolted together without the use of longer studs. It also means the clamp nuts that hold the two rim-halves together can be torqued to spec without crushing the tire's bead too much or over-stressing the outer rim-half. Note that the insert is chamfered from 11/16" thick to about 1/2" at the edges to match the profile of the OEM magnesium insert. This makes the process of getting it on and off the inner half of the rim much easier. |
||||||||||||||||||||
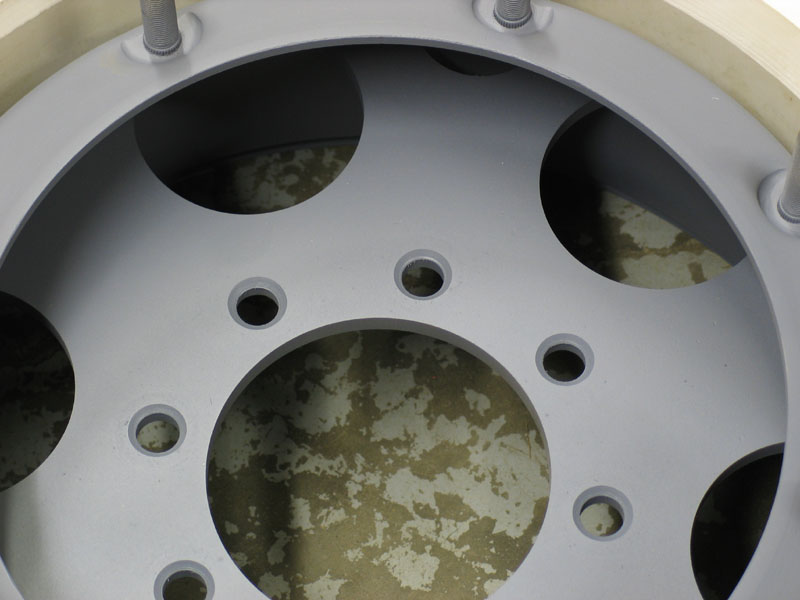 |
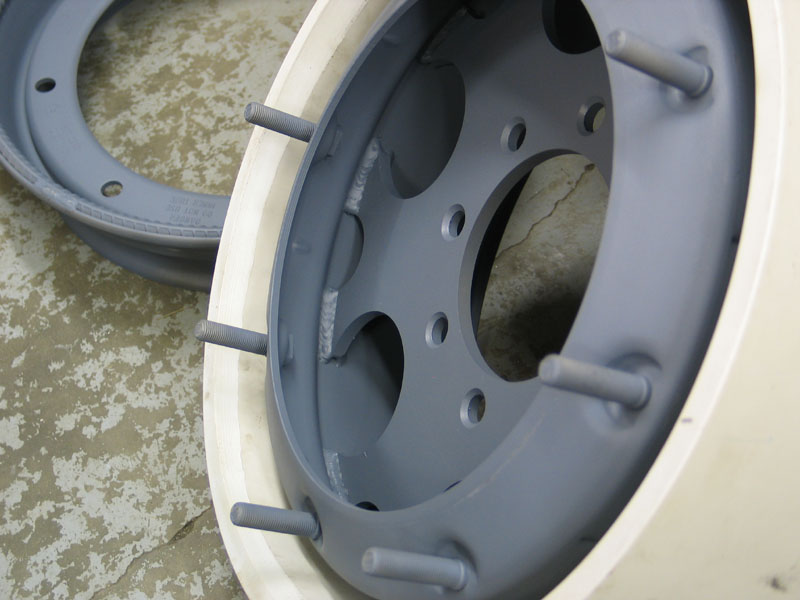
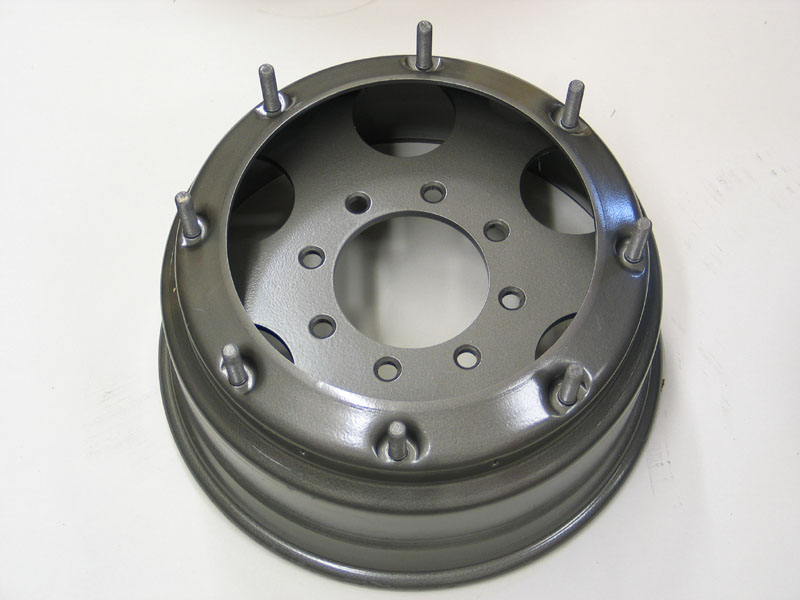
The custom centres are a burly 3/8" thick cold-rolled carbon steel. The rims come custom re-centred at your choice of backspacing (up to a max of about 4.75") and any bolt pattern you desire. The bolt pattern is perfectly accurate and all the lug-nut seats are correctly tapered. |
||||||||||||||||||||
 |
Back-side of both rim halves. Inner rim-half (left) clearly showing the new custom centre. |
||||||||||||||||||||
 |
You can clearly see the quality workmanship. Superb welds, no splatter, and great paint. |
||||||||||||||||||||
 |
Close-up. I was truly impressed. I expected them to look like re-furbished military surplus rims. They do not. They look and feel like brand new custom rims. I said in the intro - it's so rare to get something that simply exceeds your expectations but these rims did just that. |
||||||||||||||||||||
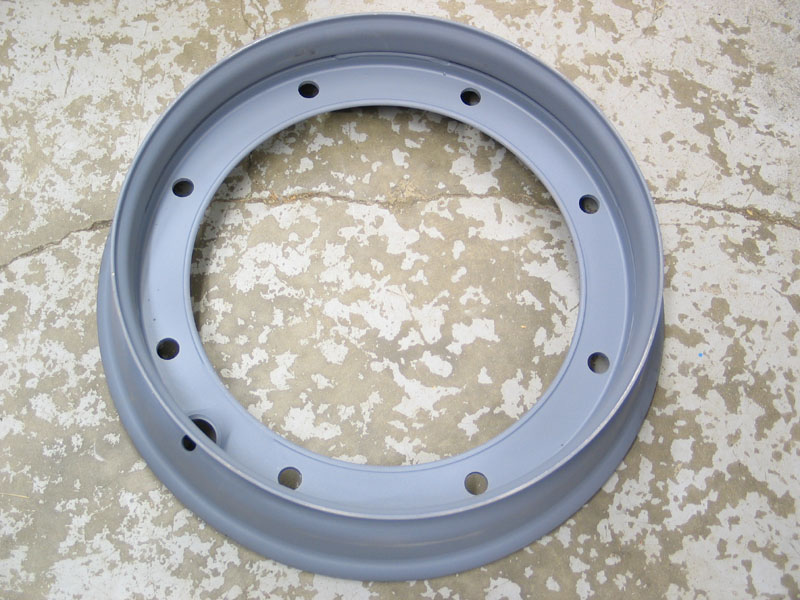 |
Close-up of the back-side of the outer rim-half. | ||||||||||||||||||||
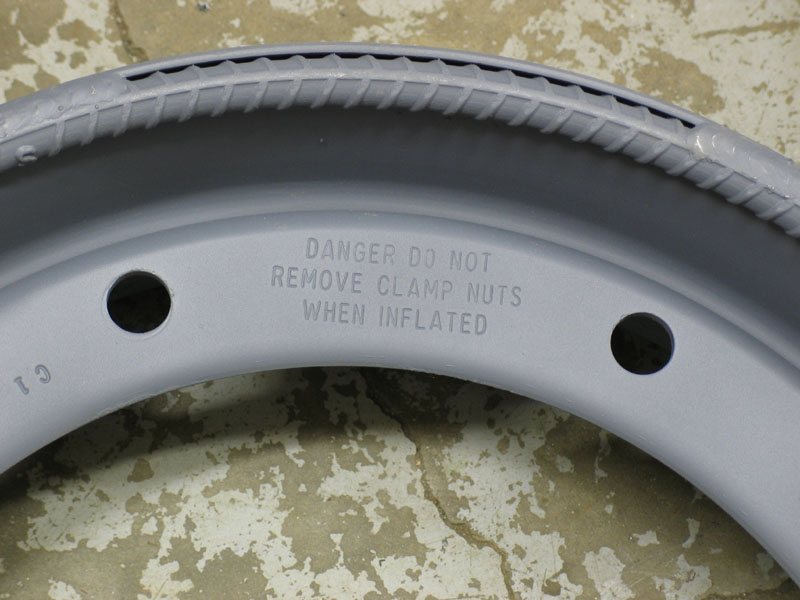 |
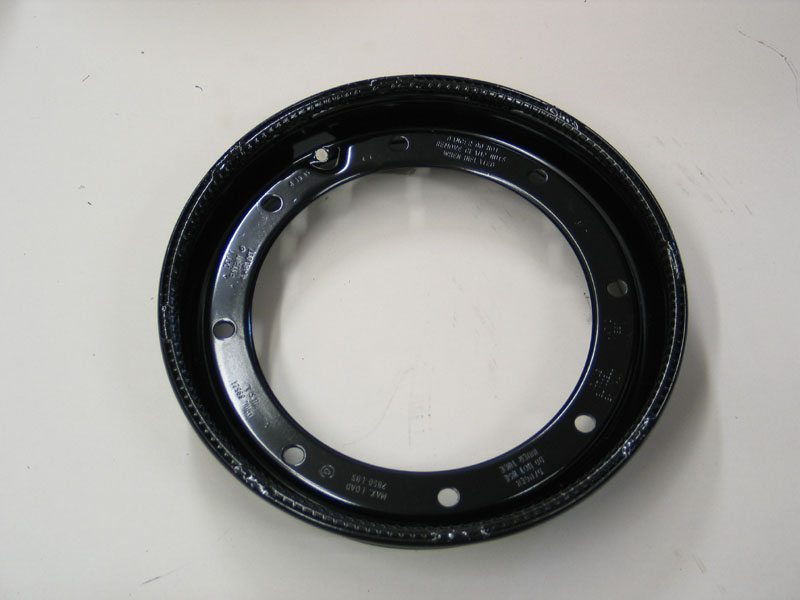
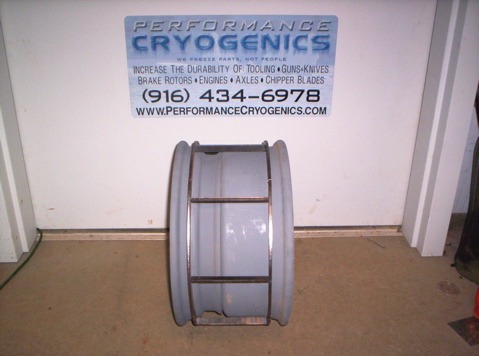
All the original markings are in place. You can enlarge the pics and see them for yourself. This one says: "DANGER DO NOT REMOVE CLAMP NUTS WHEN INFLATED" This is critical. The "clamp nuts" are the nuts that hold the two halves of the rim together. If you tried to remove them while the tire was holding pressure the rim would come apart with explosive force. The danger is real - so much so that the military use safety cages to disassemble the rims and many civilian dealerships use a special 5-sided "security nut" that can't easily be undone without a special tool. |
||||||||||||||||||||
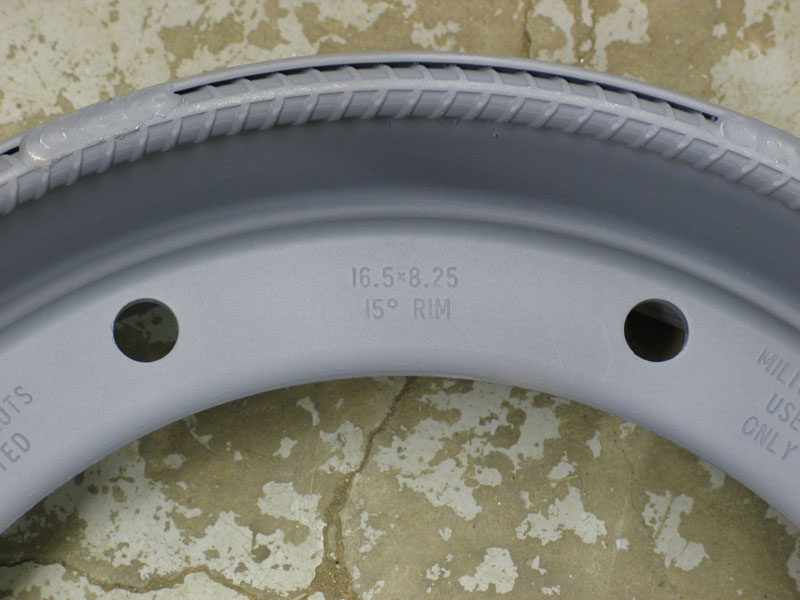 |
"16.5 X 8.25 15° RIM" Referring to the diameter and width of the rim, as well as the angle of the bead seats. |
||||||||||||||||||||
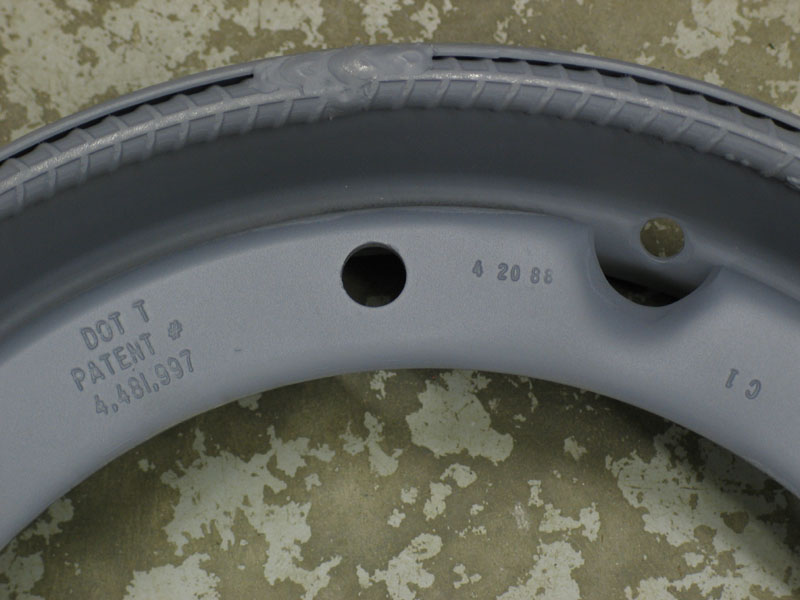 |
The much touted DOT stamp and a patent number. Does this mean the rims are street legal? I can't really answer that, as the rims are also clearly stamped with... |
||||||||||||||||||||
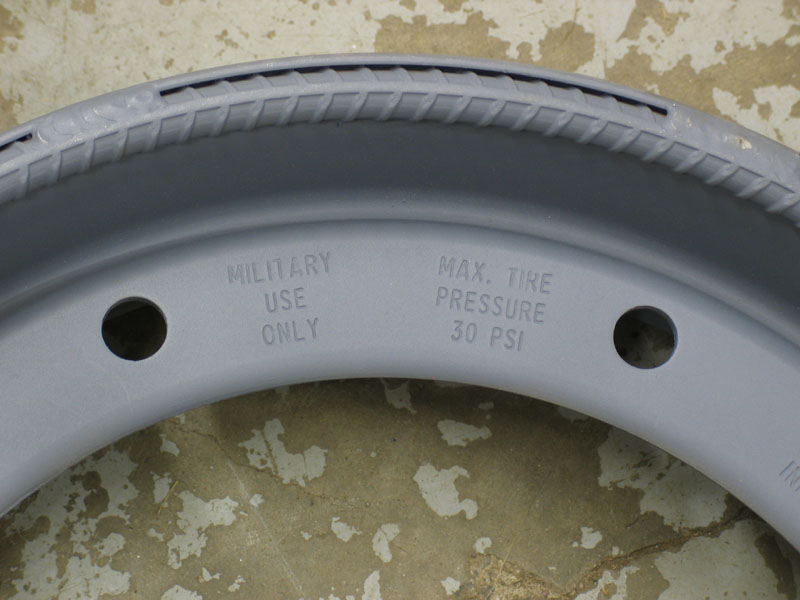 |
..."MILITARY USE ONLY" Which stamp trumps the other will likely depend not only on your local laws but also on who is interpreting them. Note the: "MAX TIRE PRESSURE 30 PSI" |
||||||||||||||||||||
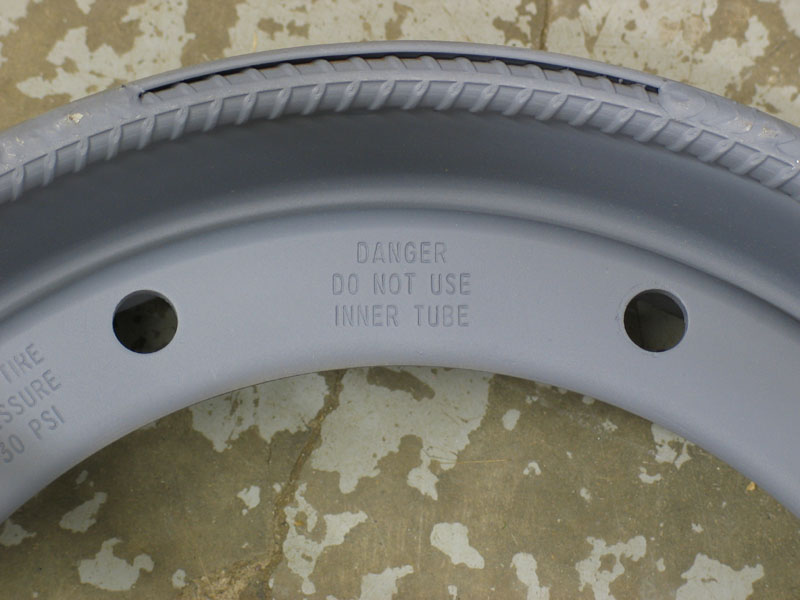 |
"DANGER DO NOT USE INNER TUBE" Again - note the quality of the welds between the rock ring and the rim. |
||||||||||||||||||||
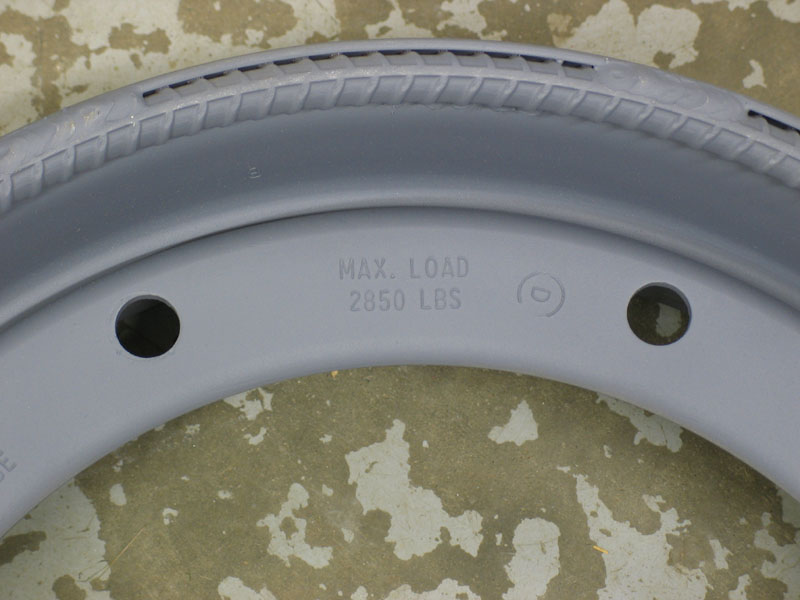 |
"MAX LOAD 2850 LBS" That's per rim. Even my rock pig isn't that heavy! |
||||||||||||||||||||
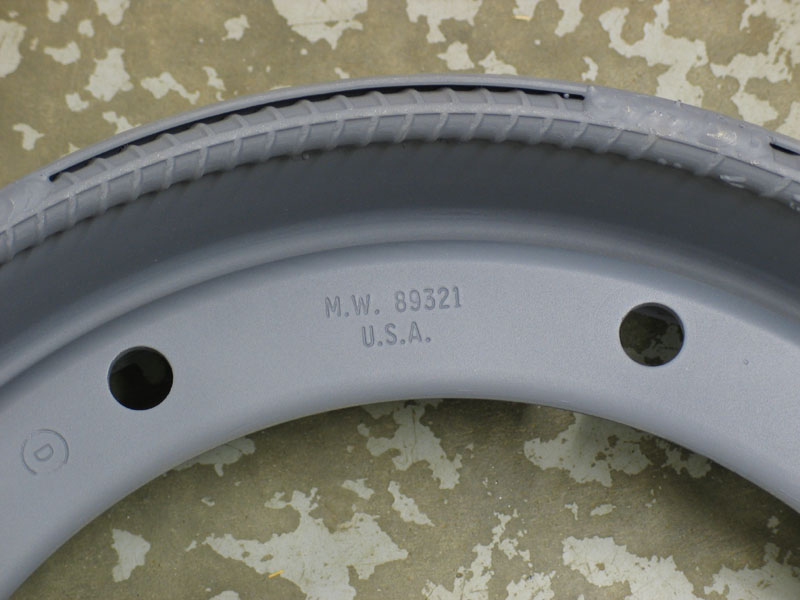 |
"M.W. 89321 U.S.A." Obviously made in the USA. No idea what the 'M.W. 89321' is though. |
||||||||||||||||||||
 |
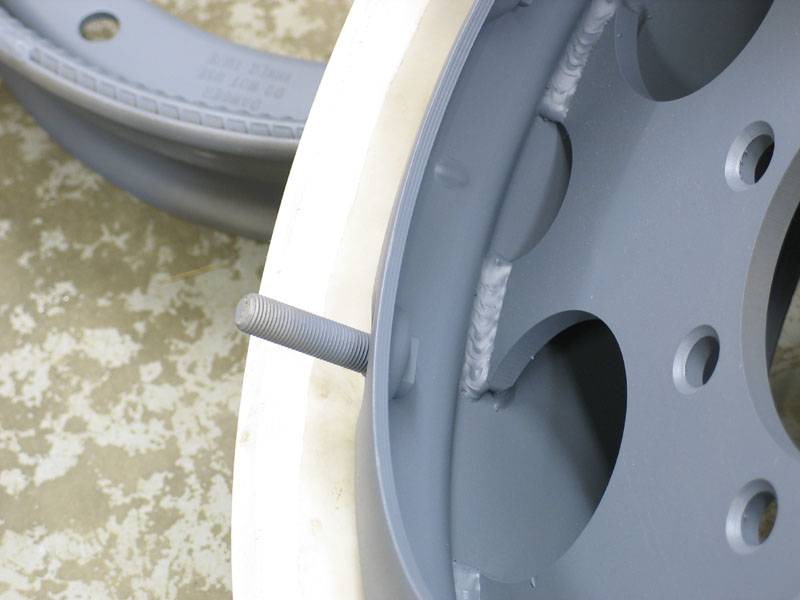
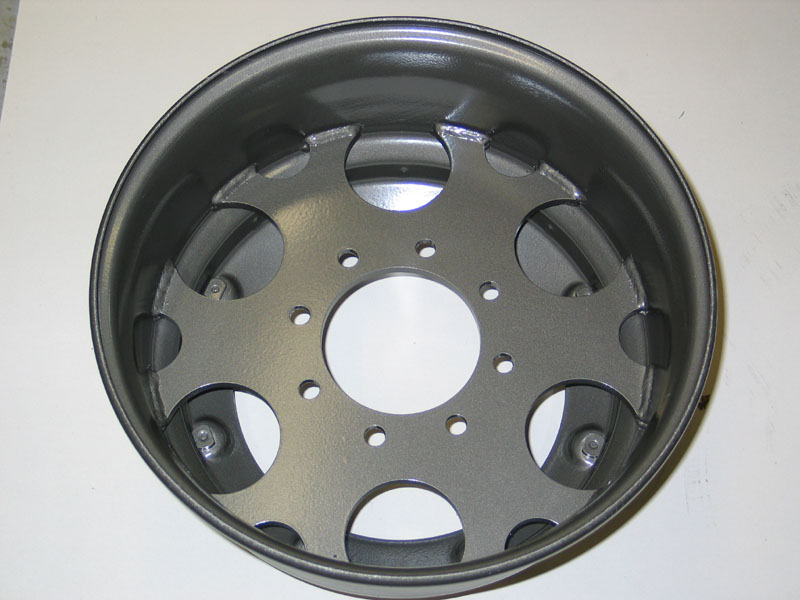
Here's a shot of the inner rim-half showing why the maximum backspacing available with the re-centre is 4.75". Any more and there isn't room to get a good quality weld on both sides of the centre section. |
||||||||||||||||||||
 |
Close up of re-centring. Very nice quality. |
||||||||||||||||||||
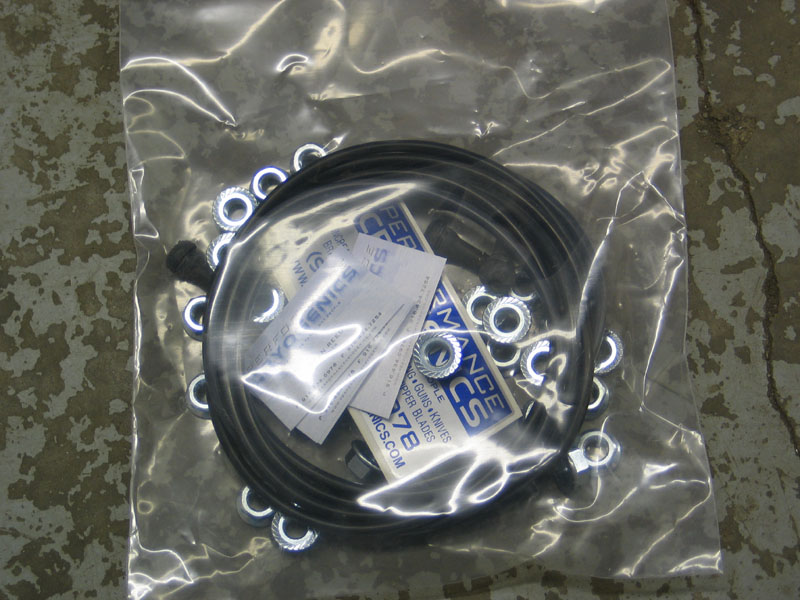 |
The rims ship with a bag containing all the hardware you need. | ||||||||||||||||||||
 |
It includes four O-rings (for sealing the two rim halves so they are air-tight); four short, rubber valve stems; and 32 brand-new, self-locking, flanged clamp-nuts. Plus a business card and a couple of stickers for good measure. The clamp nuts are 1/2"-NF20. The O-rings are 14.5" Buna-N (Nitrile) - British Standard part number 458N70 or AS568A "Dash Number": -458. |
||||||||||||||||||||
Complete specs are:
|
|||||||||||||||||||||
 |
|
||||||||||||||||||||
| The 8-stud bias-ply Hummer rim O-ring can be purchased directly from Dean and should also be available from any good O-ring supplier. For example, MCMaster-Carr sells them in a 2-pack, part number 9452K452. | |||||||||||||||||||||
 |
Before use, you must paint the rims any colour, or combination, you desire. I'd seen folks use a two-tone approach before - to compliment the two-piece design of the rims - and I liked the way it looked. |
||||||||||||||||||||
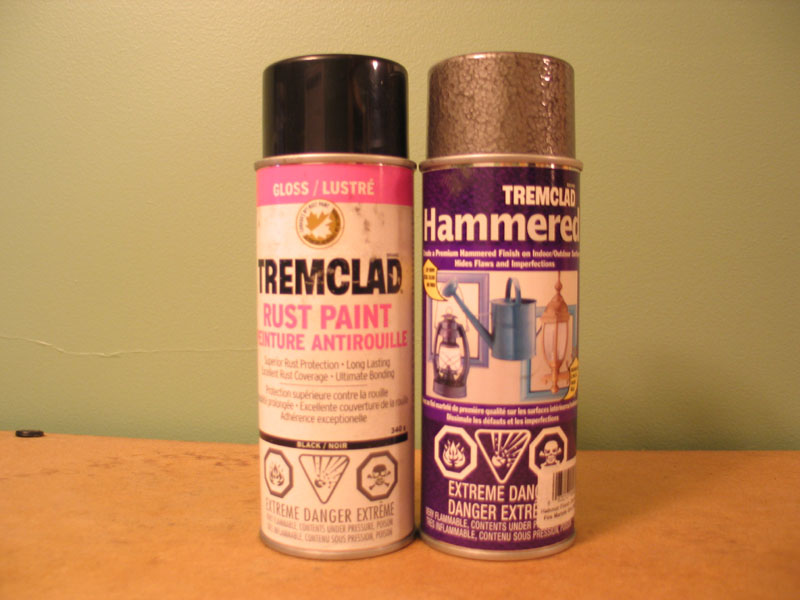 |
I chose "Tremclad" brand rust paint in "Hammered Finish Charcoal Grey" for the inner halves and good old "Gloss Black" for the outer halves. | ||||||||||||||||||||
 |
I think the "hammered finish" charcoal grey came out really well - especially for a rattle-can paint job! | ||||||||||||||||||||
 |
Back-side of inner-half painted. | ||||||||||||||||||||
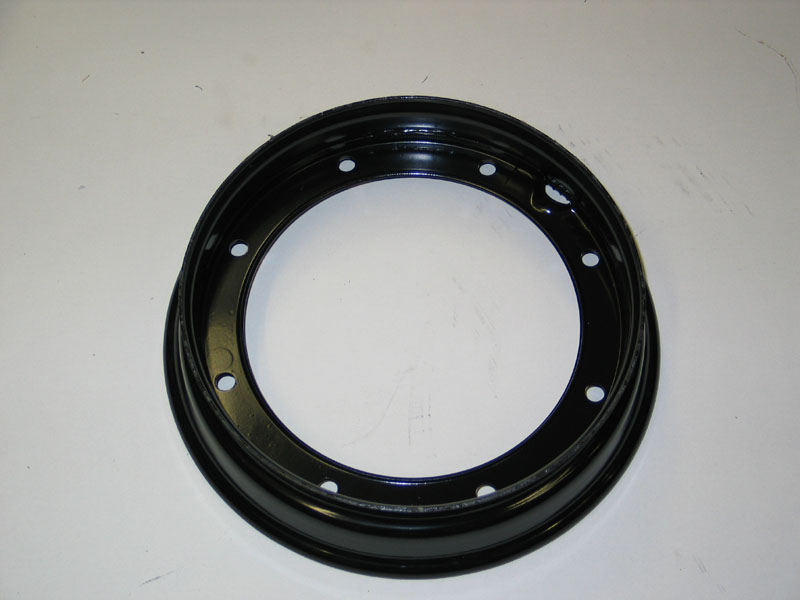 |
Back-side of outer-half in gloss black. | ||||||||||||||||||||
 |
Front-side of outer-half. I did two coats of each. |
||||||||||||||||||||
The combination looks really good together.
Specs and Dimensions |
|||||||||||||||||||||
 |
The specs on the rims are:
|
||||||||||||||||||||
| Note: Dean also has these rims available in the 12-stud (radial tire) Hummer rim version. According to Dean, the 12-stud rims weigh 52 lbs with custom centre and re-bar rock ring, and are rated to a maximum of 50 psi and 3850 lbs vice the 30 psi and 2850 lbs of the 8-stud version. | |||||||||||||||||||||
 |
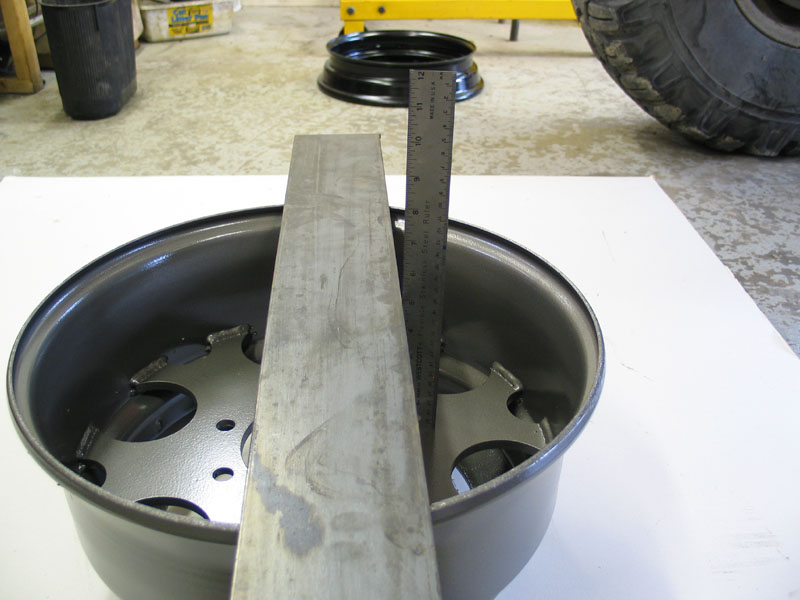
This pic clearly shows the overall width and "standard rim width" of the Hummer rims. Note that it is common practice to quote a rim's width as the dimension from bead-seat to bead-seat - which is 8.25" as clearly indicated by the top ruler. You may occasionally see a Hummer rim's width quoted as 9.75" as this is the total width from edge to edge, as shown by the lower ruler. |
||||||||||||||||||||
 |
Back-spacing is measured from the back side of the rim's mounting surface to the innermost edge of the rim, as illustrated here. | ||||||||||||||||||||
 |
4.75" backspacing. | ||||||||||||||||||||
Fitment |
|||||||||||||||||||||
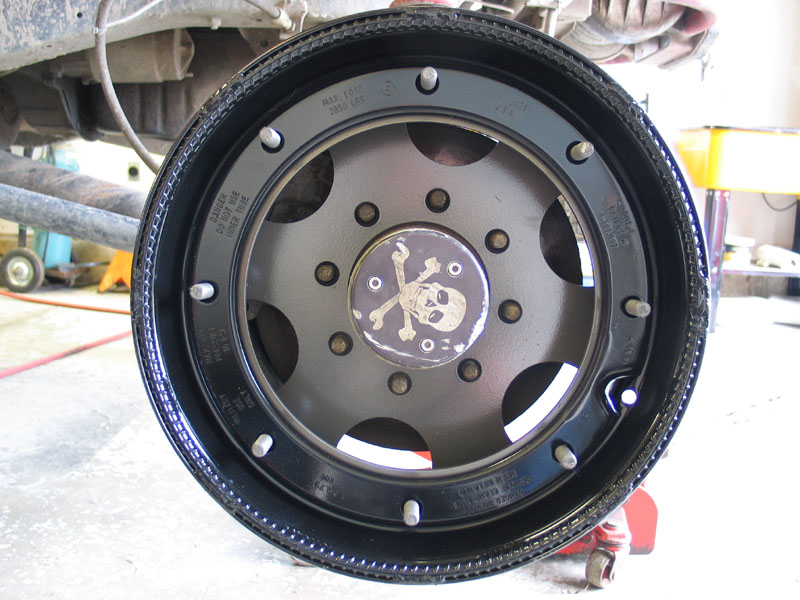 |
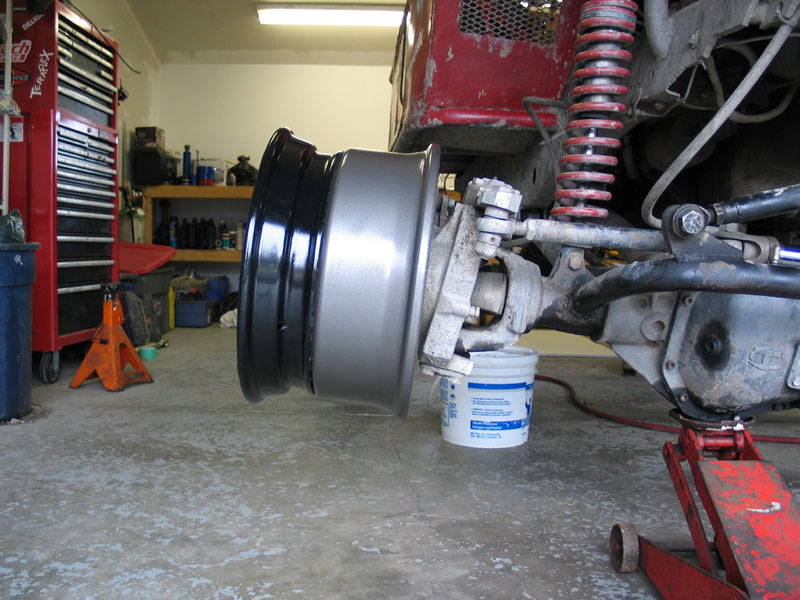
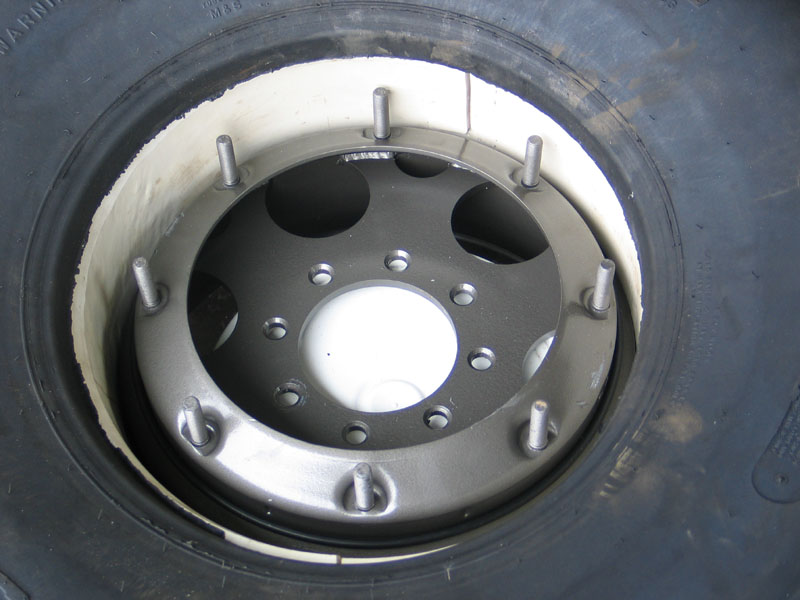
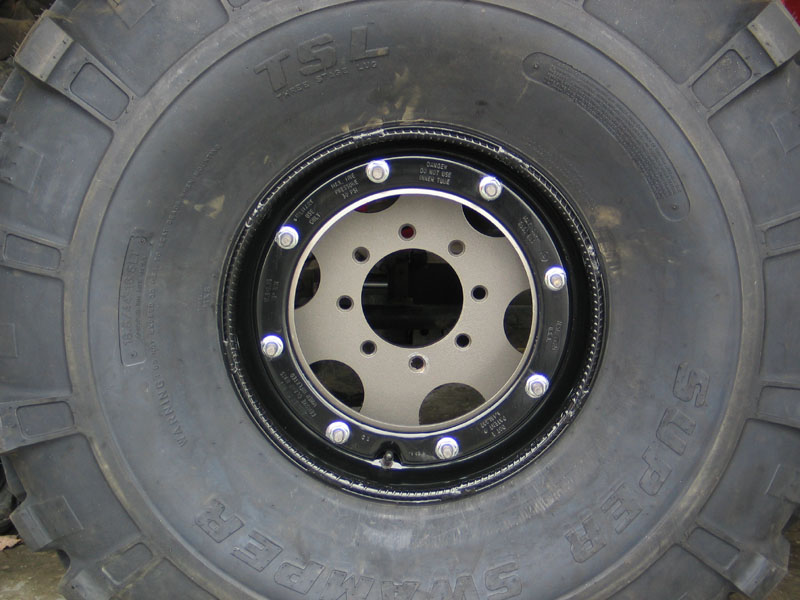
With the rim loosely assembled and installed on the rig it is obvious Dean cut the bolt pattern and centre-hole perfectly. With heavy tires and wheels it's a real advantage to have the hub to rim-centre clearance at close tolerance as shown here. This helps tremendously in mounting the heavy tire and rim combination, allowing you to heave the wheel into place on the hub and then carefully rock it into place over the lugs. |
||||||||||||||||||||
 |
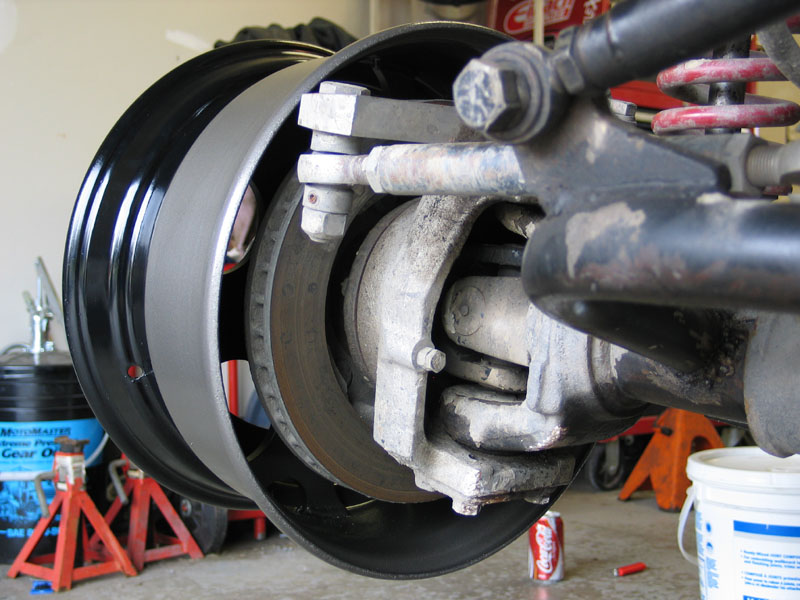
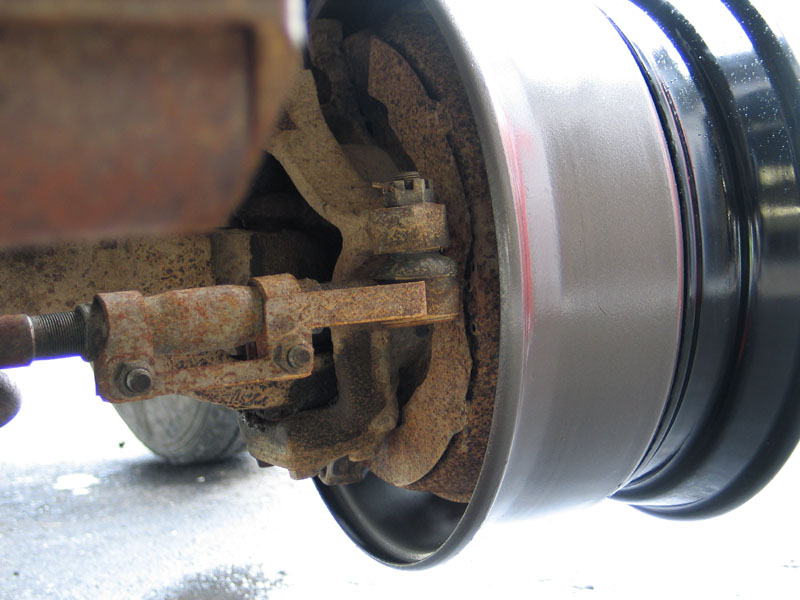
The 16.5" rim diameter gives plenty of clearance for brakes. This pic shows my Dana-60 front axle with custom-modified 3/4 ton brakes. |
||||||||||||||||||||
 |
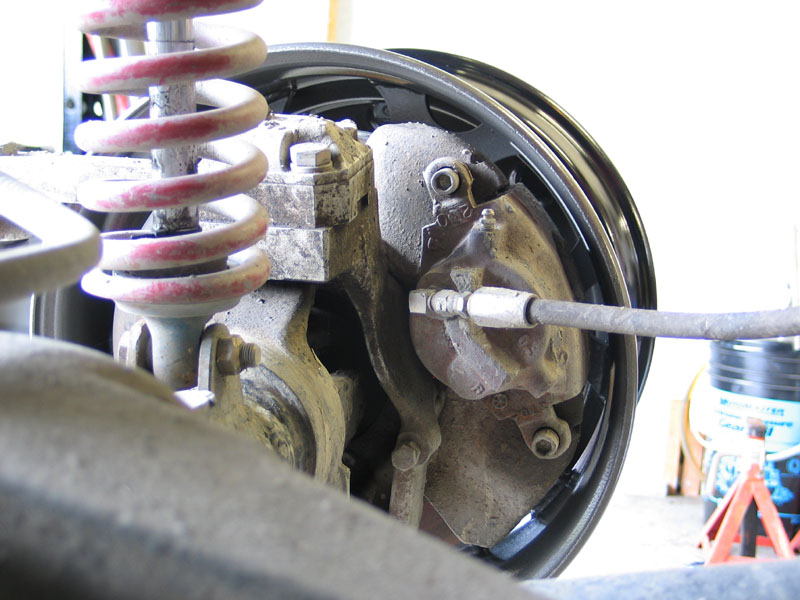
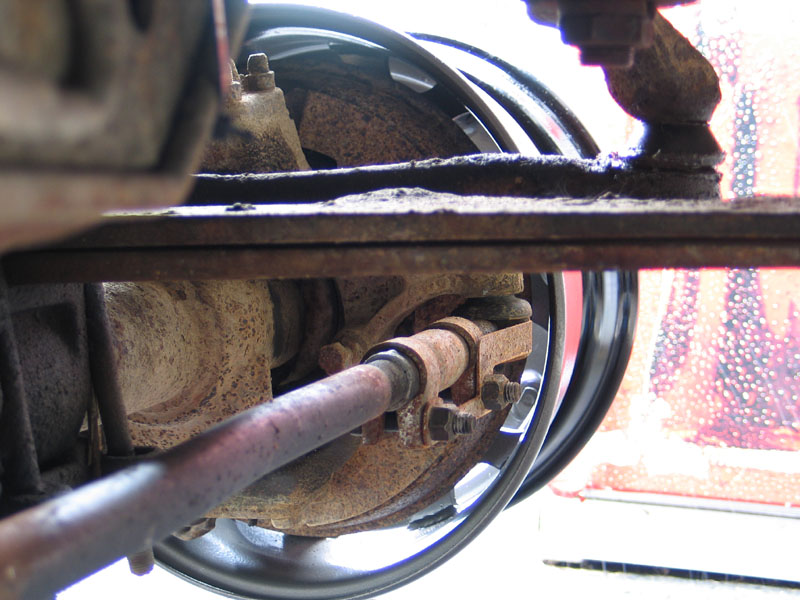
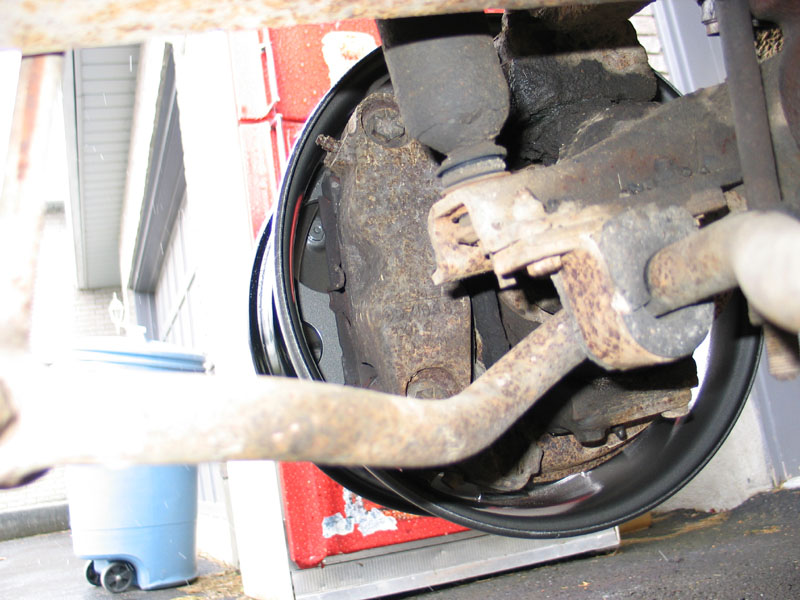
Steering arm clearance is another consideration when deciding rim-width and backspacing requirements. In this pic it almost looks as if steering-arm clearance might be an issue - until... |
||||||||||||||||||||
 |
...we check the front view and find that there is plenty of room because of the backspacing. | ||||||||||||||||||||
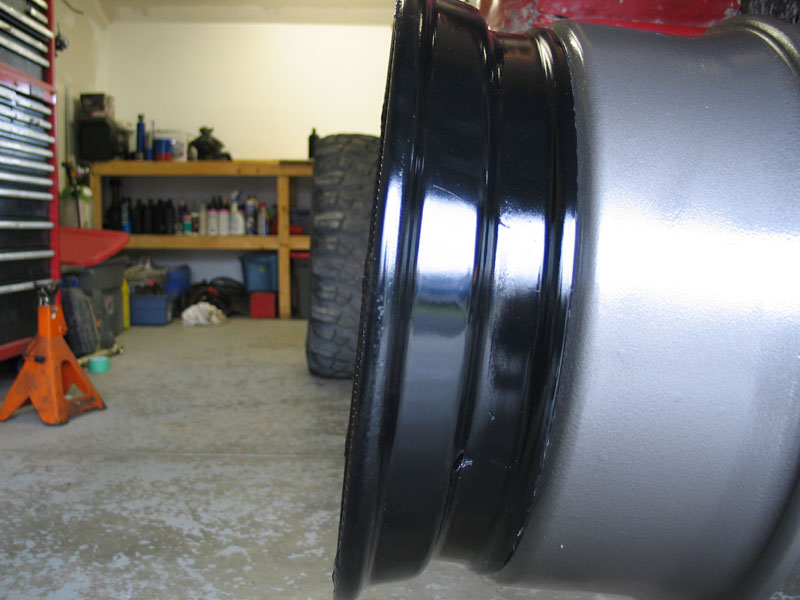 |
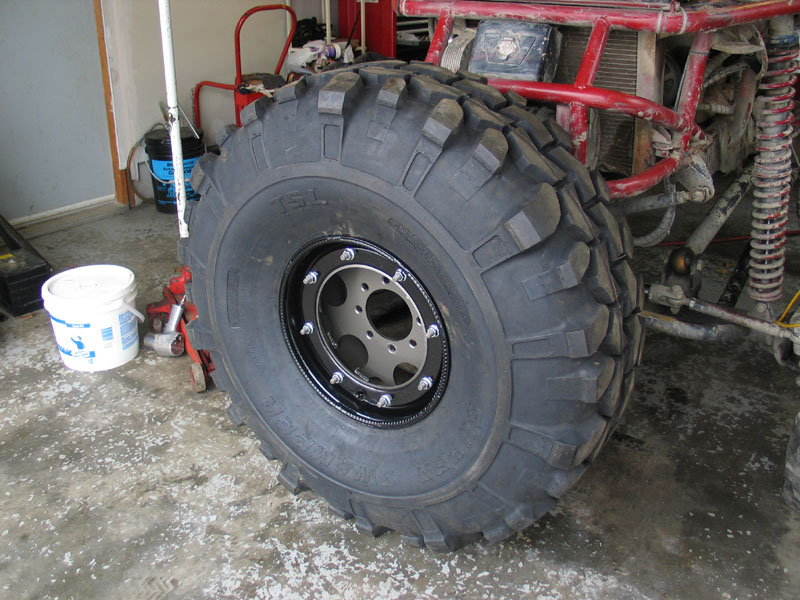
I carefully chose the backspacing I wanted to give me as much clearance as possible between the rim/tire and the vehicle, without leaving the hub unprotected. 4.75" turned out to be perfect for me, as the hub stays tucked inside the rim. |
||||||||||||||||||||
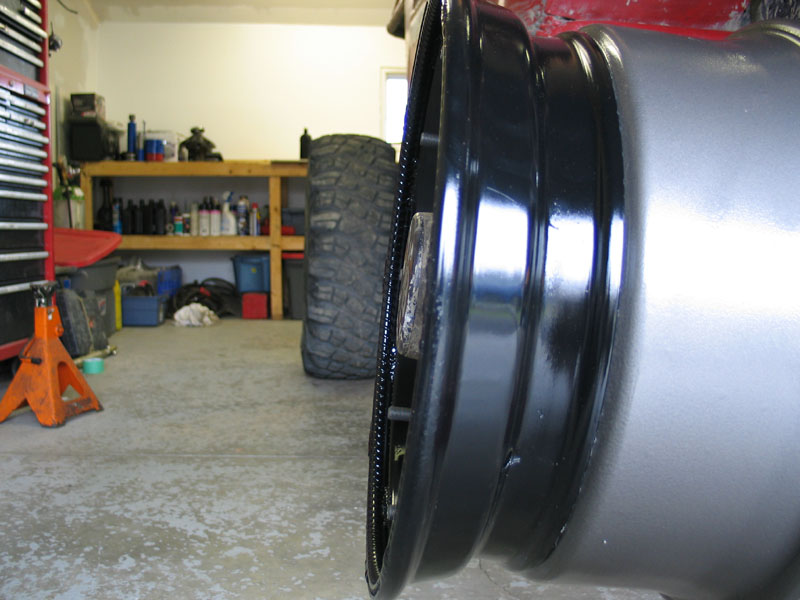 |
Here you can clearly see the hub, nestled just inside the outer edge of the rock rings - perfect! | ||||||||||||||||||||
| And just because I care... | |||||||||||||||||||||
 |
...I decide to also test-fit the new rims on the Dana-60 front axle of my old Ford F-250 tow rig - a rig with stock steering and the notoriously large double-piston front callipers. | ||||||||||||||||||||
 |
Inside of driver's front - steering clears nicely. | ||||||||||||||||||||
 |
Driver's front. | ||||||||||||||||||||
 |
The huge disc-brake callipers fit nicely inside the rim, even with 4.75" of backspacing. | ||||||||||||||||||||
 |
No worries at all. | ||||||||||||||||||||
| Installation | |||||||||||||||||||||
 |
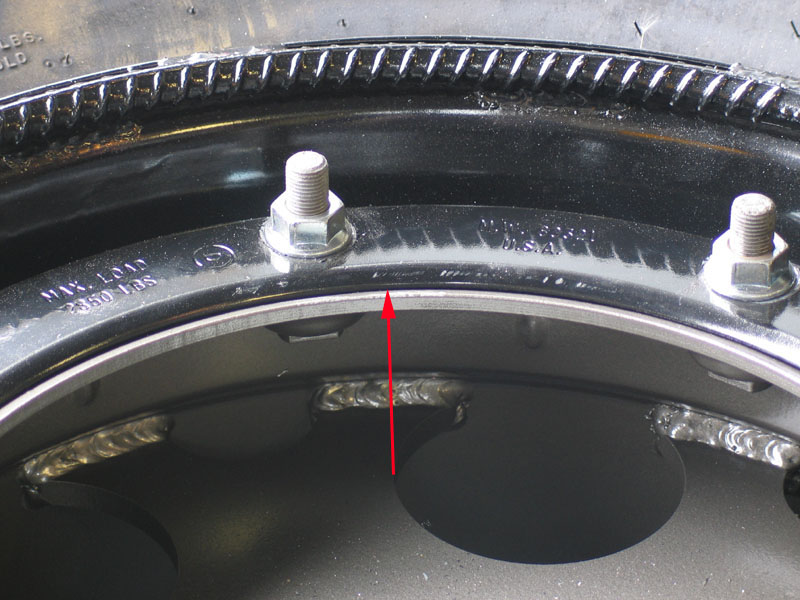
Once you have your rims painted and dry you're ready to assemble them. Step 1: Install the O-rings on the inner-halves. Generously lubricate the O-ring with tire-soap or soapy-water. Install it on the first ledge of the rim , one inch below the studs. Ensure it is uniformly positioned and not twisted. The red arrow shows correct placement. |
||||||||||||||||||||
 |
The following two pictures illustrate the corresponding O-ring mating surface on the outer-rim half. | ||||||||||||||||||||
 |
This is where the O-ring will seat when the two rim-halves are bolted together. | ||||||||||||||||||||
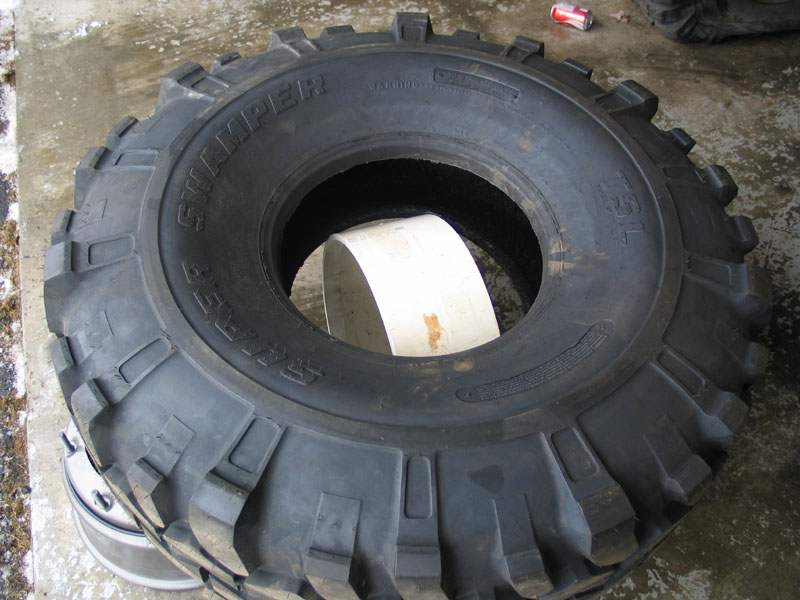 |
Step 2: Insert the beadlock-insert into the tire. Dean supplies the inserts as one-piece units. Getting them in the tire can be a bit of a challenge. The best method is to set the insert on its edge, as shown, and then place the tire over it. |
||||||||||||||||||||
 |
In this way the contact between insert and tire is reduced to just four points and if you bounce up and down on the tire you should be able to get the insert to pop in. A buddy can be very helpful when doing this. With a one-piece insert the real challenge though is getting it out of the tire again. I've heard of folks having to resort to strapping the tire to a tree and yanking or winching the insert out! |
||||||||||||||||||||
 |
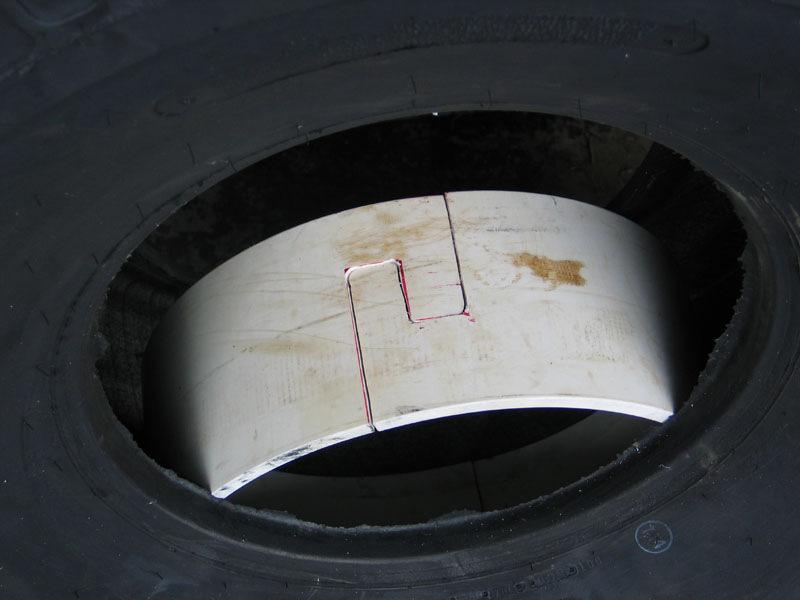
For this reason I decided to convert my inserts into two-piece units by cutting them as illustrated. | ||||||||||||||||||||
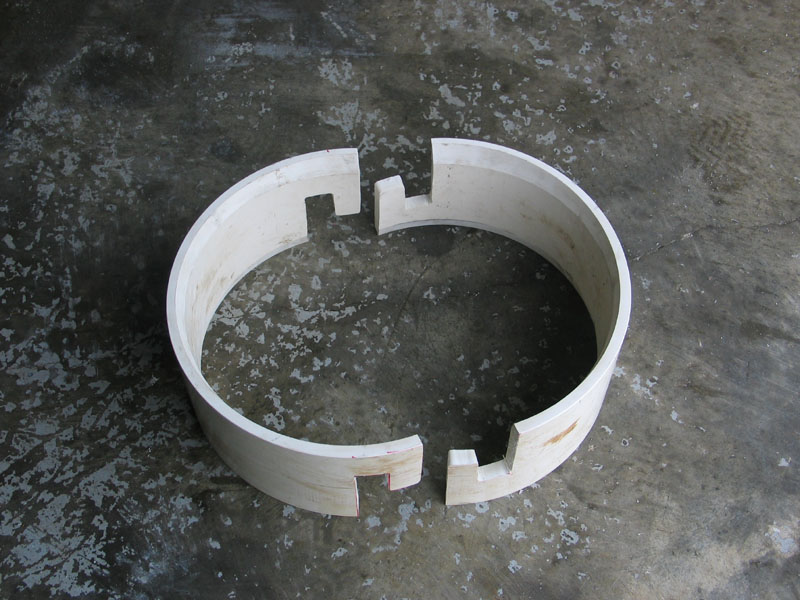 |
This way I get a two-piece insert that will very easily go into, and come out of, the tire, but because of the shape of the cuts, cannot come apart once placed in the tire and installed on the rim. By using this "jigsaw-puzzle" pattern to make the cuts I also don't have to fiddle with screws, little metal plates, and trying to screw two halves together once they're inside the rim. They literally just snap together. If you decide to do this - be sure to cut both sides in the same direction, as shown. If you don't it's very hard to get the halves back together. |
||||||||||||||||||||
 |
With the insert in two pieces, both halves can easily be placed inside the tire... | ||||||||||||||||||||
 |
...and then fit back together. | ||||||||||||||||||||
 |
Once back together inside the tire, the insert:
|
||||||||||||||||||||
 |
With the insert inside the tire, place the inner rim-half on a bucket so that the back side of the rim is sufficiently clear of the ground to prevent the tire from touching the ground when it's laid over the rim. I used an old drywall-mud pail. |
||||||||||||||||||||
 |
Step 3: Install the tire and insert over the inner rim. Lift the tire and place it over the inner rim-half so that the insert slides over the rim as shown. |
||||||||||||||||||||
 |
Wiggle the tire around (or carefully use a screwdriver between the tire bead and the beadlock insert) until the tire is centred on the insert. Check that the O-ring is still evenly in place and well lubricated. |
||||||||||||||||||||
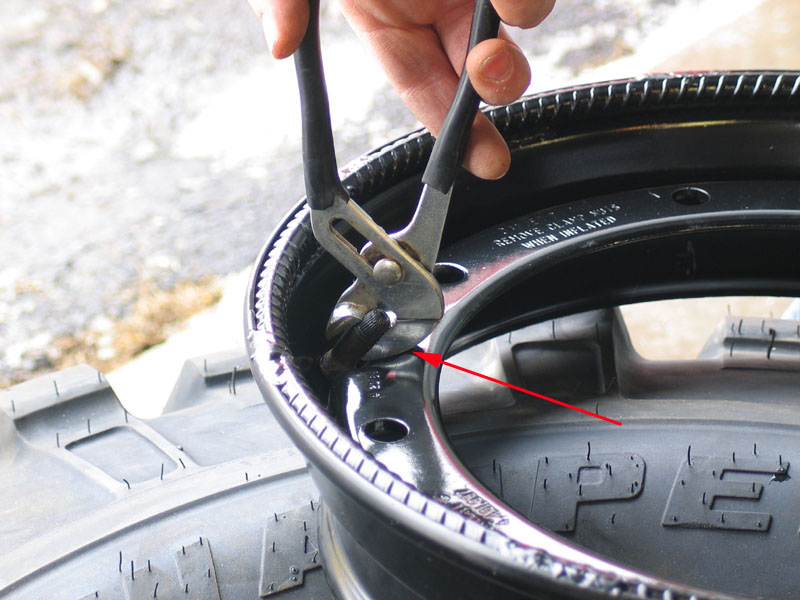 |
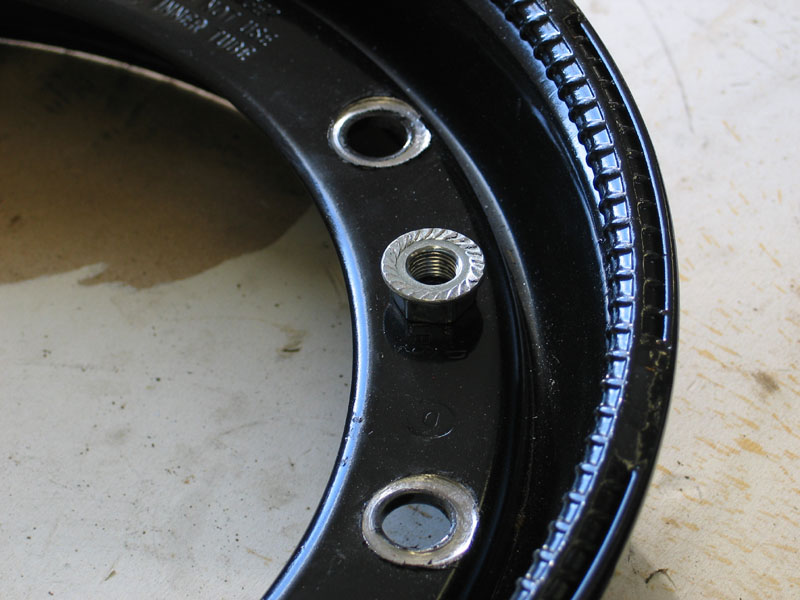
Step 4: Install the valve stem Next, install the valve stem in the outer-rim. There is, of course, a proper tool for doing this. Which, of course, I didn't have. It's actually harder than you might think, but I managed some success by using channel-lock pliers. By leveraging the curved profile of the pliers against the rim (red arrow) I was able to get them in place without mangling them too badly. Well ...three out of four isn't bad. Tip: Have extra valve stems on hand because, without the proper tool, it's hard to get them in place without damaging them. Tip 2: Generously lubricating the valve stem with WD-40 considerably eases the installation. |
||||||||||||||||||||
 |
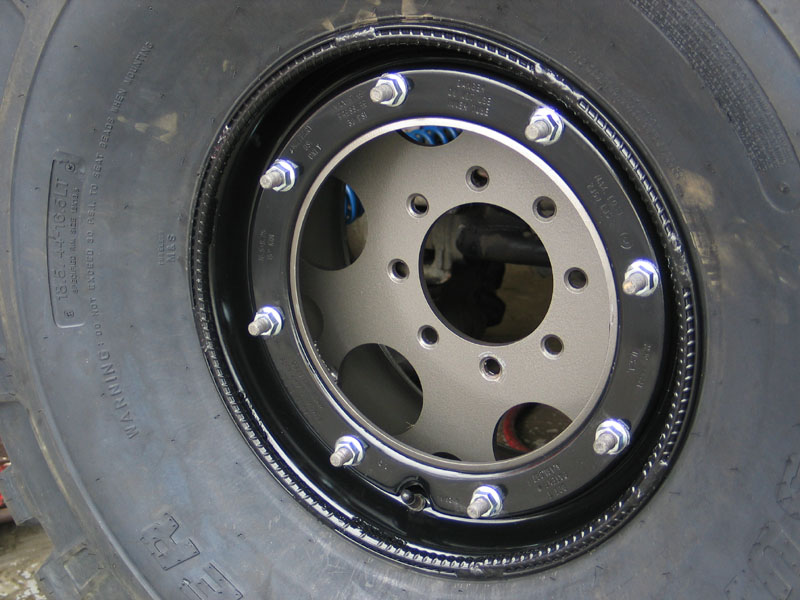
Step 5: Install outer rim-half Place outer rim-half over the studs and press down to seat it. This pic shows my 42" TSLs being mounted and you can see that there is plenty of room to get the nuts started on the studs. |
||||||||||||||||||||
 |
I'd heard of some folks having problems getting the nuts started with larger tires and I wanted to check this out for myself. I always try and make it a habit to have as much first-hand experience as possible with what I'm writing about. In the interest of bringing you the best information possible I borrowed a 44" TSL from the good folks at National 4WD in Burlington, Ontario so that I could test-mount it and check out the situation for myself. As you can see, even with a 44" tire I had no troubles having enough threads to start the nuts. Both 42s and 44s mounted and aired-up easily. My thanks to the gang at National 4WD ( http://www.national4wd.com / E-mail: sales@national4wd.com) |
||||||||||||||||||||
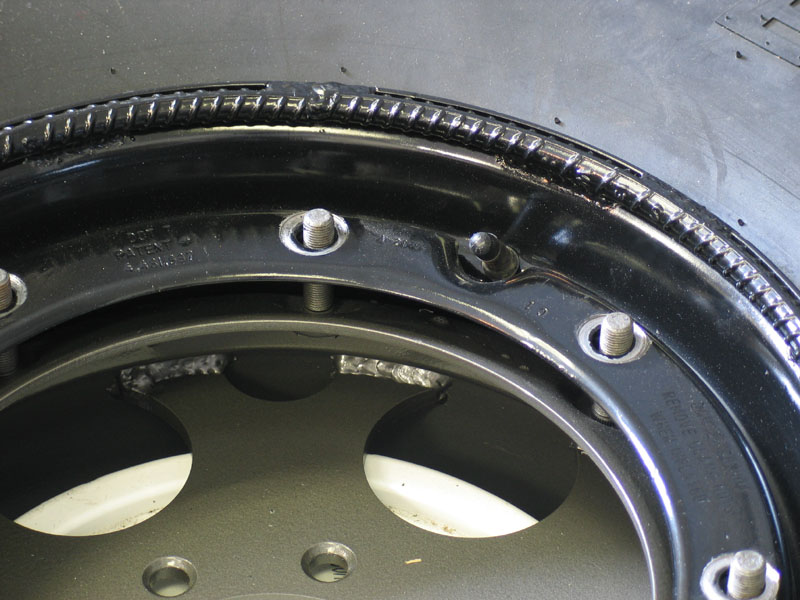 |
This illustrates the size of the gap between the inner and outer rim-halves before you torque the nuts down. | ||||||||||||||||||||
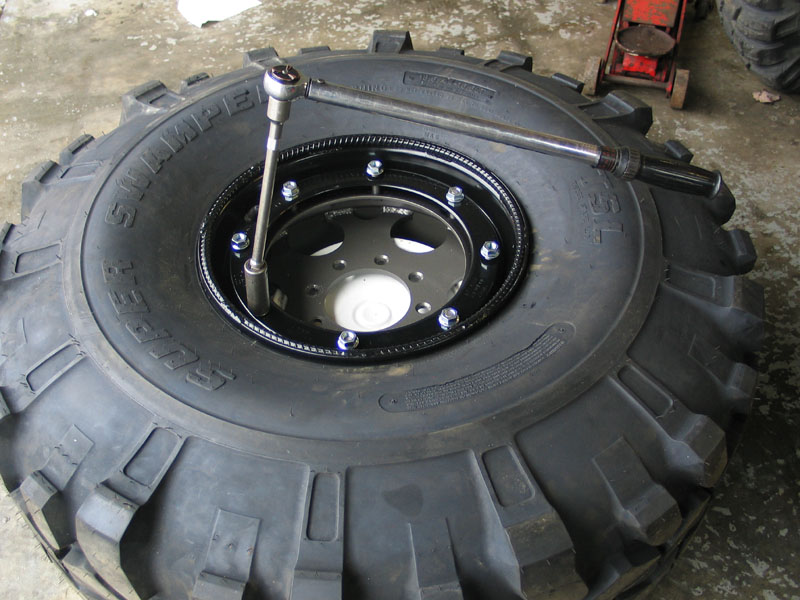 |
Step 6: Install and torque the clamp-nuts It is very important to tighten the nuts in several stages, in a star pattern, to evenly clamp the bead and prevent warping the outer rim-half. Torque specs are: 8 stud (bias) rim - Tighten to 55 ft/lbs initially, then final torque to 65 ft/lbs 12 stud (bias and radial) rim - Tighten to 85 ft/lbs initially, then final torque to 125 ft/lbs. When finished, the gap between the rim halves should be no greater than 1.5 thou (0.0015") |
||||||||||||||||||||
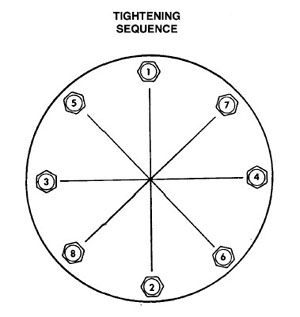 |
It is very important to do the job properly as the 8 or 12 studs hold the entire wheel assembly together. This diagram illustrates the proper tightening sequence. |
||||||||||||||||||||
 |
Gap reduces as nuts are tightened. The spec is 1.5 thou, which for all practical purposes pretty much means touching. I actually got out a feeler gauge to check - I think it was probably the first time I'd ever used a 0.0015 feeler. It is, in technical terms, "very, very thin". If you are using 8-stud rims and tires with extremely thick beads you may find that you reach the final torque before the gap is less than 1.5 thou. In this case you have a decision to make: allow a larger than spec gap or slightly over-tighten the nuts. |
||||||||||||||||||||
 |
Getting closer - but still far too much gap. In my case, at 65 ft/lbs there were just a couple of spots wider than 1.5 thou. I checked the max torque values for 1/2"NF-20 fasteners and found them to be 53-73 ft/lbs for Grade 5 and 81-103 ft/lbs for Grade 8. Not knowing the exact grade of the studs in question, I still felt quite comfortable going to 75 ft/lbs. When I did, my gap was within spec. You will have to make your own decision and proceed at your own risk. |
||||||||||||||||||||
 |
The only disadvantage to the design, that I could find, is illustrated here. Due to the width of the tire's beads, the torque specs, and the fact that the two rim-halves must virtually touch: the clamp-nuts tend to gall the outer rim-half surface quite badly. This is exacerbated by the fact that the underside of the nuts have an almost "barbed" surface (to assist in preventing vibrational loosening) - which tends to add to the tendency to chew up the rim surface. I considered using a large, hardened, flat-washer between clamp-nut and rim, but decided against it as this would negate some of the positive locking ability of the clamp nuts. In the end - I decided that the most important thing was for the nuts to stay tight and consoled myself with the fact that the rims should not have to come apart very often. |
||||||||||||||||||||
 |
Step 7: Air-up the tire Once the nuts are tightened down you need only air-up the tire and you're done. To get a good initial blast of air to help seat the beads, I removed the valve cores and stuck the quick-disconnect coupler of my air hose (with no air chuck) directly over the valve stem . The tires seated and aired-up extremely easily. |
||||||||||||||||||||
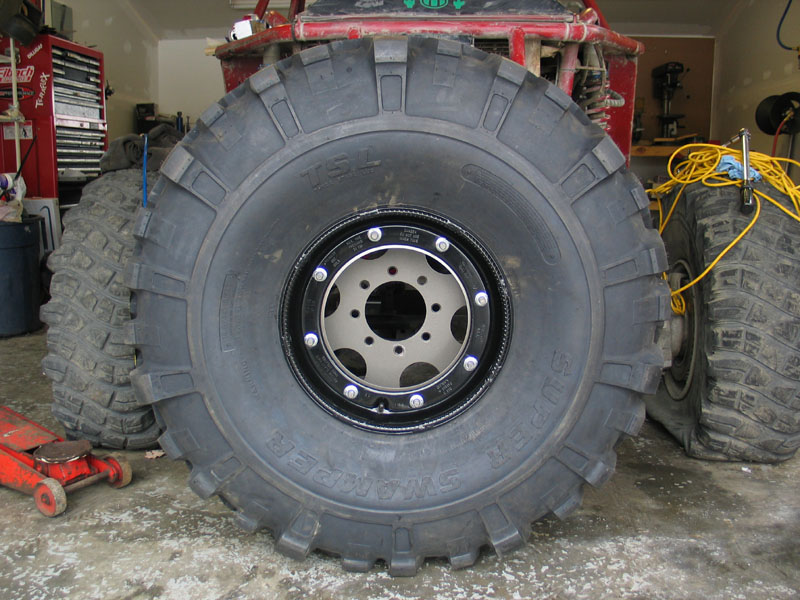 |
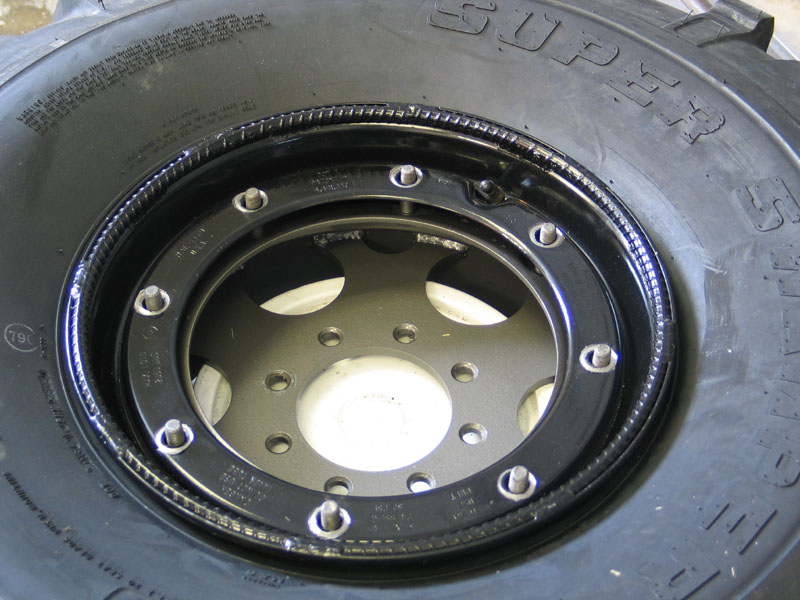
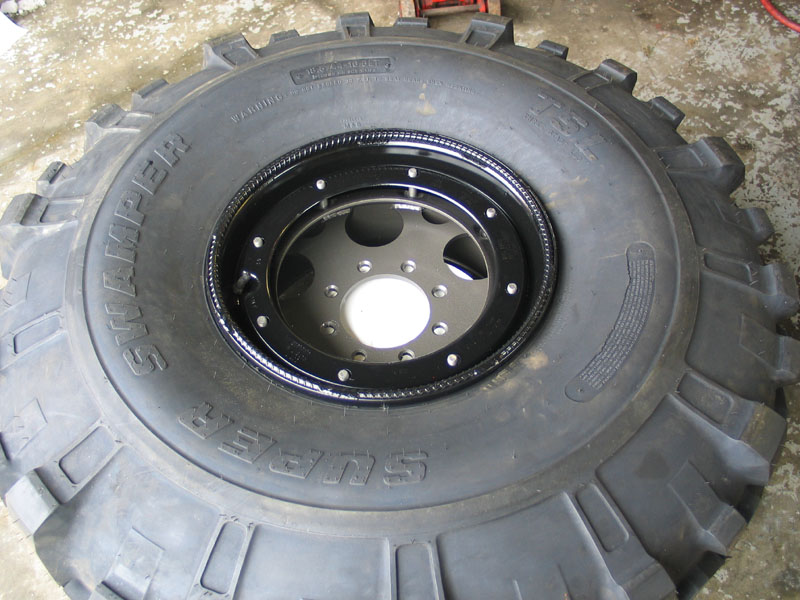
Finished tire and rim assembly, ready to be mounted. | ||||||||||||||||||||
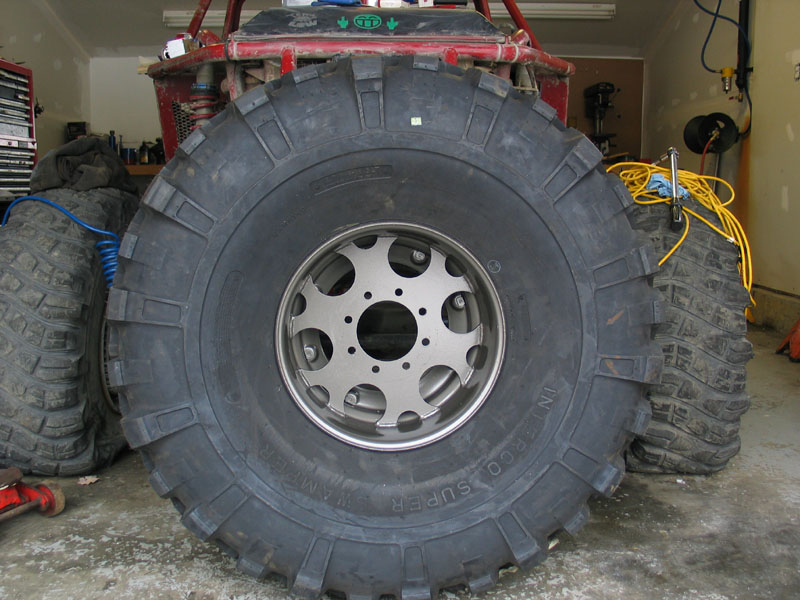 |
View from the back side. | ||||||||||||||||||||
 |
Close up. | ||||||||||||||||||||
|
|||||||||||||||||||||
 |
An awesome combo - Super Swamper TSLs and Dean's custom Hummer double beadlocks! | ||||||||||||||||||||
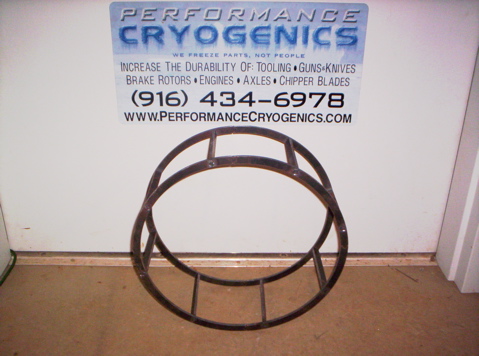
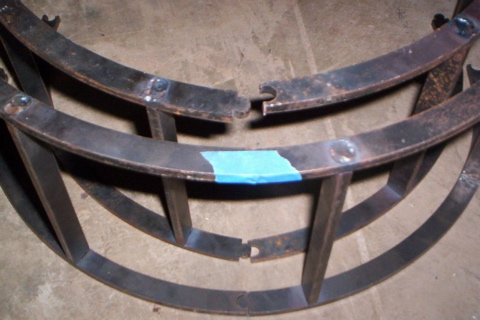
UpdateSince first writing this article Dean has stopped producing the PVC inserts and has instead moved to a custom, laser-cut, steel version that he tells me "weighs only half as much, costs less, and is much cheaper to ship." I do not have any personal experience with them but below are a couple of pics that Dean provided. You can get more information by contacting Dean directly. |
|||||||||||||||||||||
 |
|||||||||||||||||||||
 |
|||||||||||||||||||||
 |
|||||||||||||||||||||
|
|||||||||||||||||||||
|
Sources: Performance CryogenicsDean
Reed |

|

