 |
Fox Air Shox By Bill "BillaVista" Ansell |
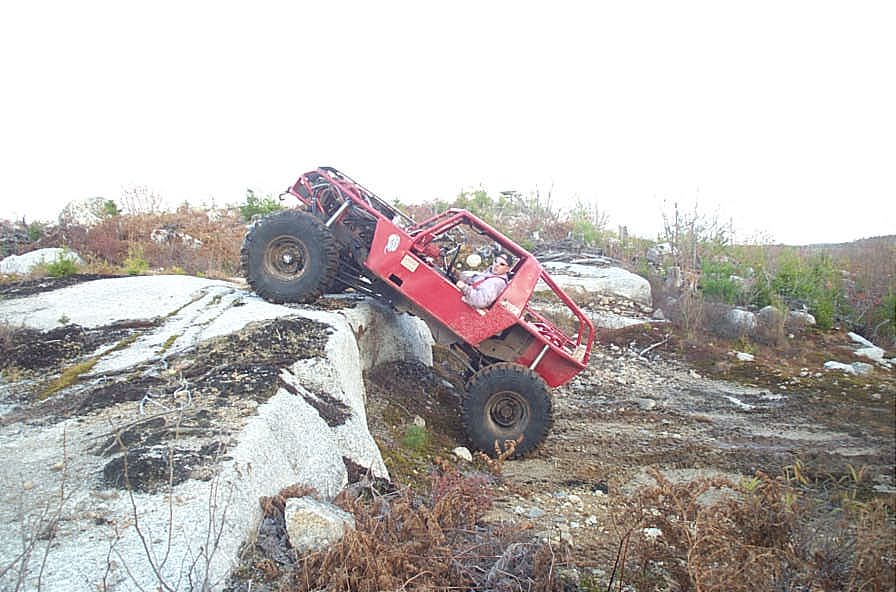
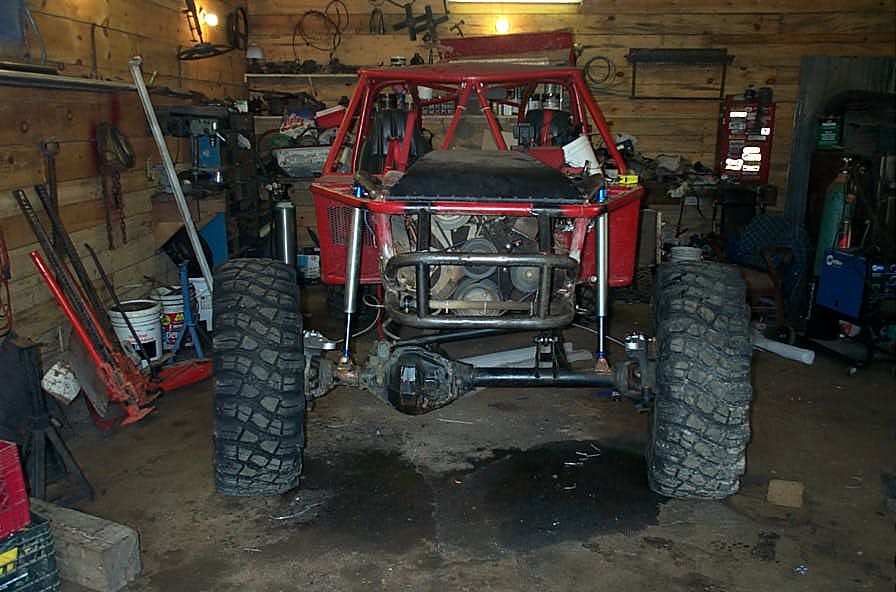
IntroductionTowards the middle of the 2003 'wheeling season I began to research new suspension design options for my buggy, The Wolf. I had exceeded the original design capabilities of the buggy. Primarily in terms of the steering and links. The original radius-arm bushing design could no longer properly control the front axle and the steering was almost completely ineffective. |
 |
Part 1 - What & Why? |
|
 |
I was having big issues, and it was starting to be un-fun! | |
| I knew I wanted to go to a full hydraulic steering system using a balanced cylinder (what many call a double-ended ram), and I would be redoing my front links. But before I began the re-design, I had to decide on a new system for springs and shocks. | ||
 |
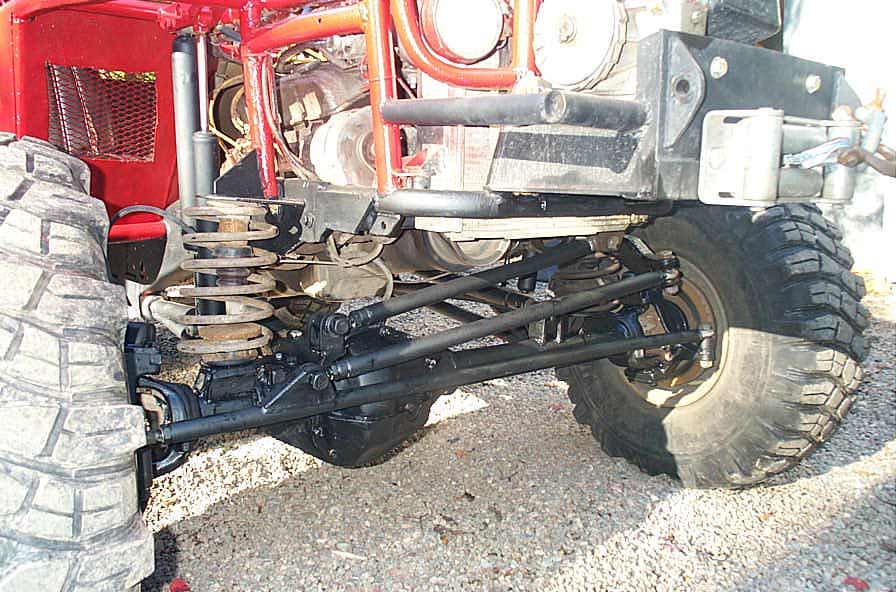
One of the main reasons for this was: I wanted to significantly "clean up" the suspension, particularly in front, so that I would have the maximum possible room and flexibility for both steering and link geometry. |
|
 |
In the original design, using conventional coil springs and multiple shocks, plus the bump stops and coil buckets etc - there was very little room. | |
 |
In addition, I wasn't happy with the springs I had tried to that point. Originally, it had short, fat, very soft coils from the rear of a, believe it or not, '69 El Camino. It flexed great but I was frequently on the bump stops and found myself unable to do any kind of speed. | |
|
I tried longer, stiffer, small diameter coils - this time from the front of a V8 Jeep Grand Cherokee. It was firmer, but still left no tunablility and all sorts of "stuff" was still in the way of where I wanted to put steering and suspension linkages. | |
So I started researching other options. Of course - coil-over shocks came to mind - lots of tunability, proven performance, reasonably compact package, and easy to mount. The only problem is - they are quite an expensive option, especially once you add up the cost of the required springs for a double or triple rate setup. It was right around this time that I came across Ron, driver for Team Purple, a professional rock crawling team, and owner of Off Road General Store. He had posted pics and comments about the "new" Fox Racing Shox 2.0 Airshox he was using on his wild new competition rock buggy. I place the word 'new' in quotation marks because air shocks are not a completely new concept, they have been in use for sometime in various vehicles from motorcycles to race trucks to monster trucks - but they are just recently beginning to make inroads with the off-road/rock crawling crowd. |
||
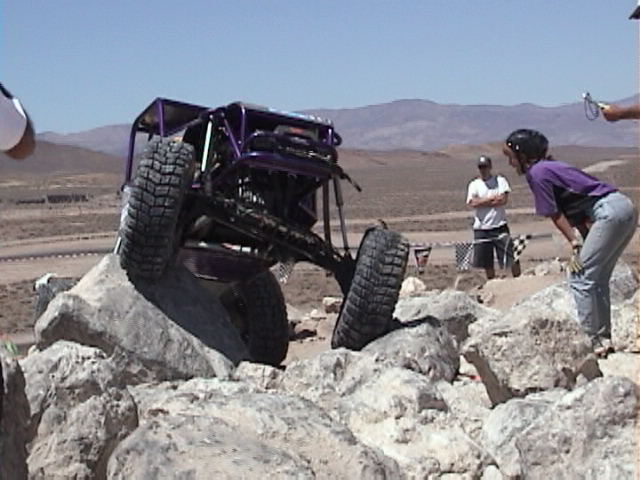 |
The awesome Team Purple rock buggy in action on it's Fox Airshox. | |
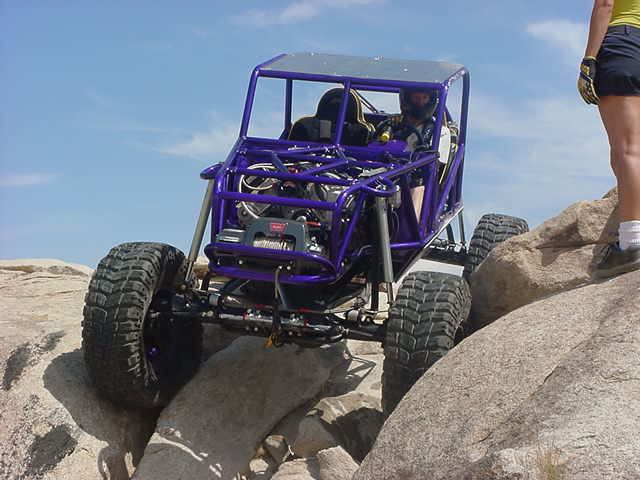 |
Team Purple rock buggy in action on it's Fox Airshox. | |
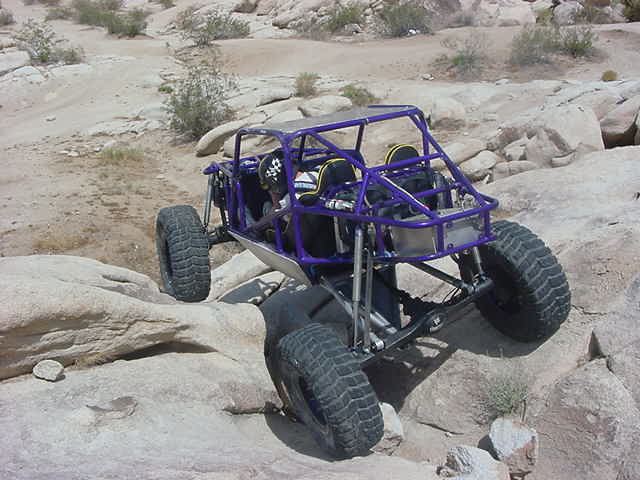 |
Team Purple rock buggy in action on it's Fox Airshox. | |
After asking around amongst those with experience with them, doing some research, and talking directly with Fox, I surmised the following (note that, unless specifically noted, the comparison is with "traditional" suspension setups consisting of a spring (leaf or coil) and separate shock absorber. This is simply because this is currently my only frame of reference, having had no personal experience with coil-over suspensions): Advantages:
Disadvantages:
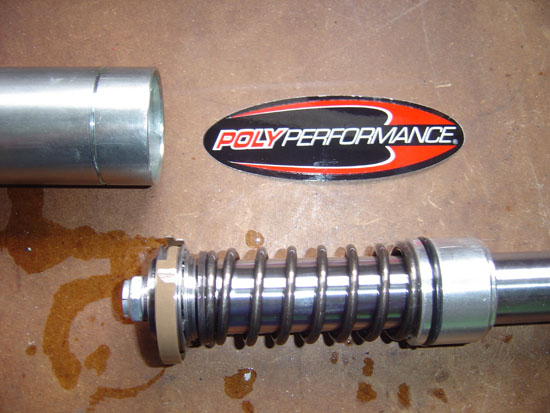
After talking to Ron and to Fox I then sought the opinion of Dave at Poly Performance. I have been a satisfied customer of Dave's in the past, and I know he deals and services a large array of high quality aftermarket shocks, from coil-overs to Airshox and I trust and respect his opinions. In the end I decided that the only possible concern for me would be the weight of my buggy, as I'm right at about 950 lbs sprung weight per corner in front. Other than that, the Fox 2.0 Airshox seemed like they might be a perfect solution for me. So I decided to try them and what follows is what I found: Part 2 - DescriptionWhen I ordered my Fox 2.0 Airshox, the longest available was a 14" travel unit, so that's what I ordered As I write this, I have just heard from Dave at Poly Performance that there is now a 16" travel version available and that he will have them in stock by the time you read this. |
||
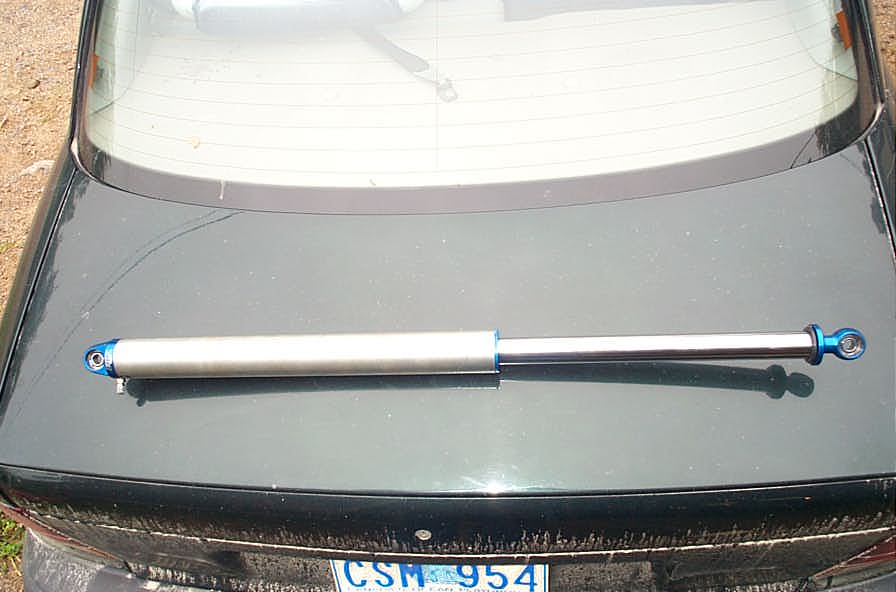 |
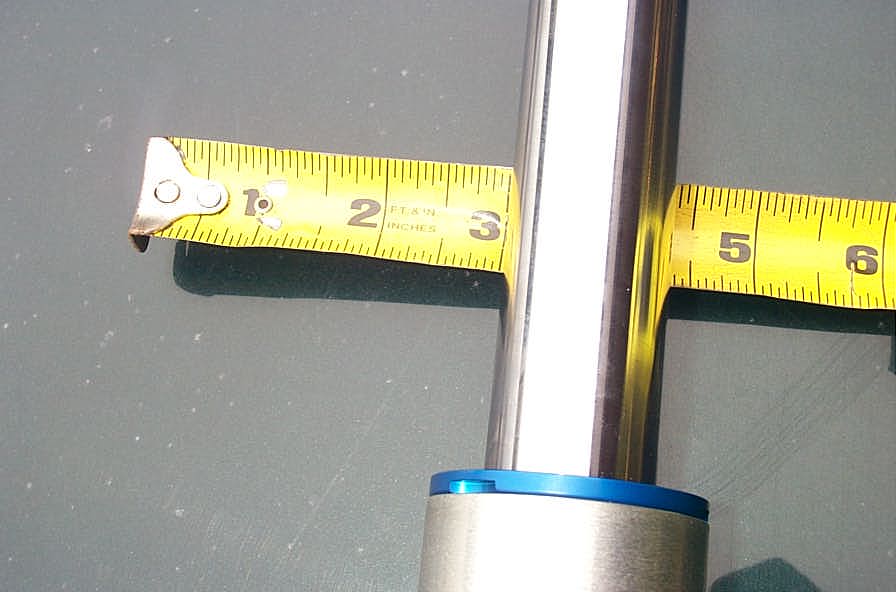
Part number 980-99-020-A, 35.33" eye to eye extended length, 21.33" eye to eye compressed length, 14.00" travel, weighing in at a tiny 6.8 lbs, the Fox 2.0 Airshox is amazingly simple and compact. Seen here adorning the trunk lid of my trusty Saturn. | |
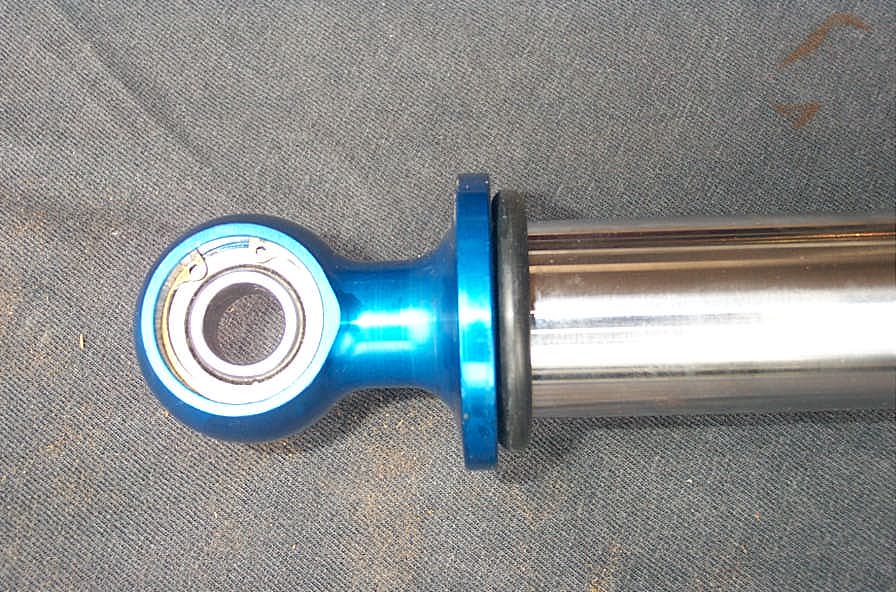 |
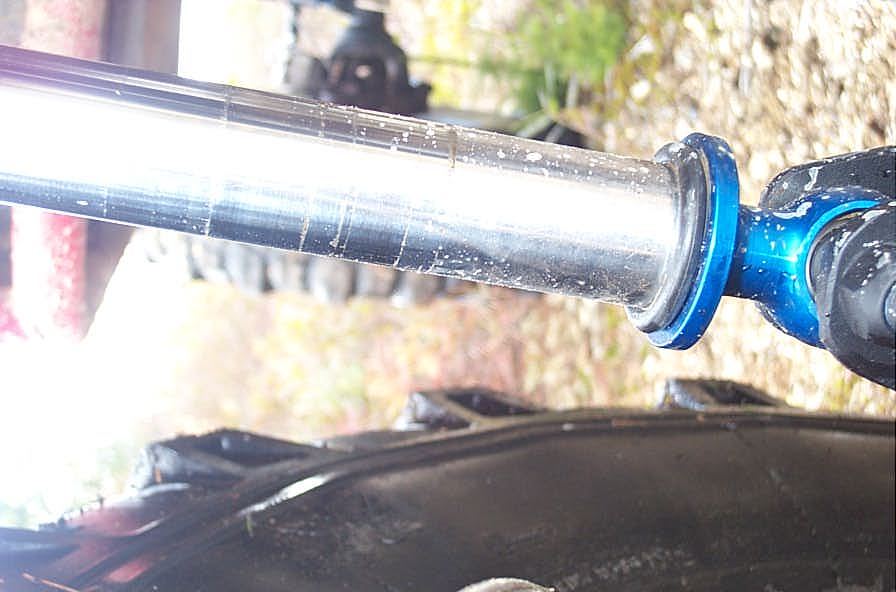
Close-up of the rod end. The spherical bearings are Aurora brand and have a 1/2" bore. | |
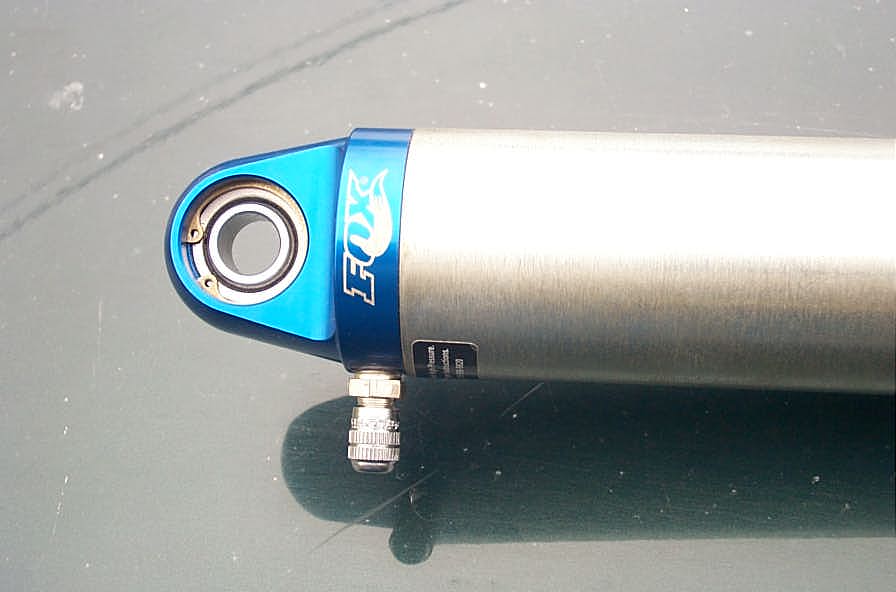 |
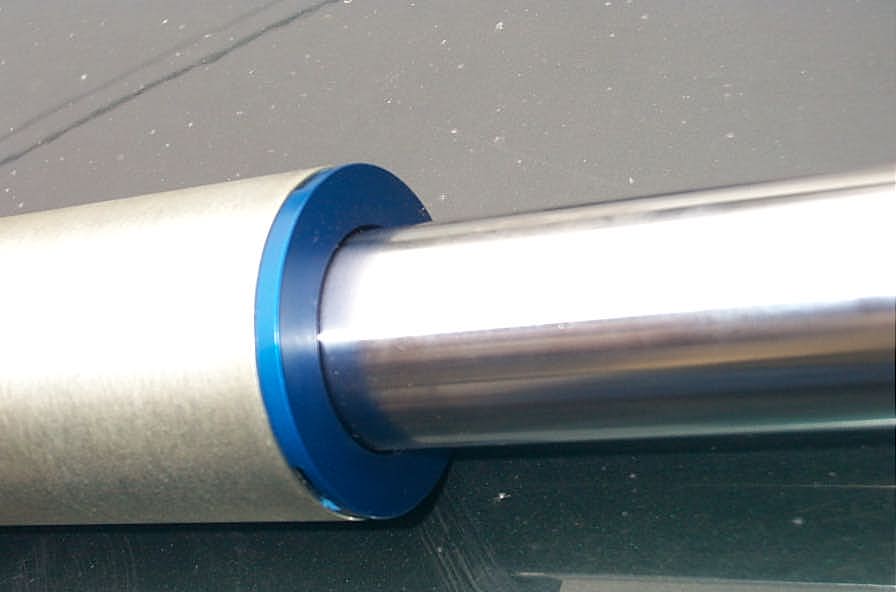
Close up of the head end, showing the shrader valve through which both oil and high pressure nitrogen are added or removed. | |
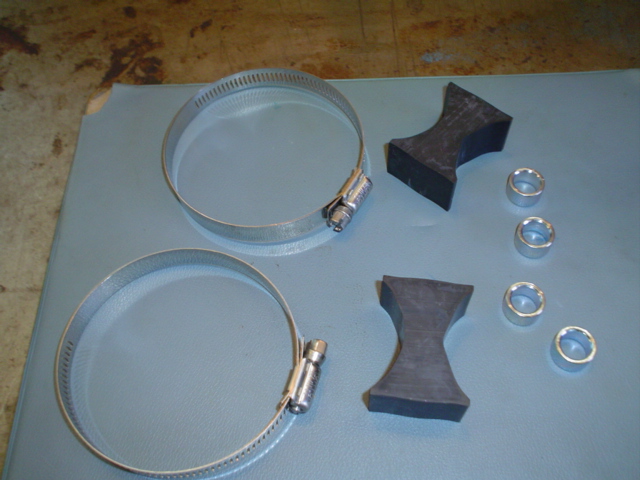 |
For mounting, on either side of the spherical bearing, you place a small bushing; to allow maximum possible misalignment in the bearing. The bushings are shown at the right of this picture (ignore the other pieces, they are not for Airshox). | |
 |
Close up of where the shaft enters the body. | |
 |
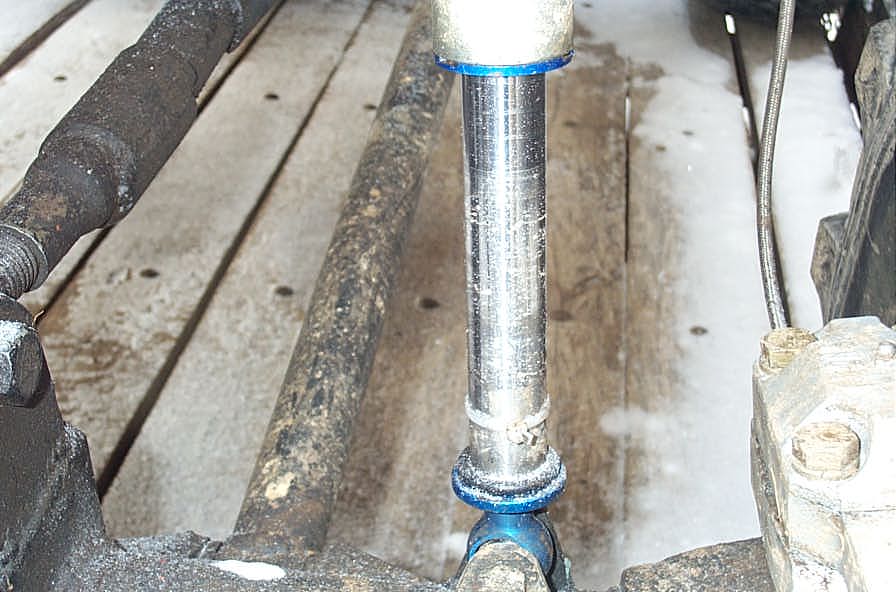
The shaft is a monstrous 1.25" in diameter. | |
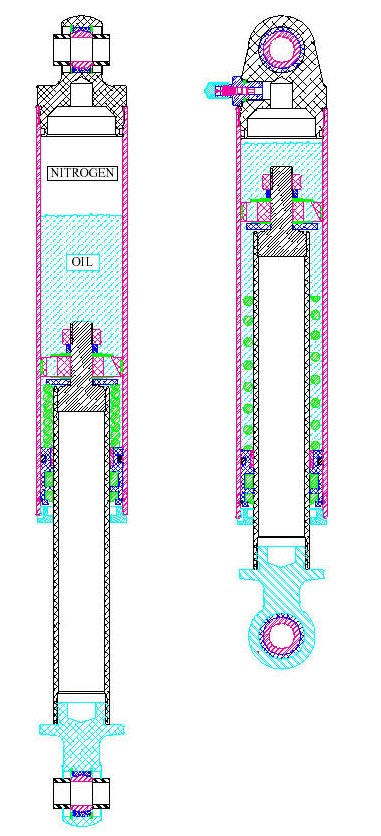 |
These pictures are EXCLUSIVE internal diagrams of the Fox Airshox - only available here, and courtesy of Fox Racing Shox. This internal cutaway diagram will REALLY help you understand how the shox work, and would be very useful kept at hand as you read the rest of the article. It is available in 3 sizes, click for the pic: |
|
 |
And here is another exclusive, courtesy of Dave from PolyPerformance. A photograph of the actual airshox internals. Compare to the diagrams above. The "negative spring" is clearly visible . |
|
Part 3 - FunctionSo, the burning question everyone has is: how do they work? The answer is both complicated and simple. I shall endeavour to stick to the simple :-). Basically, the answer is "not like a spring, but like the piston in an engine" The Airshox are both a high quality, rebuildable, re-valvable shock absorber and a means os suspending the vehicle in one package. That is, they are a "shock, and a "spring" in one. The shock portion works exactly the same as virtually any other rebuildable monotube shock absorber and so I will cover it only briefly before moving on to the "air spring" portion that makes the Airshox, Airshox! Shock / Valving On the end of the shock shaft is a piston with (8) holes. (4) compression and (4) for rebound. Layered on either side of the the piston are washers in different diameters and thickness. These washers make up the shim stack. The shim stack has to flex to allow the flow of oil in either direction of the shock. When the shock compresses, this is called compression, and when it extends this is called rebound. The shim stacks come in ranges from 30 to 110. The higher the number, the more damping force the shock will have. When the shocks are built , Fox engraves the damping numbers (compression and rebound, separated by a slash (/) ) on the shaft eyelet just under the rubber bottom out bumper or O-ring. The first number relates to the compression shim stack, the second number to the rebound stack. If there is nothing engraved on the shock eyelet, then the shock has the standard 40/60 set up. |
||
 |
My Airshox are valved 80/80, as can be seen from the pic at left. | |
The valving can be adjusted by disassembling the shock and changing the shim stacks. I have not yet had occasion to do this, but if and when I do I shall update this article with pics and descriptions. In the meantime, here is a pdf file of Fox's instructions for rebuilding the Airshox: Fox Racing Shox - Instructions for rebuilding 2.0 Airshox. Air Spring Function Instead of using a conventional spring to suspend the vehicle's weight and carry out suspension duties, the Airshox use high pressure nitrogen, contained inside the body of the shock itself. While the finite physics and chemistry involved can be quite complicated, the basic concept is very simple. The shock contains an emulsion of nitrogen and oil (emulsion just means that the nitrogen exists in suspension in the oil, a "mixture" of oil and nitrogen if you will). The emulsion exists in a container (the shock body or canister) of fixed volume. The nitrogen is compressible and the oil is not. The nitrogen is placed in the shock at some initial pressure (the charge pressure). As the shaft travels into the cylinder (shock shaft compresses) the cylinders effective volume decreases, and therefore the pressure of the nitrogen increases. Picture this exactly the same as a piston travelling up in a cylinder bore, compressing the fuel/air mixture. Since the oil is incompressible, the more oil present in the emulsion (i.e. the greater the oil volume in the shock) the less volume there is available for the nitrogen to be compressed into (using our engine/piston example, picture this as the more oil in the shock, the smaller the "combustion chamber"). It is this pressure inside the shock that provides the force able to suspend the weight of the vehicle. The pressure inside is measured in pounds per square inch (PSI) and the shaft of the shock shaft has a fixed and known area upon which this pressure acts, measured in square inches. Multiplying the pressure (PSI) by the area of the piston (SI) yields a result in pounds which is the weight of the vehicle that can be supported at that pressure. "That pressure" is affected by 3 variables - the initial pressure of the nitrogen in the cylinder (charge pressure), the volume of the cylinder (i.e. the amount of oil in the cylinder), and the "travel" of the shock (i.e. - how far the shock is compressed, or how far the shock shaft is into the body of the shock.) If forces greater than the static weight of the vehicle act on the shock shaft (e.g. the vehicle coming down after going over a bump, or the vehicles weight being re-distributed to conform to uneven terrain (flexing the suspension) ) the shaft will travel into the shock body more, and the pressure will increase. Similarly, if less weight is on the shaft (again, because of shifting weight distribution as the vehicle crosses uneven terrain, or getting a wheel in the air or whatever) the shock shaft will extend as their is less force to act against the pressure inside. Note that all these actions and reactions can easily be proven to yourself using a few simple free body diagrams, an understanding of newton's 3 laws of motion, and Boyle's, Charles's, and Dalton's laws - if you were so inclined! :-) Alternatively, we can simply agree that the volume of oil as well as the charge pressure inside the shock determine what the shock travel is for any given weight being supported by the shock. These 2 user-adjustable factors also determine how the shock acts in use, as the vehicle is driven over rough terrain - i.e. the "ride" of the shock. Of course, the shocks valving also plays a role in how the shock "rides". How we understand this is often attempted by modelling the action of the Airshox as if they were springs. The advantage to this is that it uses terms with which we are familiar, and can readily apply to our vehicle tuning and suspension design, terms like "spring force", "spring rate", and such. The disadvantage to this method is that, so far, nobody has developed an entirely accurate model, and given the complexities, I'm not entirely convinced that anyone ever will. So where does that leave us? The models in existence do a good job of explaining and helping us understand the concepts and inter-related variables, even if they do not give us precise, accurate results which we can use for exact design specification. In simple terms, modeling the Airshox as if they were springs helps us understand how to make adjustments, and gives us a good starting point from which to begin our tuning. But we must be aware that we can't count on the model for 100% accurate results, and a certain amount of trial and error is required. The best model I am aware of was originally developed by Poly Performance, and subsequently tweaked by yours truly! The following is a screen shot of the program, which is available as an Excel spreadsheet by clicking on the image or clicking HERE.
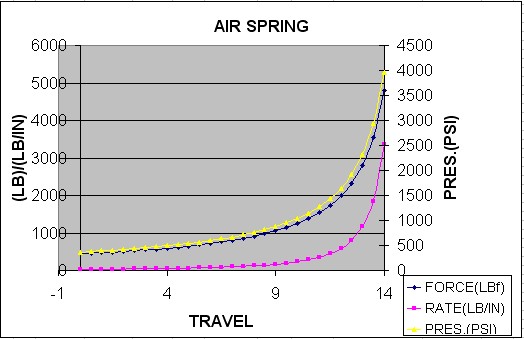
Let's concentrate on just the first 4 columns initially. Column x represents the shock travel, with 0 being fully extended and 14 being fully compressed. (note that when discussing suspension, we always define travel as being the amount the shock shaft is IN the shock body - i.e. how compressed it is, so that full travel - fully compressed.) The next column labelled"FORCE" is the modeled spring force for the given travel. The third column, "RATE", is the modeled spring rate at that travel. To populate the chart with data, the user simply enters 2 variables - the charge pressure in PSI (cell H7) and the Volume of oil in the shock in cc's (cell H9). The user could change the diameter of the shaft also, but this is of no practical value. Note that the "stock" values of these variables are 200 PSI nitrogen charge and 325 cc oil volume. By varying the volume of oil and the pressure, one can now observe from the chart the effect on "spring force" and "spring rate". The program also graphs the data from the table, the following is an example:
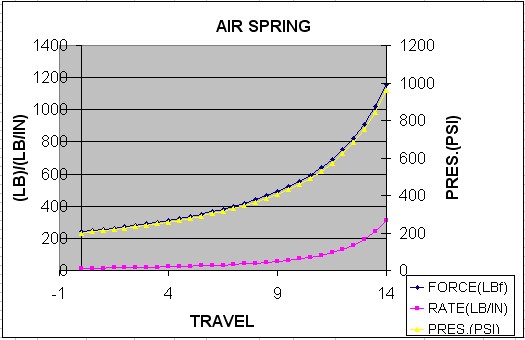
Note the highly exponential nature of the curves. In practical reality, this means the the spring force and spring rate remain constant and quite low (soft) for the first 2/3 of the shocks travel, and then increase rapidly and dramatically from there - meaning they get quite stiff quite fast. This graph is of the settings for my front shocks, which are 365 PSI and 370 cc of oil - remember that I am right at the max. weight per corner in front (940 lbs) for these shocks, and that's why my pressure and oil volume figures are reasonably high, so that I can achieve the ride height I want (about 8") while supporting the weight. Note that the pressure and volume values entered have a dramatic effect on the shape of the curves, and it is this visualization that is the real utility of the program. The following graph is that of the "stock" values, and clearly illustrates the principle, as well as illustrates why the Airshox are best suited to "lighter" vehicles.
Remember I said that the model doesn't produce precise results? Go back and have a look at the screen shot above, and observe the area titled "Actual suspension scratchpad". Here, you can see that the model predicts that at the given pressure and volume, and at my sprung weight, my ride height should be between 8" and 8.5" (to determine this, look in the chart of travel and spring force for a value of spring force = sprung weight). However, actual measurement shows that my ride height was closer to 7.75" Of course, inaccuracies of measuring both the volume of oil in the shock, the pressure, the weight on that corner, and even the actual ride height could easily account for this difference. More telling are the enormous force figures in the chart as the travel approaches its maximum value. By measuring shock travel during operation with a zip tie around the shock shaft, I know that I have compressed the front shocks to within 1.5" of maximum, that is, to at least 12.5" travel. According to the chart, that means I would have had to have had a force or weight on that corner at that time of 2328lbs, which is well over twice the static weight of 940 lbs. Given that I hadn't jumped the vehicle I feel that this is unlikely - however, I can't say for sure without testing with an accelerometer (which would be getting silly - even for me!), and we do know that Force = Mass x Acceleration, so it is possible - just unlikely in my opinion. Another reason the model will not give precise, accurate results is that it does not account for the negative spring. The negative spring is inside the body of the shock at the bottom end (if you depressurize the shock and then fully extend it by hand you can feel the spring inside in the last 2" of stroke as you extend the shaft) The negative spring is active for the first 2.0" of shock travel. It has a 70# spring rate. At full shock extension, it provides 140# of force to help you compress the shock. (If you run less than 115 psi, the shock will not fully extend) The point is, the model is an excellent tool for understanding the operation of the shocks, their limitations (high weight vehicles) and as a starting point for tuning oil volumes and nitrogen pressures, as well as modelling and understanding how those 2 variables interrelate. It should not, however be counted on for so precise a ride height prediction that you'd want to weld in a complex mounting system based solely on it's prediction. In other words - some trial and error testing and tuning will be required. A final note - at the beginning of the article I mentioned that a possible drawback to the Airshox was the effect of temperature - we can now examine why this would be. Charles' law states that for a gas (in this case, the nitrogen that acts as our "spring") as the temperature increases, the volume increases. We know the volume inside the shock cylinder cannot change (for any given shock travel, that is), so we refer to Boyle's law that tells us that pressure and volume are inversely proportional (as one goes up, the other goes down) and we arrive at the fact that, as the shock heats up - the pressure of the nitrogen at any given amount of shock travel will have increased, altering the "spring force" and "spring rate" values, and therefore possibly the ride height and performance of the shock/spring. To convince yourself of this, go back to the Excel spreadsheet and play with just the pressure value and observe the effects. How much of temperature change is required for any noticeable effect I cannot say, as I have neither attempted to model it, not have I experienced it. I believe the magnitude of the temperature change required, i.e. how much the shock has to heat up, is quite high and is likely only to happen of the shocks are run for prolonged periods at high speeds over very rough terrain - like a desert race truck may do, which is something I don't do. I can tell you that ambient air temperature changes from +15°c to -15°C make no measurable differences in ride height, as that I have measured. If all that makes your head hurt, don't worry. Fox actually supply far simpler instructions, and you can simply follow them and use the methods I will outline below to trial and error your way to satisfactory results: On the Fox "owners manual" (actually a sheet of paper) it says: "air shocks can be filled with Nitrogen from a range of 10 to 500 psi. To calculate the spring rate, multiply the psi by 1.105 (example 200 psi x 1.105 = 221 lbs/in spring force) 3:1 is the standard compression ratio for our shocks - you can modify this by adding or subtracting oil " When I asked for clarification, they told me: Initial Pressure: Oil Level: Part 4 - Installation |
||
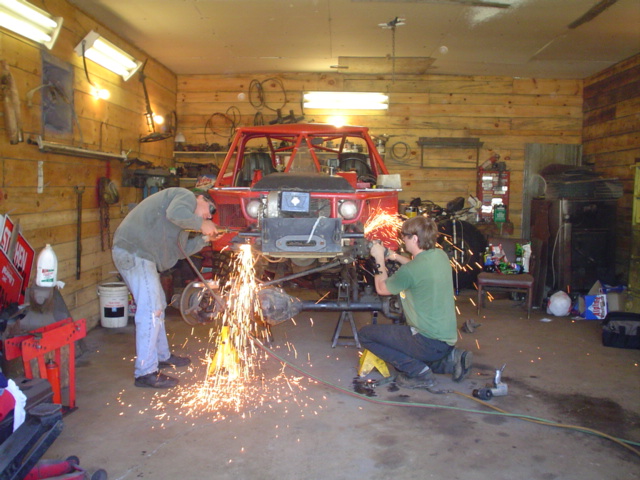 |
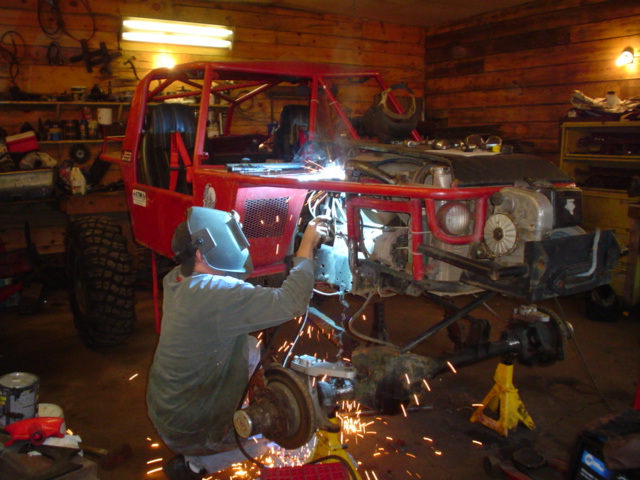
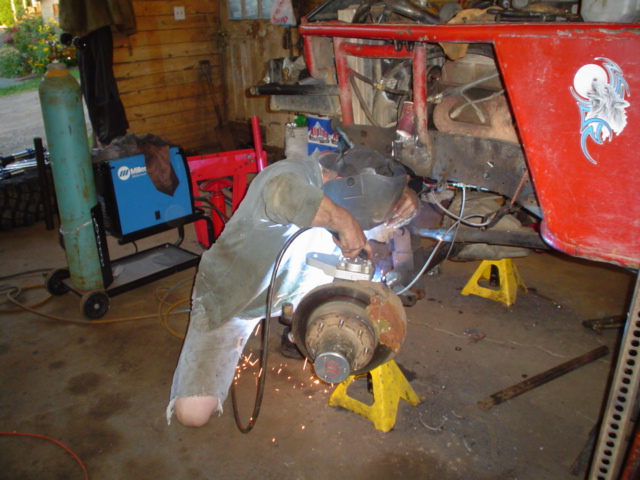
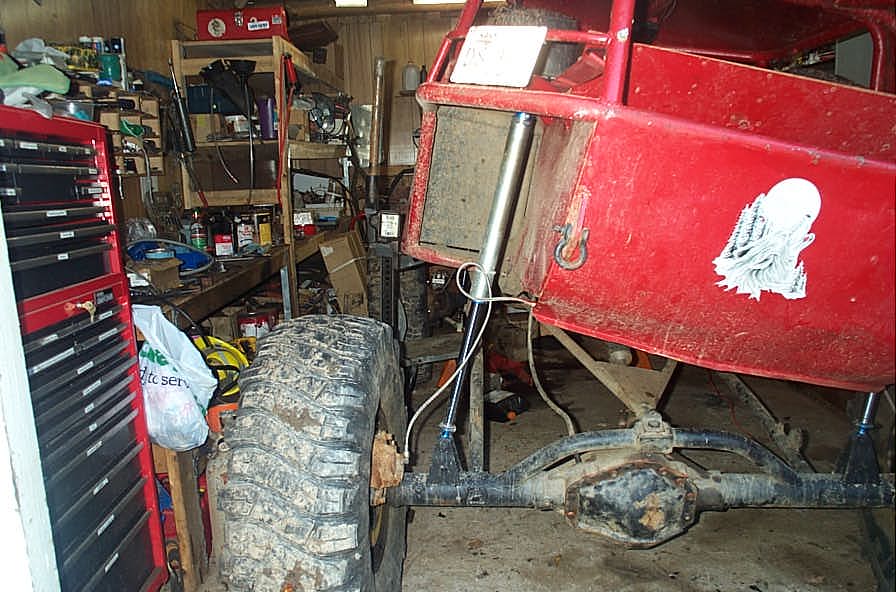
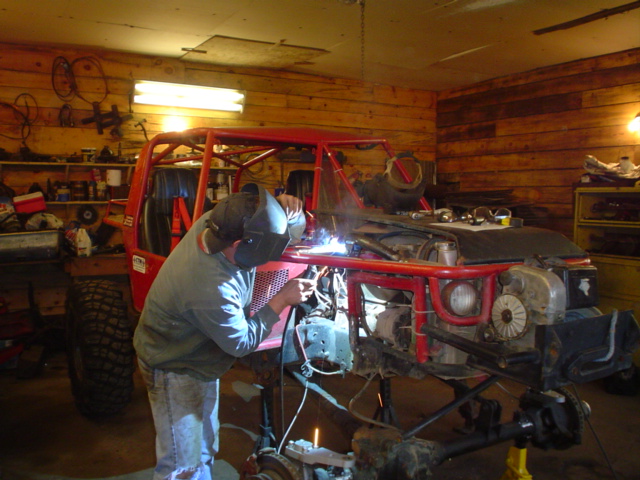
What glorious fun this was. Step 1 was, of course, to cut, torch, and grind all the old stuff of the buggy to make room for the new Airshox. I just stood back holding the camera and said "Steve, Rue - hack all that stuff off there will ya" Their eyes lit up and they went to town! |
|
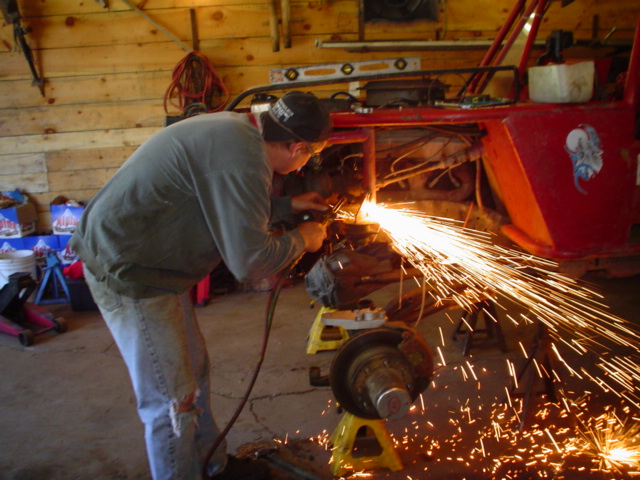 |
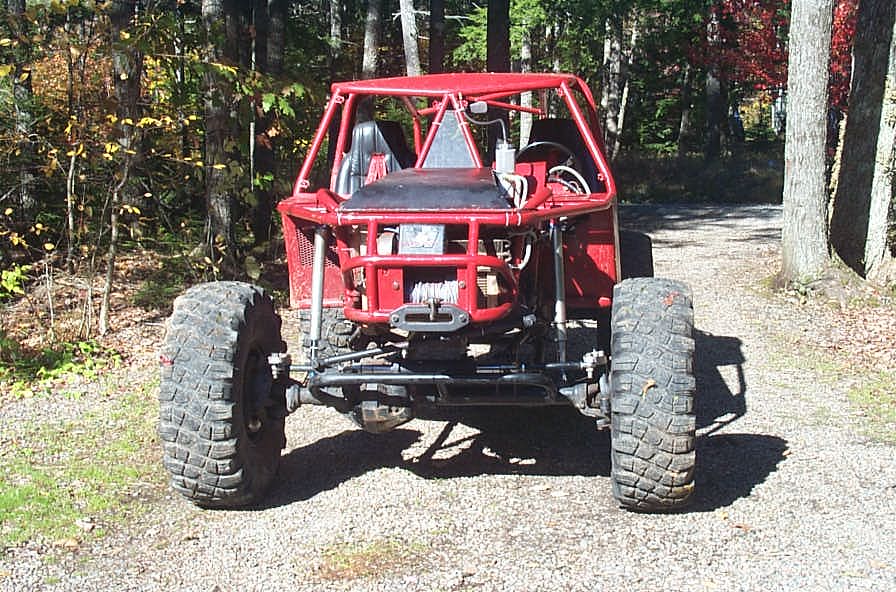
I'm sure we shaved off at least 30 lbs per corner in coil buckets, coil springs, dual shocks, shock mounts, bump stops, etc. | |
 |
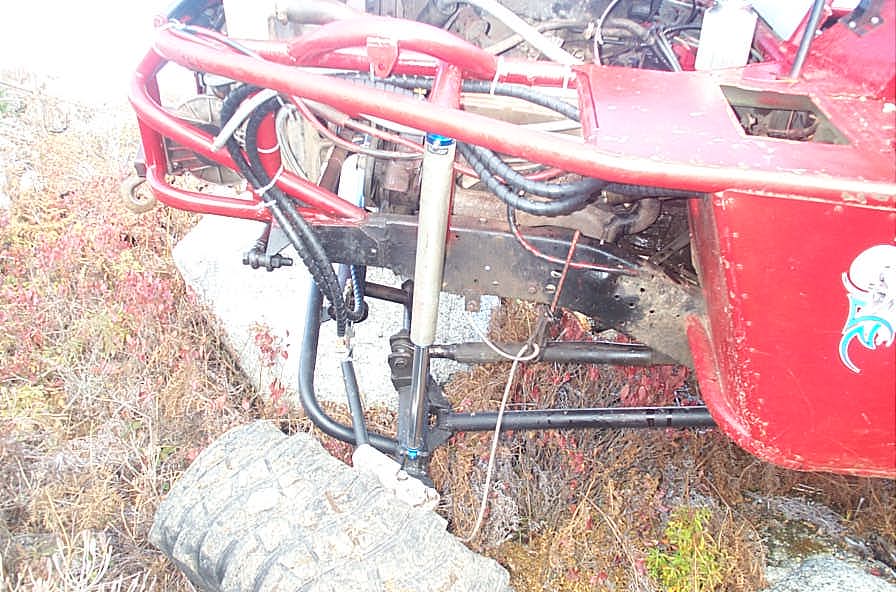
Mounting the Airshox couldn't be simpler - you only need to weld a couple of tabs at the top... | |
 |
...and a couple more tabs to the axle, and you're done. | |
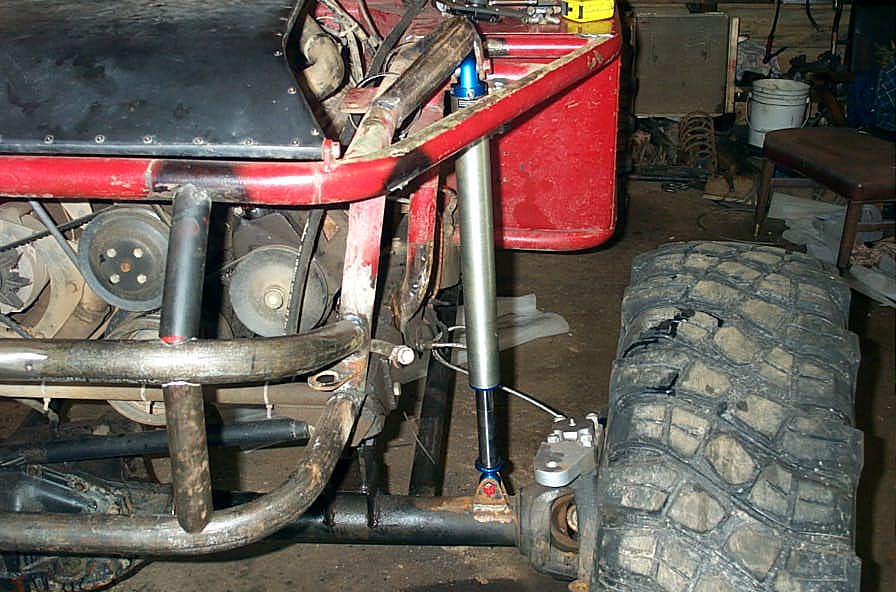 |
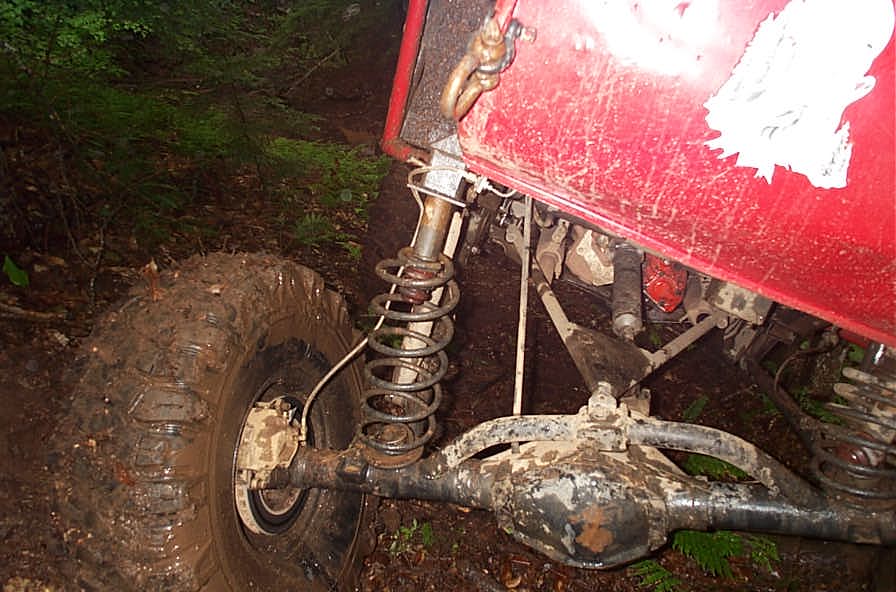
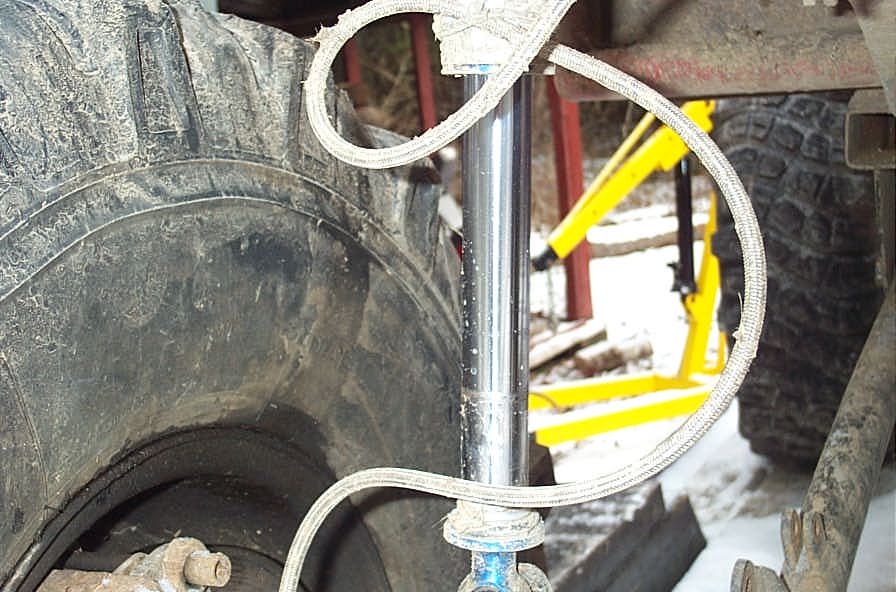
Left front in place. Keep in mind that you must mount the Airshox with the body of the shock up, shaft down only! This is because there is no separator piston (or Internal Floating Piston (IFP)) between the nitrogen and the oil. If you mounted them upside-down the first third of the shock stroke would be completely undamped since the piston would be stroking through nitrogen rather than oil. | |
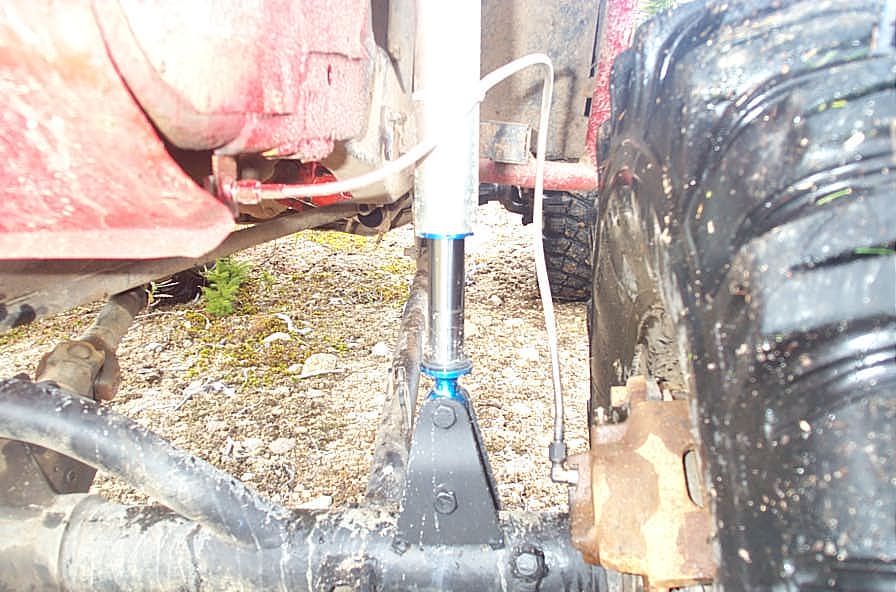 |
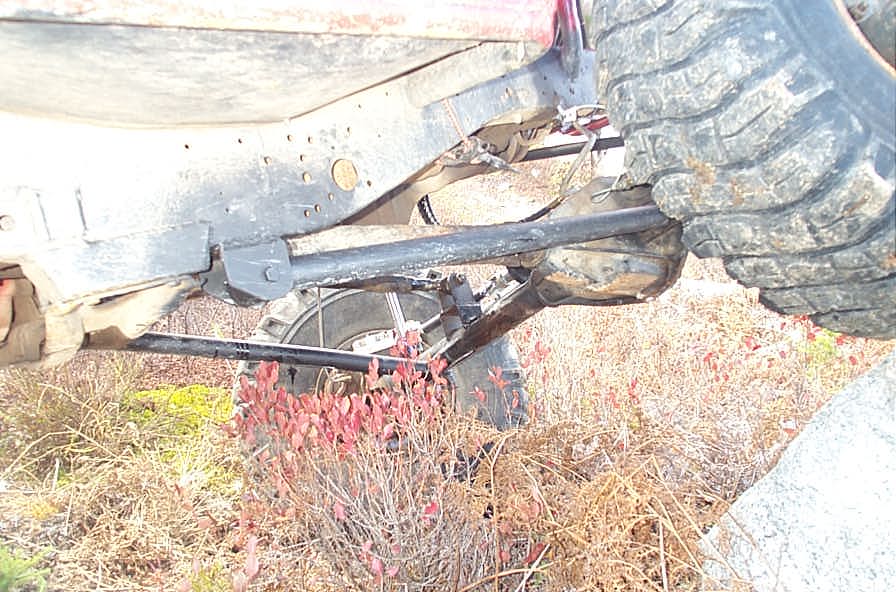
Right rear axle mounting. The reason for the "extra tall" bracket is so that th bracket can accommodate either a 14" or a 16" travel shock. | |
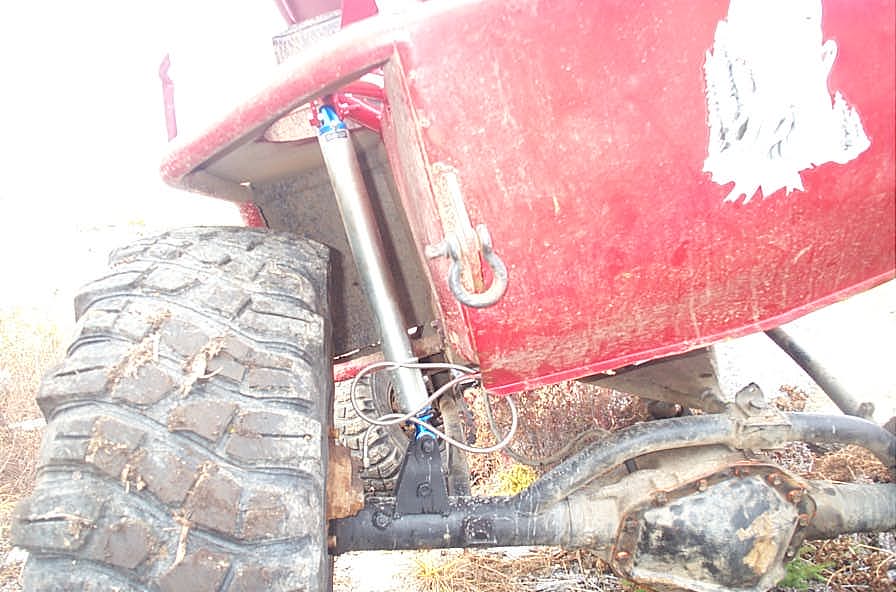 |
Orienting the mounting tabs so that the maximum misalignment possible is achievable from the spherical bearings is important, as the shocks will have to operate through quite a dramatic arc. From this... |
|
 |
...to this. In the end all of my lower (axle) mount bolts are inline with the front/rear axis of the truck, and all the upper bolts are inline crosswise (point left to right). |
|
|
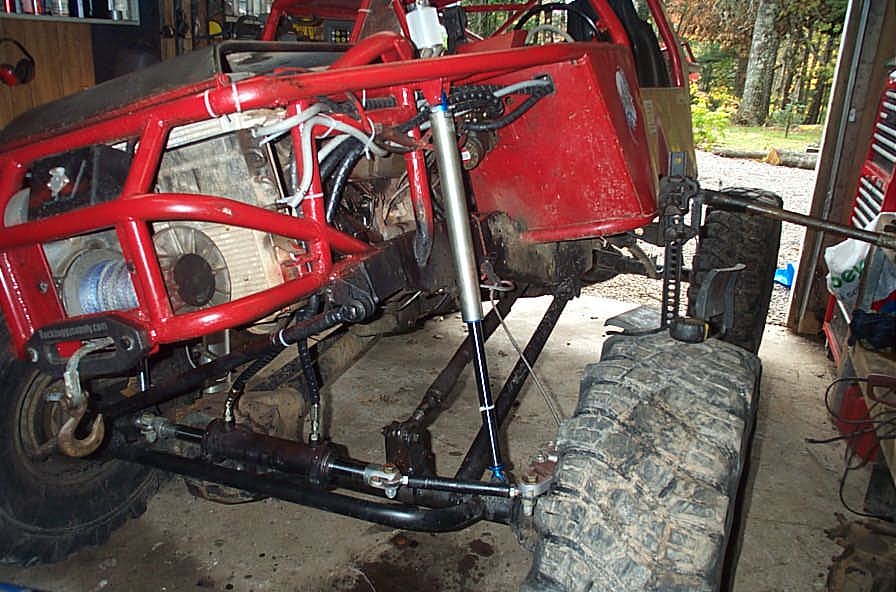
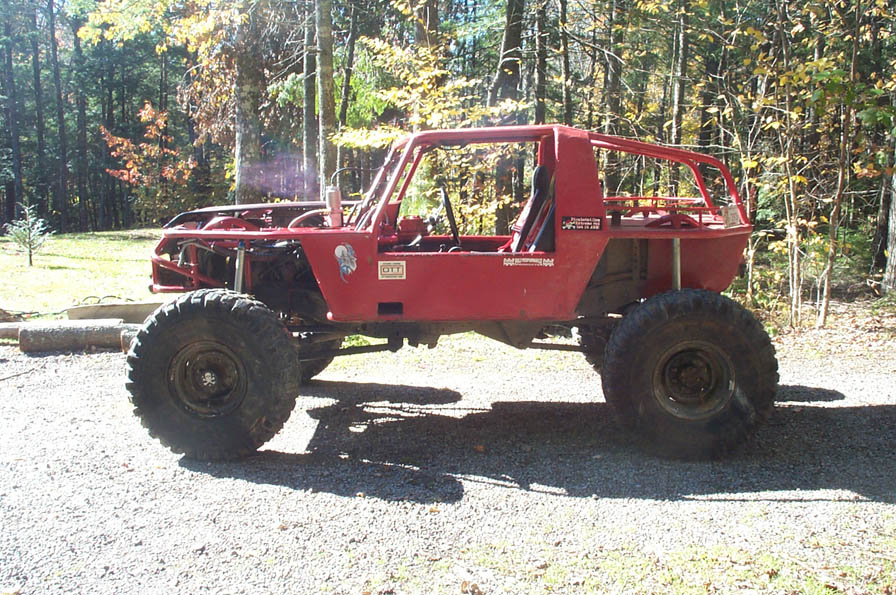
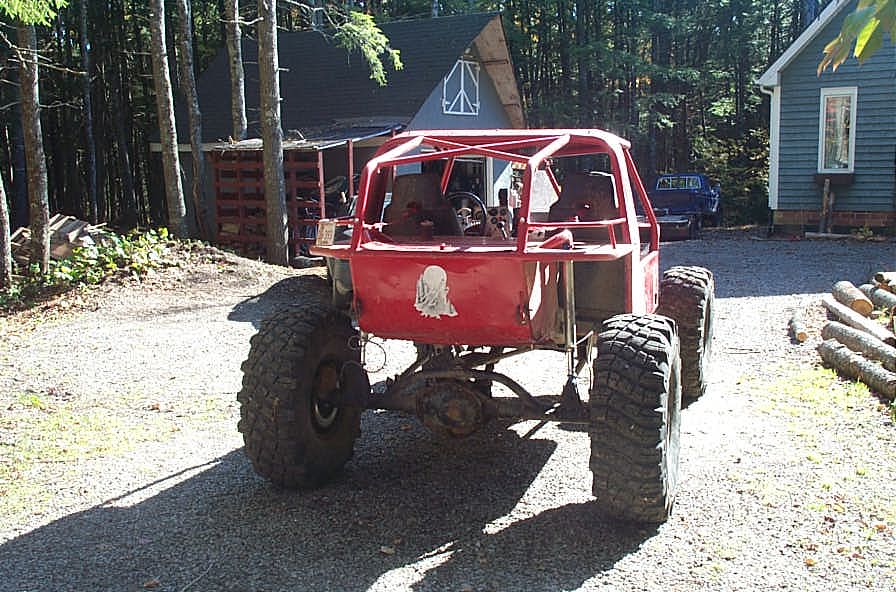
Three pics illustrating how clean and compact they make the suspension. It's hard to believe that's all there is too it, but the additional space and clearance was extremely welcome when designing placement for suspension and steering linkages. | |
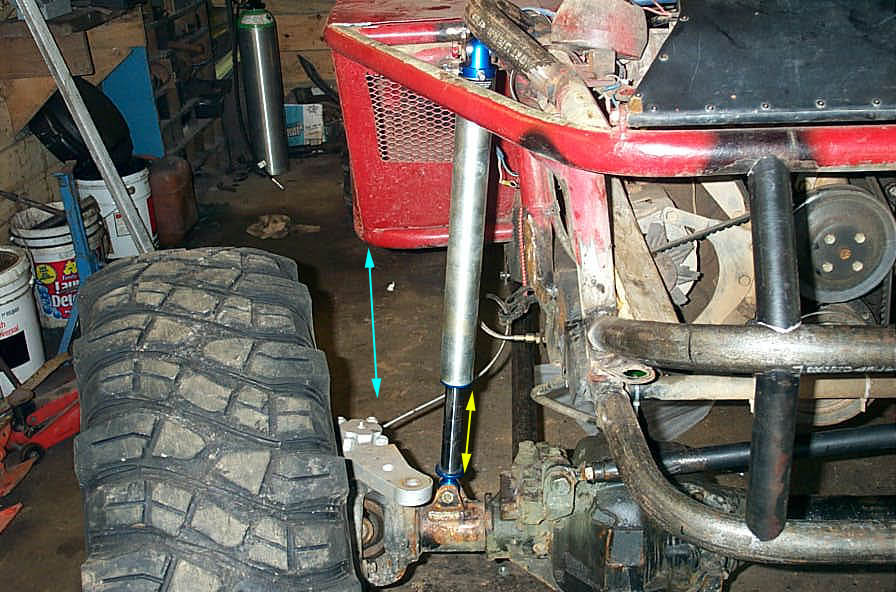 |
Ride height vs chasis height (lift). I see these terms interchanged all the time. For ages it confused the heck outa me. In an effort to keep things simple and understandable, as well as common so that sharing experiences is meaningful, I offer the following definitions. Ride height applies to shocks, chasis height (or lift) applied to vehicles. Ride height - Ride height is simply a statement of the travel of the shock absorber desired when the vehicles weight is set upon it. It has nothing to do with how high the vehicle itself sits, how much clearance between frame and axles there is, how much "lift" it has or anything like that. It is simply an expression of how many inches the shock shaft is inside the shock cylinder with the vehicles weight is on the shock. In that way, it is also a measure of the number of inches of "droop" available from that shock. Chasis Height - Commonly called "lift" when applied to vehicles that once had a defines stock oem starting point, the term Chasis Height better applies to buggies and the like that never had a stock spec from which to deviate. It refers to how high a vehicle sits, how high it's chasis is above the ground. There is no common standard reference for measuring this, but the term is useful in a qualitative sense, and must be distinguished from "ride height" In the pic to the left, the yellow arrow indicates ride height( which may be something like 6-8"), and the blue arrow chasis height (which may be something like 30") |
|
|
The only tricky part of mounting the shox is figuring out the required span between the mounting tabs. This is where a distinction between ride height and chasis height is useful. First, determine ride height, say 8". Then determine required chasis height (usually by clearance between components - for example crank pulley and front axle diff). Determine shock length at ride height by subtracting ride height from extended length (35" - 8" = 27"). Set vehicle at chasis height by using blocks/jacks. Weld mounting tabs 27" apart. Install shock Adjust shock oil volume and nitrogen pressure to achieve desired ride height at the weight that is now on the shock. |
|
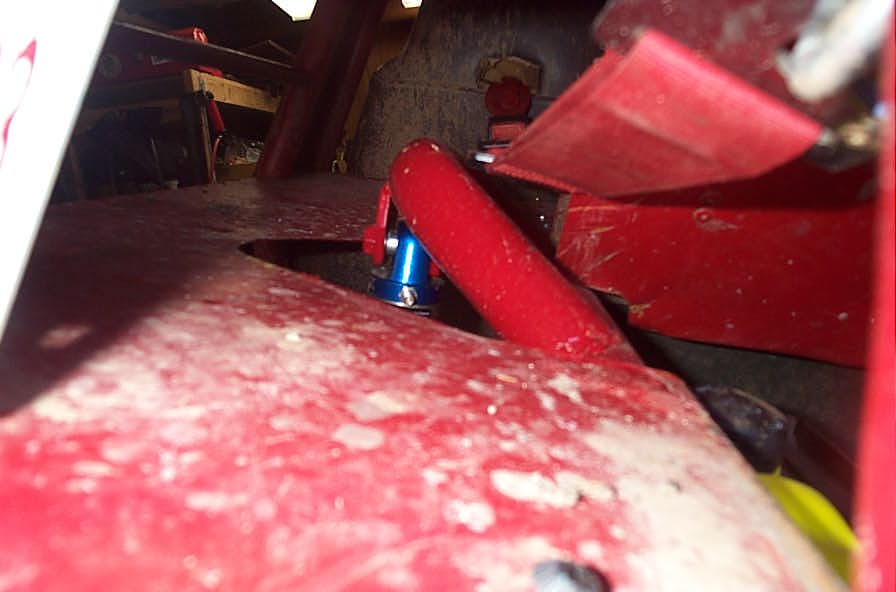 |
One final tip - as you will need frequent access to them during tuning - make sure tat all the shrader valves are easily accessible with the shock installed. | |
Part 5 - TuningFor adjusting oil volume you need:
|
||
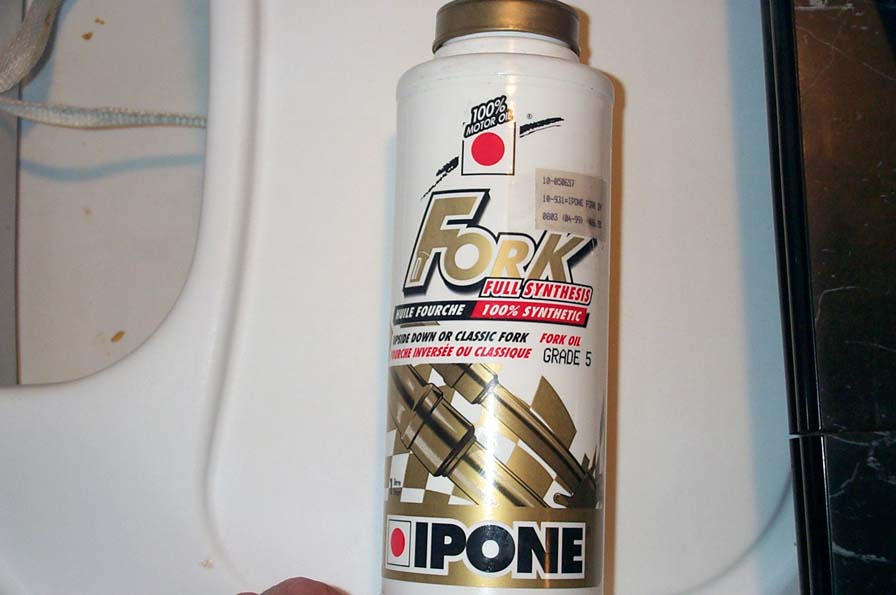 |
I sourced this shock oil from the local snowmobile / motorcycle dealership. | |
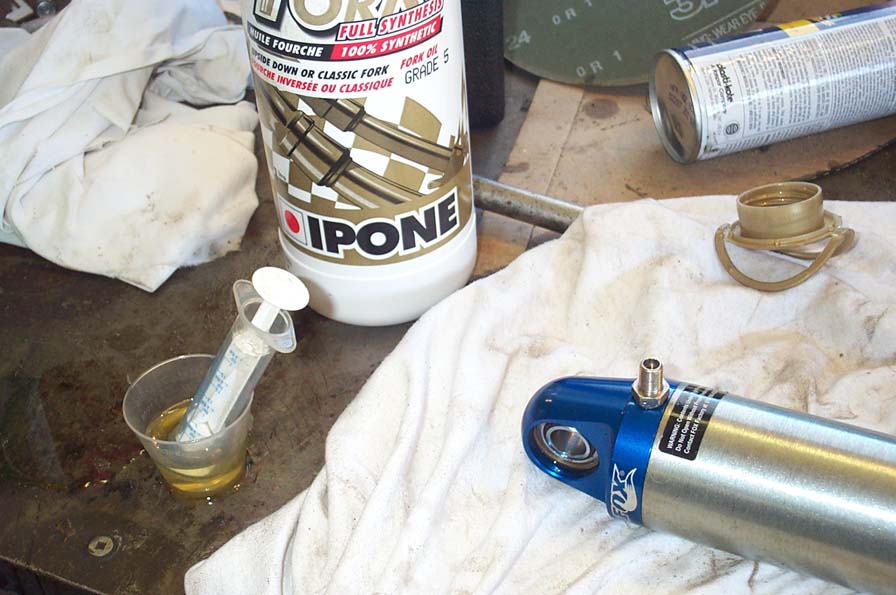 |
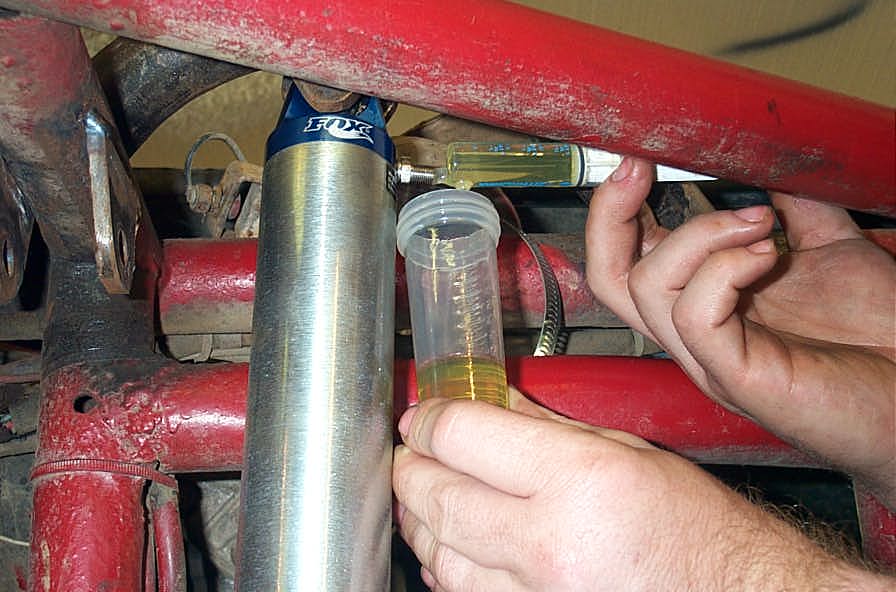
This shows the rest of my "kit". The little plastic container is a medicine dispenser, and the syringe is a child's medicine syringe. I found it quite difficult to add precise amounts of oil based on the graduations on the syringe itself, because of the difficulty in accurately filling the syringe while simultaneously expelling any air from the syringe. In the end, I found the easiest procedure to be: fill the graduated container with the precise amount of oil you wish to add, then simply use the syringe to transfer it all to the shock. | |
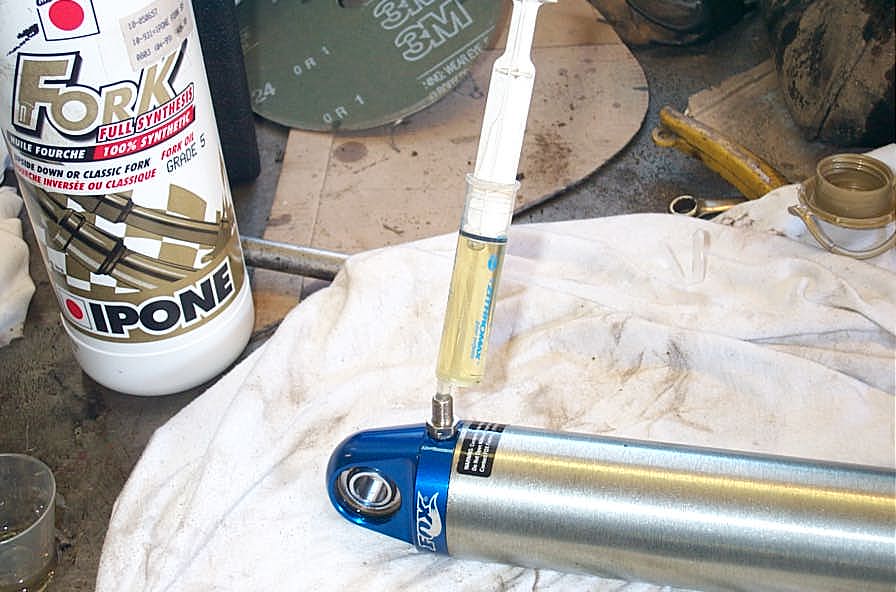 |
Here I am adding oil to the shock on the bench. I actually removed the shock's shrader valve core, depressurized the shock, compressed the shock fully, and then added oil until no more would go in. I then emptied all the oil and measured the volume - and this is how I arrived at the "max oil volume" used in the spreadsheet. Any more oil than this, and the shock would hydro-lock. | |
 |
Incidentally, this is the precise maximum volume of oil - I measured it to be 24.4 cubic inches, or 400 cc Note to readers: Shock oil tastes horrible! Note to self: DO NOT use drink containers for storing non-consumable items - no matter how "alert" you think you are :-) |
|
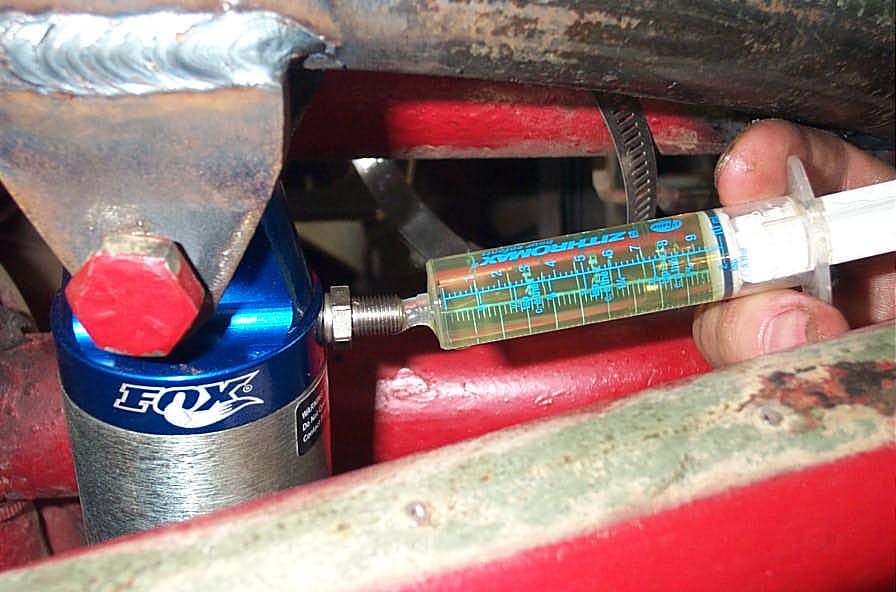 |
Here I am adjusting oil volume with the shock installed. You can see how important it is that the shrader valves be easily accessible. In order to adjust oil volume with the shock installed you MUST first jack up the truck to fully extend the shock. Failure to do this will result in very high pressure nitrogen inside the shock (compressed by the shaft) that will force oil out of the shock in a fine mist/spray when you remove the shrader valve core. It is then impossible to know what volume of oil you have in the shock without dismounting it, completely emptying it, and starting over. Some small loss is inevitable, because even when fully extended, the shock cylinder still contains the initial nitrogen pressure, so great care must be taken to avoid loosing too much oil. It's a bit of a messy, fiddley PITA but you have to lose several cc's for there to be a noticeable effect. |
|
|
I actually switched to a different graduated cylinder that had clearer markings and was taller and more narrow and therefore less prone to spillage. Shock oil is pretty damned expensive - you don't want to be slopping it everywhere. | |
For adjusting nitrogen pressure, you will need:
|
||
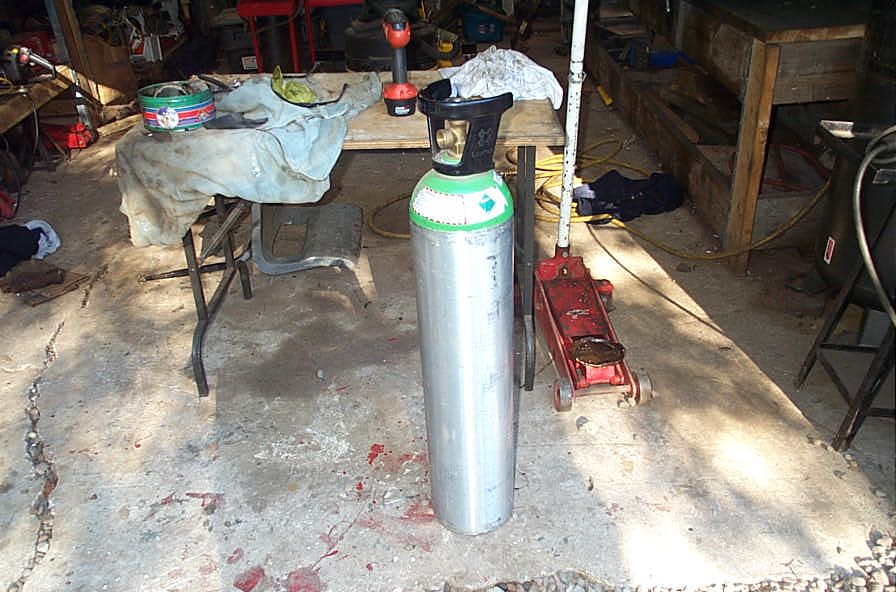 |
I leased an aluminum nitrogen cylinder from my local welding gas supplier. Also, many race teams use nitrogen track-side to power air tools and fill tires, so you may track down a supply that way. | |
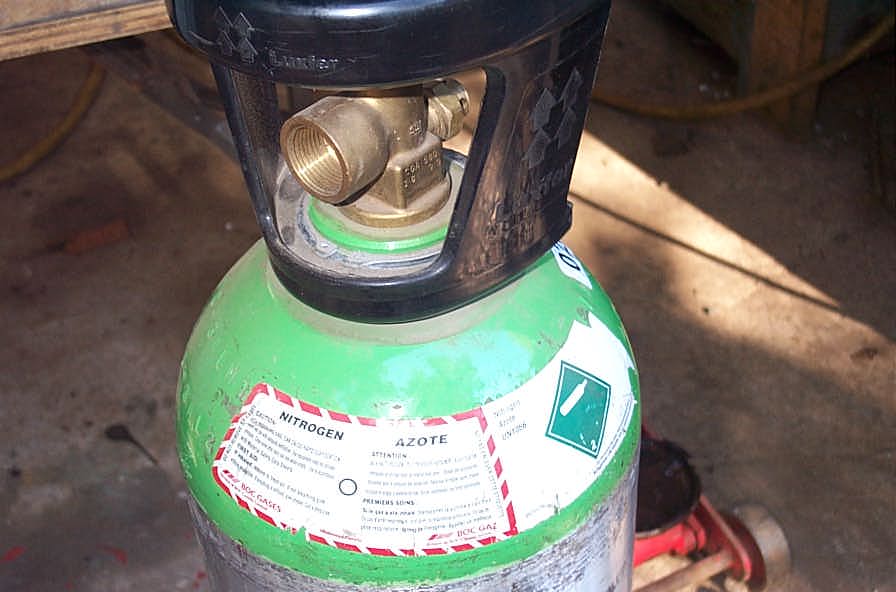 |
This is the style of fitting on the nitrogen tank. | |
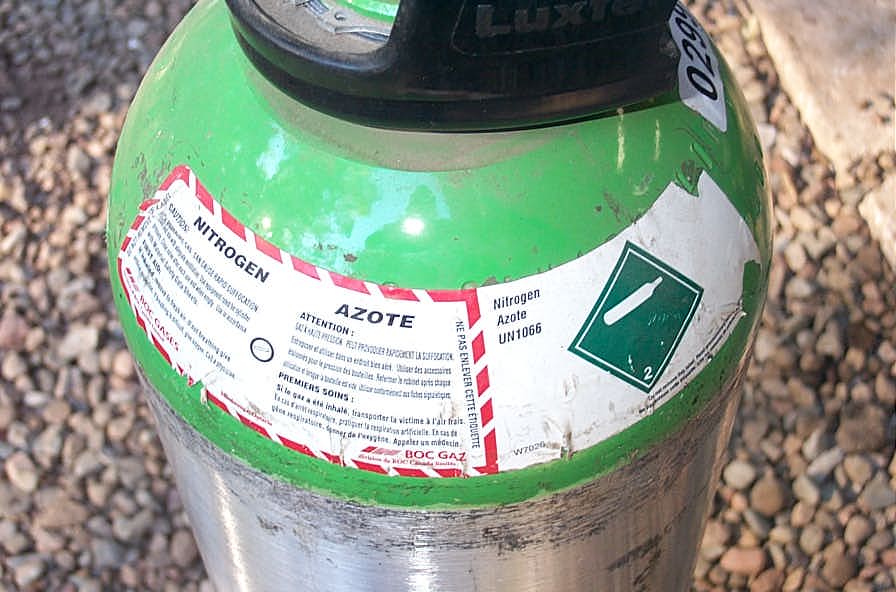 |
All Fox Shox should be charged with nitrogen only, as nitrogen will not hold moisture, is inert, and expands less than other gasses as temperatures increase. Do not fill Airshox with compressed air as it contains water vapour and introducing moisture to the shock will cause internal corrosion. | |
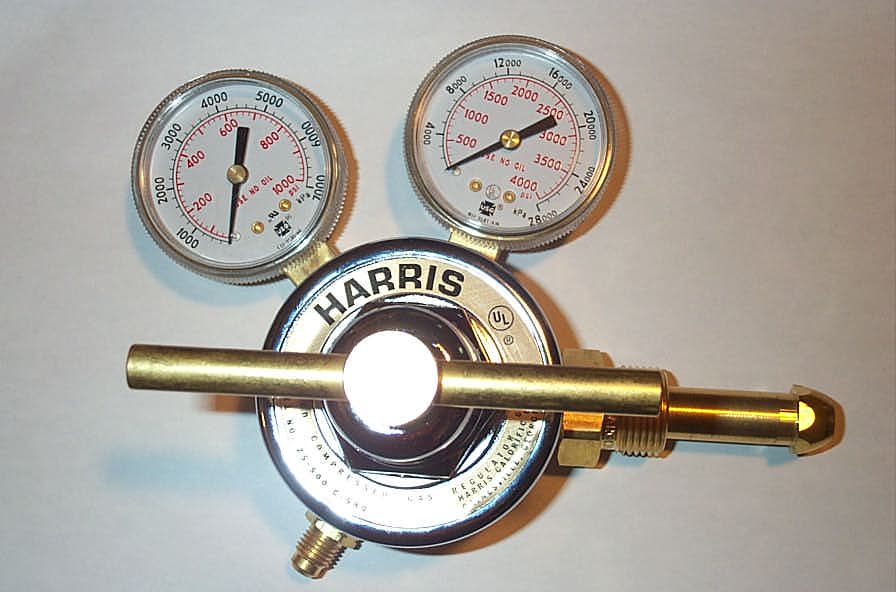 |
Getting a high pressure nitrogen regulator can prove a little more challenging, and potentially expensive. There aren't a great many uses for high pressure nitrogen, so the units are not terribly common. I sourced this Harris regulator from my local welding supplier. | |
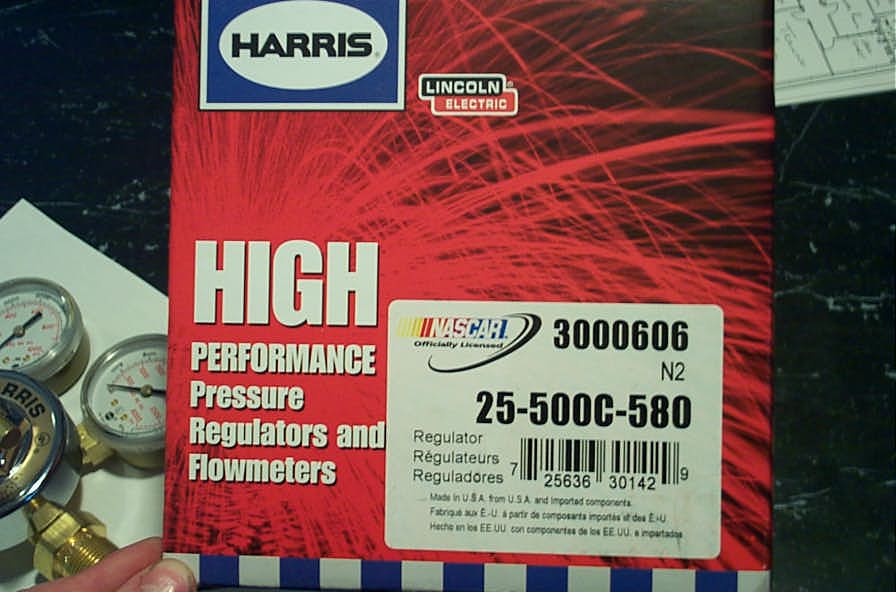 |
The guys at the shop did me a big favour by selling me the unit as a "demo model" (after having just opened the box!) which saved me considerably. I think they said the regular full list price on this unit was $450. I got it for $125 | |
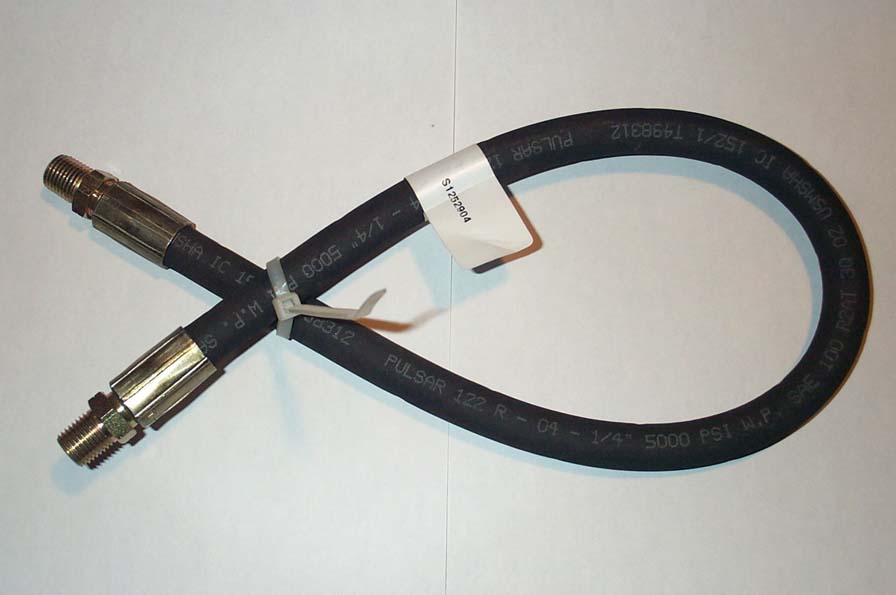 |
You need a HIGH PRESSURE hose to connect the regulator output to your shox. Regular air hose does not have a high enough burst pressure rating and will not tolerate the high pressures involved here. Using it would be very unsafe. I used a simple 1-wire hydraulic hose.... |
|
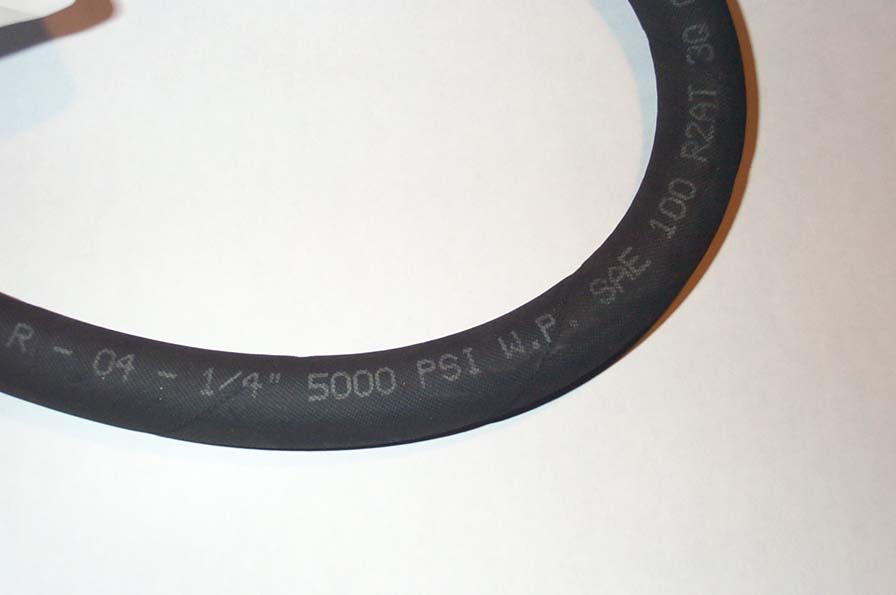 |
...rated to 5000 psi!! No problems there! | |
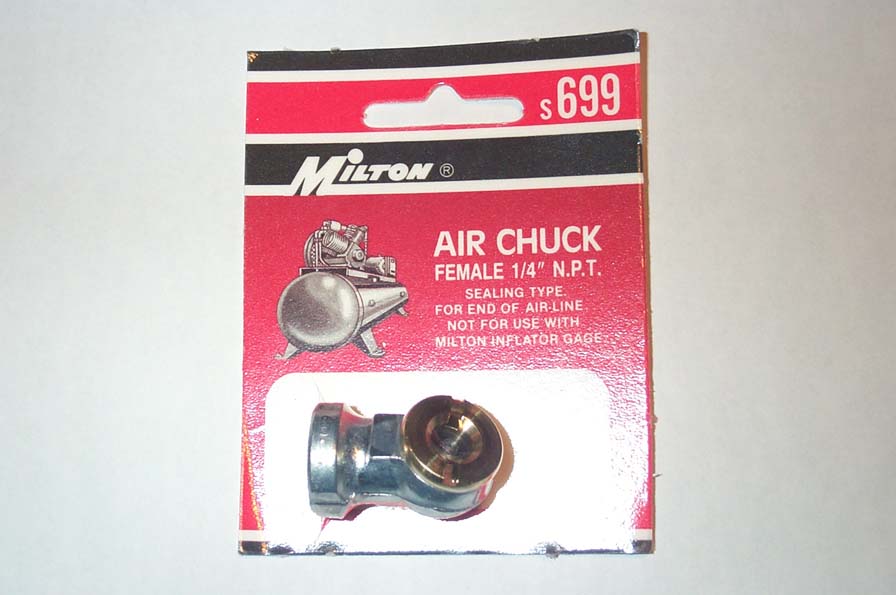 |
And on the other end of the hose you will need a good, high quality air chuck. | |
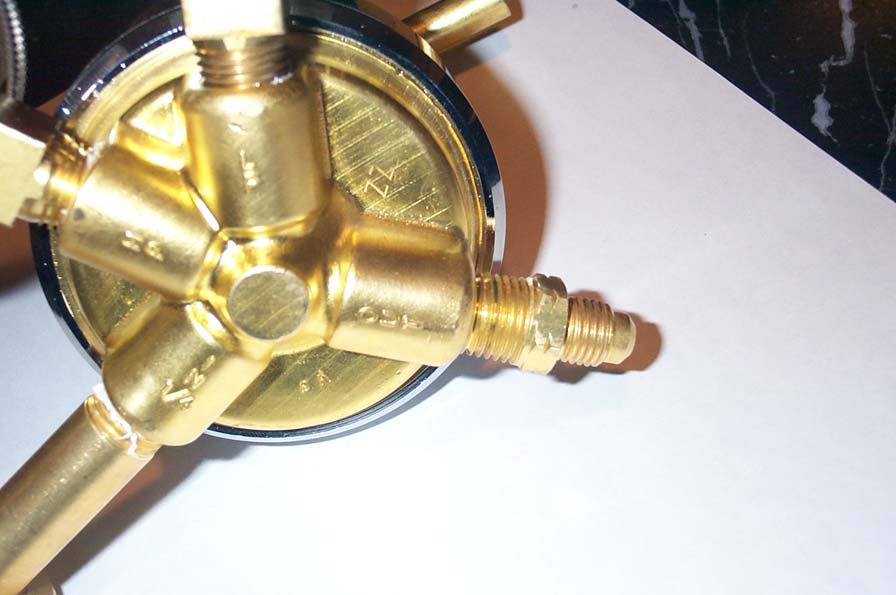 |
I removed the outlet fitting from the body of the regulator.... | |
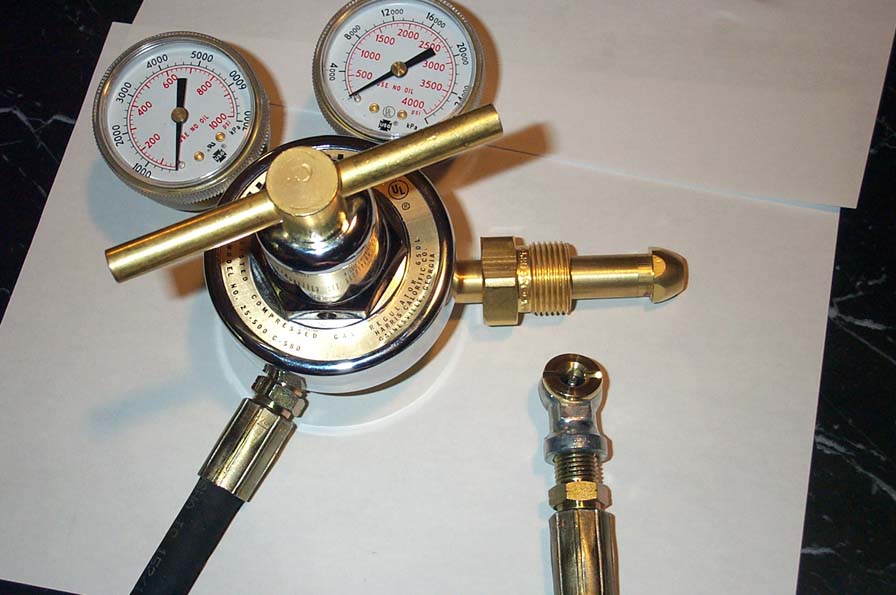 |
...and screwed in the hydraulic hose. All fittings are 1/4" NPT. On the other end I screwed the air chuck, and .... | |
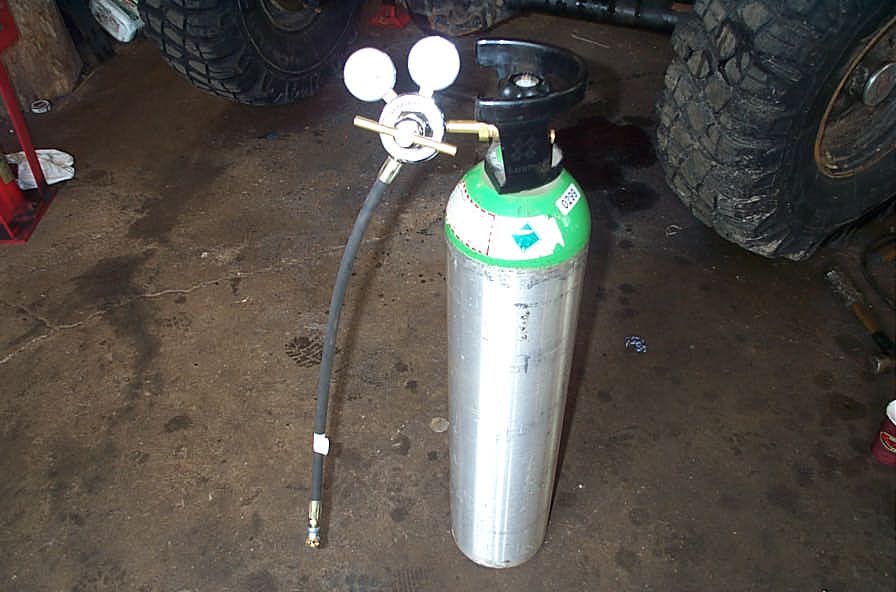 |
...voila, the complete setup ready to go. Note - ensure you use a hose long enough to reach the shock valve with the shock installed and the tank on the ground! |
|
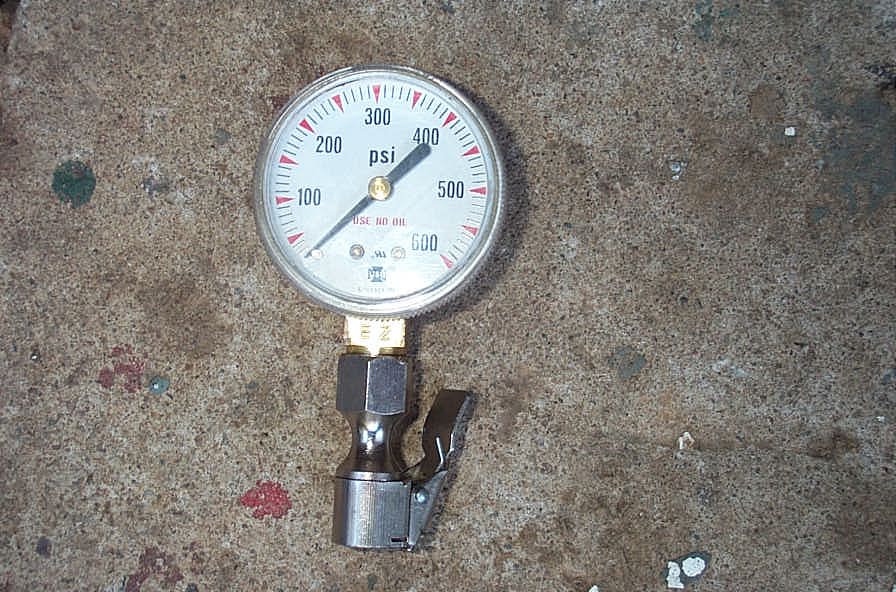 |
Originally, I also constructed this air pressure gauge using a 0-600 psi gauge I got from the local welding supply outlet, and a clip-on tire chuck. However, because the volume is so small and the pressure so high with the Airshox, I found that the very act of taking the pressure changed the pressure by 30-40 psi each time, and led to inaccurate data and unrepeatable results. In the end, I removed the 0-1000 psi gauge from the regulator, and replaced it with the 0-600 psi gauge shown here. This gave me the best possible fidelity in setting the pressure. I'm able to set pressures to within +/- 5 psi. I no longer take the pressures independently, but rather decide on my target pressure, set the regulator for that pressure, carefully depressurize the shock until I'm below that value, then charge it up in one quick shot. |
|
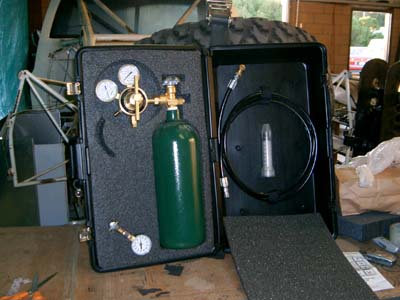 |
I know that Dave a Poly Performance has recently released a complete shock servicing kit that includes all the nitrogen equipment, plus a plastic oil syringe, all in a handy foam-lined case. Though I have no personal experience with the kit, and can therefore not report directly on it, it appears to be a good kit and should save you some time and effort in assembling your own components. Other reported benefits (I can't currently confirm or deny) are:
|
|
| Nitrogen Pressure Adjustment Procedure | ||
 |
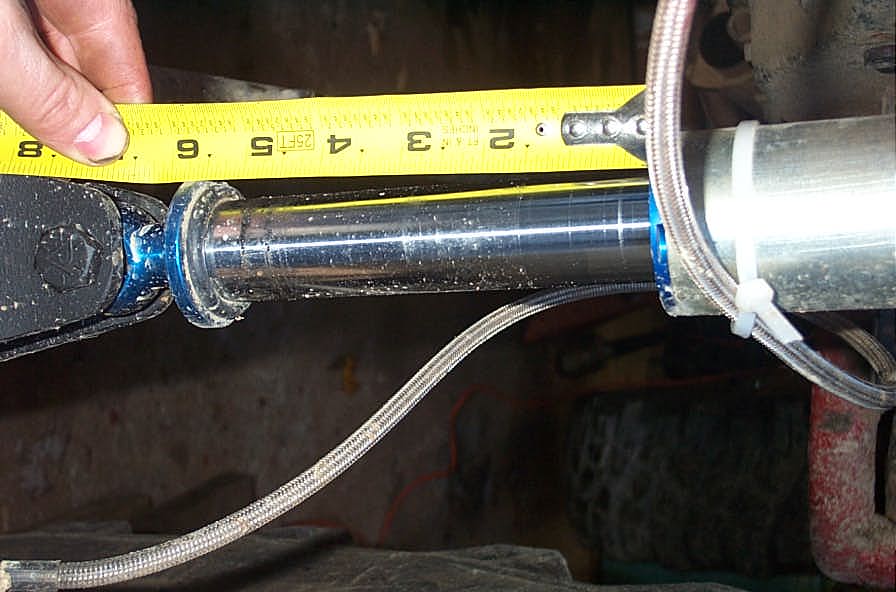
The first step in adjusting the nitrogen pressure is to fully extend the shock. This is because, if you do not, you will be getting a false result, as any amount the shaft is into the shock cylinder will be compressing the nitrogen and falsely elevating it's pressure reading from the true, fully extended, reference point. | |
 |
I am fortunate in that I am just able to fully extend the 14" travel shocks with a 48" Hi-Lift jack on a couple of 2x6s, fully jacked up, placed under the rockers. | |
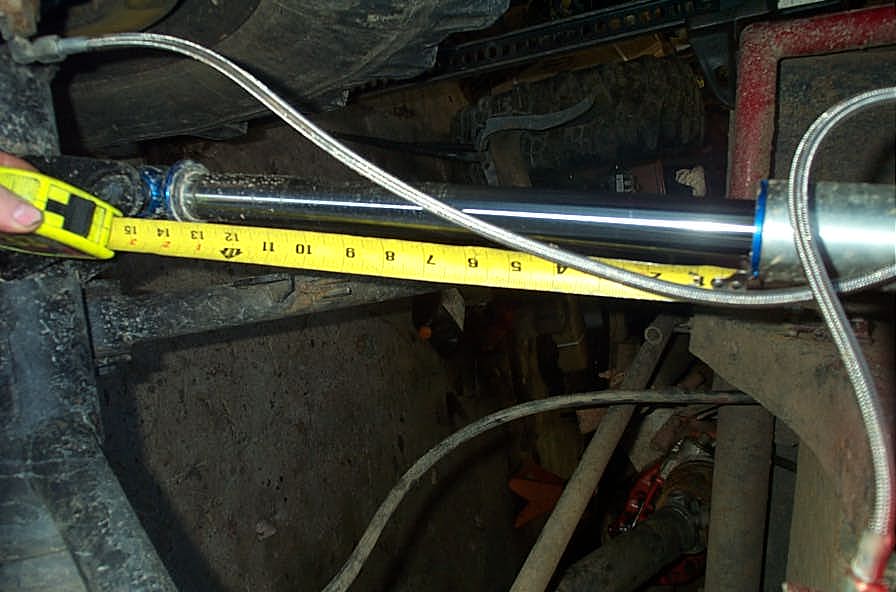 |
When you think you've just got the wheel off the ground, measure to make sure that the negative spring is compressed and all 14 inches of shock shaft are extended | |
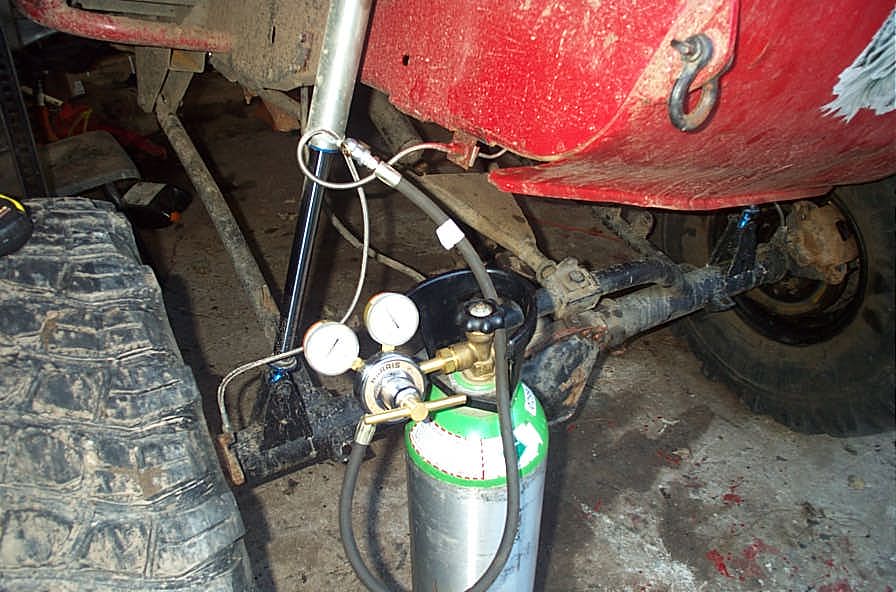 |
Remove cap from shrader valve, adjust delivery pressure on regulator, and get ready to charge the shock. If you are reducing the pressure, carefully depress the shrader valve to relieve pressure so that you are sure you are below the desired setting. be careful to minimize oil loss through the valve Hold the air chuck square to the valve, and when ready, press and hold it on with one swift, firm motion - thus minimizing pressure and oil loss when you activate the shrader valve. You will hear a pressure surge and within a second the pressure will have equalized and the shock will be charged. With a swift motion remove the air chuck from the valve. |
|
ote that when you are adjusting pressures, a peculiarity of Airshox will become apparent. You MUST set the pressure in all 4 shocks, rock the vehicle side/side and front/back and then set is on perfectly level ground with equal (or at least real-world, in-use) weight distribution and tire pressure all around before evaluating the results. This is the result of two things. First, the first few inches of the Airshox travel is at a very low "spring rate" so that they are very sensitive in this part of their travel to any changes in terrain evenness or weight distribution (the exact magnitude of how sensitive they are will of course depend on your oil volume, nitrogen pressure settings, vehicle weight, and ride height). The other factor is what is known as the high level of "stiction" that the Airshox have. Because they have large diameter seals and high pressure grabbing the shaft, after an adjustment is made, or loading of the shock changes, the shock initially appears to "stick" where it was left (for example, if you were to jack all the weight of one corner, then make no adjustment but just gently set the vehicle weight back down on the shock on that corner, 9 times out of 10, the shock will not settle back to exactly where it was initially, but rather will likely "stick" at a lesser travel (more shaft sticking out). This phenomenon is at it's worst when the shock sits static for some time. (All of the oil gets squeezed out of the seals). As the shock is used, the "stiction" is greatly reduced. Also, this phenomenon does not adversely affect the shocks performance, it simply takes getting used to. The following 3 pictures show the Wolf all set up for it's first run on the Airshox |
||
 |
Front, | |
 |
Side. | |
 |
Back. | |
One final note on adjustment. When you first begin to adjust and use the Airshox, the nitrogen is absorbed by the oil. This means, for the first 3 or 4 times you will need to re-charge the shock after each run. At some point the oil becomes saturated and the pressure loss diminishes. Keep in mind though, there is no foaming inside the shock due to the pressure. The nitrogen bubbles are microscopic. Part 6 - TestingSo now we cut to the chase. What are they really like? How are they at speed? Are they rough? Do they overheat easily? Do you like them? etc. etc. I get all these questions, and more, frequently. Here's what I have to say about them: |
||
 |
First, I have had many different types of suspension on the Wolf. From 1/4 elliptic... |
|
 |
...to short, fat coils... | |
 |
...to tall, firm coils... | |
 |
...and now the Airshox. | |
 |
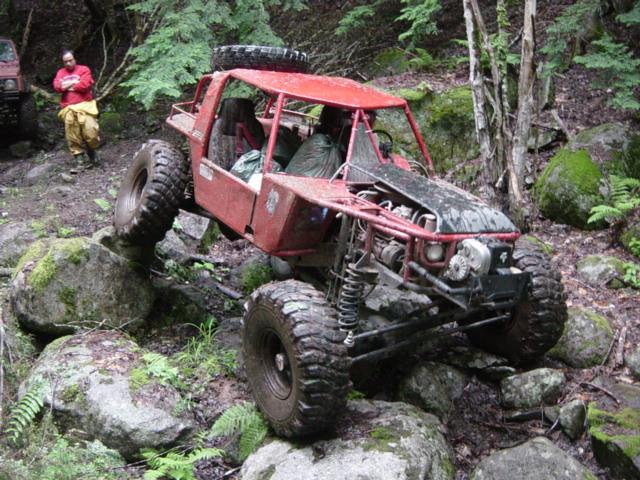
For all around trail use, crawling, as well as "hauling" - the Airshox are by far the best system I have ever run. Are they the perfect, a magic bullet, ideal for all rigs and conditions? Certainly not - like anything they have their strengths and weaknesses. Hopefully I can report my findings and at least give you some things to think about when choosing your own suspension. Remember, however, that much of the information in this section, by its very nature, is quite subjective in nature. By which I really mean - I will make you a deal - I will report my uncensored, full, honest opinions if you agree not to e-mail/pm me and whine if you decide to buy and try and then find you happen to not agree with me! |
|
|
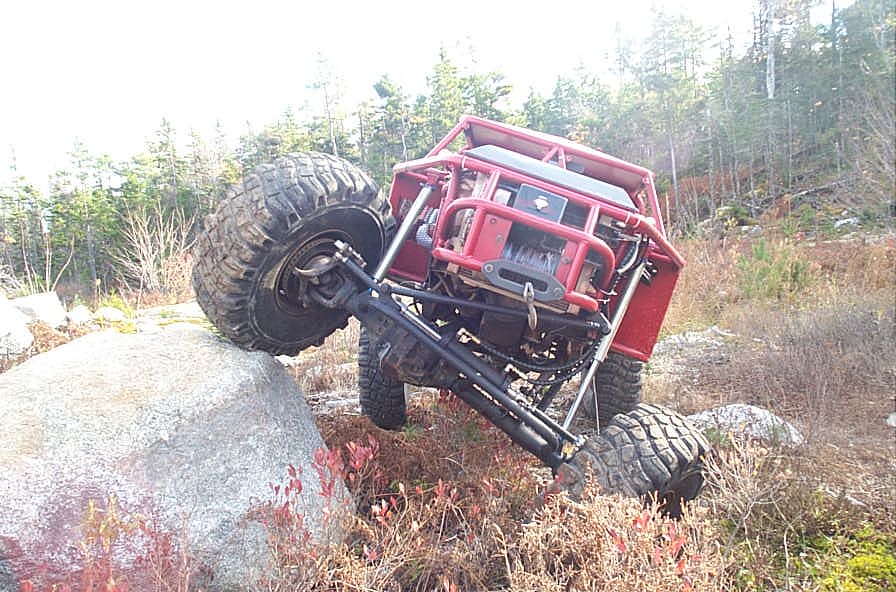
They flex well, even at the higher-end pressure and oil volume required to support my buggy's weight. My sprung weight per corner is 940 lbs in front and about 690 lbs in the rear. I have the shocks set up at 360 psi nitrogen and 370 cc oil in front and 260 psi and 355 cc in the rear. At these settings, which net a ride height of approximately eight (8) inches front and rear, and after having gone... |
|
 |
...boulder crawling and... | |
 |
...climbing, and ... | |
 |
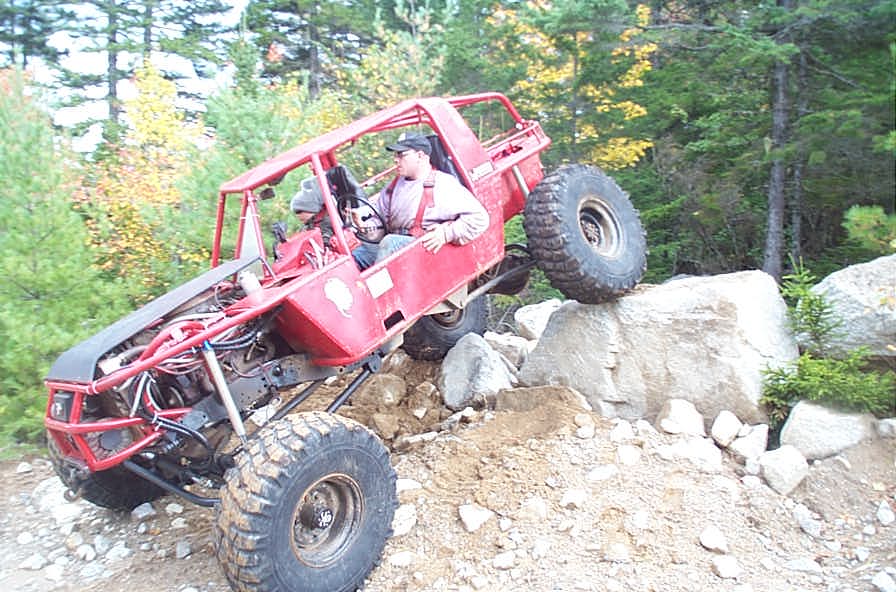
...whizzing over the little whoops at 40 mph. | |
 |
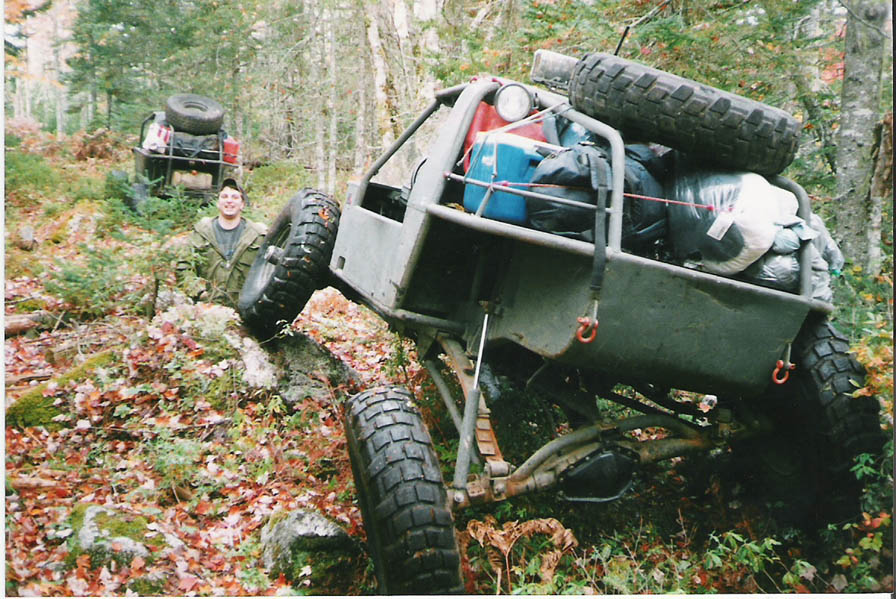
As well as a bunch of mixed muddy, rutted, general 'wheeling | |
 |
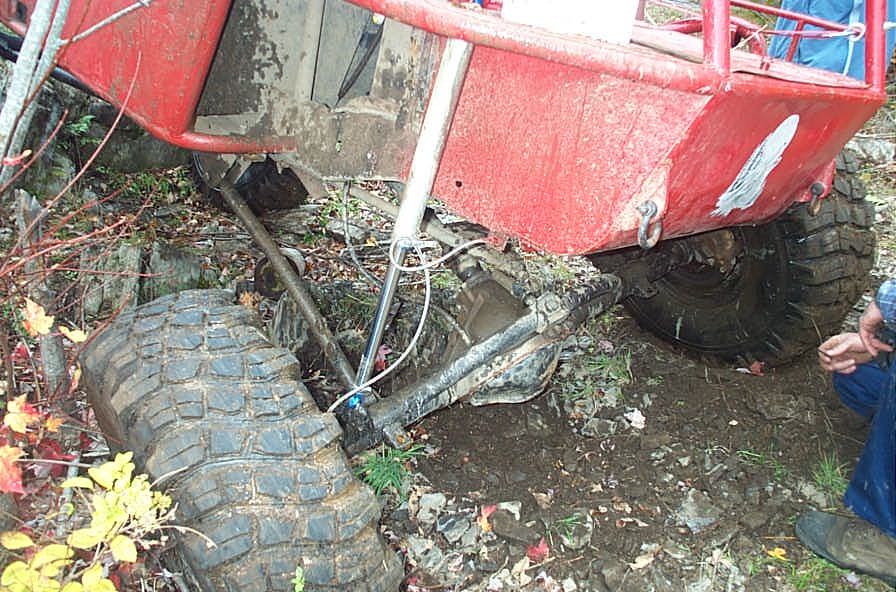
You can see from the zip tie that I have not quite bottomed out the front shocks... | |
 |
...but that I have fully compressed the rear shocks, although not hard enough to actually mangle the zip tie, as it remained intact. | |
 |
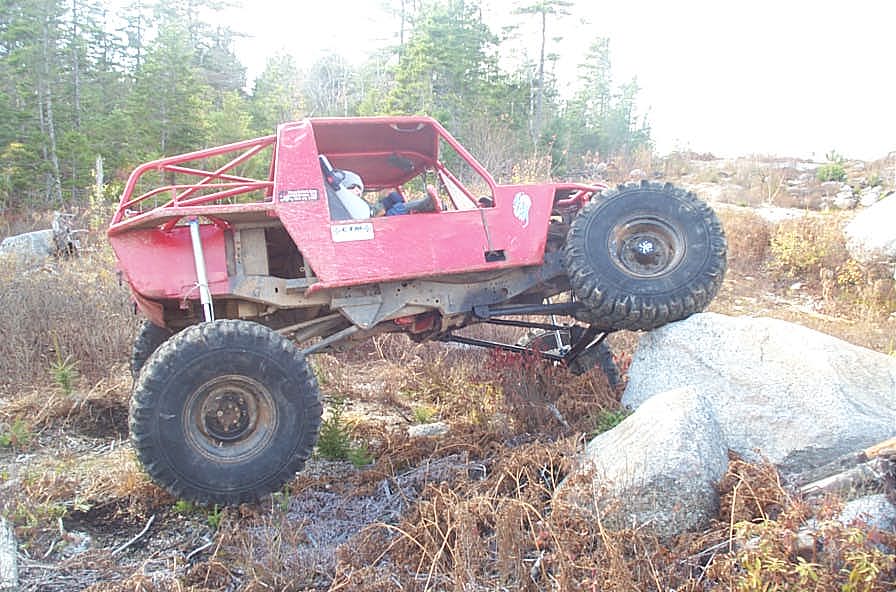
As I mentioned, I am very happy with my Airshox, they are an almost ideal solution for my rig and trail needs - even though my buggy is right at the weight limit. Because it is a heavy rig, the pressure and volume required to support it do provide a slightly firmer ride than ideal, but not dreadfully so, and certainly they ride better than any other combination I've used to date. The tuning process is a little fiddley and quirky, and you need to have the equipment, but after some practice it is quick and easy. Low-speed trail performance in a variety of conditions is quite excellent, I have no complaints at all. As one progresses to medium and faster speeds (20-40 mph), the need for some sort of adequate roll control can be a factor. Personally, it's not of an issue for me to even bother with anti-sway bars at this time, as I don't go fast for more than several minutes (<30 mins) at a time, I imagine street driven trucks, esp. those driven frequently would have to address the issue of roll control. This picture doesn't particularly illustrate any of this but I thought it was a cool looking picture when enlarged :-) |
|
|
||

|
Sources: Fox Racing Shox 9435 Wheatlands Ct. Suite A Poly Performance Offroad Products725 Buckley Rd Off Road General Store23061 La Cadena |


|

