 |
Front Leaf Spring Conversion By Bill "BillaVista" Ansell |
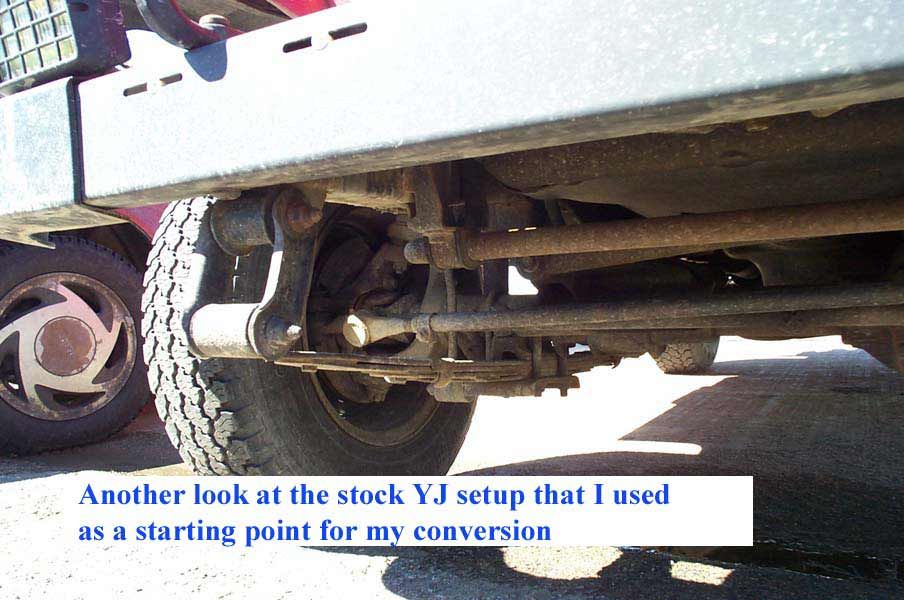
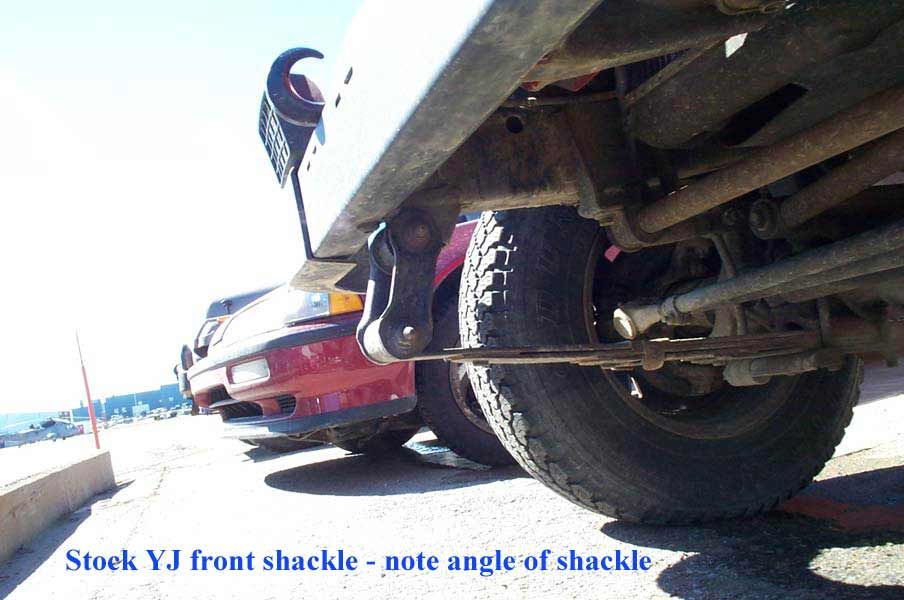
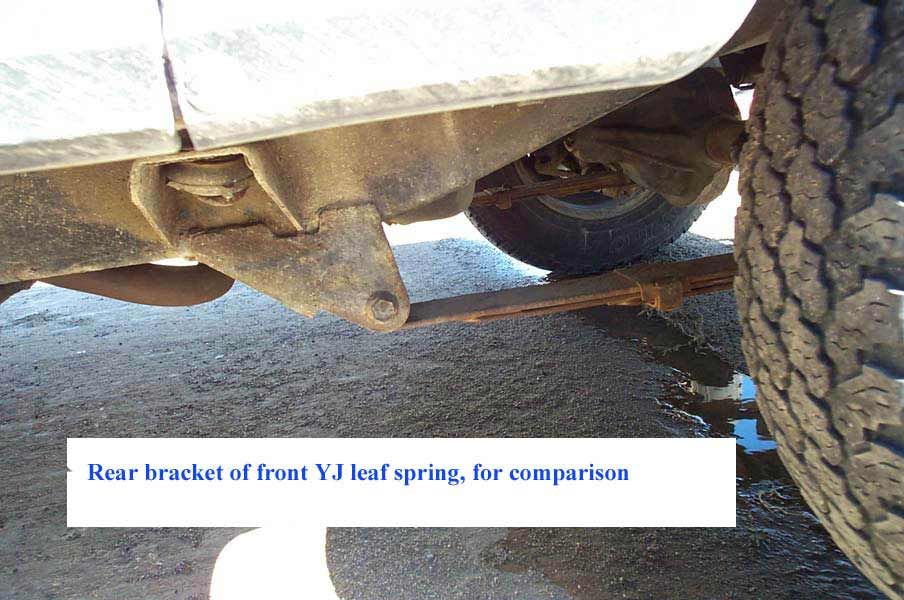
Swapping the XJ front suspension from 4-link coil to Spring Over Axle Leaf springsIntroductionThe first question people always ask is "why?". Well, the first 3 pictures should explain how unsatisfactory the stock setup was when I reached about 7" of lift. The control arm angles were way too steep, the steering was way beyond its design limits, and the ride and handling sucked....and I wanted to go bigger yet. So what to do? I could have done a custom multi-link design or one of the so-called "long arm" conversions....but that's a lot of trial and error and geometry to make it all work well. So I chose the simple, proven reliability and performance of the leaf spring over axle setup. I just love the clean simplicity and the ease of fine tuning the lift height and wheelbase. |
 |
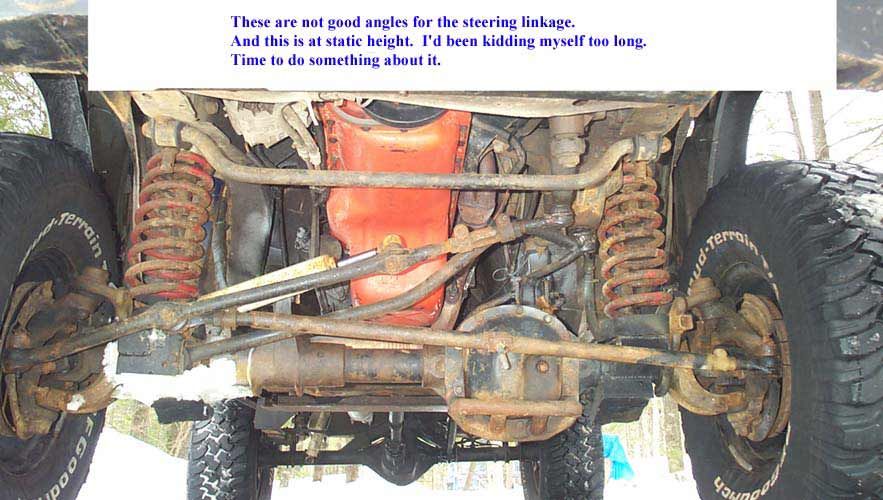 |
Scary stock steering angles. | |
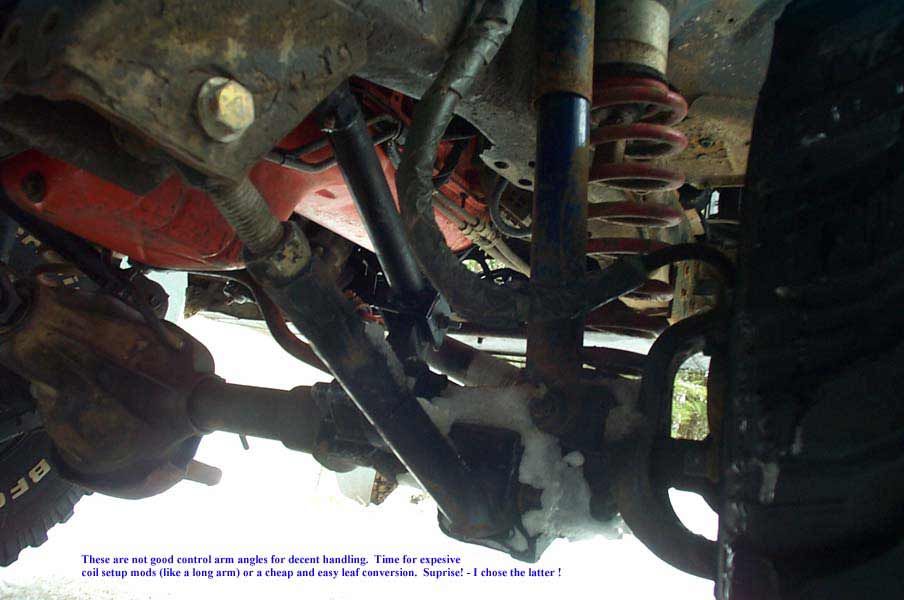 |
Gross control arm angles, and these were already custom adjustable-length control arms. | |
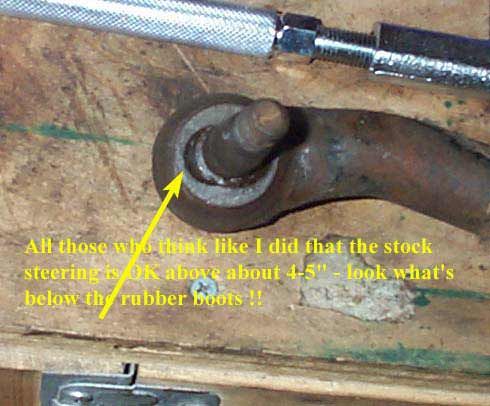 |
The ugly truth behind the rubber boots. | |
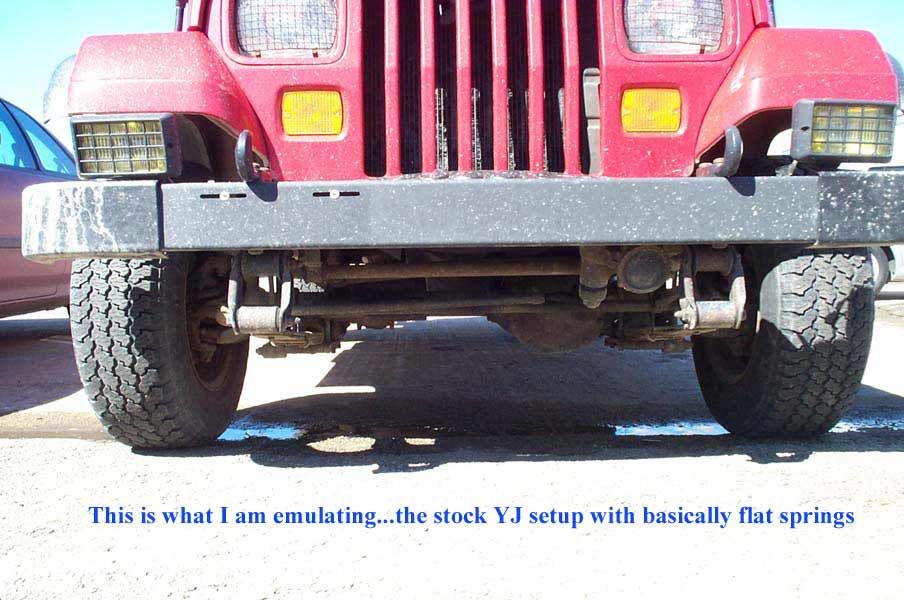 |
I basically set about emulating the simple YJ design, but spring over axle (SOA). | |
 |
SOA has worked extremely well for the short wheelbase guys for years. | |
 |
And I had access to free YJ front springs (thanks Chad!). | |
 |
||
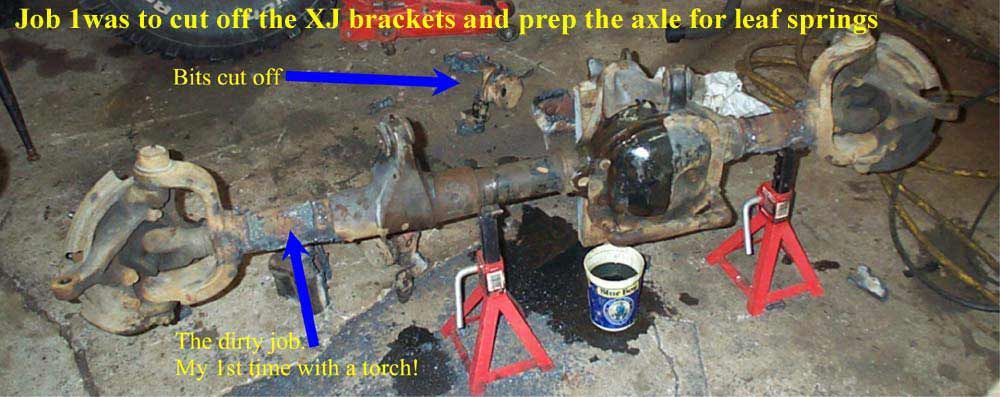 |
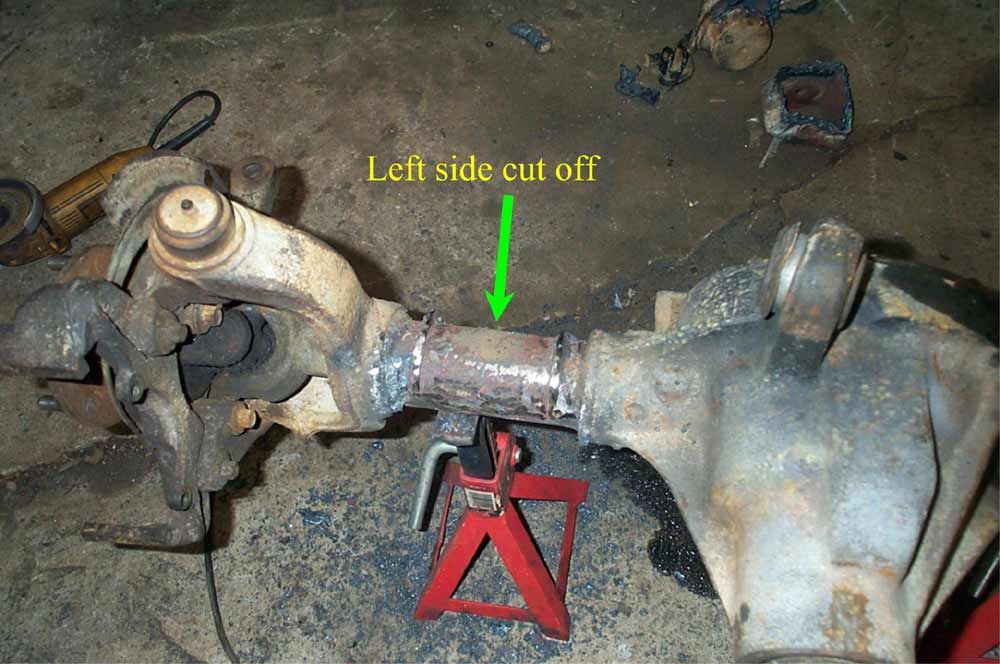
The next few pics show the initial step of cutting off the XJ coil bracketry. | |
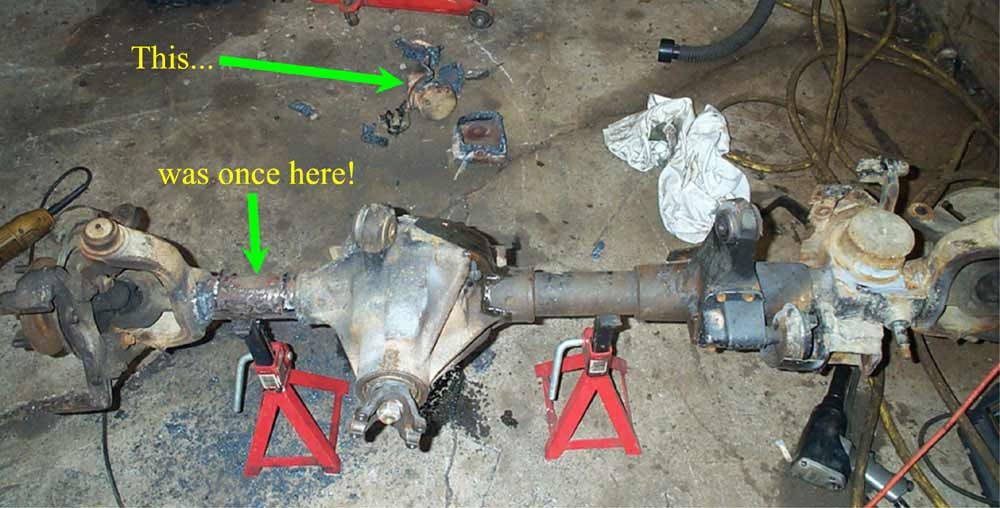 |
This was my first time with the ol' flame wrench (thanks to Rico for hauling his out here for me). | |
 |
||
 |
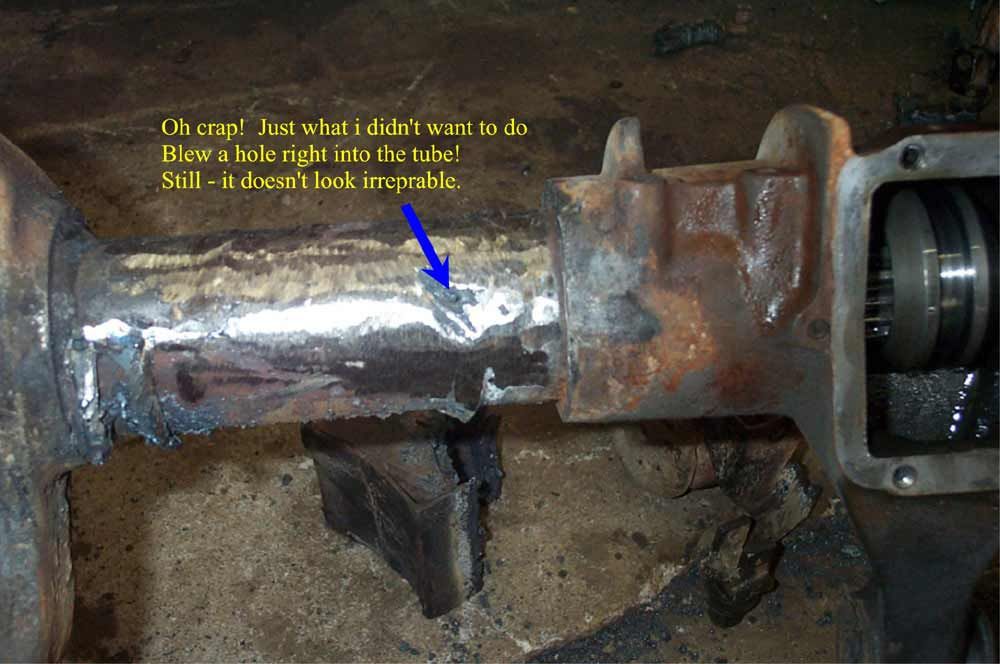
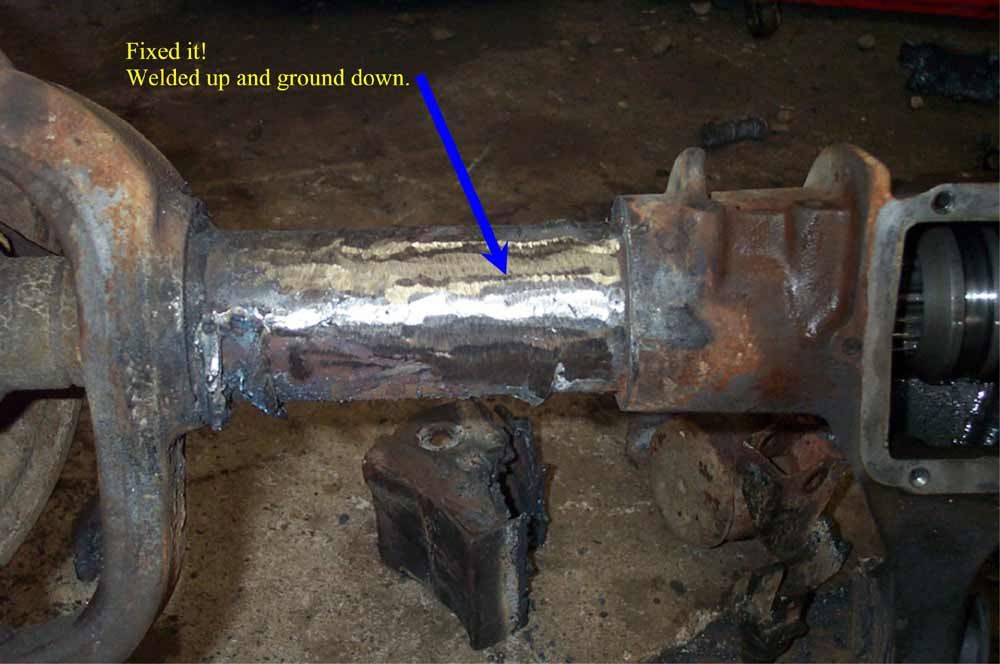
I made an ugly job of it, but as Chad keeps saying..."you're not building a space shuttle) :-) | |
 |
||
 |
||
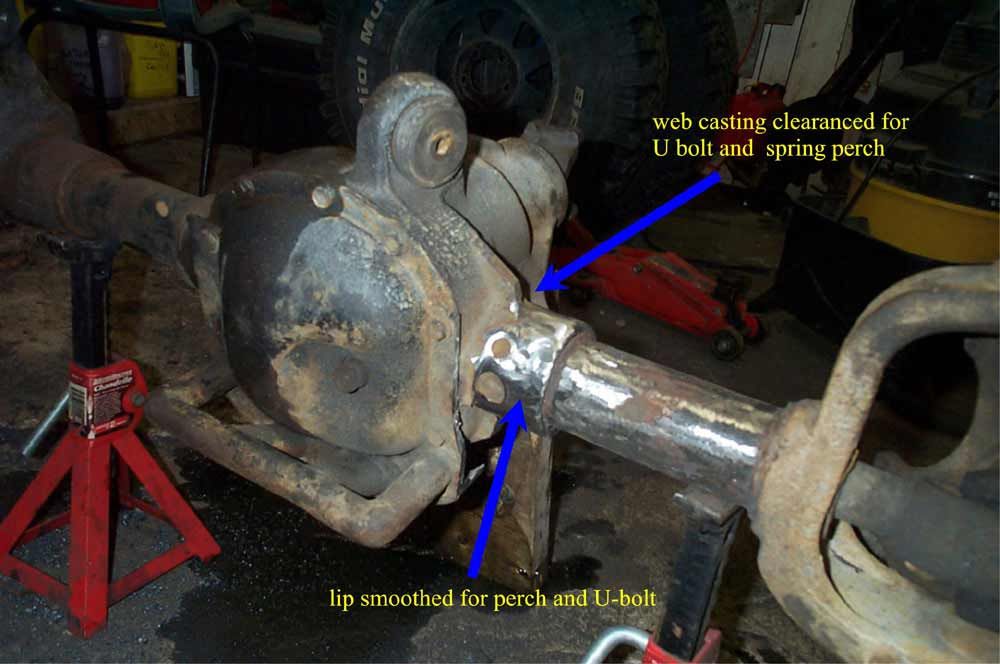 |
Because of the required location (to centre the axle) for the driver's spring perch, the diff housing requires some modification. | |
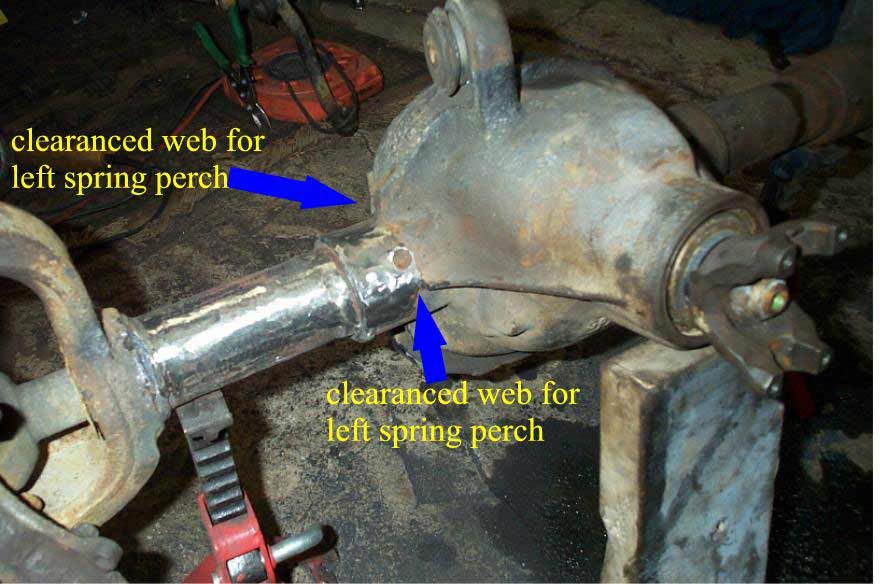 |
The inner U-bolt on the driver's side needs to fit around the stub on the diff housing. | |
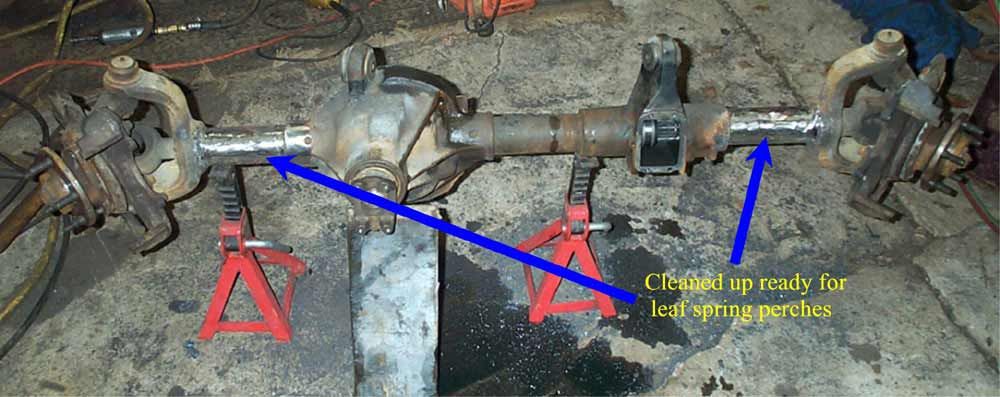 |
All the coil brackets removed. | |
 |
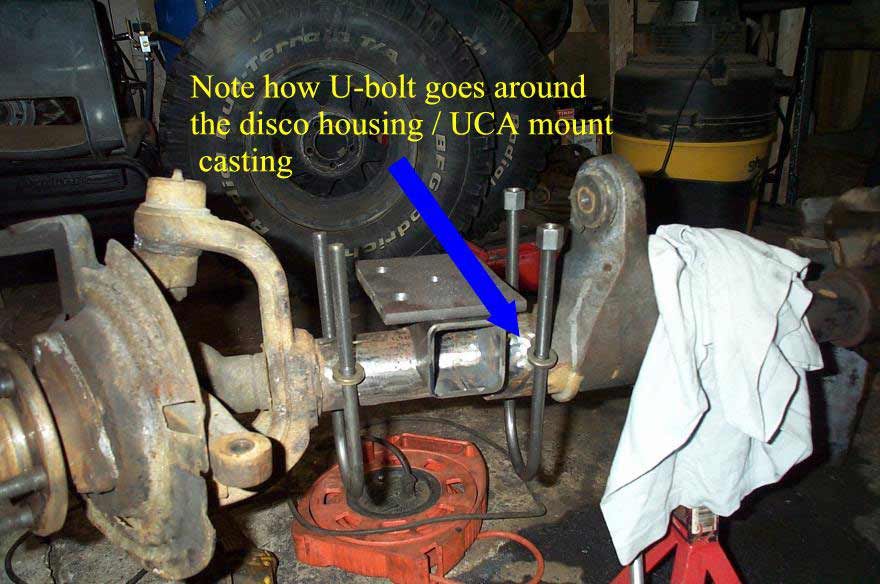
The inner U-bolt on the passenger side fits around the large disconnect housing, which needs a little "cleaning up". If you're working with a non-disconnect housing, this won't be an issue Personally I like the strength of the big cast disco housing. | |
 |
Driver's spring perch mock-up. | |
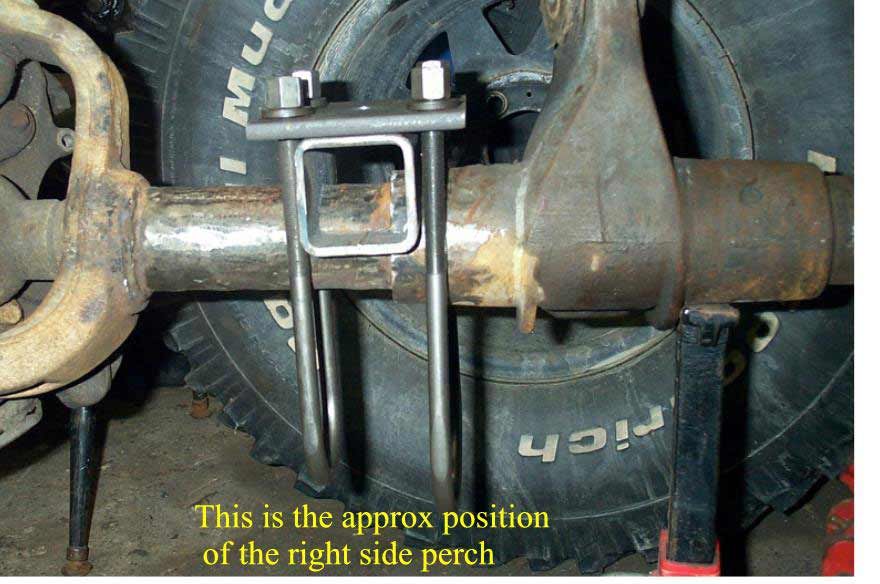 |
Passenger side spring perch mock-up. | |
 |
||
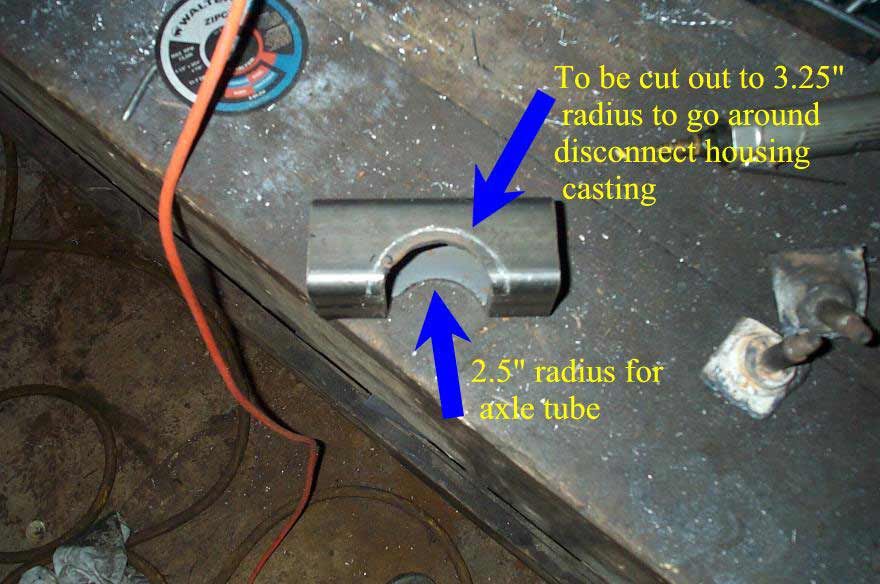 |
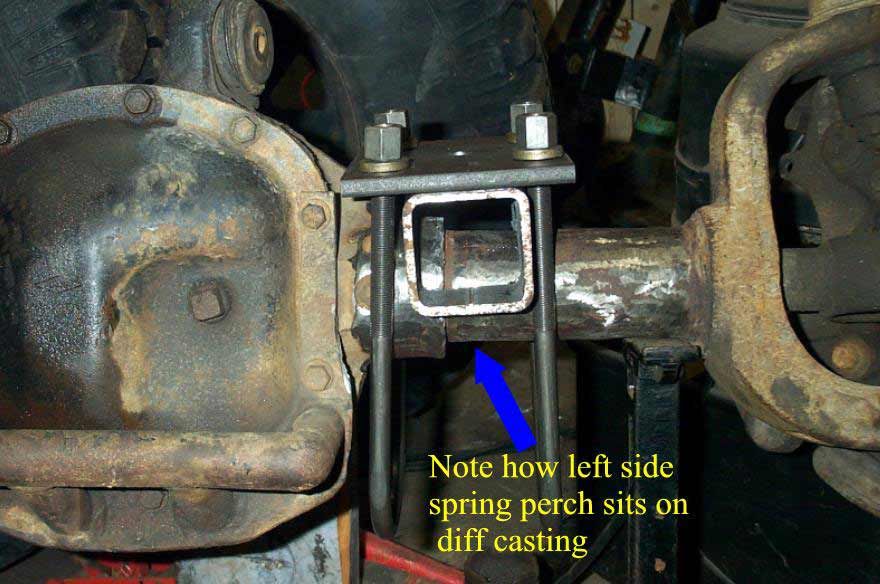
The required placement of the spring perches requires 2 different diameters. Good job I was making them myself. | |
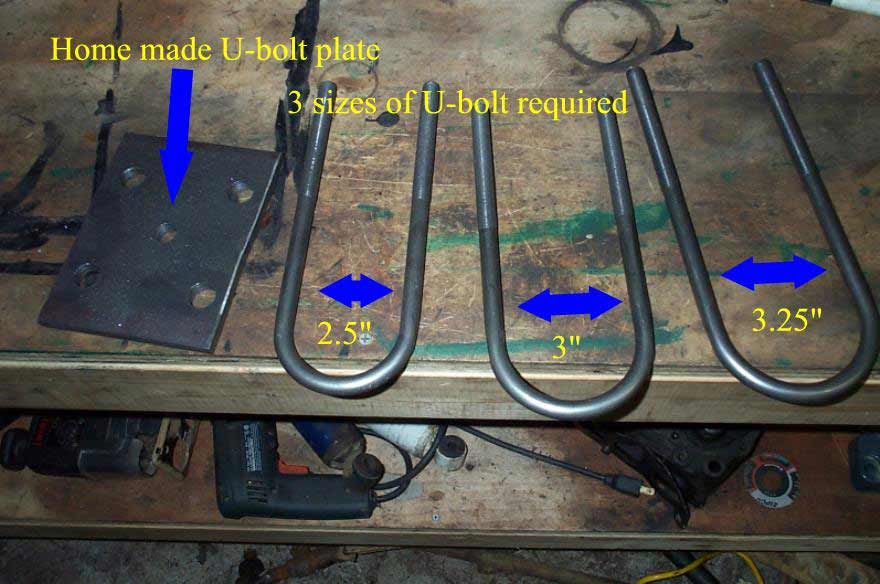 |
3 different size U-bolts were required,
as follows:
2.5" - Passenger and Driver side outer 3" - Passenger inner (to fit around disco housing) 3.25" - Drivers inner, to fit around diff housing U-bolt plates are just 1/4" steel plate. |
|
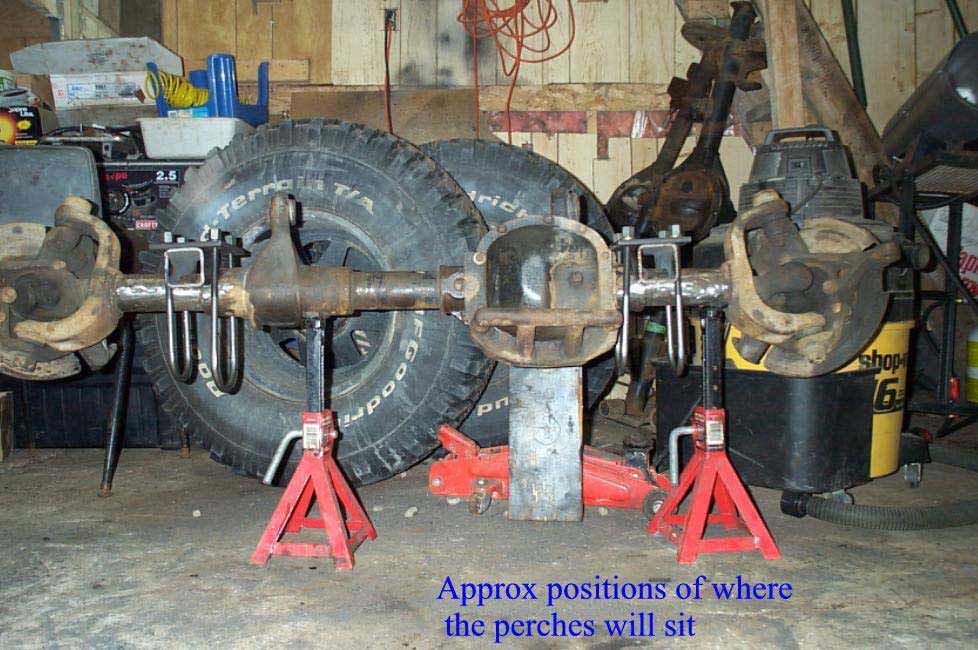 |
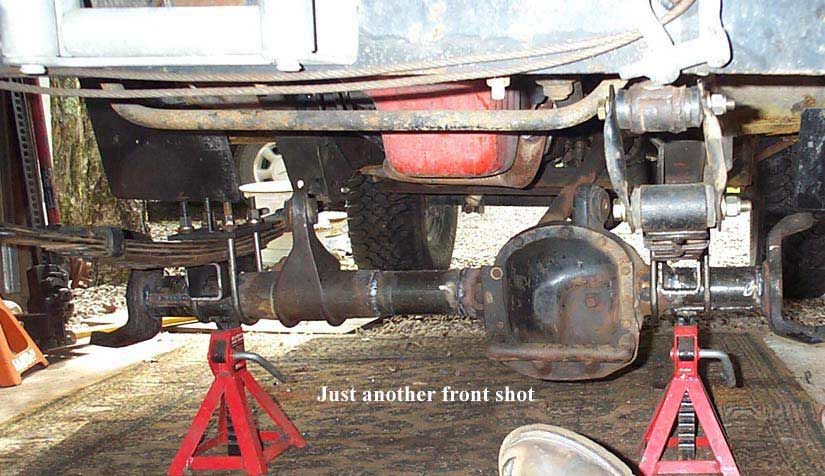
This is how the perches will sit to centre the axle under the Jeep. To figure out the locations, here's what I did. Mounted the rear of the leaf packs in the stock LCA frame brackets. Measured diagonally between them to get them parallel to one another and the frame. With them in this orientation, measured the width between the centring pins of the leaf packs (dimension A). I then measured the width of the axle from inner knuckle to inner knuckle (dimension B). Subtract A from B, result is C. Divide C by 2, result is D. Measure from inner knuckle (same location as used in getting dimension B) in an amount equal to D. This is where the centre of the new spring perch needs to be. | |
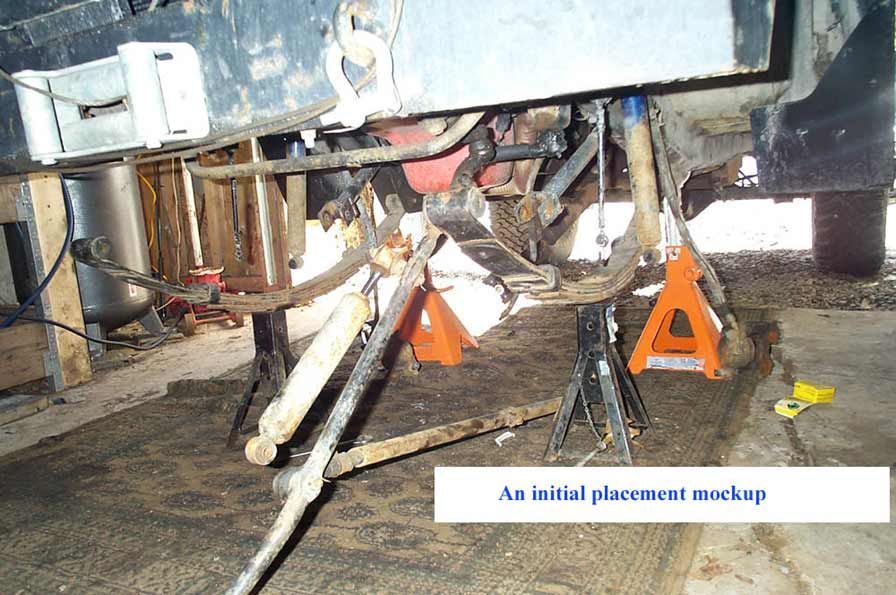 |
Initial mock-up of leaf spring location. | |
 |
This is how I measured between the centre pins of the spring packs. | |
 |
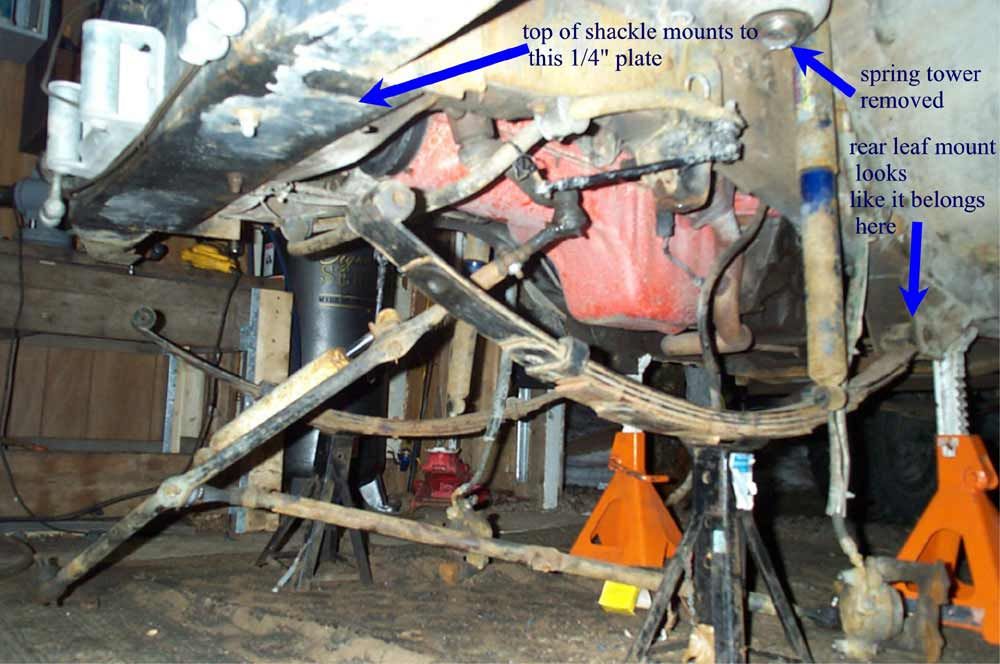
Showing where front will mount. I did not want to do a shackle reversal because I didn't want to buy a new "high travel" front drive shaft, and according to my research, it would be of little or no benefit, and could even be counter-productive. Check out John Nutter's excellent article on the subject at www.jeepwire.com. | |
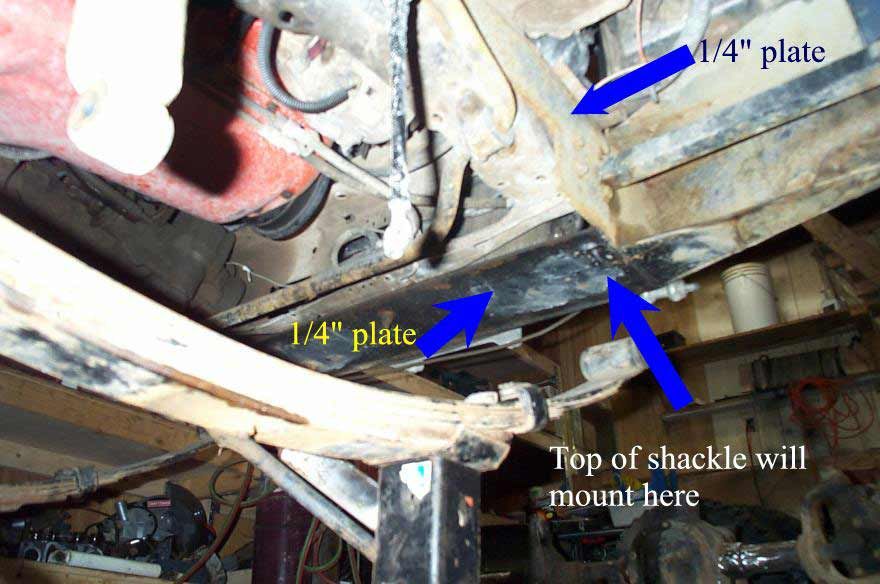 |
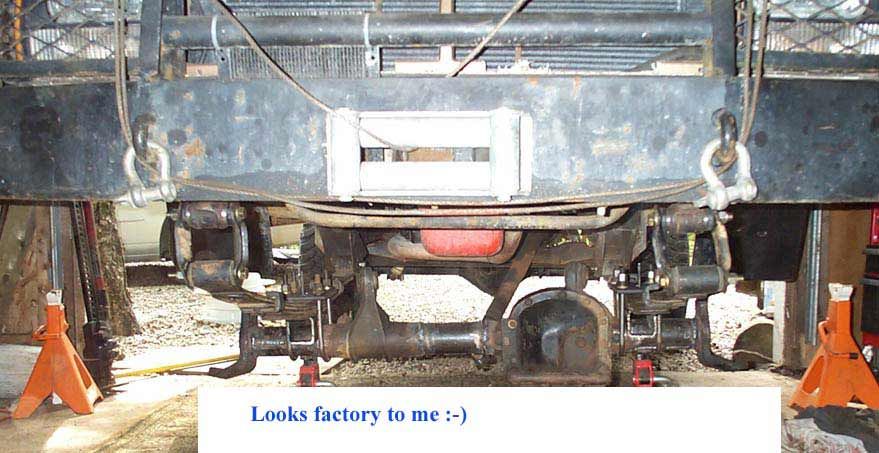
I was fortunate enough to have a big sturdy custom bumper of 1/4" plate to mount my shackle hangers to. It would be very simple to make a cross member though. | |
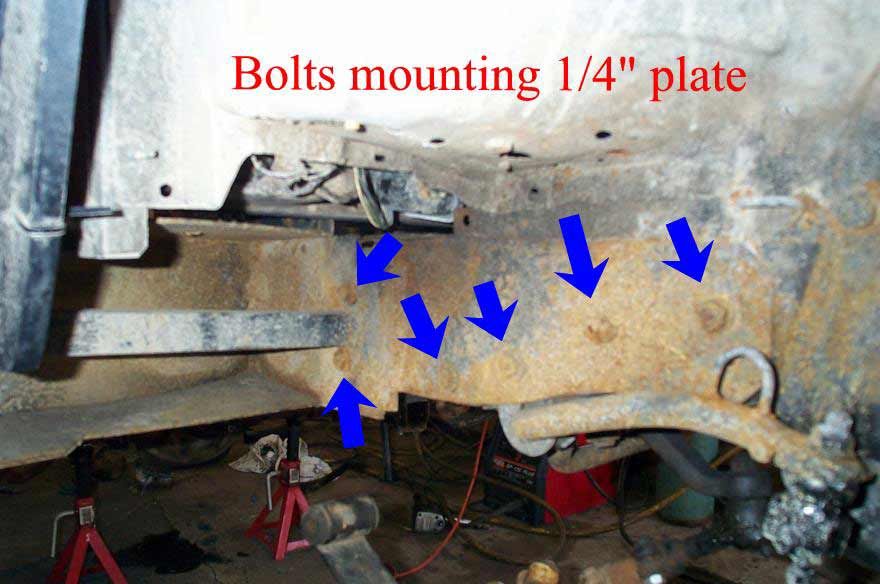 |
My bumper attaches with many bolts. | |
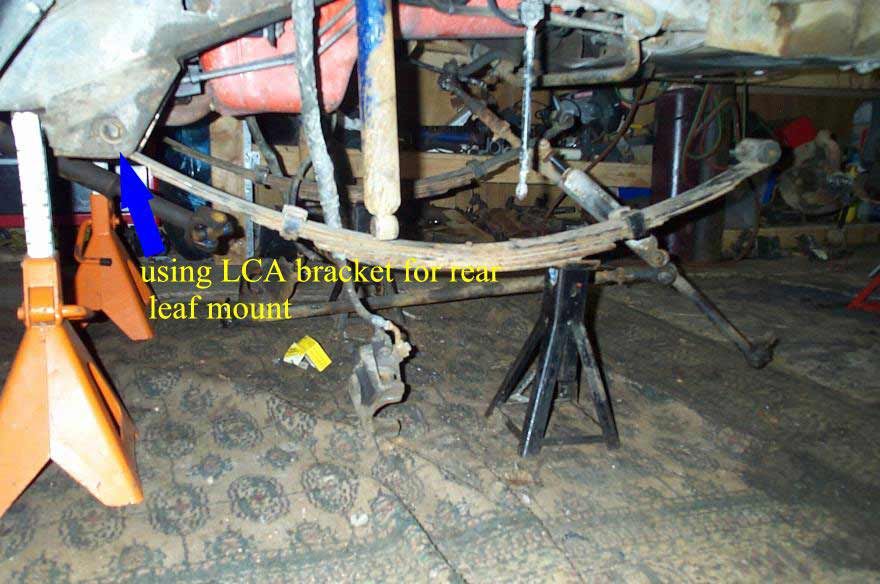 |
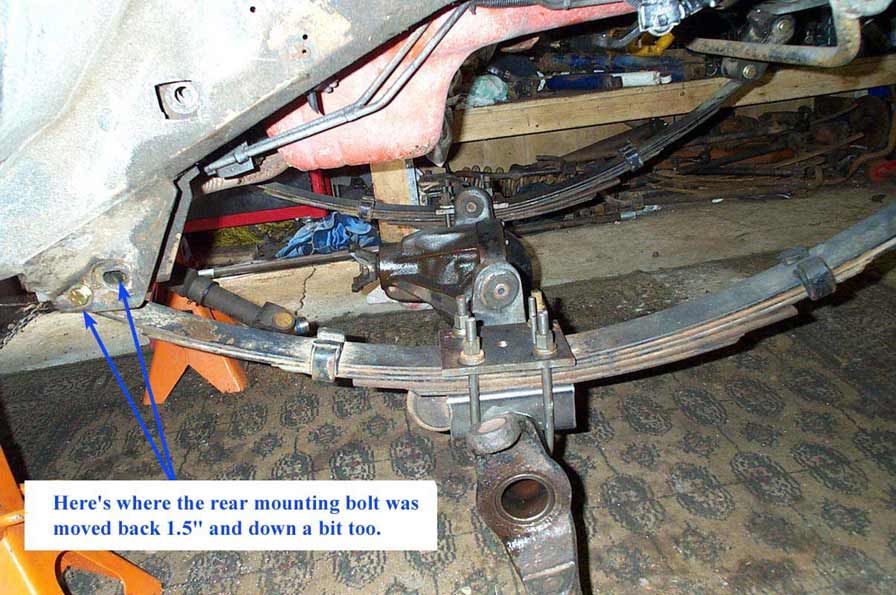
I chose to mount the rear of the leaf packs in the stock LCA frame brackets. they were already there, in the right place, and the right width for the spring eye bushings. | |
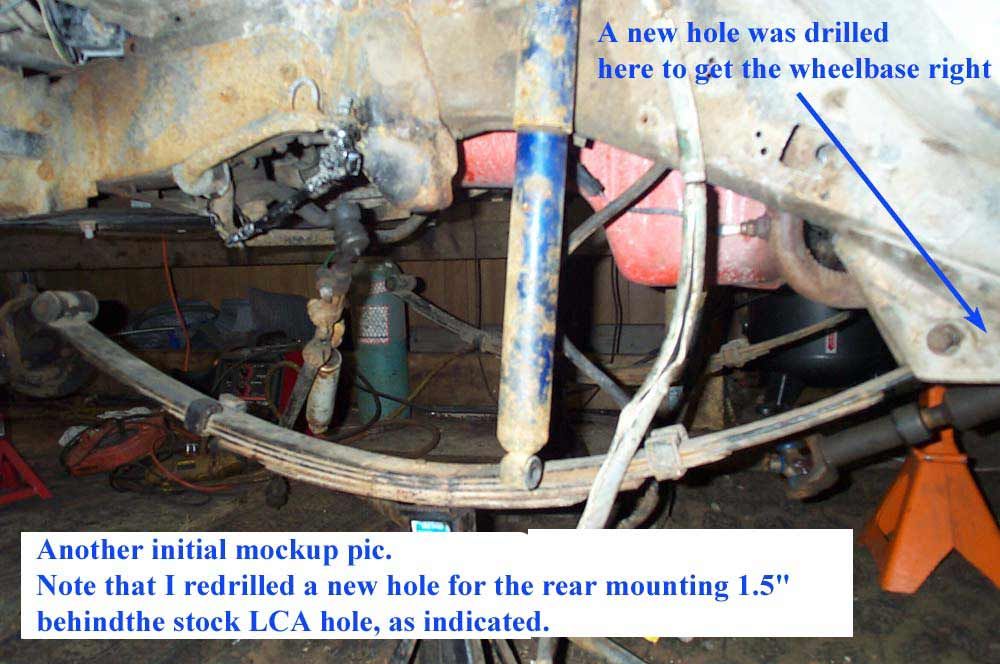 |
Like the pic says, I drilled a new hole in the LCA bracket, 1.5" behind the stock hole, so the wheelbase would come out stock. | |
 |
Here's the axle installed for the first time. | |
 |
||
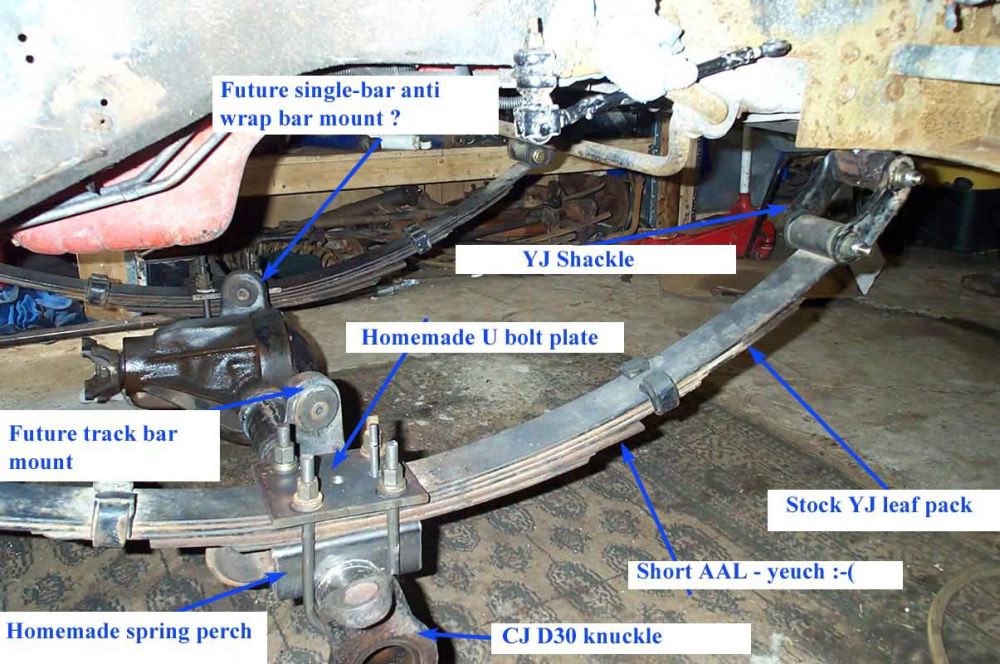 |
Pic with many labels :-) | |
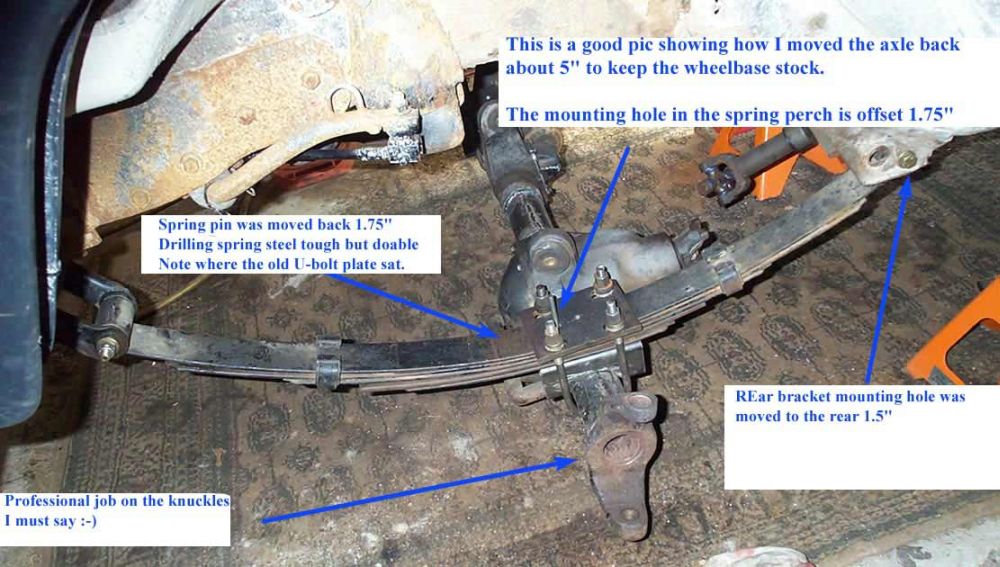 |
This pic shows how I accomplished moving
the axle back 5" (from where it would have been if I'd made no adjustments)
so the wheelbase would remain stock. Later, I would end up re-using
the centred spring perch hole, as opposed to the offset one I drilled, moving
the axle forward about 1.75" to keep my 36" Swampers off the back
of the front fender wells.
Note the inner knuckles are swapped on CJ units as part of my hybrid axle with manual hubs project - detailed elsewhere on my site. |
|
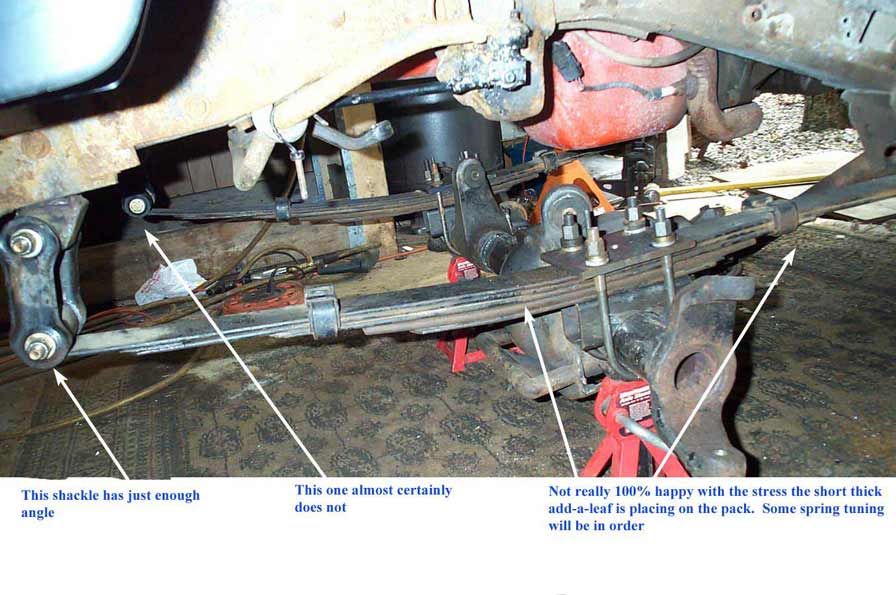 |
Here you
can see 2 initial concerns I had:
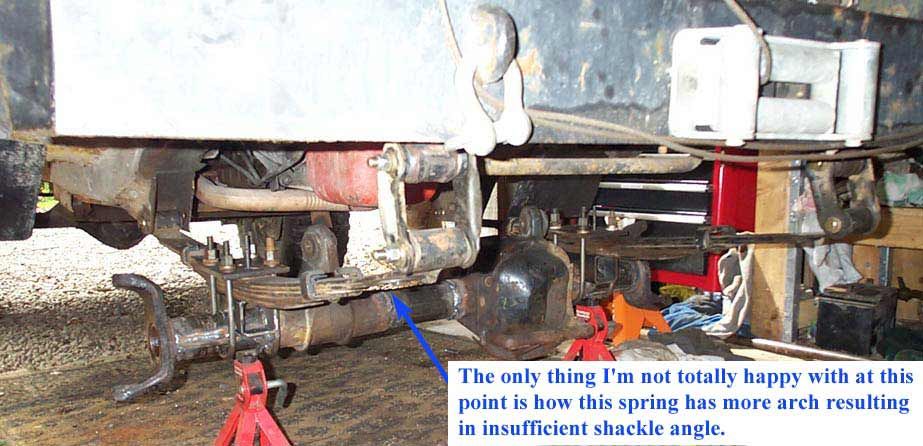
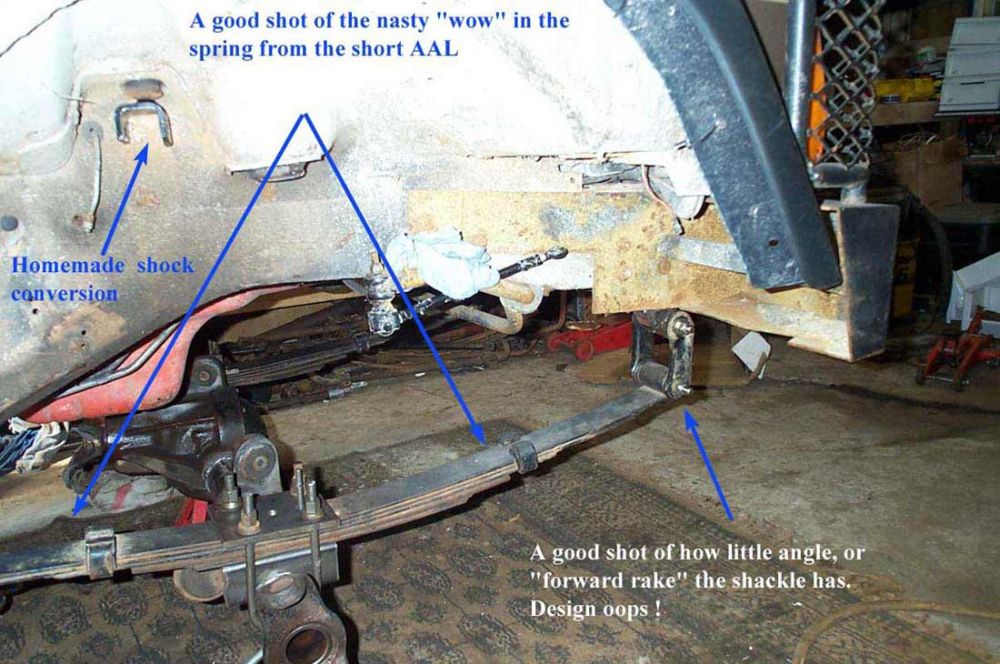
1) I placed the front shackle hangers a bit too far forward, leaving the shackles almost vertical, where I would have preferred a steeper angle to the shackle (bottom of shackle further forward than top) so there's no chance it would fold back on itself against the frame and bend the spring. This has turned out not to be a problem at all. 2) I was concerned about the stress of the short AAL on the spring pack. In the end, I fine tuned the leaf pack by removing the shortest stock lower leaf, and adding 2 long leafs, one almost full length. The short AAL is also still present (1 year later) and isn't a problem. I love how easy it is to fine-tune a leaf spring suspension. |
|
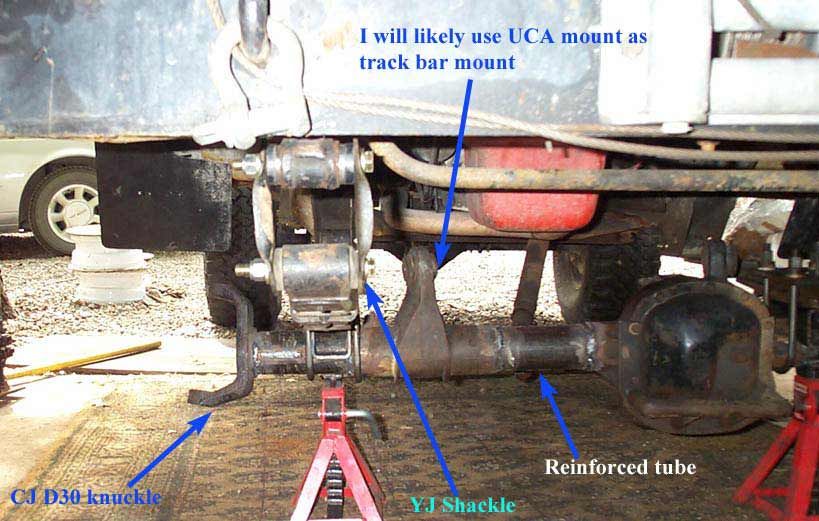 |
I did use the passenger side UCA axle bracket and bushing as a track bar mount initially, but have since removed the track bar and sway bar and am perfectly happy with the results. My shocks are RS9000 set on stiffest setting on the street. | |
 |
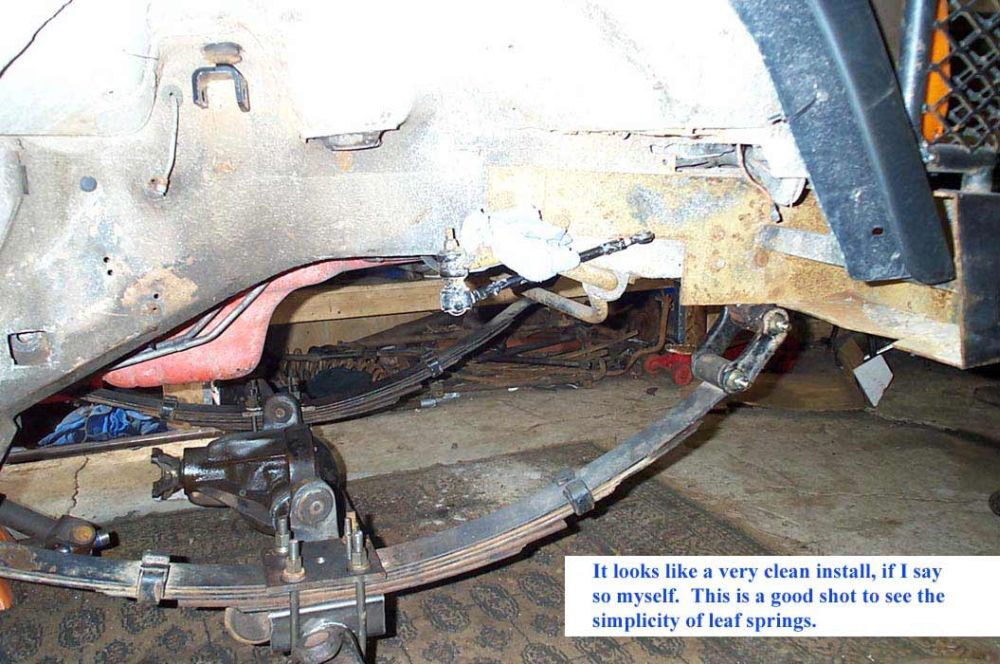
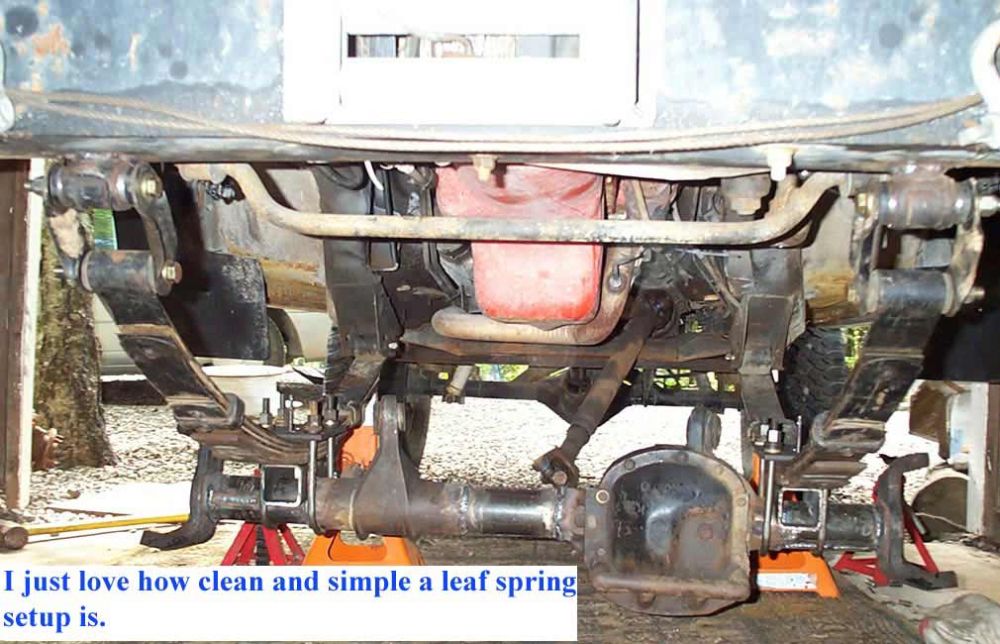
Despite my concern (when I labelled the pic) the shackle position has been fine, and the leafs have been customized to where they are equal and even. | |
 |
I think I was a little too hard on myself when I did up these pictures initially. It has all worked out exceptionally well. | |
 |
I think... | |
 |
...Leaf springs... | |
 |
...Rock!! | |
|
||
|
 |
|

