 |
Superior "Evolution" Series Cr-Mo Alloy Axles By Bill "BillaVista" Ansell |
IntroductionIf we are to properly evaluate expensive,
high-end components such as these; If we are to do so without bias, and devoid
of marketing hype, rumour, innuendo, and misinformation. If we are to give an
honest to goodness, technical fact based, no BS answer to the questions: |
 |
I was originally going to write a long, wordy introduction about the axle shaft and U-joints being the beating heart of your Axle, the soul of your rig, blah blah blah. (Insert sound of needle skidding abruptly across vinyl record here) The fact of the matter is, your front axle shafts and U-joints are the weakest part of your axle, and likely, (with the possible exception of a small driveshaft U-joint) the weakest part of your entire drivetrain. So it stands to reason, if you plan to tackle the toughest terrain, whether in competition or recreation, that you want.....no NEED the toughest, strongest, most abuser-friendly axles and U-joints you can get. That's certainly what I want in the BV-60 and it's what this article is all about - because breaking SUCKS! Superior Alloy ShaftsLet's cut to the chase - what makes the Superior Alloy axle shafts the best on the market? Simple answer really: The material, manufacturing process, and physical shape/size - (all critical to a parts ultimate suitability for any given use) - are all carefully engineered and controlled for the specific duty of hardcore 4x4 abuse. No other axle on the market offers all the advantages of the Superior alloy shafts, namely:
This material and manufacturing process results in axle shafts that have by far the highest strength and ductility. In addition the Superior shafts:
and if that weren't enough, Ron Stobaugh, President of Superior Axle & Gear explains: " We are the ONLY true manufacturers of replacement axles for the aftermarket - others just buy and re-box. Ask to see their manufacturing facility - we’ll gladly give you a tour of ours! We continue to forge; spline and heat-treat axle shafts in the United States even as our competitors have gone overseas to find the cheapest product available. We feel it is our strength and responsibility to maintain engineering and quality control in our own facility. We are enthusiasts, racers, offroaders– we are just like you – we want high quality at a fair price." Enough of the pitch - on with the pics and details..... |
|
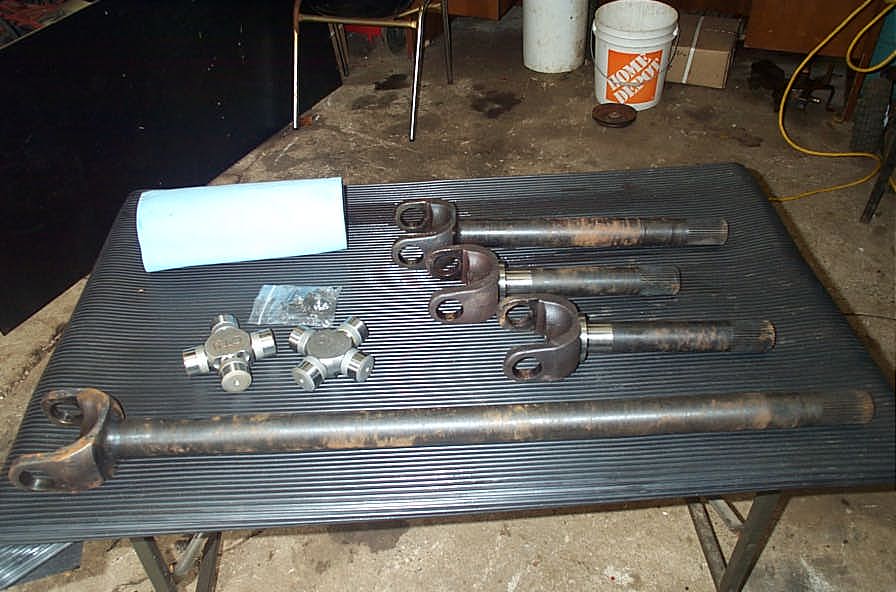 |
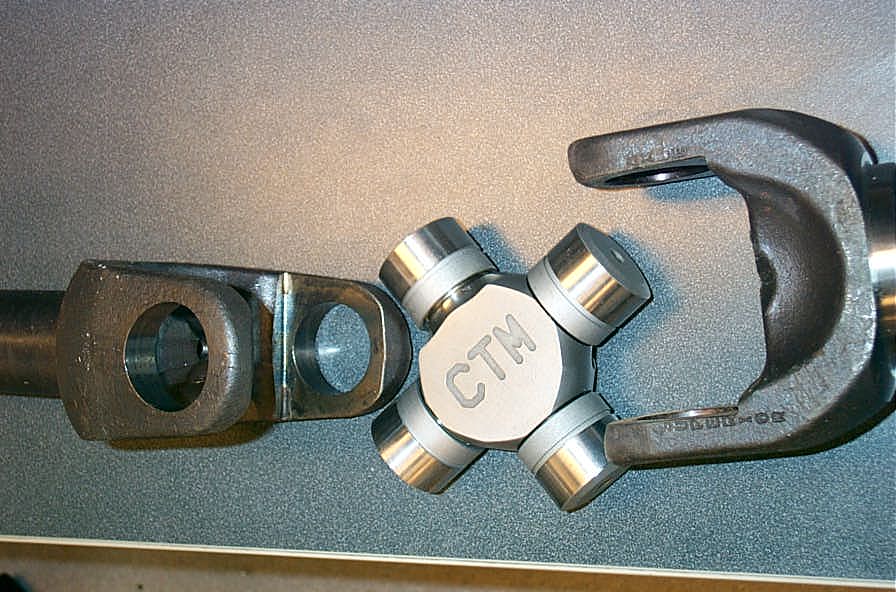
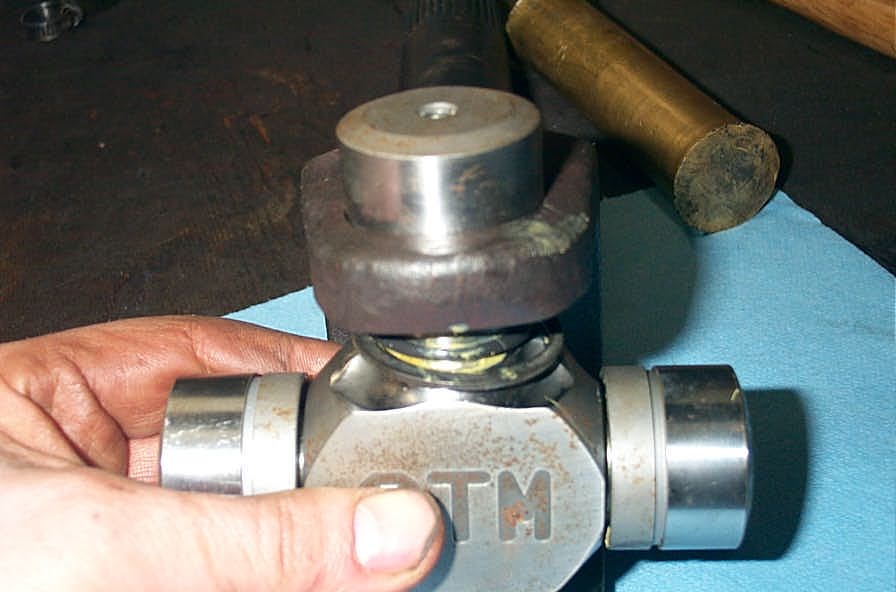
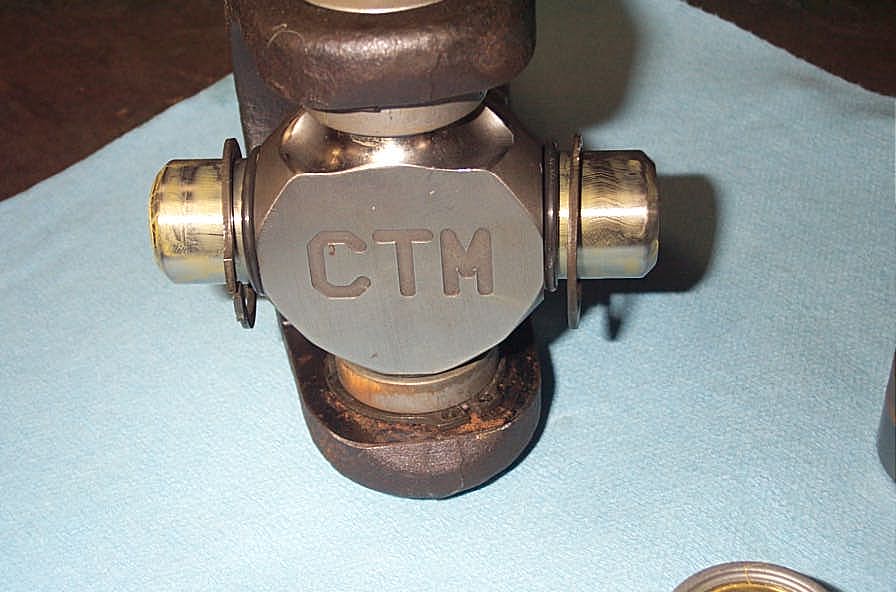
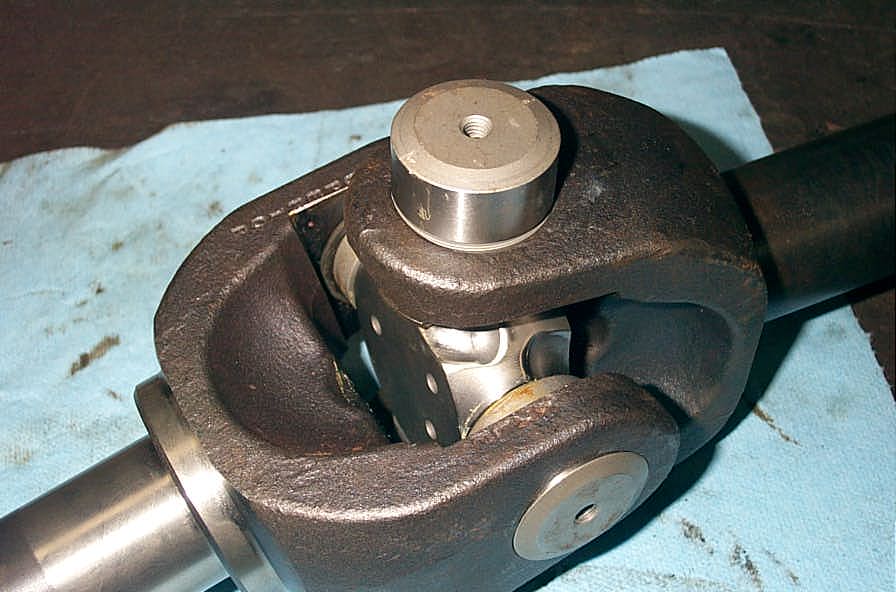
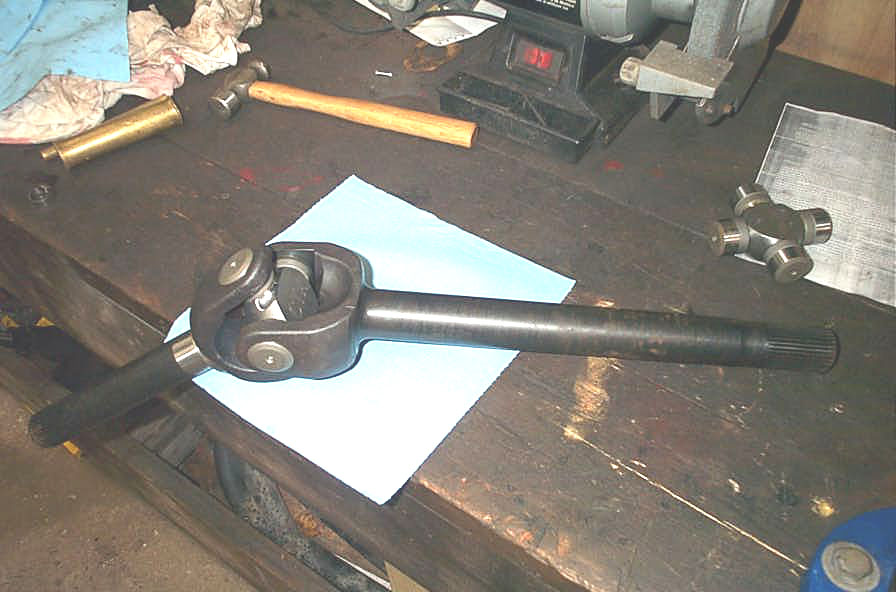
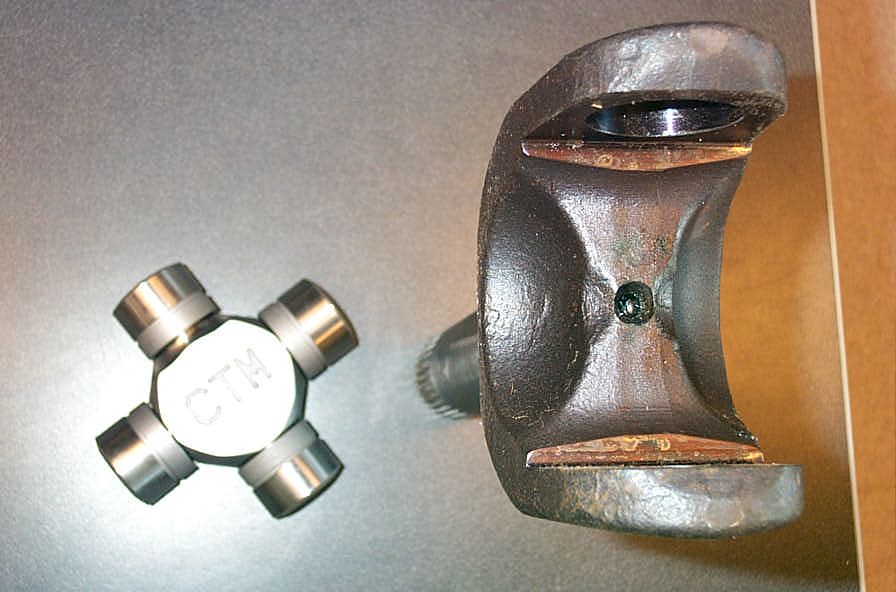
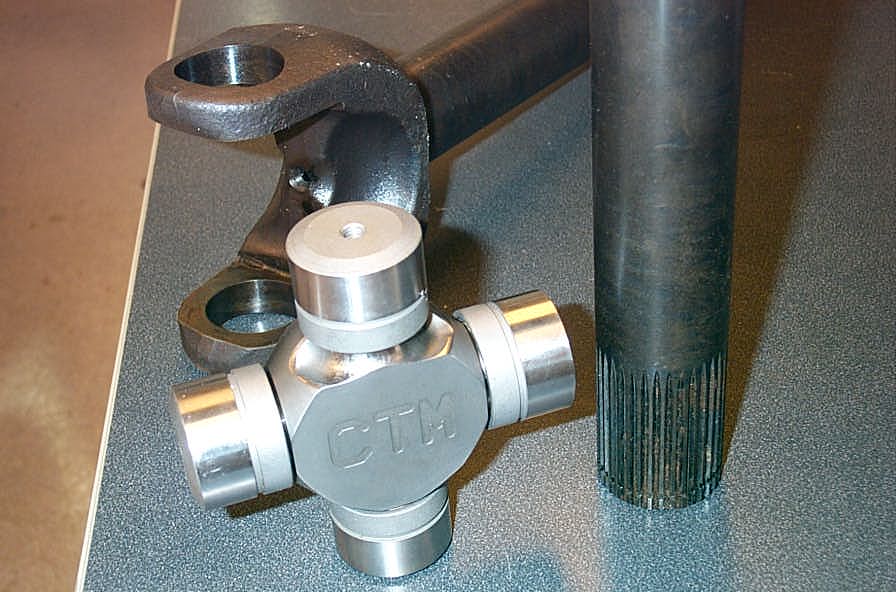
That, my friends, is the "beef". The guts of an ultimate Dana 60 front axle. A great combo - Superiors and CTMs |
||||||||||||||||||||||||
 |
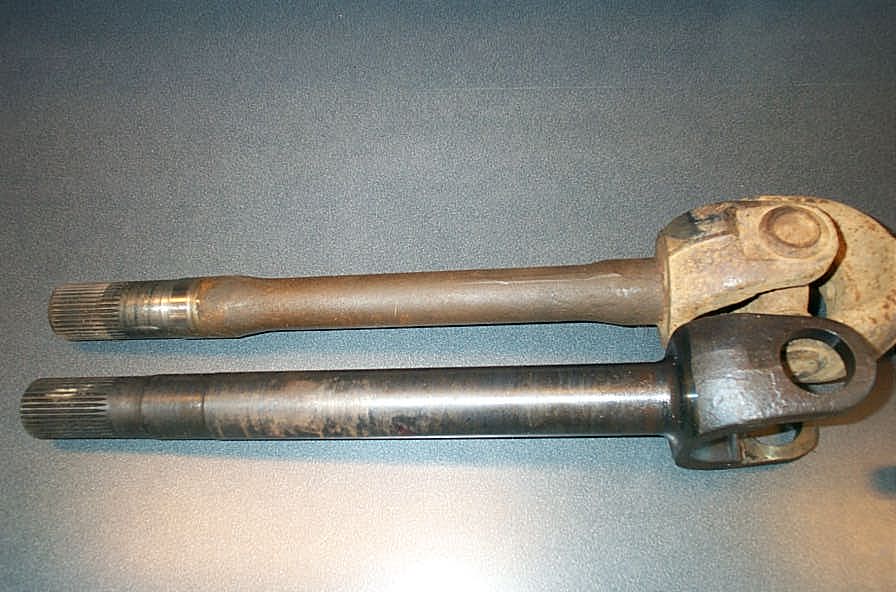
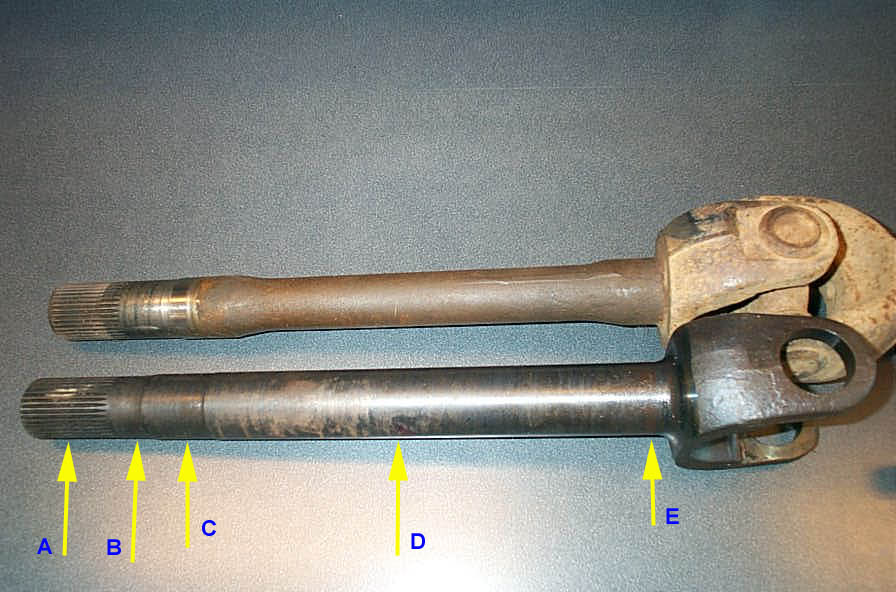
Old stock Spicer 30 spline stub top, below it the massive 35 Spline Superior Cr-Mo alloy stub. | ||||||||||||||||||||||||
 |
Maximum size - maximum strength. | ||||||||||||||||||||||||
 |
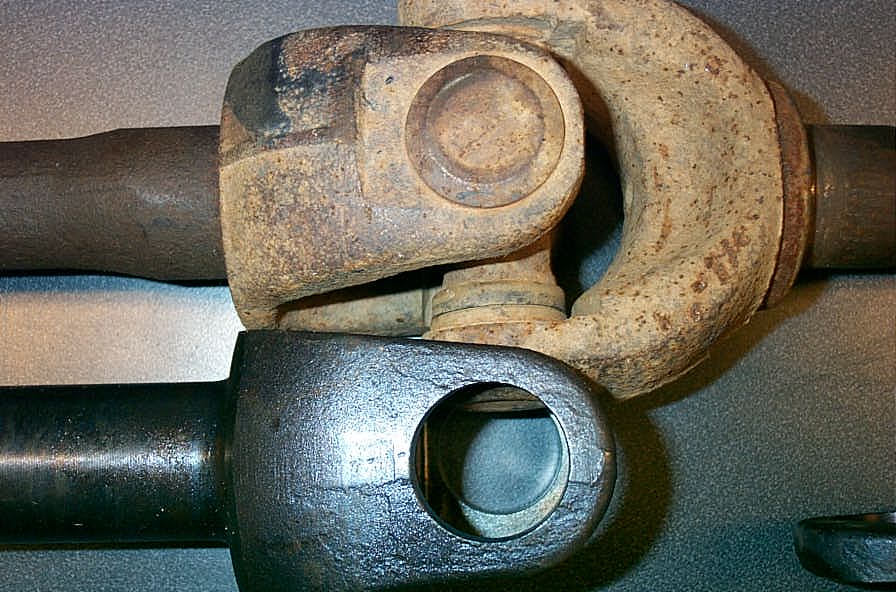
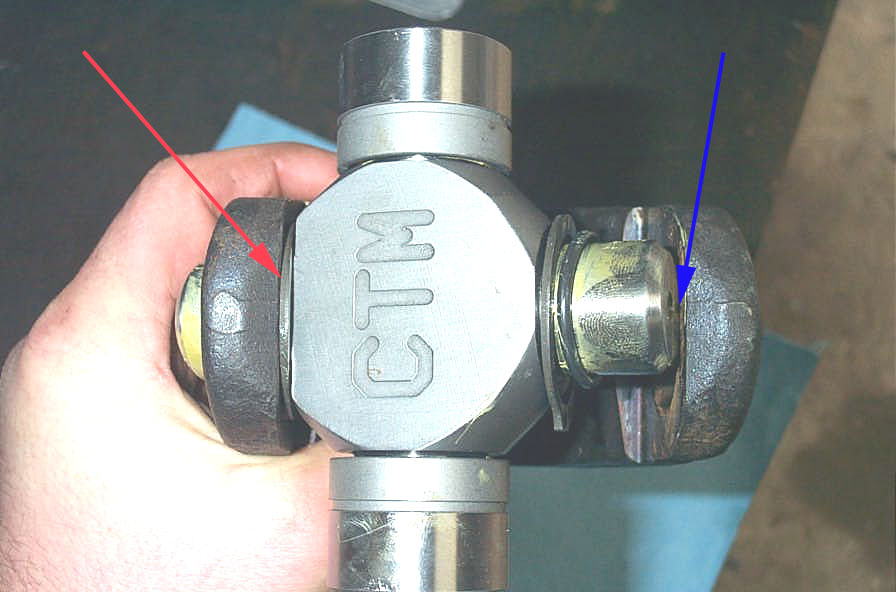
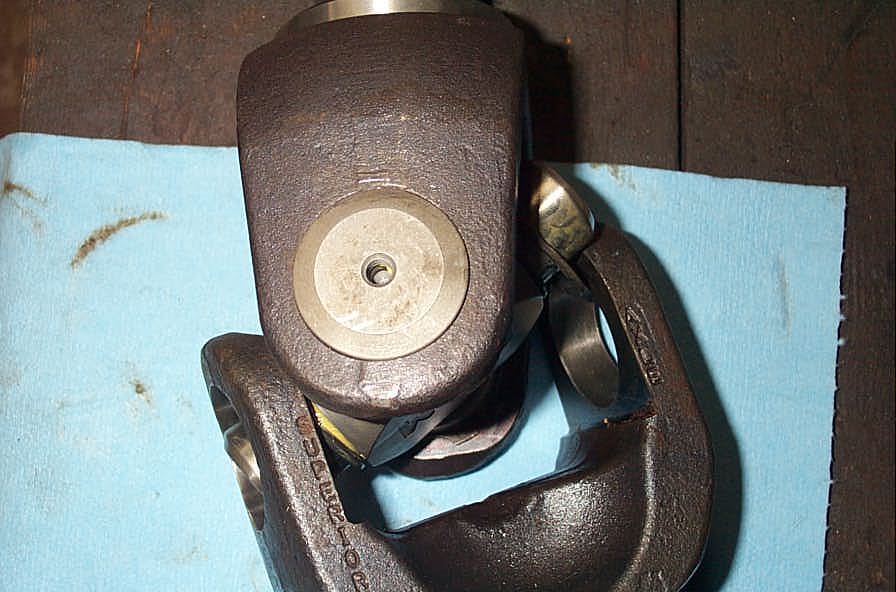
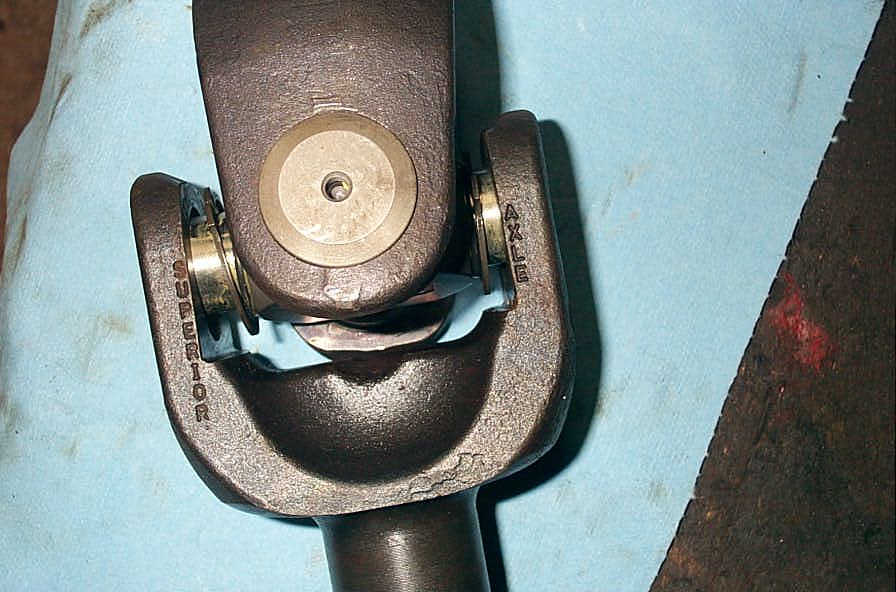
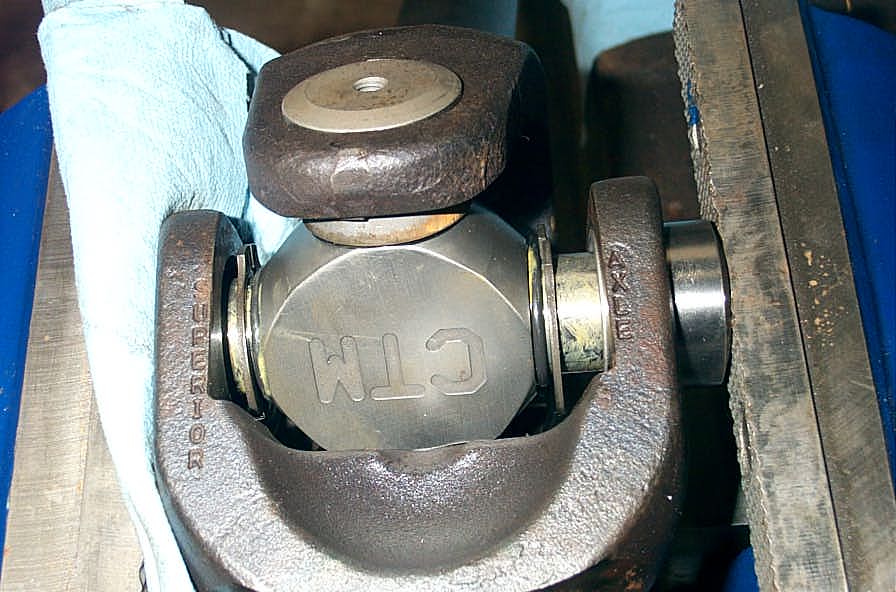
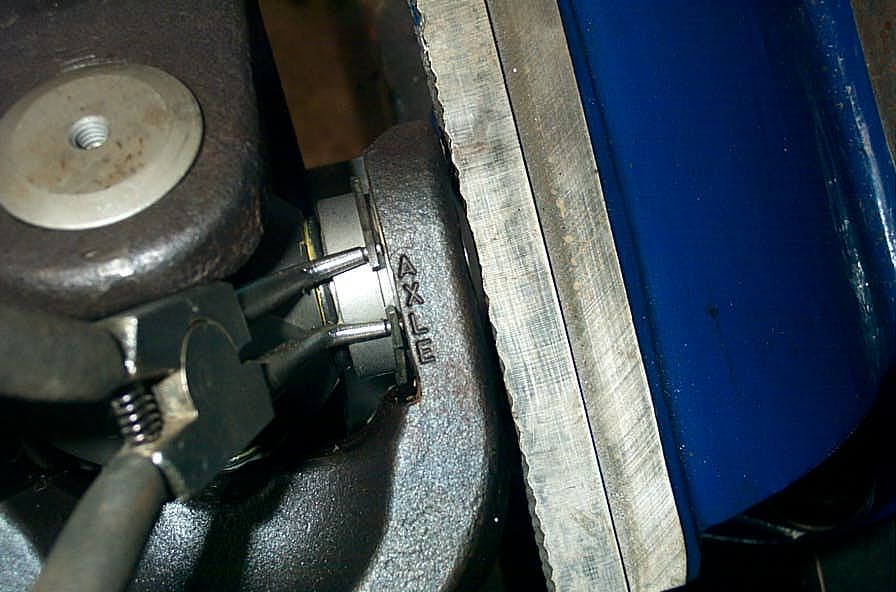
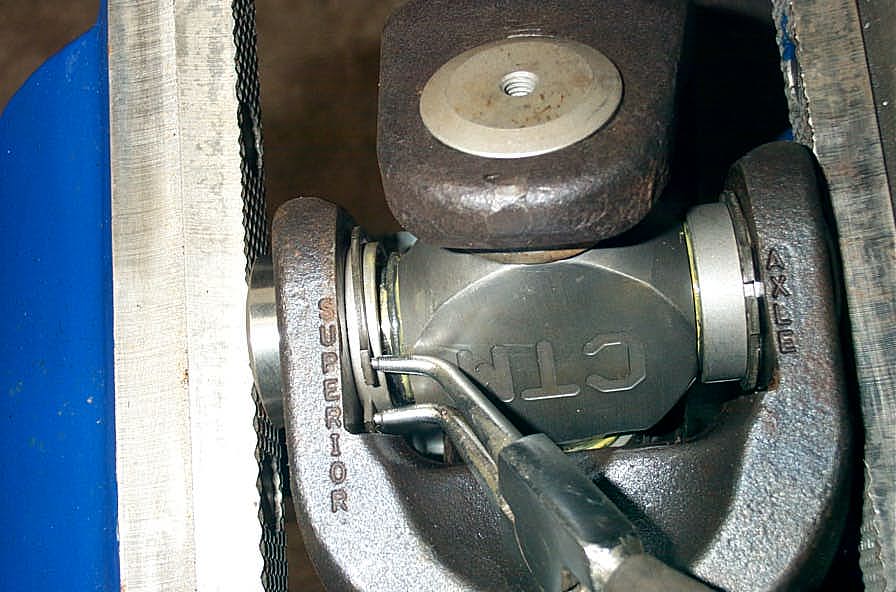
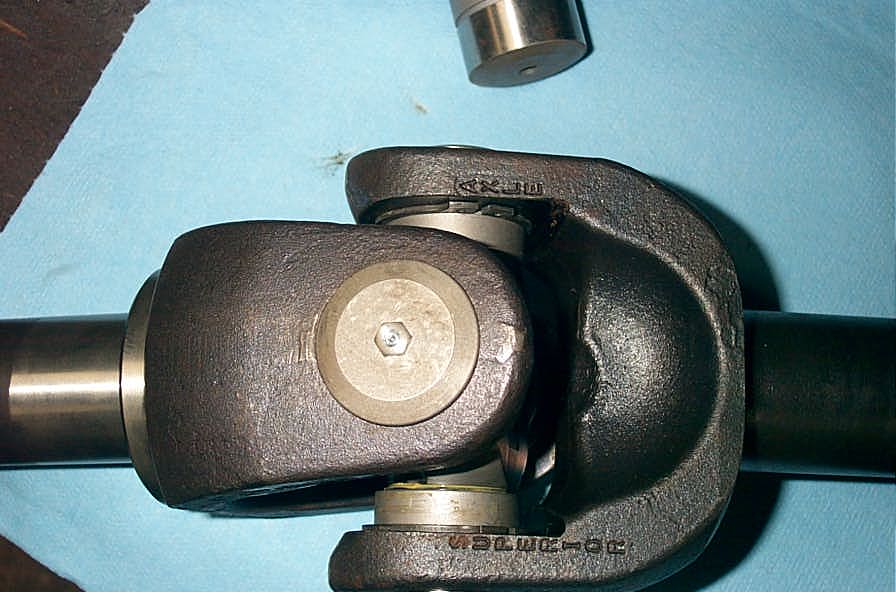
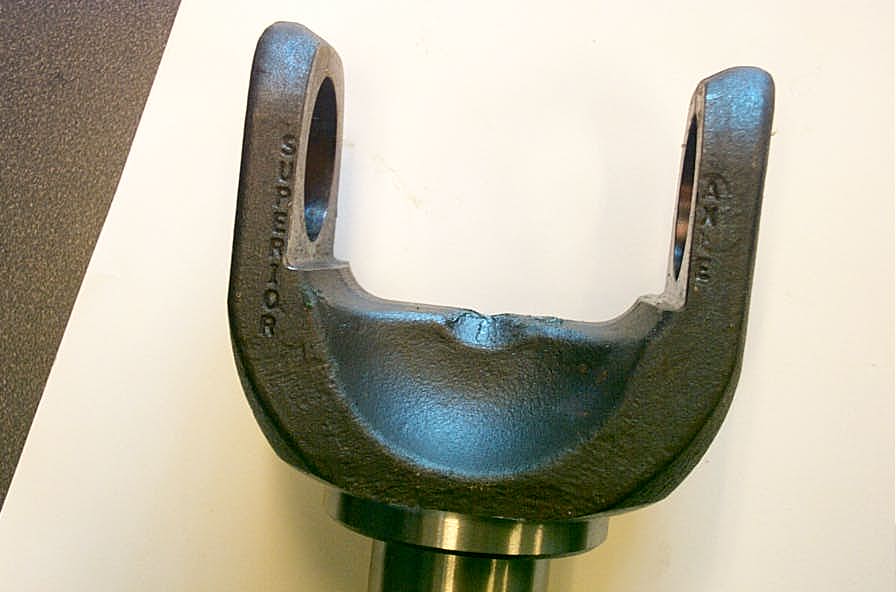
Recognize the genuine article by looking for the word SUPERIOR AXLE stamped on the yokes. | ||||||||||||||||||||||||
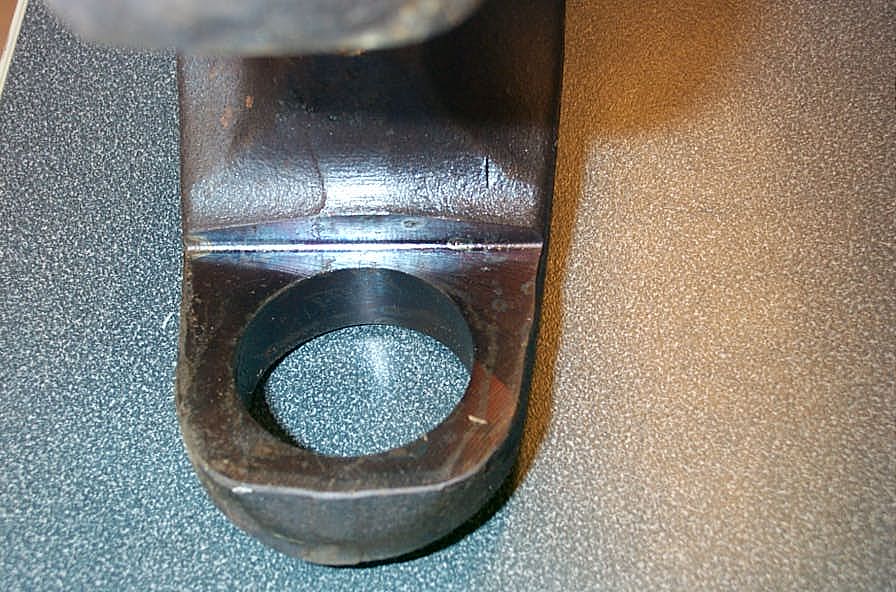 |
Yokes are pre-machined for full-circle snaprings. | ||||||||||||||||||||||||
 |
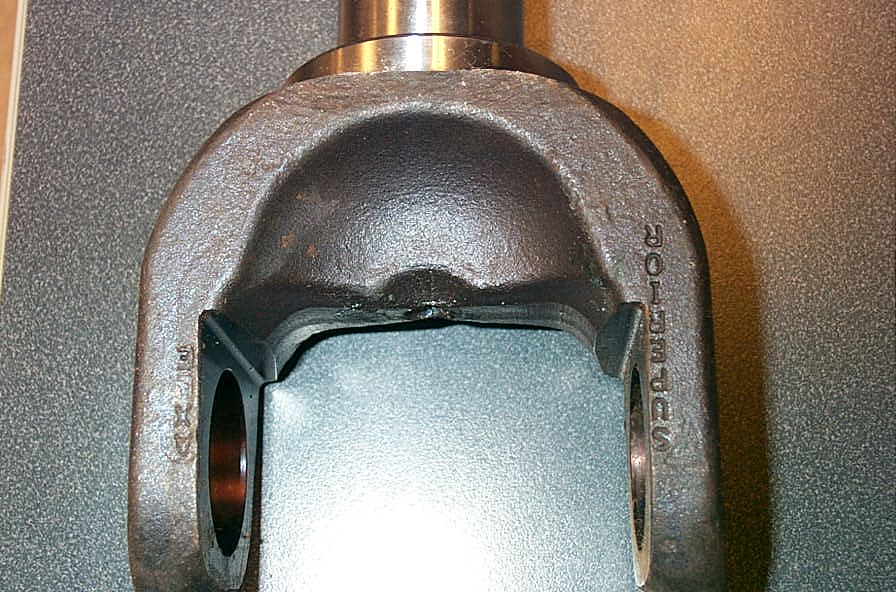
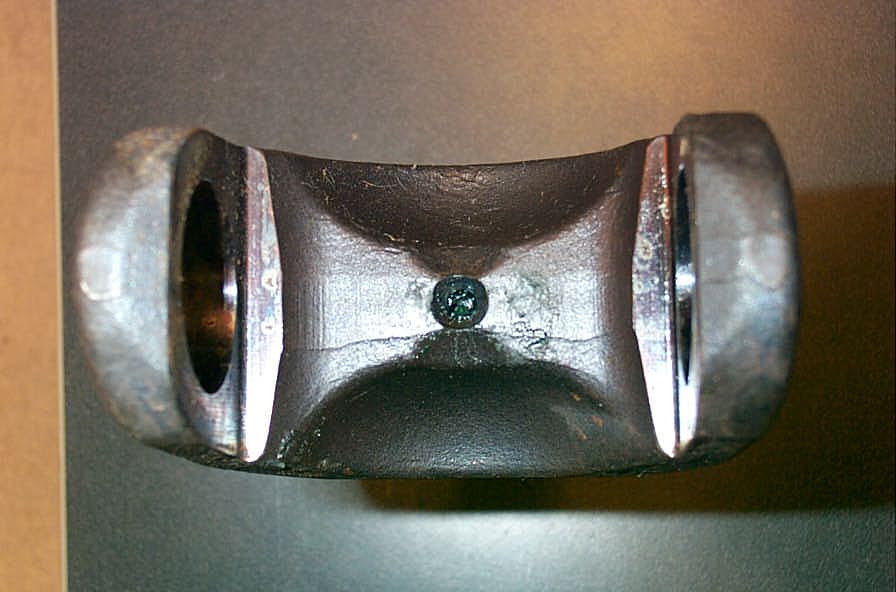
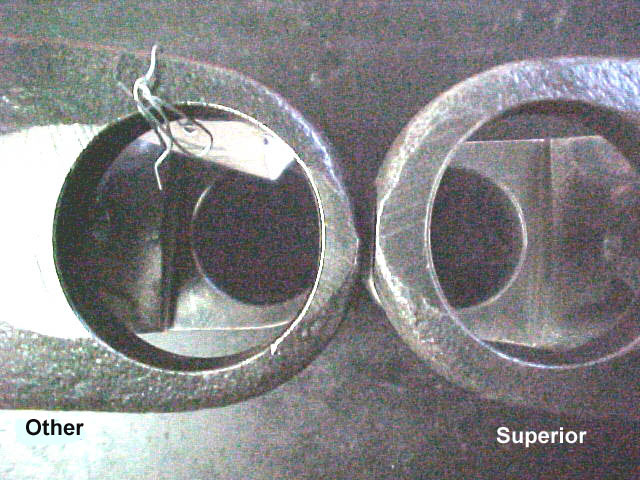
Here you can clearly see the extra material around the U-joint bore - a critical area. | ||||||||||||||||||||||||
 |
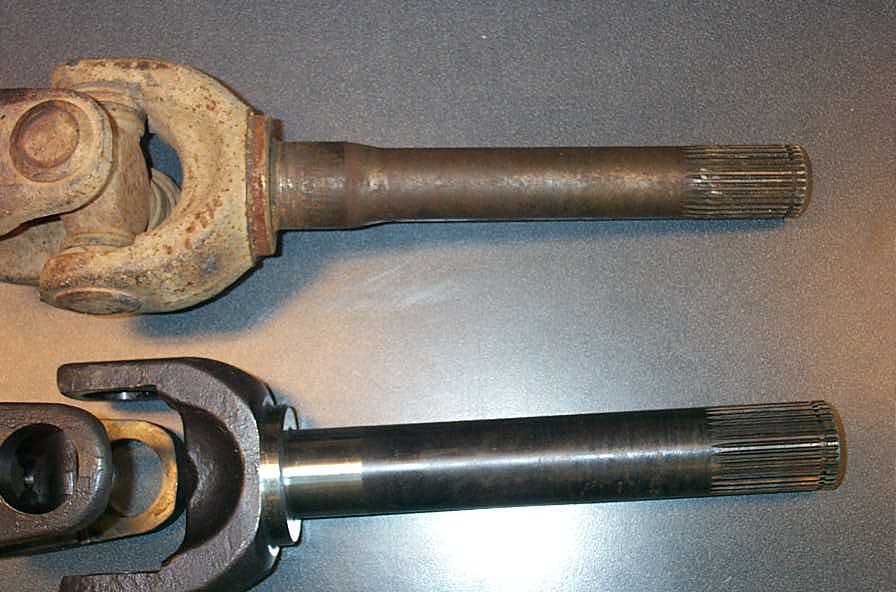
Spicer 35 spline inner shaft top, Superior Cr-Mo shaft bottom. | ||||||||||||||||||||||||
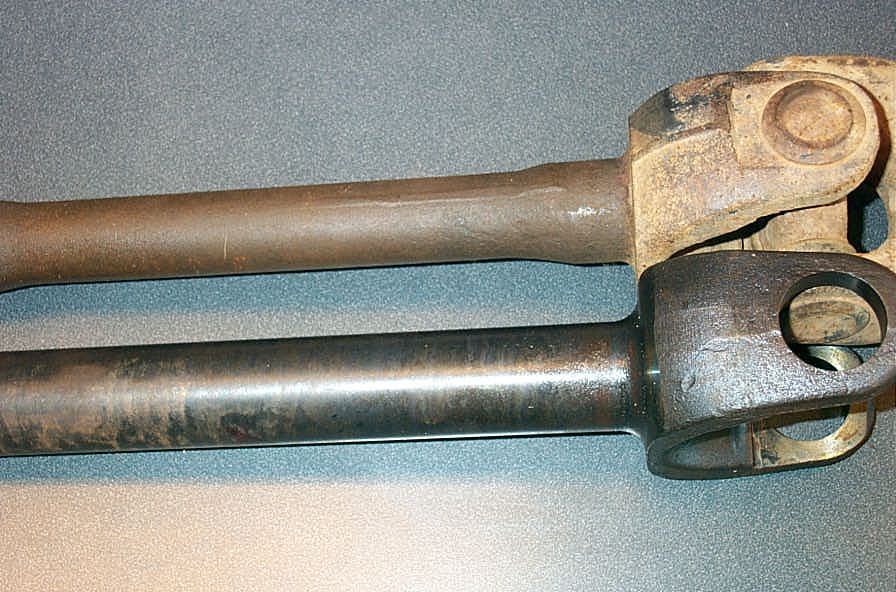 |
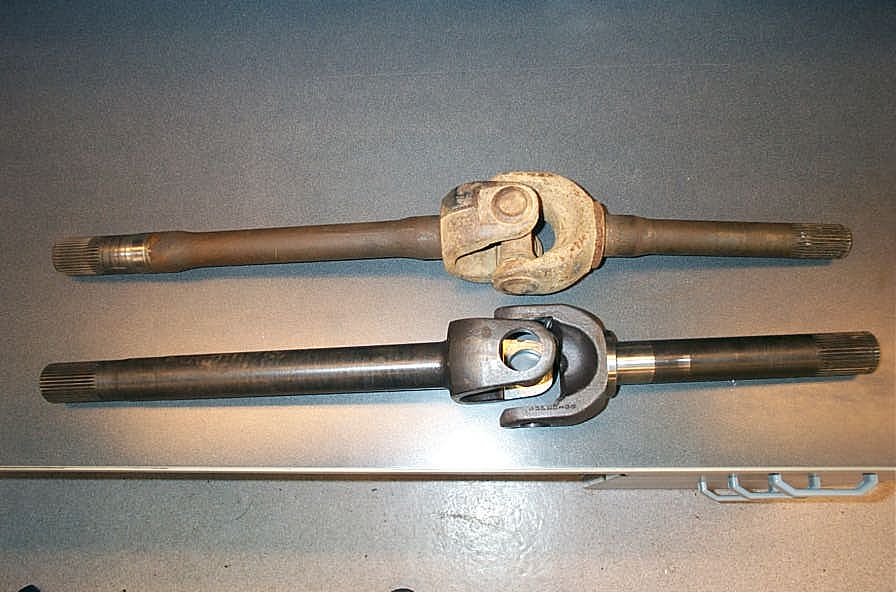
Comparison of Spicer (top) and Superior 35 spline short-side inner axle shafts. | ||||||||||||||||||||||||
 |
With better material, dual heat treating, and much greater size the Superior shafts are vastly stronger than stock axles. | ||||||||||||||||||||||||
 |
Comparison of short-side combo. | ||||||||||||||||||||||||
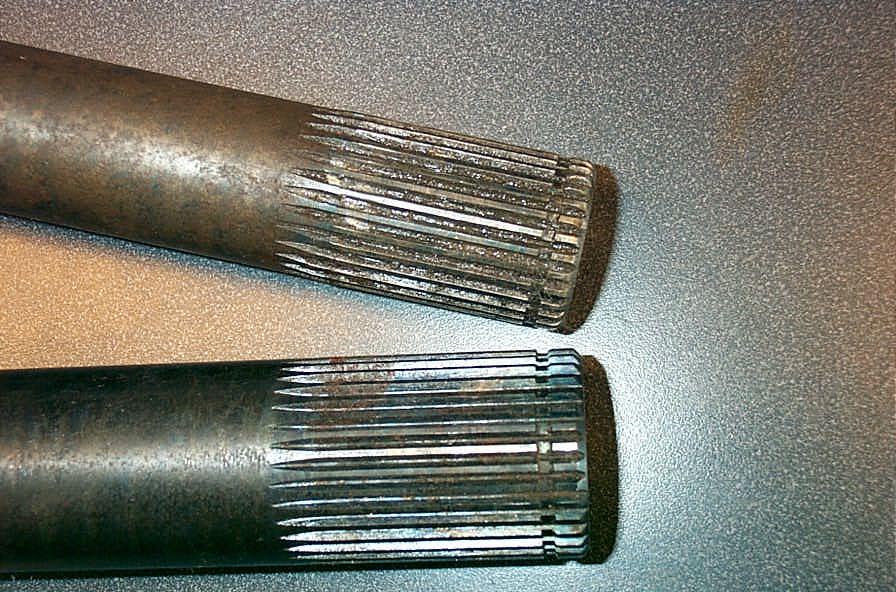 |
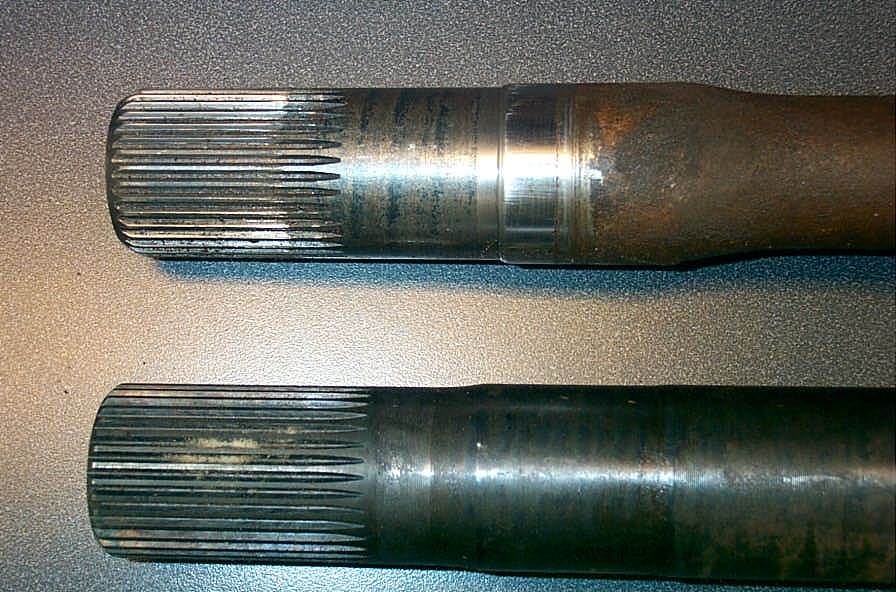
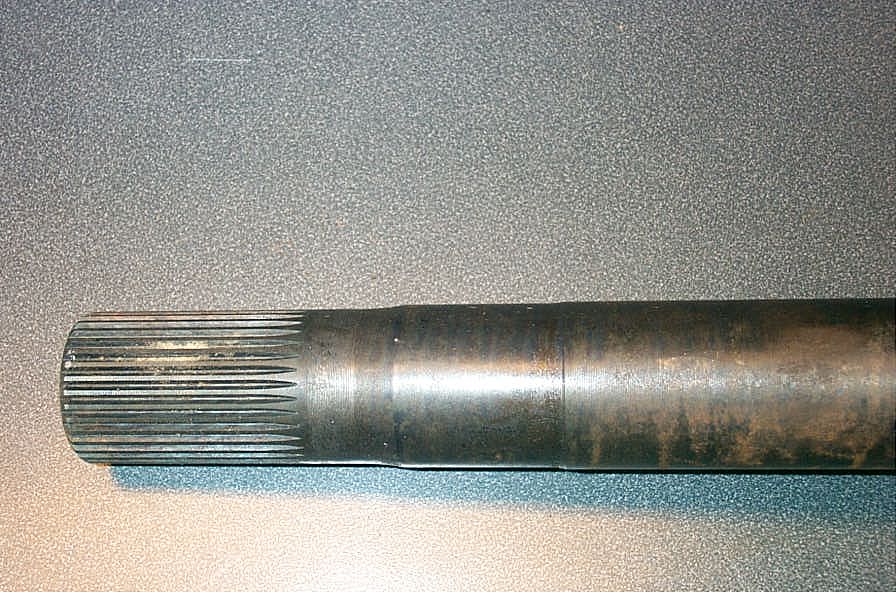
Comparison of stub-shaft splines. Spicer top and Superior bottom. Note: To meet the deadline for this article, my stub axles had the splines hobbed, normal production Dana 60 stub shafts will have rolled splines. |
||||||||||||||||||||||||
 |
Like peanut butter and jelly... | ||||||||||||||||||||||||
|
...pizza and beer... | ||||||||||||||||||||||||
 |
...the perfect combination! Superior and CTM. |
||||||||||||||||||||||||
 |
Splined end of Superior Cr-Mo alloy Dana 60 axle, short-side inner; showing exclusive "torque equalizing" profile (more dimensions and comparisons below) The result is that the 2 different length front axle shafts have much more similar load carrying capabilities than the stock configuration; meaning ultimately that the whole assembly is more durable and reliable. |
||||||||||||||||||||||||
 |
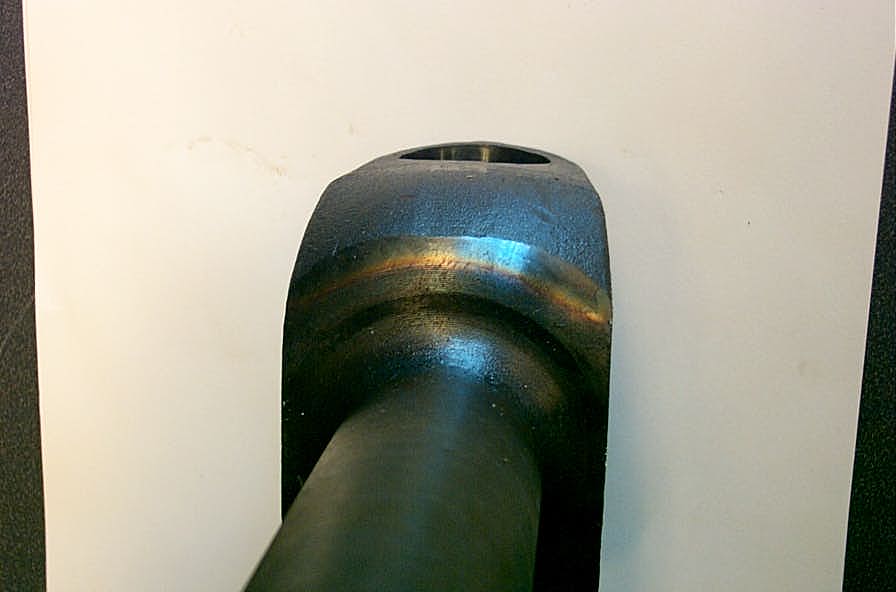
Maximum material retained in the critical yoke are for strength and reliability. | ||||||||||||||||||||||||
 |
Superior Cr-Mo alloy Chevy Dana 60 long-side inner axle shaft. | ||||||||||||||||||||||||
 |
Splines and profile of Superior Cr-Mo alloy Chevy Dana 60 long-side inner axle shaft . To meet production schedules, these axles were hobbed. Normal, non-custom length inner axles may have rolled or hobbed splines, depending on production schedules. |
||||||||||||||||||||||||
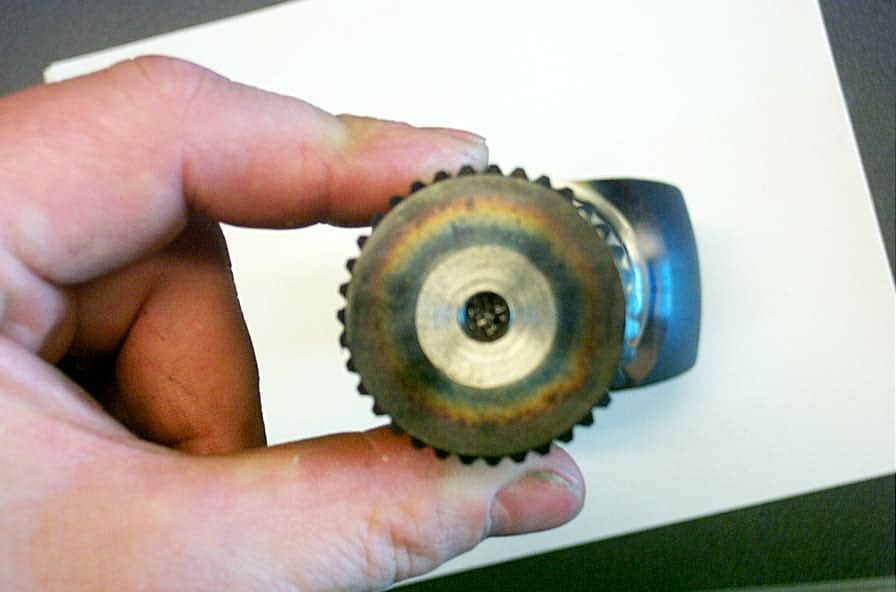 |
Cool picture of "rainbow effect" caused by through-hardening process; seen on stub shaft. | ||||||||||||||||||||||||
 |
Look closely and you will see the rainbow-effect of the heat treatment of the yokes (which few, if any, other companies can or will do) - this is a major contributor to the strength of the Superior shafts. Non-hardened axle shaft yokes deform under hardcore 4x4 loads, bearing caps spit out, U-joints break and shafts rupture. For serious use, you need through hardened yokes. |
||||||||||||||||||||||||
|
Yoke strength - not only THE most critical aspect of a front axle shaft - but also where the Superior shafts shine the most. Space inside the knuckle is extremely limited, but Superior found a way to add even more material to the yokes in the most critical areas. They are larger than Spicer D60 shafts in every dimension I measured. The following pic and table show the results of my measuring:
|
||||||||||||||||||||||||
|
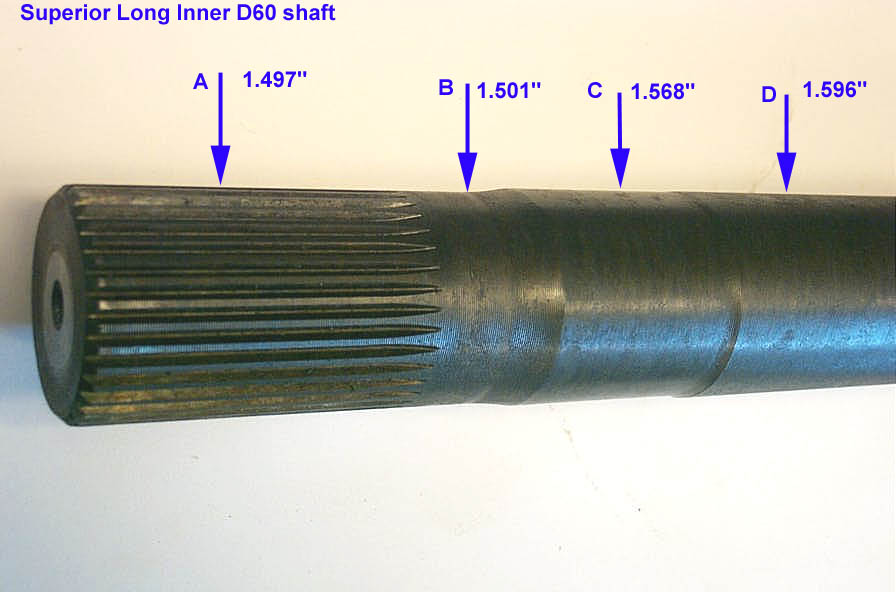
Here's a comparison shot of the Dana60 30 spline stub shaft, the stock Spicer 35 Spline Dana70 stub shaft and the Superior Cr-Mo Alloy stub shaft. The dimensions in the pic are:
|
||||||||||||||||||||||||
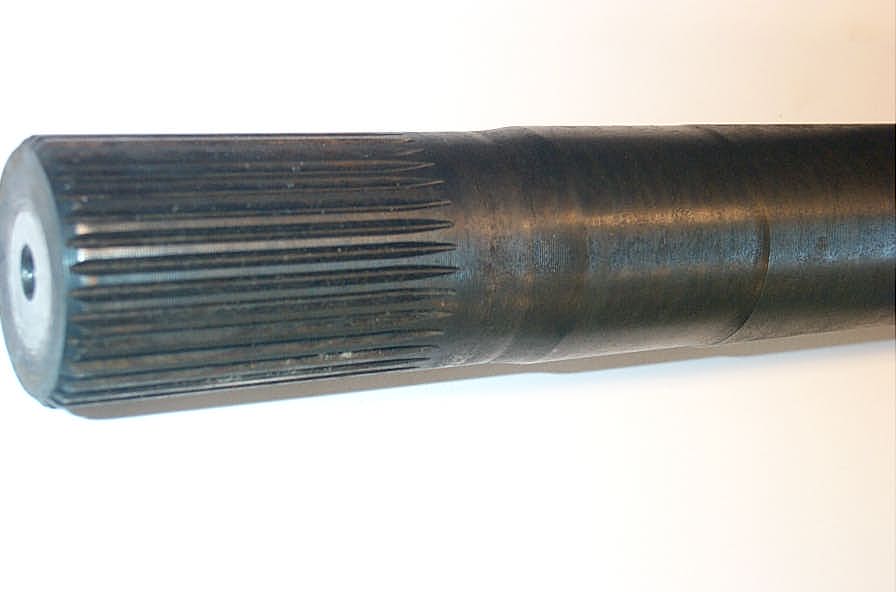
 |
Comparison of Old Spicer, New Spicer, and Superior Alloy Axle long-side inner shafts. Pic illustrates Superior shaft.
|
||||||||||||||||||||||||
 |
Comparison of old, Spicer, and new Superior Alloy Axle short-side inner shafts:
|
||||||||||||||||||||||||
The Superior Alloy axles come with a 2 year warranty. Most, if not all, warranties are designed to protect the consumer from defects in material or workmanship. fair and simple. They are not designed to be "wear out" or "abuse" insurance. It's reasonable to expect any MANUFACTURING defect to appear within 2 years - after that - you're on your own, and you got what you paid for. That said, EVERY other component used to date in the BV-60 and reviewed in this article comes with a no-question, no quibble LIFETIME guaranty - essentially, if you break it, they replace it. Period. That kind of guaranty says a huge amount about the companies confidence in their product, and certainly makes it easier to pay the premium price commanded for all these premium products. I am sure that Superior have their reasons for offering only a 2 year warranty, and it is, after all, purely their business decision - but my opinion is that I and other consumers would be better served by a longer, if not lifetime, warranty - the same as Poly Performance, CTM, and Crane do. Compared to the Alternatives Great products speak for themselves - However, there has been a bunch of talk recently about a newcomer to the Dana 60 alloy axle playing field. A notorious "re-boxer" company have entered the fray with what they describe as a "4340 Chrom-moly axle." Now, I have bought re-boxed products before, and as long as I got parts from an actual manufacturer I recognized and approved of, I couldn't care what box they come in. In the case of these alloy axle offerings, things are not so clear. No actual manufacturing company or plant or even location has been made clear - at least certainly not to me; though it does seem almost certain that they are being "manufactured" over-seas - likely in India or other Asian location. The thing is - these shafts are being offered by big-name retailers at prices substantially lower than those of the Superior shafts. So the immediate question is - how can they do this? I immediately wanted to know so I did a little sleuthing, and came up with some pics and info that pretty much answers the question: |
|||||||||||||||||||||||||
 |
It seems the way to cut manufacturing costs, and therefore retail prices, is to skimp on the material, process and/or quality control. Here we see the cheap offering next to the Superior shaft. Note the lack of material around the yoke bore in the other shaft. Worse than that - several of these other shafts have ben measured by reputable sources, and it has been found that the dimensions in areas like the material surrounding the yoke bore vary by as much as 0.100" between samples....that's a TENTH of an inch ! |
||||||||||||||||||||||||
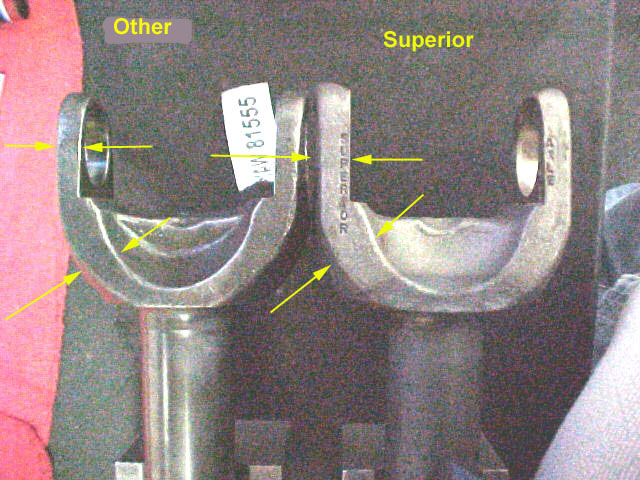 |
See for yourself the differences, particularly in the area of the yellow arrows, as indicated. | ||||||||||||||||||||||||
 |
Again, the difference is obvious. So my question now becomes, if design is substandard, manufacturing tolerance poorly controlled, and the product made in some un-named place by an un-named company - what assurance do I have that material selection and grade are up to par and properly controlled - to say nothing of the complex machining and heat-treating processes. Answer is - it turns out Grandma was right - nothing in life is free, and you get what you pay for. I'll stick with Superior! |
||||||||||||||||||||||||
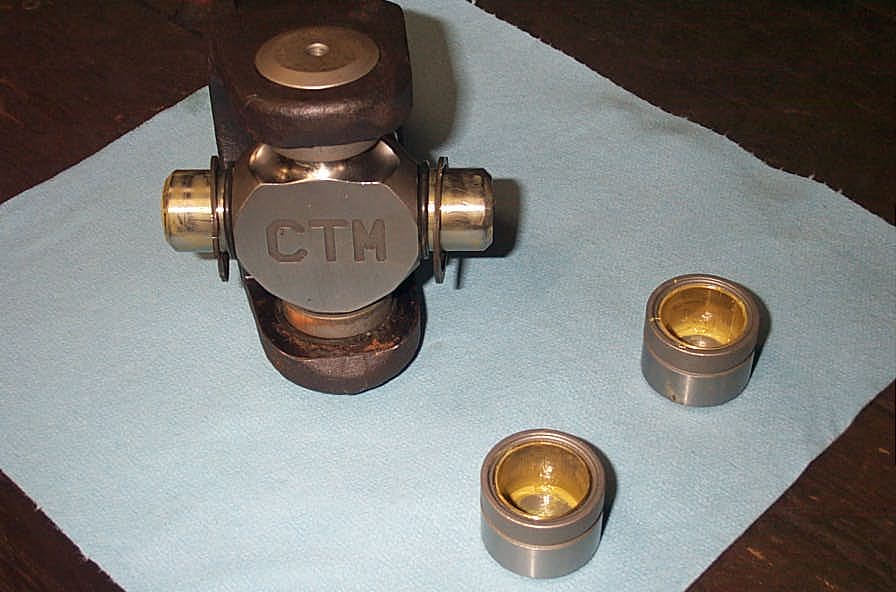
Superior Alloy axle and CTM U-joint AssemblyNaming Conventions |
|||||||||||||||||||||||||
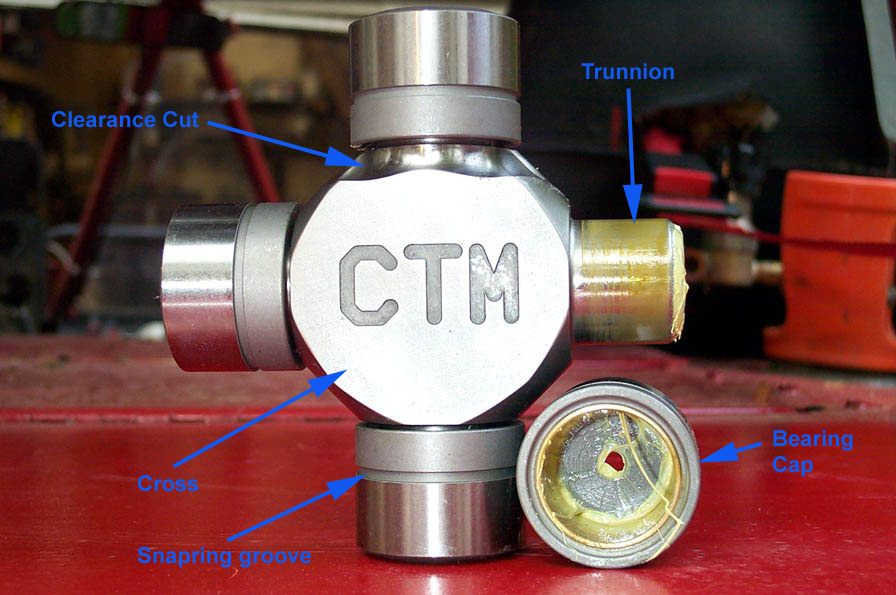 |
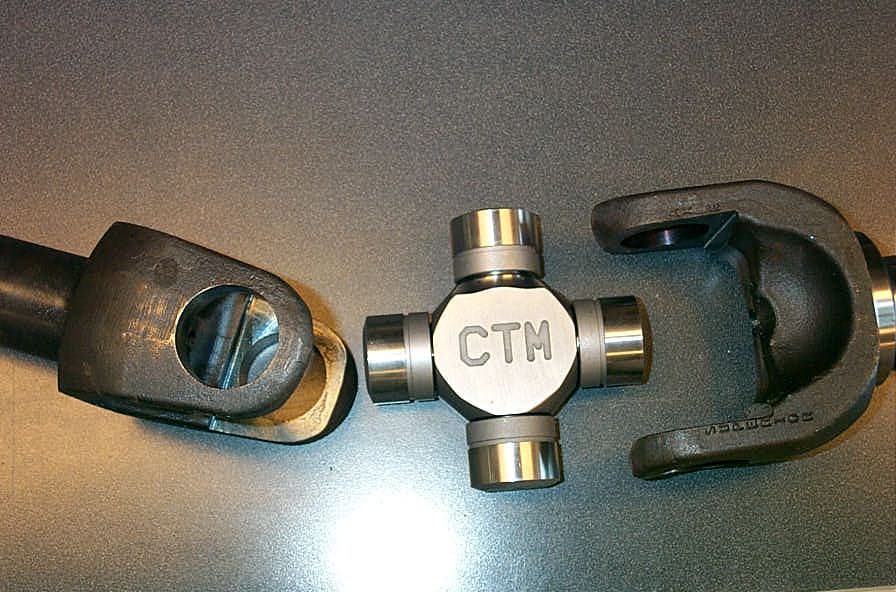
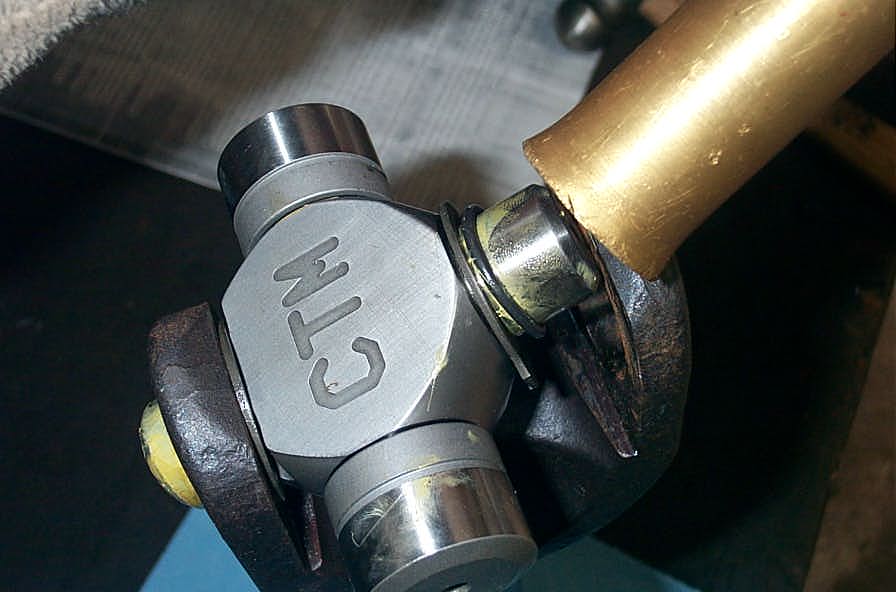
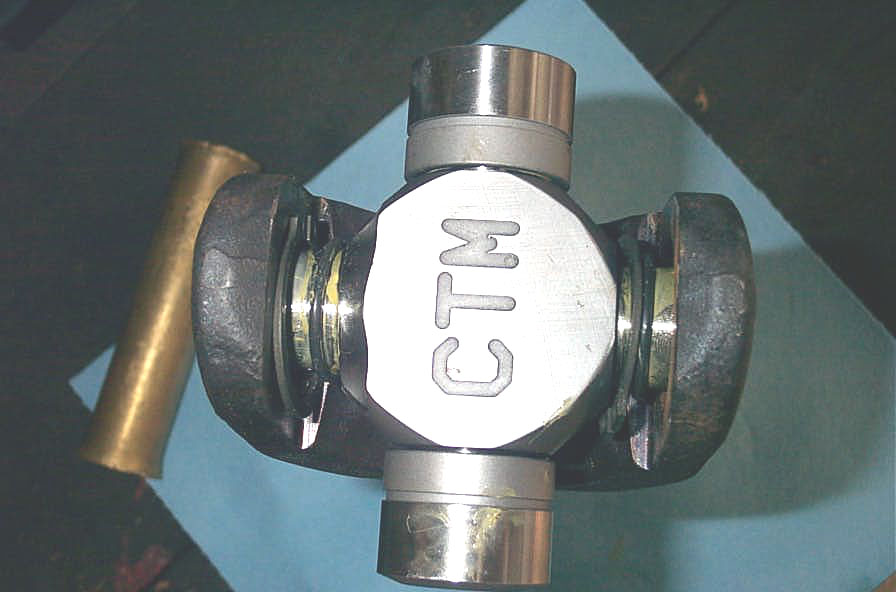
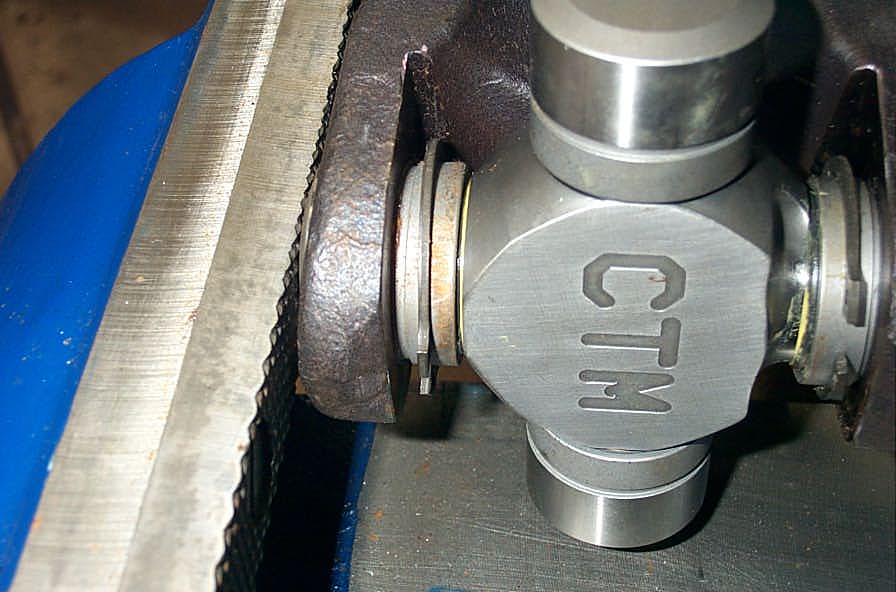
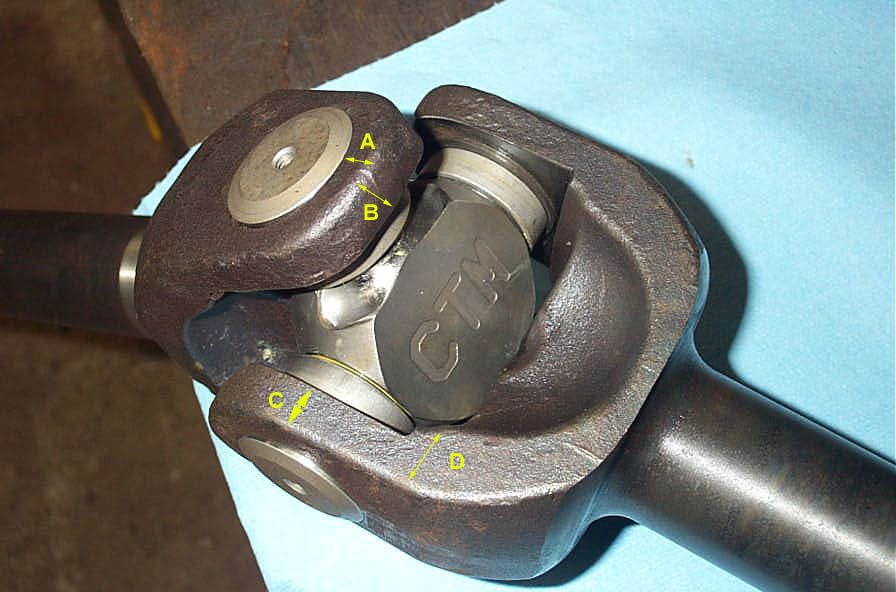
For clarity I have illustrated the names I shall use for the parts of the CTM U-joint and kit in the following pics to the left. Here is a front view of the joint... |
||||||||||||||||||||||||
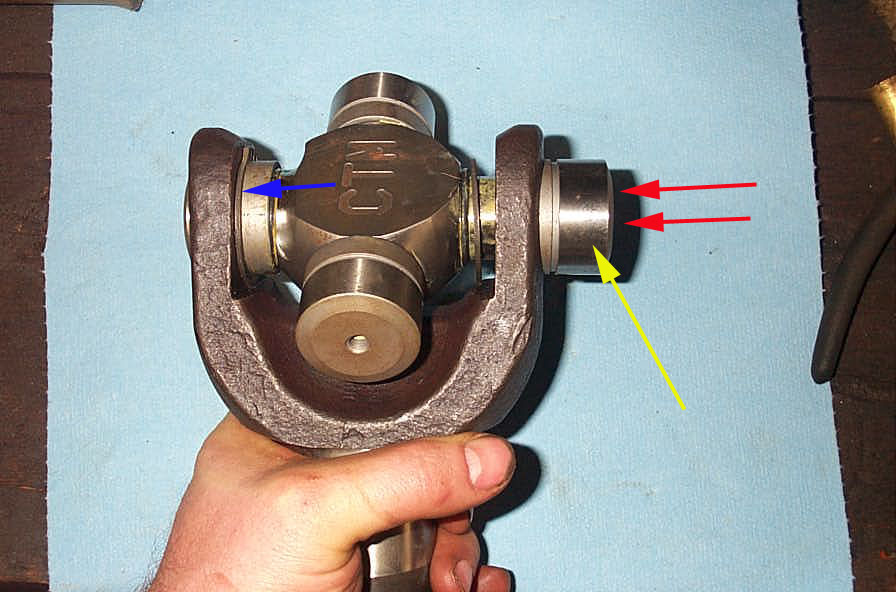
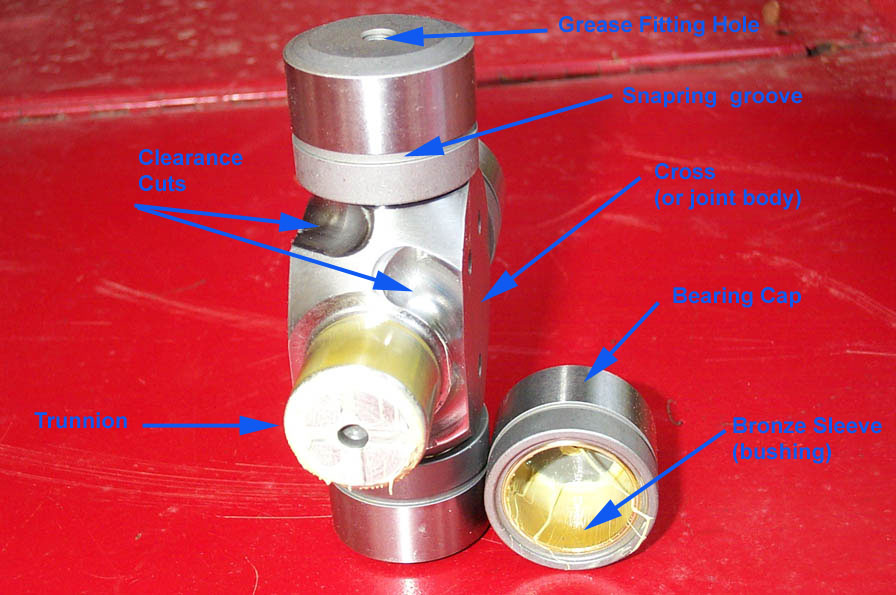 |
...a side view of the joint. The main body I will call the "cross", the bearing journals "trunnion", and the bearing caps "caps". |
||||||||||||||||||||||||
 |
The supplied hardware kit. Simple stuff, sure enough, but by now you know I'm a fanatic for clarity and accuracy. |
||||||||||||||||||||||||
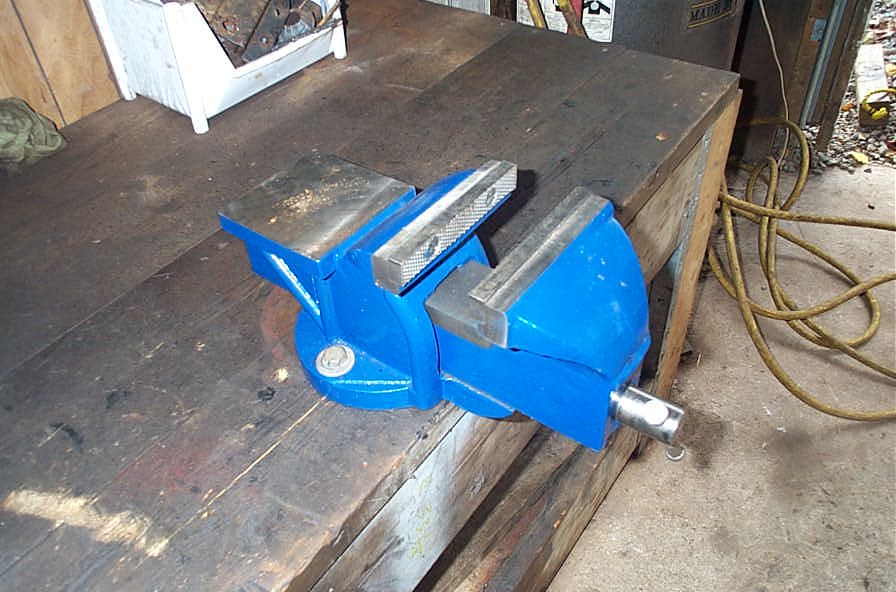 |
In the "tools needed" section of the official instructions with the CTMs say "shop press or good machine vice." I had a piece of junk bolted to the bench where a vice should go, so I took this opportunity to rationalize the purchase of a nice new vice. Hey - when Axle Jack says get a good vice...you get a good vice! You'll want one with jaws that open at least " |
||||||||||||||||||||||||
 |
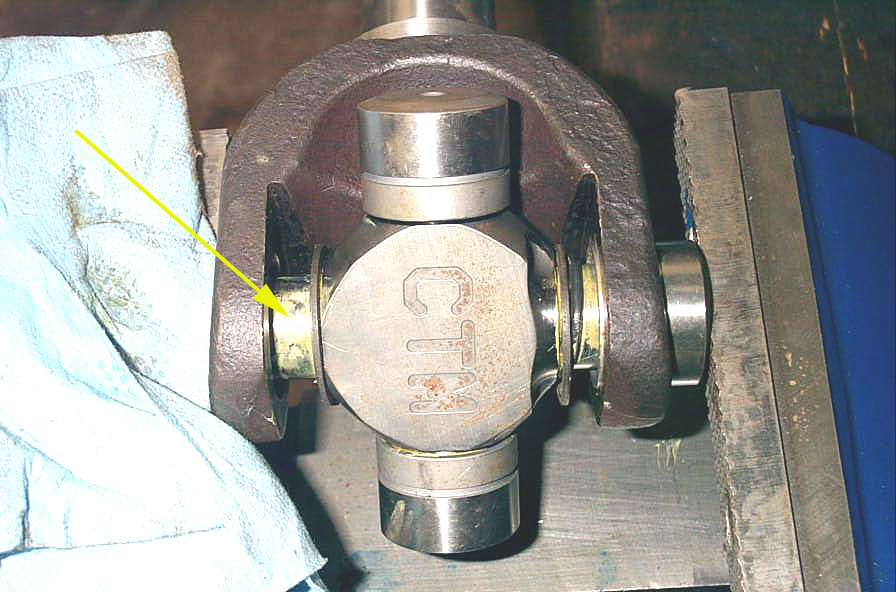
1. Take a joint, remove a pair of opposing bearing caps, and onto each trunnion place a snapring followed by an O-ring. | ||||||||||||||||||||||||
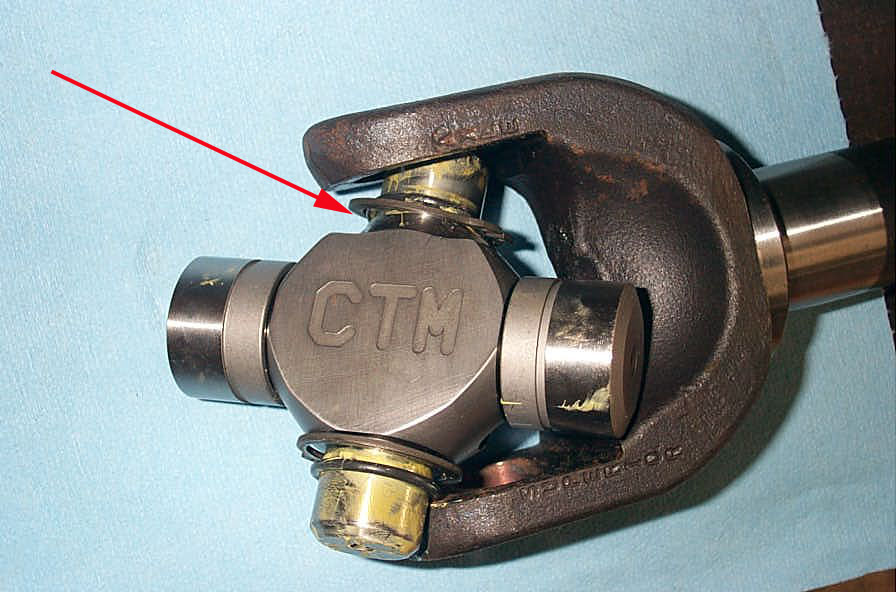 |
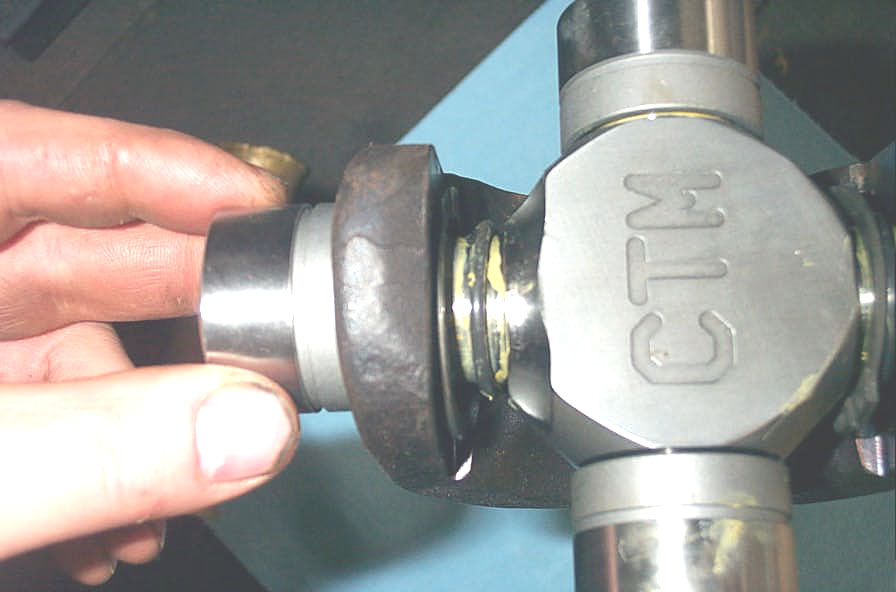
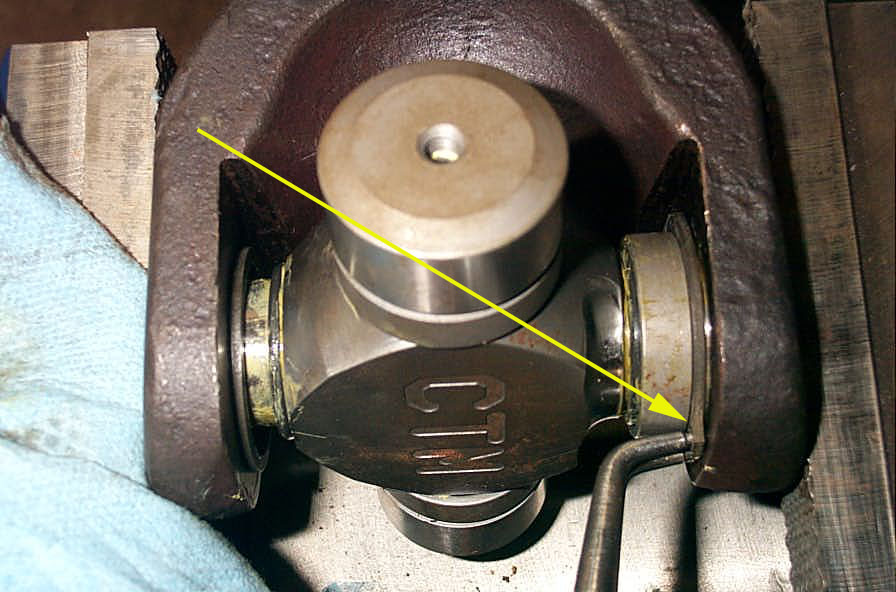
2. Hold the cross so the CTM label faces you and the cut-out is at the top facing you. Place the snapring in the cut out area (red arrow) and slip this trunnion into the yoke first. | ||||||||||||||||||||||||
 |
3. Even with the snapring in the cutout (red arrow) clearance at the opposite trunnion will be very tight (blue arrow). | ||||||||||||||||||||||||
 |
4. Use a brass or hardwood drift to GENTLY tap the trunnion past the yoke... | ||||||||||||||||||||||||
 |
... until the U-joint sits fully in the axle yoke. | ||||||||||||||||||||||||
 |
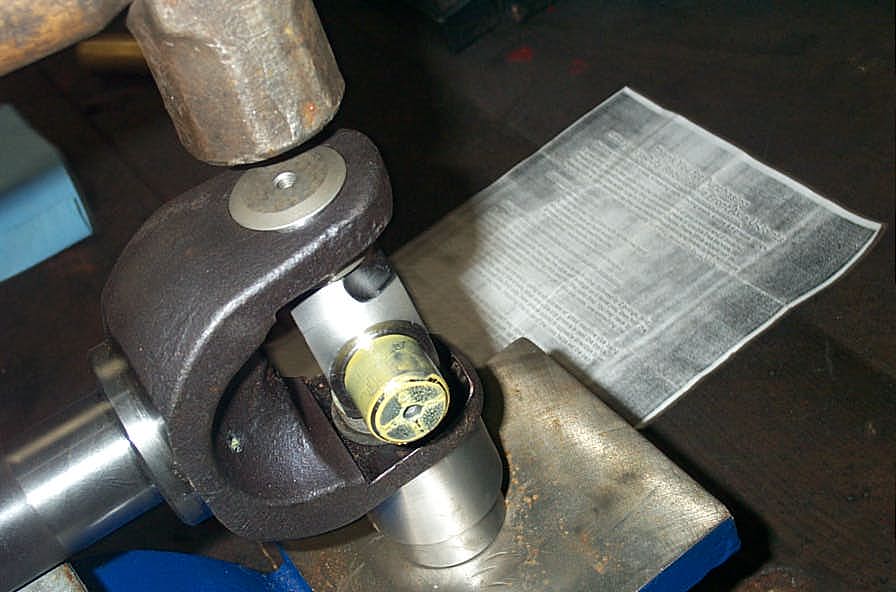
5. Carefully install a bearing cap on the trunnion by pressing it through the hole in the axle yoke. | ||||||||||||||||||||||||
 |
Start by using your fingers, being extra careful to keep he trunnions, caps, and yoke bores all lined up, and making sure the O-rings and snaprings aren't pinched or caught up... | ||||||||||||||||||||||||
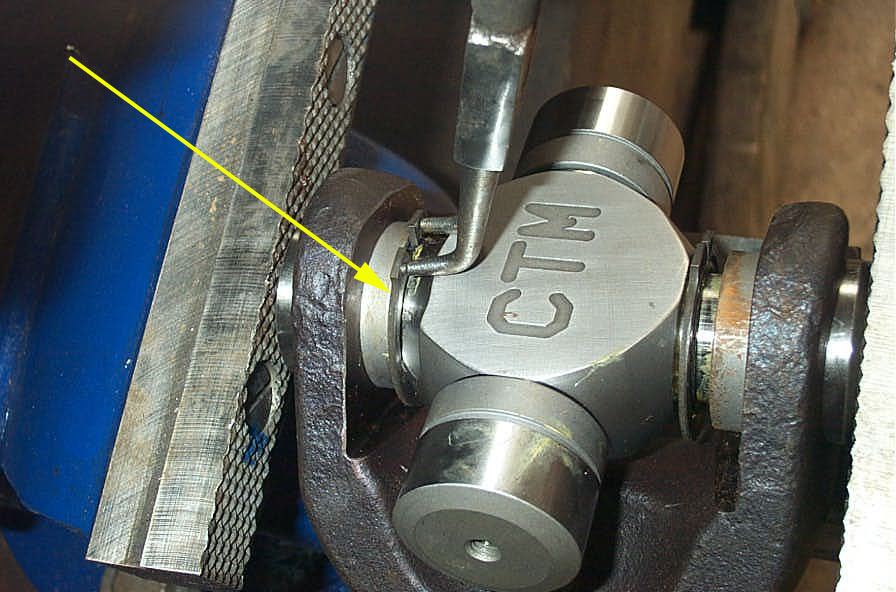
 |
6. Once the cap is lined up and finger tight proceed to press it in using your vice or shop press. When doing the first one, be sure to use a rag to protect the end of the opposite trunnion (yellow arrow) from being marred by the jaws of the vice. | ||||||||||||||||||||||||
 |
7. Pause partway once the cap protrudes past the inside flat of the yoke. Spread the snapring with pliers and slip it over the cap (yellow arrow). | ||||||||||||||||||||||||
 |
8. Continue to press the cap on until the snapring groove (yellow arrow) is fully inside the yoke. | ||||||||||||||||||||||||
 |
9. Install snapring in snapring groove using snapring pliers (yellow arrow) (snapring, snapring, snapring.....hmm, funny - after you say it to yourself 36 times the word loses all meaning!) |
||||||||||||||||||||||||
 |
10. Place the other cap on its trunnion (yellow arrow) and using the brass or hardwood drift tap the joint in the direction indicted by the red arrows to seat the snapring (blue arrow) tightly between the flat on the inside of the yoke and the snapring groove in the cap. Set the cap and snapring in this manner so that you cannot spin the snapring in its groove with finger pressure. | ||||||||||||||||||||||||
 |
11. Continue pressing the second cap on with your vice or press and continue as per the first cap install. | ||||||||||||||||||||||||
 |
12. Remember to pause and slip the snapring over the cap, press cap until snapring groove is visible inside yoke, and insert snapring in groove. | ||||||||||||||||||||||||
 |
13. You must also press joint back in opposite direction to seat cap and snapring. I found it necessary to place cap over a large socket and tap the opposite cap to seat the snapring. | ||||||||||||||||||||||||
 |
When you have finished installing both snaprings and clips, the cross should rotate freely in the bearing caps with no hint of bind, but you shouldn't be able to spin either snapring in its groove just by trying to turn them with your fingers. | ||||||||||||||||||||||||
 |
14. Continue by removing the cpas from the remaining 2 trunnions, and installing an O-ring followed by snapring onto both. | ||||||||||||||||||||||||
 |
15. The trickiest part of the CTM installation is getting the cross in the second yoke. Because of the size of both the U-joints and the Superior Alloy shafts clearances are quite tight. You will have to carefully align the trunnions with the yoke bores... | ||||||||||||||||||||||||
 |
...and make use of the second clearance cut-out (yellow arrow)... | ||||||||||||||||||||||||
 |
...too get the trunnions to pop through the bores. But it will fit, just be patient, and don;t hammer or force anything but feel free to apply a little persuasion with a brass drift. Not only is this trickiness more than made up for by the fact that there are NO needle bearings do drop, crush, get trapped etc - but if you're struggling, remember that the parts fit tightly because of their maximum size and strength - which is exactly what you want! |
||||||||||||||||||||||||
 |
16. Once the cross is situated in the yoke of the second axle, proceed as above to press on the first cap. | ||||||||||||||||||||||||
|
17. Stop when the snapring groove is inside the yoke Don't forget to frequently pause and admire the amazing beef of your super-cool new axles and U-joints ;-) |
||||||||||||||||||||||||
 |
18. Install the snapring. | ||||||||||||||||||||||||
 |
19. Install the final cap. | ||||||||||||||||||||||||
 |
20. Final snapring in place. | ||||||||||||||||||||||||
 |
AWESOME! Very cool, VERY beefy, - form and function in one sweet package. installing the CTM's was a JOY! I have never had such an easy time installing U-joints. I didn't have to force anything, no dropped needles, no getting the whole thing assembled and one cap wont sit right and you realize a needle has fallen over and you have trapped it - jeez I hated that! I love these joints. Down with needle bearings I say! |
||||||||||||||||||||||||
 |
21. Install the grease fittings in the ends of each of the caps and grease the U-joint at each cap with a high quality synthetic grease. | ||||||||||||||||||||||||
 |
22. Before installing the axle assemblies into the axle housing - do a final check that all yokes move smoothly and freely with no binding; that all caps are greased and grease fittings are installed; and that all snaprings are firmly seated in the groove and do not spin under finger pressure. | ||||||||||||||||||||||||
Corrosion Protection |
|||||||||||||||||||||||||
 |
Corrosion protection is extremely important for mechanical assemblies subjected to cyclical loads and subject to fatigue, because small surface imperfections and corrosion form stress raisers, from which fatigue cracks can develop. Despite the "anti-corrosion" black oxide coating the Superior axles come with, they are subject to corrosion. After just a couple of weeks in my shop they bagan to show light surface rusting. This is nothing new - I'm convinced it's a California thing - how could a Cali company develop a corrosion resistant coating sufficient for the North Atlantic Canadian coast? I live in one of the most corrosive environments there is - if you don't, be thankful - EVERYTHING rusts here! |
||||||||||||||||||||||||
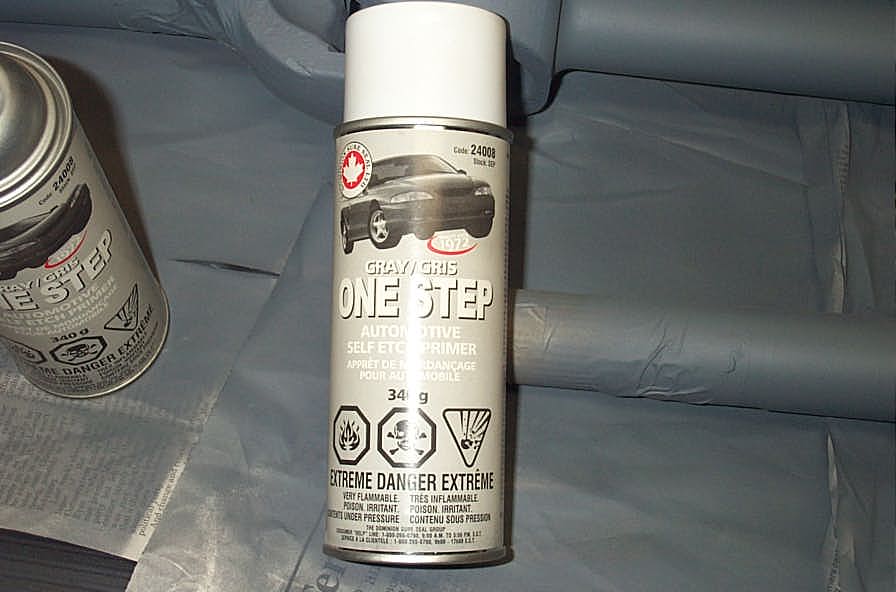 |
As such, I decided to take the extra protective step of painting my axle shaft assemblies before installing them. To paint the steel in a meaningful manner that has any hope of lasting, it is VERY important to use a high quality self-etching zinc primer first. It costs 3-4 times what the cheap grey primer does, but if you skimp here, you may as well not bother as only the self-etching primer will properly adhere. |
||||||||||||||||||||||||
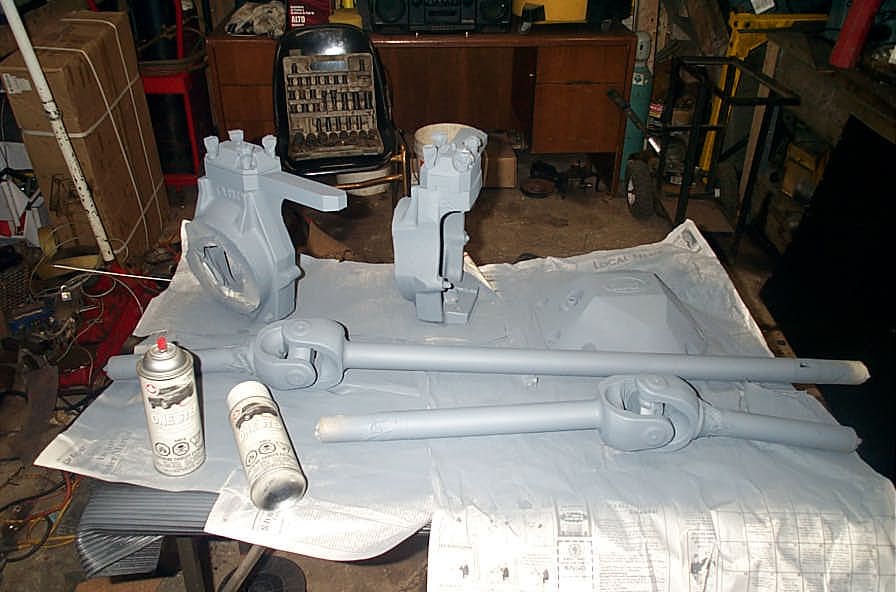 |
I did my knuckles, steering arms, diff cover, and axles at the same time. | ||||||||||||||||||||||||
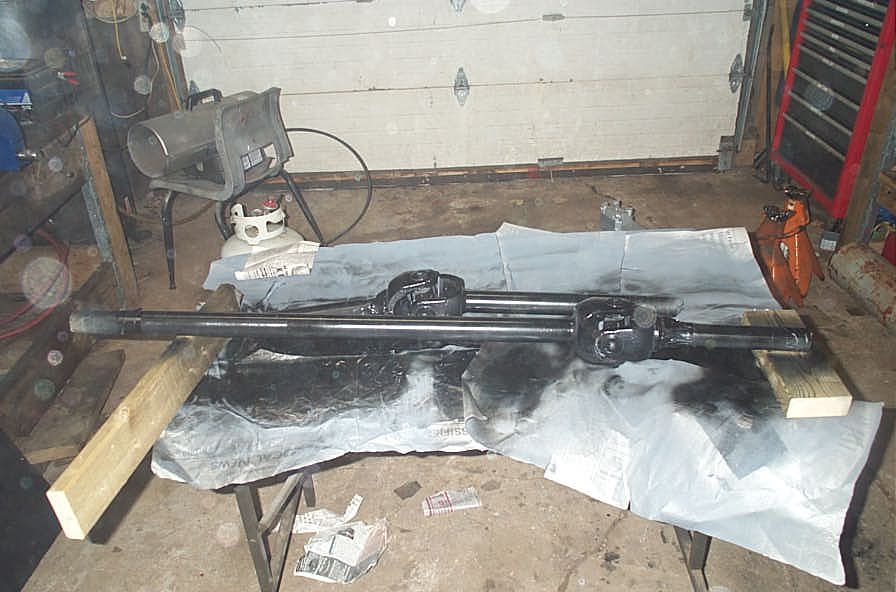 |
And then top-coated with a good quality gloss black rust paint. | ||||||||||||||||||||||||
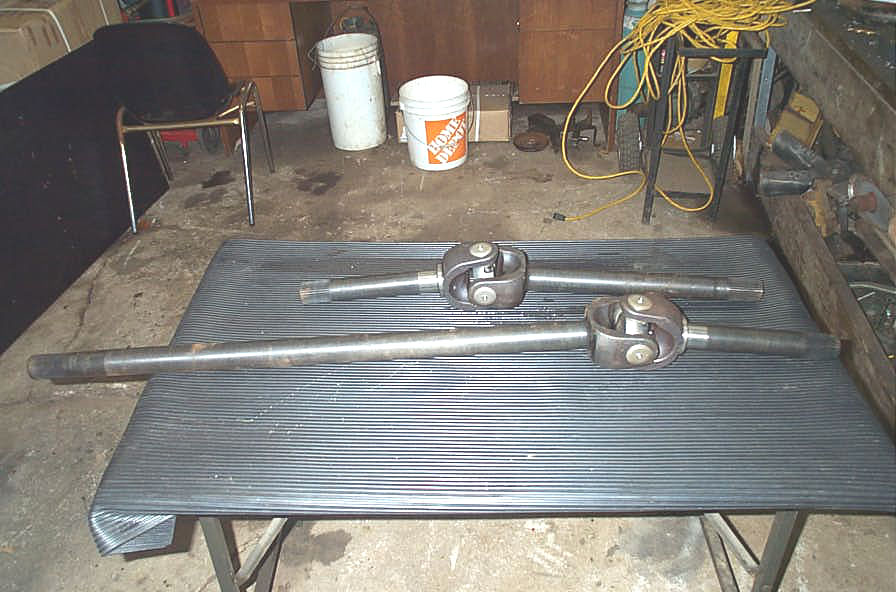
InstallationMy intent was never to make this article a detailed installation article - I'm assuming that we're pretty comfortable with axle R&R at this stage. However, should you wish to review or study detailed information regarding the building of a D60 front axle, that information is readily available in several articles I have written. You can check out: The original Spicer D60 front axle maintenance manual The one ton axle tech manual compiled from US military manuals The Dana light axle service manual (torque and setup specs) and my other tech articles: Dana 60 front axle kingpin rebuild That said, here are a few pics of the Superior/CTM assemblies being installed in the BV-60. |
|||||||||||||||||||||||||
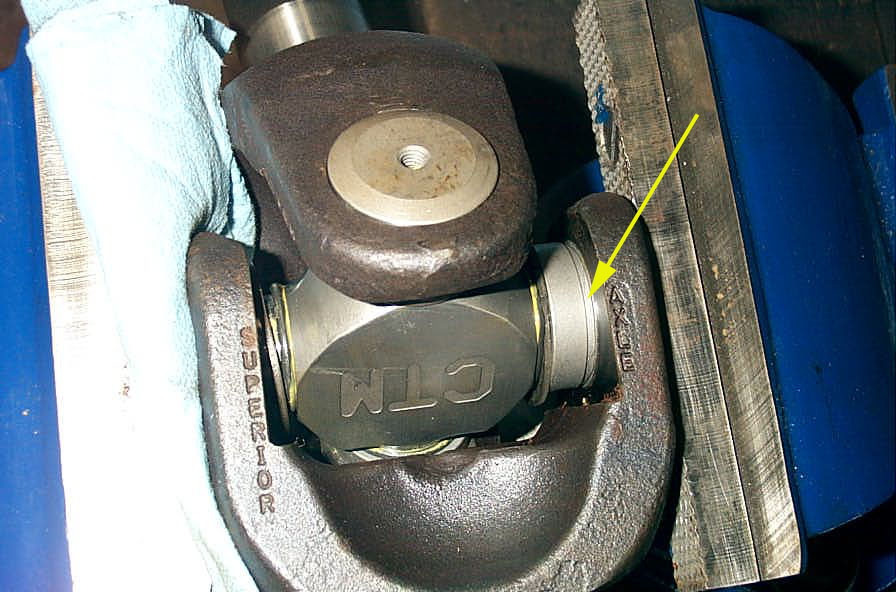
 |
Slide axle assembly through knuckle and into housing. Take care not to disturb the inner axle seal with the inner end of the shaft. There is a caution in the official CTM installation instructions that mentions the possibility of having to remove the grease fittings from the ends of the caps prior to installing the assembly through the knuckle and into the housing. I found that this wasn't necessary on my axle (1980ish Chevy D60 outfitted with Crane knuckles.) |
||||||||||||||||||||||||
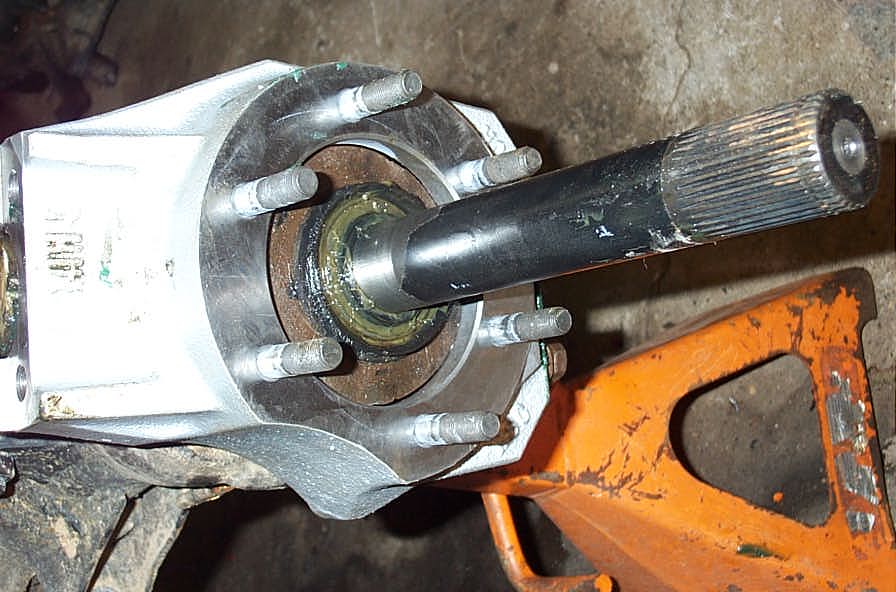
 |
Install spindle over stub shaft. | ||||||||||||||||||||||||
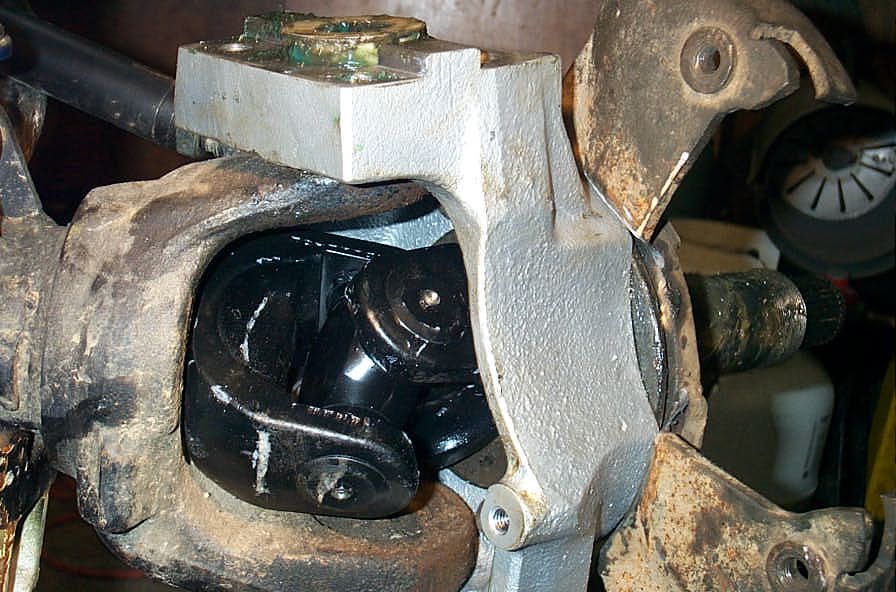 |
It is critical that you carefully check clearances once everything is installed. The knuckle must be cycled from lock to lock while the axle is being rotated (a helper is enormously useful here) while you carefully check to make sure that the axle/U-joint assembly doesn't contact any part of the knuckle or axle housing at any time. |
||||||||||||||||||||||||
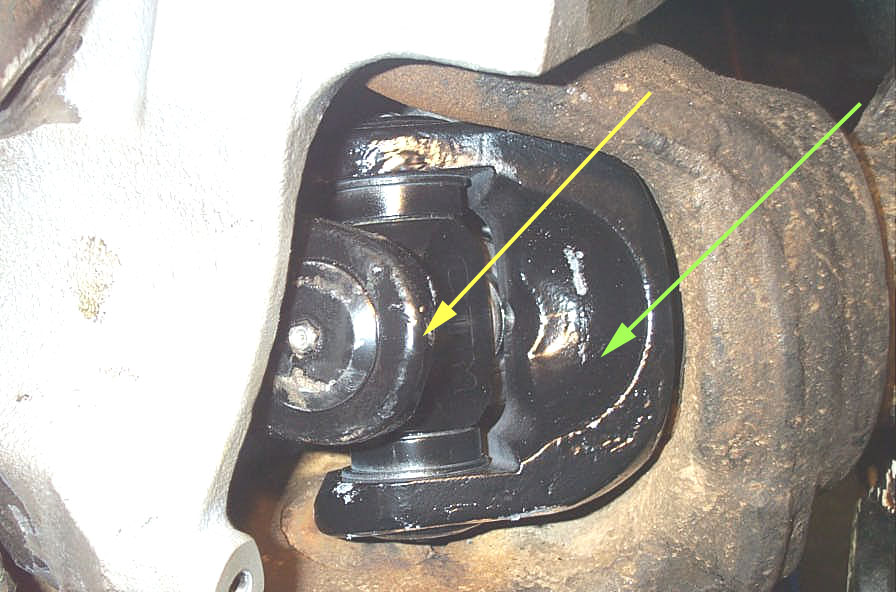 |
And also check to make sure that there is no contact possible between the top of the yoke ears (yellow arrow) and the bottom of the yoke on the opposite shaft (green arrow). If there is any interference, you will be able to see, hear, and feel it, and you must adjust your steering stops to eliminate it. It is wise to allow a little extra clearance to make sure nothing contacts under hard use where things may compress a bit. |
||||||||||||||||||||||||
FAQQ: Can I have these made in custom lengths?A: That is the cool thing about these, they are available in custom lengths, but still have splines hobbed and then heat treated, they are not just a cut-n-spline axle blank, it is truly a custom made axle. Q: Will these be available for the '99-newer Ford Super duties, that run the seals and unitized bearing?A: Yes, these axles will soon be available for the newer SD front ends. Q: why so spendy?A: Ron Stobaugh, President of Superior Axle & Gear Answers: We spent over three years and paid cash over $12,000 for forge dies and tooling for this admittedly low volume project. It was the only way to make them right - no corners cut. We custom make these in a plant that makes production runs of hundreds at a time - same amount of set-up on all forging, CNCs, spline rolling machine, heat treat programs, precision grinding, etc. except instead of hundreds of axles to amortize the set-up costs, we have one or two at a time. The cost question is valid - I invite you to a free factory tour - and then I believe you'll see for yourself. Bottom line: we made these for hard core competition, and we know they'll do the job! |
|||||||||||||||||||||||||
|
|||||||||||||||||||||||||


|
Sources: Superior Axle and Gear 1477 Davril Circle |
|