 |
Iron Baltic HDPE Skidplate Installation By Bill "BillaVista" Ansell |
IntroductionA good set of skidplates should be on the short list of every Can-Am owner's first mods. The stock factory parts are thin and weak and really offer little more than paint protection. There have been aftermarket aluminum skidplates on the market for a long time, but my experience in the rock buggy world has made me a fan of "plastic" skidplates. In fact, the all-aluminum 525HP LS2 Corvette motor in my rock buggy is protected by a "plastic" skidplate. After a good deal of research, I came across a company called "Iron Baltic" based in Estonia, that make a full set of skidplates for the Can-Am ATVs made out of HDPE or High Density Polyethylene". |
 |
The reason I like the "plastic" skidplates is that they are light, strong, offer excellent impact protection (absorb the energy of impacts well) and most importantly they are quiet and "slippery" - they slide over rocks, logs, snow, etc. very well without catching or snagging. So, when I found Iron Baltic, and checked out their website, I knew I'd found the skidplates for Wolverine, my 2014 Can-Am Outlander 1000. This article will show you the in's and out's of the Iron Baltic HDPE skidplates and detail their installation step-by-step. In addition to the pics and text, I have included video segments of each part of the process for those that prefer to watch video. At the end of the article their is a complete video of the entire process from removal of the stock pieces to comparison between stock and Iron Baltic skidplates to detailed installation of every piece of the Iron Baltic set - it is a compilation of each of the separate video segments imbedded throughout this article. If you prefer, you can skip right to it and watch it first by clicking here. Note: In this article, when I say "left" or "right" I am referring to the side of the ATV as seen from the driver's seat, facing forwards. Since most of the pictures are taken looking at the underneath of the ATV, when I say "left" it will most often be on the right side of the picture, and when I say "right" it will most often be on the left side of the picture. Prologue - Inside the Box |
|
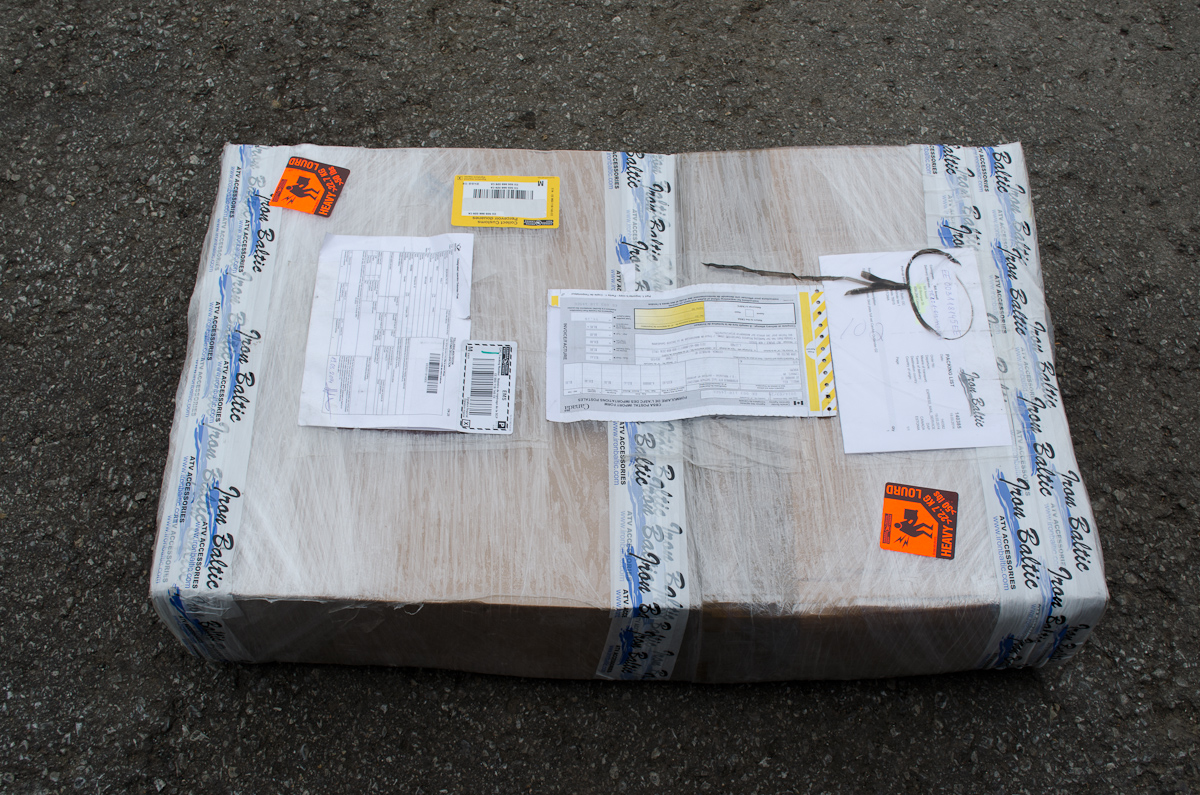 |
This is the package that arrived from Estonia after I ordered the skidplates. The package shipped from Estonia on 19 March, hit Canadian customs on 26 March, and was delivered to my house 27 March. I paid a whopping $13.41 in duty. The shipping weight was 16kg. |
|||||||||||||||||||||||||||||||||
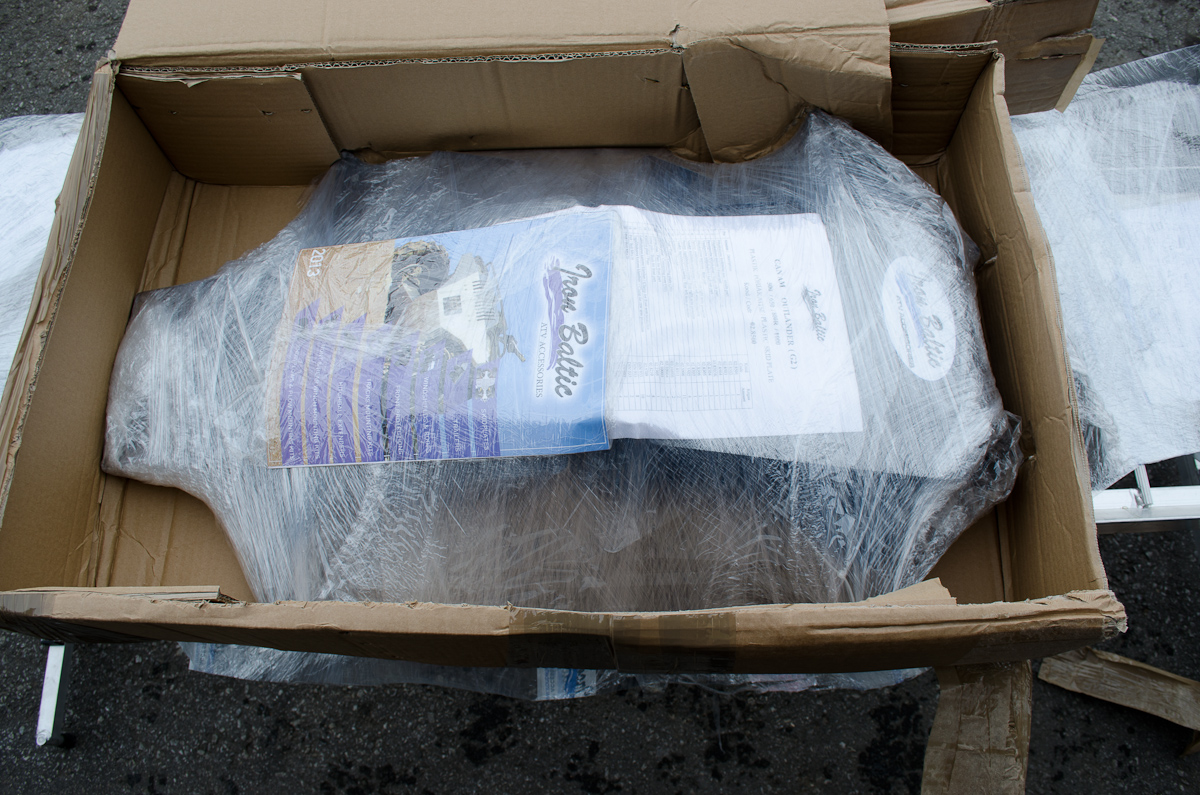 |
Inside the box everything is tightly shrink-wrapped. | |||||||||||||||||||||||||||||||||
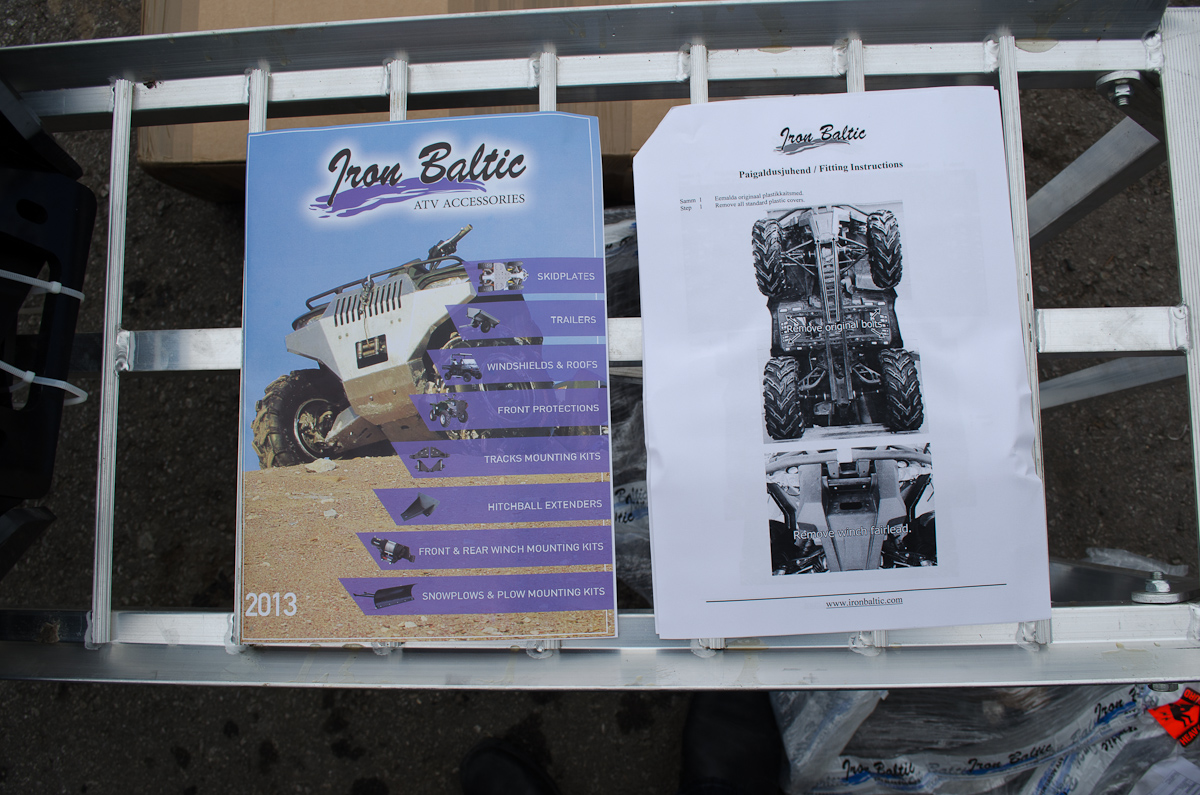 |
There is a catalog (left) and an instruction booklet (right) in the package. | |||||||||||||||||||||||||||||||||
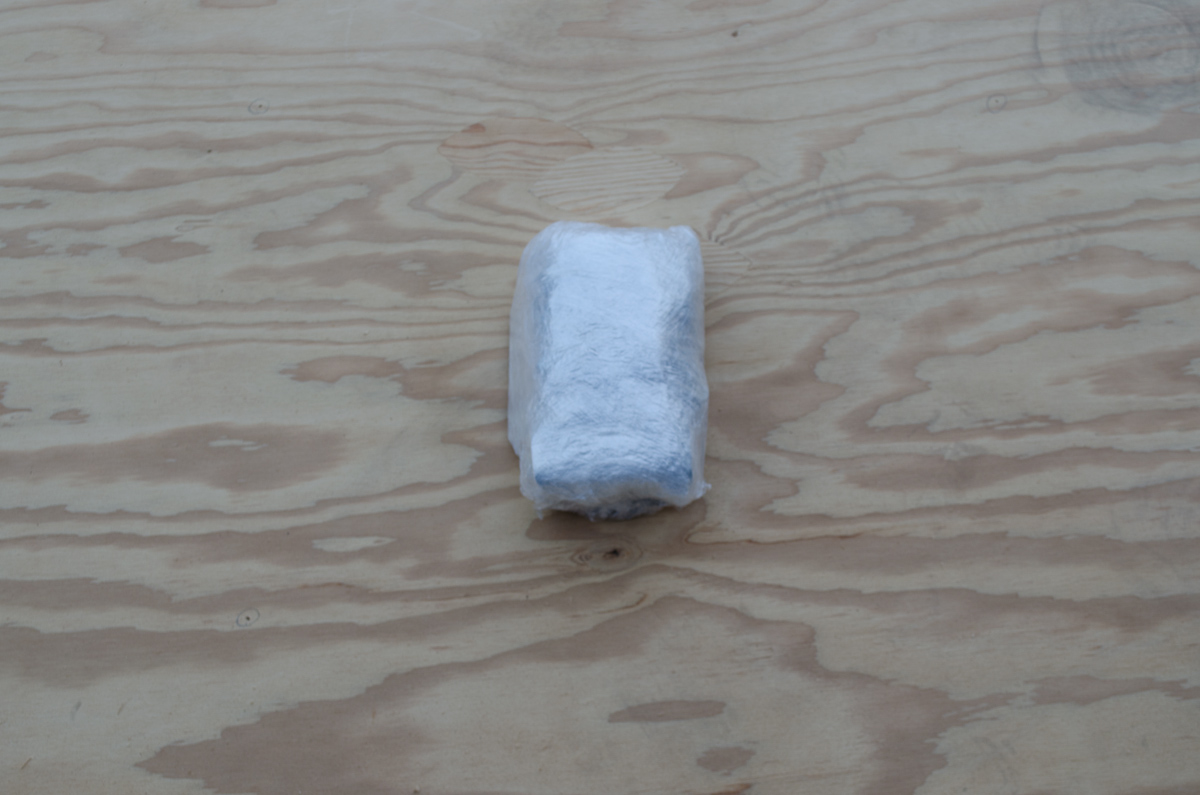 |
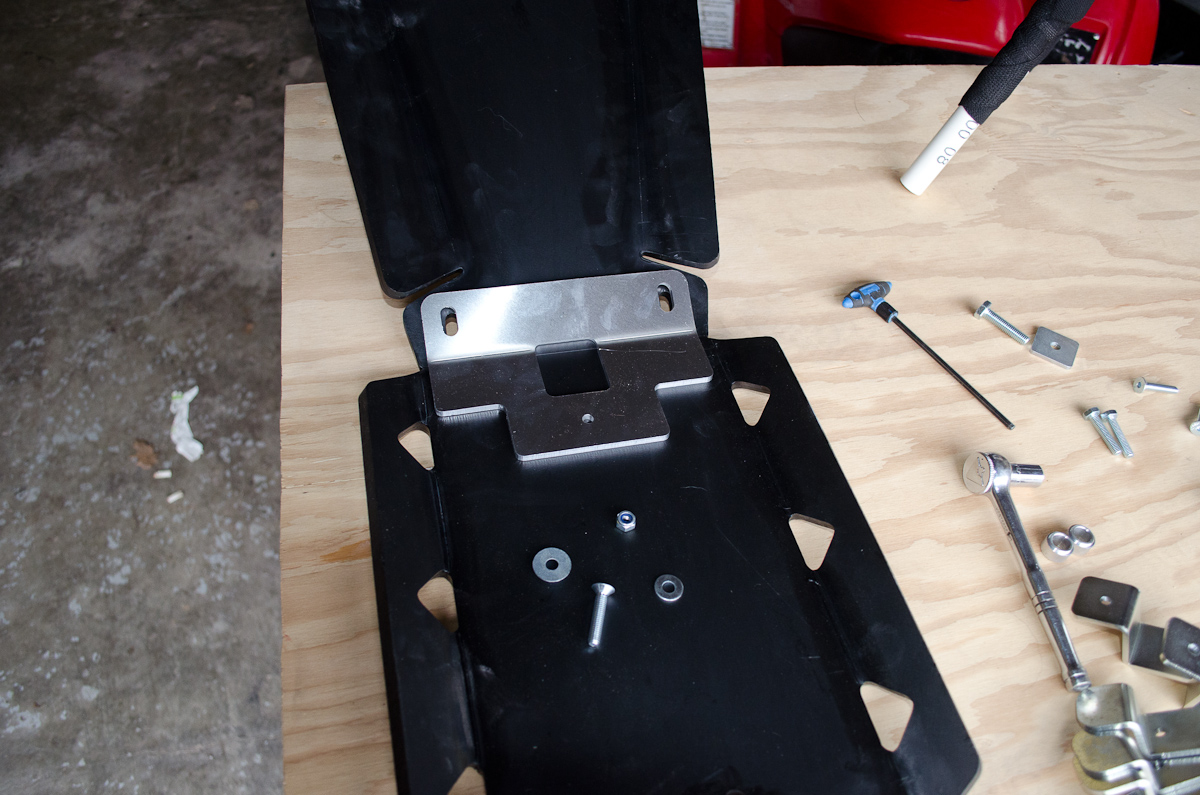
There is also a tightly-wrapped package of hardware, inside of which there is... | |||||||||||||||||||||||||||||||||
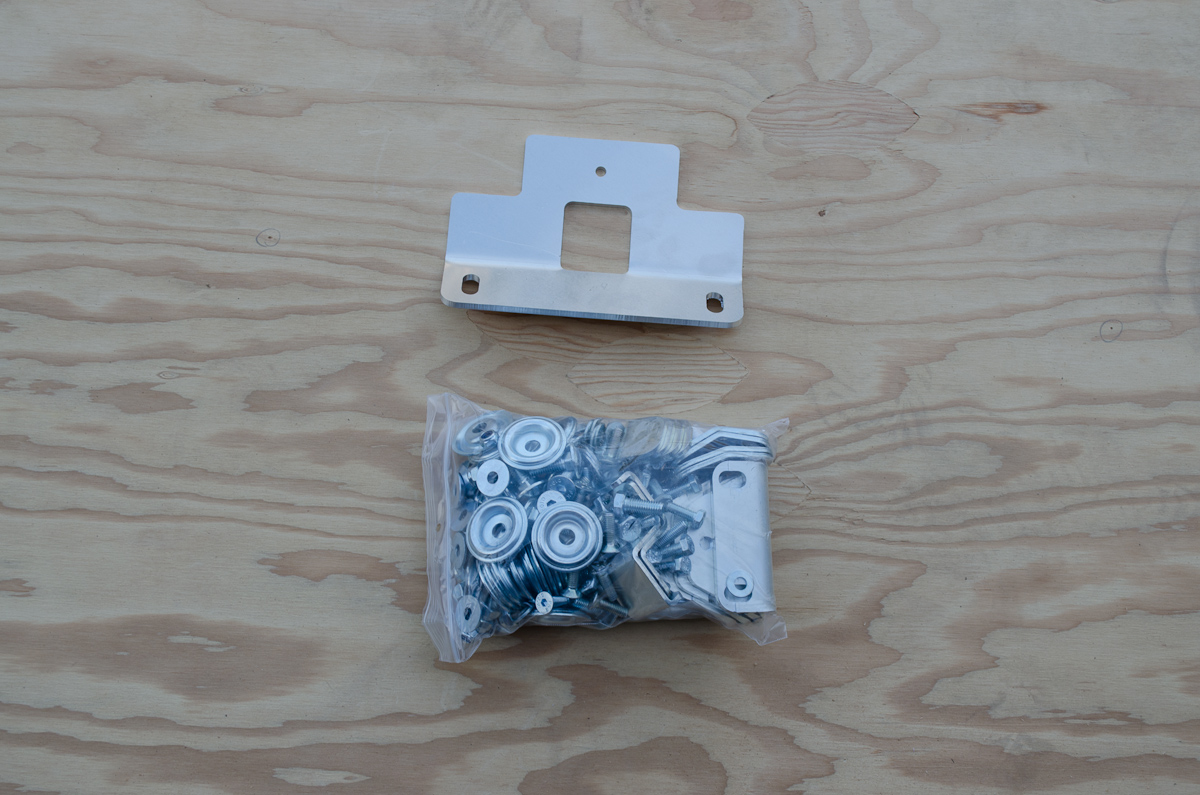 |
...the front skidplate reinforcing bracket (top), and a bag of fasteners (brackets, bolts, washers, and nuts.) | |||||||||||||||||||||||||||||||||
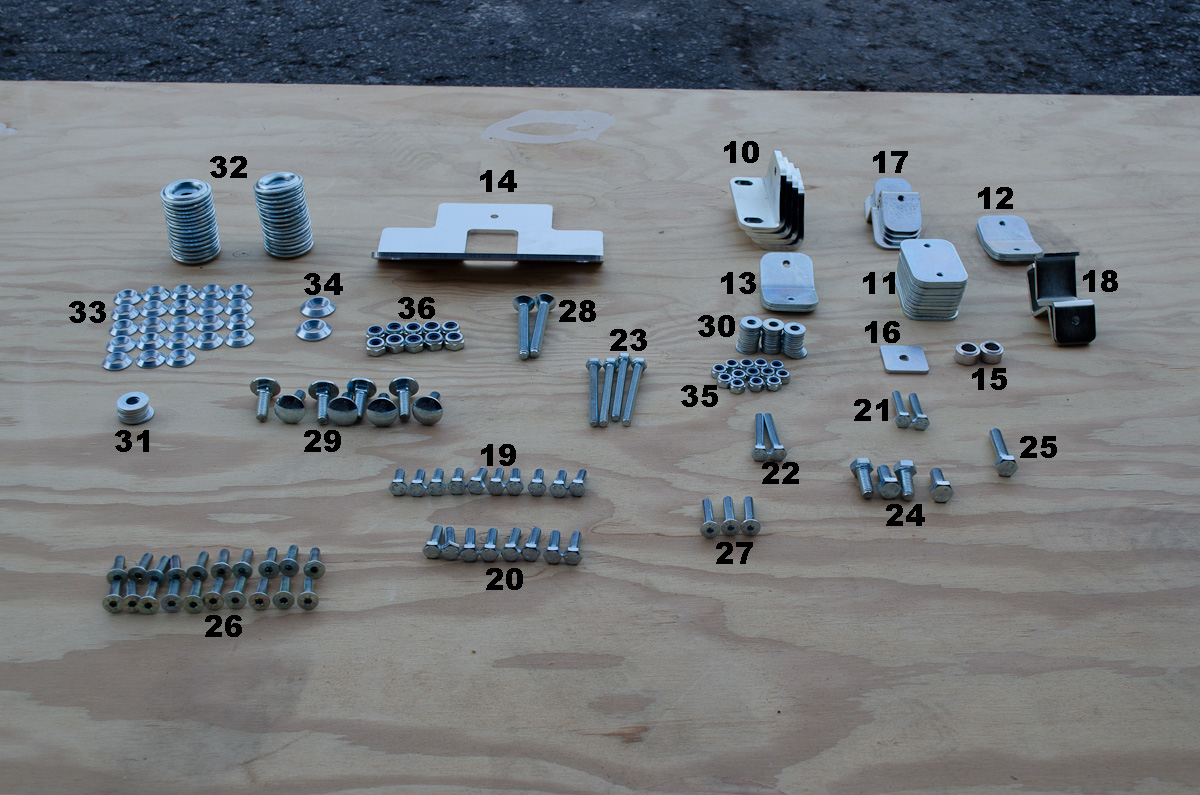 |
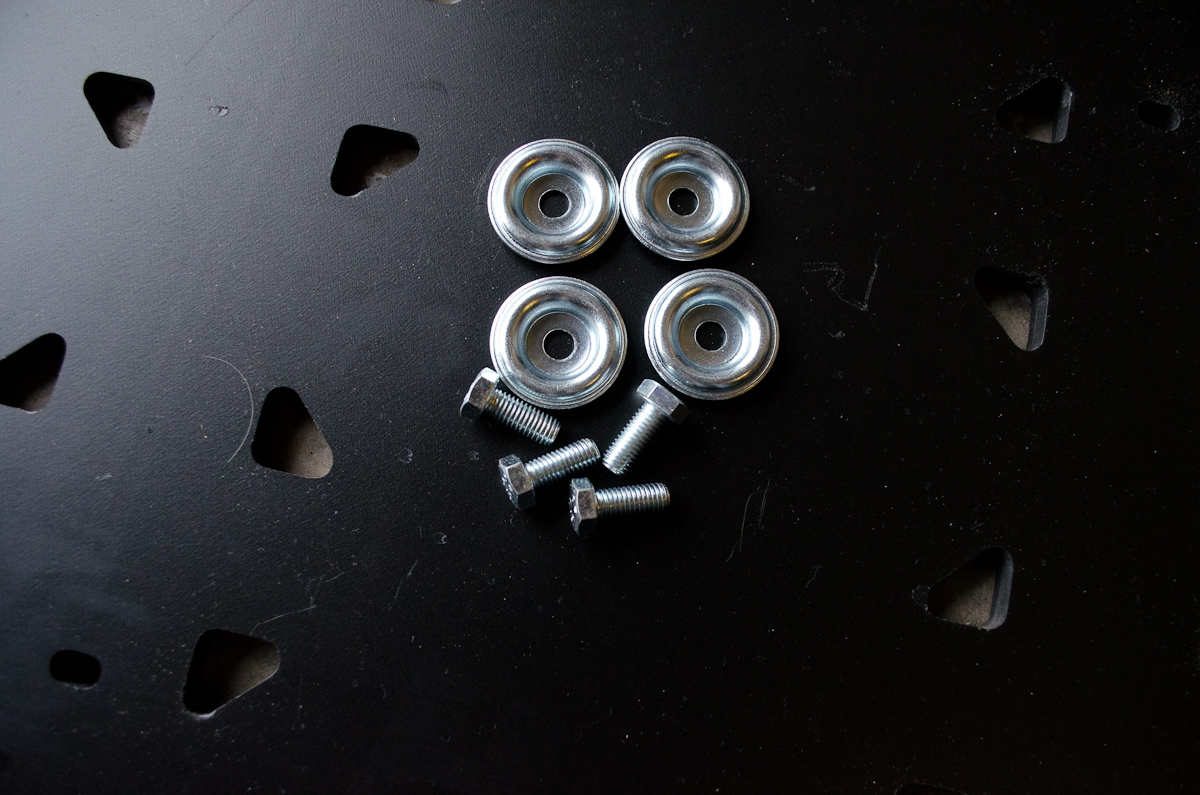
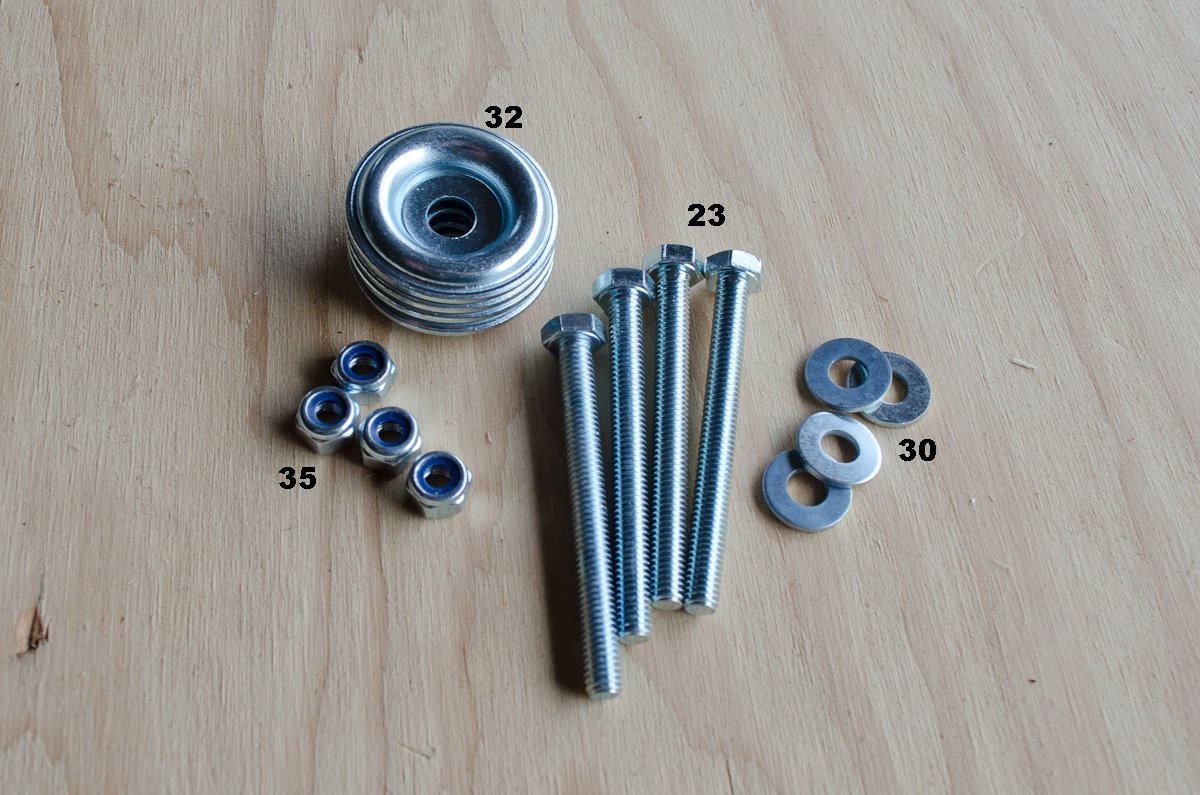
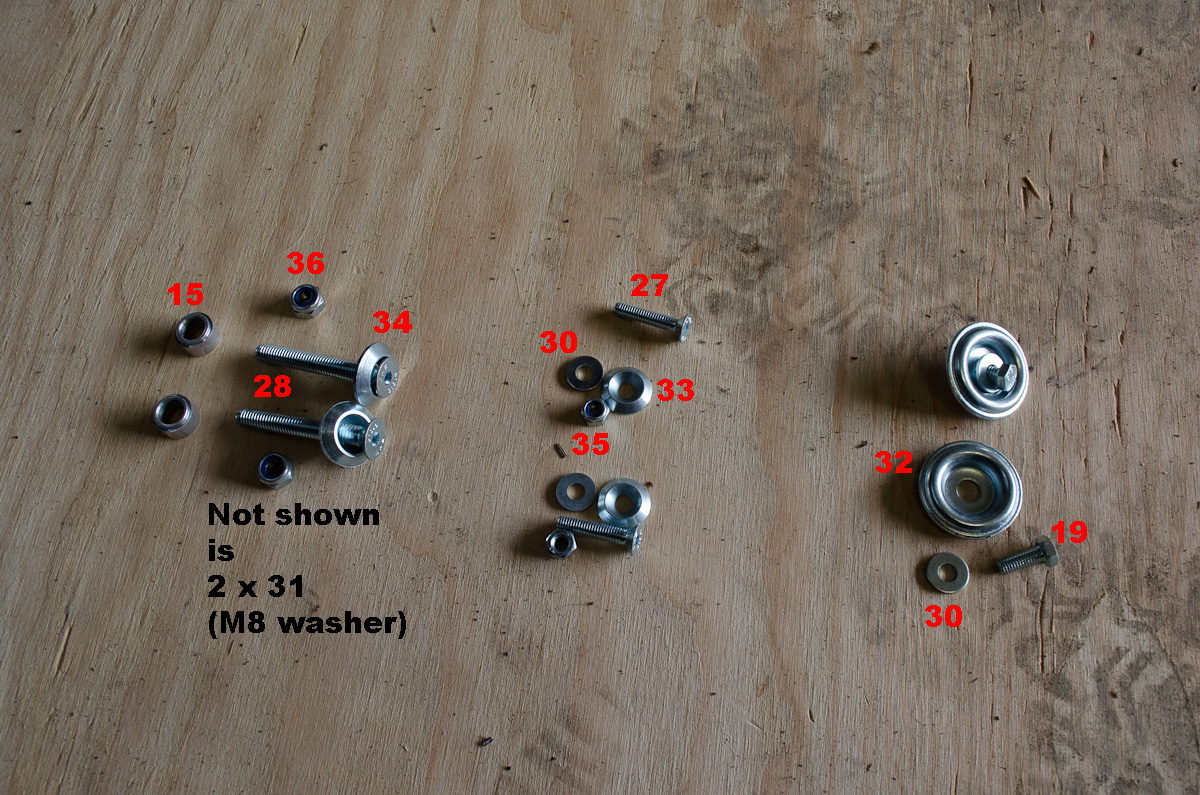
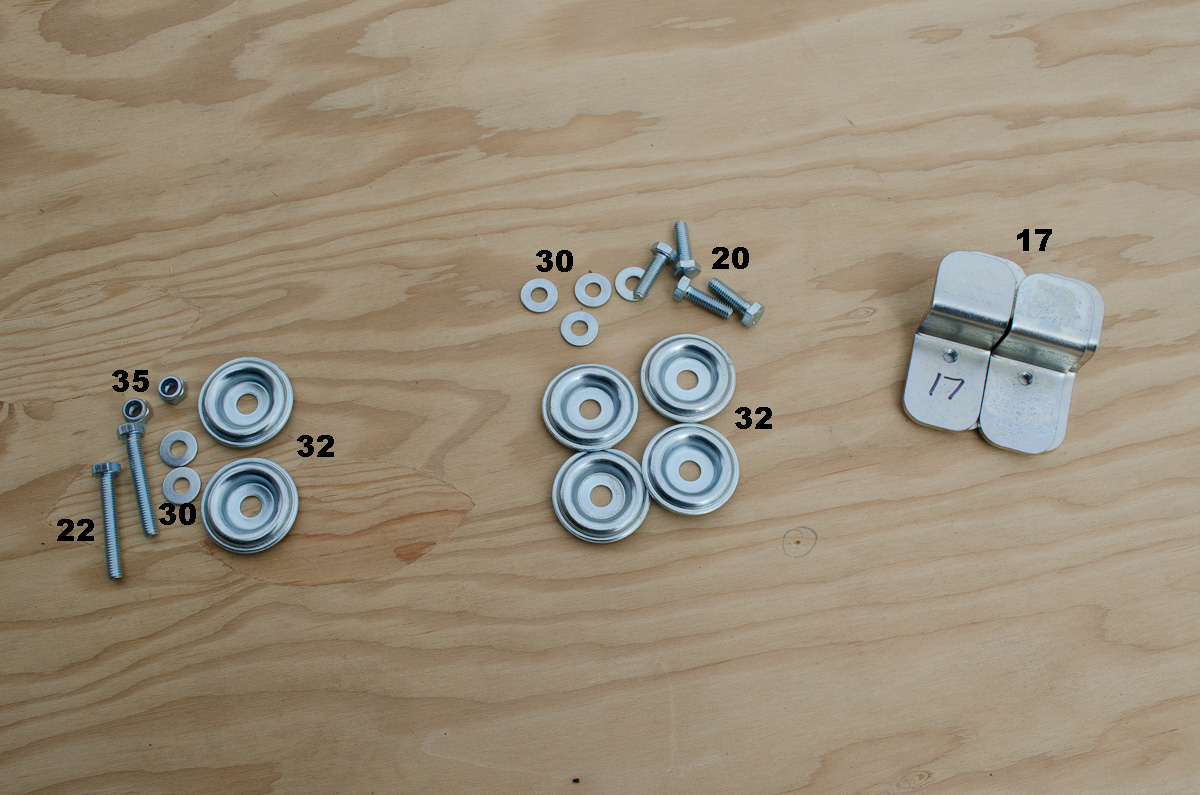
This is the contents of the fastener package, labelled with the numbers that correspond to the instruction sheet. | |||||||||||||||||||||||||||||||||
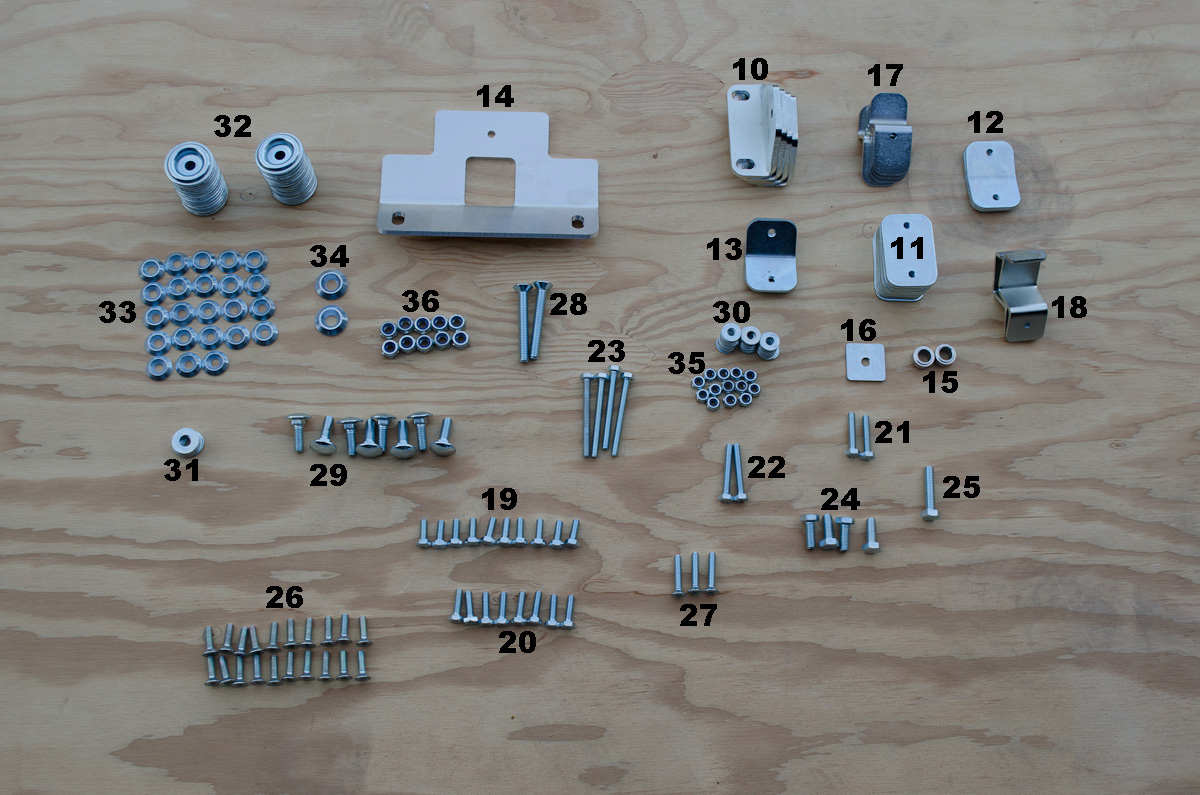 |
Different view to help you identify everything. I recommend laying everything out neatly like this before you begin the installation. |
|||||||||||||||||||||||||||||||||
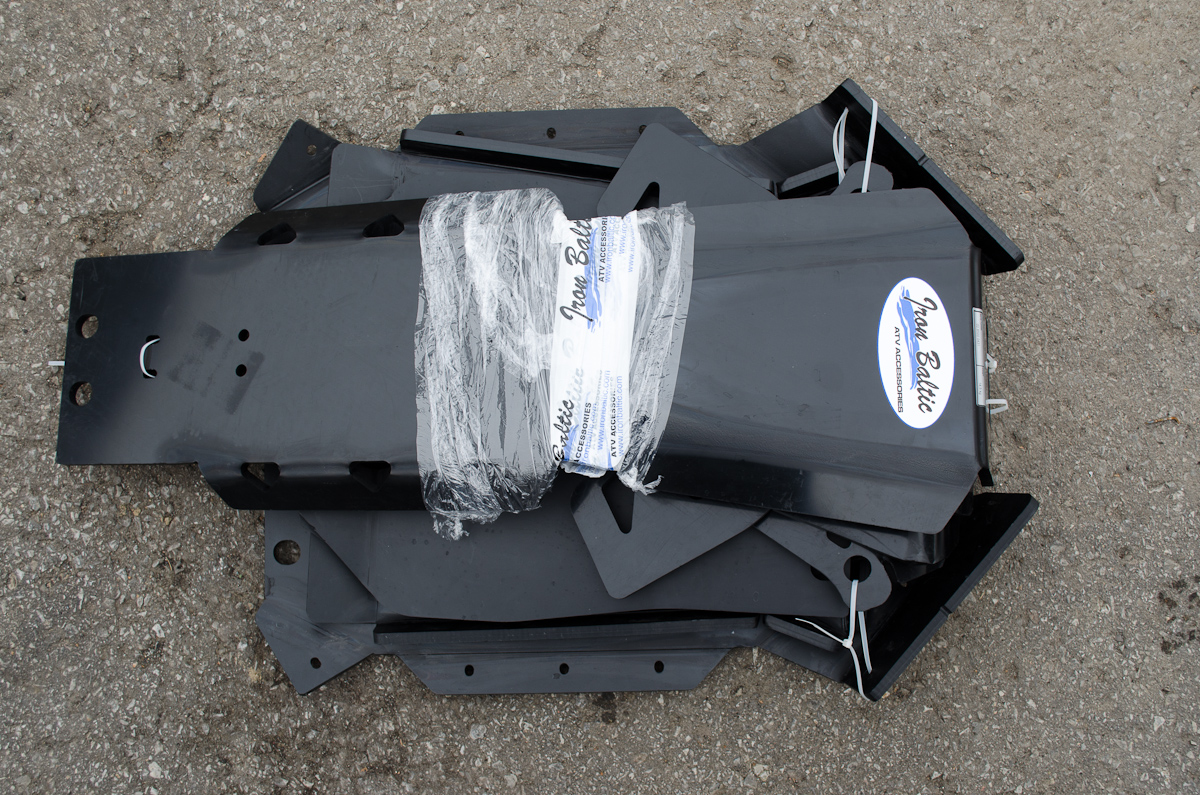 |
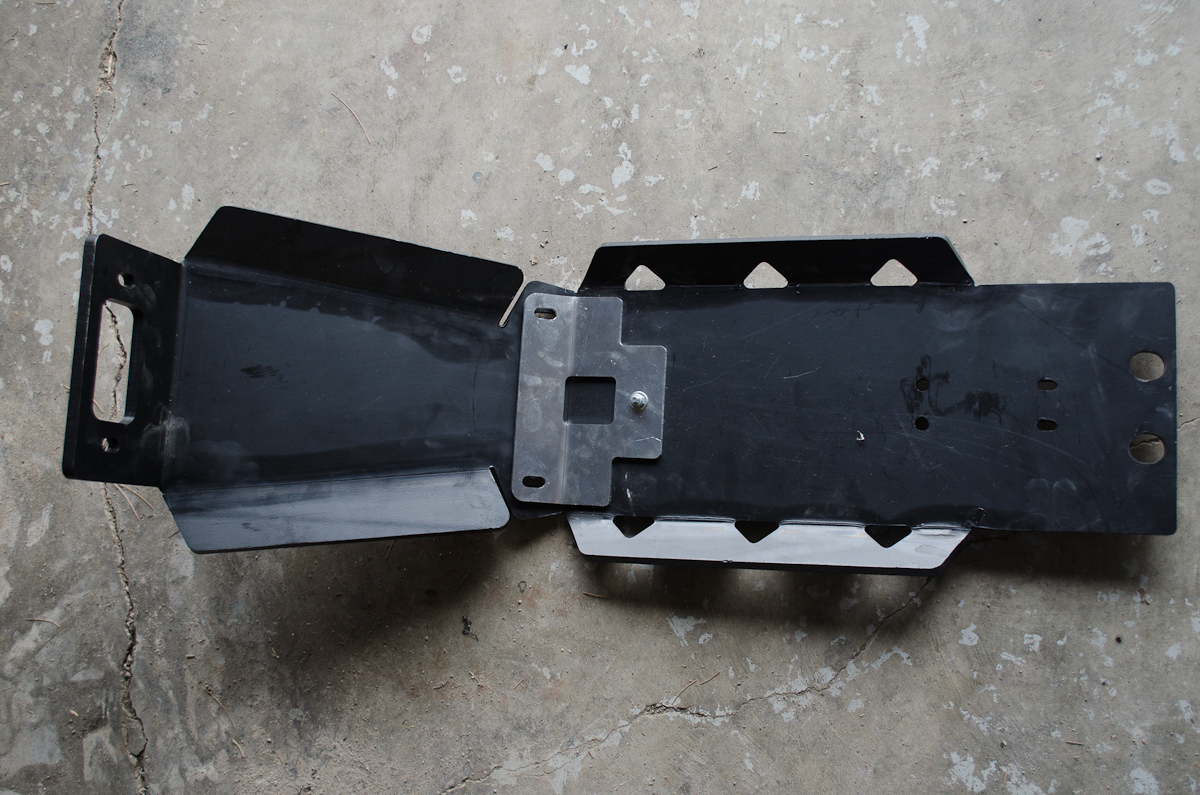
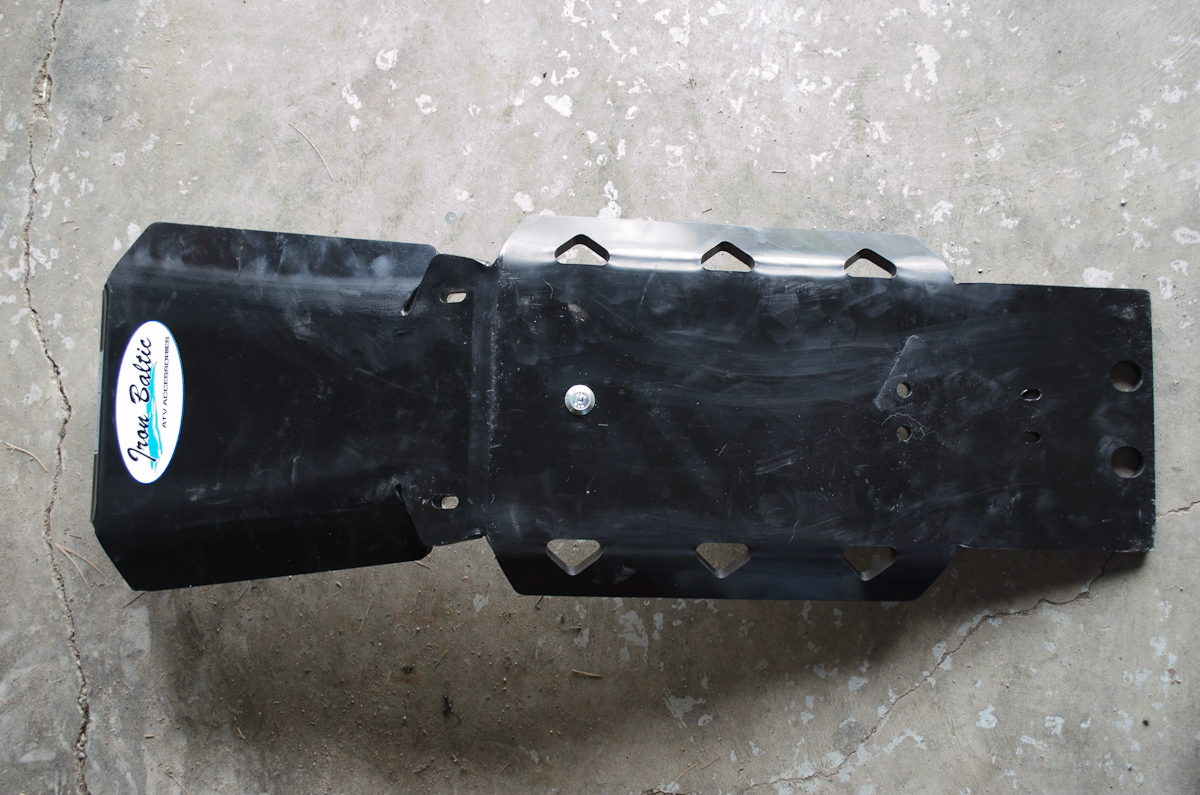
And of course there are the skidplates themselves bundled together. | |||||||||||||||||||||||||||||||||
 |
These are the footrest skidplates and the rear skidplate. | |||||||||||||||||||||||||||||||||
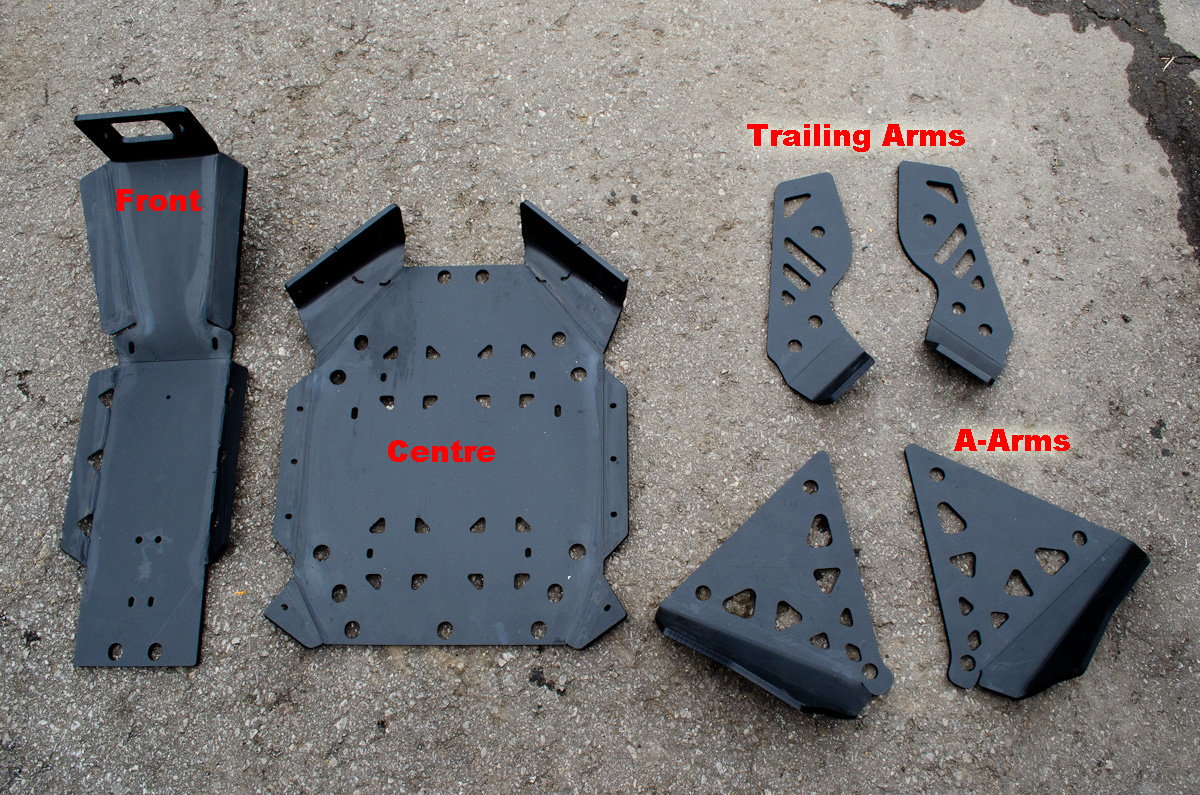 |
And these are the front skidplate, centre skidplate, the rear trailing-arm skidplates, and the front A-arm skidplates. | |||||||||||||||||||||||||||||||||
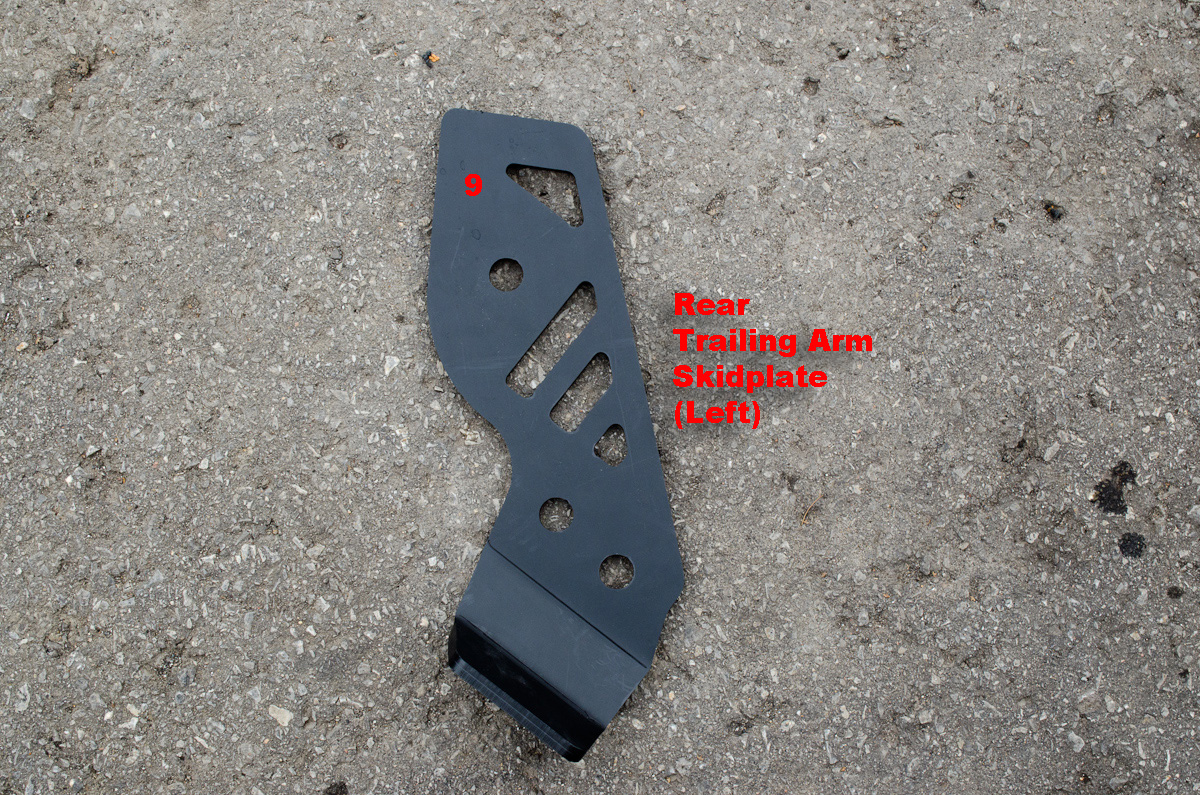 |
The rear trailing arm skidplates are parts #8 and #9. This is the left, part #9. | |||||||||||||||||||||||||||||||||
 |
The front A-arm skidplates are parts #6 and #7. This is the left, part #7. | |||||||||||||||||||||||||||||||||
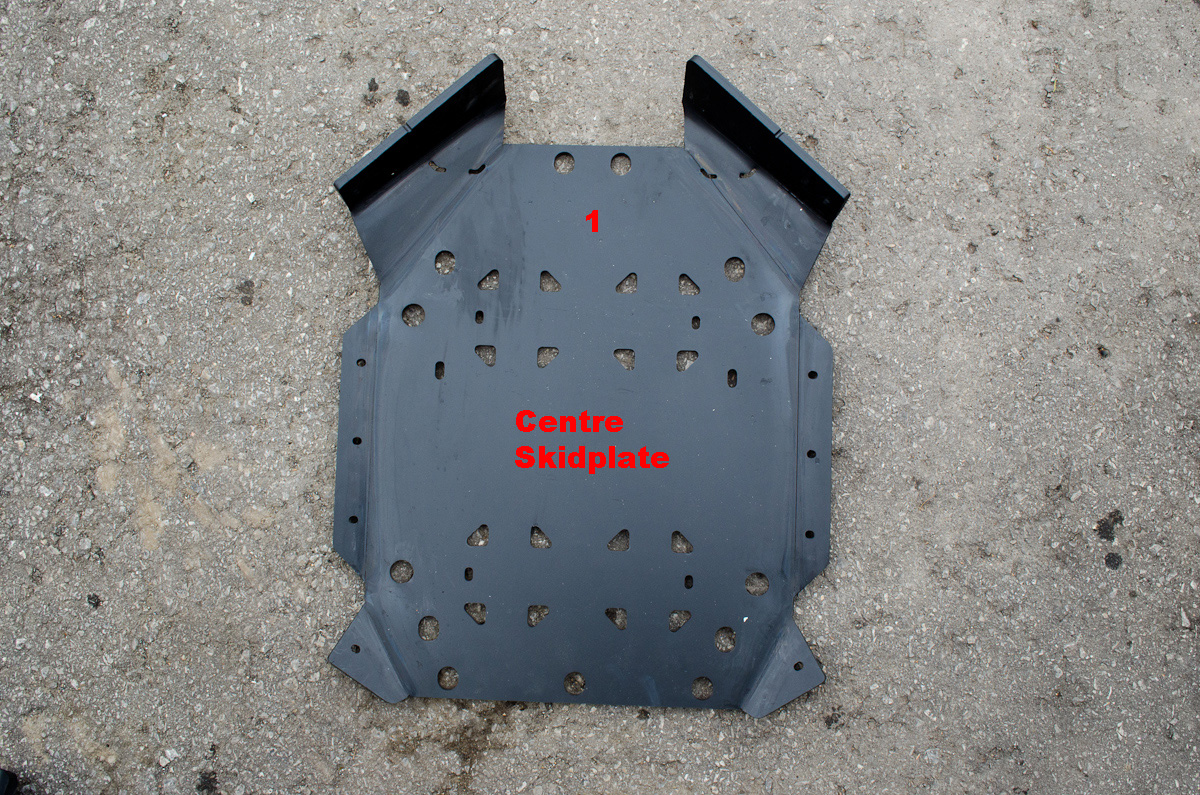 |
The centre skidplate, part #1. | |||||||||||||||||||||||||||||||||
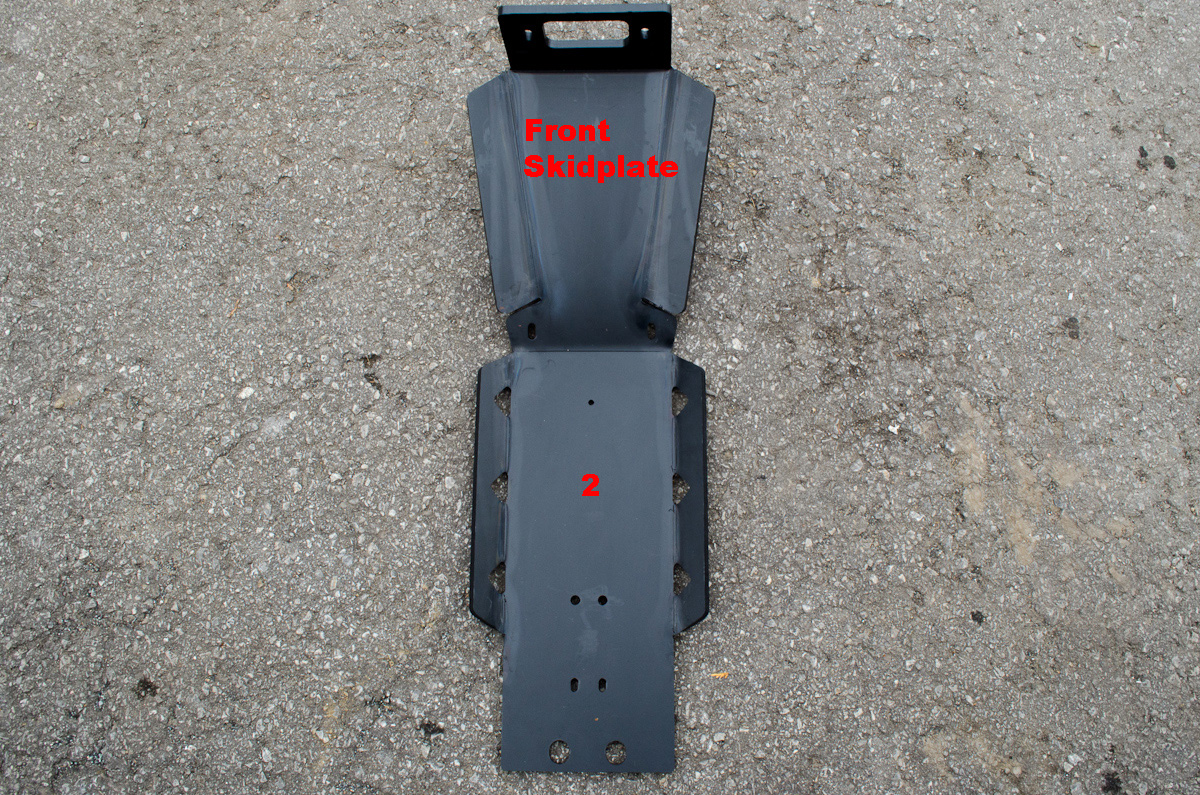 |
The front skidplate, part #2. | |||||||||||||||||||||||||||||||||
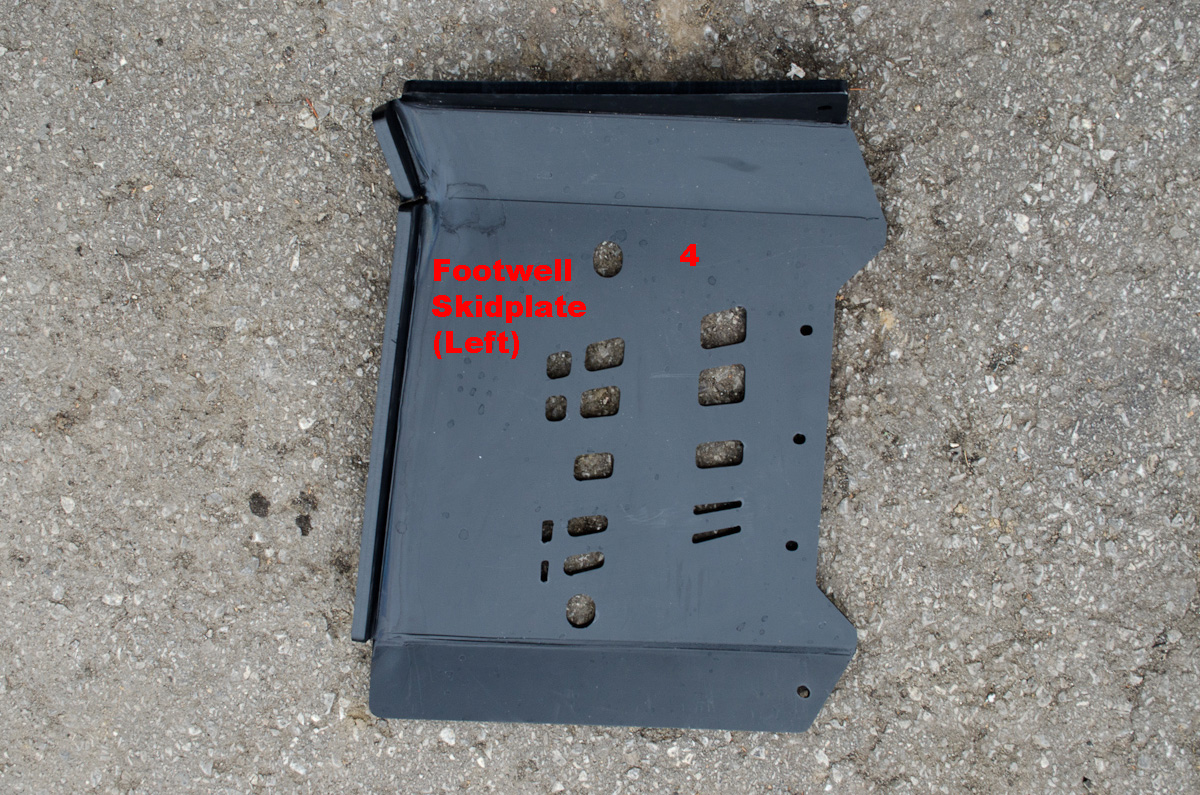 |
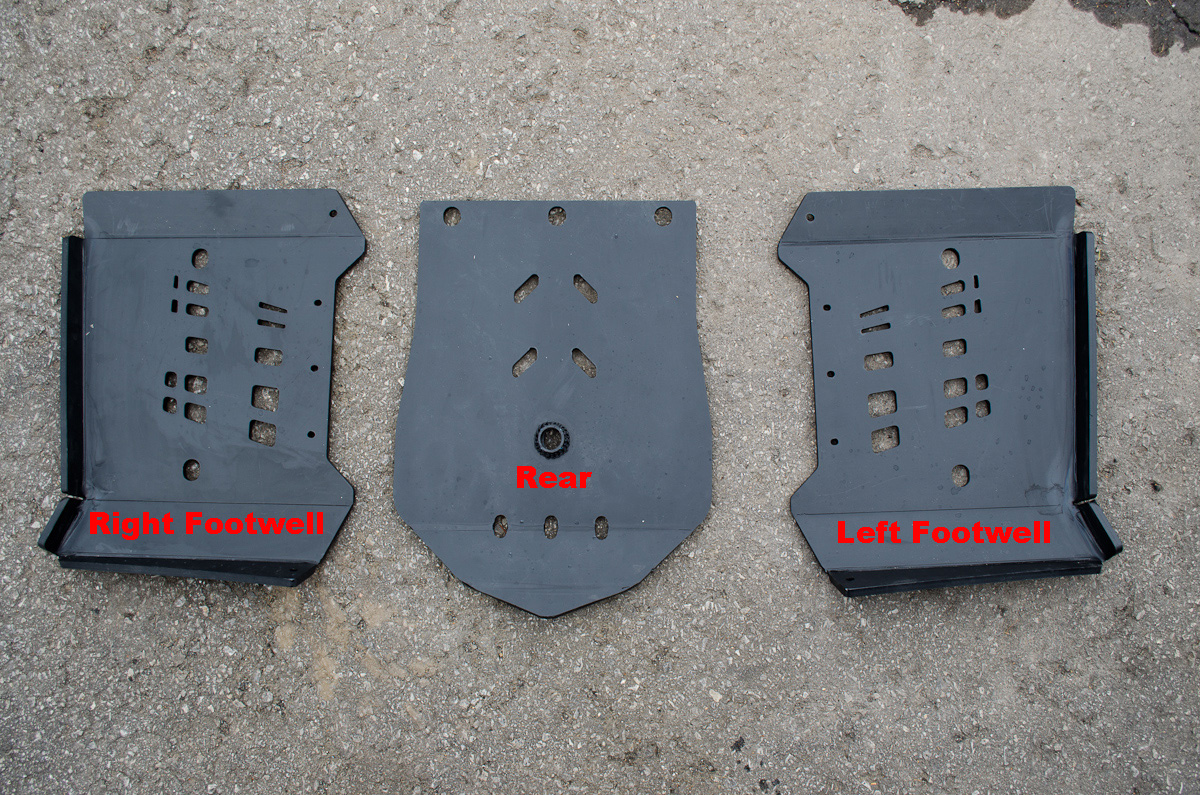
The footwell skidplates are parts #3 and #4. This is the left, part #4. | |||||||||||||||||||||||||||||||||
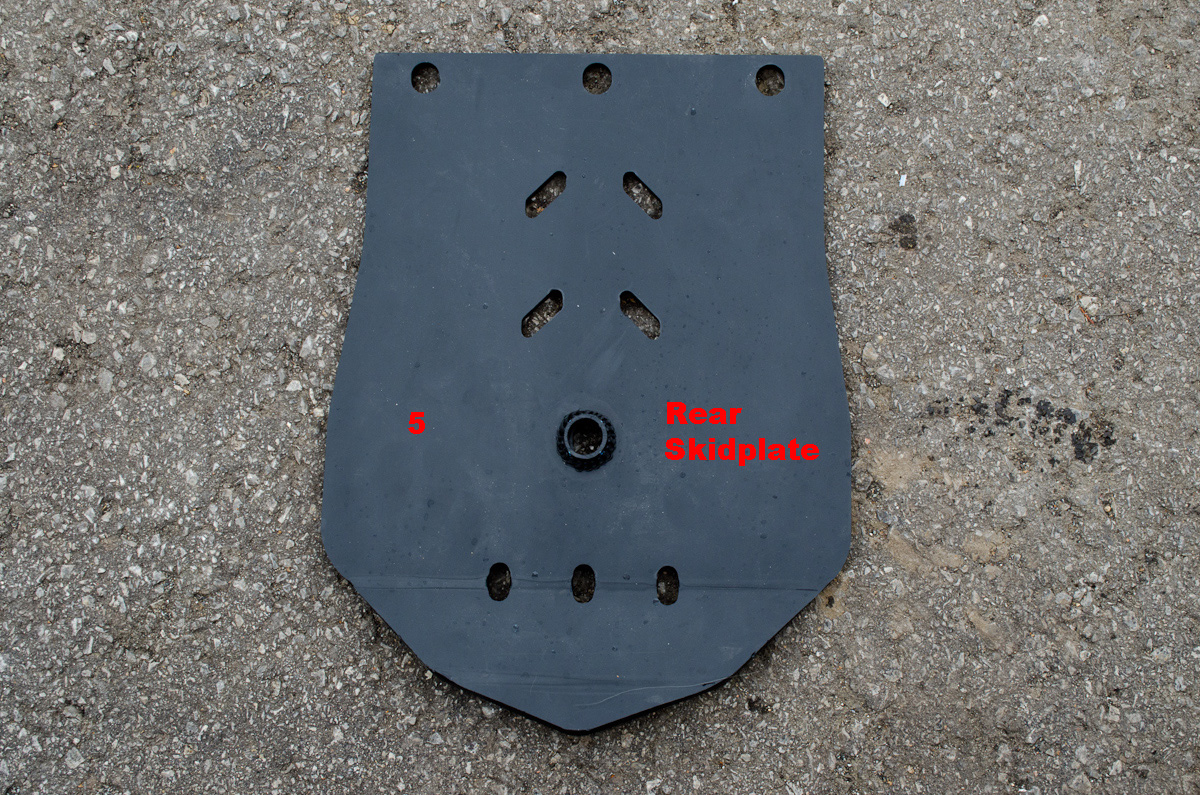 |
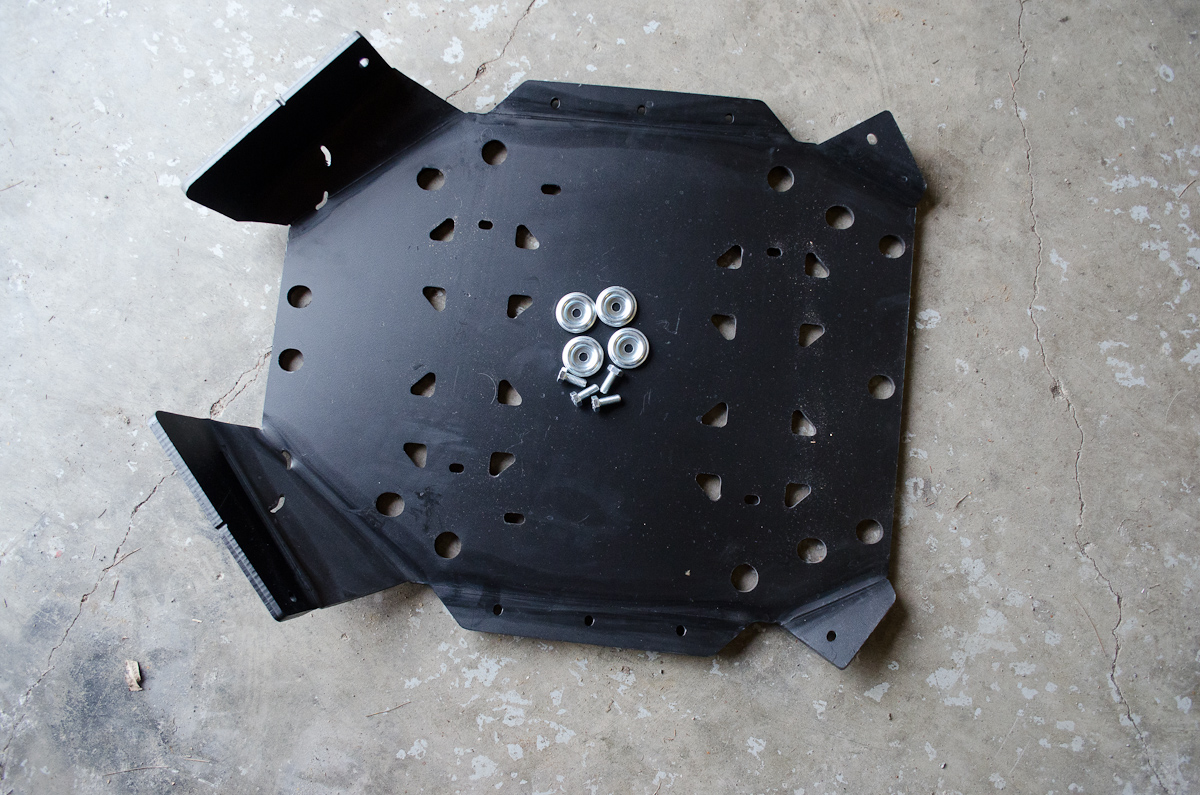
The rear skidplate, part #5. | |||||||||||||||||||||||||||||||||
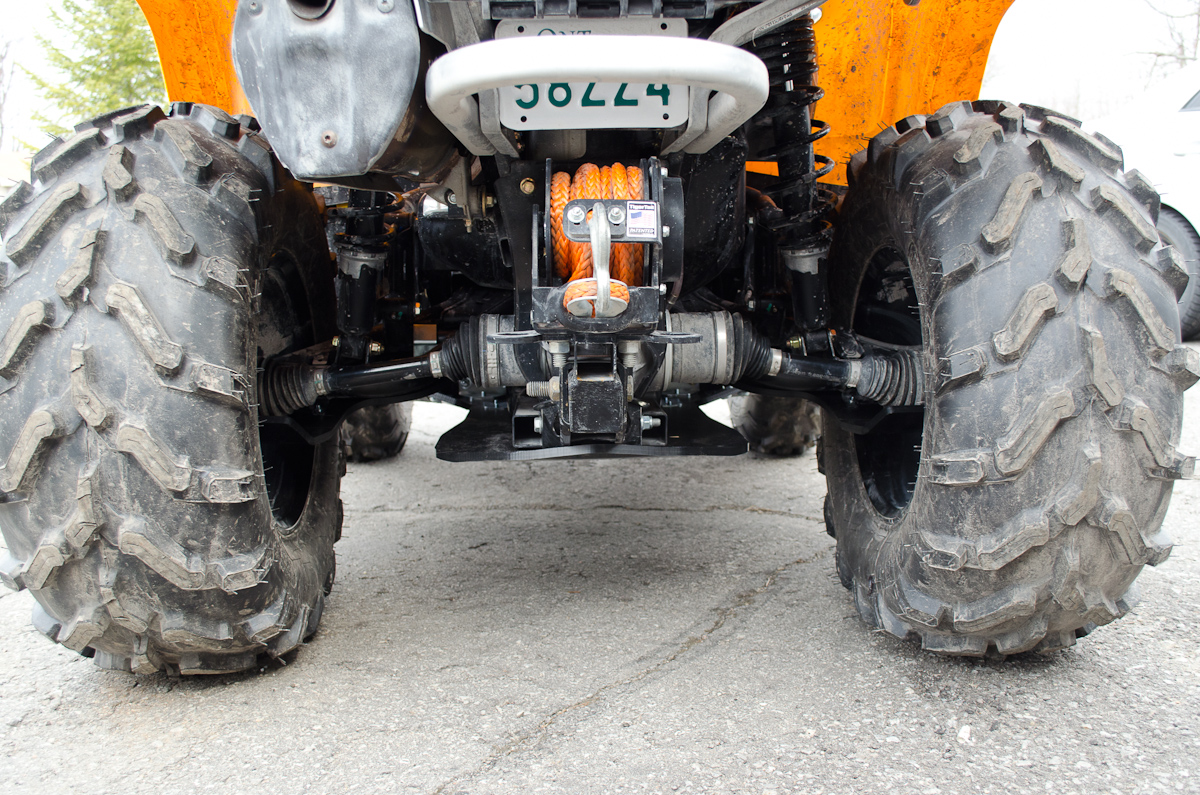
Part 1 - A Look at the Stock SetupCheck out the video for a look at the stock skidplate setup before we start tearing into things:
Part 2 - Removing the Stock Setup |
||||||||||||||||||||||||||||||||||
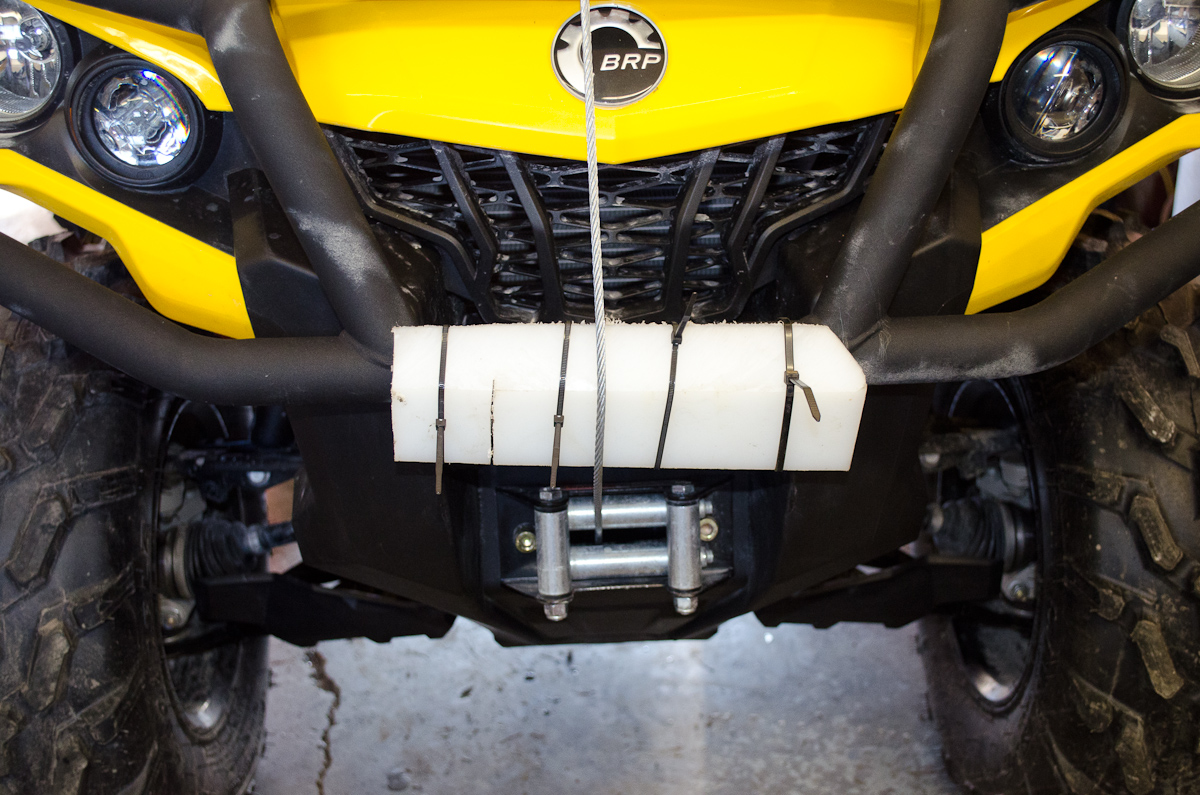 |
The first step is to get the ATV in a comfortable position to work on. You can do the job with it on a stand, or even sitting on the ground, but it will be more challenging. I decided to winch the front end up to a beam in the ceiling of my shop and work on it standing up on its back end. If you choose this method, make sure whatever you use to support the front end can safely take the weight. Also, it's a good idea to use some sort of protection to prevent the winch cable from chaffing the front bumper as you winch it up and down. Once winched up into position I strapped it in place, as the next step required is the removal of the winch fairlead, which also requires removing the winch hook. |
|||||||||||||||||||||||||||||||||
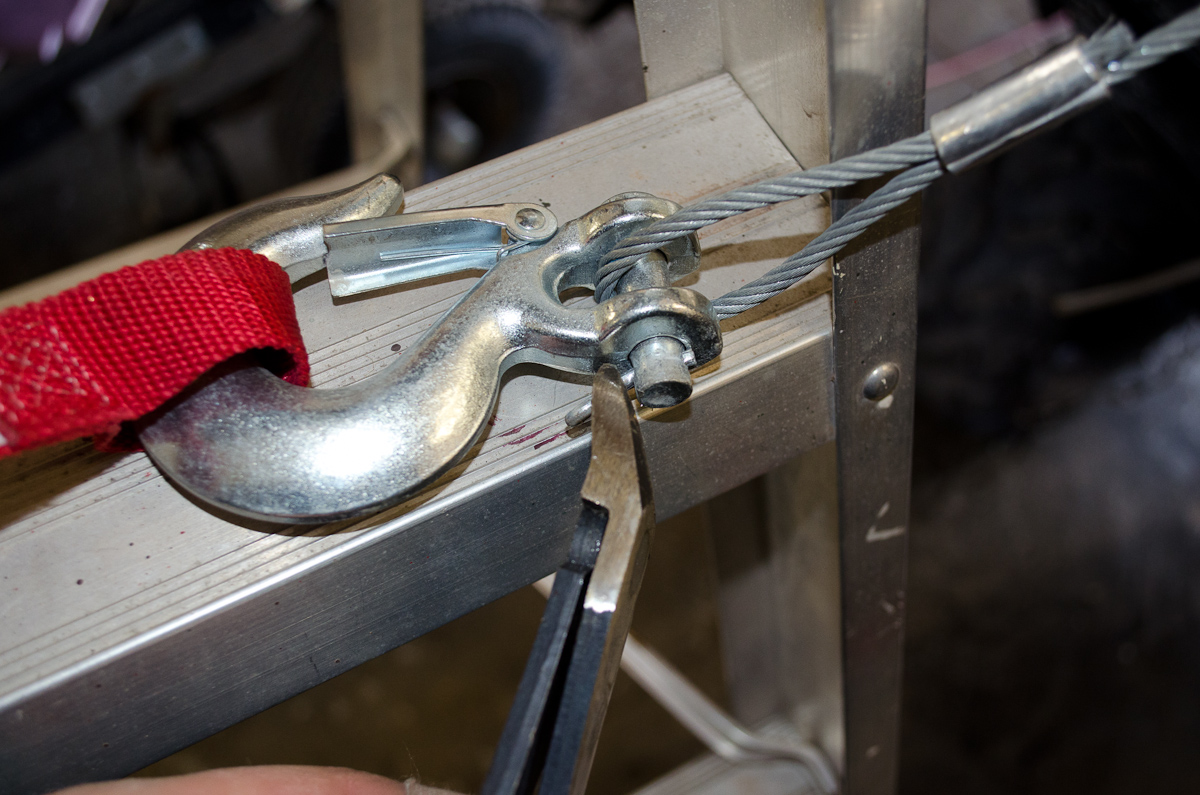 |
To remove the hook, you must pull the cotter pin from the mounting pin. I like to use side cutters for pulling cotter pins as you can get a good "bite" on the cotter pin and also use the curve of the jaws as a lever to work the cotter pin out. |
|||||||||||||||||||||||||||||||||
 |
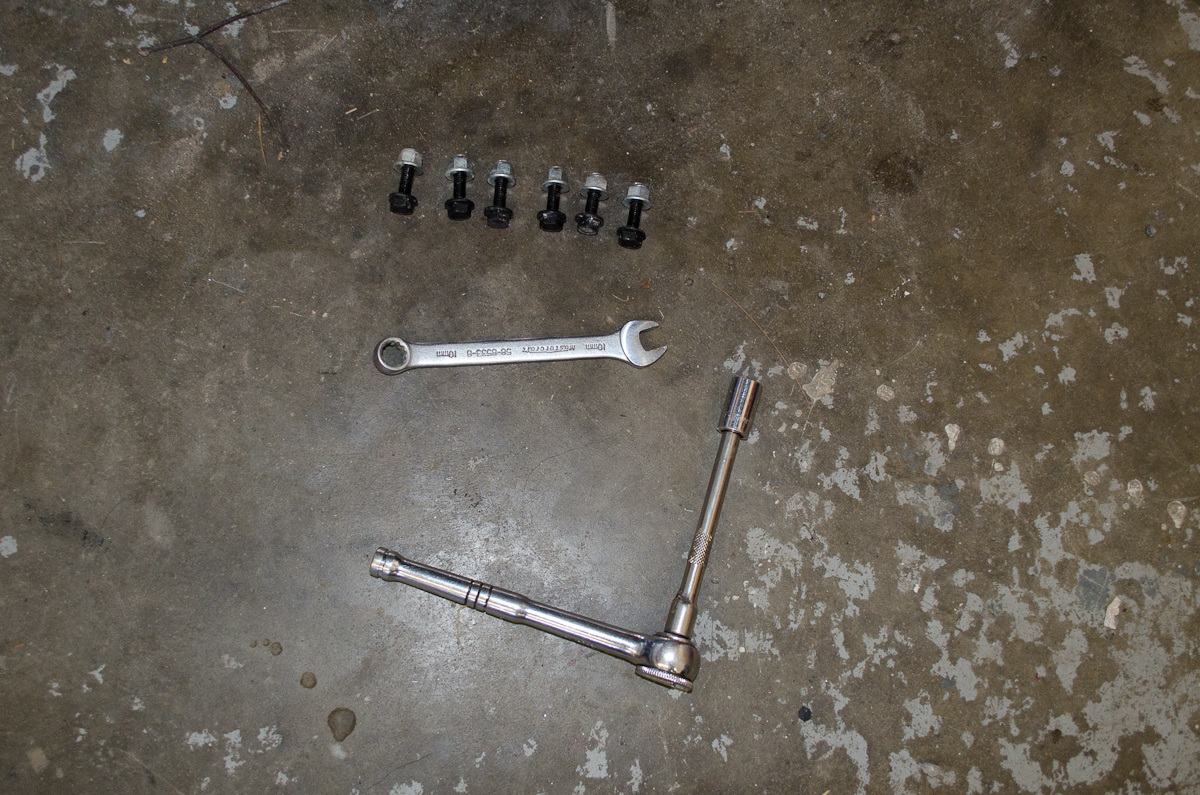
With the hook removed, next remove the winch fairlead. The bolts take an 8mm Allen key, and the nuts a 15 mm wrench. |
|||||||||||||||||||||||||||||||||
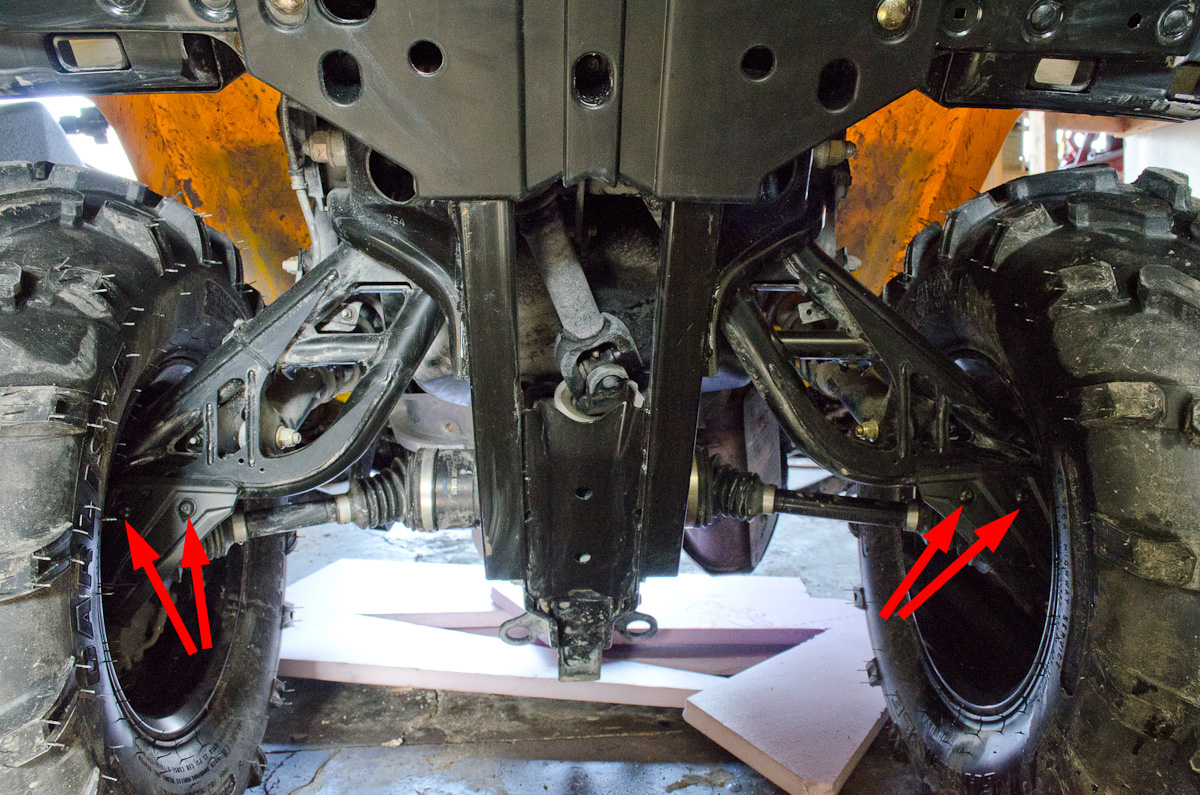
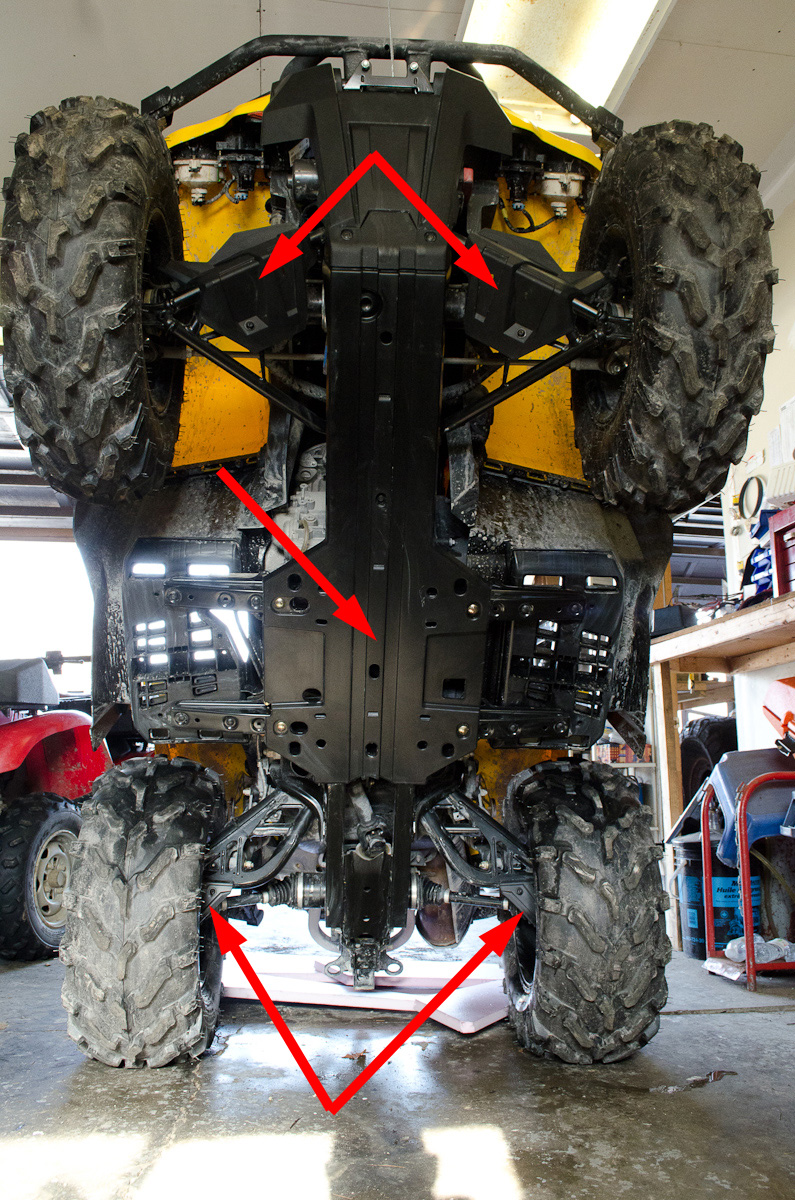 |
You will need to remove the stock A-arm skidplates (top arrows), the stock centre skidplate (middle arrow) and the stock trailing arm skidplates (bottom arrows). The stock front skidplate (aka the "bash plate") will be re-used and will therefore remain in place. |
|||||||||||||||||||||||||||||||||
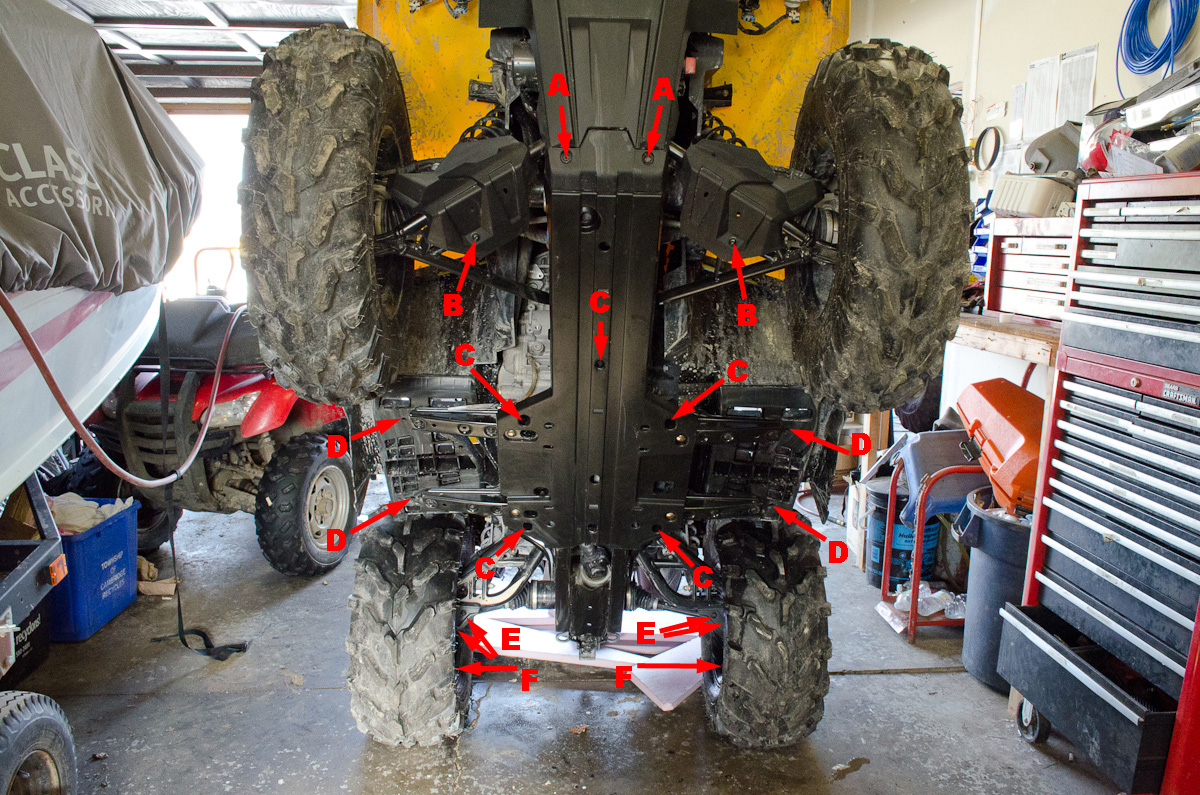 |
These are all the fasteners you need to remove to get the stock skidplates off, as follows: A - Front skidplate bolts: T40 Torx and 13mm wrench for the nuts on the back-side. |
|||||||||||||||||||||||||||||||||
 |
Remove the front A-arm bolts: T30 Torx and 10 mm wrench for the nuts on the back-side. Right side. |
|||||||||||||||||||||||||||||||||
 |
Remove the left side. | |||||||||||||||||||||||||||||||||
 |
Remove the front skidplate bolts: T40 Torx and 13mm wrench for the nuts on the back-side. | |||||||||||||||||||||||||||||||||
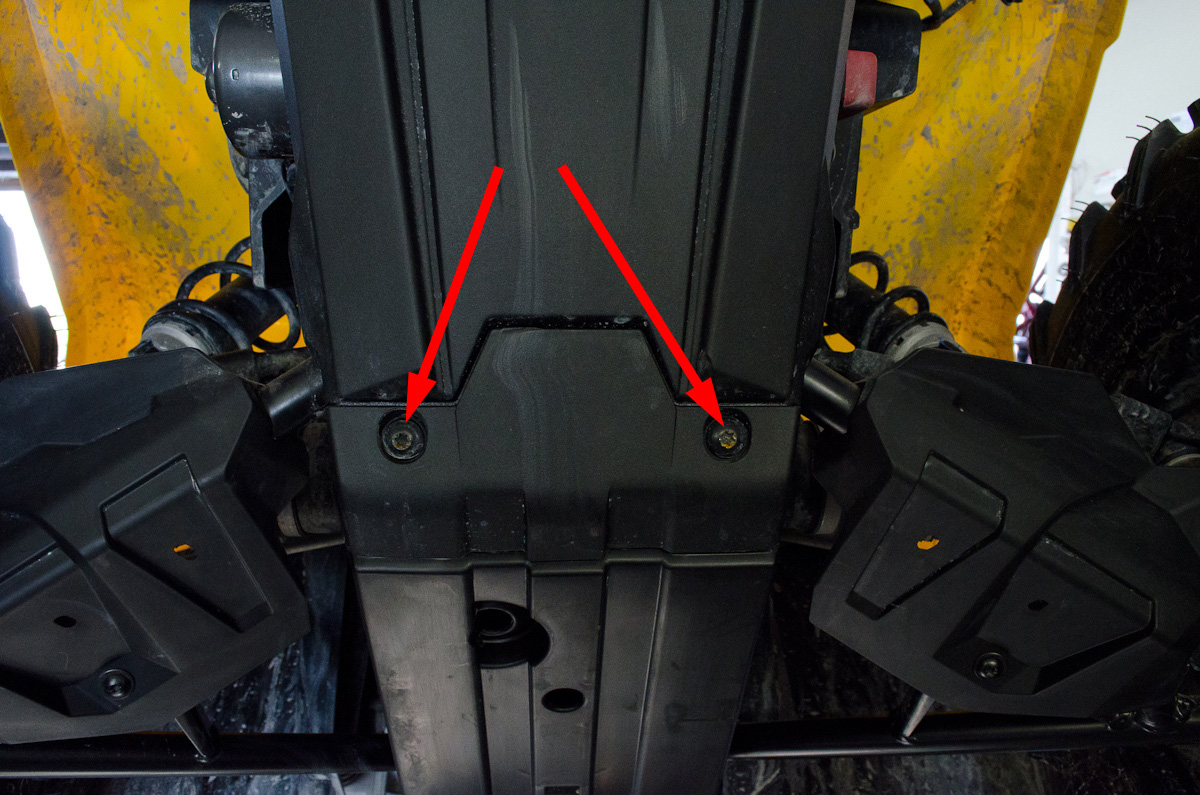
 |
Remove the centre skidplate bolts: 10mm socket and 10mm wrench for the nuts on the back-side. There are six (6) in total - as shown. |
|||||||||||||||||||||||||||||||||
 |
I used a 1/4" drive ratchet with extension and 10mm socket on the bolt heads and a 10mm combination wrench on the nuts. | |||||||||||||||||||||||||||||||||
 |
The six bolts removed from the centre skidplate. | |||||||||||||||||||||||||||||||||
 |
With the bolts removed, you have to work the factory centre skidplate out from between the frame and factory metal bashplate... | |||||||||||||||||||||||||||||||||
 |
... it can be quite tight, and you may have to work it back and forth or even pry it out to get it loose. | |||||||||||||||||||||||||||||||||
 |
Once I got the centre skid removed, a couple of "extra" fasteners fell out! I couldn't find anywhere where there was anything missing so I suspect they may have been dropped at the factory and instead of being recovered, somebody just grabbed extras for whatever they were installing! |
|||||||||||||||||||||||||||||||||
 |
Remove the the first four (4) rear trailing-arm skidplate bolts (2 each side): T30 Torx and 10 mm wrench for the nuts on the back-side. | |||||||||||||||||||||||||||||||||
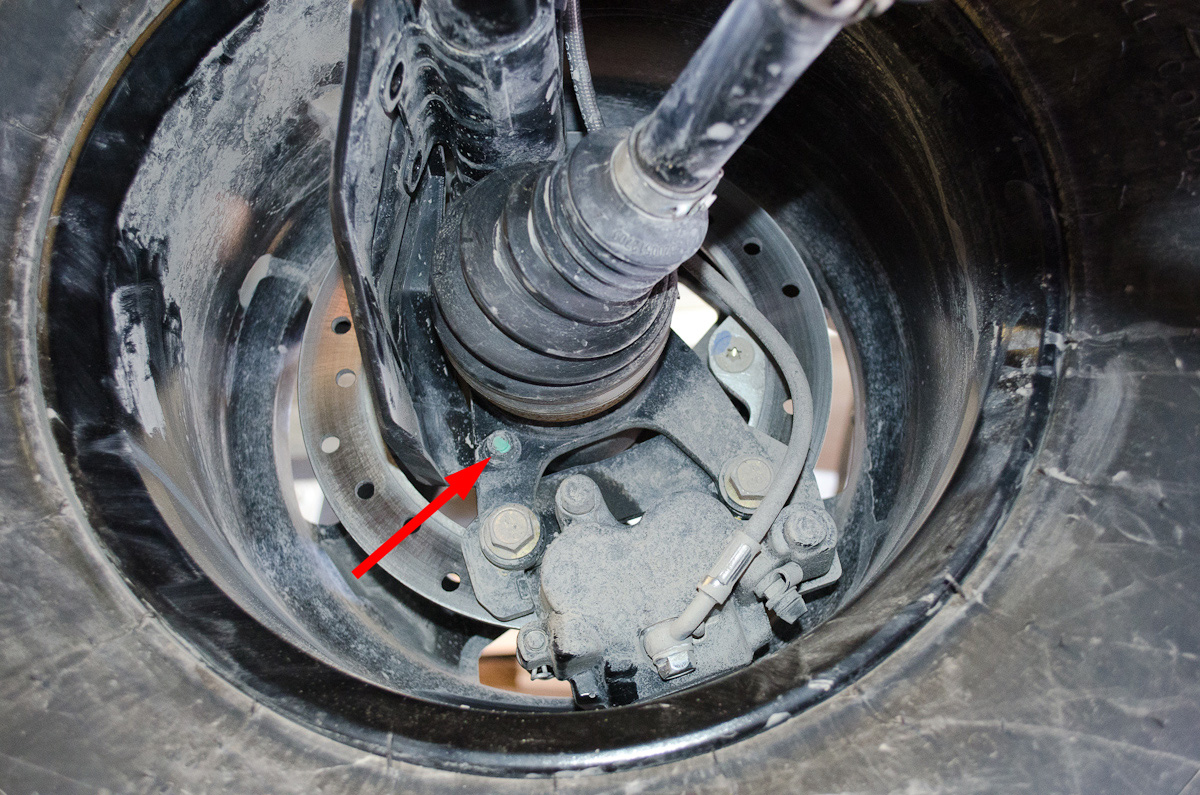 |
The last two rear trailing-arm skidplate bolts (one per side - T30 Torx and 10 mm wrench for the nuts on the back-side) are a little less obvious. The nut is accessible from inside the wheel (red arrow). |
|||||||||||||||||||||||||||||||||
 |
And the T30 Torx bolt can be reached through the wheel... | |||||||||||||||||||||||||||||||||
 |
... I used a 1/4" drive ratchet with a long extension to get to it. | |||||||||||||||||||||||||||||||||
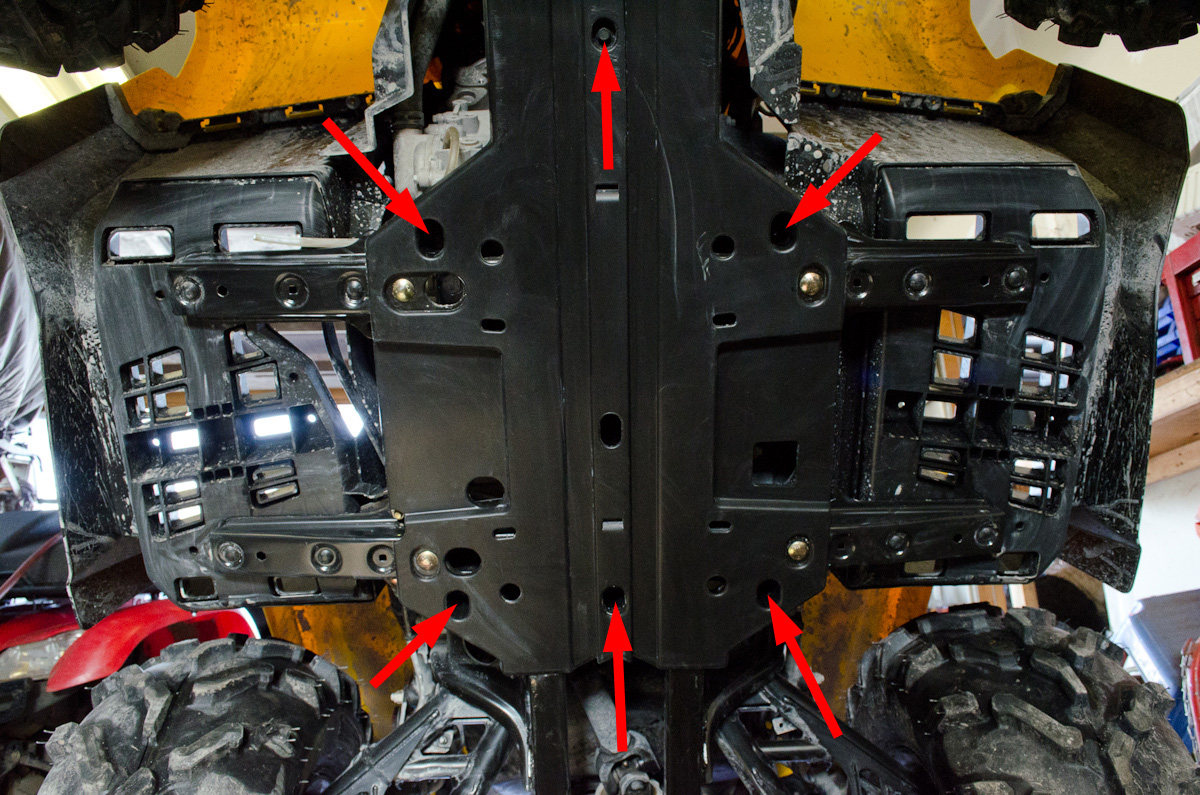
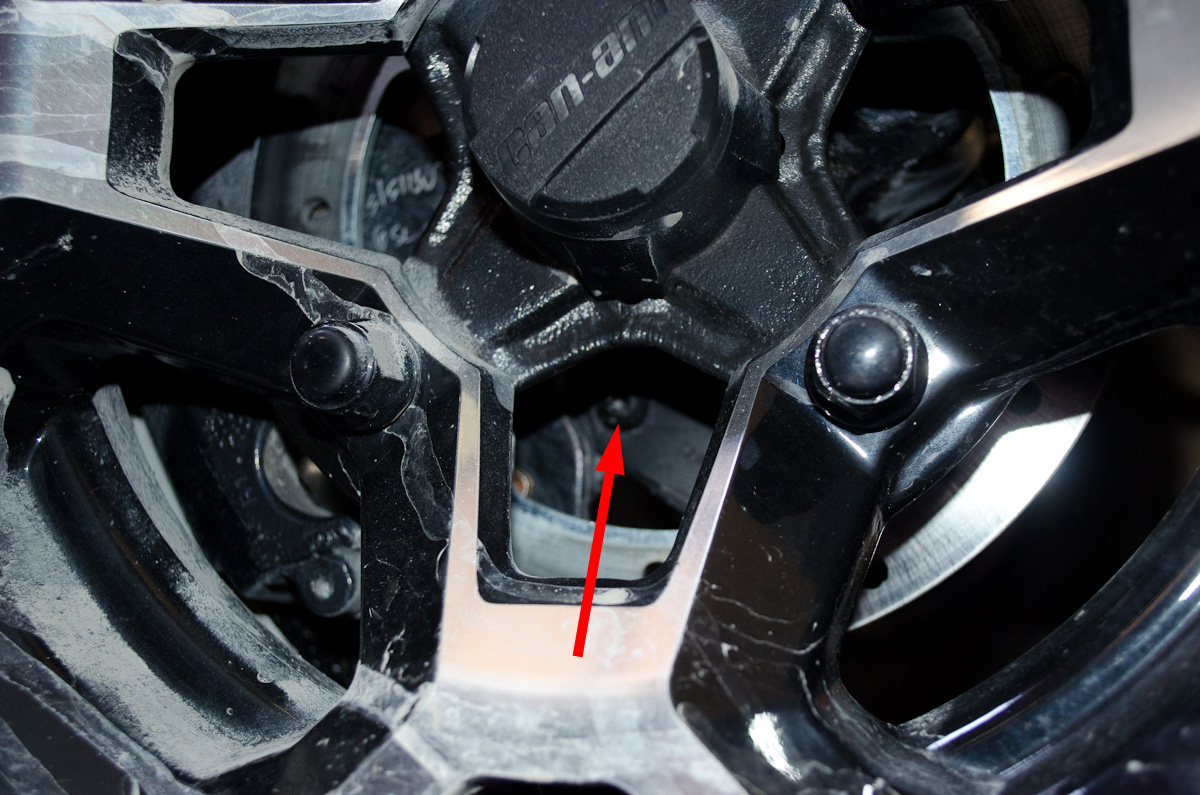
 |
Finally, you also have to remove two footwell bolts per side (four total) using a 10mm socket. The positions are indicated here by the red arrows. |
|||||||||||||||||||||||||||||||||
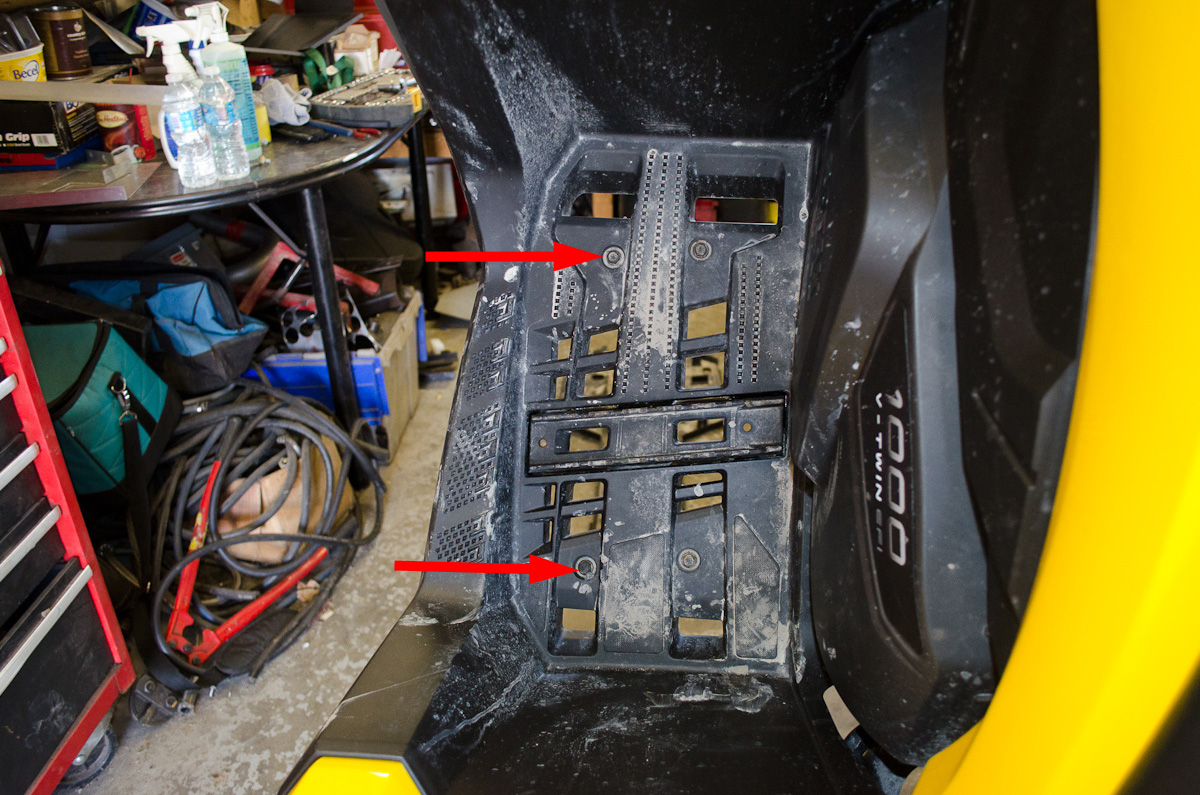 |
The bolts are removed from the top side. Left side shown. |
|||||||||||||||||||||||||||||||||
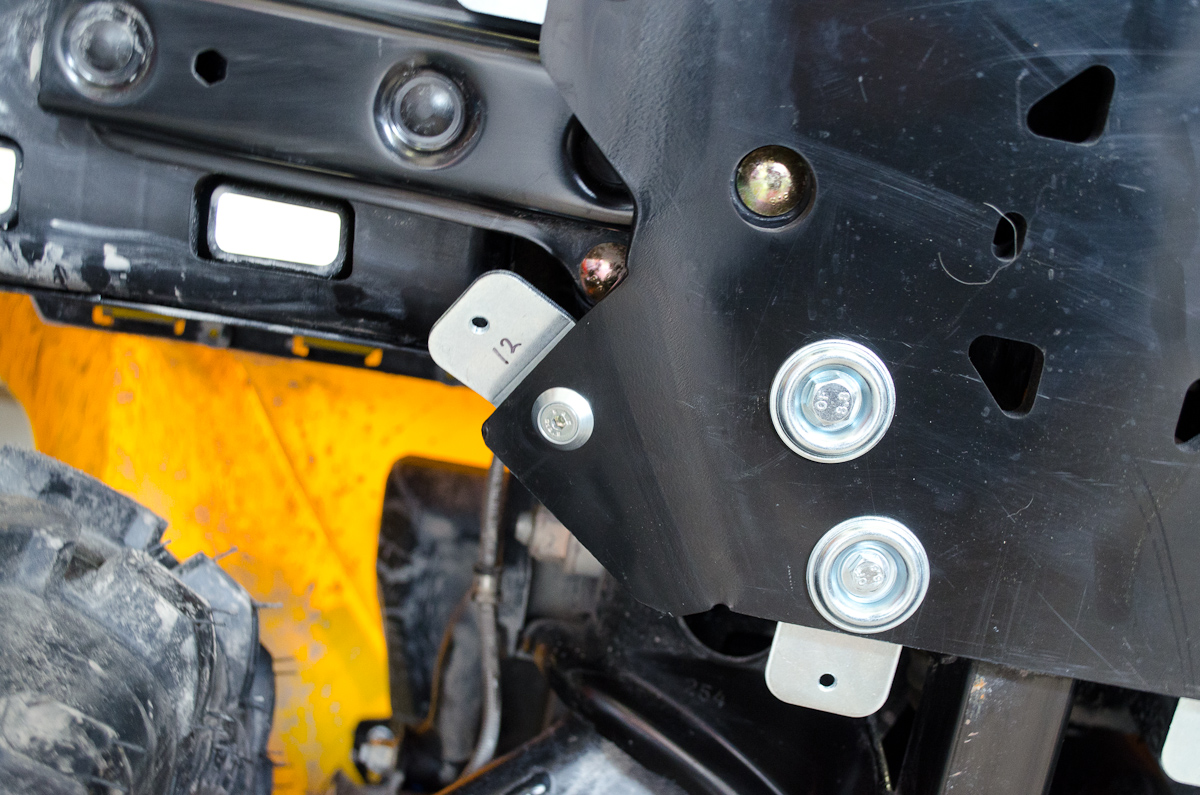
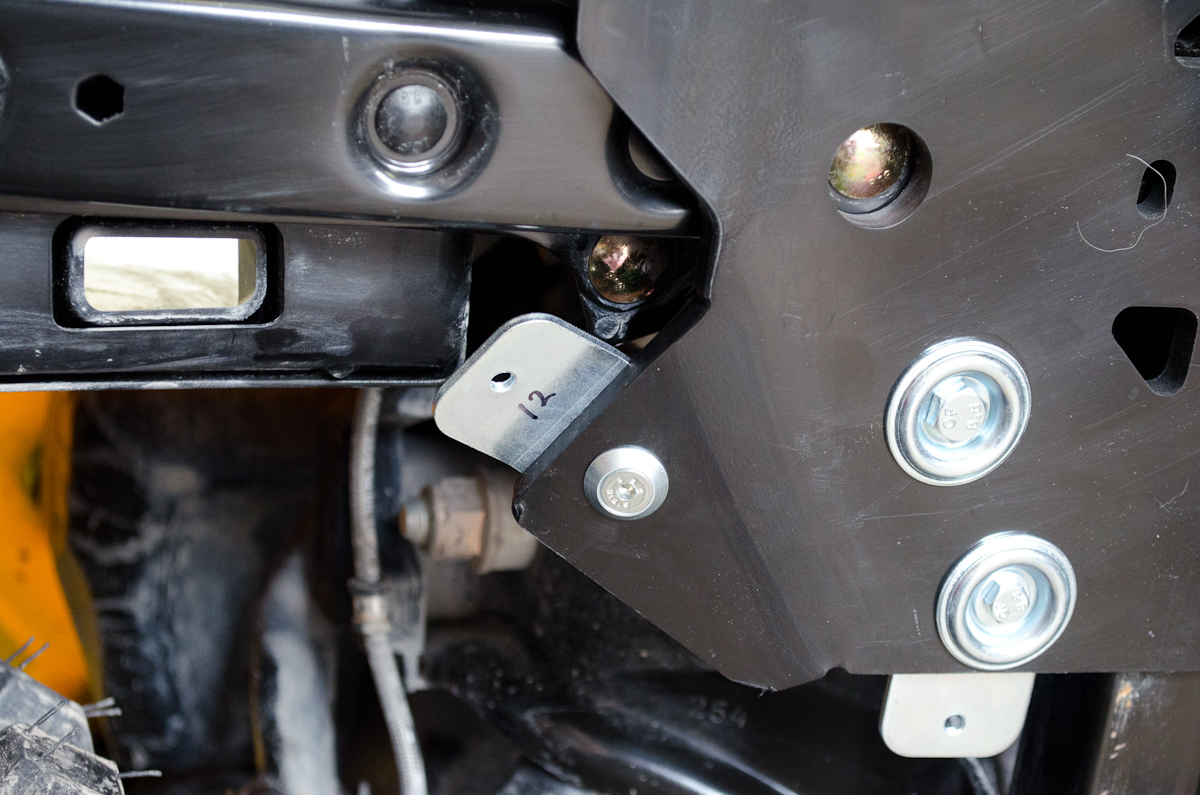
 |
Close-up of the left-side footwell bolt locations, seen from underneath. These holes will be used when the Iron Baltic footwell skidplates are installed later. |
|||||||||||||||||||||||||||||||||
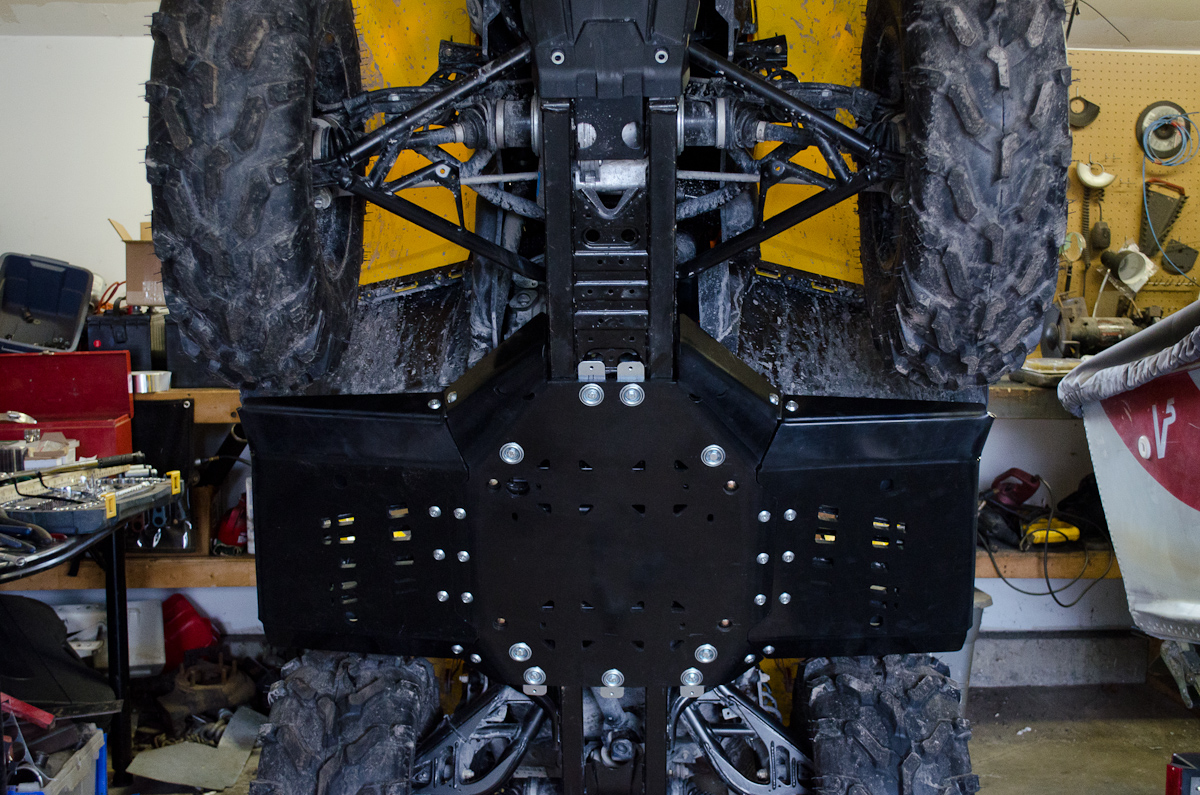
 |
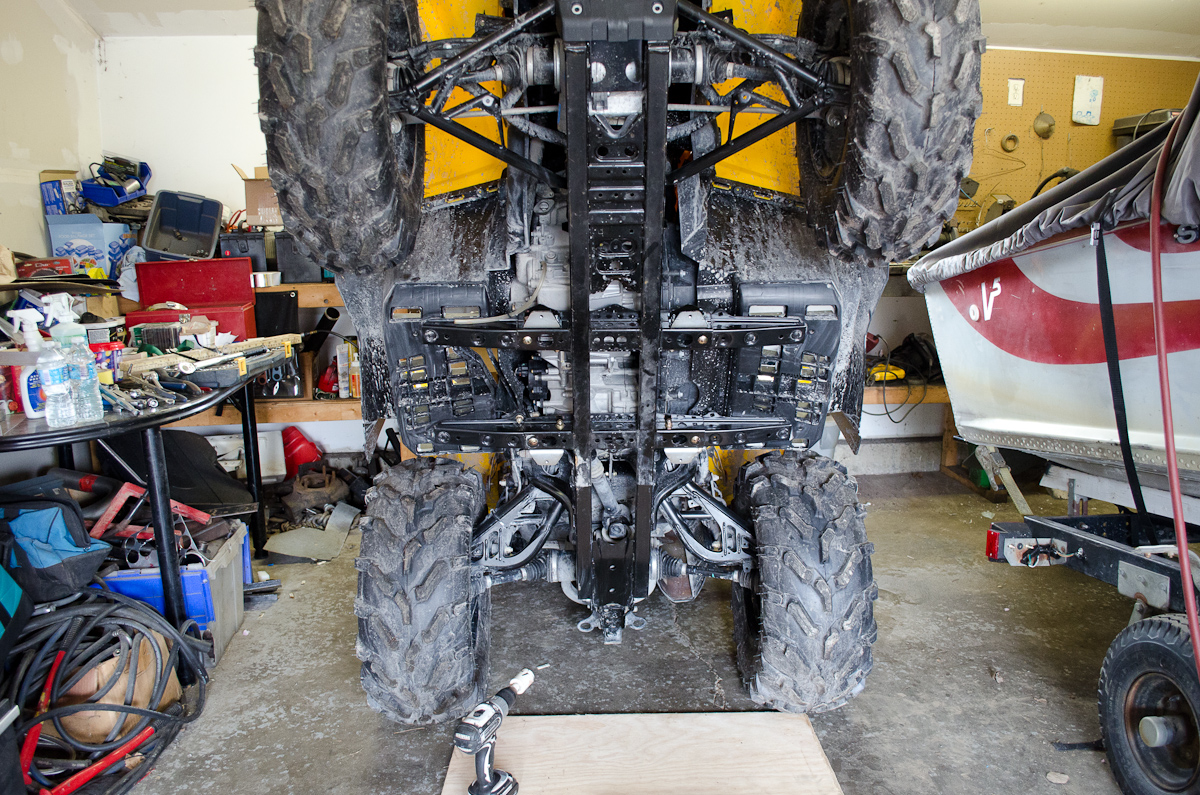
With all the stock skidplates removed, this is what you are left with. | |||||||||||||||||||||||||||||||||
Part 3 - Comparing the Stock and Iron Baltic SkidplatesFor a comparison between the two - check out the Part 3 Video, below:
Part 4 - Installing Iron Baltic Frame BracketsThe first step in the installation is to install the four frame brackets, part #10. |
||||||||||||||||||||||||||||||||||
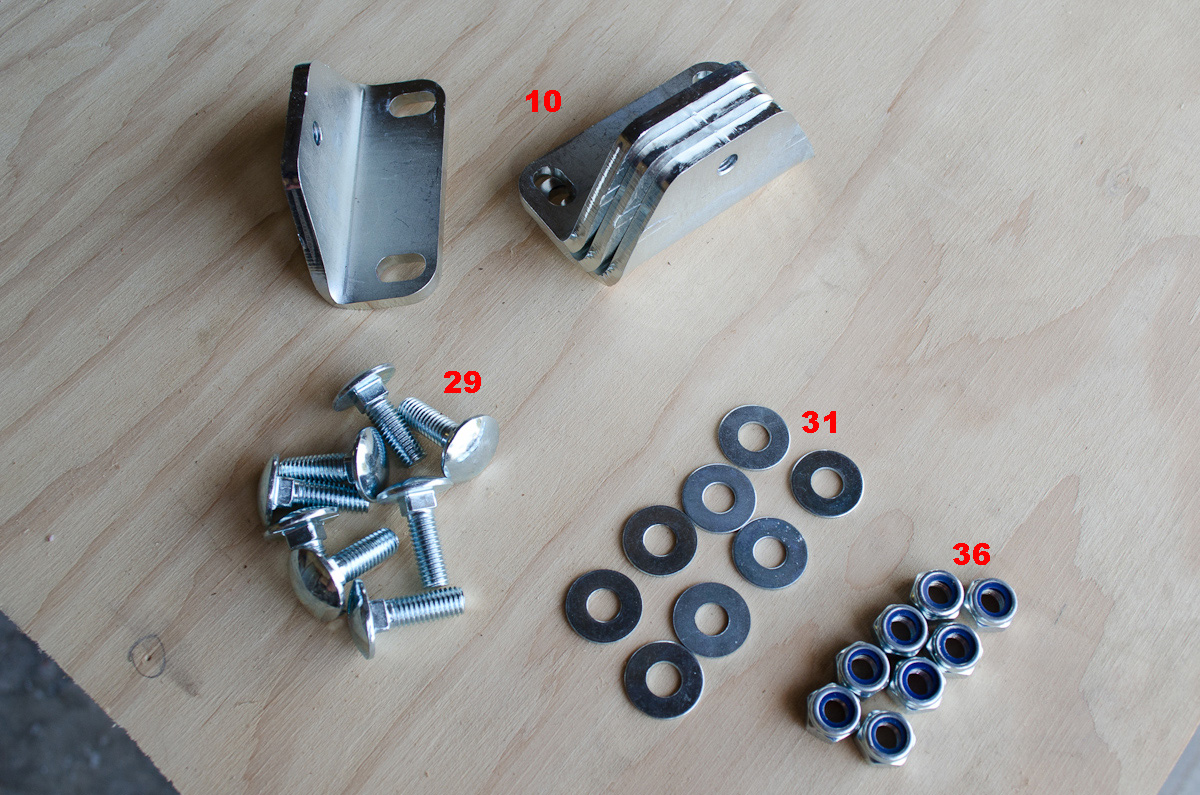 |
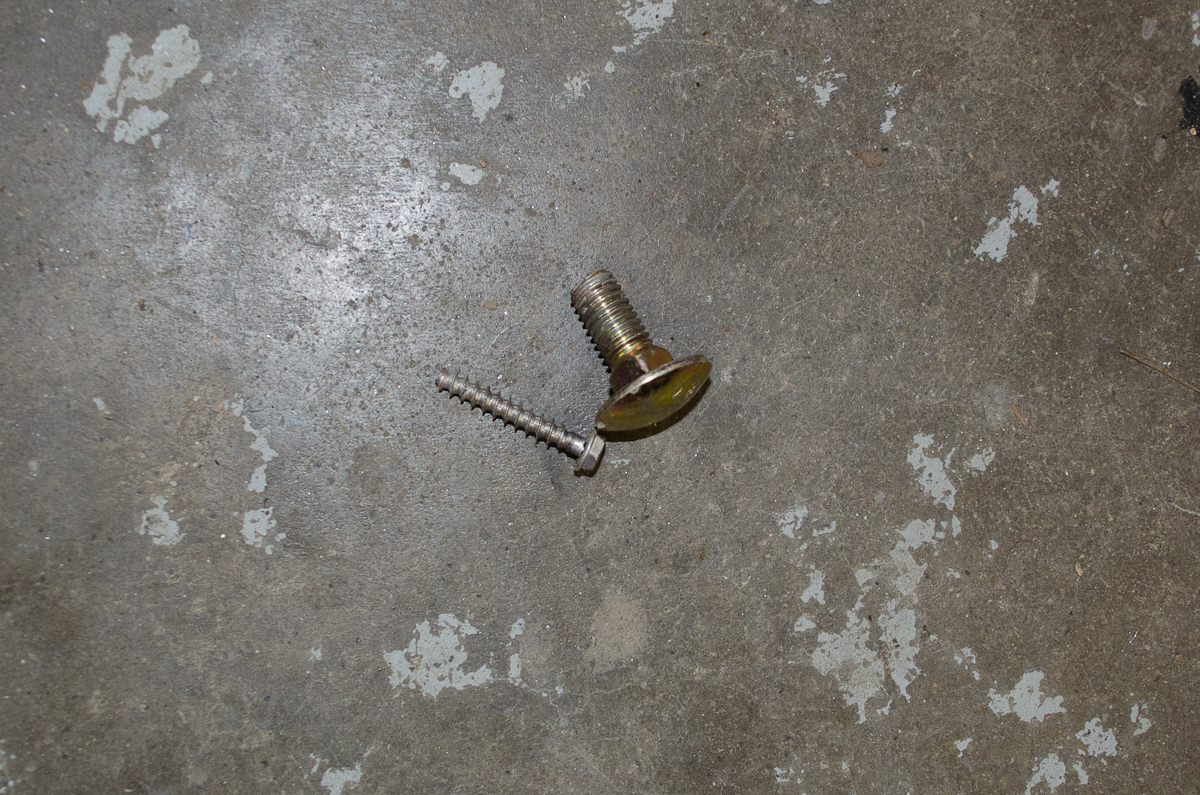
This is the hardware required for this step.
|
|||||||||||||||||||||||||||||||||
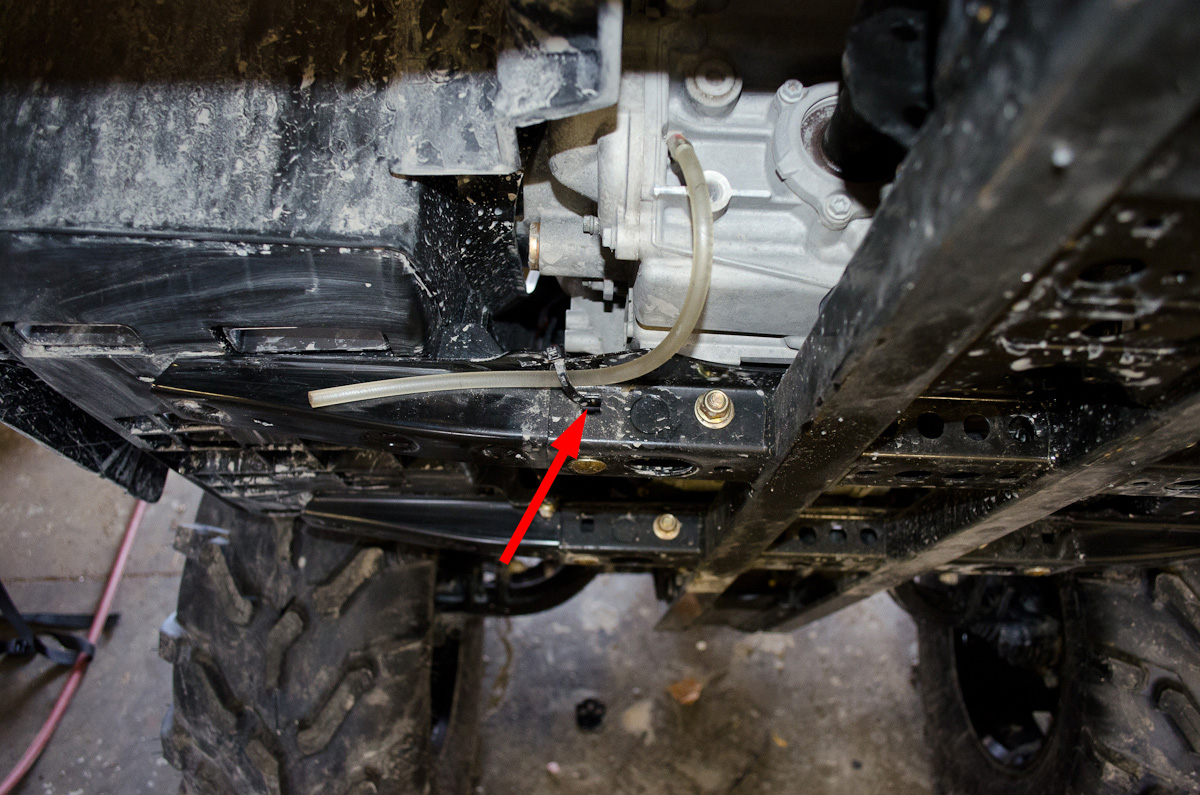 |
First, the water pump weep hose must be relocated, as we will be using the hole it is currently zip-tied to (red arrow). Cut the zip tie and and install a new ziptie in one of the other holes to the right (of the bike, towards the left in this pic). |
|||||||||||||||||||||||||||||||||
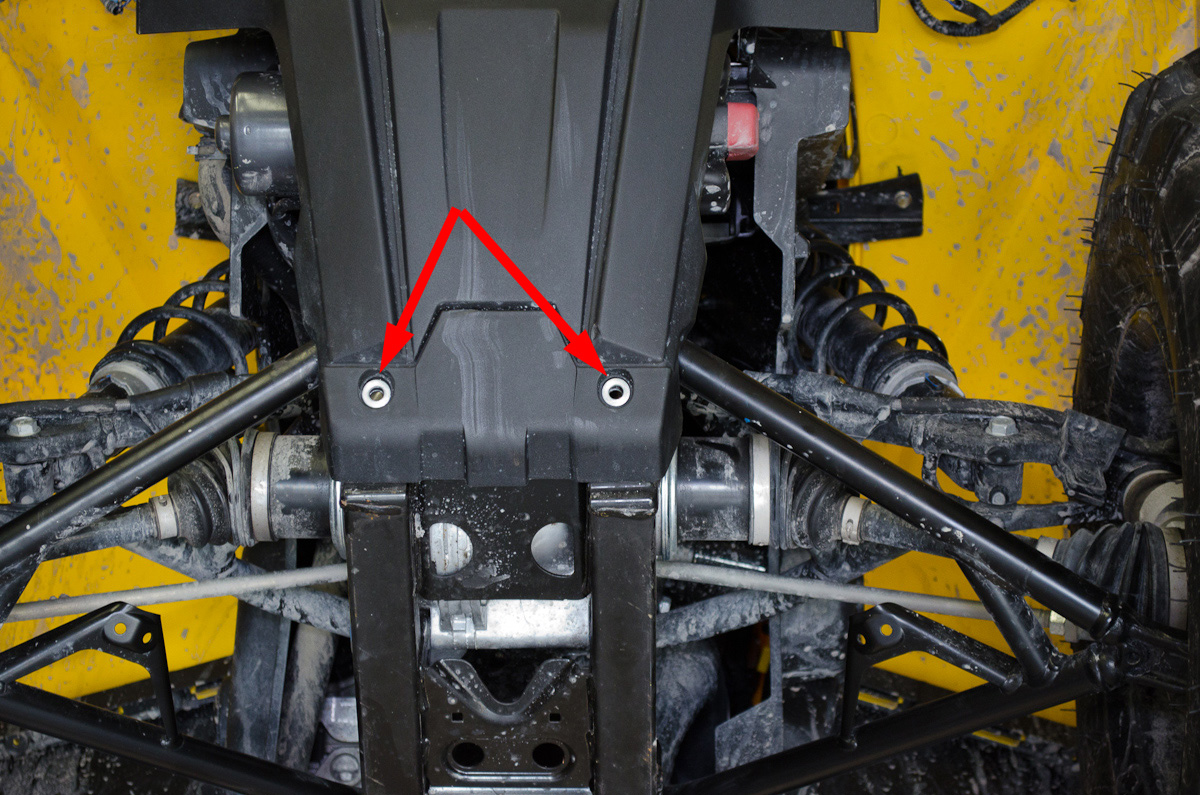
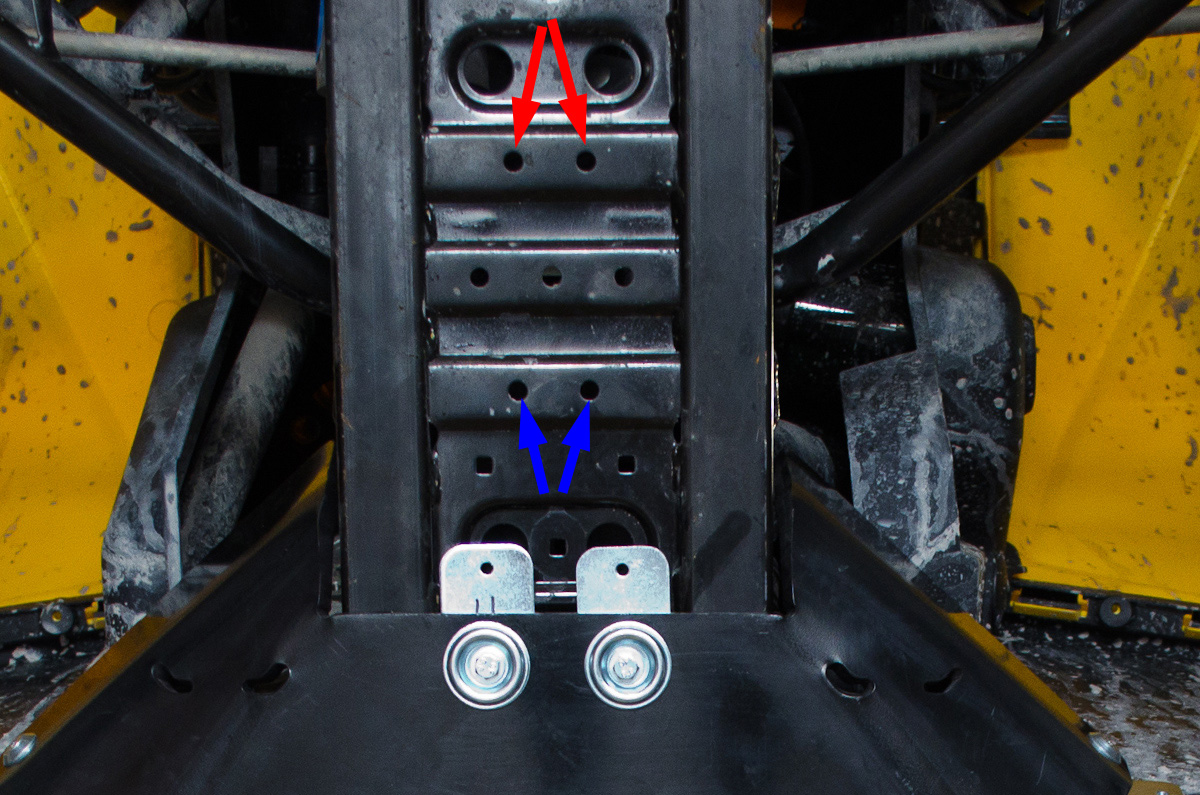
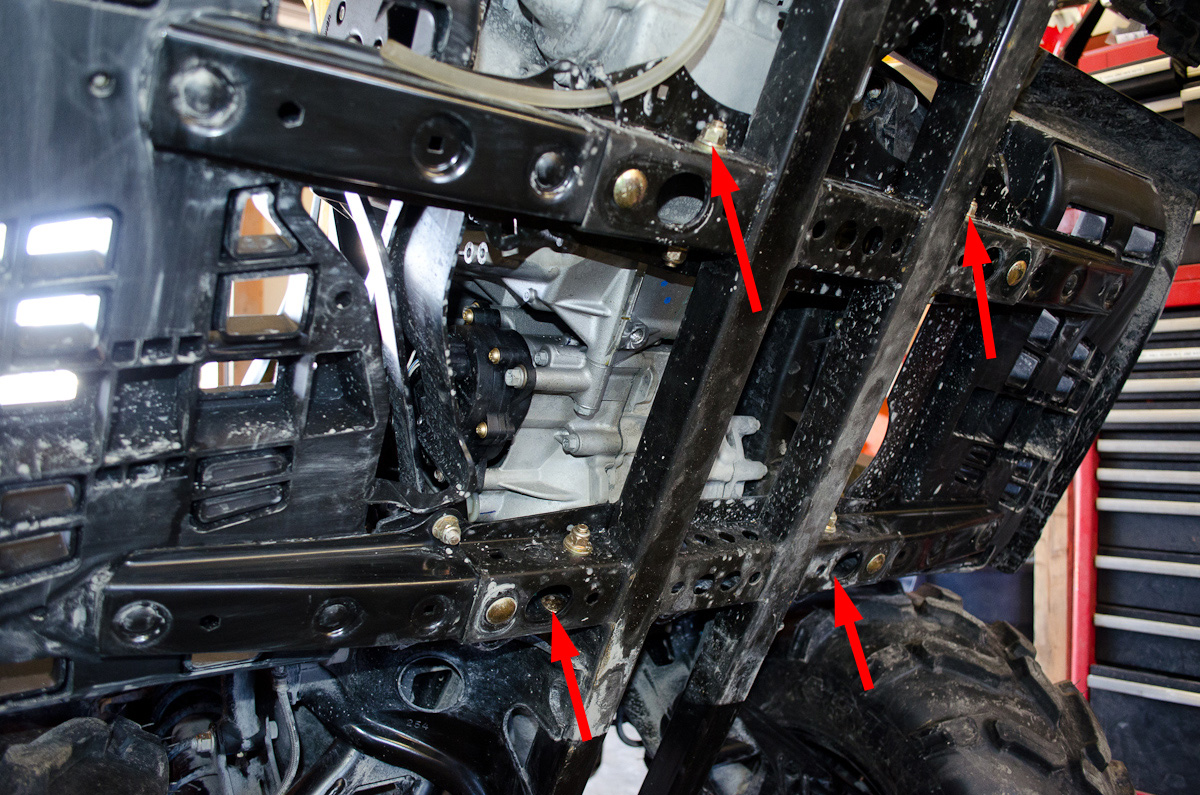 |
Next, remove the four stock carriage bolts indicated. Two point to the front of the bike, and two to the rear. Make sure, on the front cross-member, you remove the bolts that point forwards and on the rear cross-member you remove the bolts that point rearwards. |
|||||||||||||||||||||||||||||||||
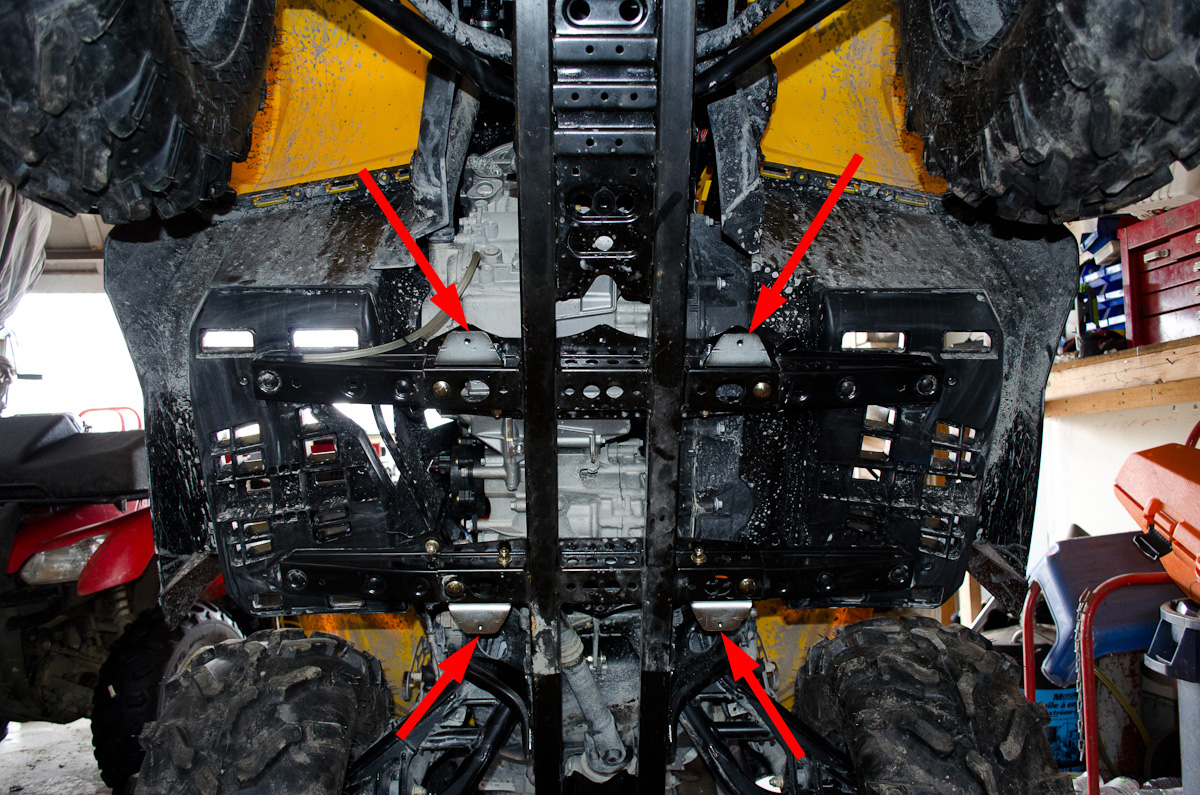 |
In each of the four locations, using the hole from which you just removed the stock bolt and it's neighbor, use parts 29, 31, and 36 to install a part #10 frame bracket. | |||||||||||||||||||||||||||||||||
 |
Make sure the bottom (underside) of the bracket is flush with the bottom of the cross-member. | |||||||||||||||||||||||||||||||||
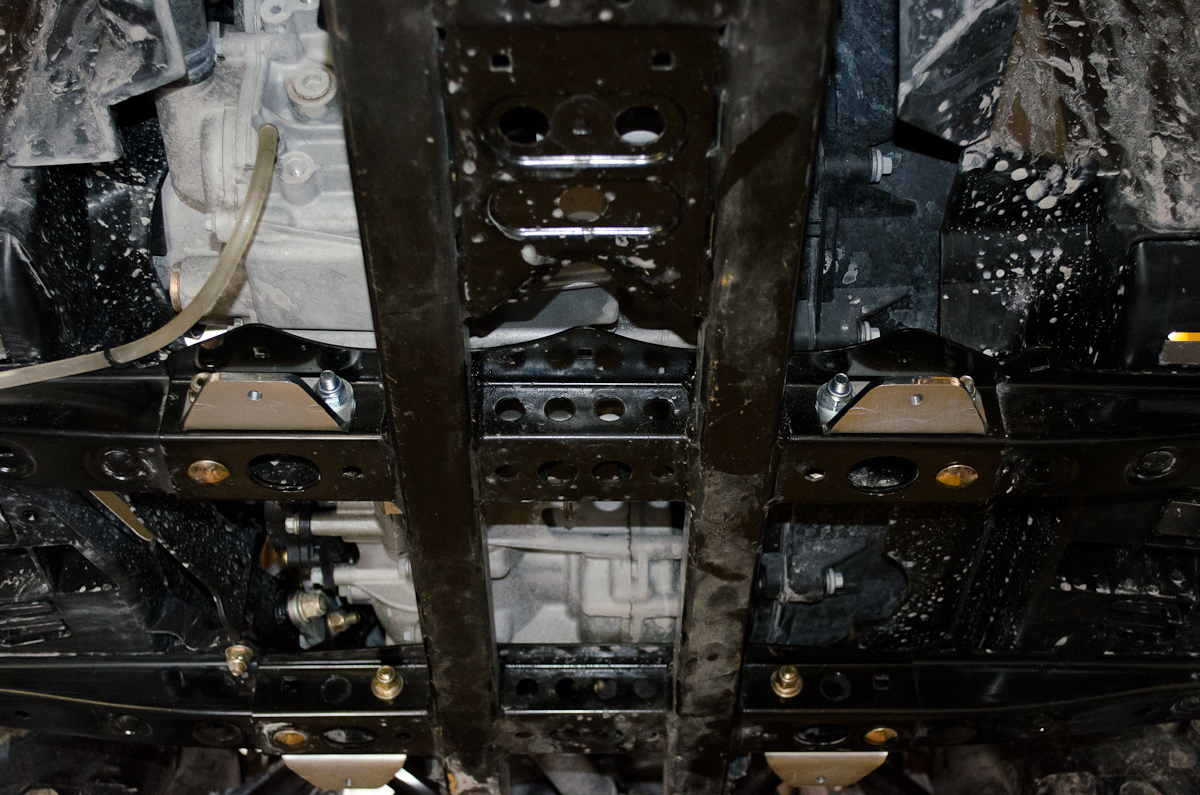 |
Front frame brackets installed. | |||||||||||||||||||||||||||||||||
 |
Rear frame brackets installed. | |||||||||||||||||||||||||||||||||
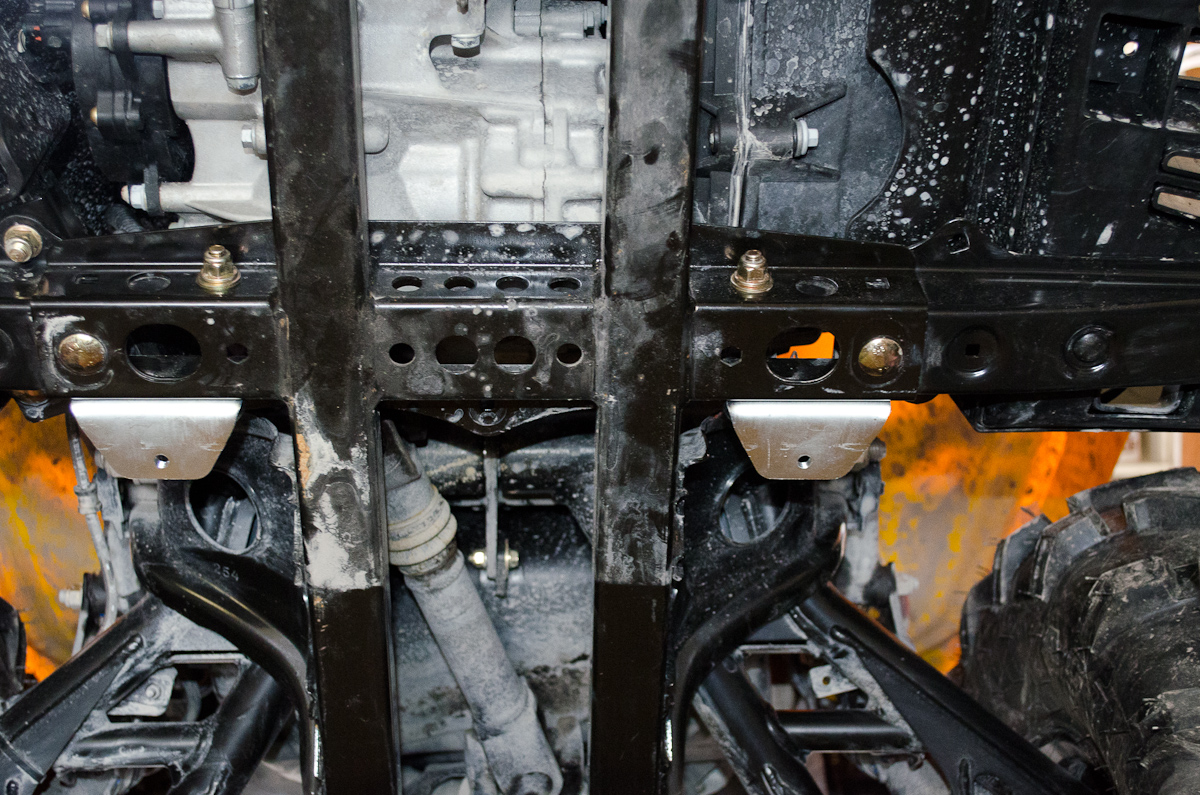
Part 5 - Installing Iron Baltic Centre Skidplate |
||||||||||||||||||||||||||||||||||
 |
Once the frame brackets are installed, the next step is to install the centre skidplate onto these brackets. | |||||||||||||||||||||||||||||||||
 |
This is the hardware required for this step.
|
|||||||||||||||||||||||||||||||||
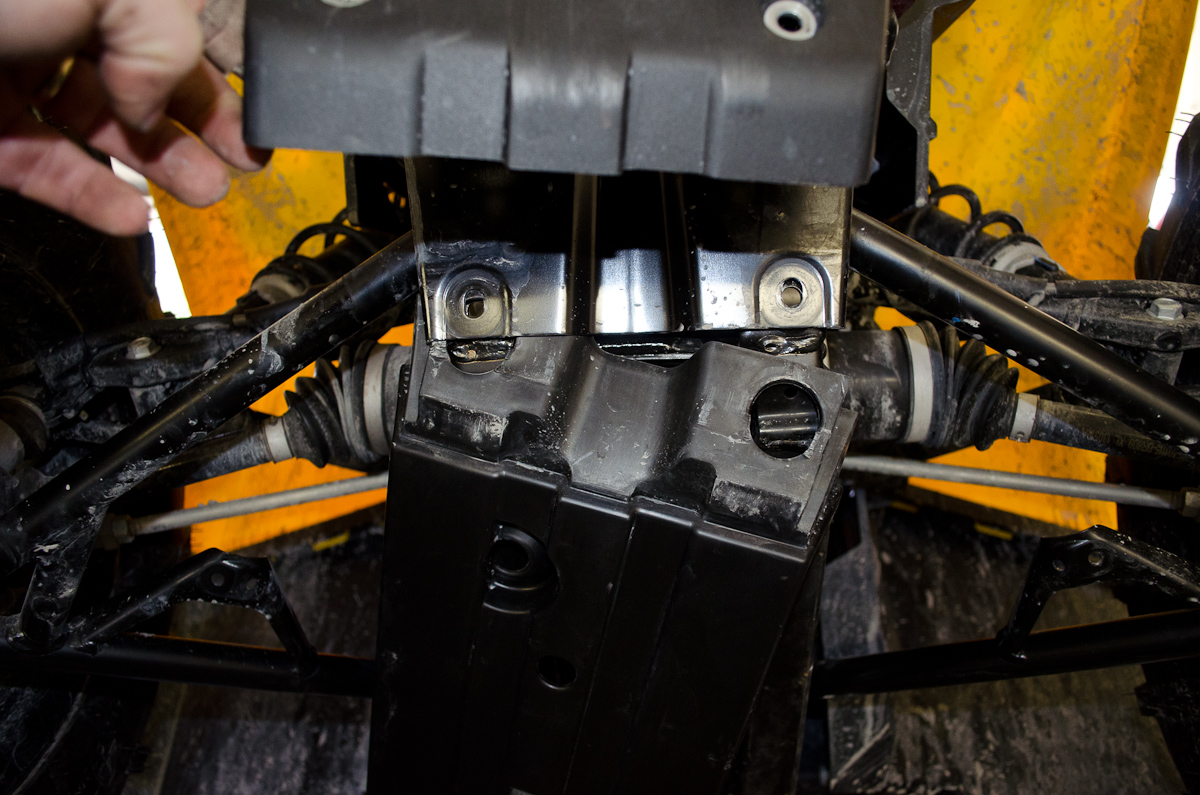
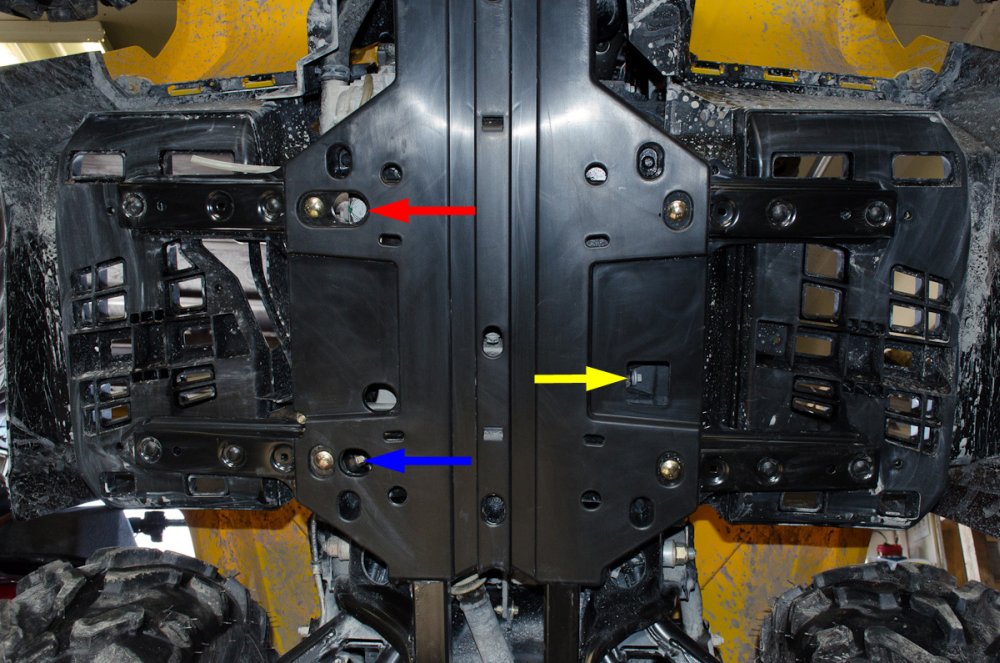 |
One thing I should note, there are 3 cutouts on the factory centre skidplate that are not present on the Iron Baltic centre skidplate. They are the engine oil drain cutout (red arrow), the gearbox oil drain cutout (blue arrow) and the CVT water drain cutout (yellow arrow). |
|||||||||||||||||||||||||||||||||
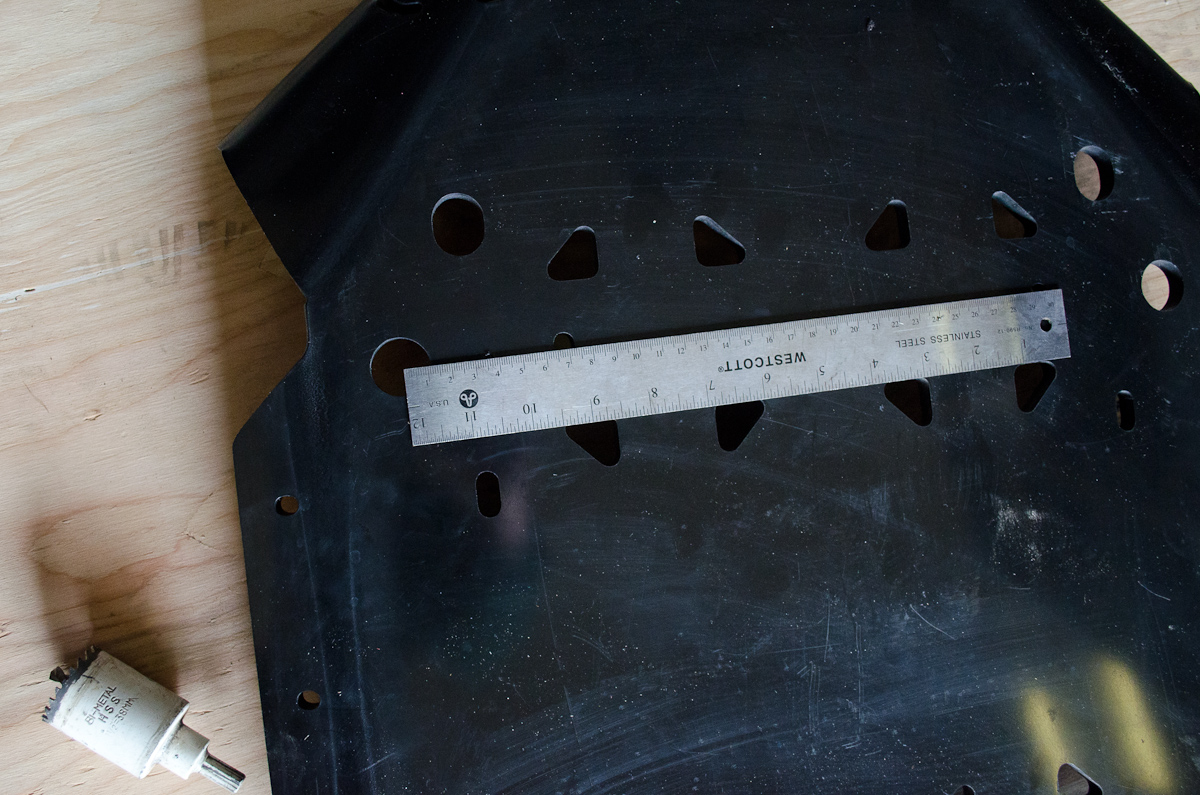 |
I only noticed the oil drain cutout during the install, and so will have to drill the other two next time I have the skidplates removed. But the oil drain cutout I made by marking a point 37mm from the centre of the large hole (where a carriage bolt head fits)... |
|||||||||||||||||||||||||||||||||
 |
and drilling there with a 1-1/2" hole saw.
|
|||||||||||||||||||||||||||||||||
 |
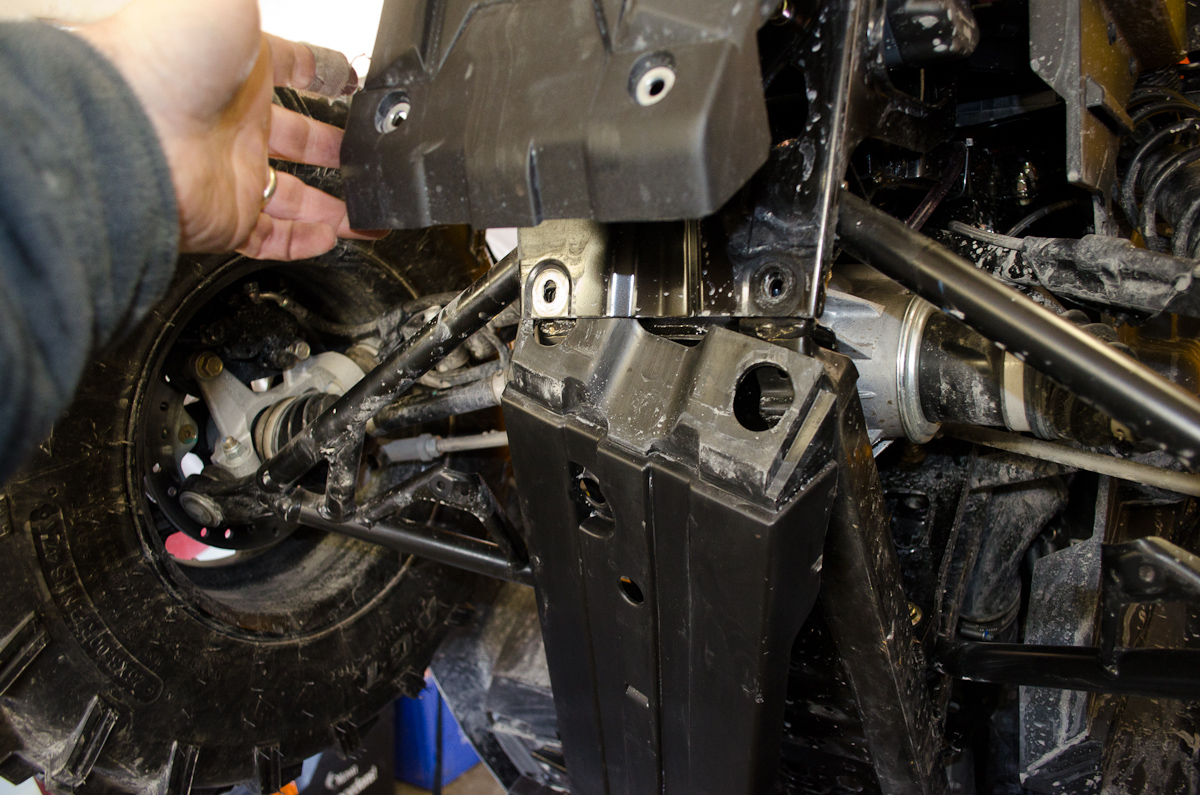
With that done, it's a simple matter of bolting the centre skidplate to the frame brackets with the 4 bolts and dished washers. | |||||||||||||||||||||||||||||||||
| The next step is to add all the tabs and brackets to the centre skidplate that will be used to attach the other skidplates. | ||||||||||||||||||||||||||||||||||
 |
This is the hardware required for this step.
|
|||||||||||||||||||||||||||||||||
 |
||||||||||||||||||||||||||||||||||
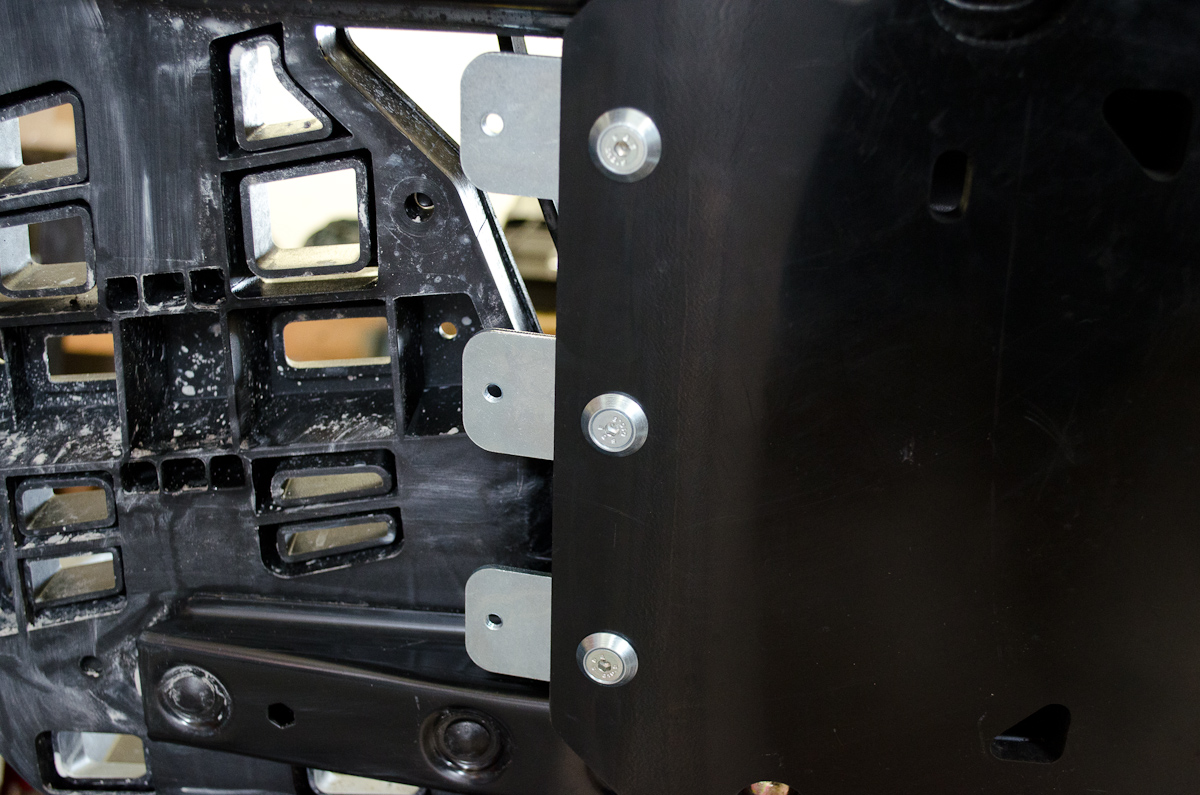
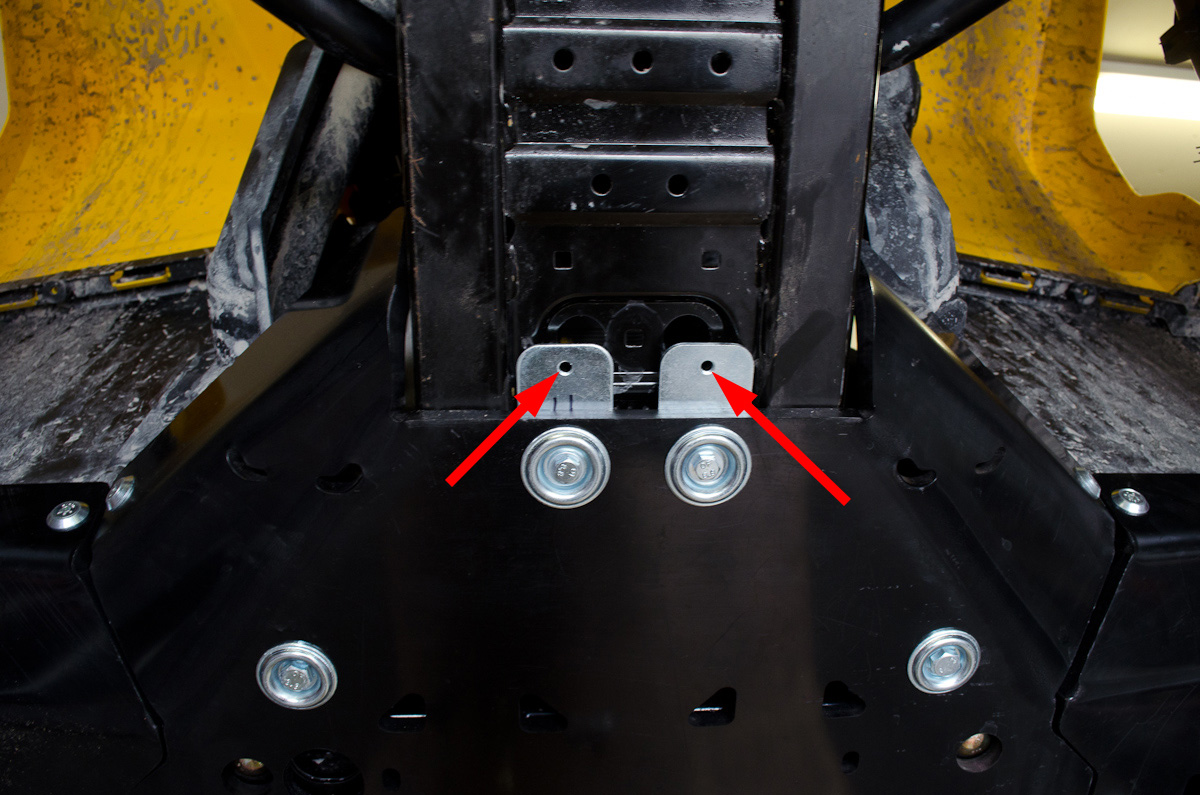
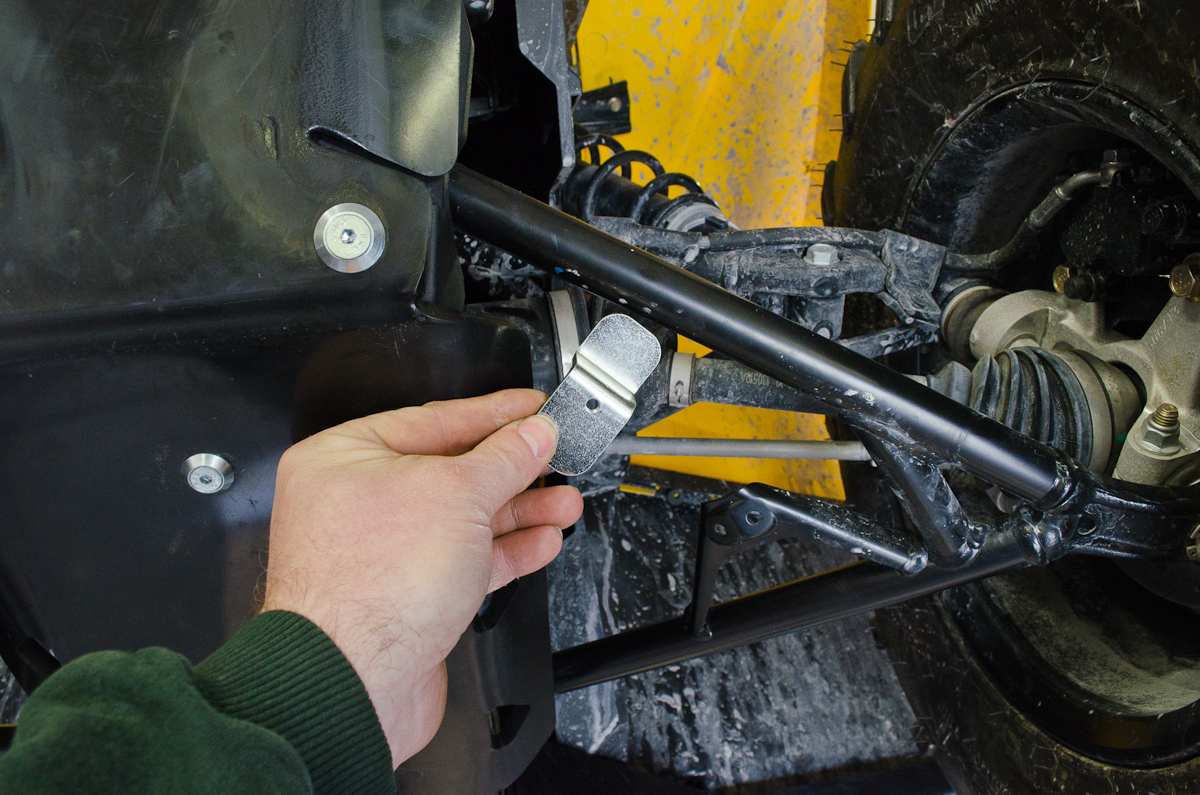
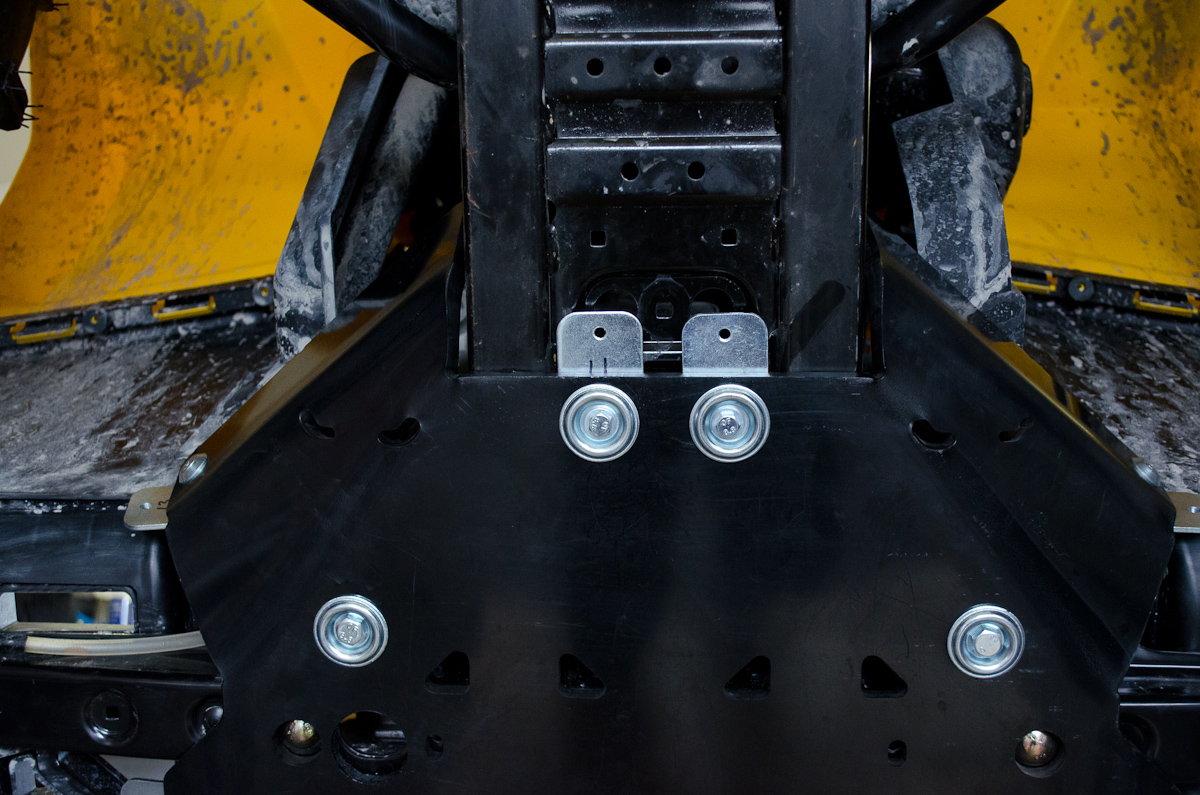 |
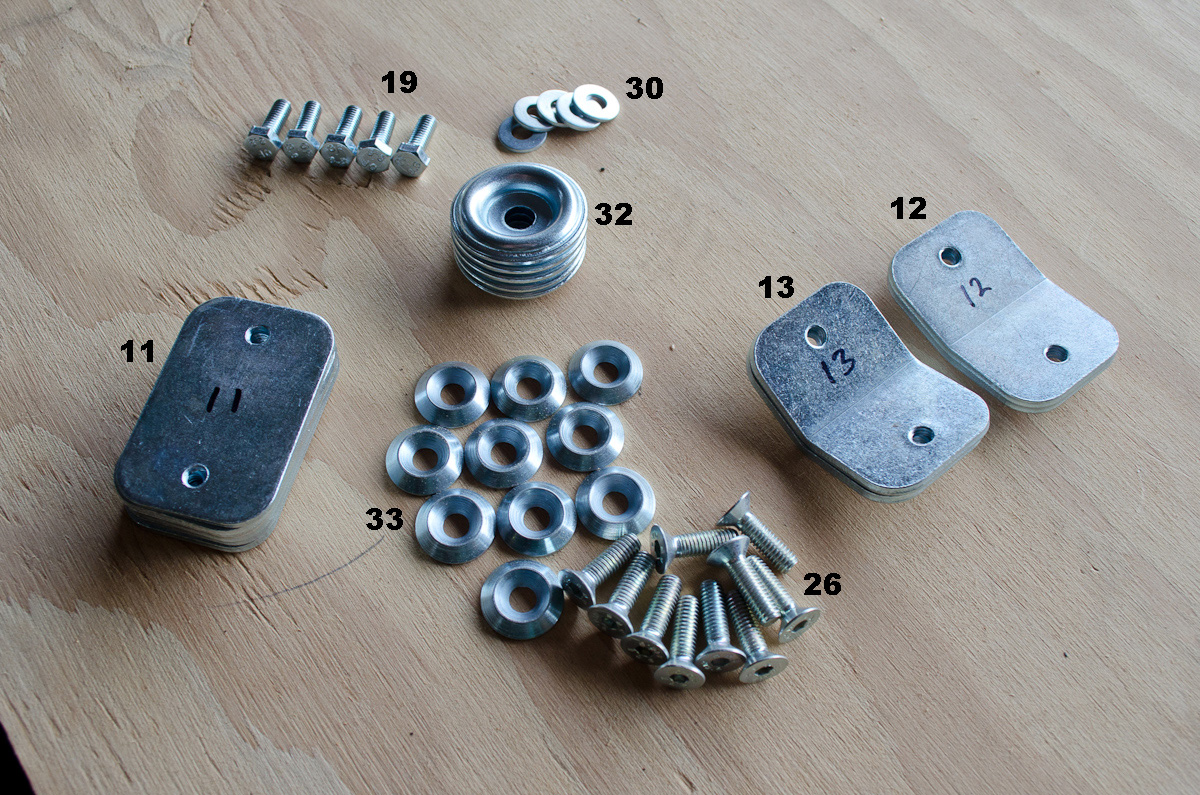
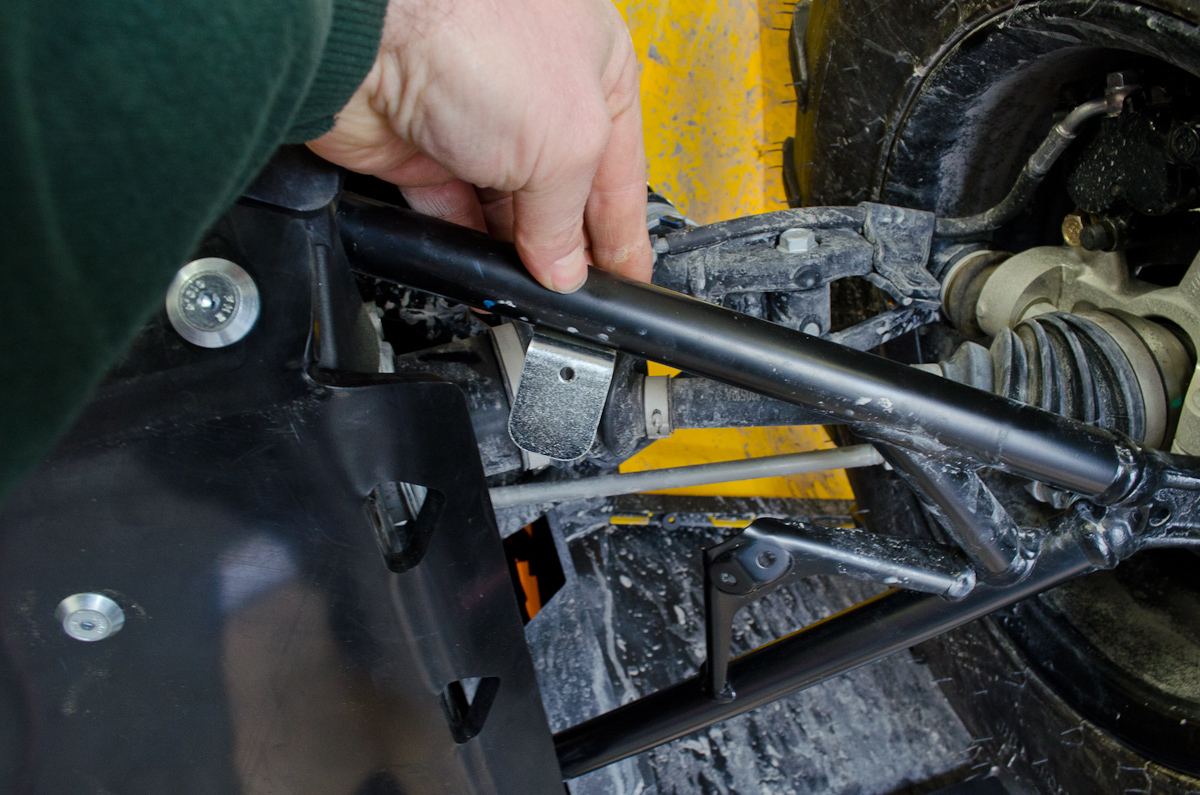
Start by installing two #11 flat tabs at the front of the skidplate using two #32 dished washers and two #19 M6 bolts. | |||||||||||||||||||||||||||||||||
 |
Then install three more #11 flat tabs at the back of the skidplate using #32 dished washers and #19 M6 bolts. | |||||||||||||||||||||||||||||||||
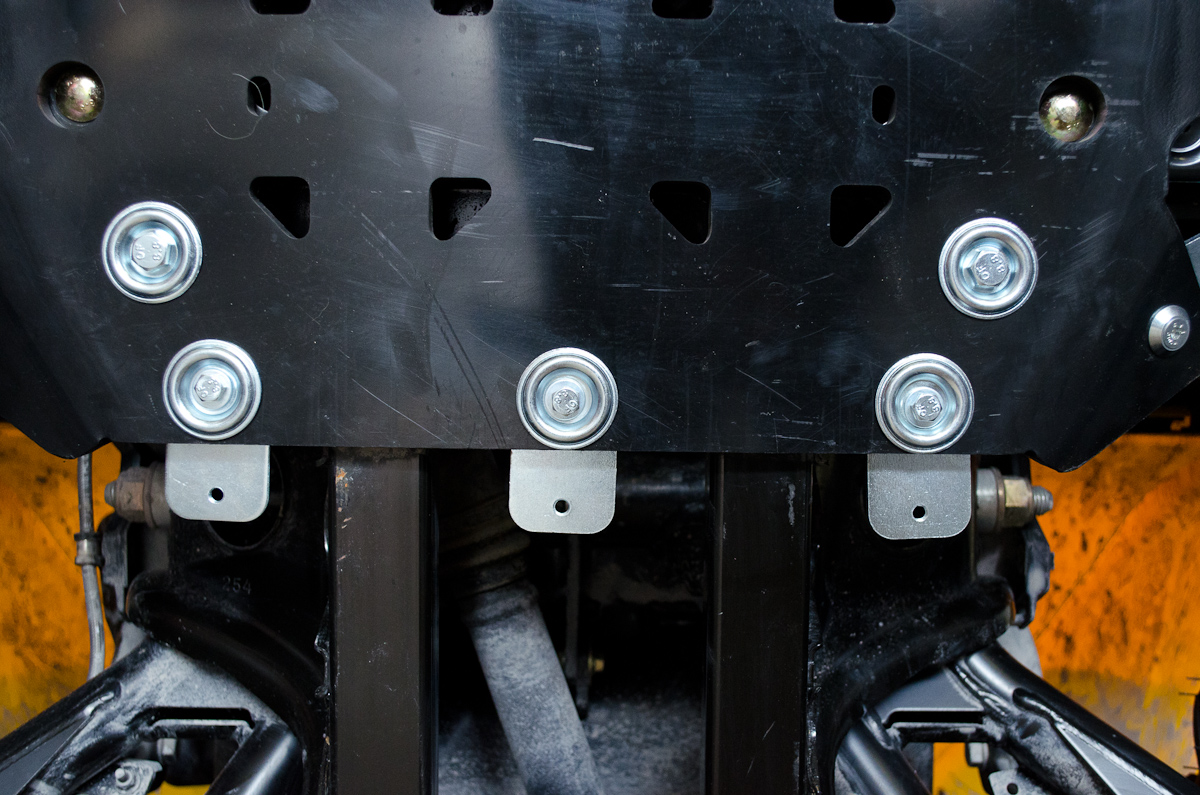
 |
Next, install three more #11 flat tabs on the left side of the skidplate using three #26 bolts and three #33 conical washers. | |||||||||||||||||||||||||||||||||
 |
Do the same on the right side. | |||||||||||||||||||||||||||||||||
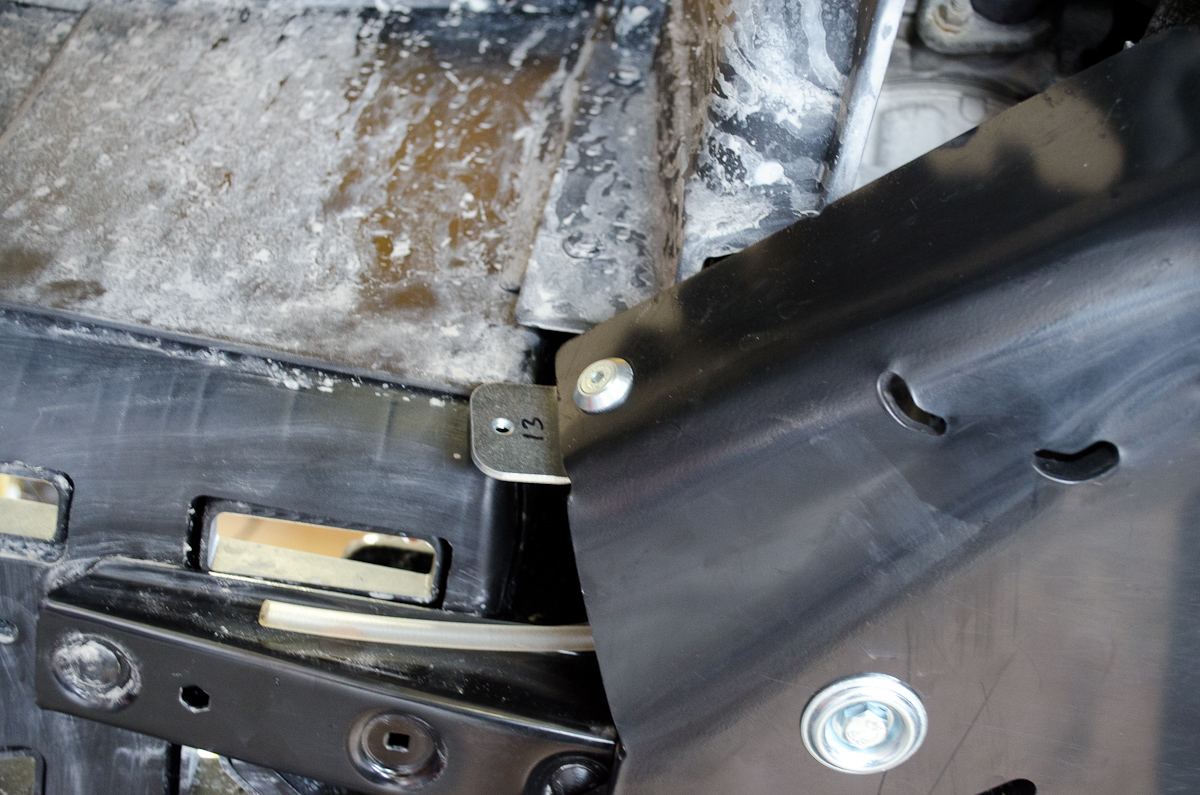 |
Then move to the top right corner and install a #13 40° Angled Tab using a #26 bolt and a #33 conical washer. | |||||||||||||||||||||||||||||||||
 |
Do the same on the front left corner. | |||||||||||||||||||||||||||||||||
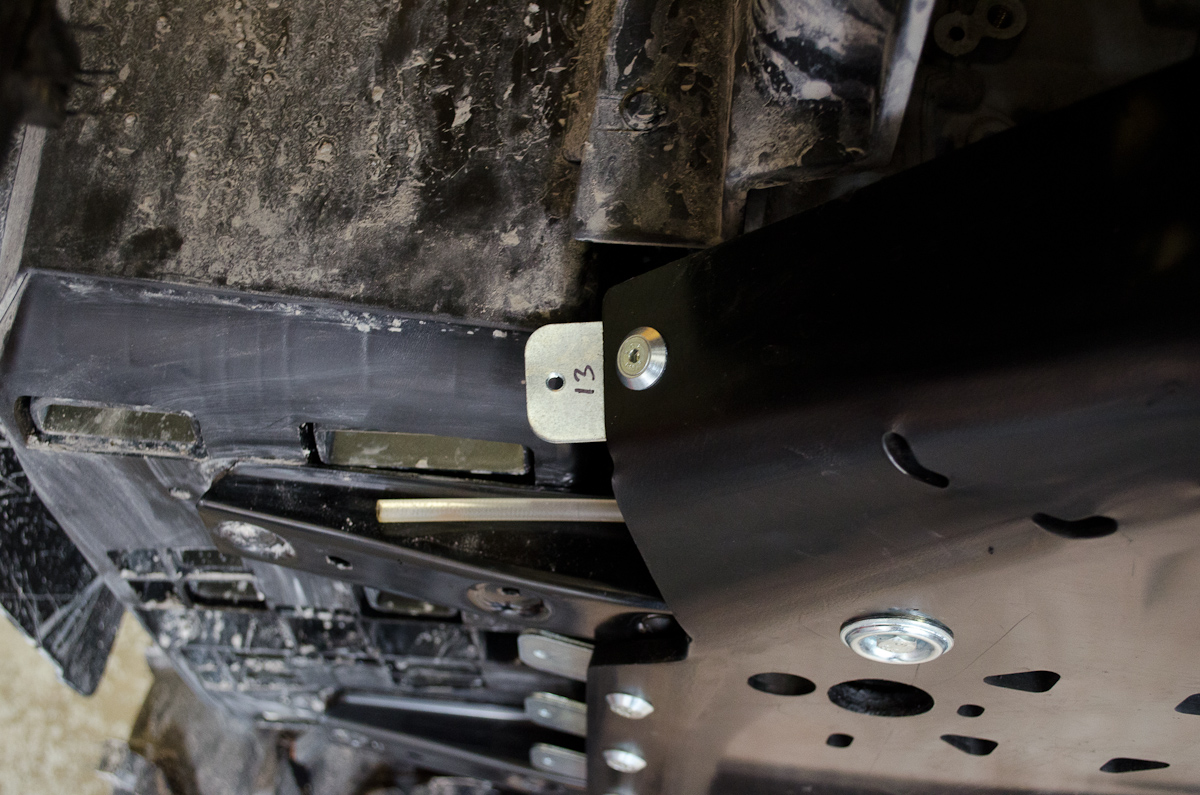 |
#13 Angled Tab installed (front right). | |||||||||||||||||||||||||||||||||
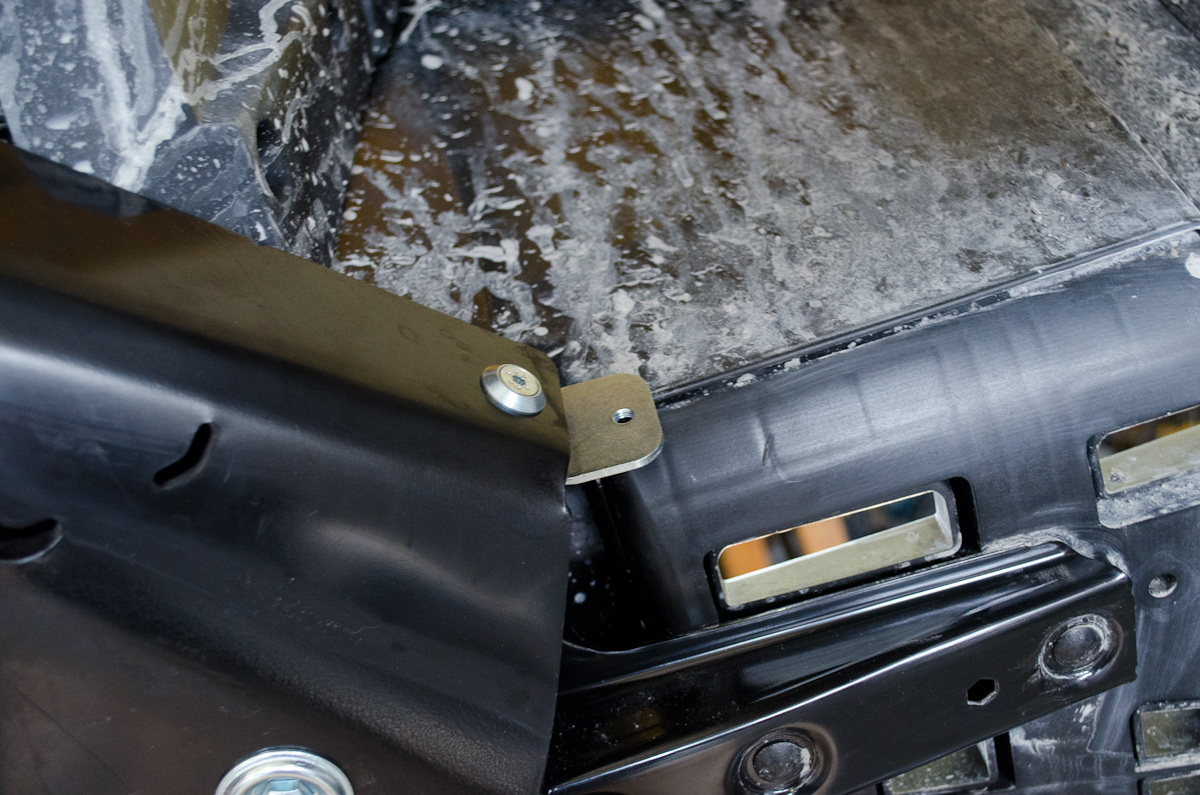
 |
Then move to the rear right corner of the centre skidplate and install a #12 20° Angled Tab using a #26 bolt and a #33 conical washer. Do the same on the other side. |
|||||||||||||||||||||||||||||||||
 |
#12 Angled Tab installed (rear right). | |||||||||||||||||||||||||||||||||
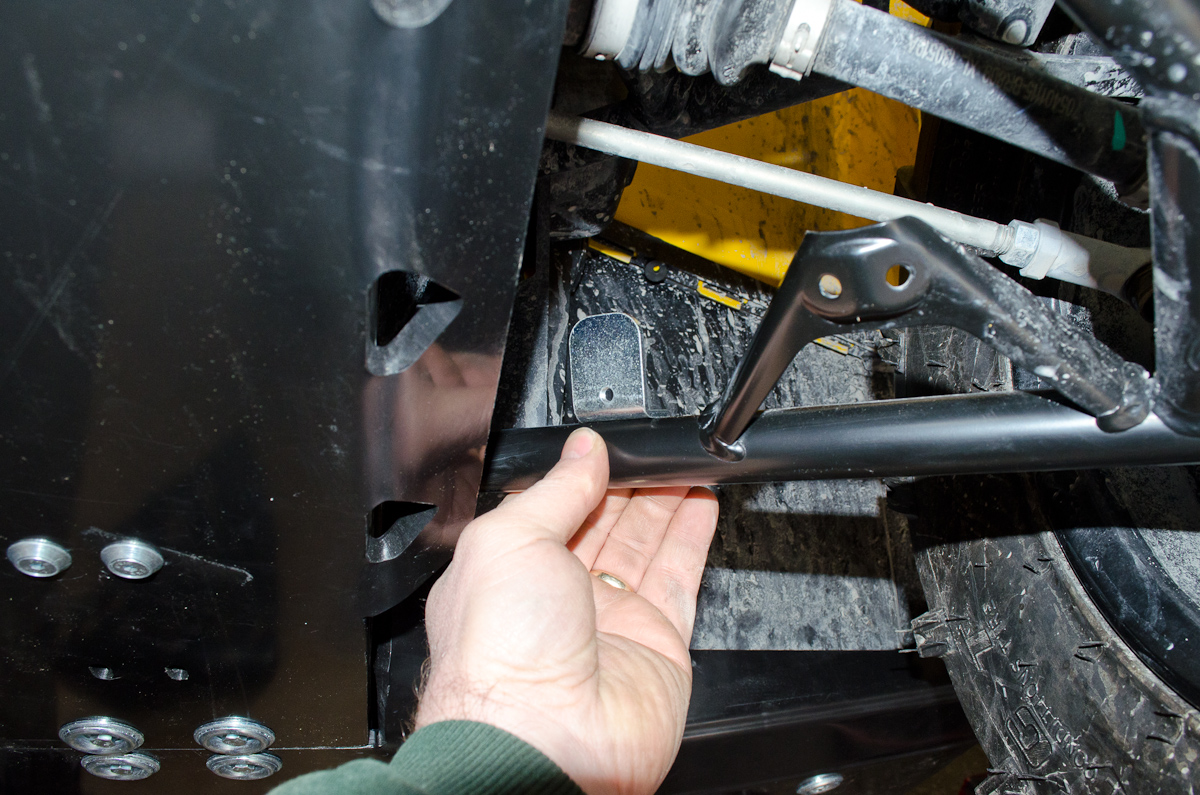
 |
When you're done you should look like this. | |||||||||||||||||||||||||||||||||
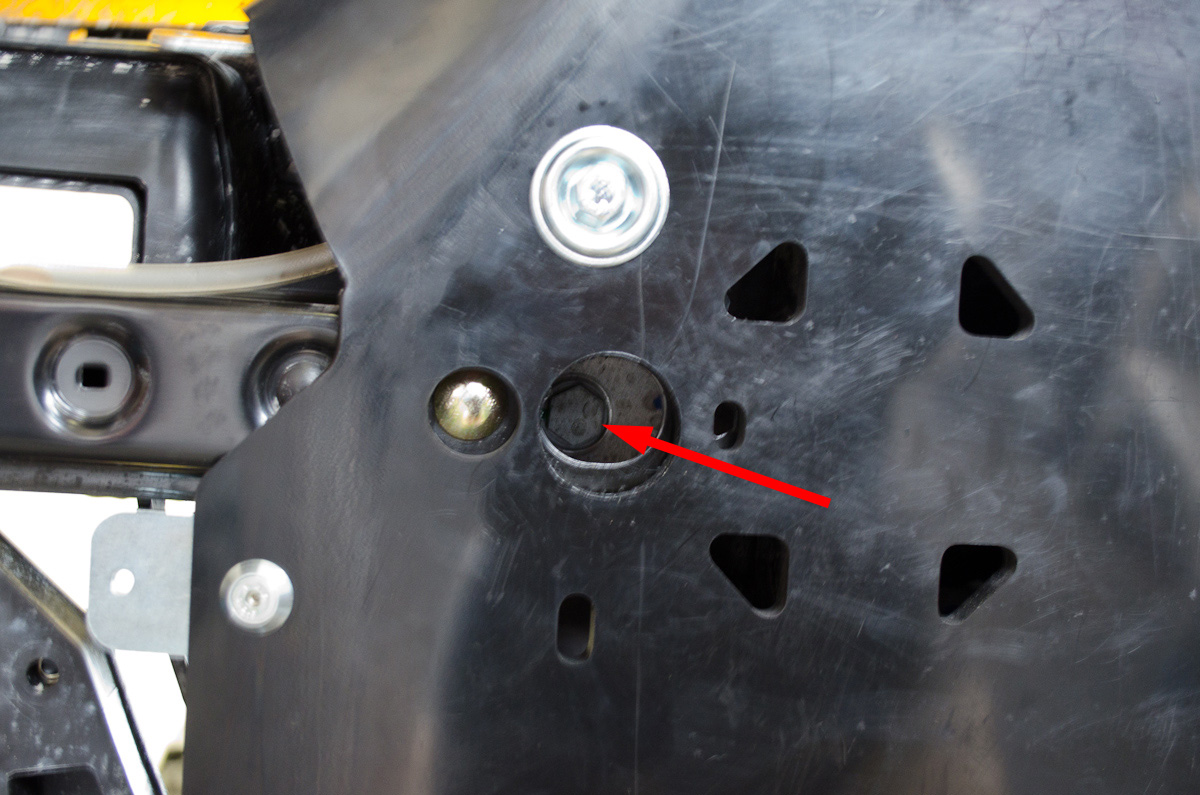 |
And if you drill the hole carefully, you will be able to access the oil drain plug without removing the skidplates. | |||||||||||||||||||||||||||||||||
Part 6 - Installing Iron Baltic Footwell SkidplatesNext to be installed are the footwell skidplates. |
||||||||||||||||||||||||||||||||||
 |
This is the hardware required to bolt the footwell skidplates to the flat and angled tabs just installed on the centre skidplate
|
|||||||||||||||||||||||||||||||||
 |
And this is the hardware required to bolt the footwell skidplates to the stock footwells.
|
|||||||||||||||||||||||||||||||||
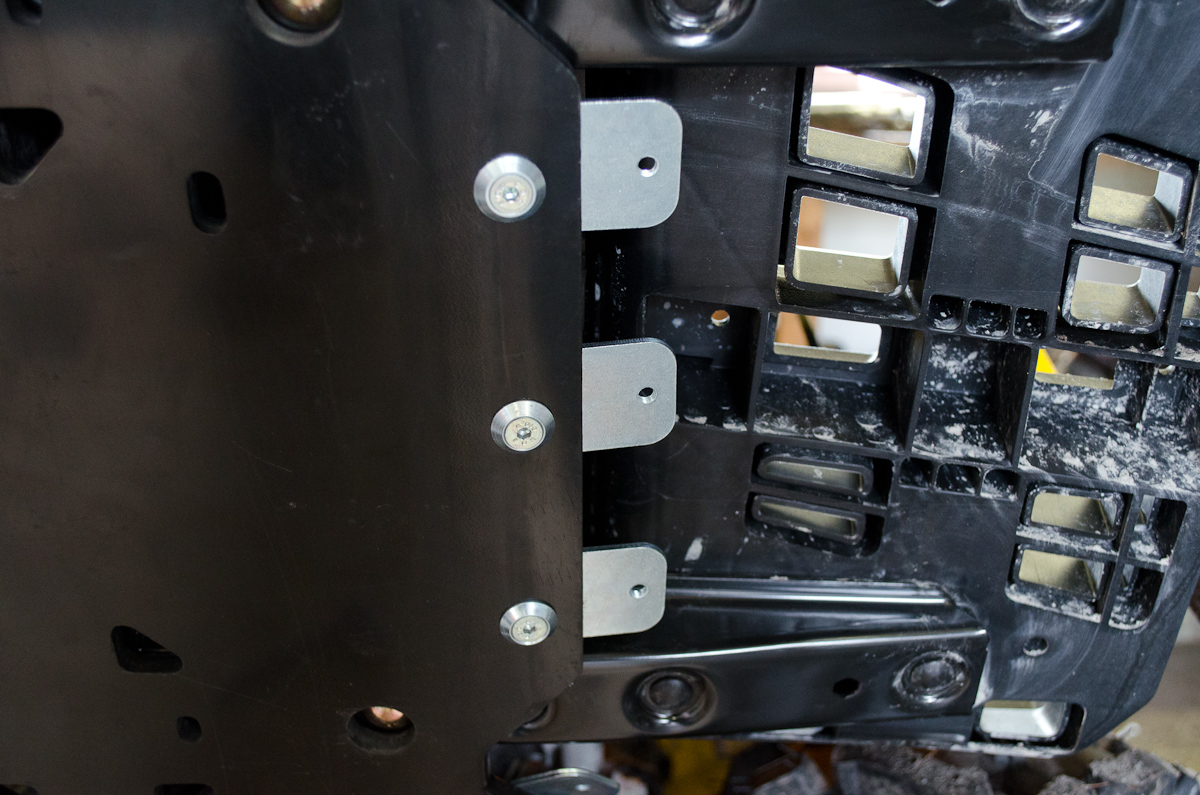
 |
Start by holding the skidplate in place and using three #26 bolts and three #33 conical washers to attach it to the flat tabs on the side of the centre skidplate. | |||||||||||||||||||||||||||||||||
 |
Use another #26 bolt and a #33 conical washer to attach it to the front angled bracket (#13). | |||||||||||||||||||||||||||||||||
 |
Use another #26 bolt and a #33 conical washer to attach it to the rear angled bracket (#12). | |||||||||||||||||||||||||||||||||
 |
Repeat on the other side. | |||||||||||||||||||||||||||||||||
 |
Finally, use two #23 bolts, two #30 washers, and two #32 dished washers per side, and tighten the bolts up through the threaded inserts in the footwells. | |||||||||||||||||||||||||||||||||
 |
Finish by installing a #35 Nyloc nut on each bolt installed in the previous step, on the other side of the footwell. | |||||||||||||||||||||||||||||||||
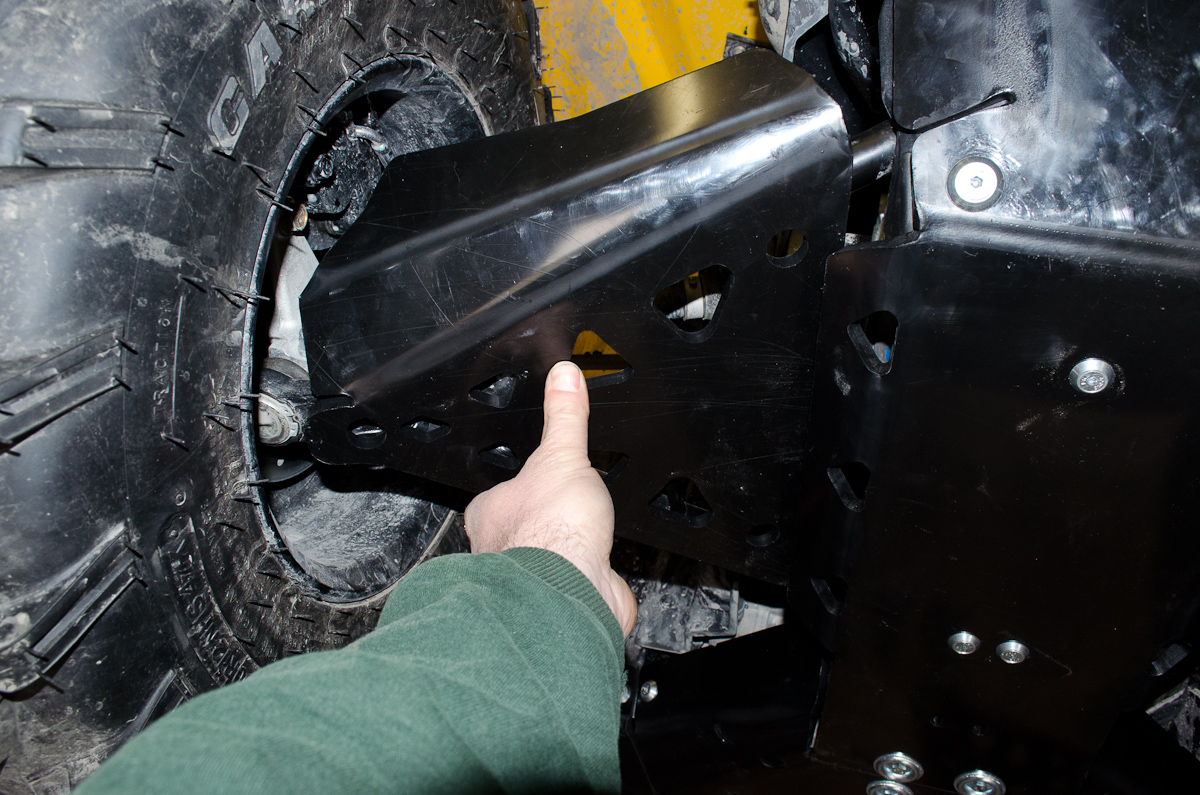
 |
Centre and footwell skidplates installed. | |||||||||||||||||||||||||||||||||
Part 7 - Installing Iron Baltic Front SkidplateThe next piece to be installed is the front skidplate. |
||||||||||||||||||||||||||||||||||
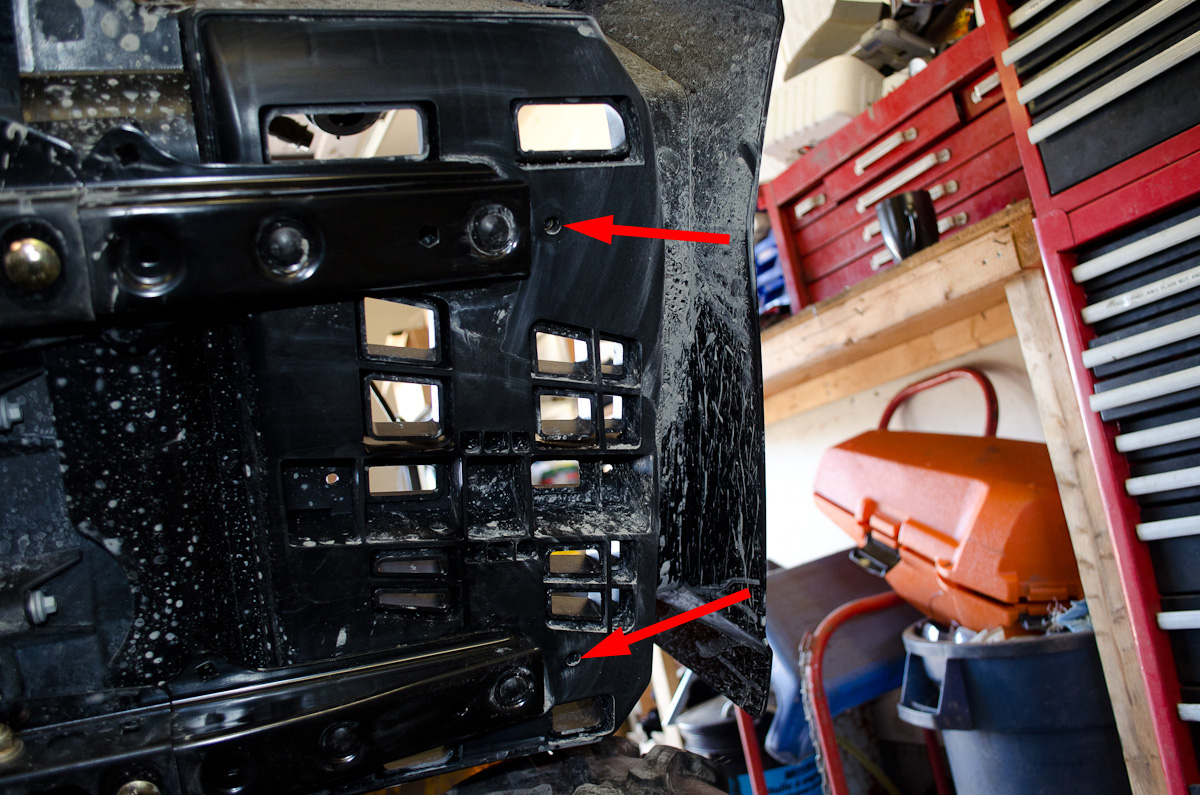
 |
First, attach the aluminum reinforcing bracket (part #14) to the inside of the front skidplate using:
|
|||||||||||||||||||||||||||||||||
 |
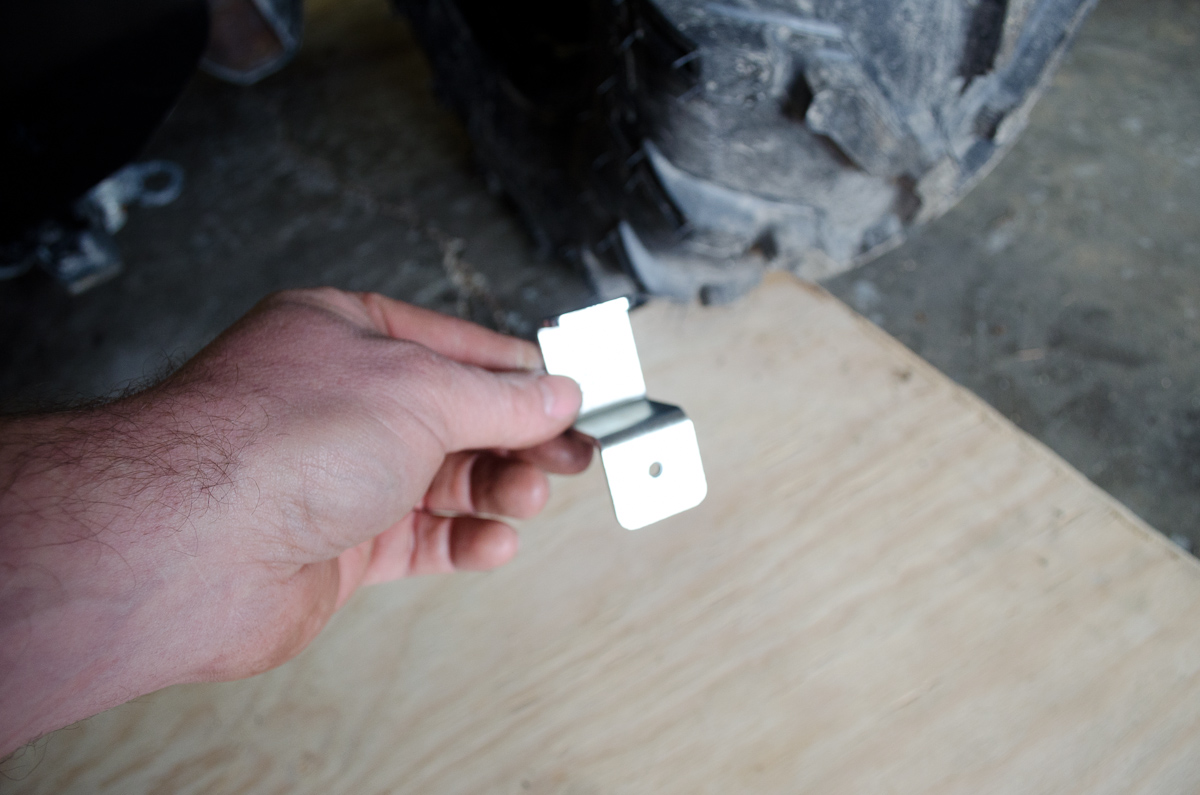
Aluminum reinforcing bracket installed on front skidplate - inside view. | |||||||||||||||||||||||||||||||||
 |
Aluminum reinforcing bracket installed on front skidplate - outside view. | |||||||||||||||||||||||||||||||||
 |
This is the hardware required for the rest of the front skidplate install:
|
|||||||||||||||||||||||||||||||||
 |
First the stock bushings in the front bashplate must be removed and replaced with the Iron Baltic bushings (part #15). | |||||||||||||||||||||||||||||||||
 |
I used a small flat-bladed screwdriver to lever out the old bushings and then pressed the replacements in by hand. | |||||||||||||||||||||||||||||||||
 |
Starting from the bottom, use two #19 bolts, two #30 washers, and two #32 dished washers to bolt the front skidplate to the two tabs at the top of the centre skidplate. | |||||||||||||||||||||||||||||||||
 |
Working our way up, the next set of hardware (two #27 bolts, two #30 washers, two #33 conical washers, and two #35 nuts) can be installed in either of the two sets of holes indicated by the arrows. I chose to use the location indicated by the red arrows as I felt the spacing was better here, but more importantly because it was much easier to get the nut on the back side in this location. |
|||||||||||||||||||||||||||||||||
 |
Insert the #28 bolts with #34 conical washers through the front skidplate, new bushings, stock bashplate, and frame, and secure with the #36 Nyloc nuts on the inside of the frame. | |||||||||||||||||||||||||||||||||
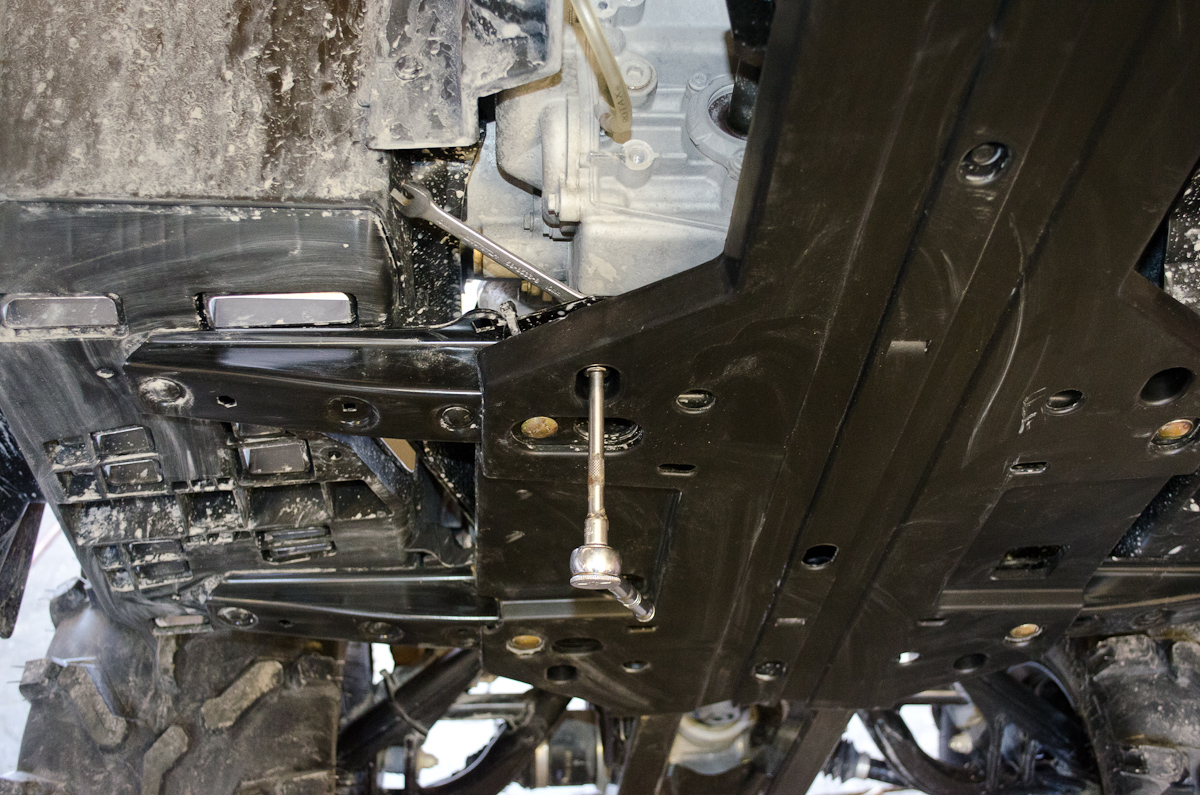
|
Finally, thread the winch cable through the cutout in the Iron Baltic front skidplate and then re-install the winch fairlead using the factory hardware. | |||||||||||||||||||||||||||||||||
|
Re-install the winch hook on the winch cable and insert a new cotter pin. |
|||||||||||||||||||||||||||||||||
 |
Centre, footwell, and front skidplates installed | |||||||||||||||||||||||||||||||||
Part 8 - Installing Iron Baltic Rear SkidplateNext up is the rear skidplate. |
||||||||||||||||||||||||||||||||||
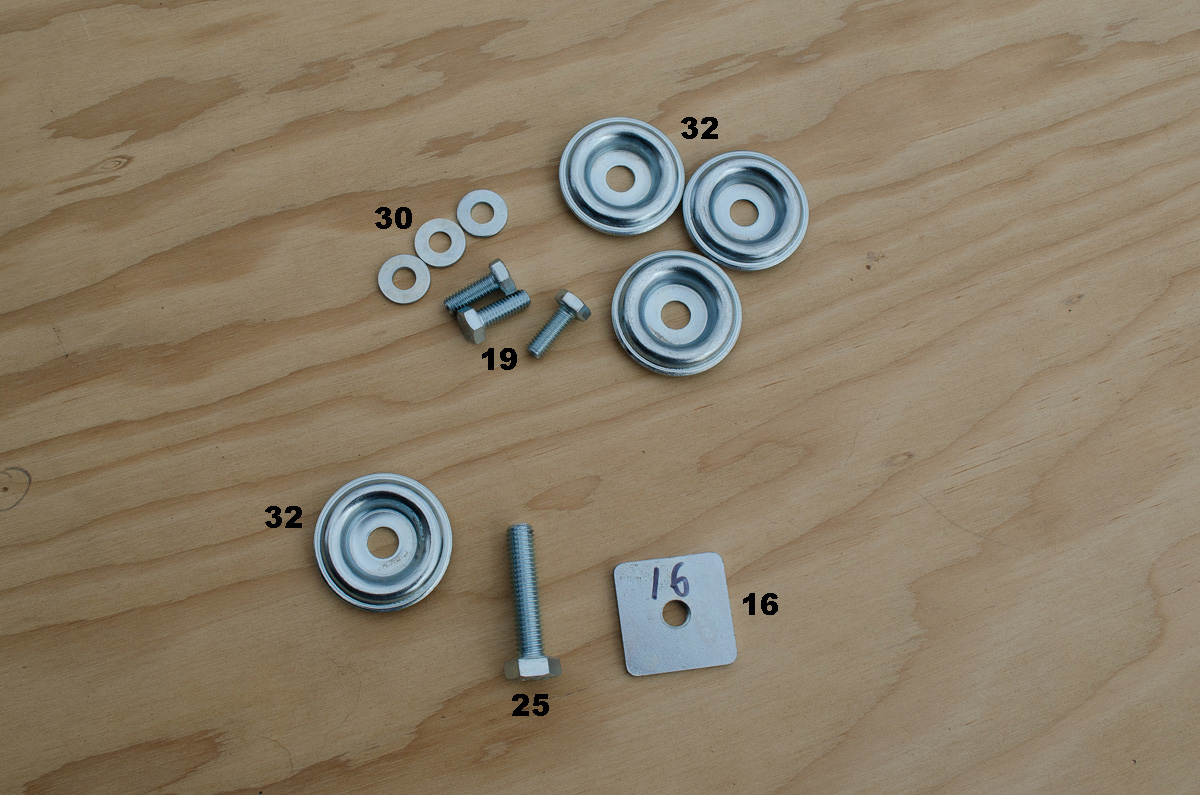 |
This is the hardware required for the rear skidplate install:
|
|||||||||||||||||||||||||||||||||
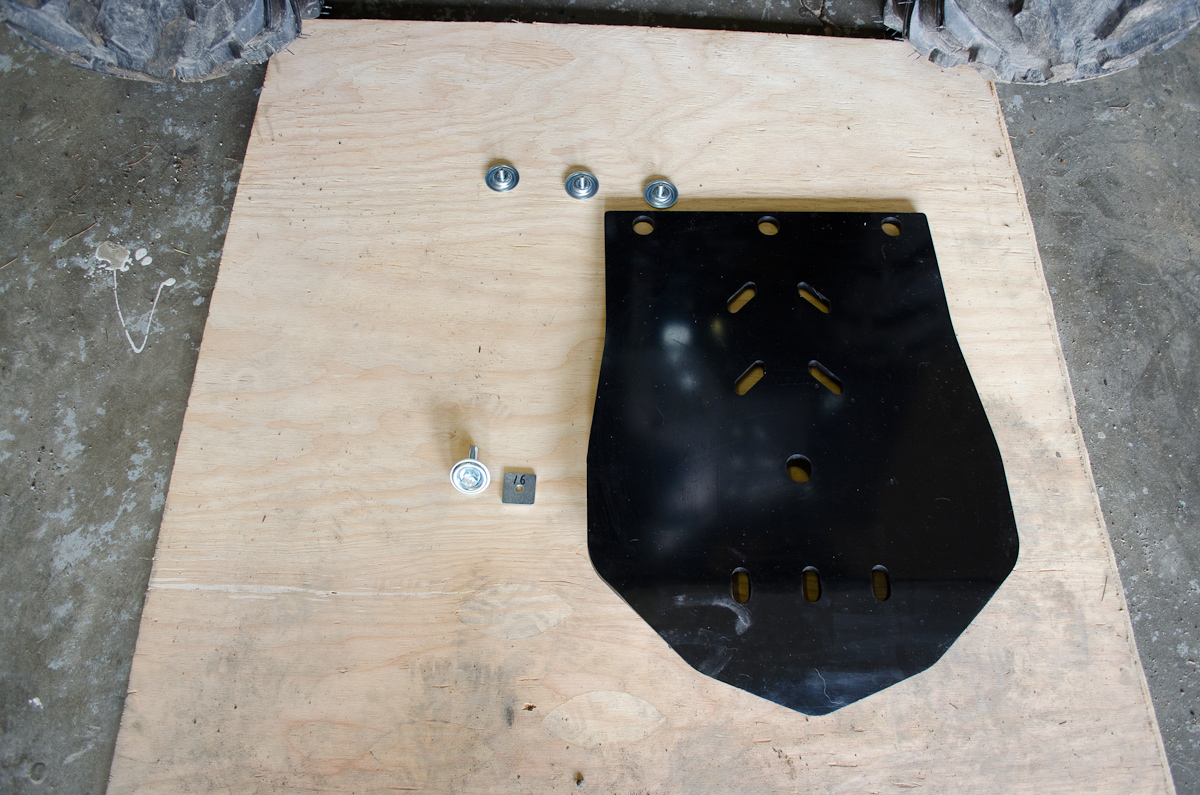 |
Rear skidplate laid out ready for install. | |||||||||||||||||||||||||||||||||
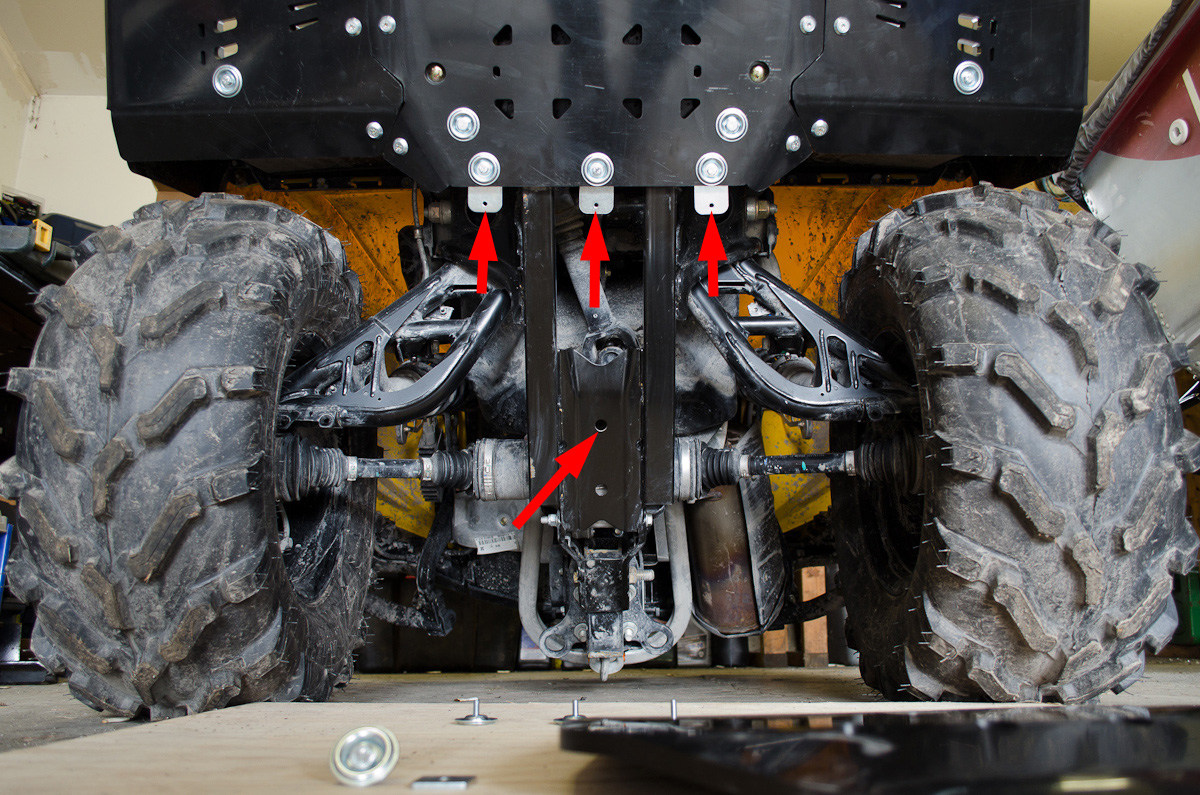 |
Use three #19 bolts, three #30 washers, and three #32 dished washers to bolt the skidplate to the flat tabs on the centre skidplate (top row of red arrows in the pic). Use the #25 bolt, a #32 dished washer and the #16 plate (acts like a nut) to bolt the skidplate through the hole in the frame indicated by the lower red arrow in the pic. |
|||||||||||||||||||||||||||||||||
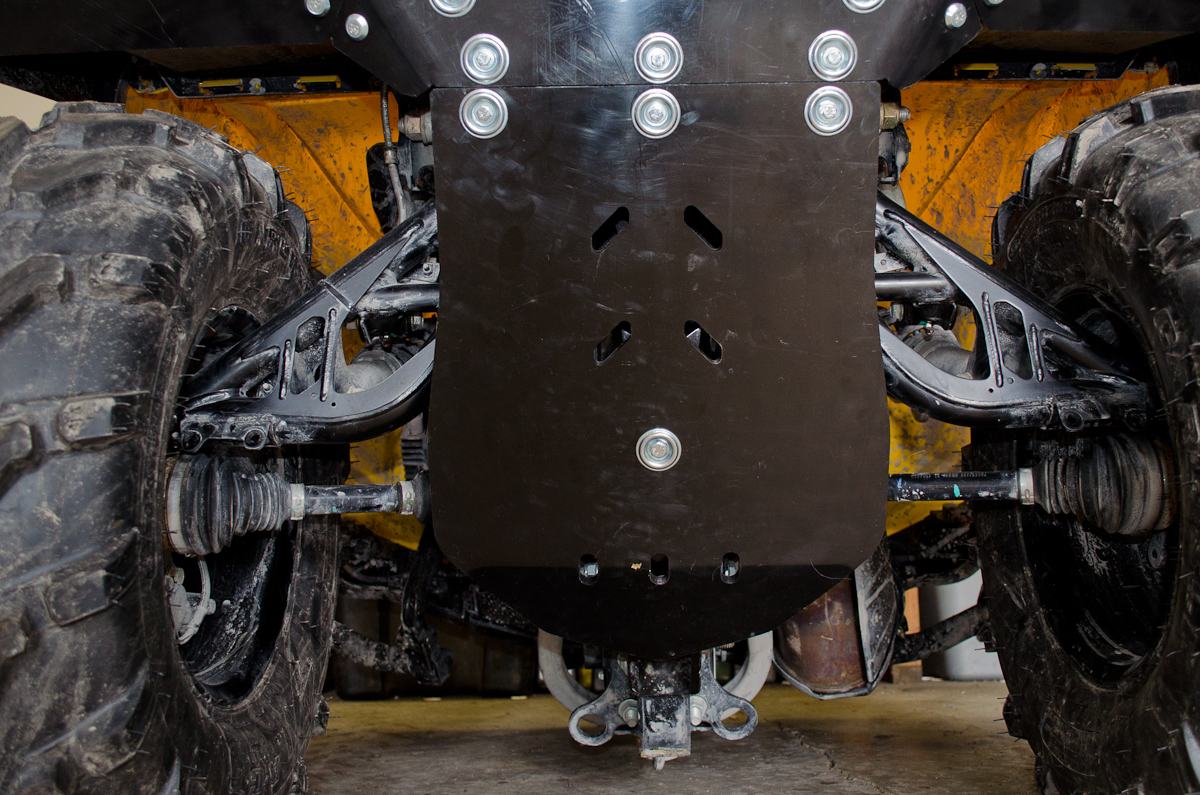 |
Rear skidplate installed. | |||||||||||||||||||||||||||||||||
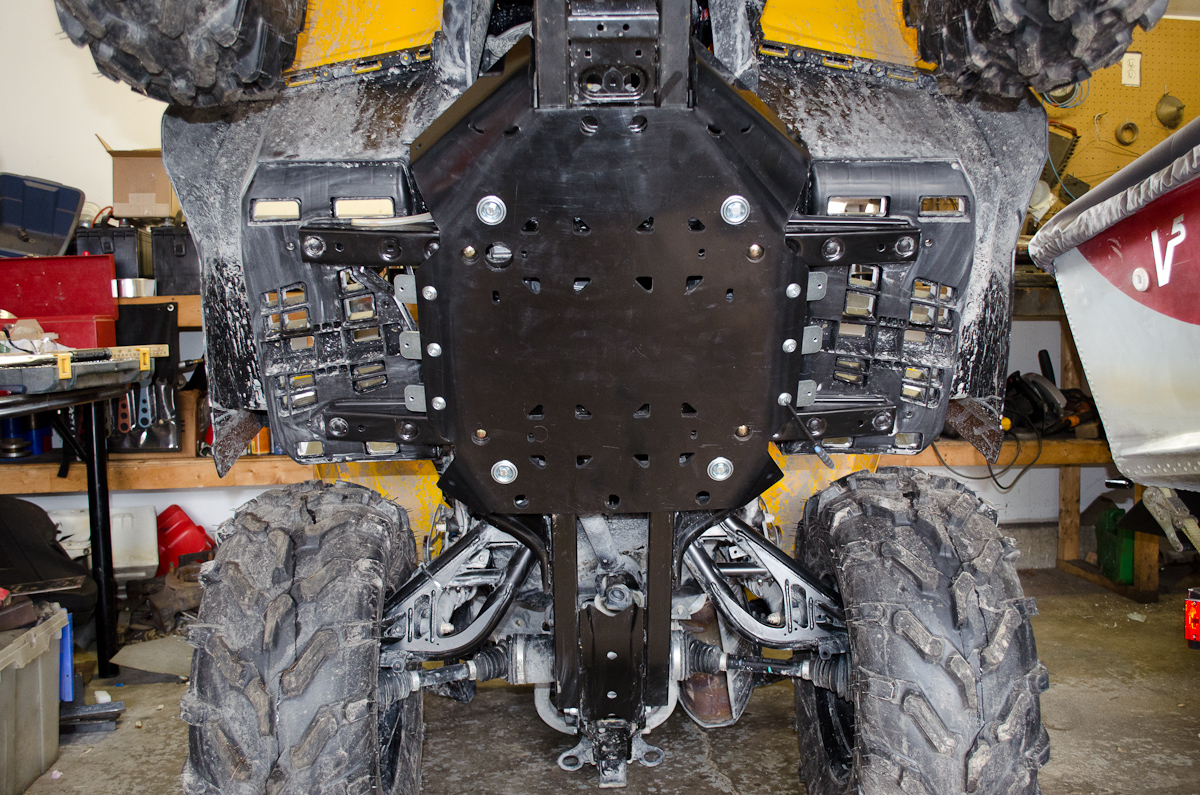
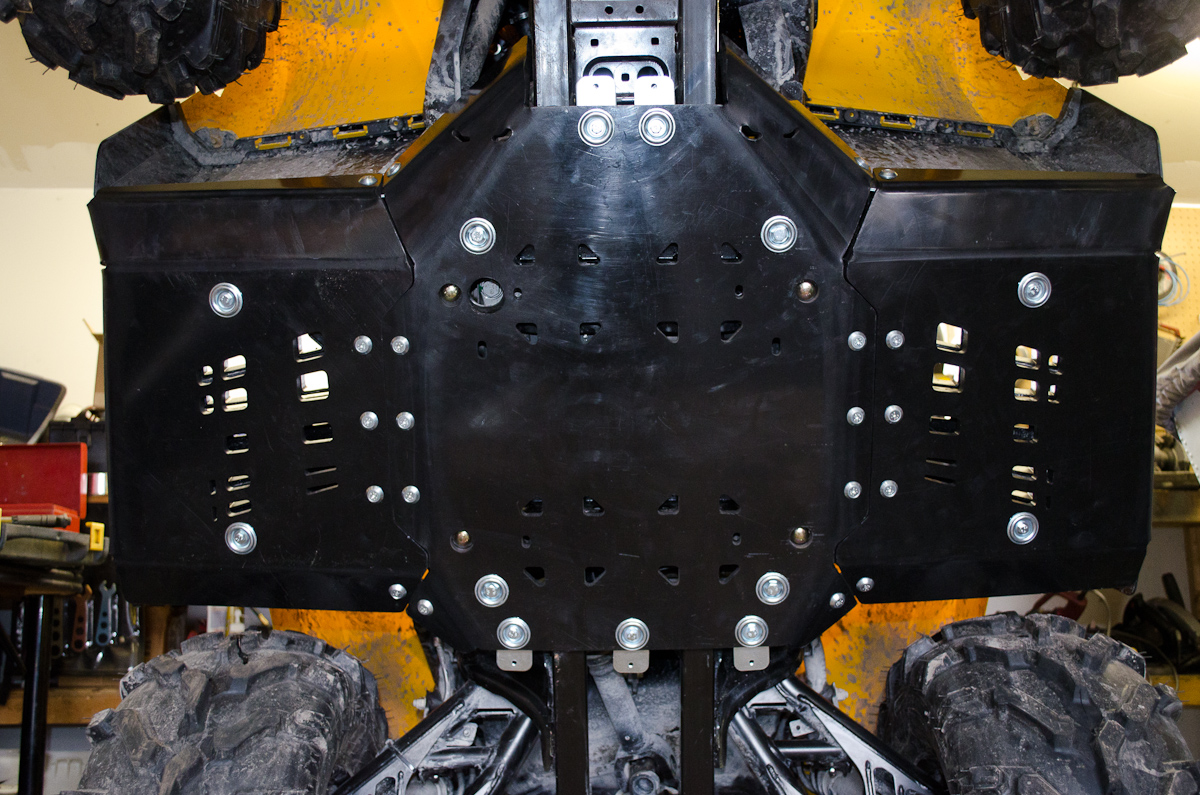
 |
Centre, footwell, front, and rear skidplates installed. | |||||||||||||||||||||||||||||||||
Part 9 - Installing Iron Baltic Front A-arm SkidplatesThe front A-arm skidplates are next. |
||||||||||||||||||||||||||||||||||
 |
This is the hardware required for the A-arm skidplates install:
|
|||||||||||||||||||||||||||||||||
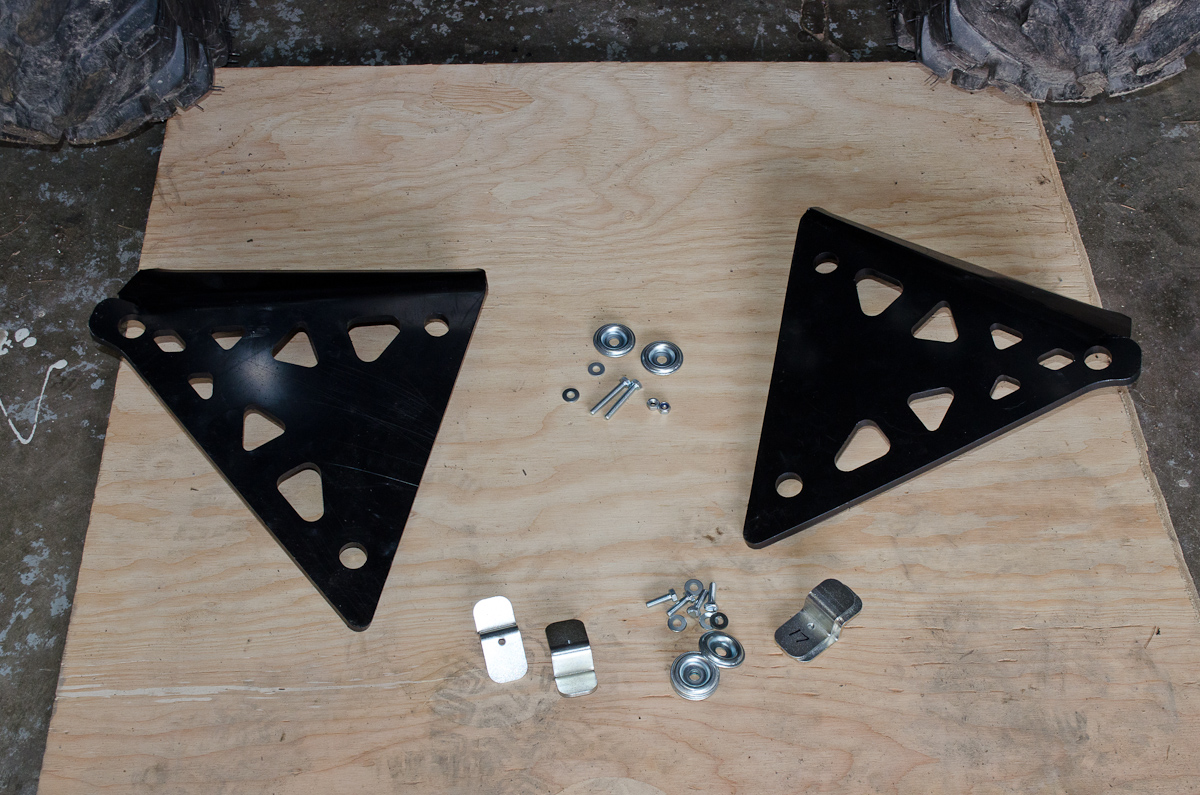 |
Parts laid out for install. | |||||||||||||||||||||||||||||||||
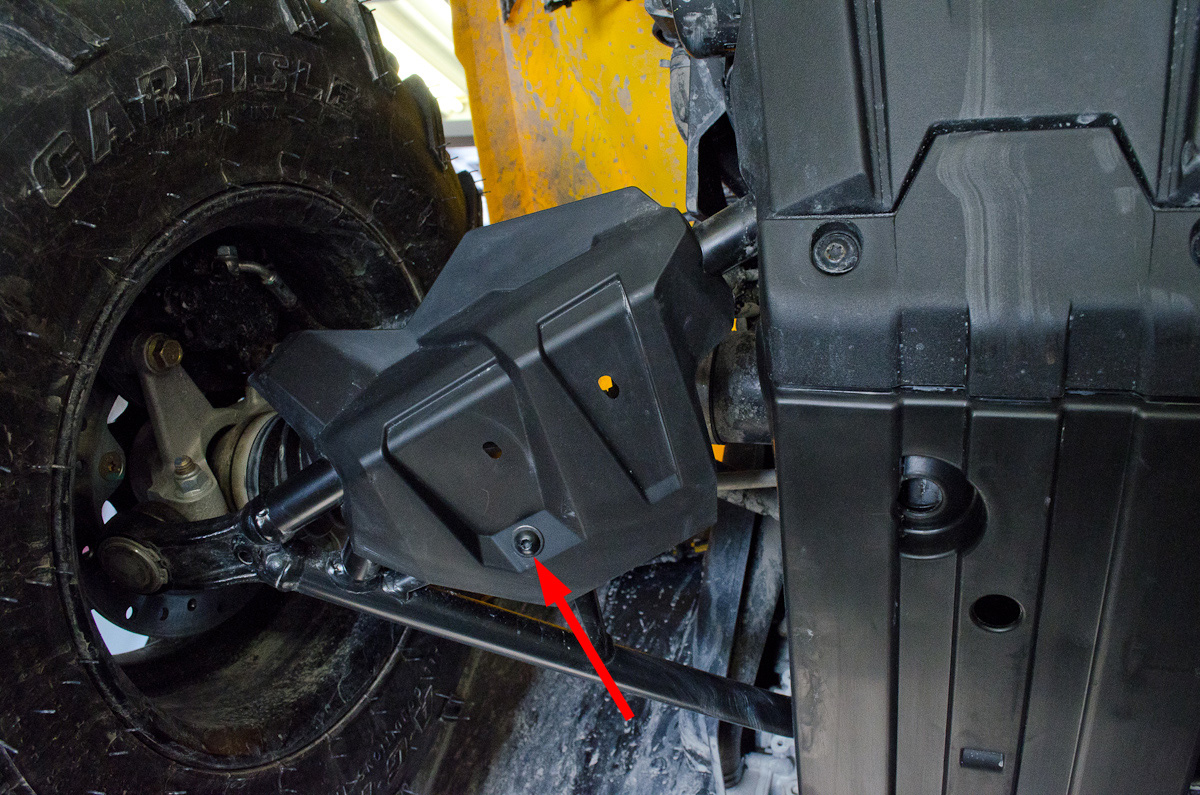
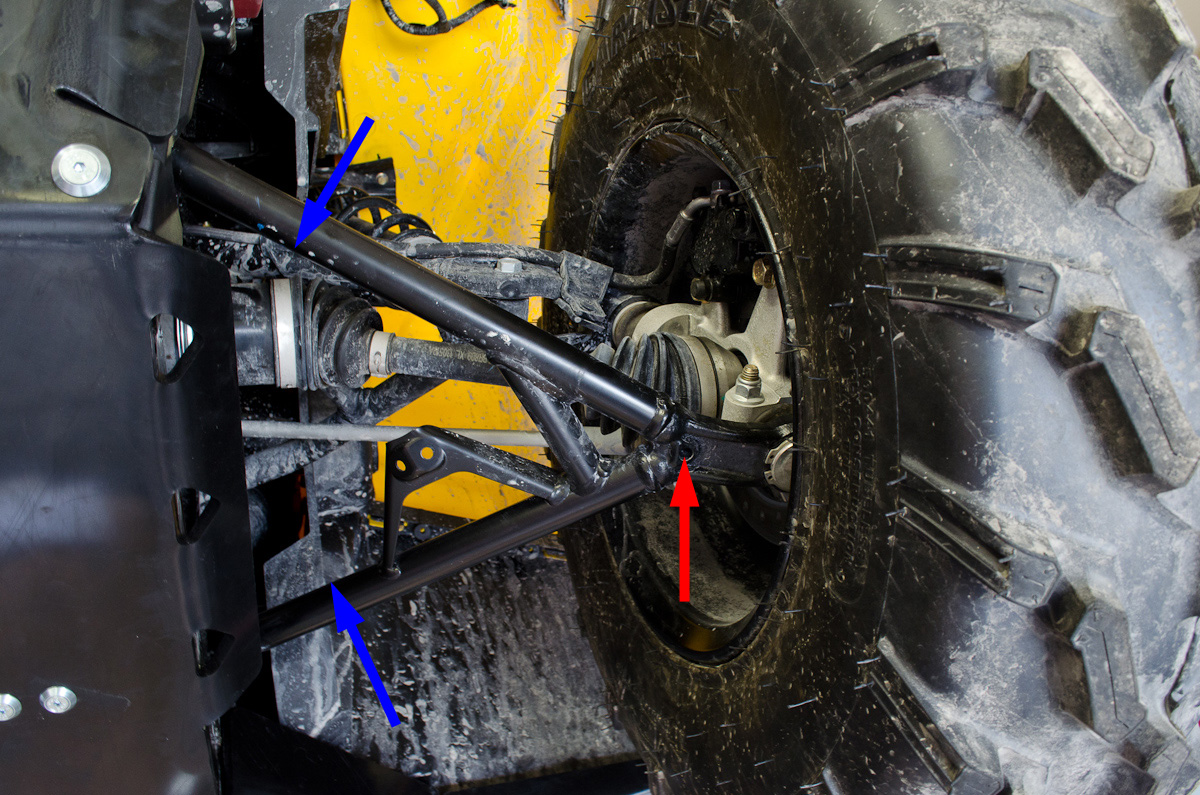 |
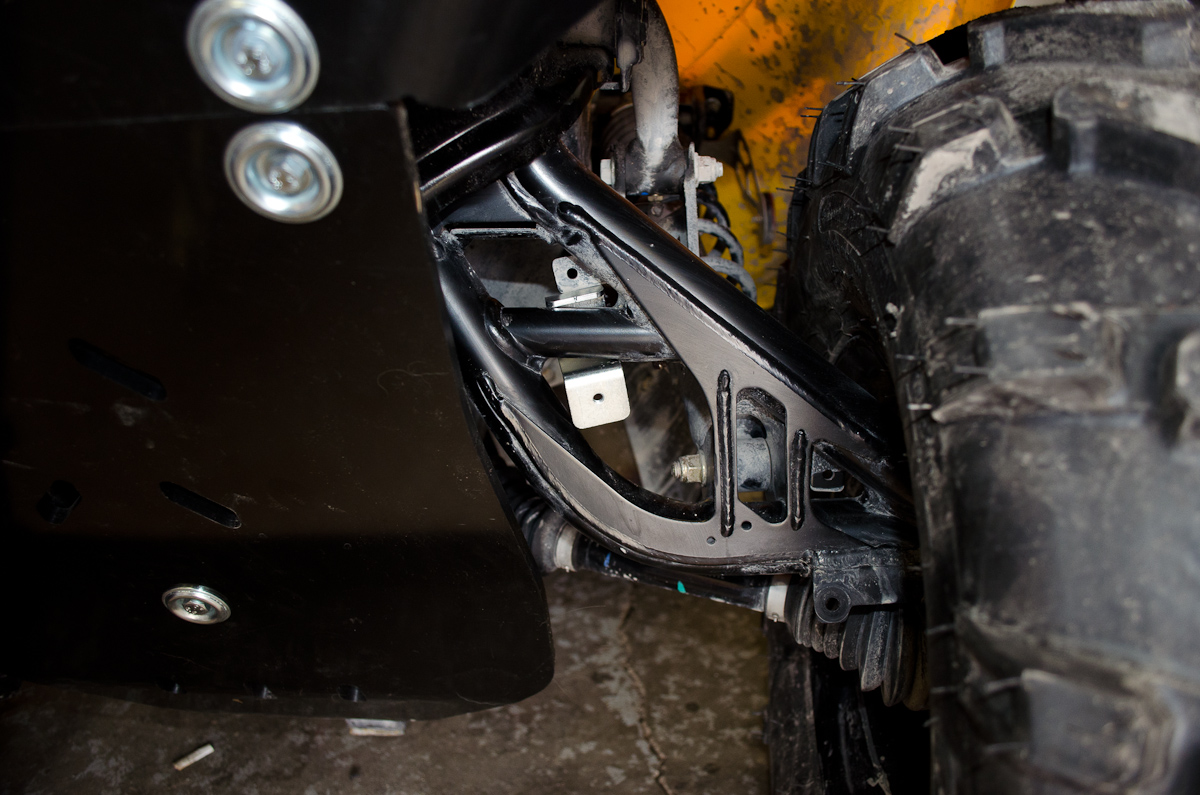
Each front A-arm skidplate has three attachment points - two clamps and a bolt with nut. The clamps attach to the A-arm in the positions indicated by the blue arrows. The nut and bolt connection goes through the factory hole on the A-arm indicated by the red arrow. |
|||||||||||||||||||||||||||||||||
 |
The #17 clamps go in place in this orientation... | |||||||||||||||||||||||||||||||||
 |
...like this for the front one... | |||||||||||||||||||||||||||||||||
 |
...and like this for the rear one. | |||||||||||||||||||||||||||||||||
 |
The A-arm skidplate fits up against the A-arm like this. | |||||||||||||||||||||||||||||||||
 |
Make sure that the inside edge is tucked up inside the edge of the front skidplate, like this. | |||||||||||||||||||||||||||||||||
 |
Use two #17 clamps along with two #20 bolts, two #30 washers, and two #32 dished washers per side. Also use one #22 bolt, one #30washer, one #32dished washer, and one #35 nut per side, through the factory hole in the A-arm, as shown. |
|||||||||||||||||||||||||||||||||
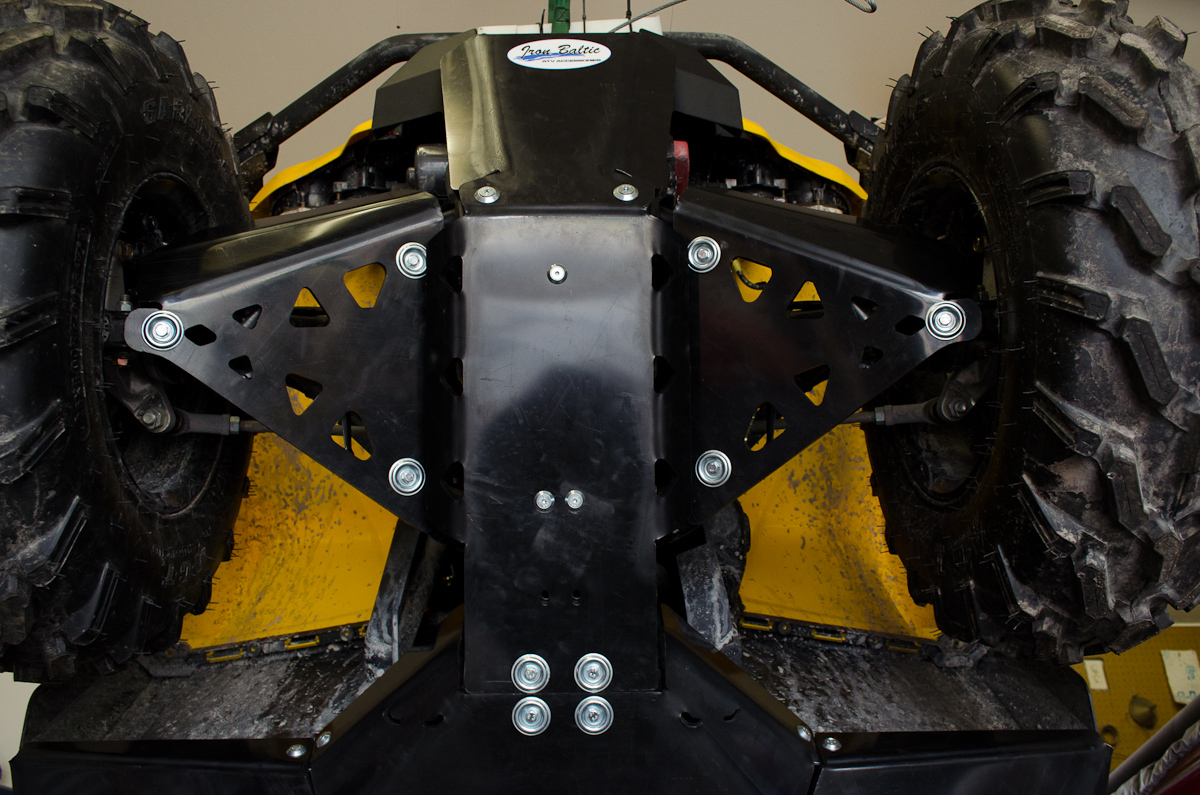
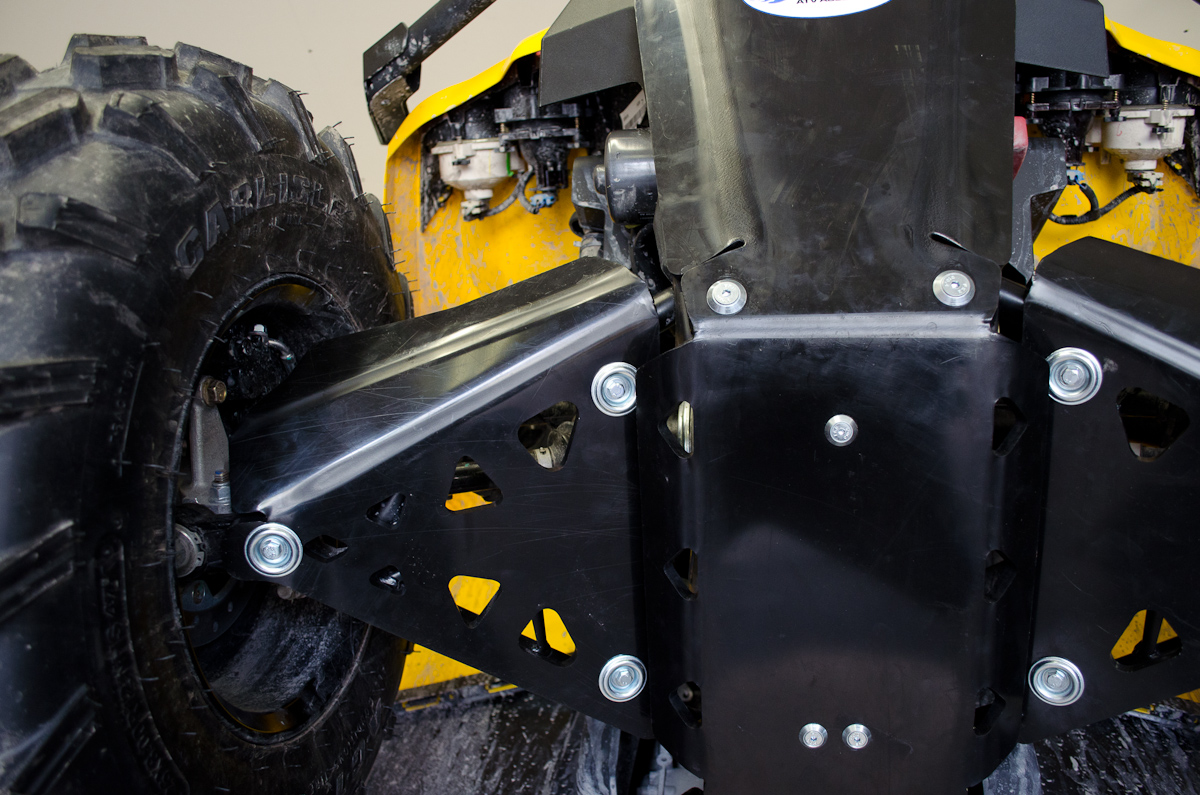 |
Right A-arm skidplate installed. | |||||||||||||||||||||||||||||||||
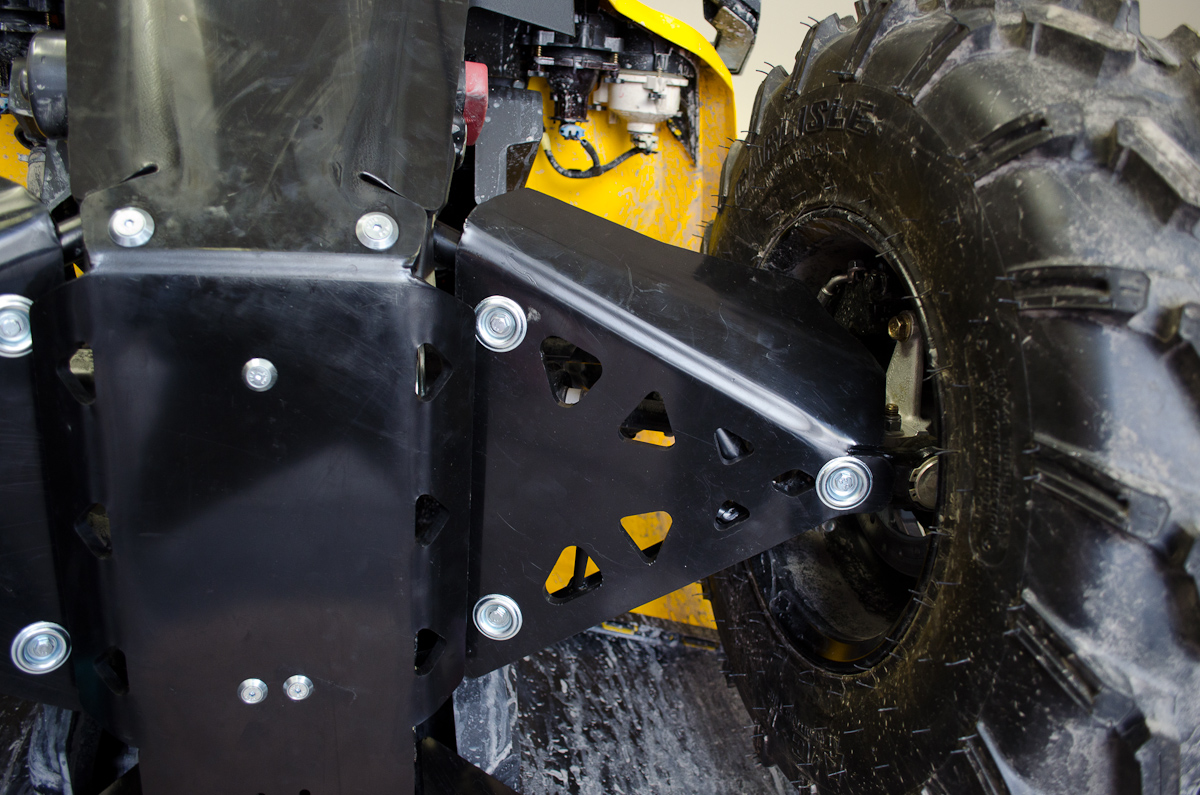 |
Left A-arm skidplate installed. | |||||||||||||||||||||||||||||||||
Part 10 - Installing Iron Baltic Rear Trailing Arm SkidplatesThe last parts to be installed are the rear trailing-arm skidplates. |
||||||||||||||||||||||||||||||||||
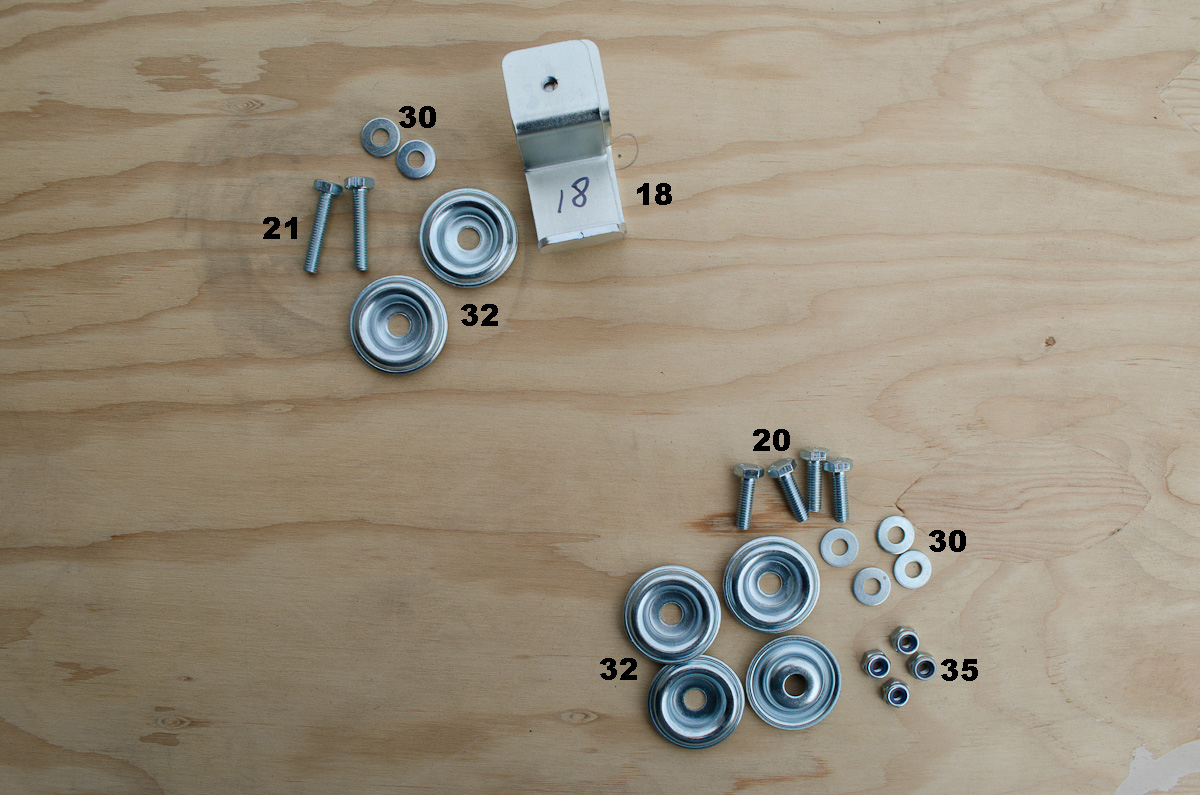 |
This is the hardware required for the rear skidplate install:
|
|||||||||||||||||||||||||||||||||
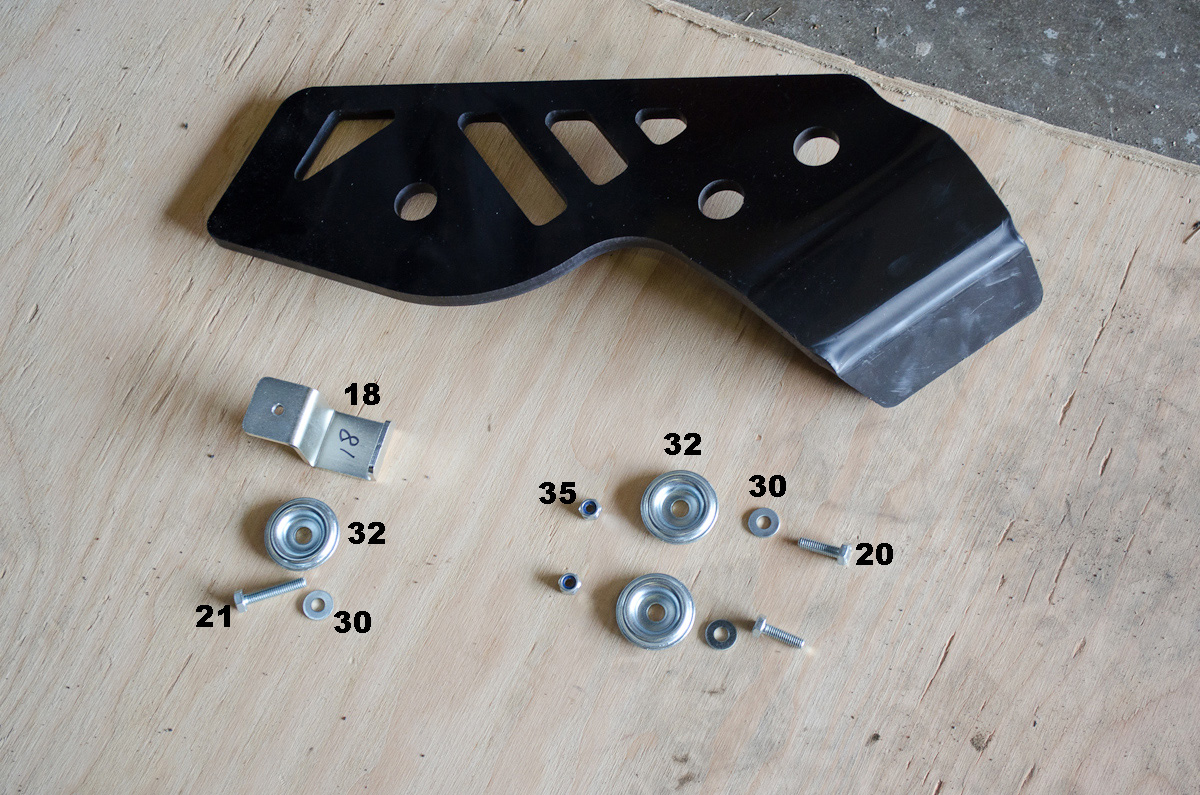 |
Trailing-arm skidplate with its hardware, laid out ready for installation. | |||||||||||||||||||||||||||||||||
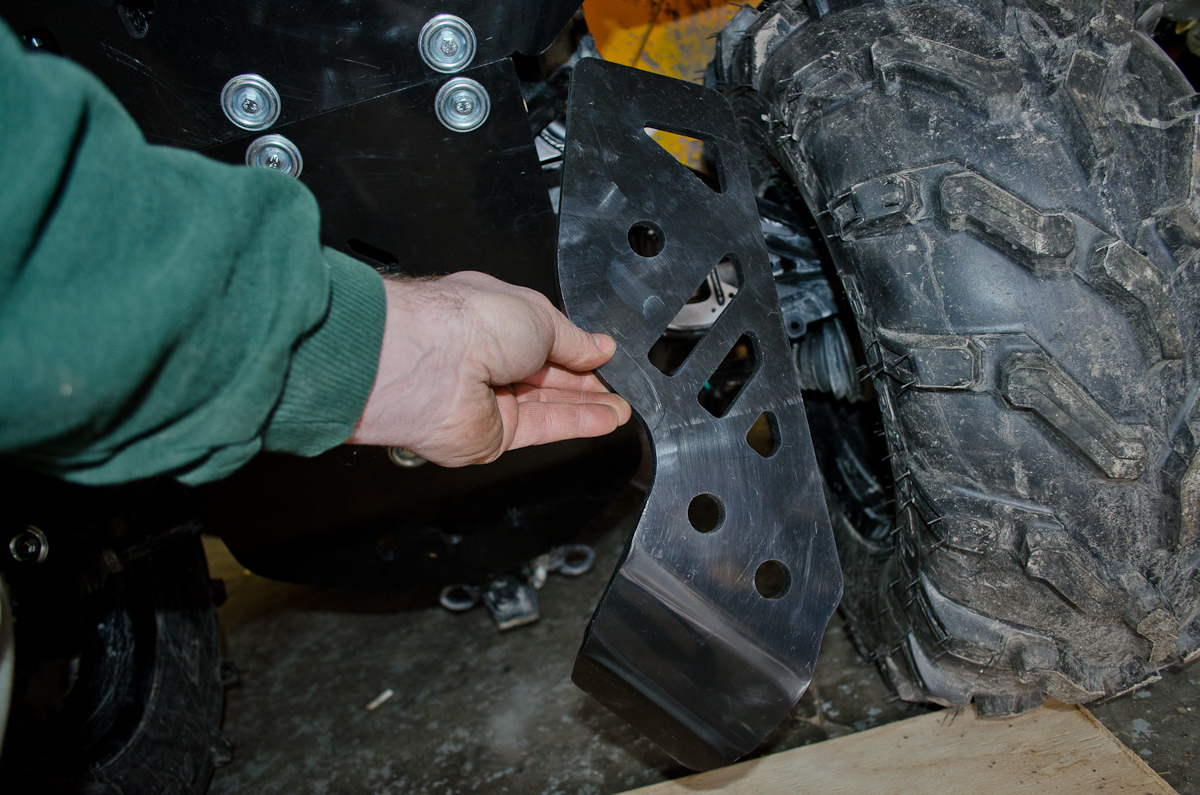 |
The trailing-arm skidplates are installed in this orientation... | |||||||||||||||||||||||||||||||||
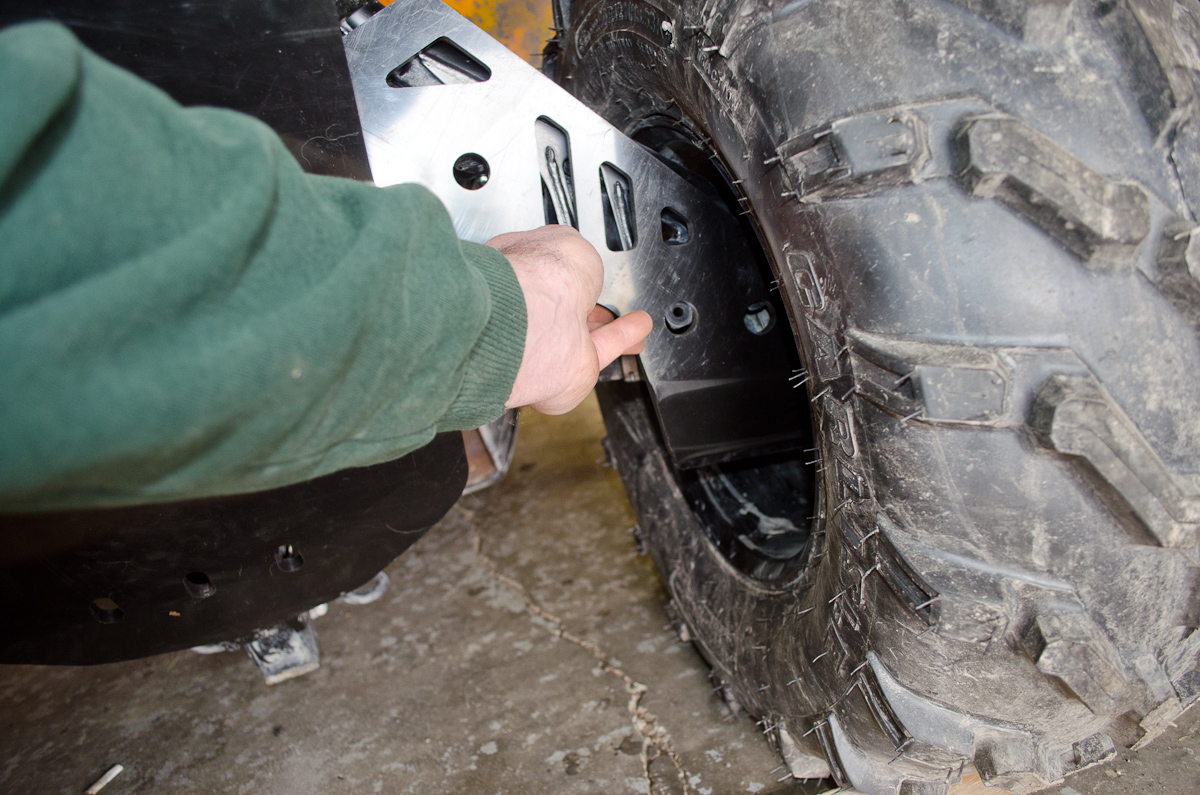 |
...so that they fit on the trailing arms like this. | |||||||||||||||||||||||||||||||||
 |
On each side, use a #18 clamp like this... | |||||||||||||||||||||||||||||||||
 |
...that installs on the trailing-arm like this. Use a #21 bolt, #30 washer, and #32 dished washer to bolt the trailing arm to the clamp |
|||||||||||||||||||||||||||||||||
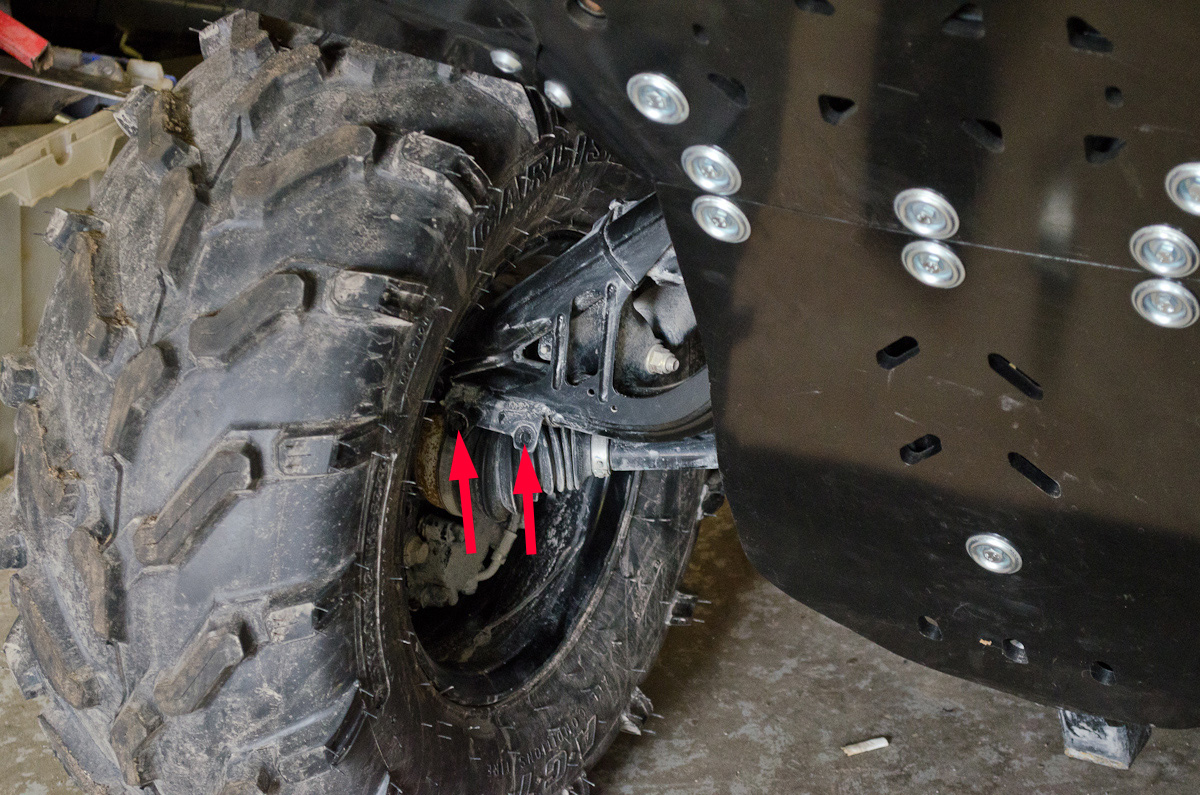 |
And use two ##20 bolts, two #30 washers, two #32 dished washers, and two #35 nuts, per side, to bolt the trailing-arm skidplate to the trailing-arm through the two factory holes indicated by the red arrows. | |||||||||||||||||||||||||||||||||
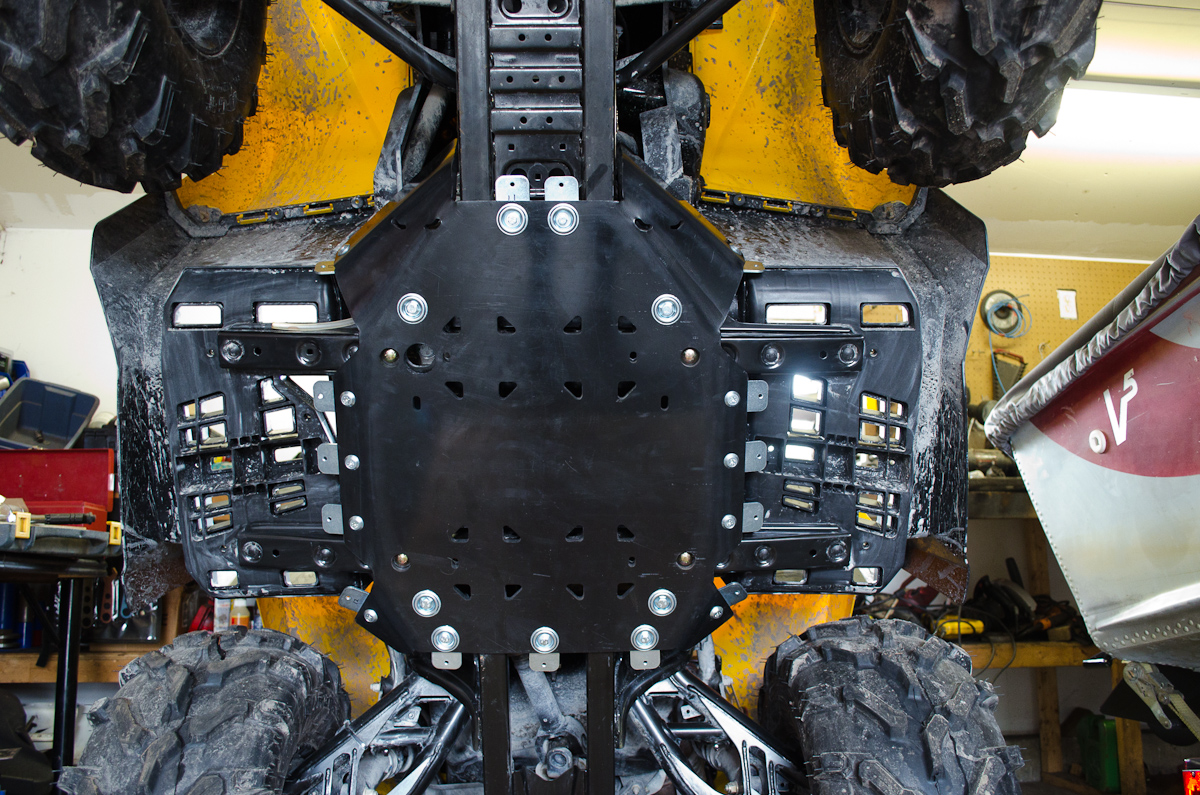
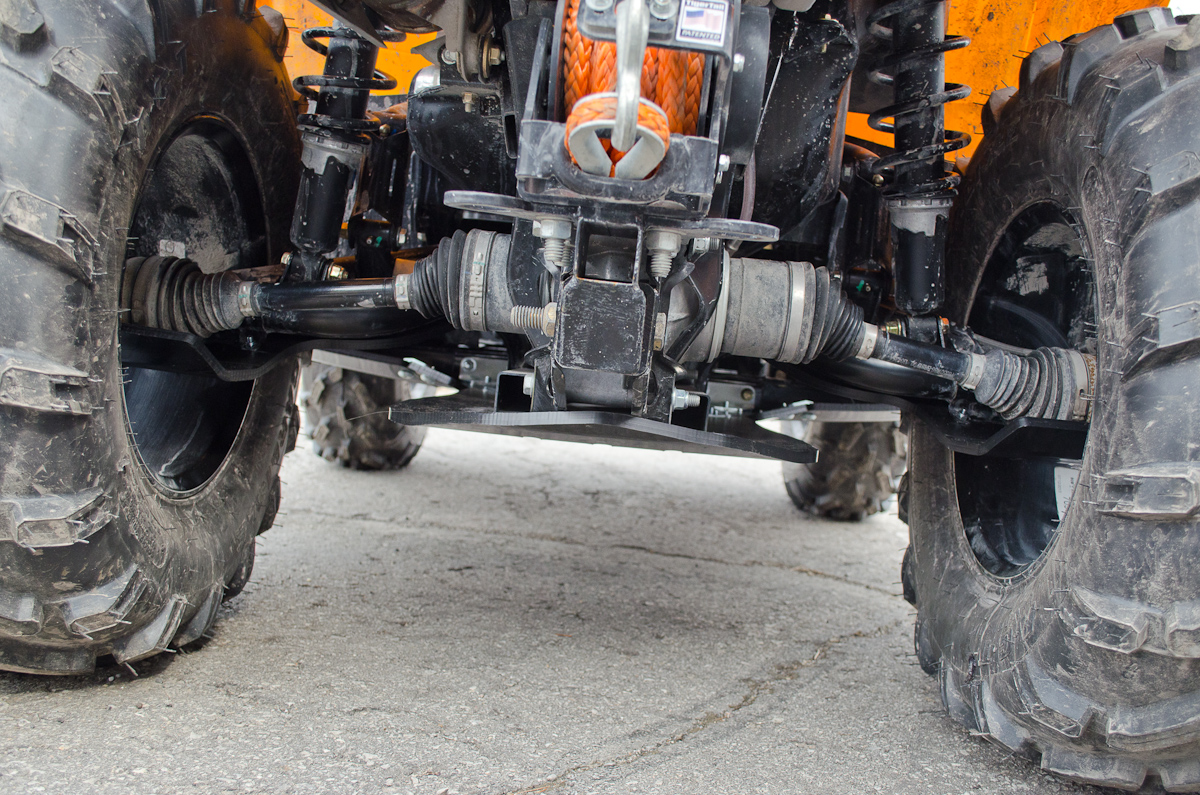
Part 11 - A Look at the Completed Iron Baltic Skidplate InstallationWith the trailing-arm skidplates installed, the complete installation is finished. Following are some pics of the complete installation. |
||||||||||||||||||||||||||||||||||
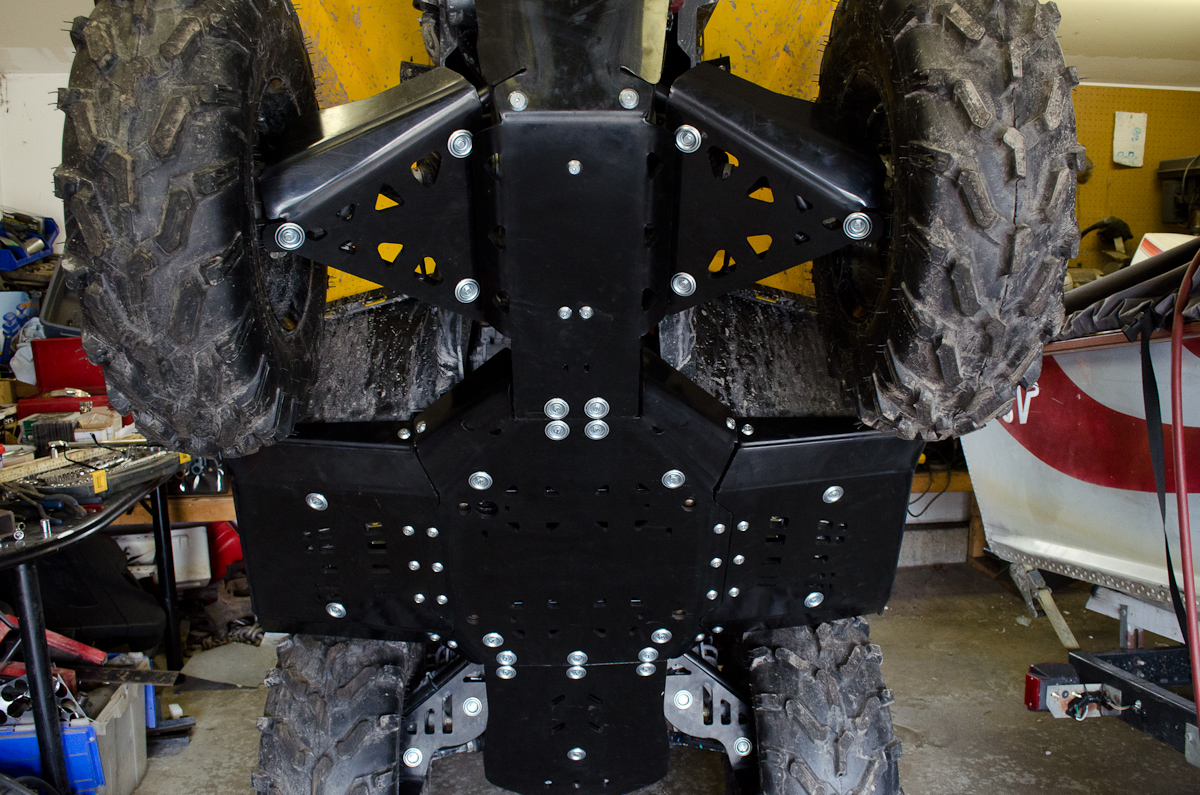
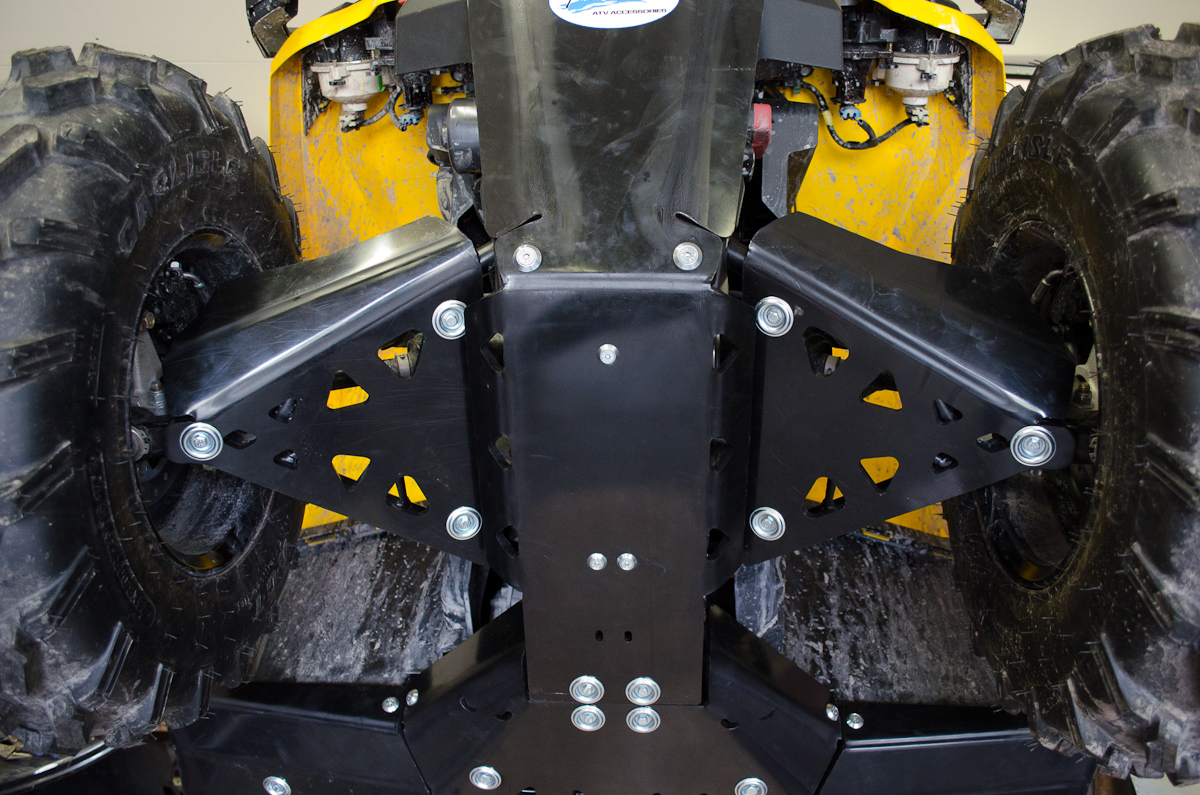
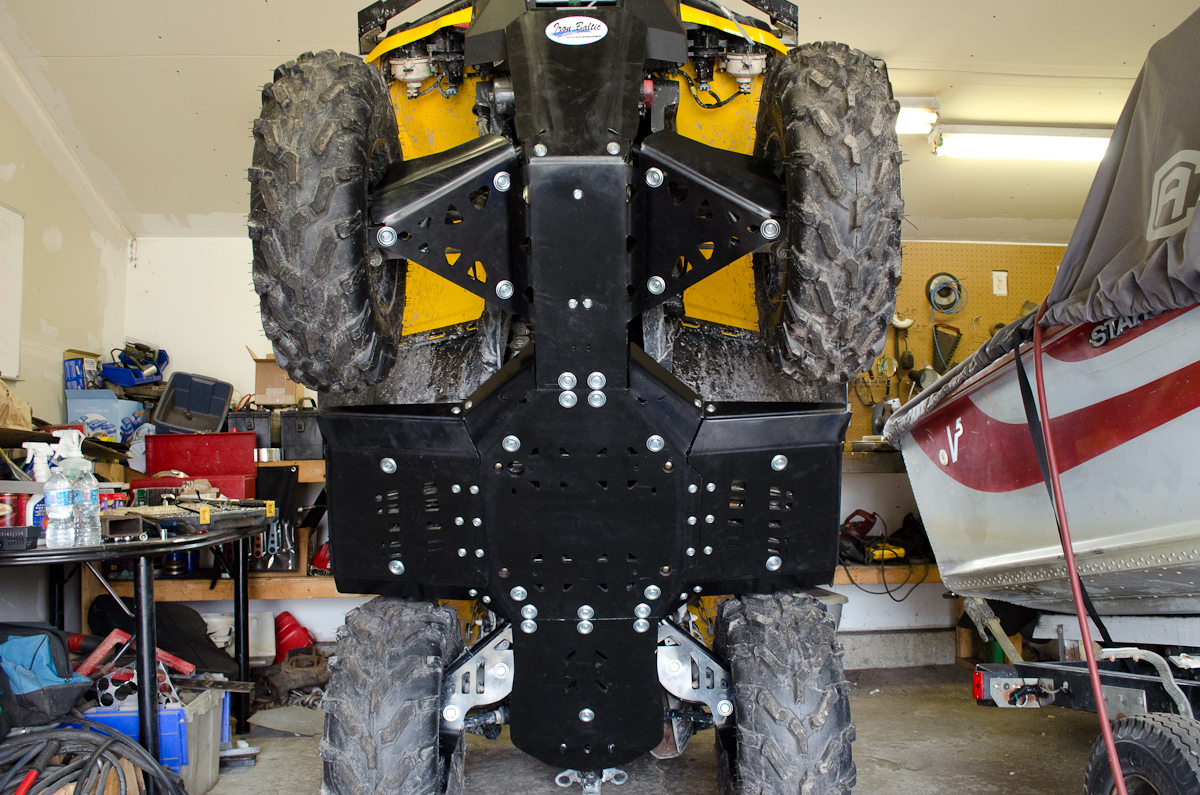 |
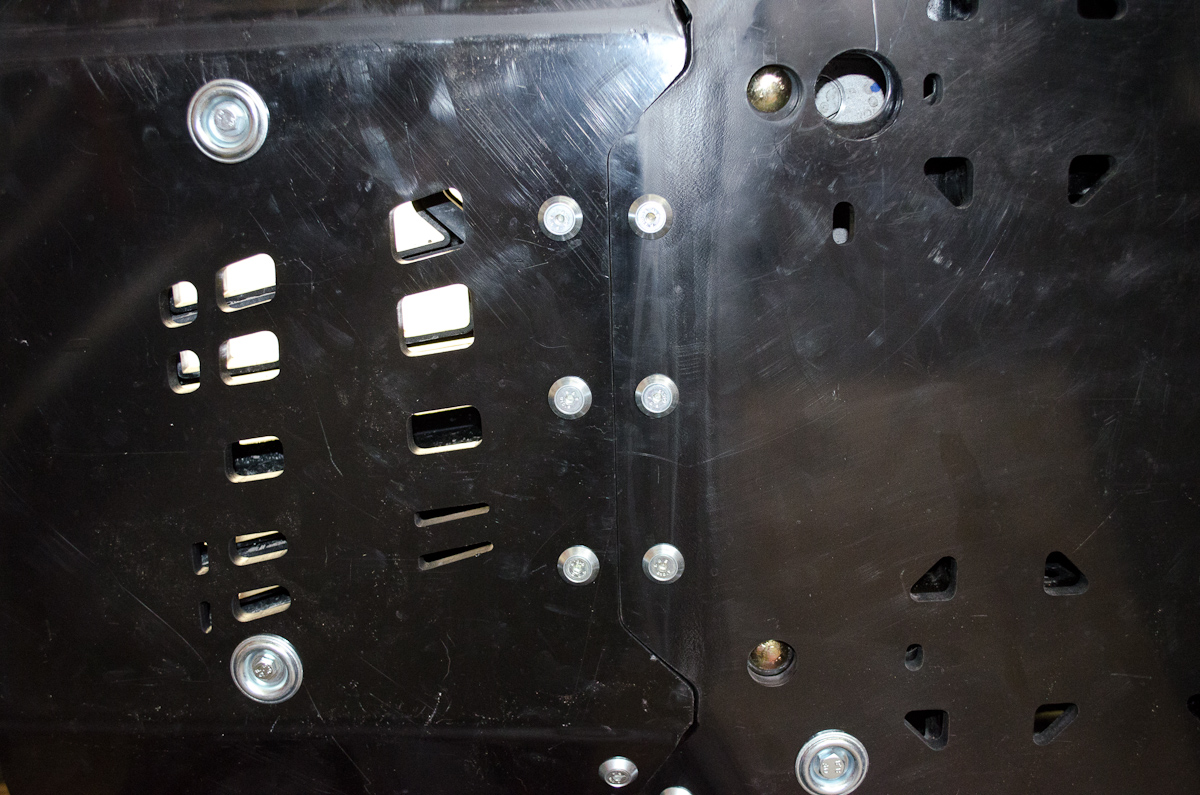
Everything installed. After you get all the pieces installed, go over each part and check the alignment and tighten all the fasteners. |
|||||||||||||||||||||||||||||||||
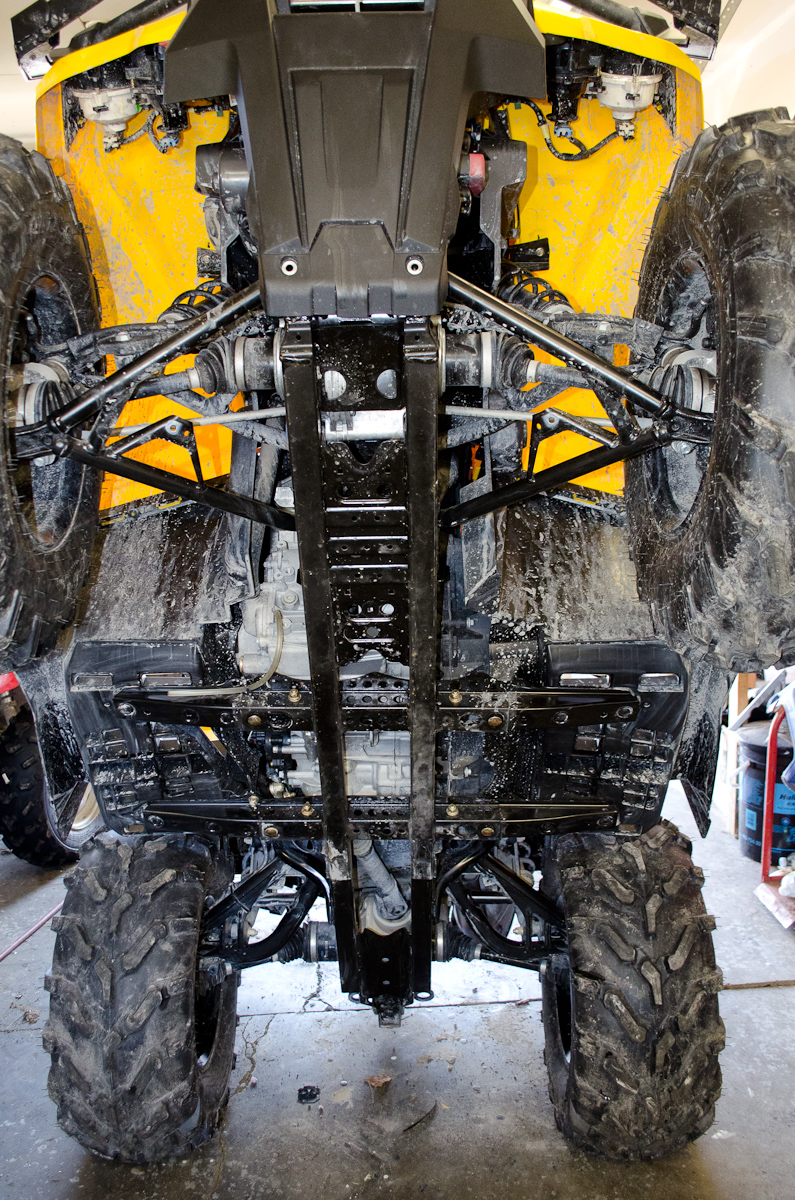
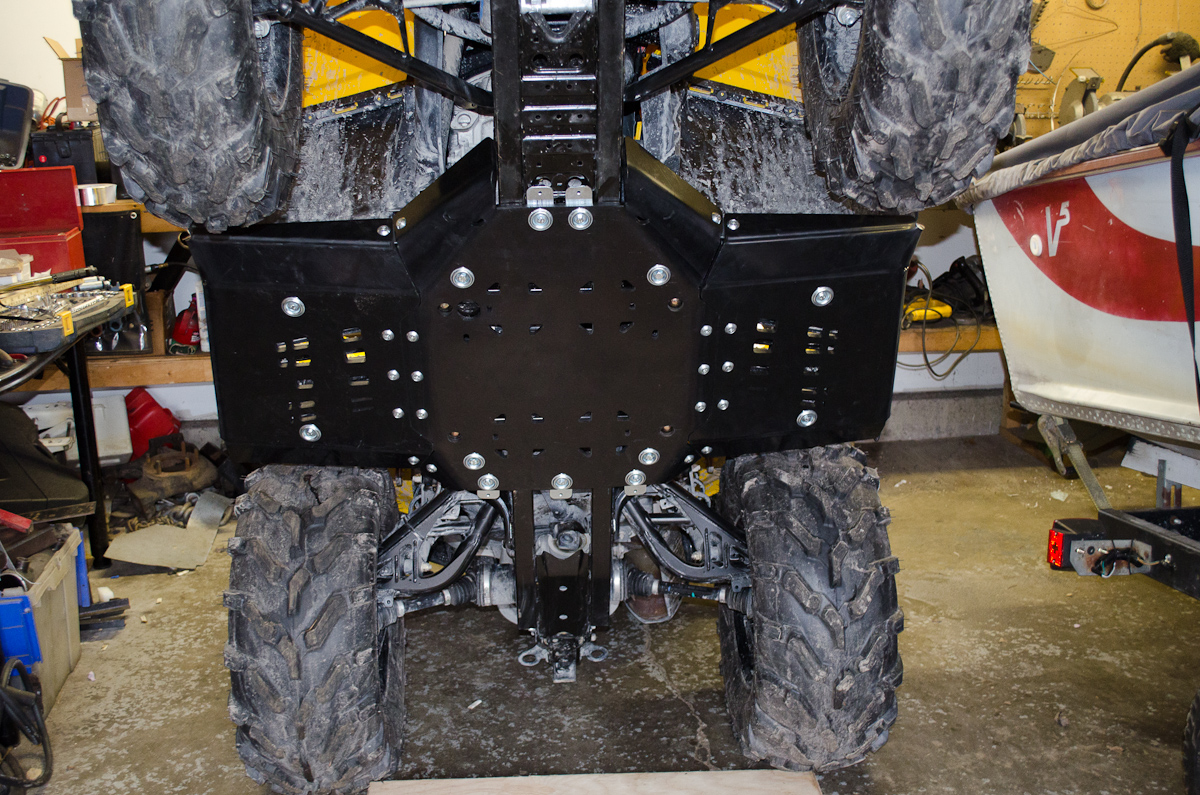
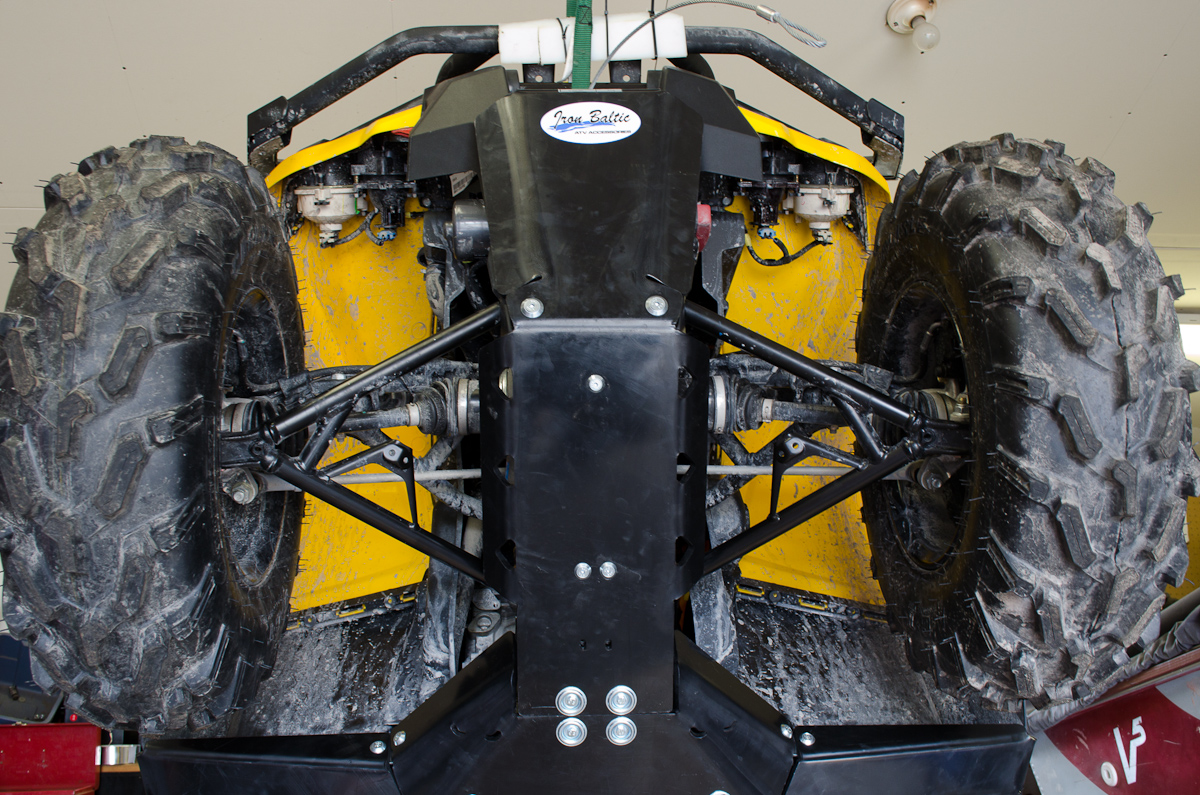
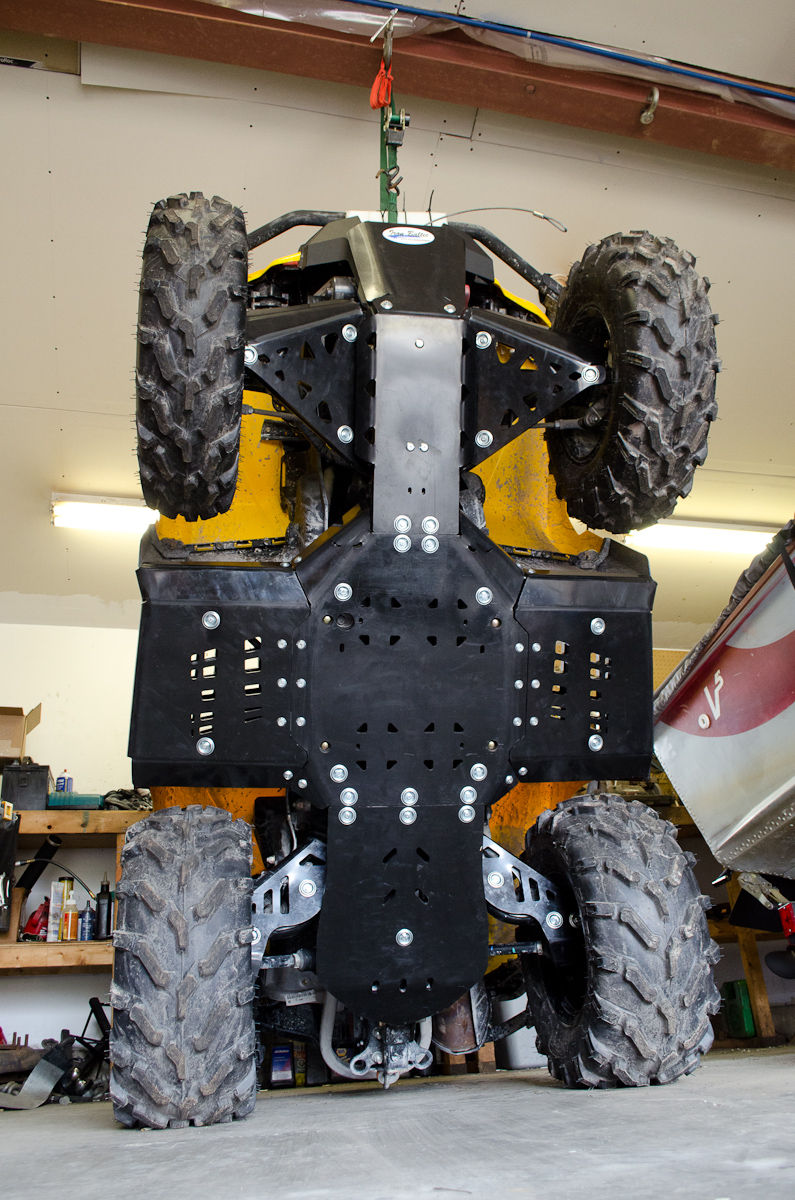 |
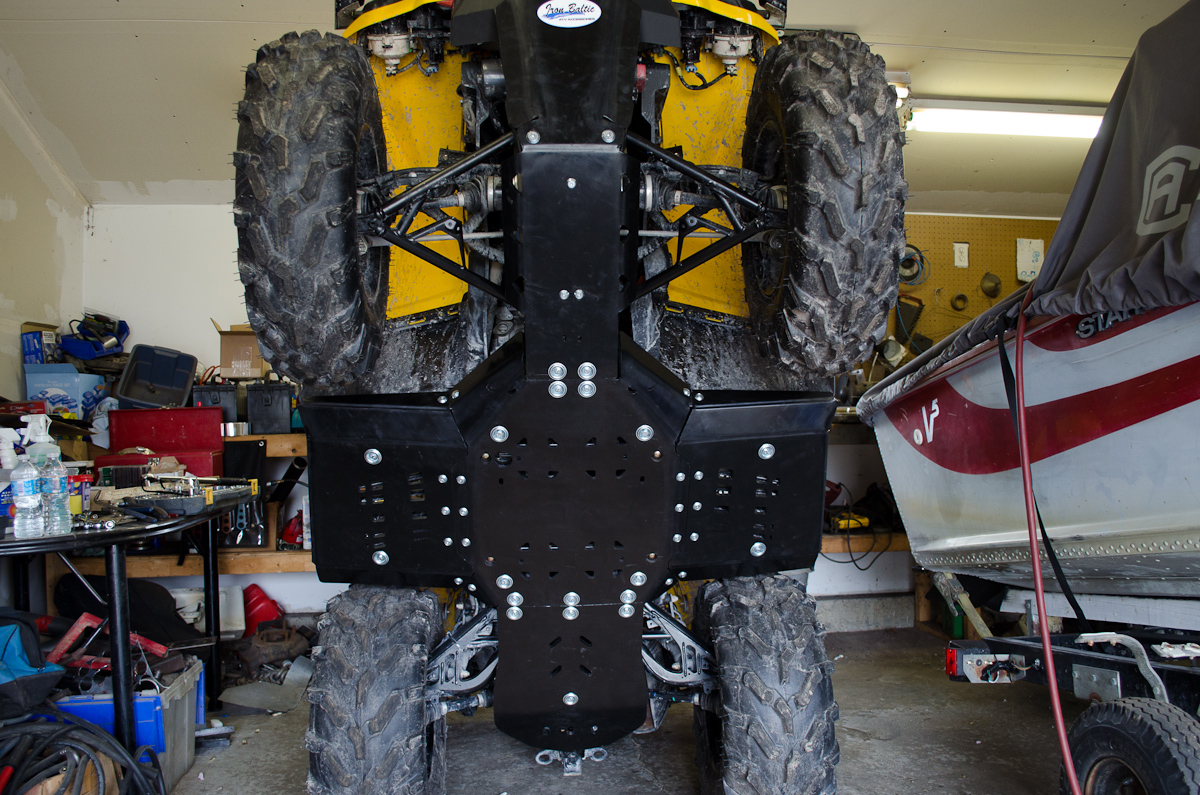
You can see that the complete Iron Baltic kit provides excellent coverage and protection... | |||||||||||||||||||||||||||||||||
 |
...from the rear... | |||||||||||||||||||||||||||||||||
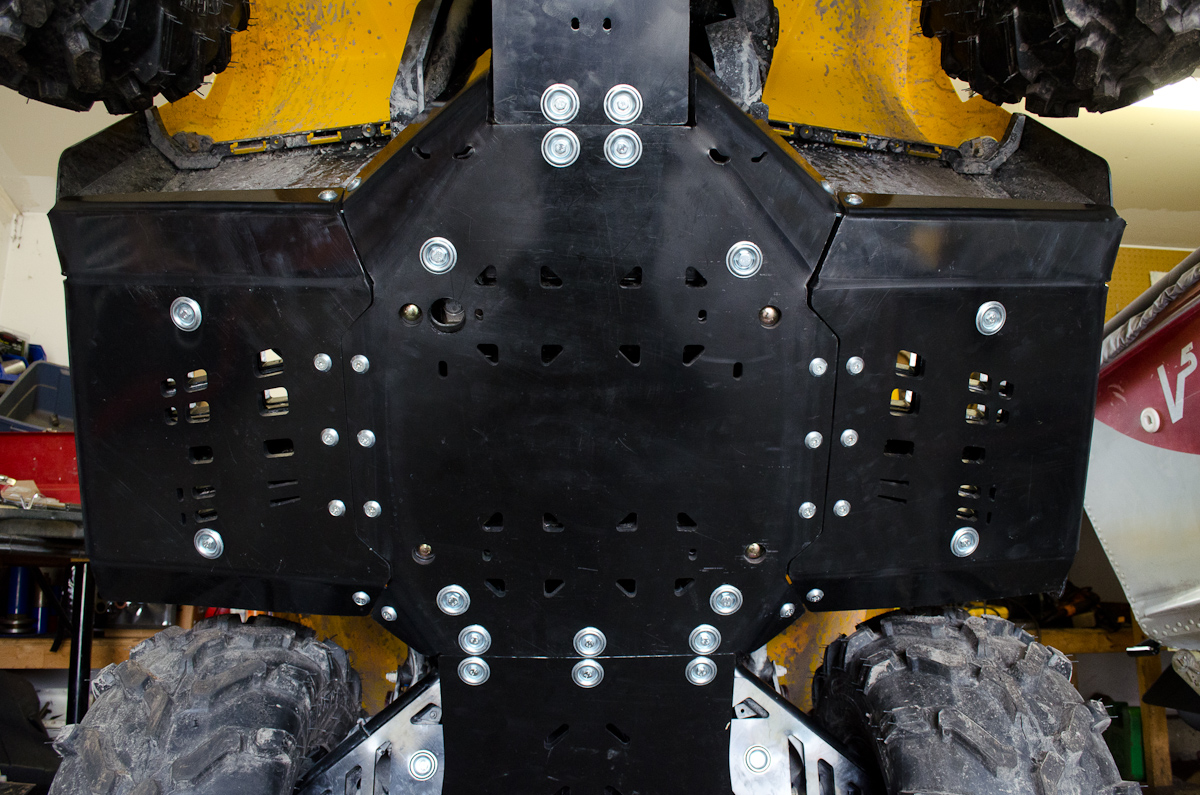 |
...to the centre... | |||||||||||||||||||||||||||||||||
 |
...to the front. | |||||||||||||||||||||||||||||||||
| The following pics show some views of the installed kit on the ATV with the ATV back on its wheels on the ground. | ||||||||||||||||||||||||||||||||||
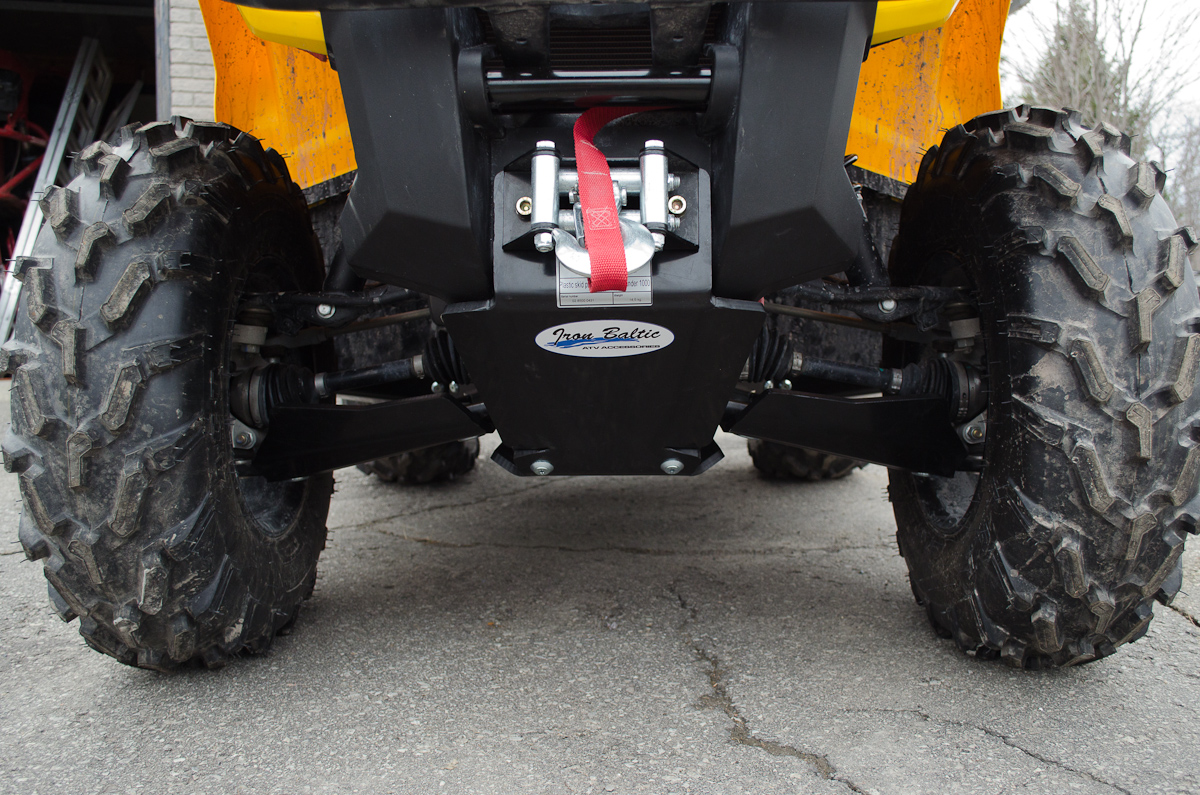 |
Front view. | |||||||||||||||||||||||||||||||||
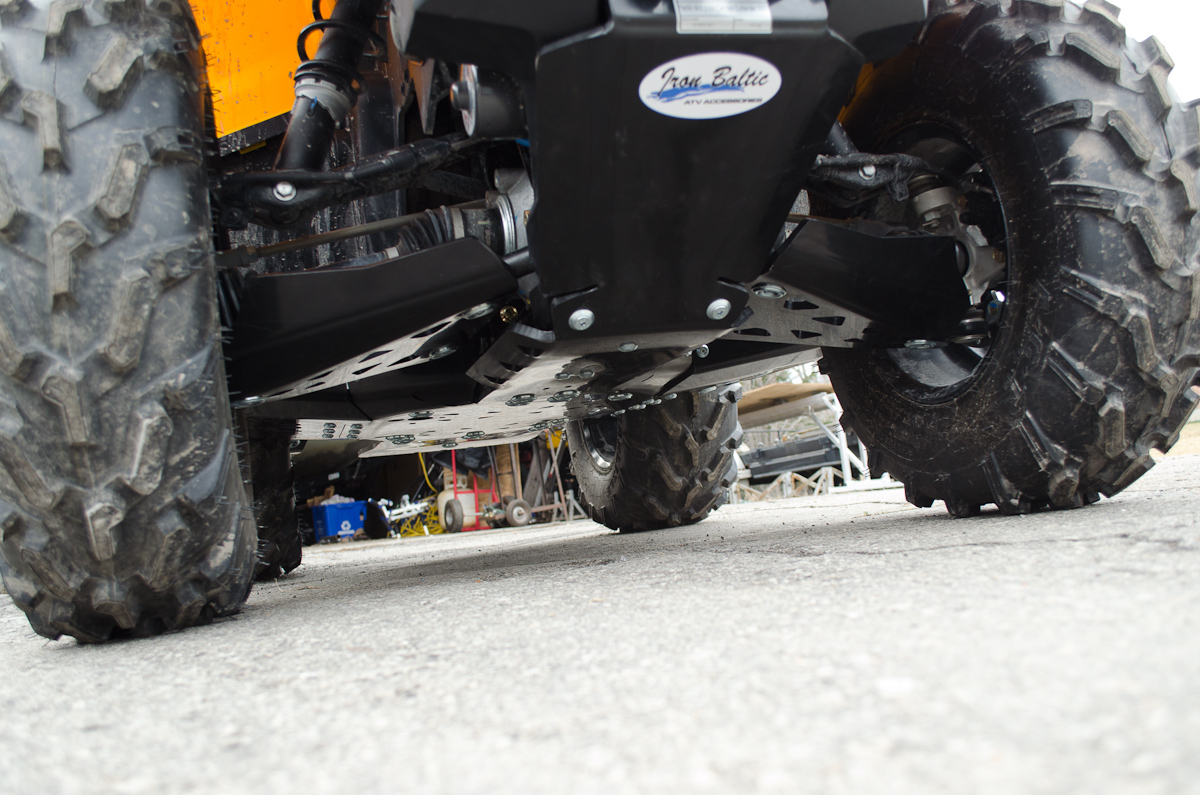 |
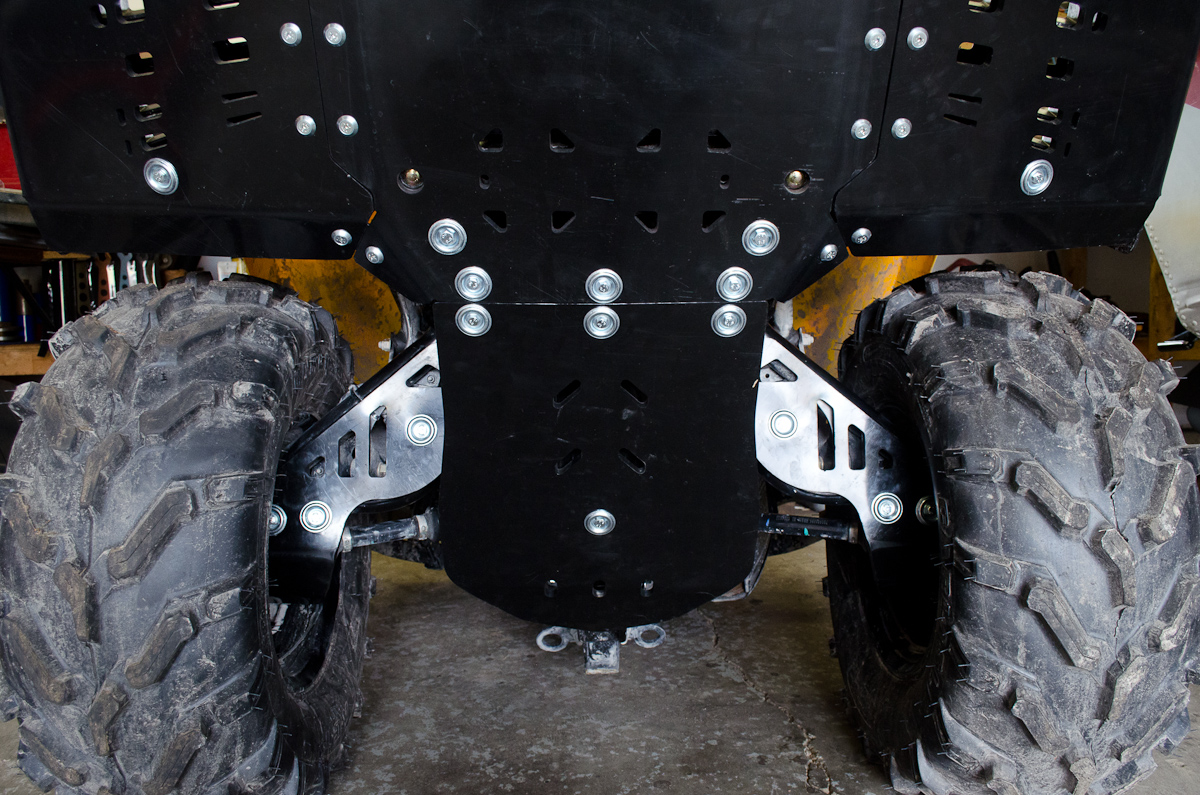
Underneath, from the front. | |||||||||||||||||||||||||||||||||
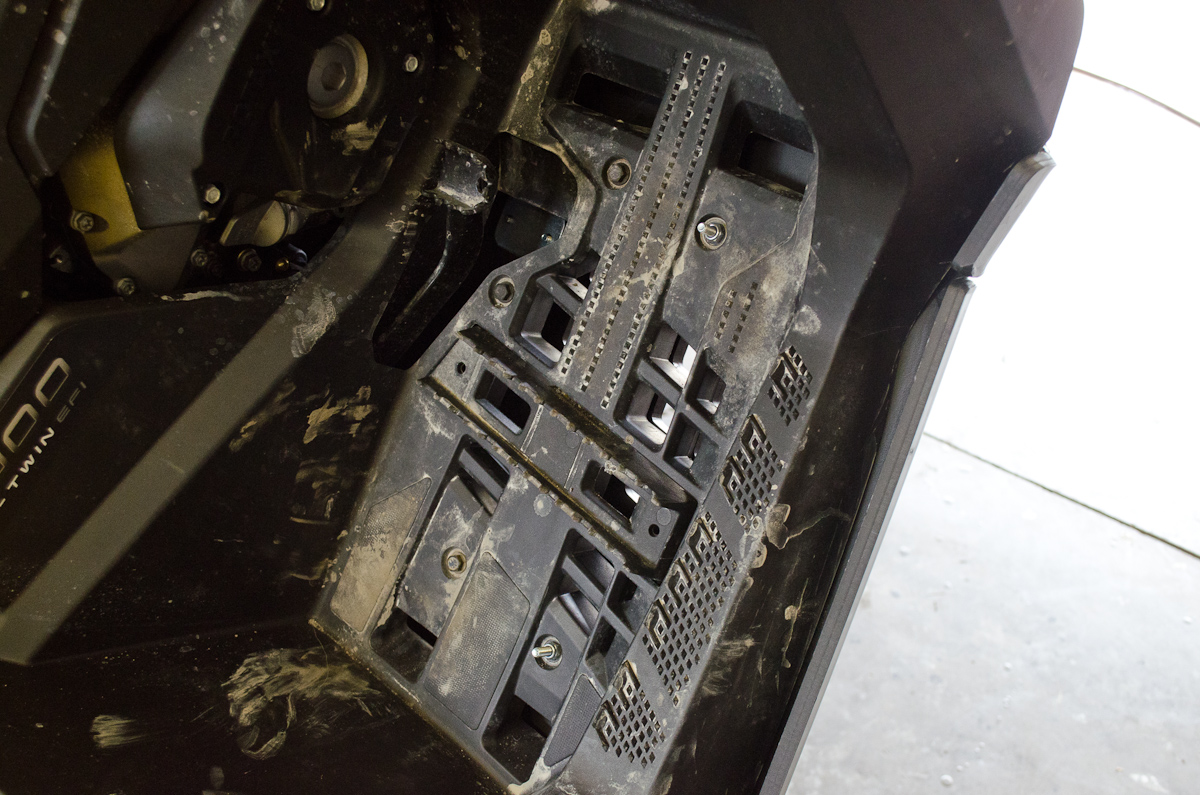
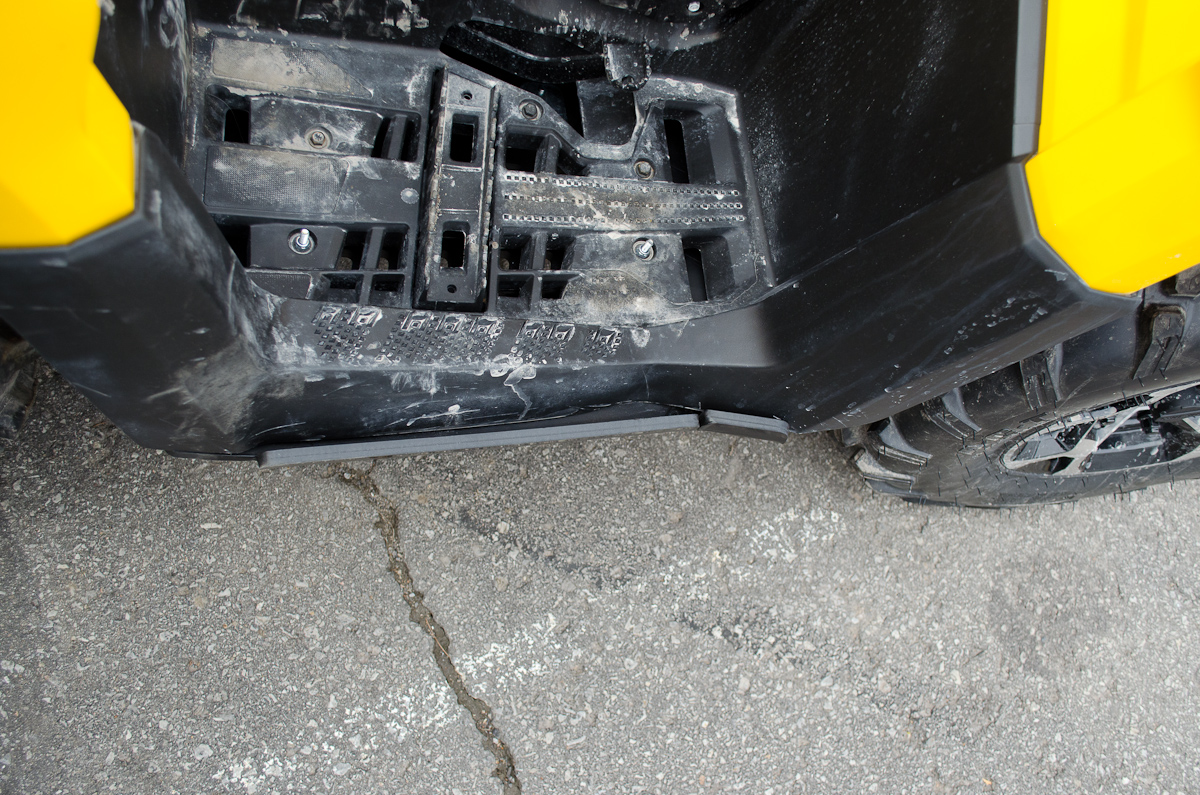
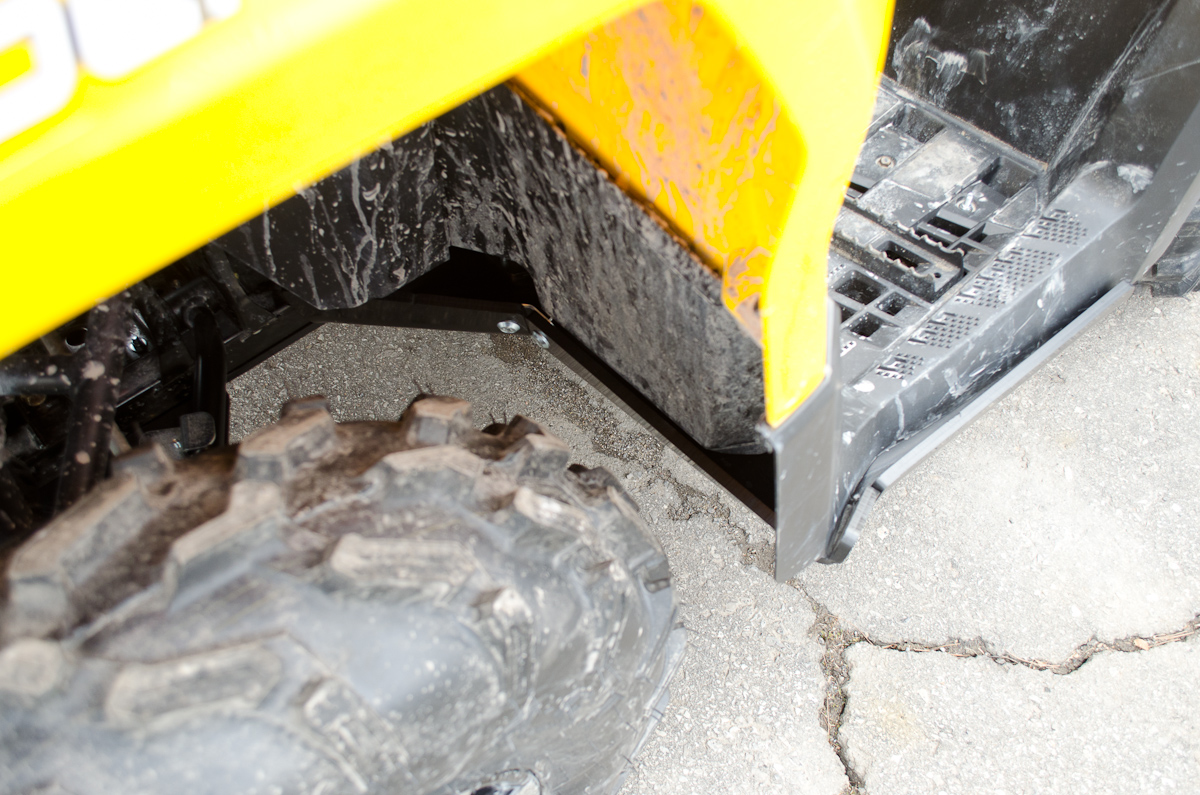 |
One of my favourite parts is the footwell skidplate. | |||||||||||||||||||||||||||||||||
 |
The fit and extra protection are excellent. | |||||||||||||||||||||||||||||||||
 |
Rear view. | |||||||||||||||||||||||||||||||||
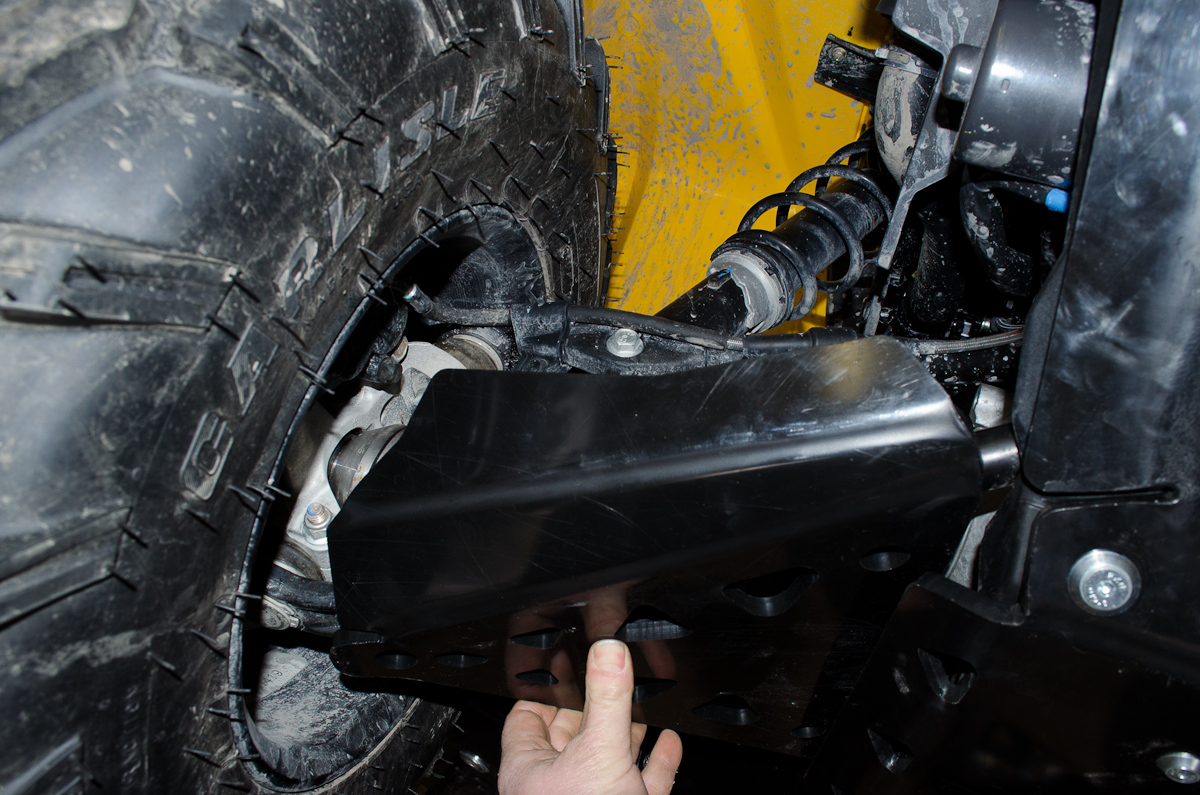
 |
Trailing-arm skidplates protecting those rear outer CV boots. | |||||||||||||||||||||||||||||||||
 |
Rear skidplate protecting the diff and rear inner CV boots. | |||||||||||||||||||||||||||||||||
 |
Rear axle / CV boot protection - right side. | |||||||||||||||||||||||||||||||||
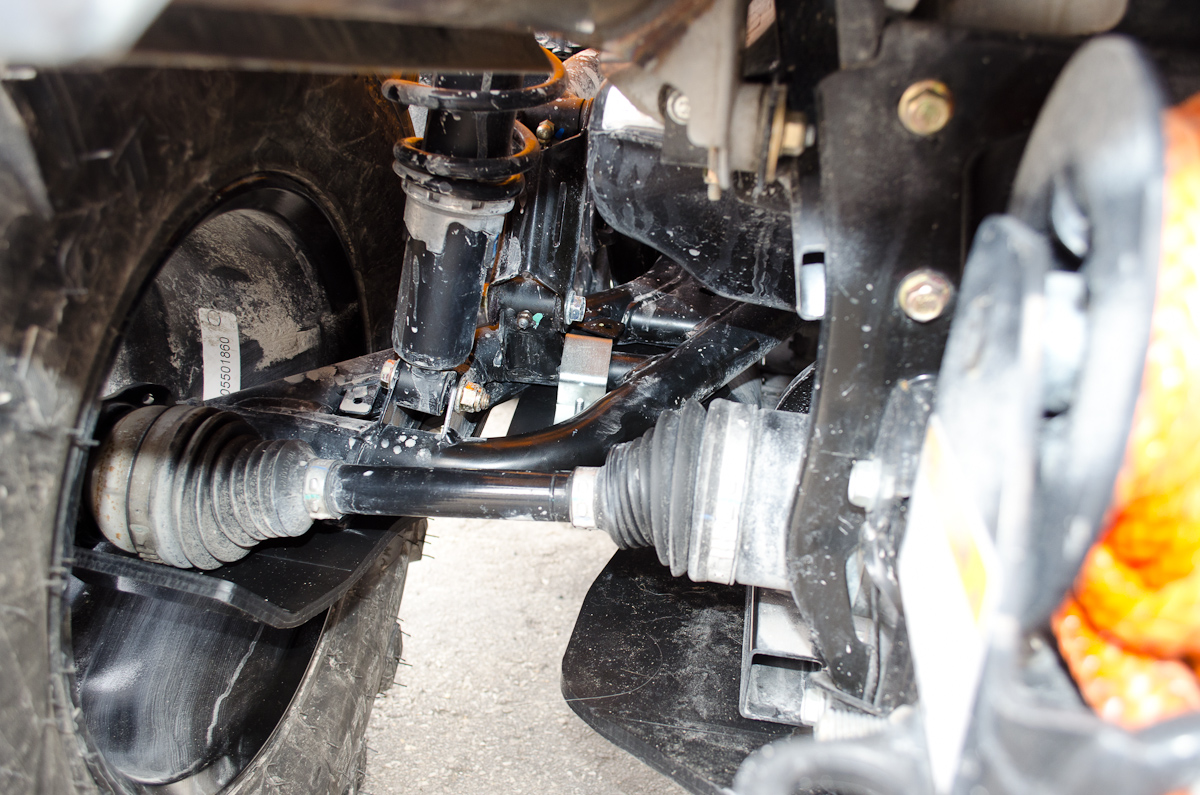 |
Rear axle / CV boot protection - left side. | |||||||||||||||||||||||||||||||||
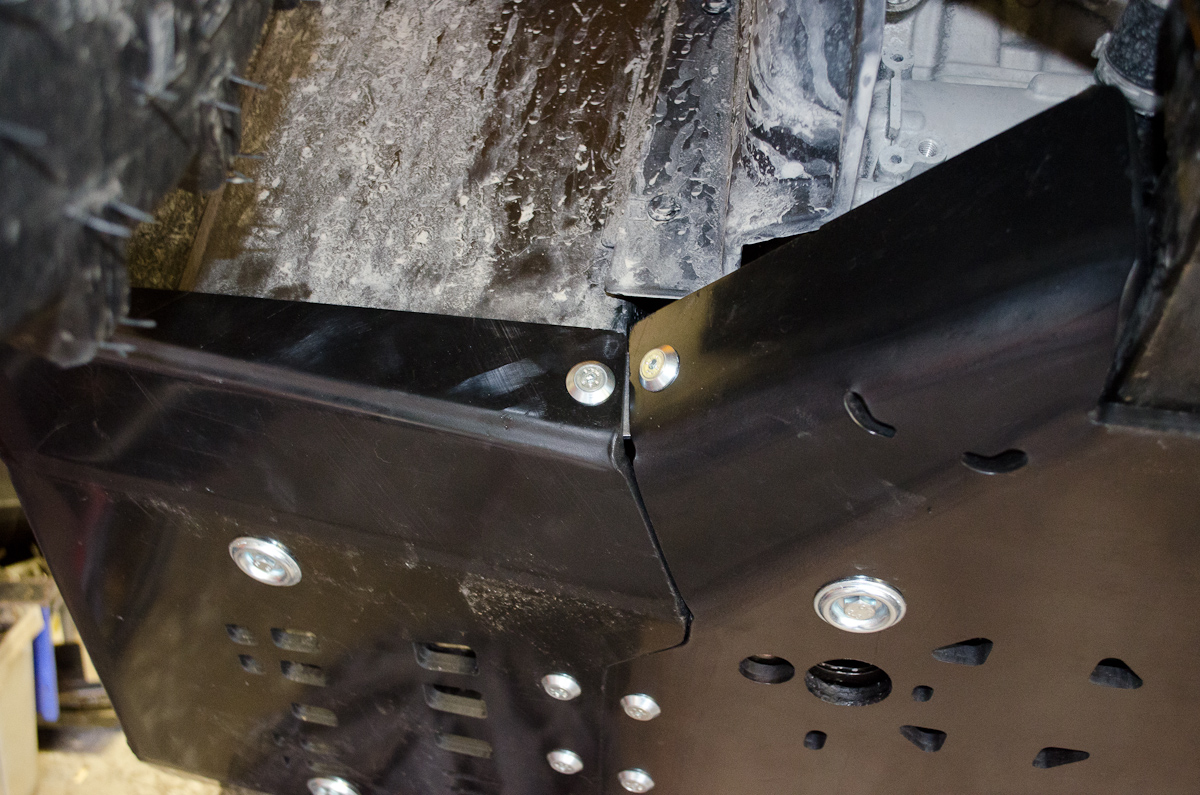
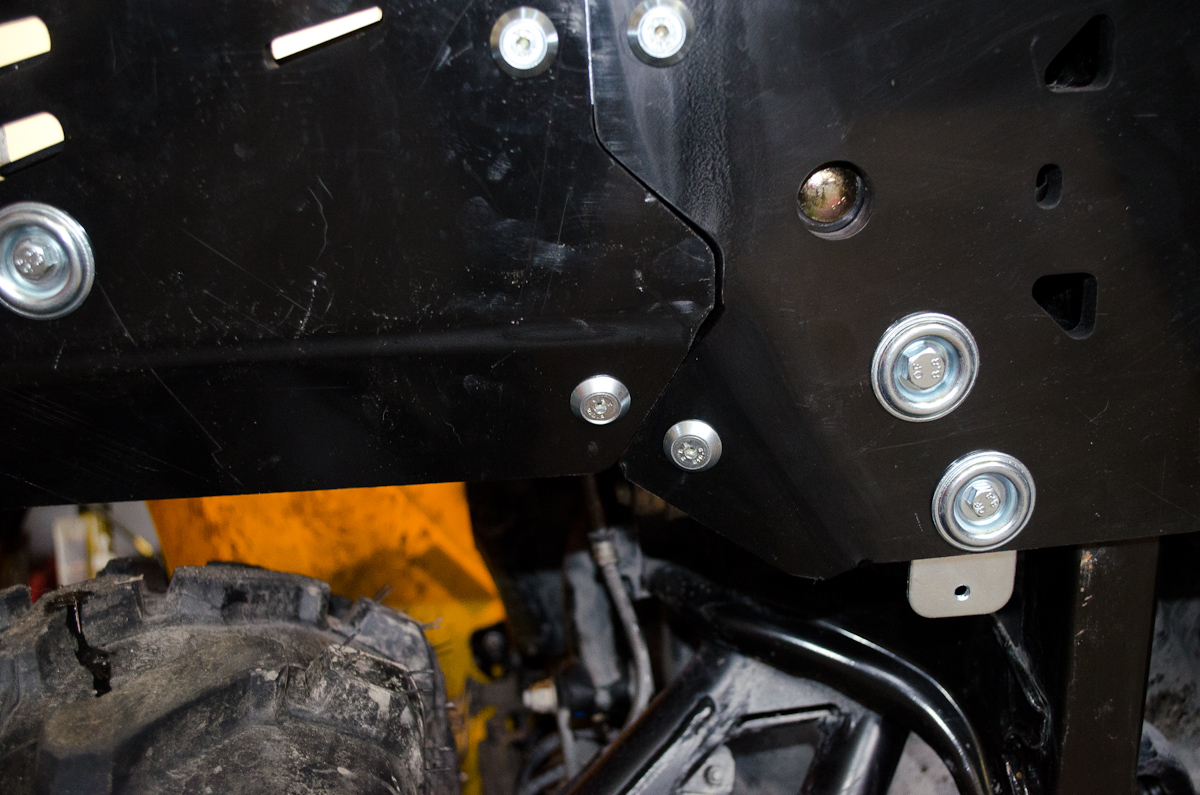
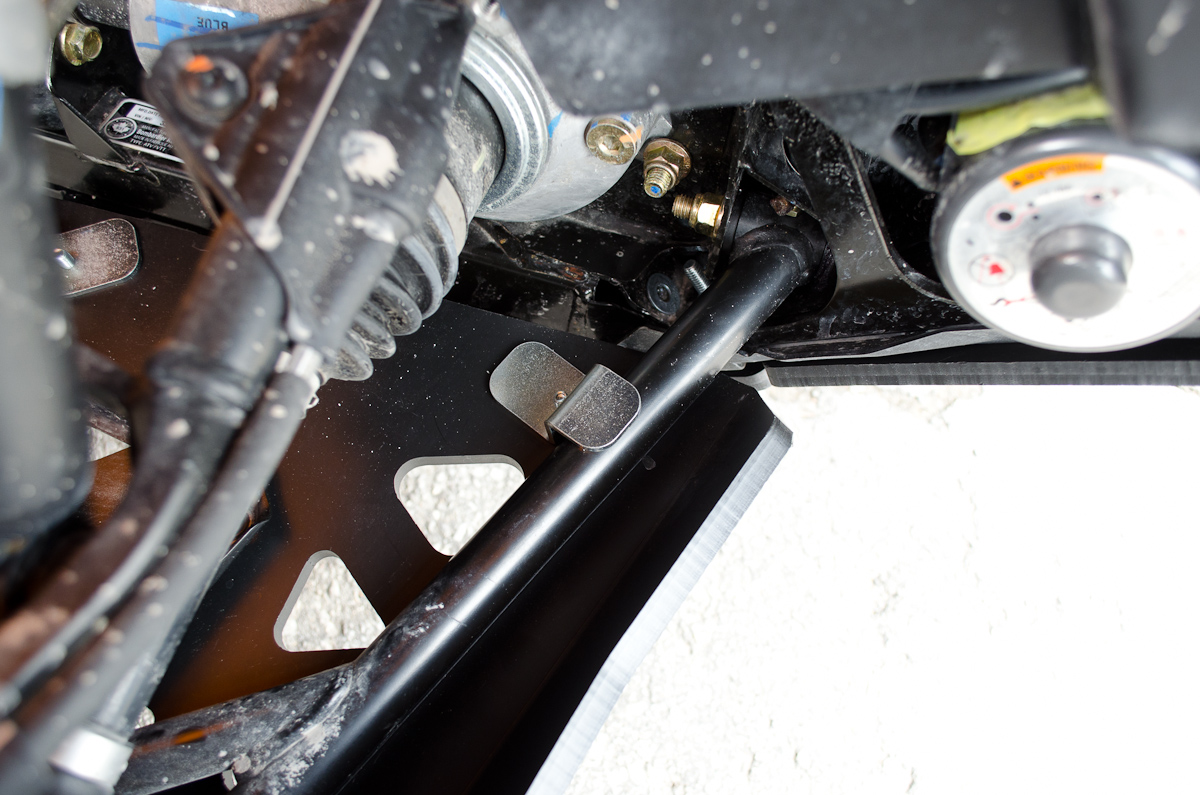
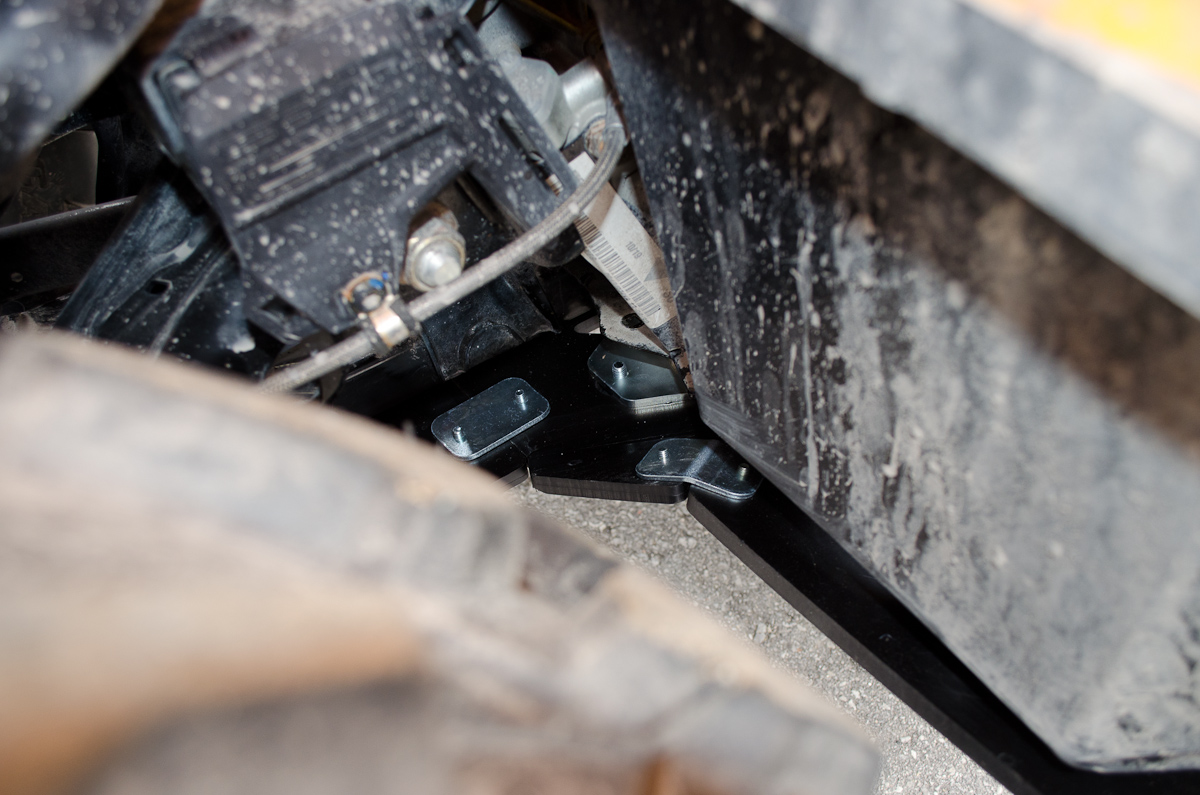 |
Here we can see the tabs we installed, connecting the individual skidplates together. | |||||||||||||||||||||||||||||||||
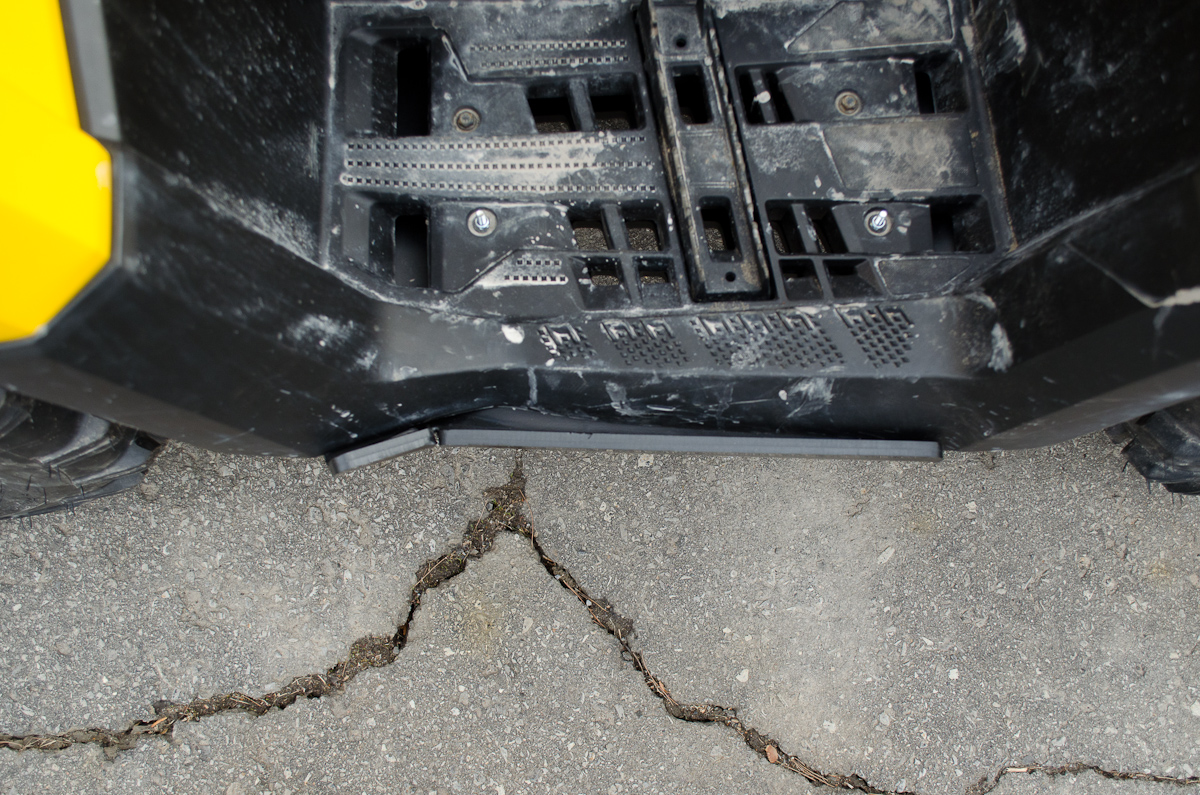
 |
Right-side footwell skidplate. | |||||||||||||||||||||||||||||||||
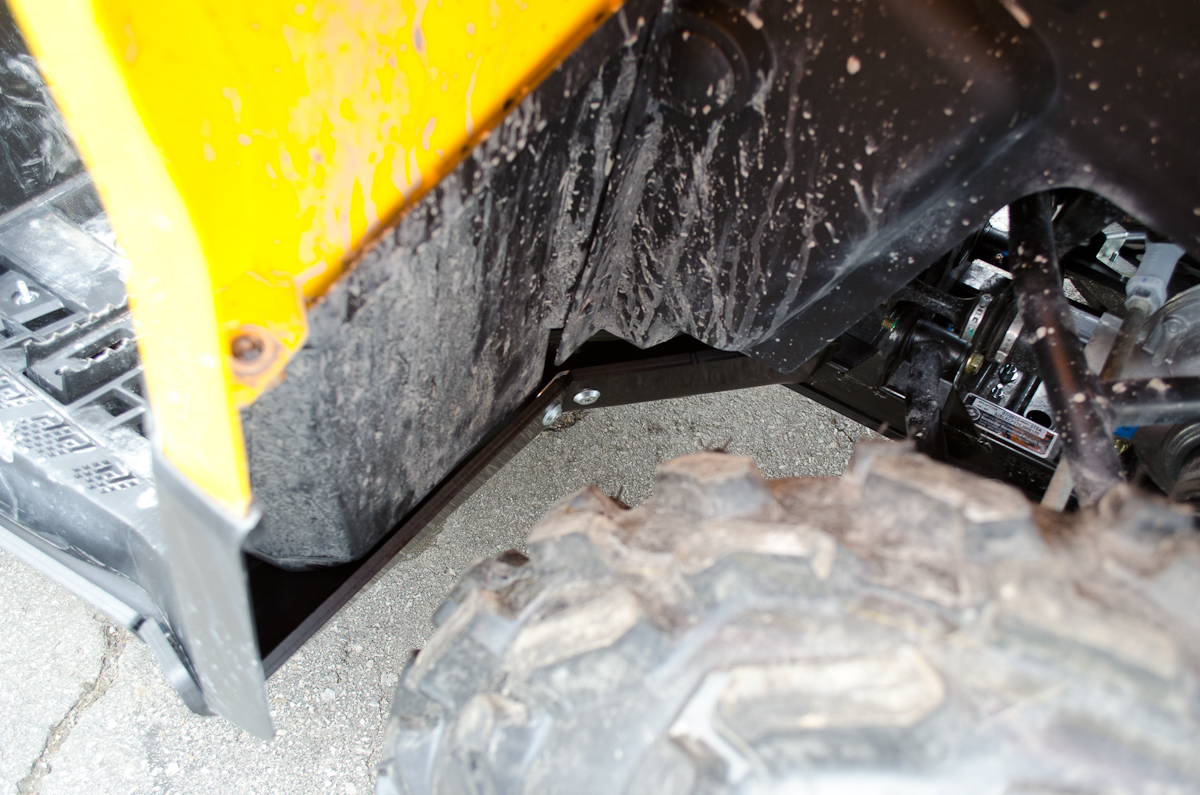 |
Front edge of the right-side footwell skidplate illustrating the fit and "wrap-around" protection offered. | |||||||||||||||||||||||||||||||||
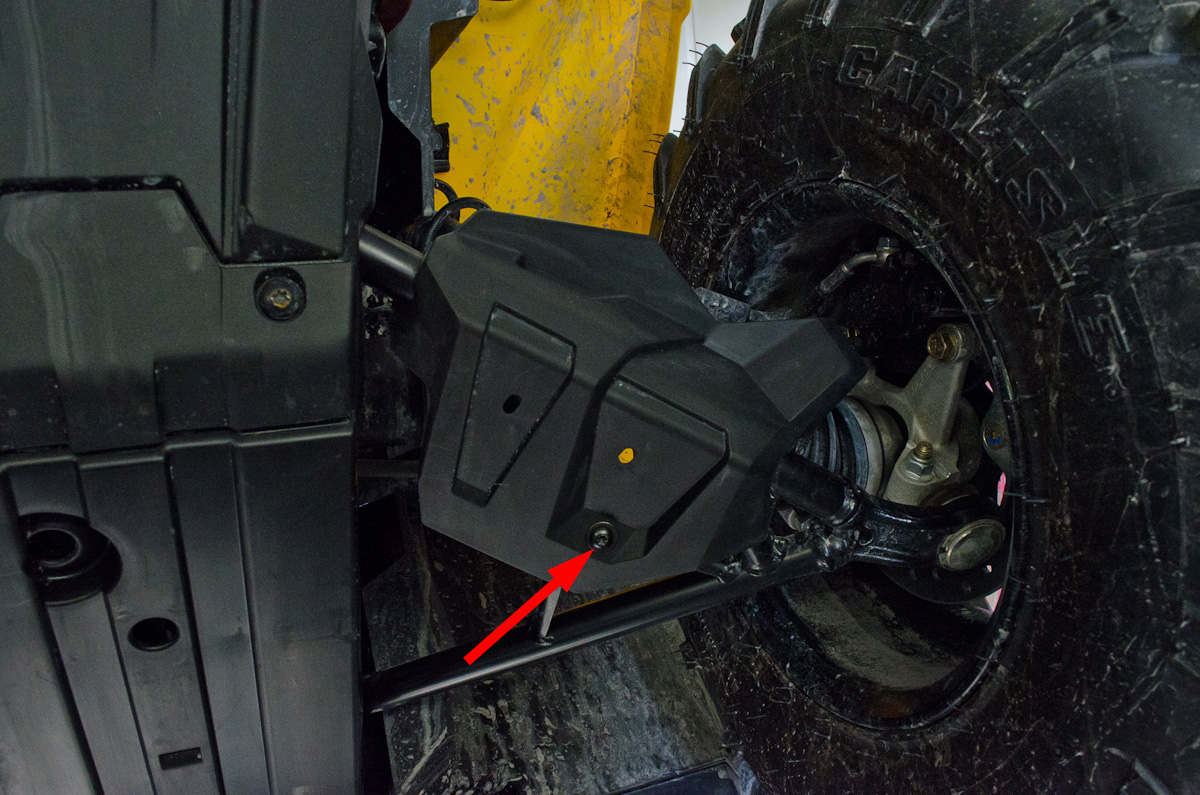
 |
View of one of the clamps holding on the front A-arm skidplate. | |||||||||||||||||||||||||||||||||
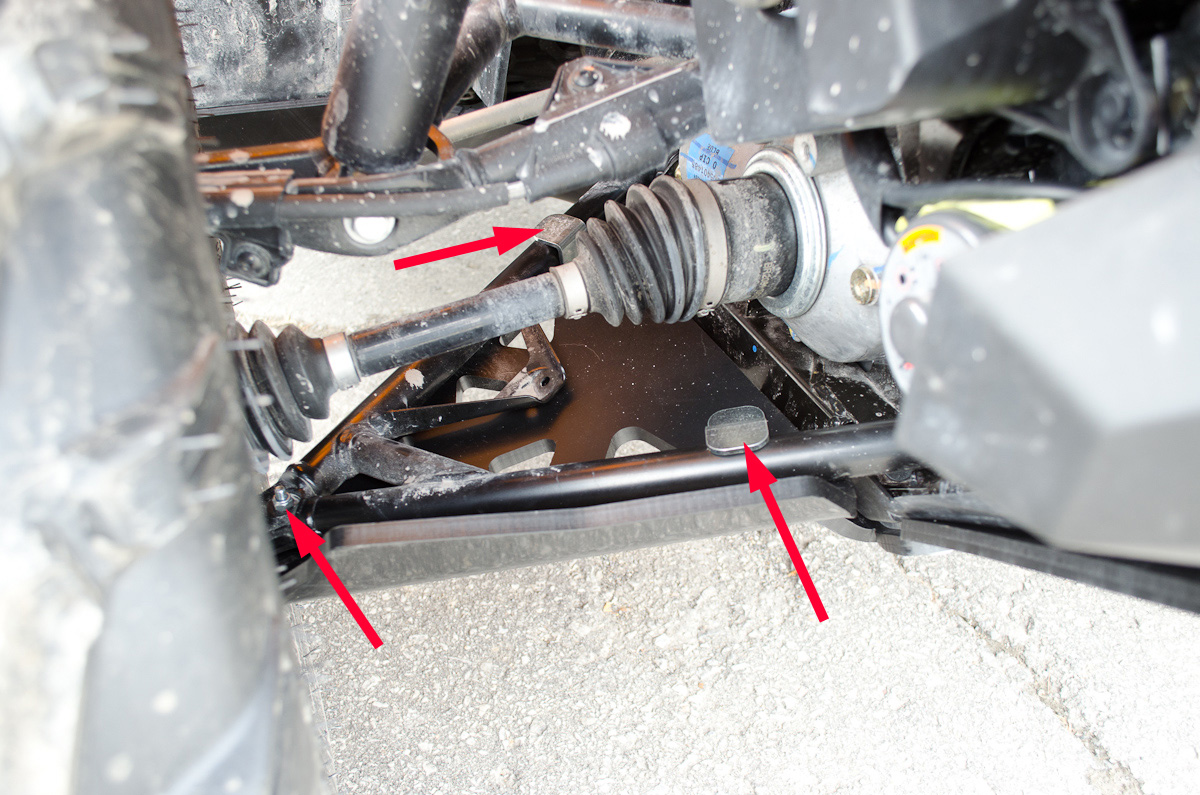 |
Front A-arm skidplate attachment points. Also note the coverage and protection of the front axles / CV boots. |
|||||||||||||||||||||||||||||||||
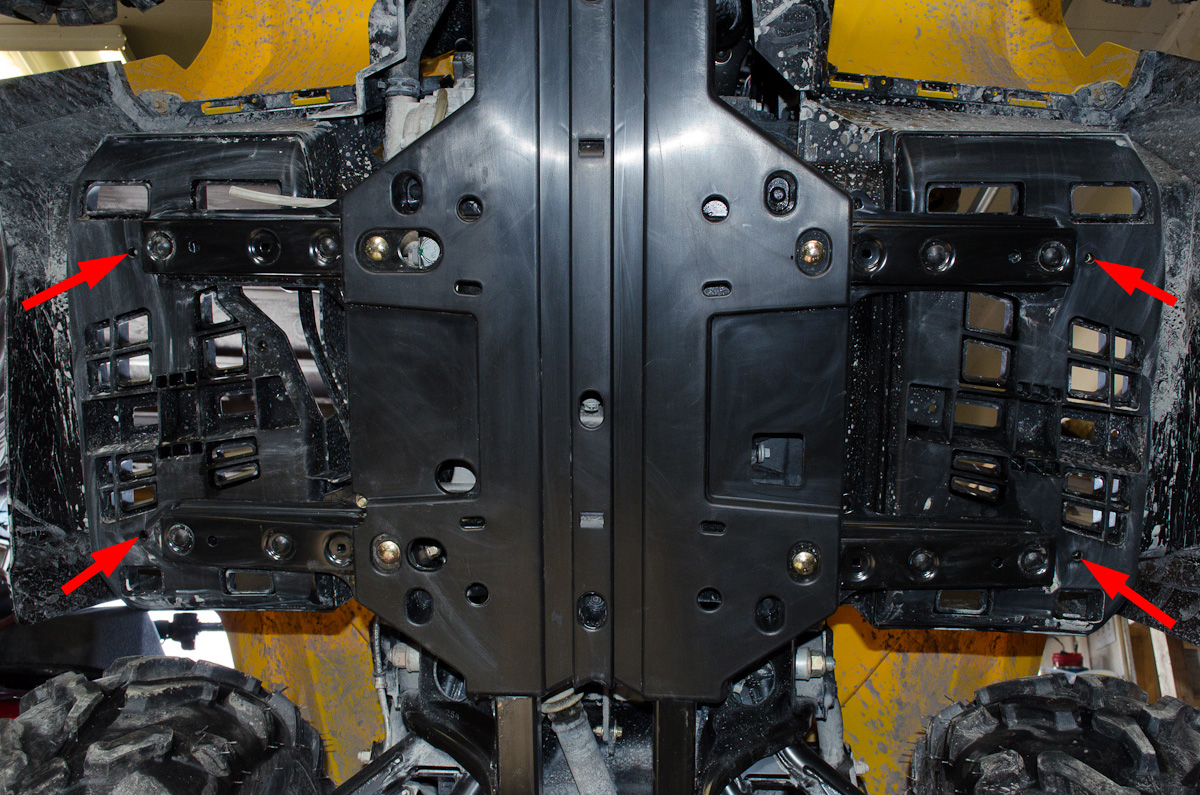
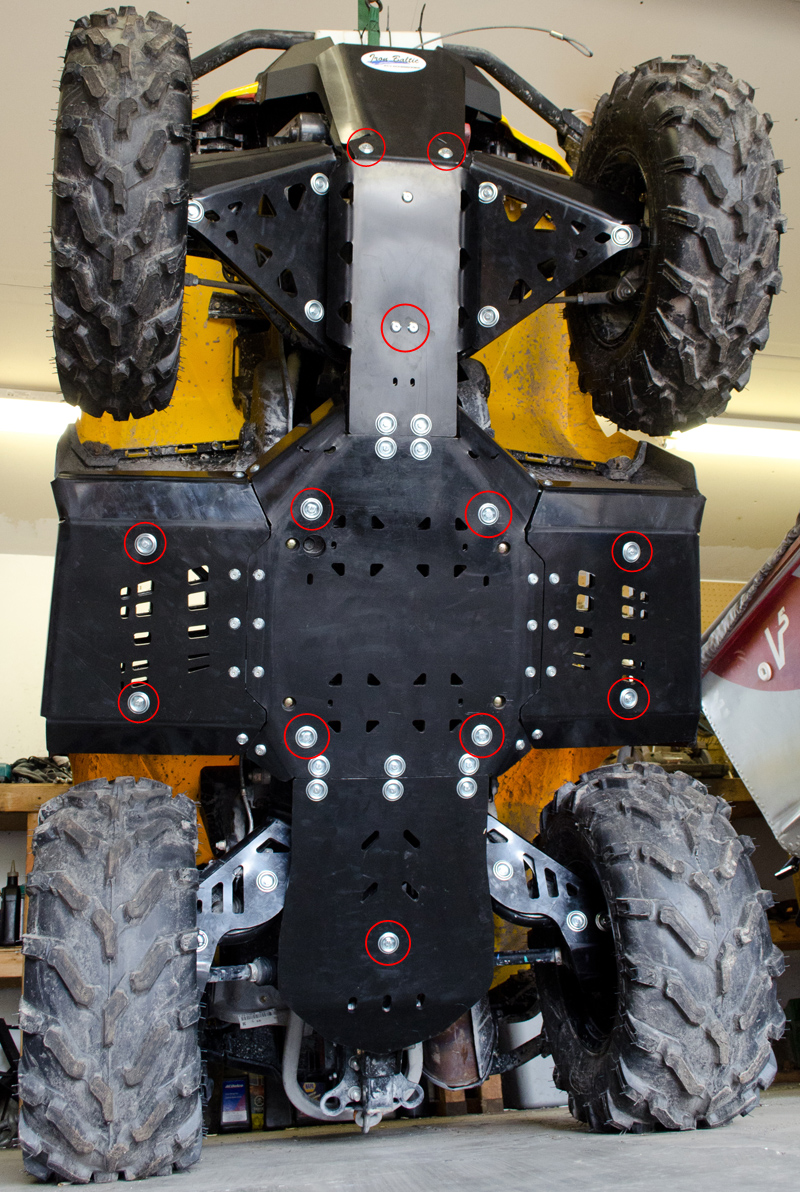
Removing the SkidplatesThe following picture illustrates the fasteners, circled in red, that have to be undone in order to remove the complete skidplate set in one piece (except the A-arm and Trailing-arm skidplates of course). The only two not illustrated are the two bolts holding on the winch fairlead which will also have to be removed along with the winch hook and fairlead itself. You can also download a .pdf file of this picture for reference or to give to whomever works on your ATV for you by clicking here.
|
||||||||||||||||||||||||||||||||||
|
||||||||||||||||||||||||||||||||||
|
Sources: Iron Baltic Ltd Põldmäe tee 1, Vatsla, Saue 76915, Estonia, EU +372 6 533 711 |
|