 |
Vaitrix Digipedal Commander By Bill "BillaVista" Ansell |
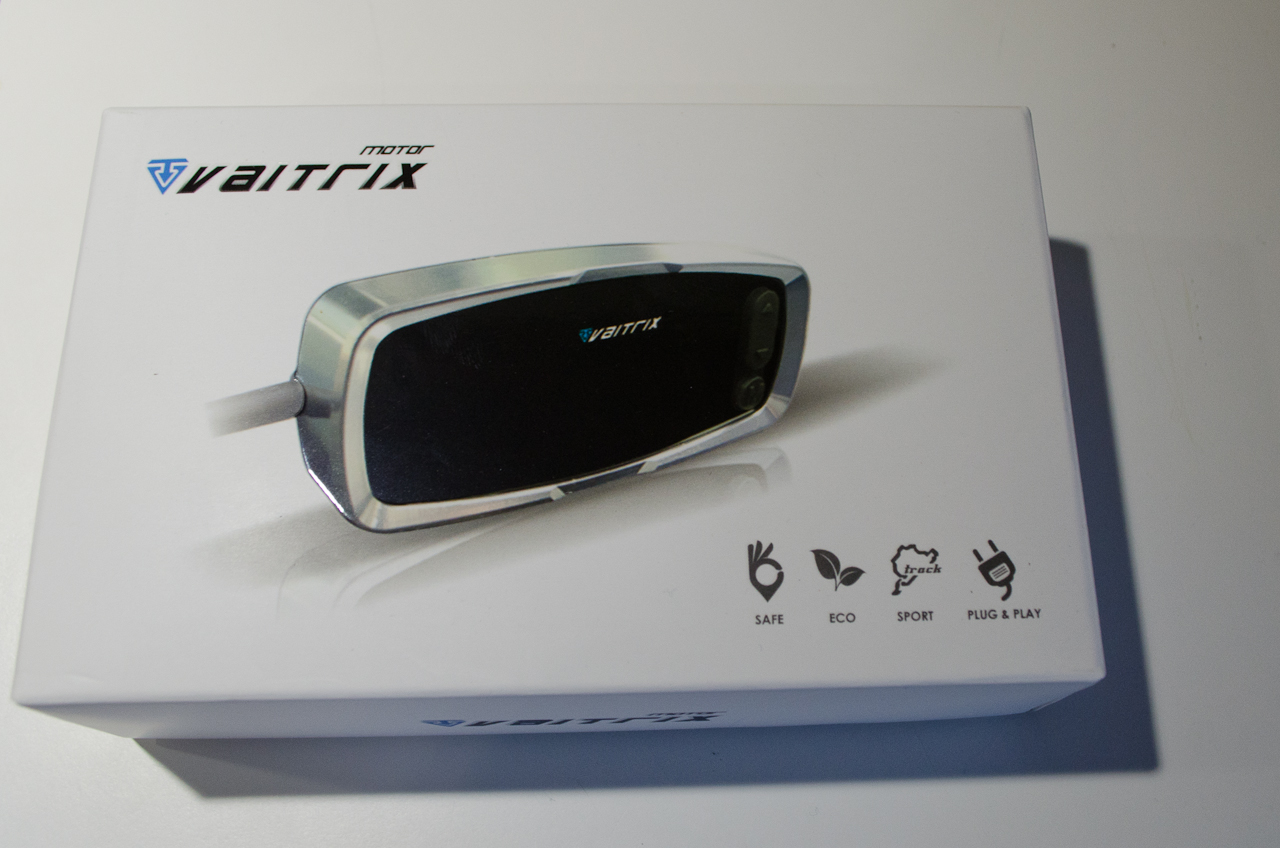
IntroductionThe Vaitrix Digipedal Commander is a very small digital controller designed to be installed in a car with throttle-by-wire technology to allow drivers to tune the throttle sensitivity to suit the way they drive. By doing so, the Vaitrix Digipedal Commander can eliminate throttle lag and enhance throttle response. Check out the manufacturer's web page on it at http://www.vaitrix.com/DIGIPEDAL%20COMMANDER.html |
 |
|
I'd read about users of this and other similar products reporting that it was a fun addition to the car and that although it couldn't make the car faster, it sure could make the car FEEL faster - which would make it seem like a perfect match for this car since the 124 Spider's real charm and beauty lies in the fact that it feels so wonderfully sporty and responsive even when not being driven terribly fast! Does it live up to the hype? Stay with me to the end to find out... |
||||||
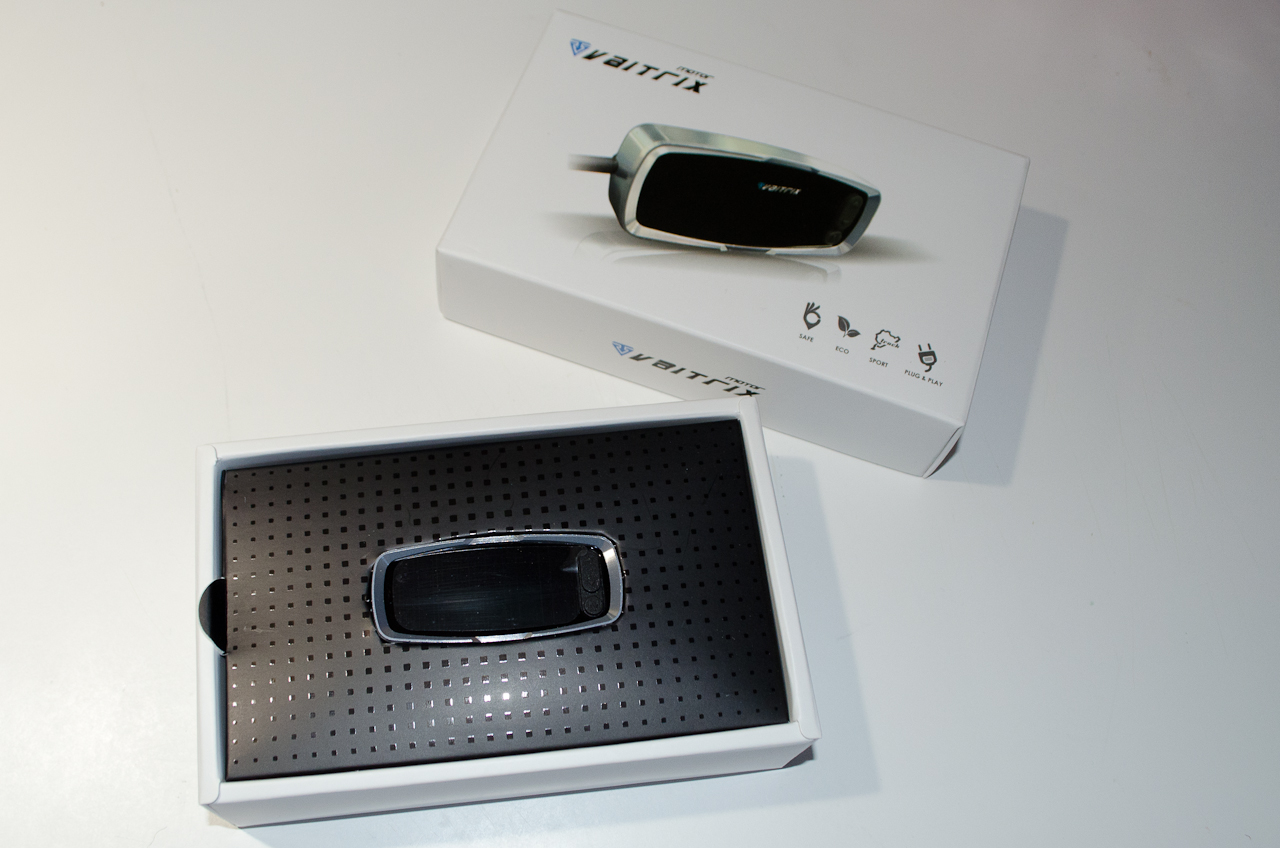 |
Inside the box is the controller itself... | ||||||
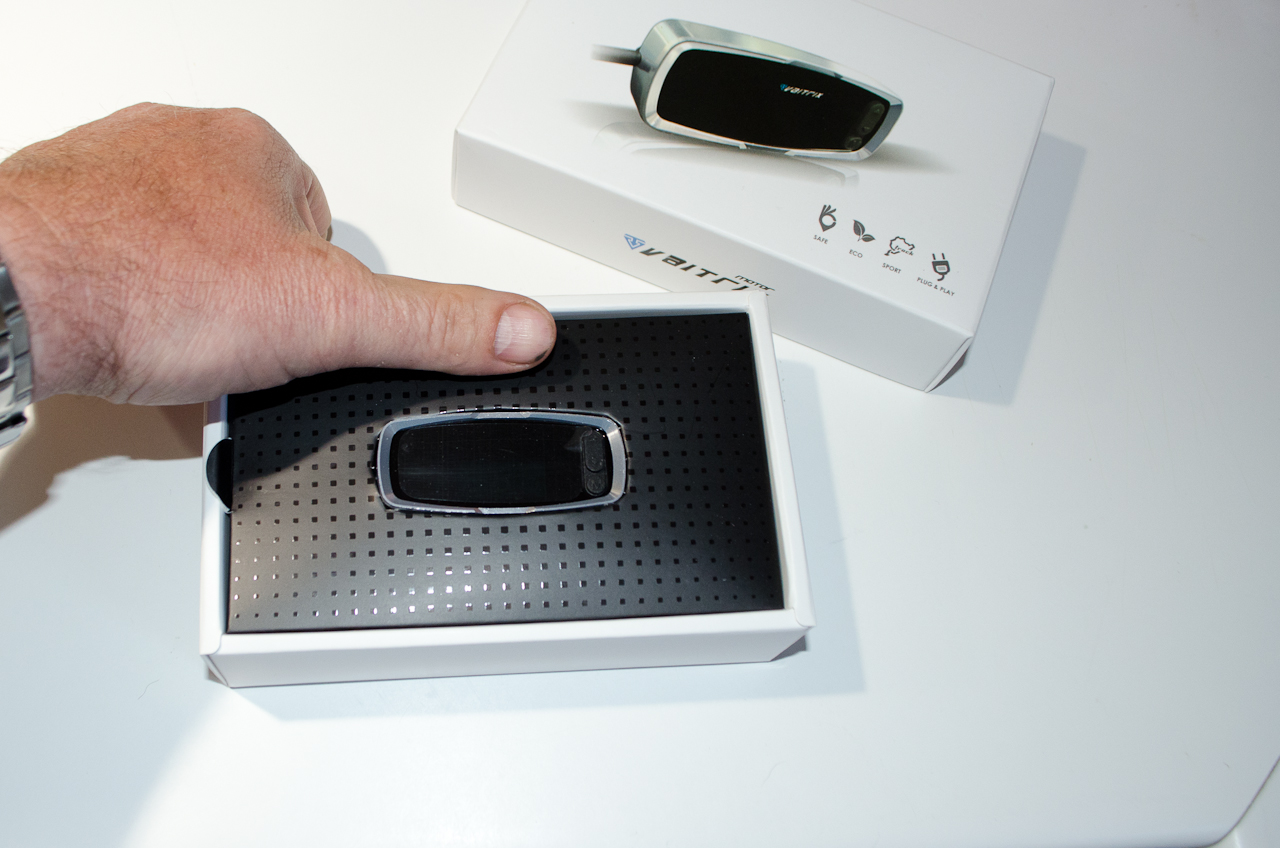 |
...it's tiny. Normal human male hand for scale. | ||||||
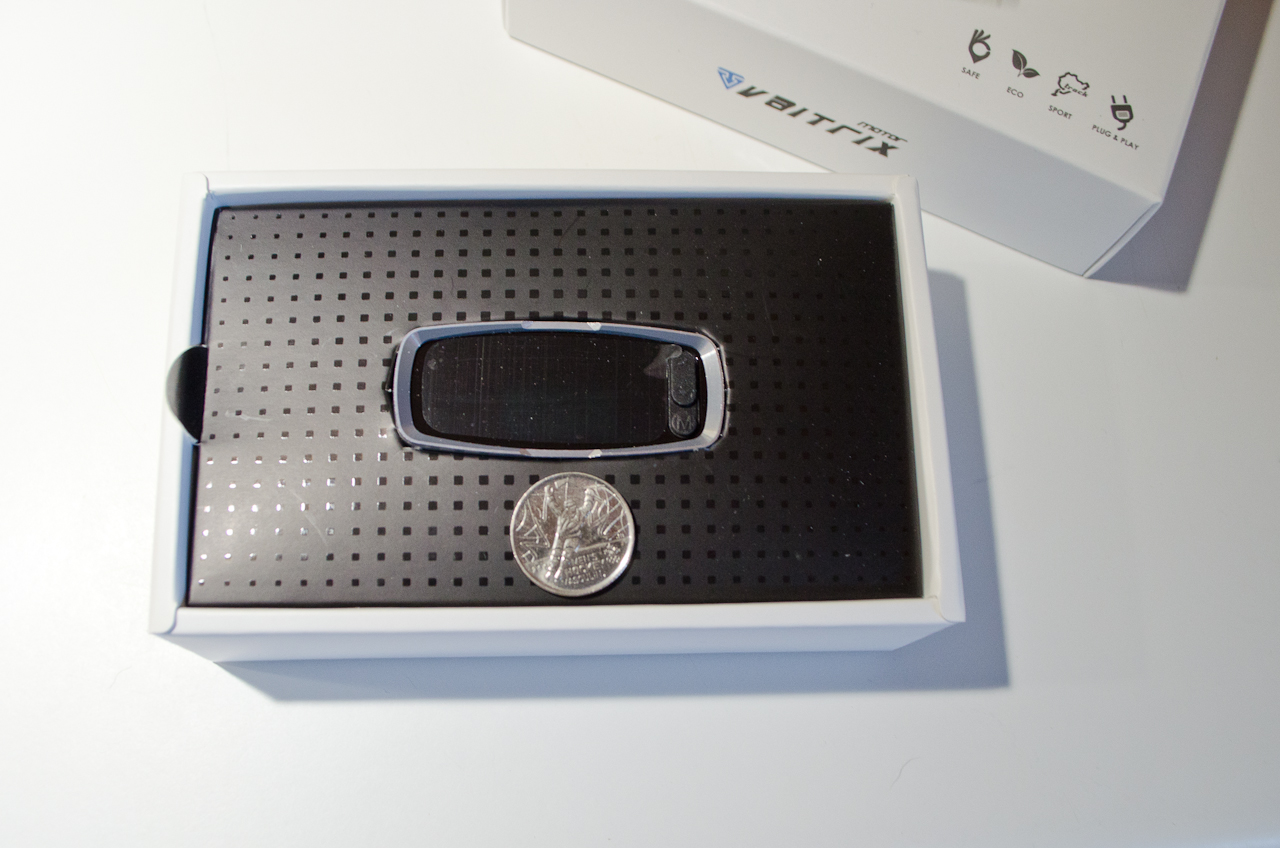 |
Quarter for scale. | ||||||
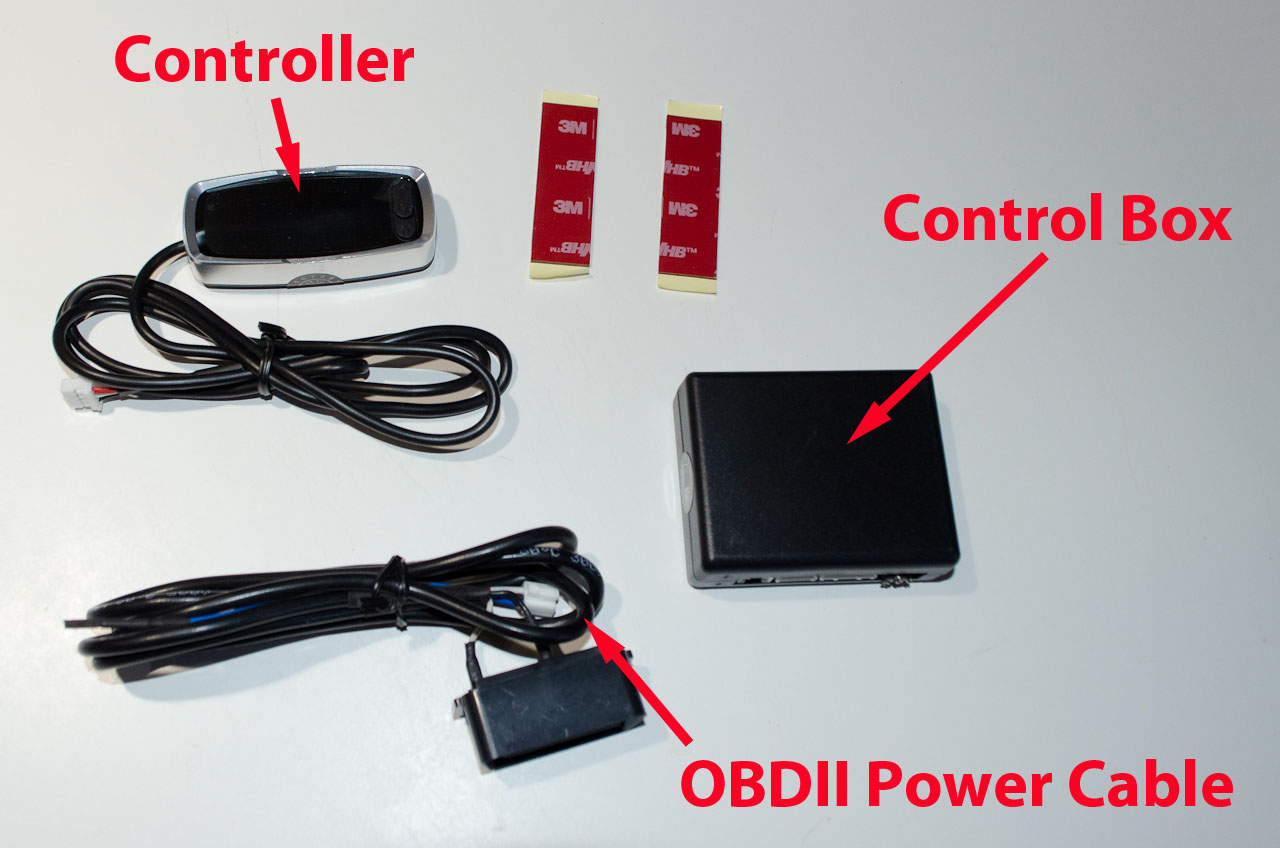 |
Also inside the box is the small digital control box, a power supply cable that can be plugged into the car's OBDII port (more on power options later), and two strips of 3M double-sided sticky tape (one to mount the controller to the dash and one to mount the control box (normally under the dash). | ||||||
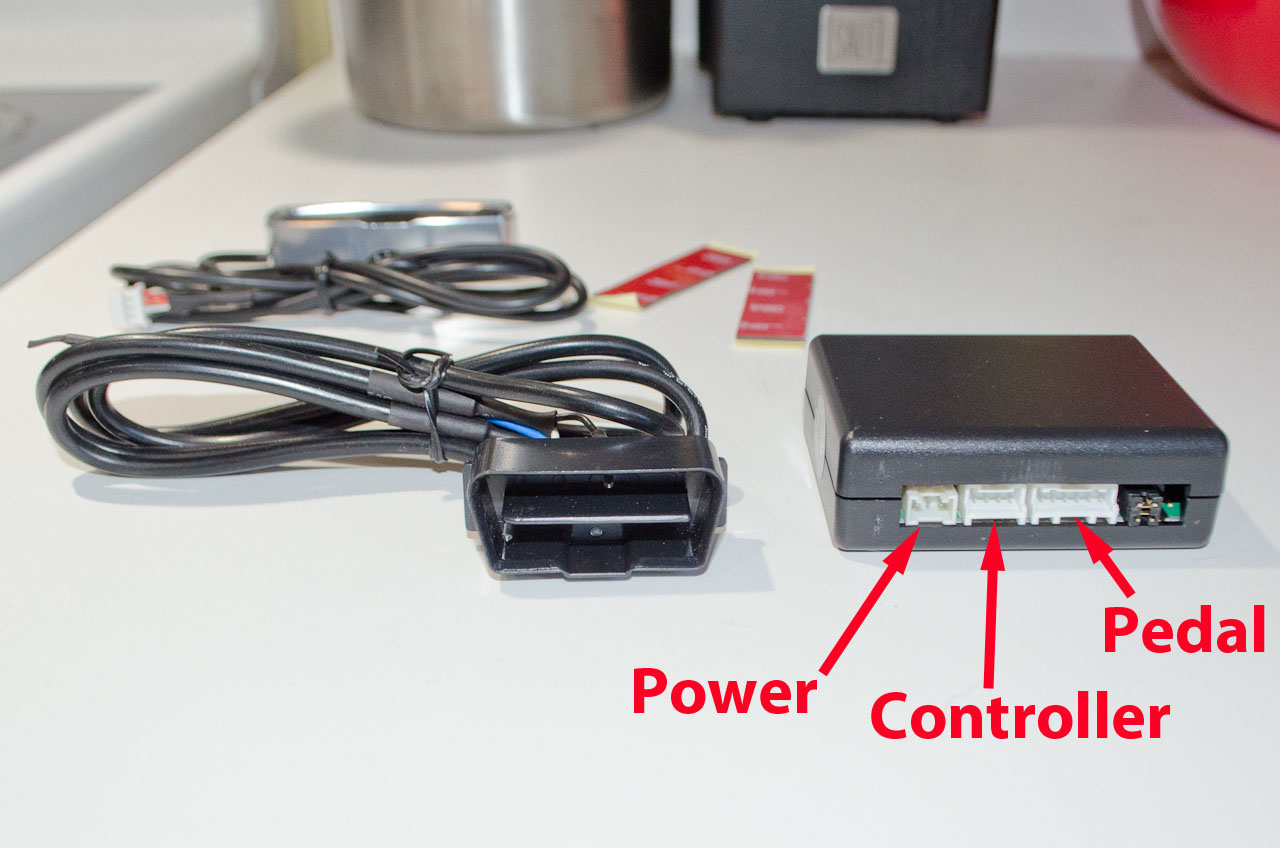 |
There are 3 connections on the control box: Power: The 3-prong power cord (connected to a source of battery 12V+ (always on) and Ground) plugs in here. Controller: The 4-prong plug on the wire attached to the controller plugs in here. Pedal: The 6-prong plug that comes from the pedal assembly plugs in here. |
||||||
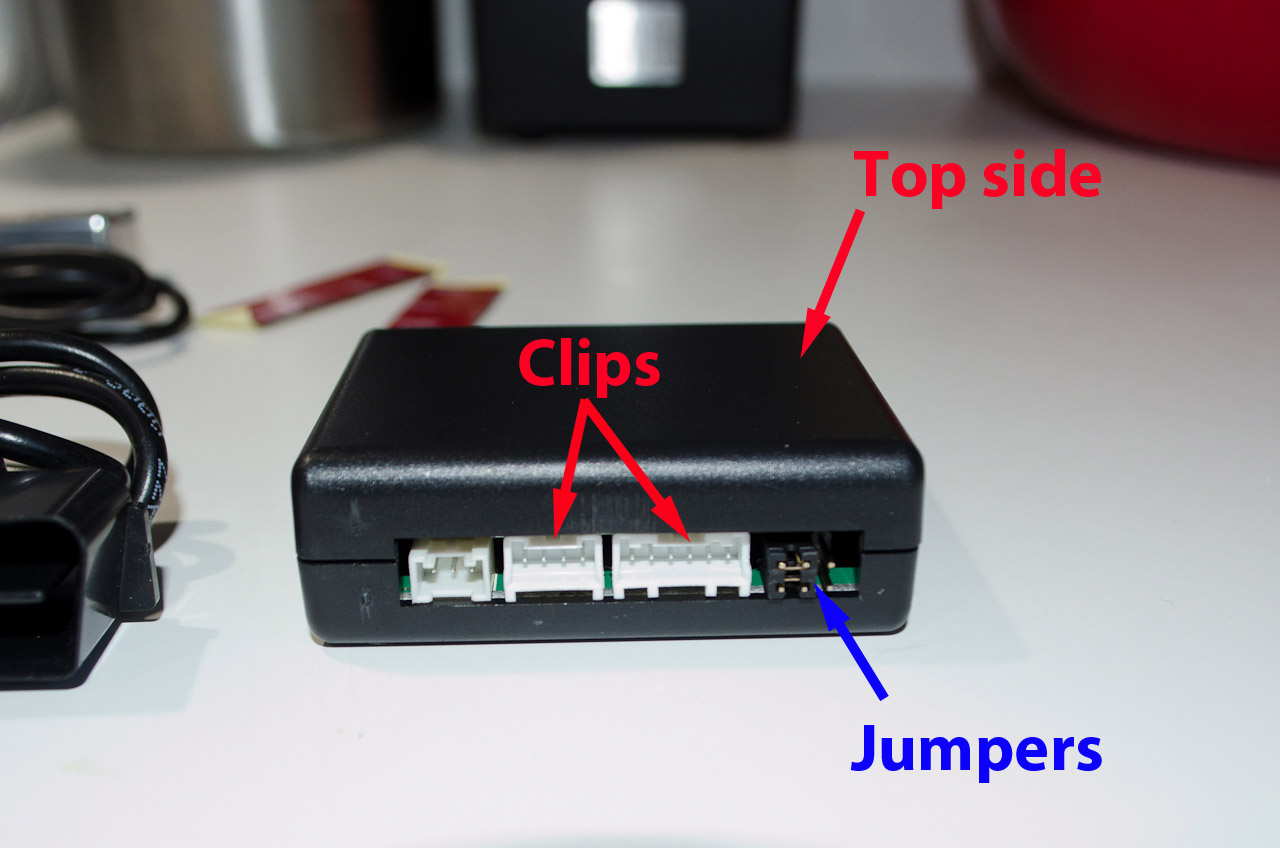 |
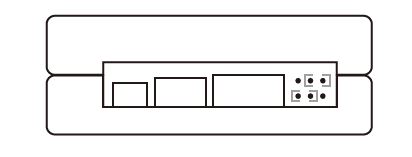
At the end of the installation, it will be important to understand the orientation of the control box so that the little jumper switches (blue arrow) can be set to the correct positions. The "top side" faces up when the little clips that secure the plugs are up. In this orientation, the top jumper is "Row 1". The bottom jumper is "Row 2". |
||||||
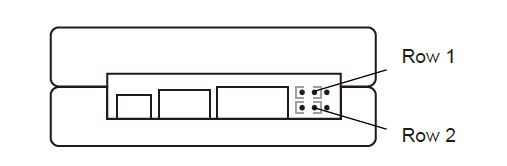 |
Jumper labels with control box "top up". This will all make sense later. |
||||||
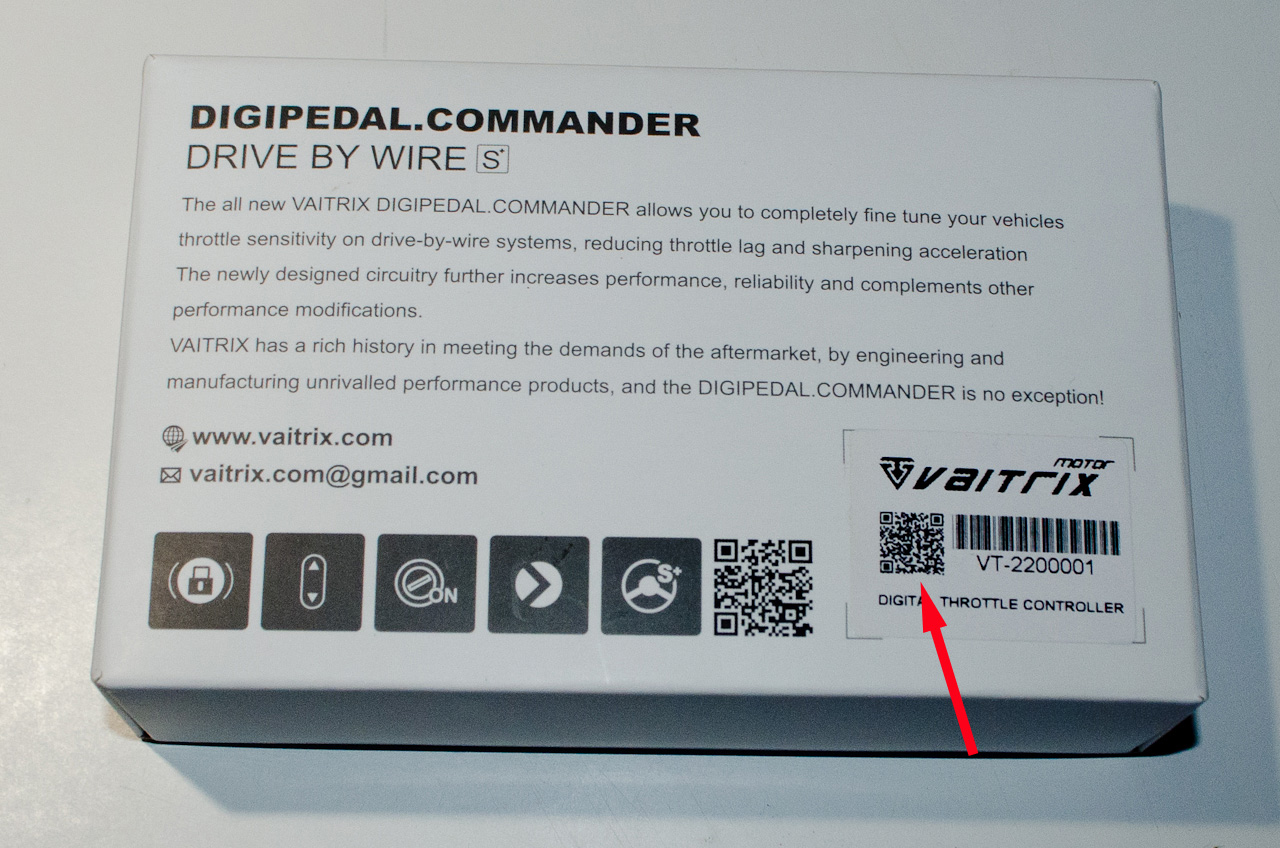 |
On the back of the box there is a QR code that, if scanned by a cell phone camera, downloads the PDF manual from the manufacturer. WARNING: It is really badly written...like really badly! |
||||||
 |
Click on the icon to download the PDF. (But really...you're much better off just reading the rest of this article) |
||||||
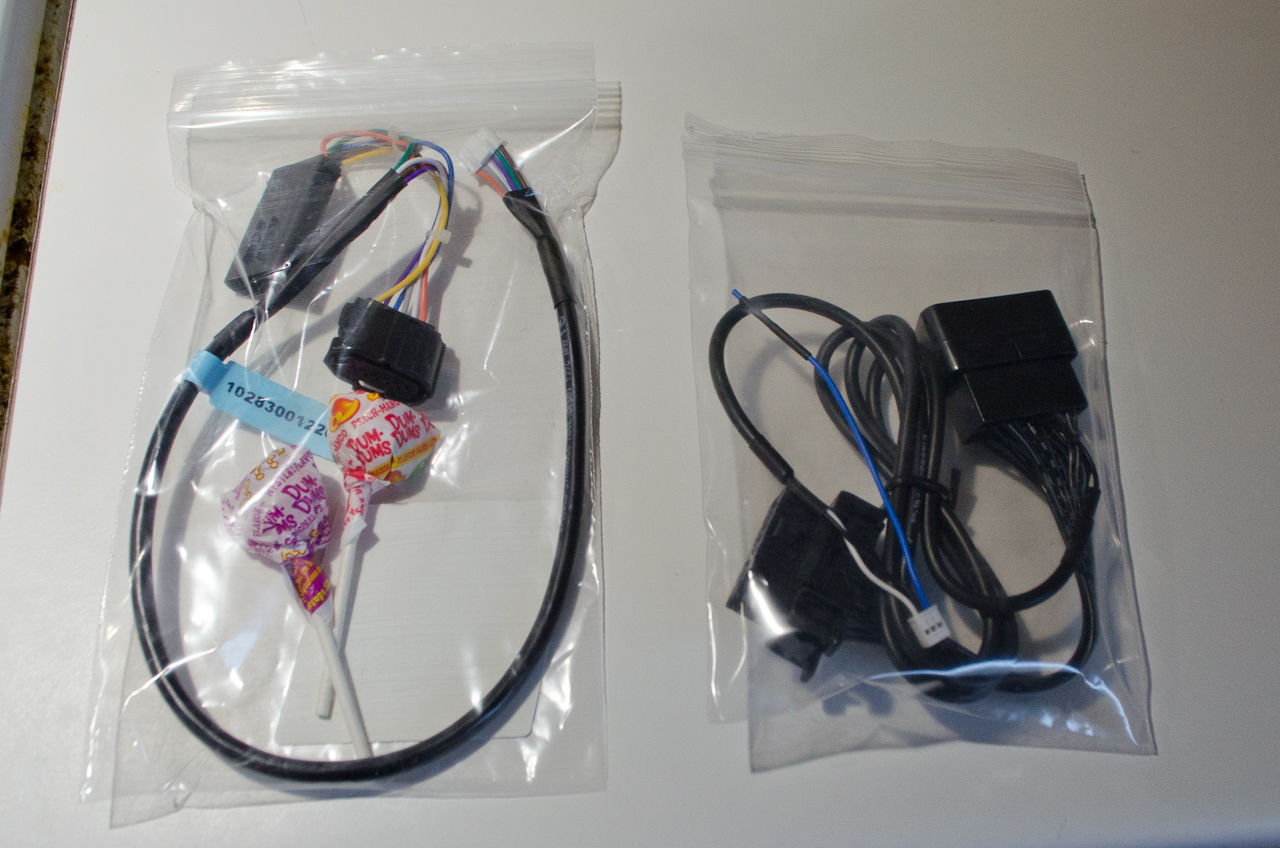 |
There are two other packages that come with the Vaitrix box when you order from Eurocompulsion. One is the vehicle-specific wiring harness that connects the car's throttle pedal to the control box. The other is an additional (optional) OBDII power cable that allows you to retain an open OBDII port while supplying power to the control box. |
||||||
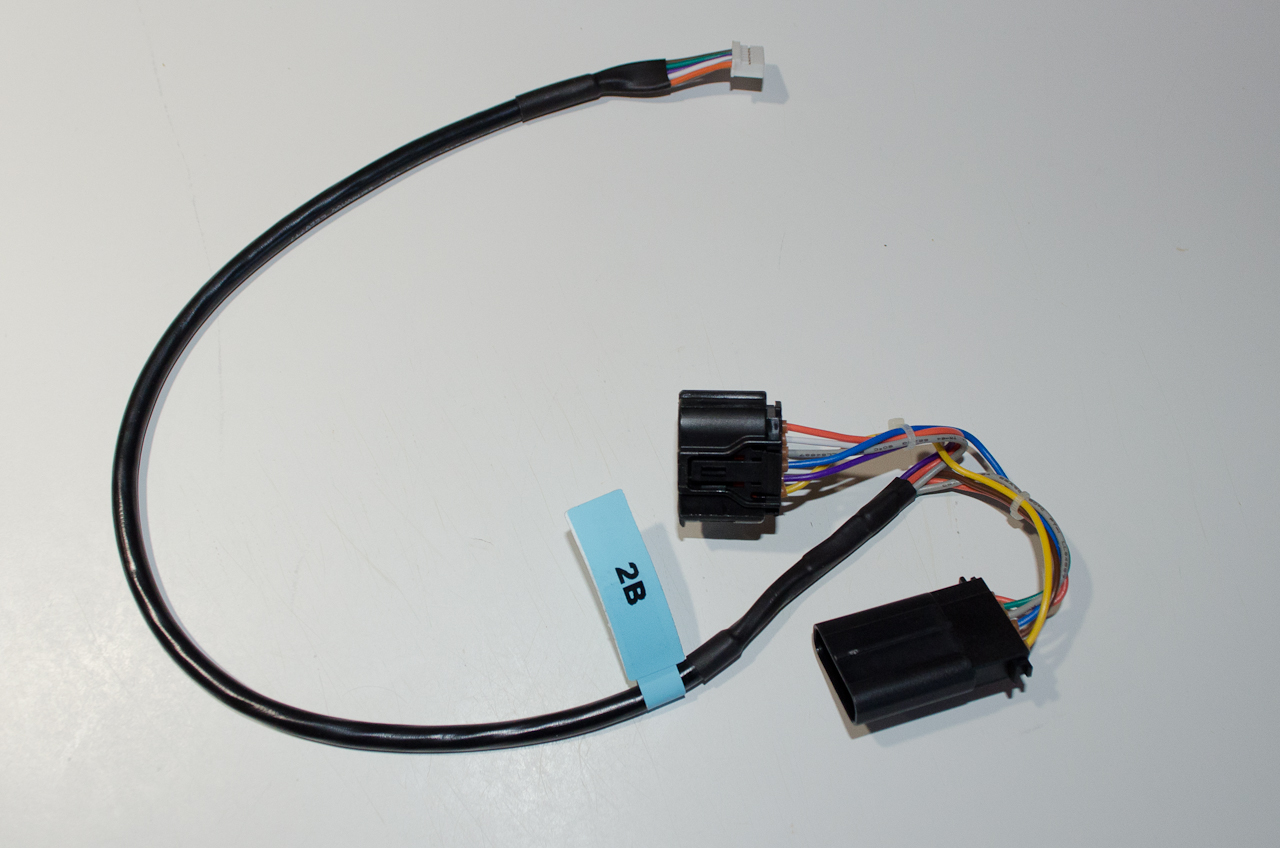 |
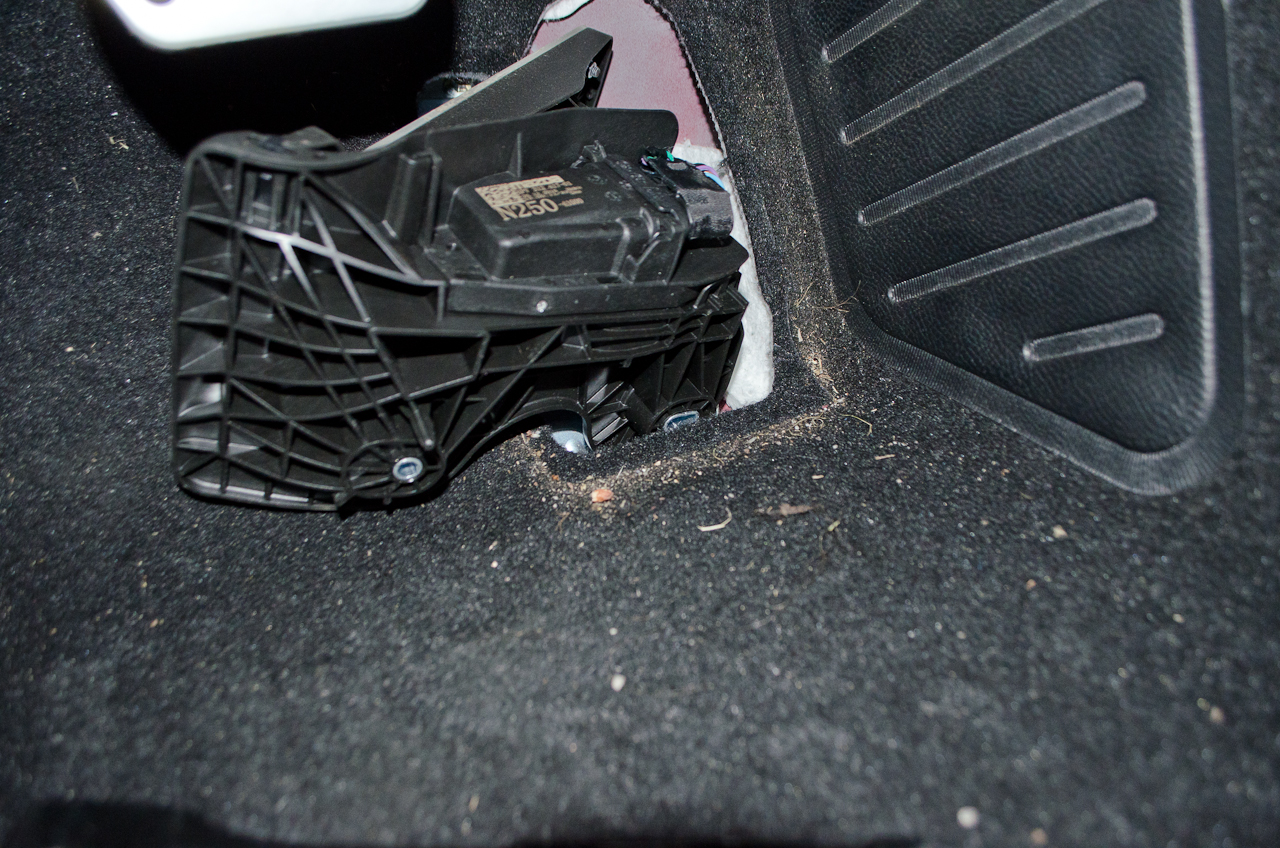
This is the pedal assembly wiring harness for the FIAT 124 Spider. | ||||||
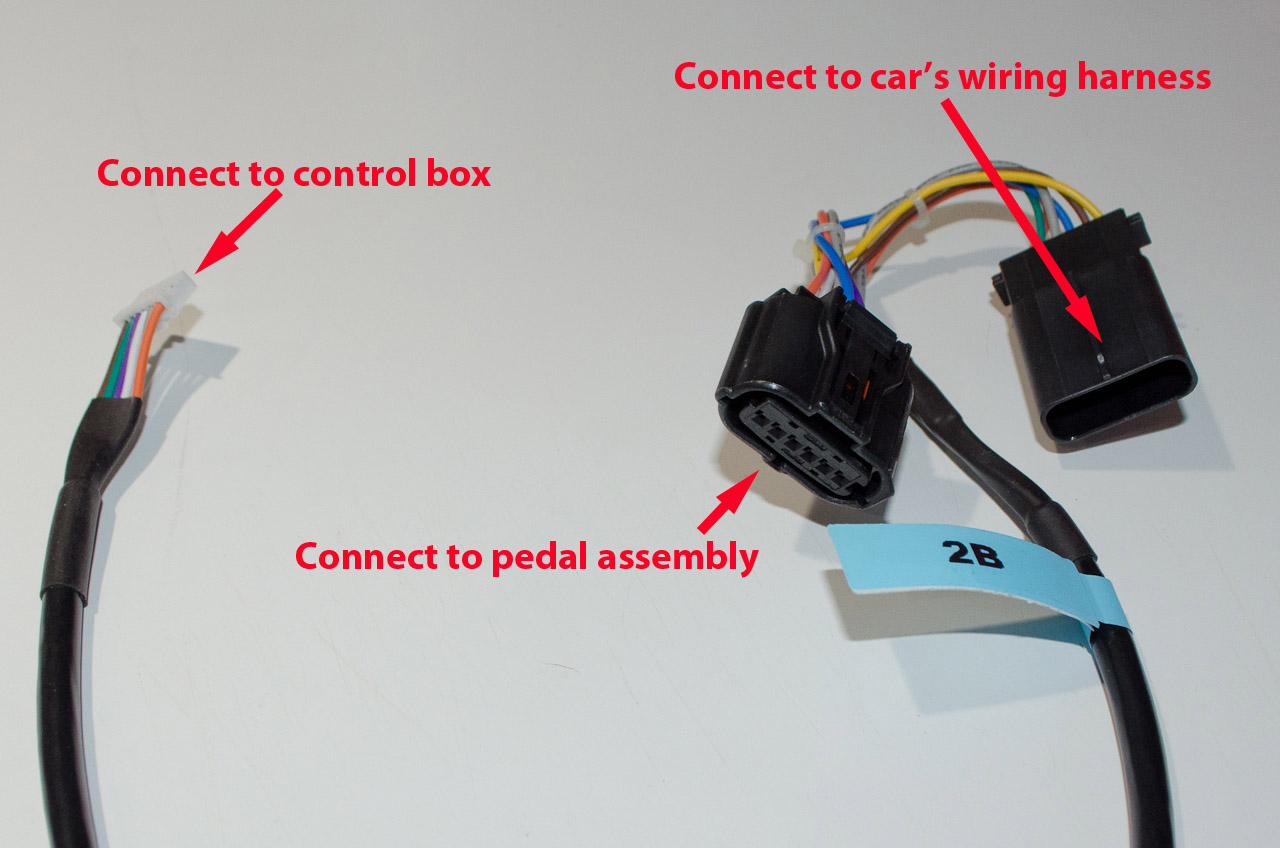 |
The longer connector (far right in this pic) has male prongs inside - it connects to the wiring harness of the car, once you disconnect the throttle pedal assembly from it. The smaller female connector plugs into the pedal assembly. The small white 6-prong connector connects to the control box. |
||||||
Power Connection OptionsThere are 3 methods of supplying the required battery 12V+ constant voltage to the control box:
|
|||||||
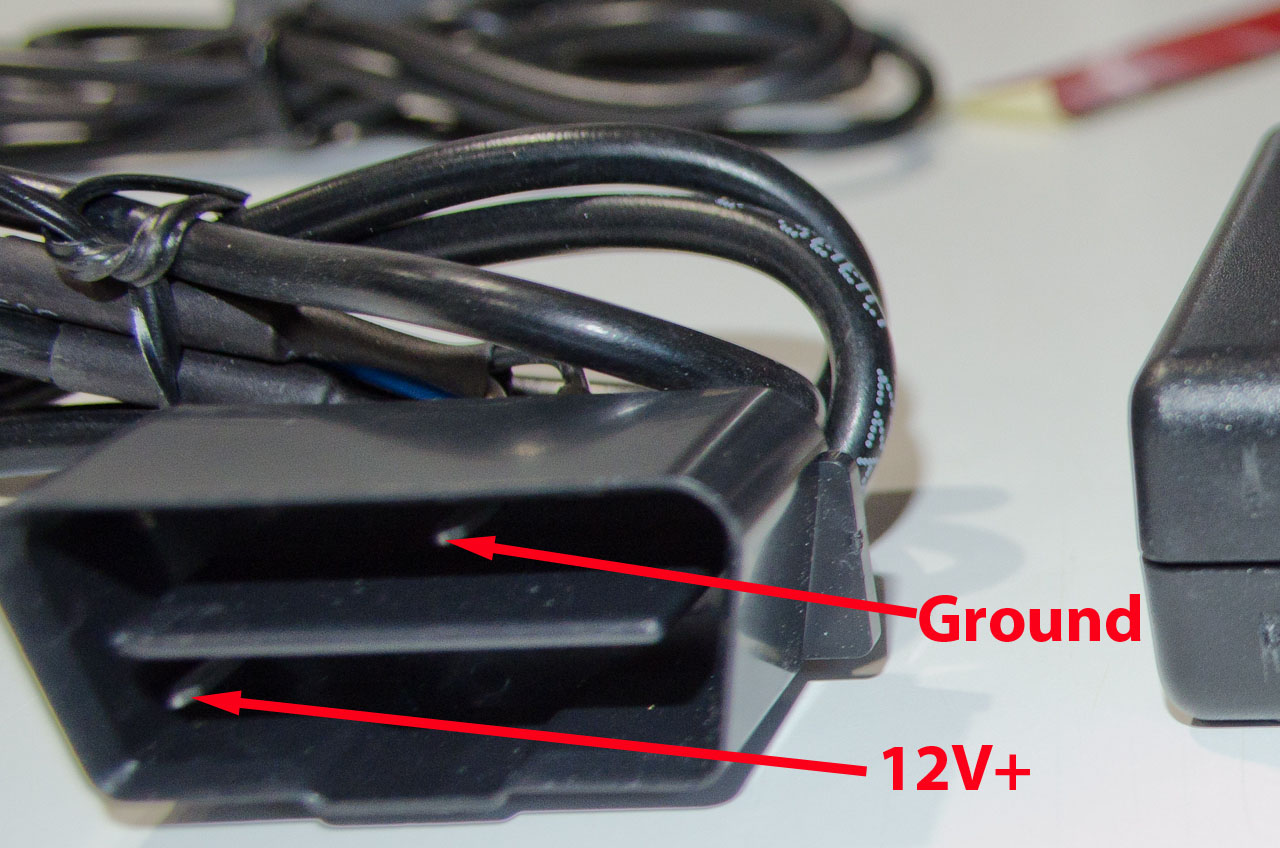 |
Method 1: This is the plug that goes into the OBDII port. I rejected this method as I need to have access to the OBDII port at all times. |
||||||
 |
Method 2: This is the OBDII cable that allows retention of the OBDII port. | ||||||
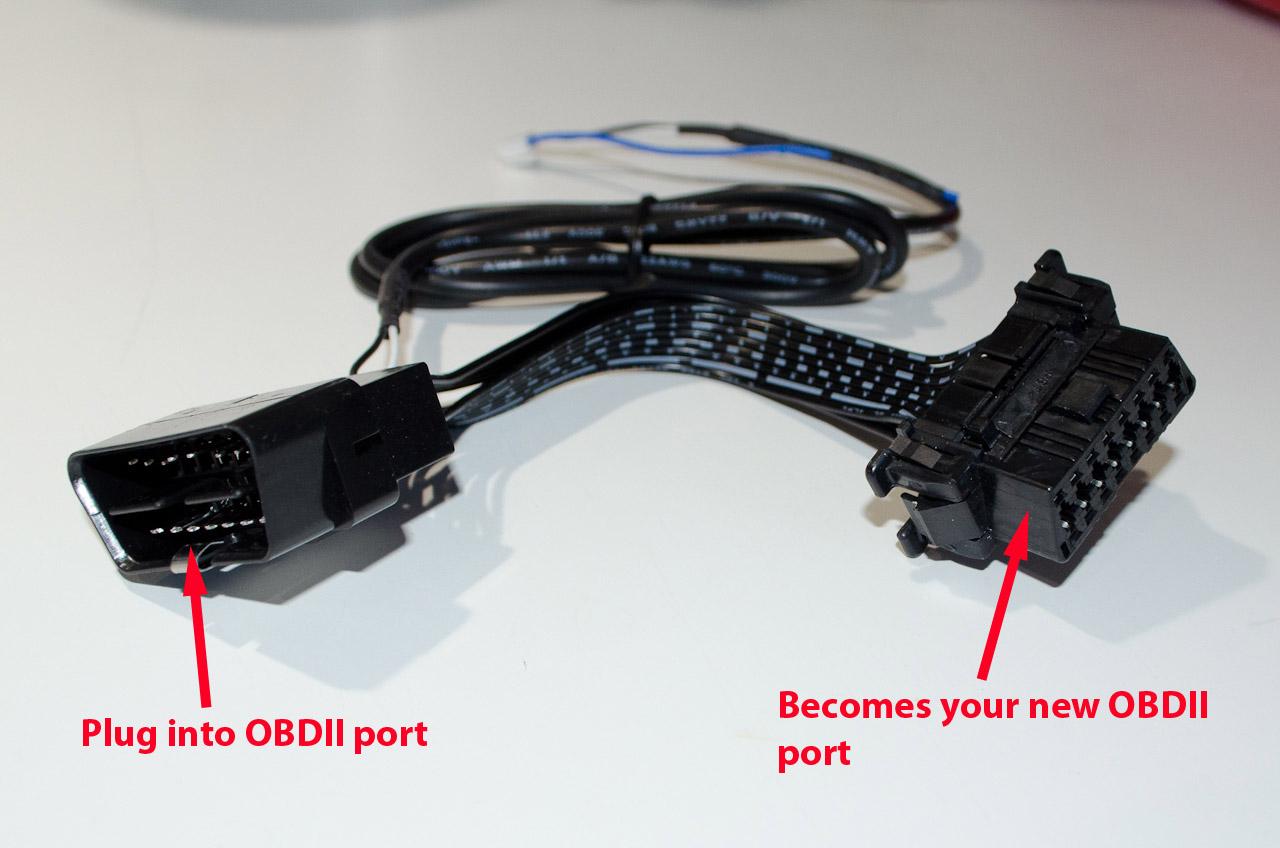 |
Method 2: One end plugs into the car's existing OBDII port and the other end needs to be secured somewhere so that it can function as an OBDII port. I rejected this method because I didn't want to mess about with the OBDII port at all and I didn't want to deal with the extra wire and finding a way to secure all this under the dash. |
||||||
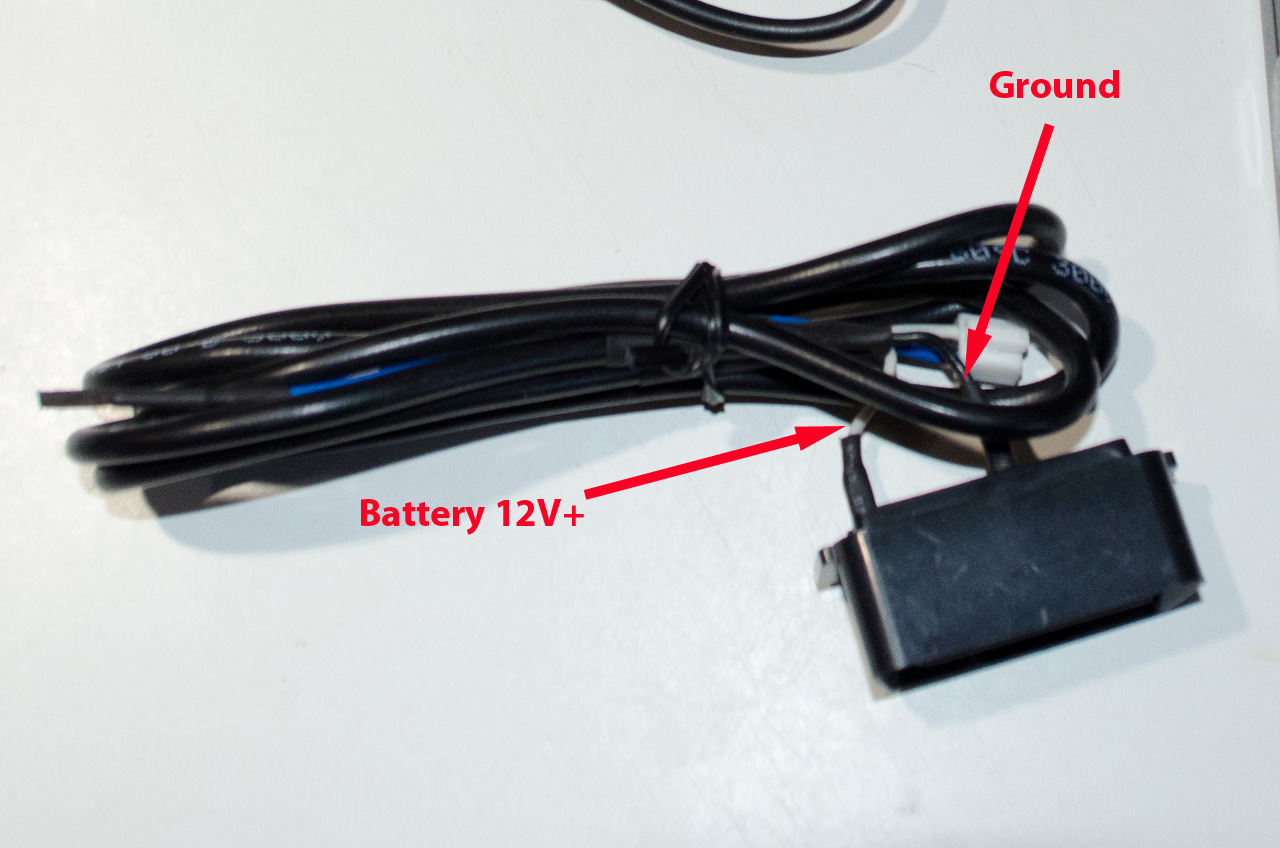 |
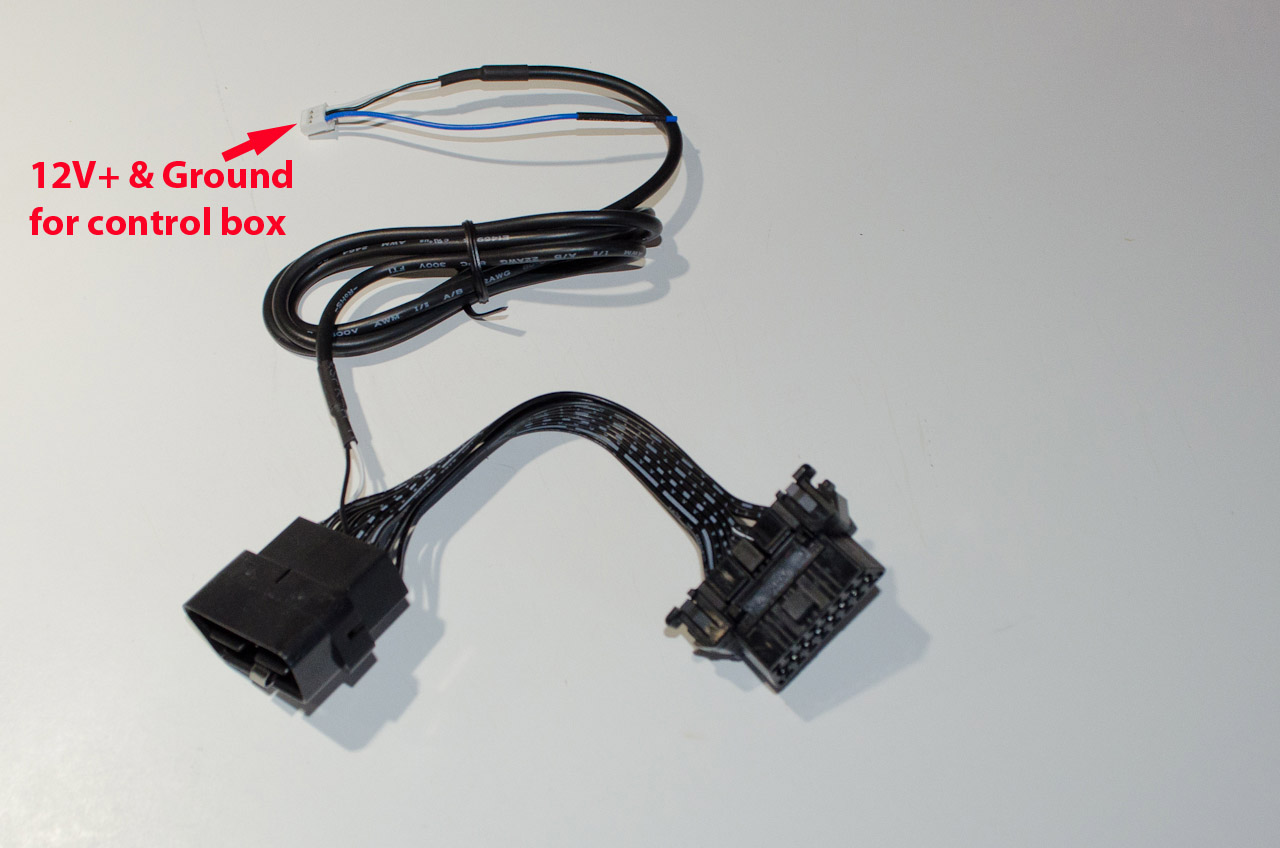
Method 3: I opted to cut the OBDII connector off the Method 1 cable, leaving me with a white wire that I will connect to 12V+ battery voltage from the interior fuse box using an "add-a-circuit" fuse tap and a black wire that I will connect to ground (the interior fuse box mounting bolt). | ||||||
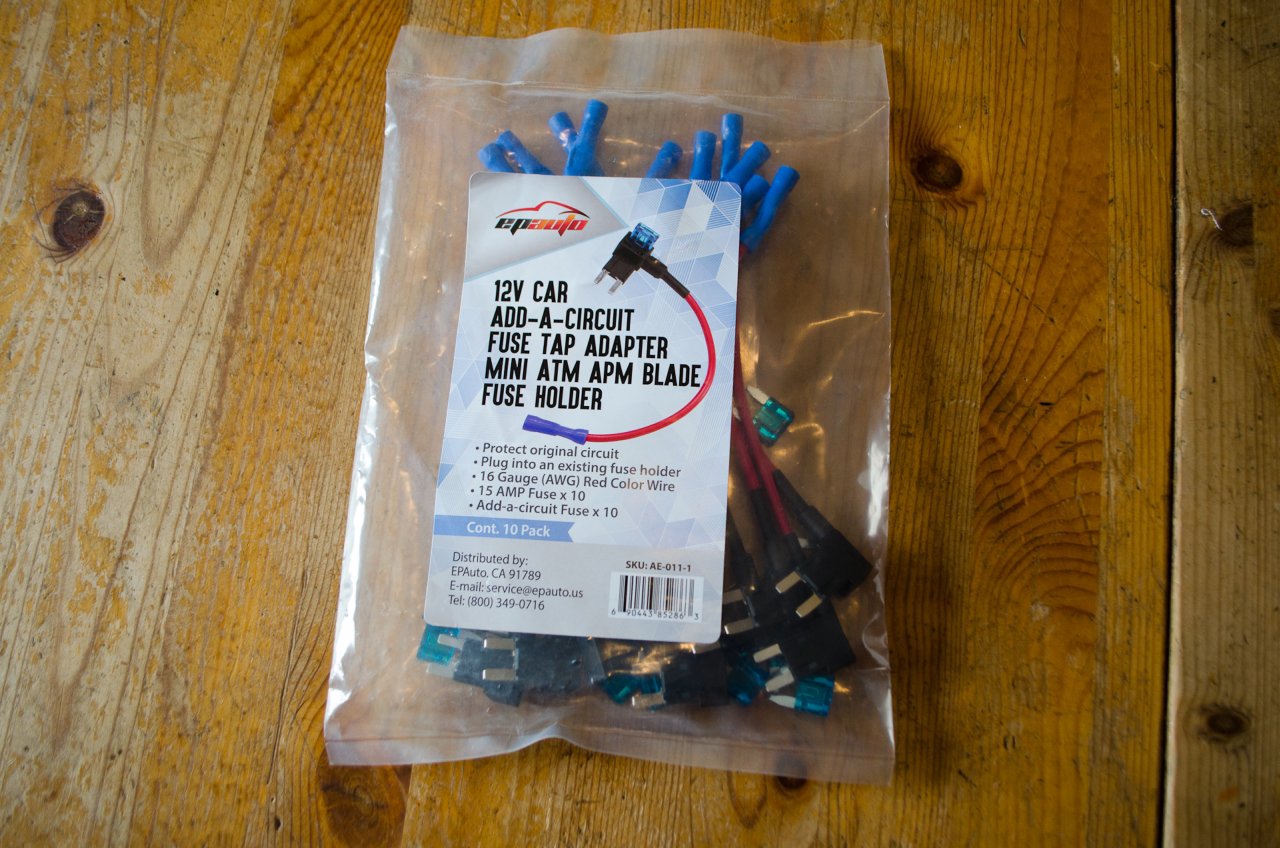 |
These are the "add-a-circuit" fuse taps that i used. Only 1 is required. | ||||||
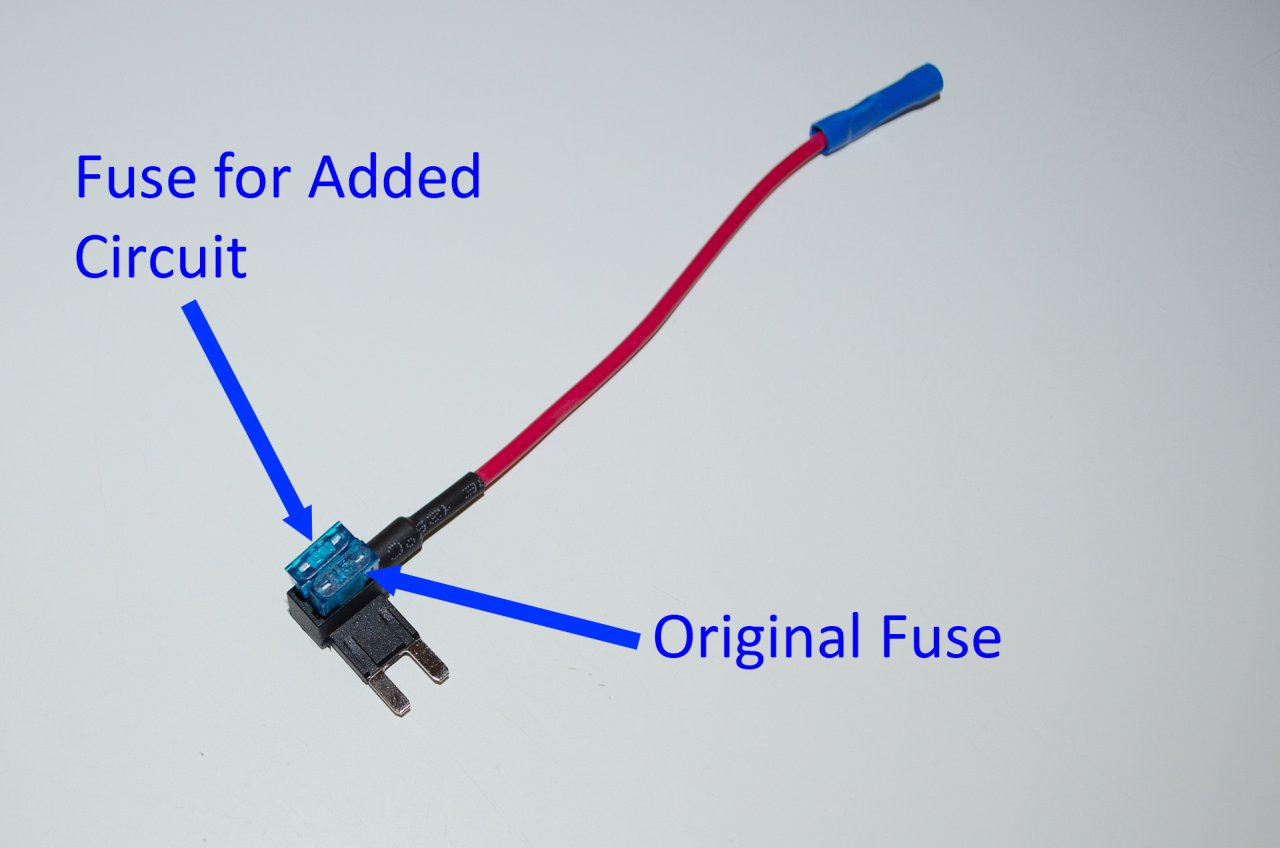 |
Depending on whether you will be tapping into a fuse socket that already has a fuse installed, or tapping into an empty slot that provides the required constant 12V+ you will either install 2 fuses or just 1 for the added circuit, as shown here. | ||||||
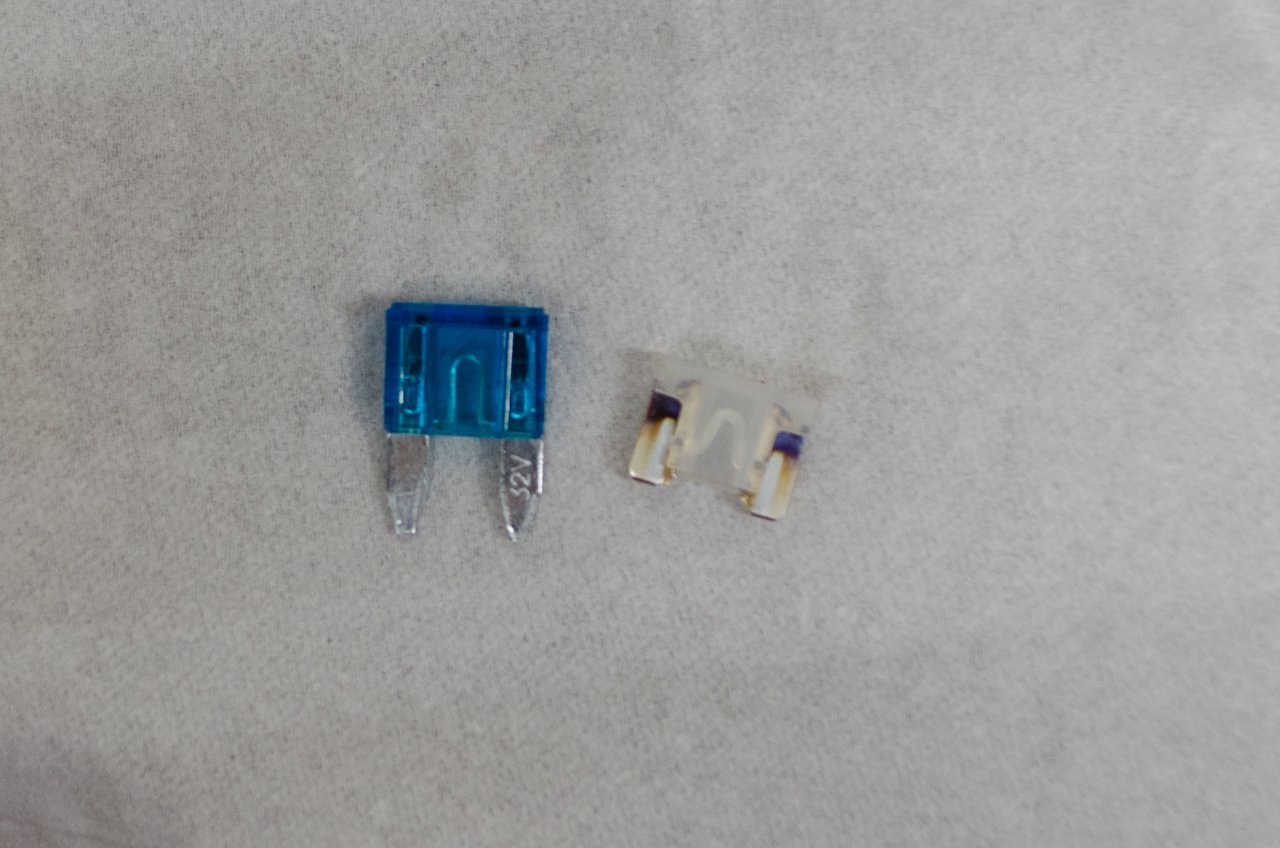 |
The fuses that came with my "add-a-circuit" fuse taps were a bit larger than the factory fuses, but worked fine. | ||||||
 |
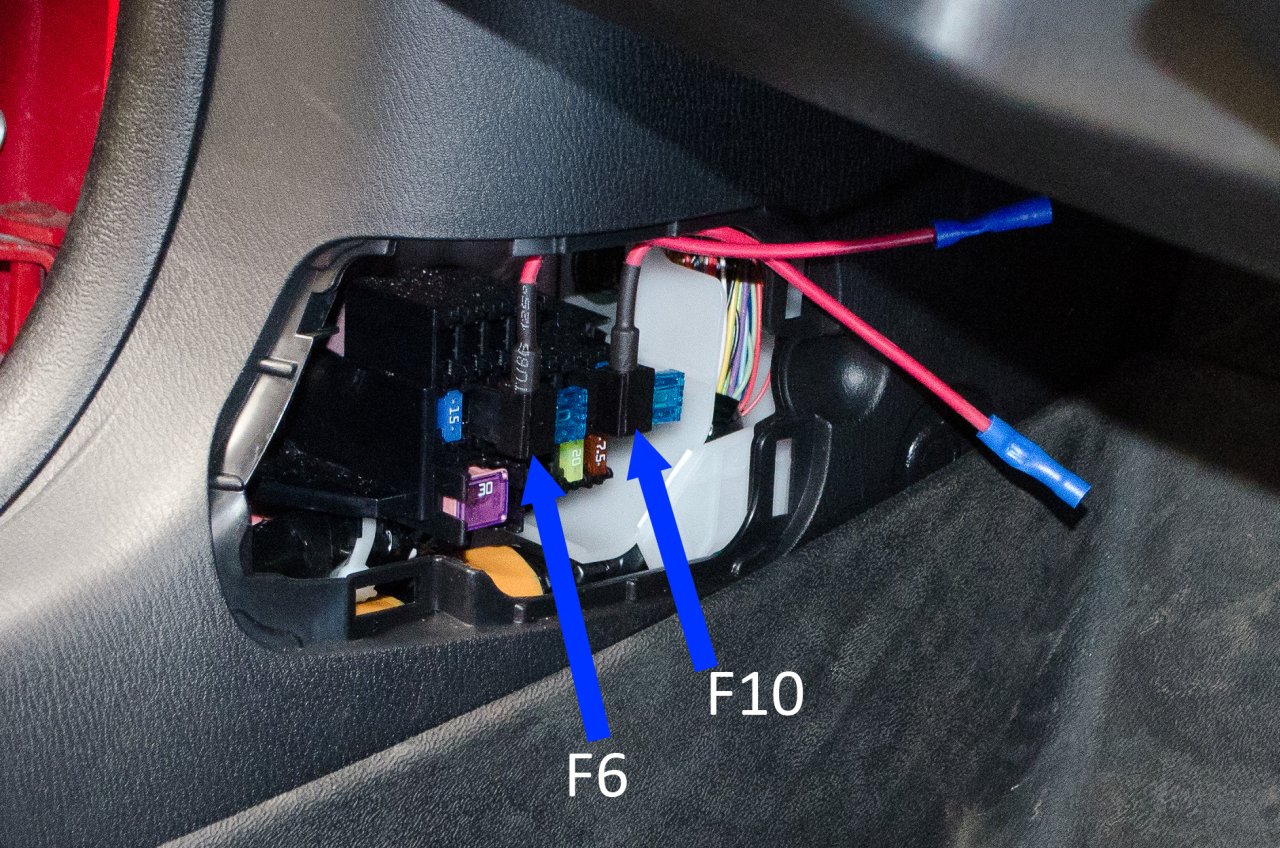
So, we need to find a fuse slot that provides constant-on 12V+ voltage. This is the fuse map for the interior fuse box. Slot F10 is an empty slot that provides constant-on 12V+ voltage. |
||||||
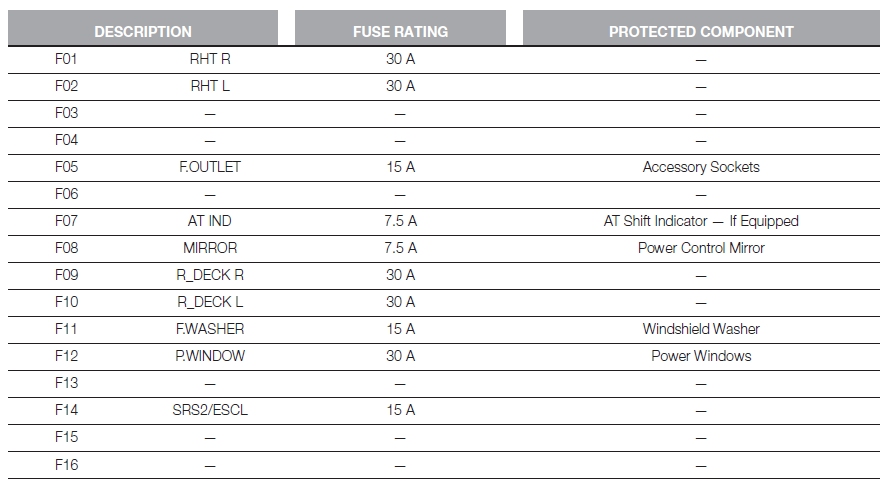 |
Description of interior fuses. F10 was an unused slot in my car. |
||||||
Installation |
|||||||
 |
As with any/all electrical work, step 1 is to disconnect the negative terminal of the battery. | ||||||
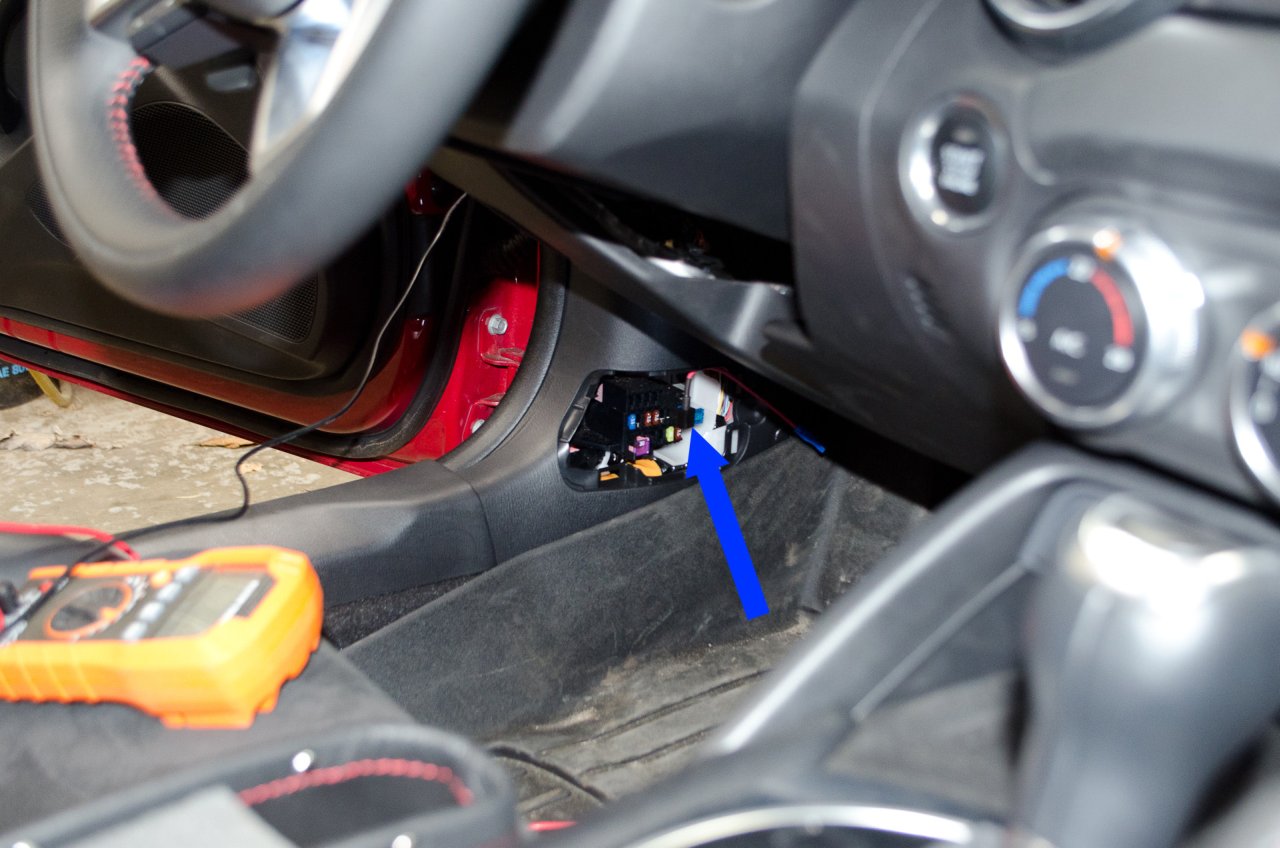 |
Locate the interior fuse box in the left side footwell. | ||||||
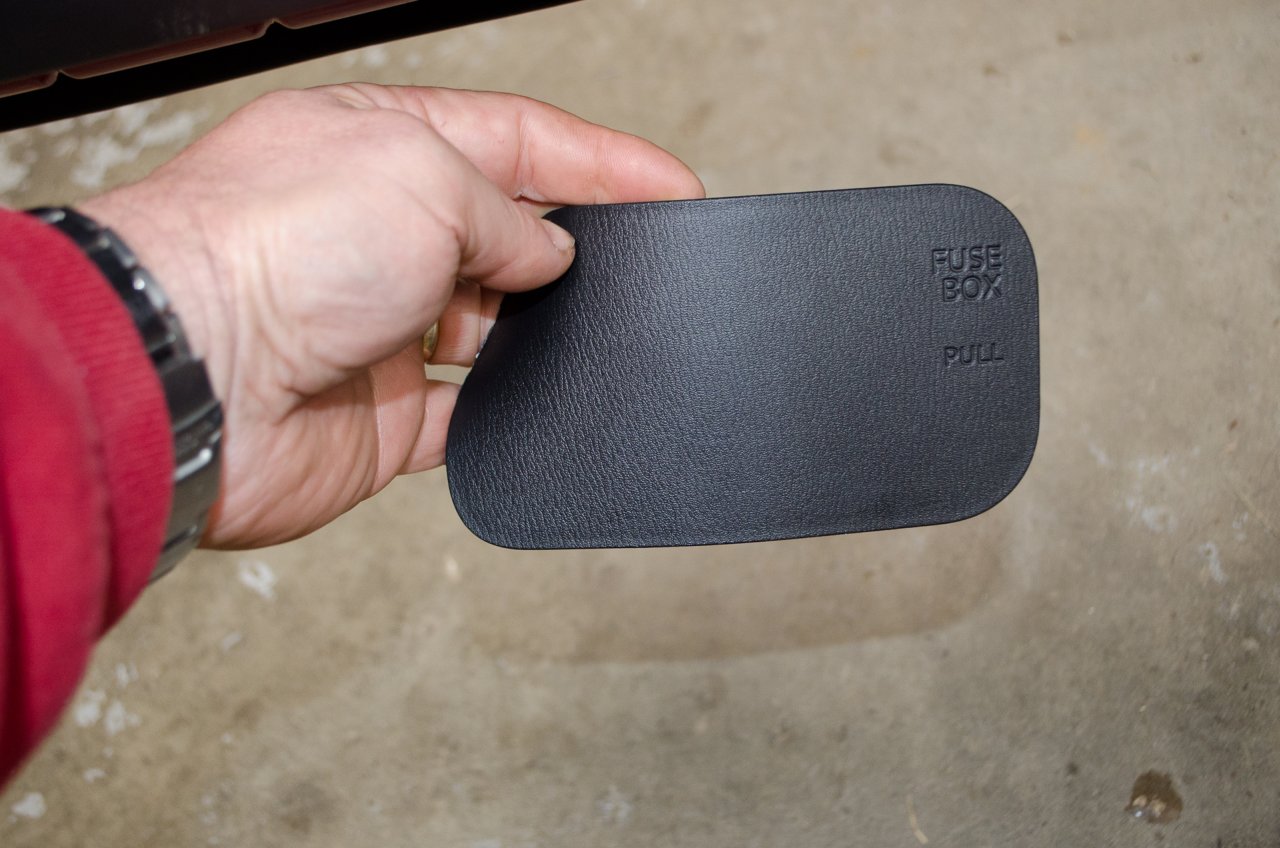 |
The little cover just pulls off. | ||||||
 |
This is actually a shot of two fuse taps I installed previously to power a Vaitrix Boost Gauge. I'm going to splice into the one in slot F10 so that it powers the boost gauge as well as the Digipedal Commander. |
||||||
 |
I pulled the trim piece off the footwell so I could work with the wires more easily, since I was splicing. If you're just inserting a new fuse tap you can do it with just the fuze box cover removed. |
||||||
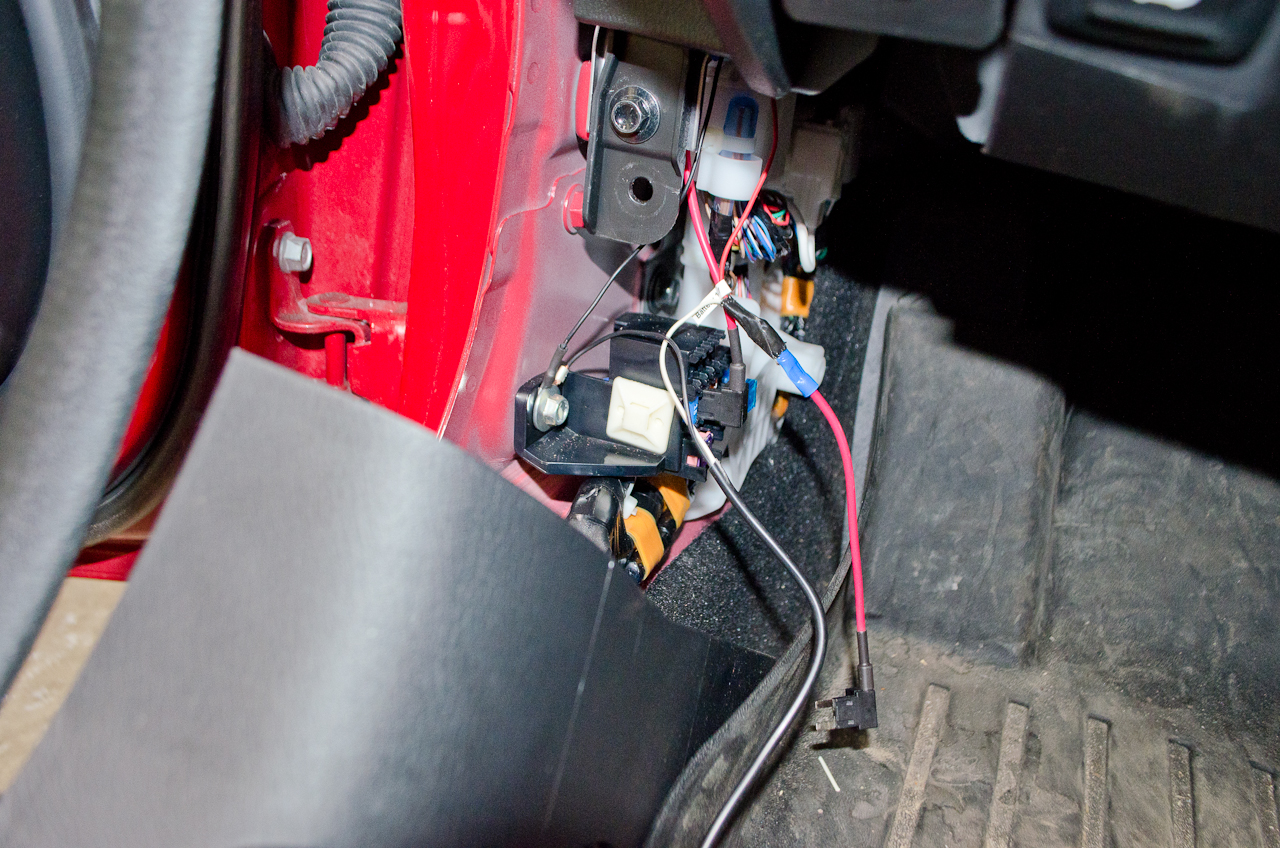
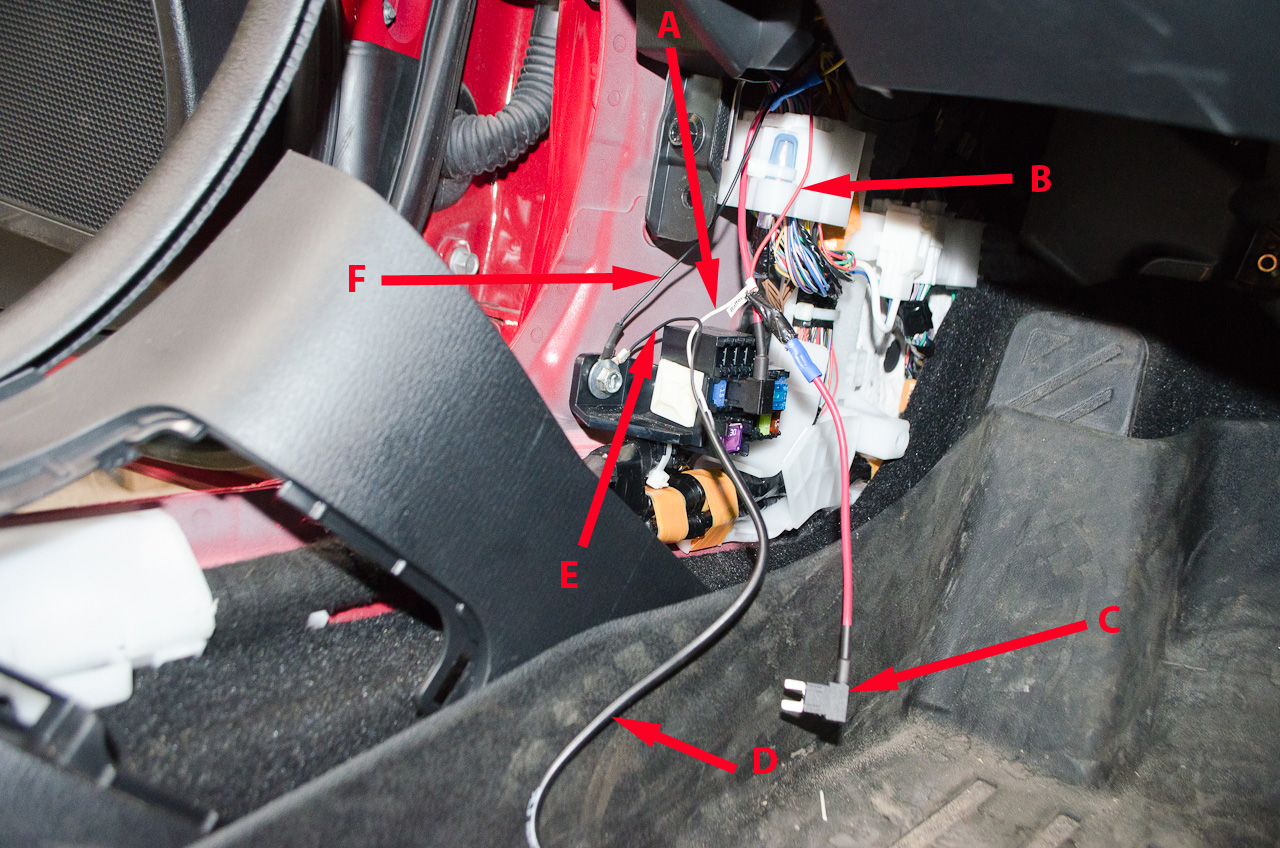 |
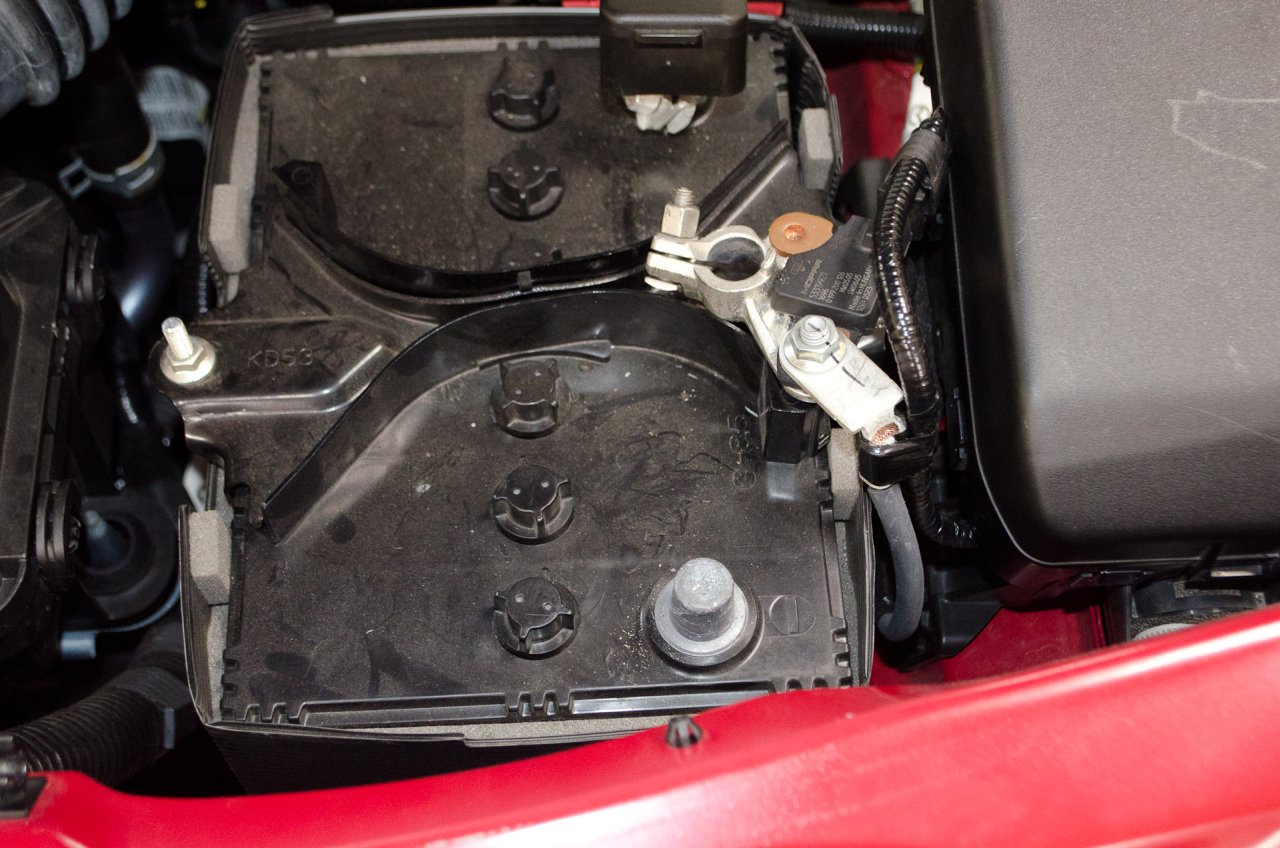
Here we see: A: 12V+ to Digipedal control box This is more complicated than necessary for just installing the Digipedal Commander but it gives you good idea of the layout and using the fuse box mounting bolts for a ground point. |
||||||
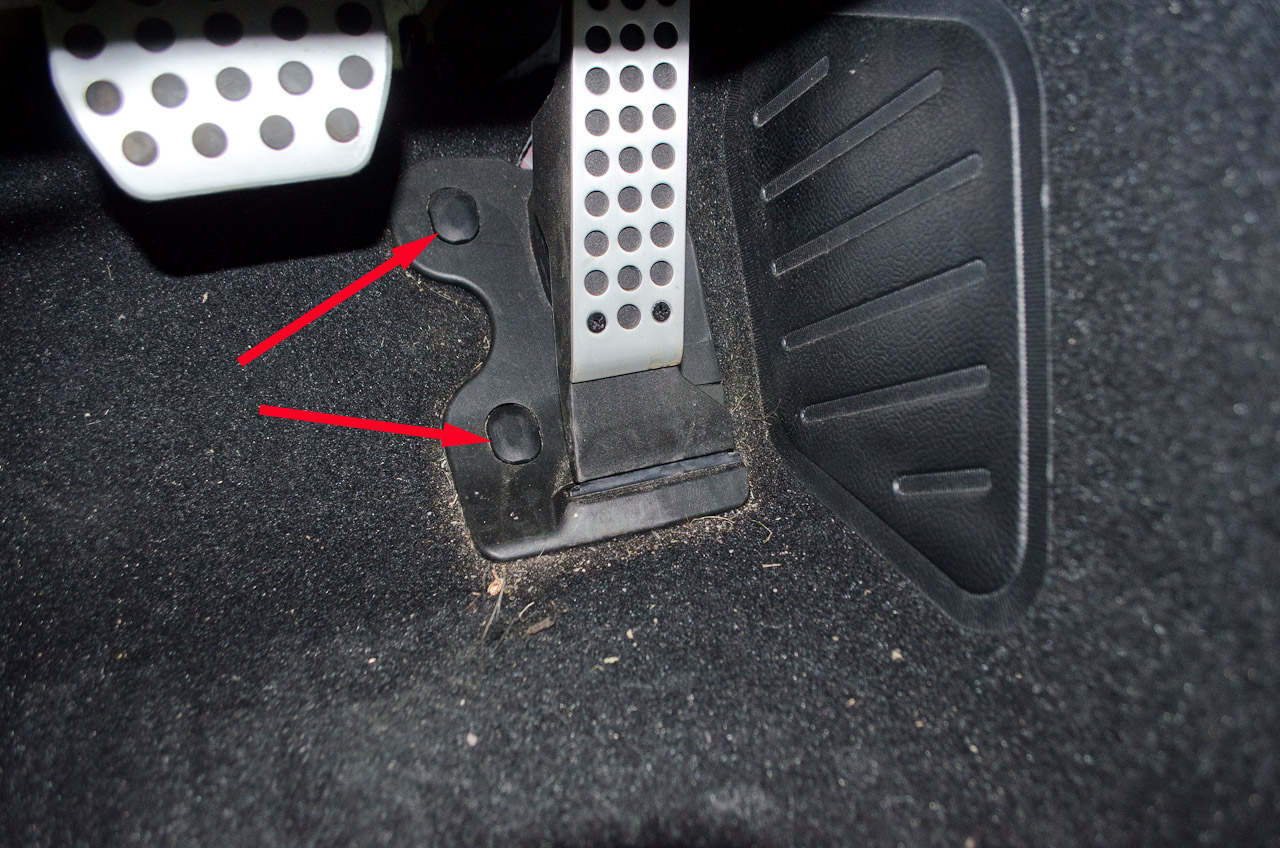 |
To install the wiring harness between the pedal and the Digipedal control box, start by locating the two small plastic plugs covering the pedal bolts and carefully lever them out with a small screwdriver or pick. | ||||||
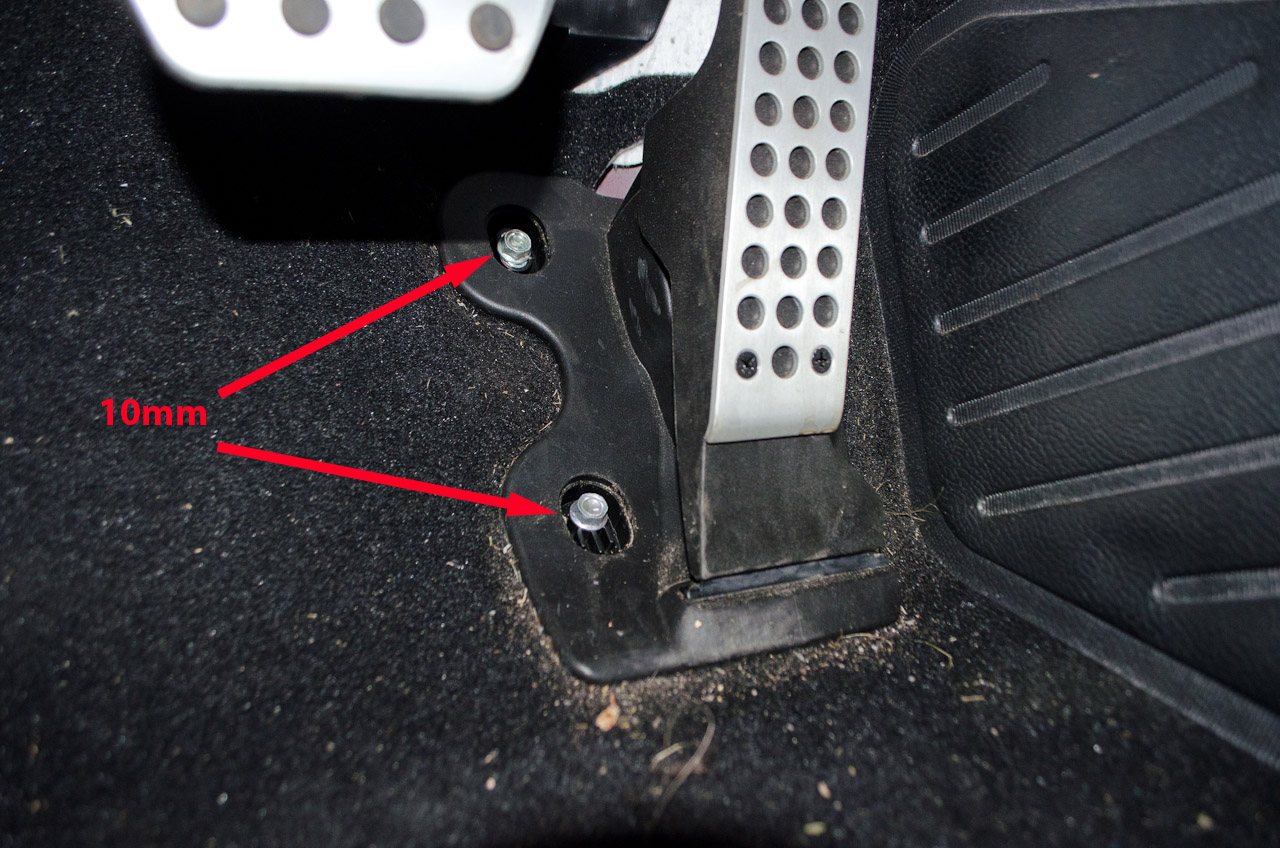 |
Use a 10mm socket to remove the two bolts. They are the same so you can't mix them up. | ||||||
 |
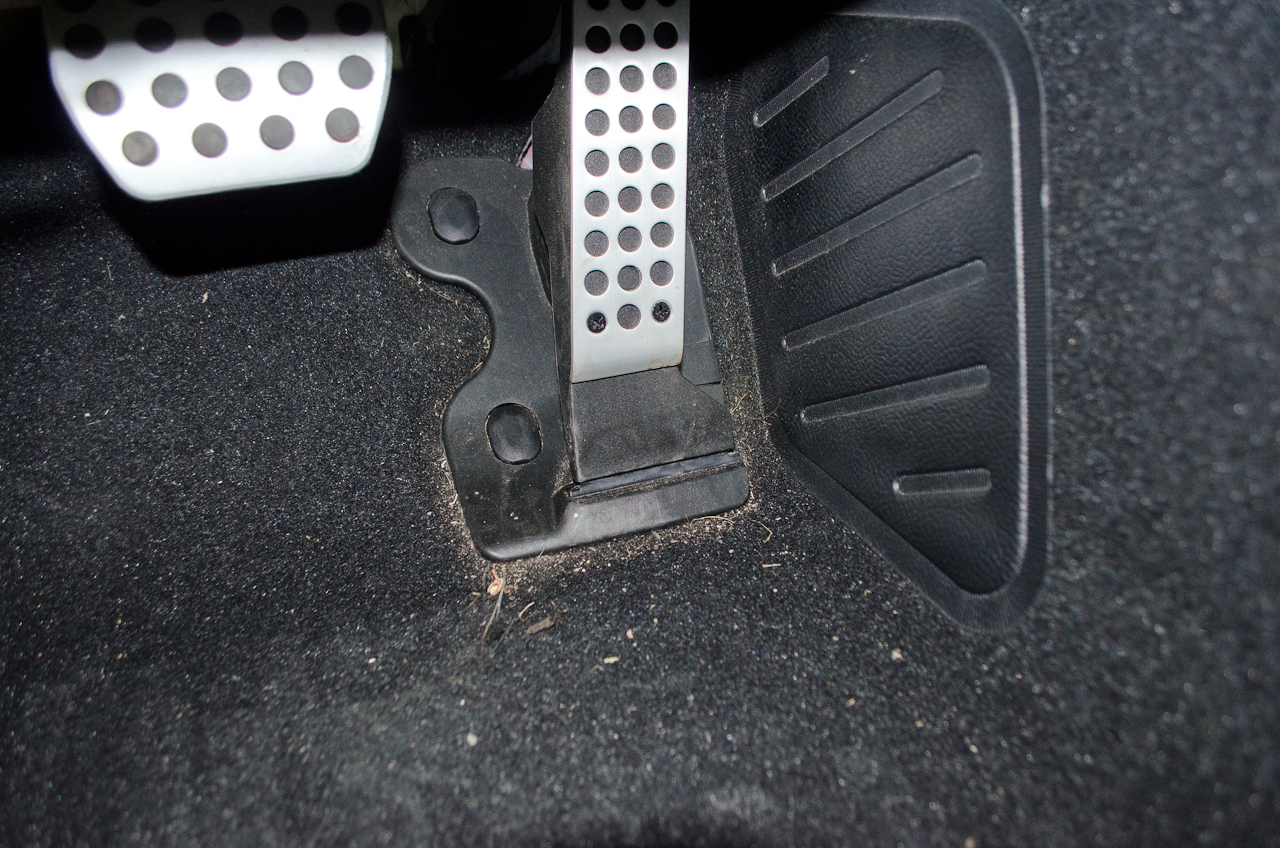
With the bolts removed, turn the pedal assembly onto its side to expose the wiring harness plug. | ||||||
 |
Disconnect the wiring harness from the pedal by pressing down on the latch as indicated (it is covered by some tape so isn't obvious). | ||||||
 |
Plug removed | ||||||
 |
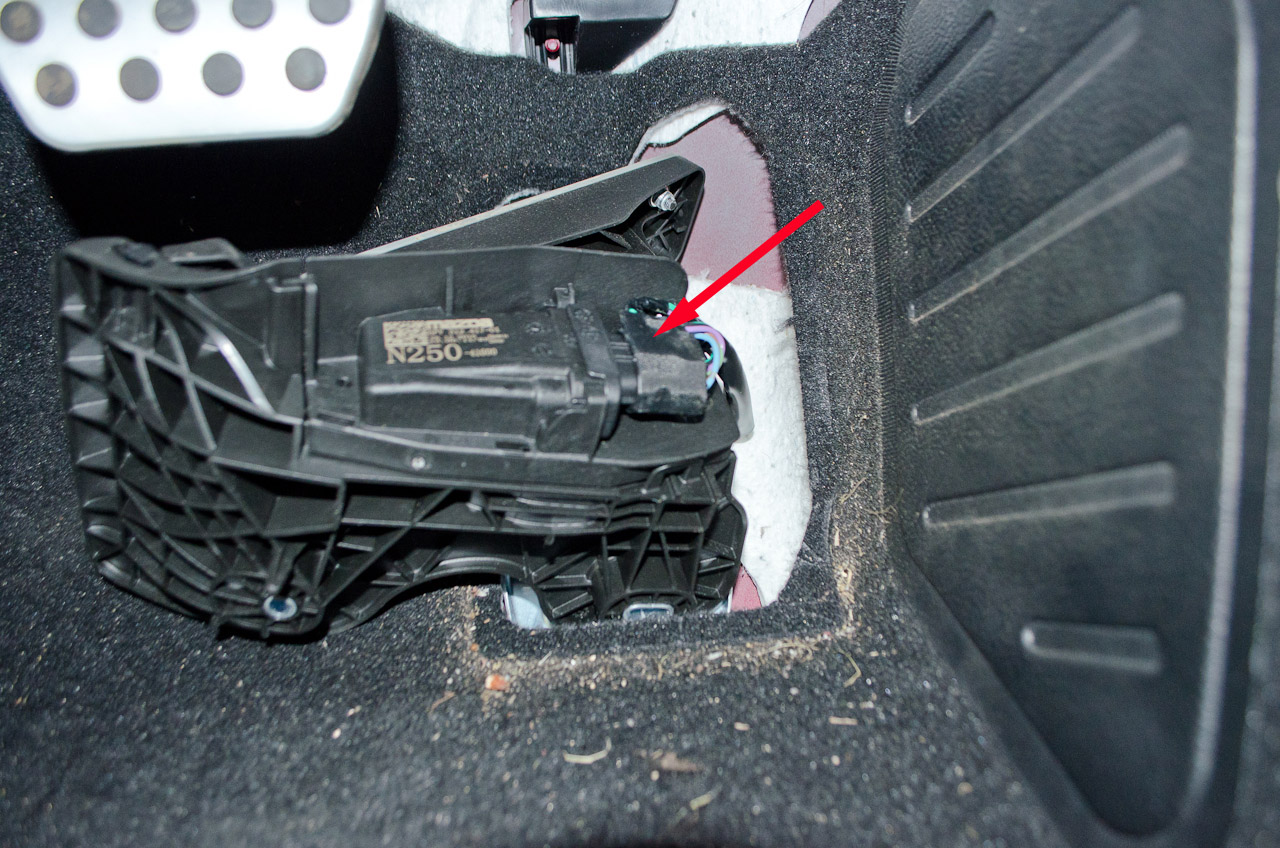
Now connect the Vaitrix harness inline between the factory wiring harness and the pedal assembly. Plug the "longer" plug on the Vaitrix harness (the one with the male pins inside) into the factory wiring harness plug... |
||||||
 |
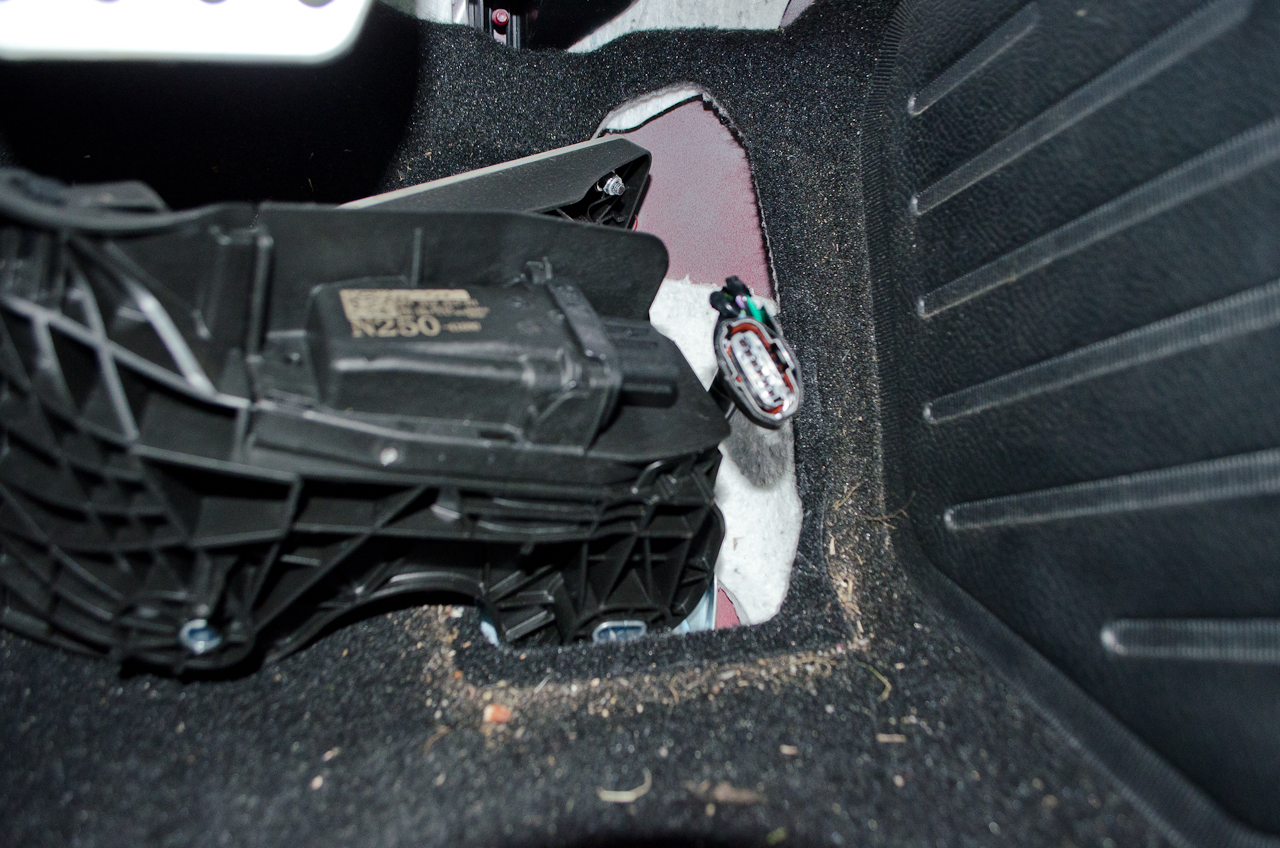
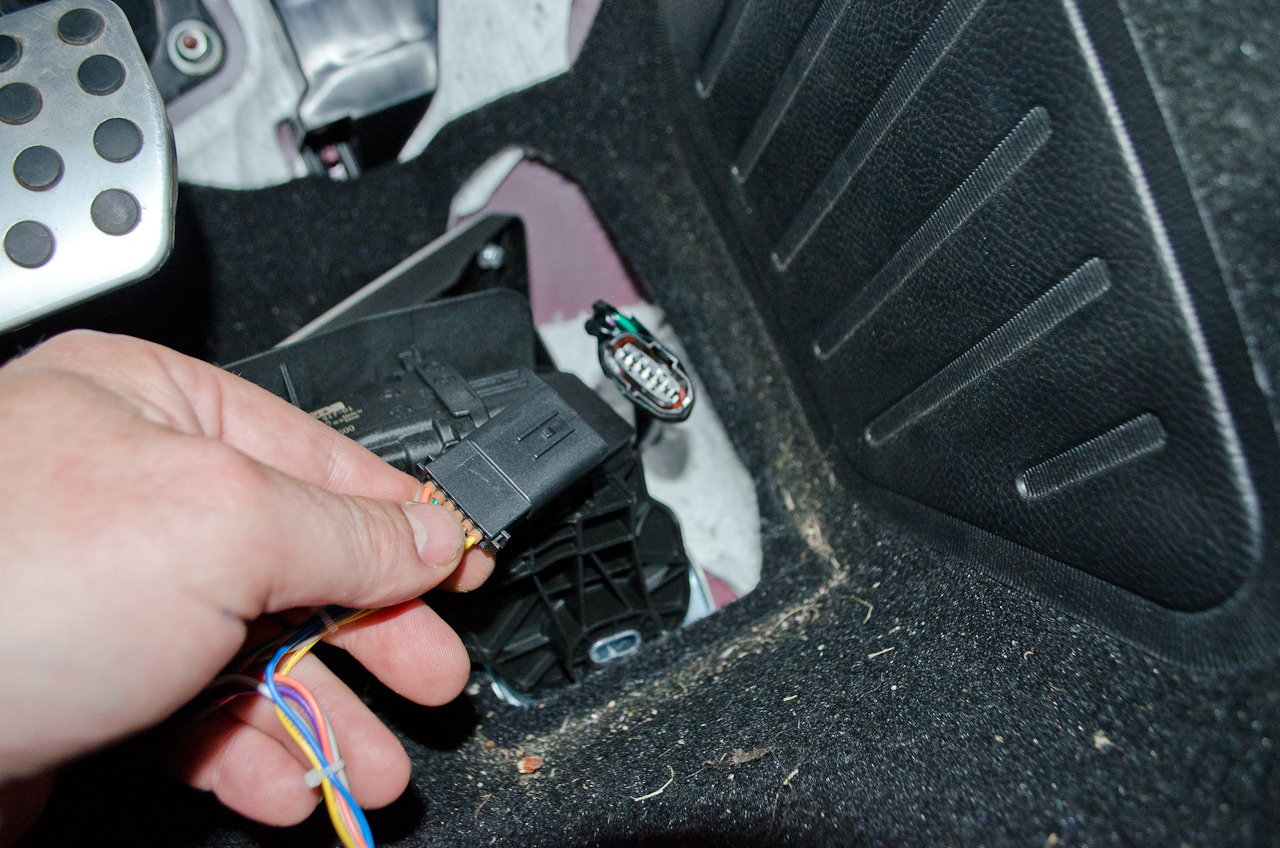
...and connect the shorter "female" end of the Vaitrix harness into the pedal assembly. Then, carefully place the pedal assembly back into place while running the Vaitrix wiring up towards the location where you will be placing the control box. This particular harness is not very long, and will likely be the limiting factor in where you can place the control box. I found that under the dash on the right, next to the transmission tunnel, to be a good spot, allowing the power, pedal, and controller wires to all reach the control box. |
||||||
| DO NOT permanently mount the control box at this time as you will need access to the back of it to set the jumpers correctly once the initialization process is complete. | |||||||
 |
Replace the pedal assembly and you're ready to move on to the final connection - the controller itself. | ||||||
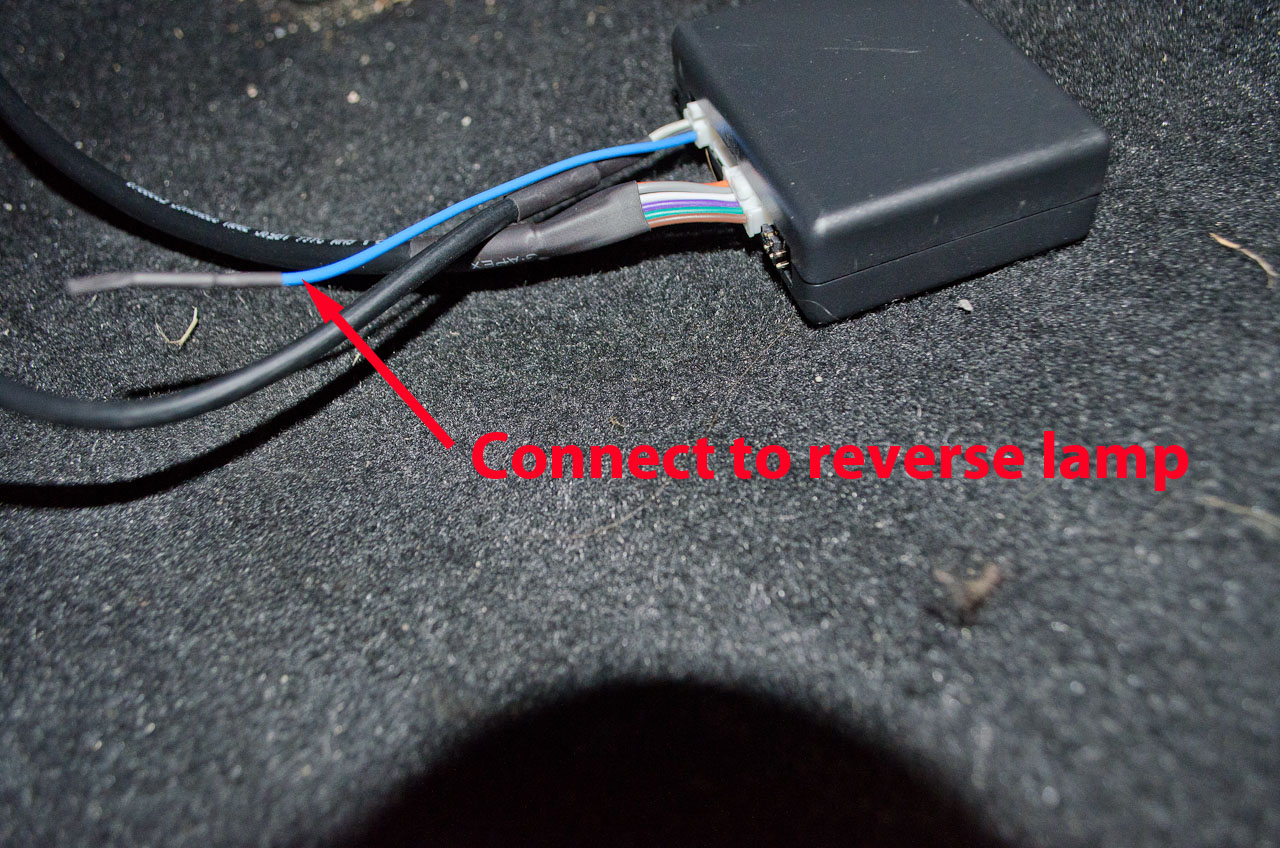 |
I should mention, there is a blue wire that comes out of the control box's power connection. Its use is optional, but if you connect it to your reverse lamp circuit it will disable the Digipedal when in reverse - a useful safety feature. I have to admit - I didn't use it though, but might in the future. |
||||||
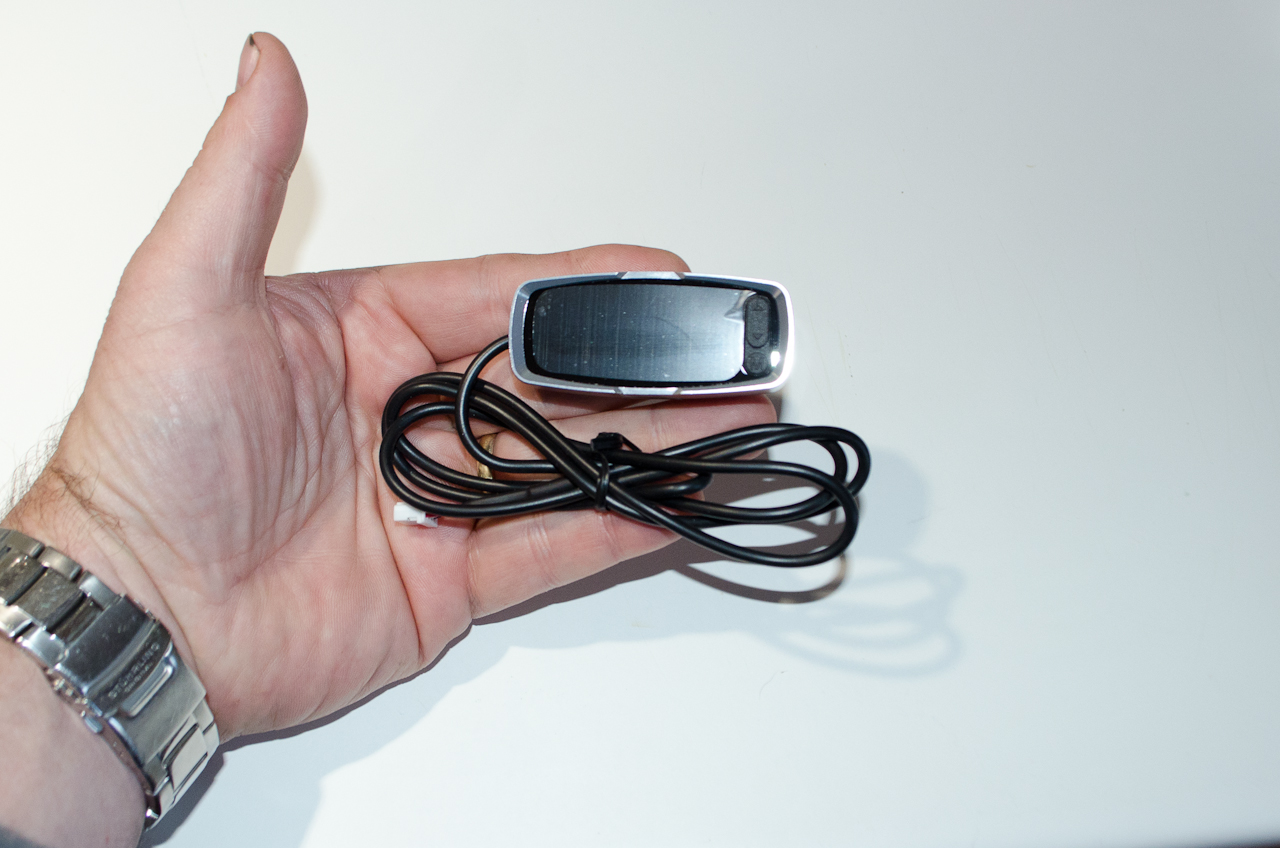 |
The final piece of the puzzle is mounting and connecting the controller. It's very small, facilitating many mounting options. That said - it does have its cable coming out of the left hand side so if it's important to you to hide wires as much as possible, you will have to take this into account. |
||||||
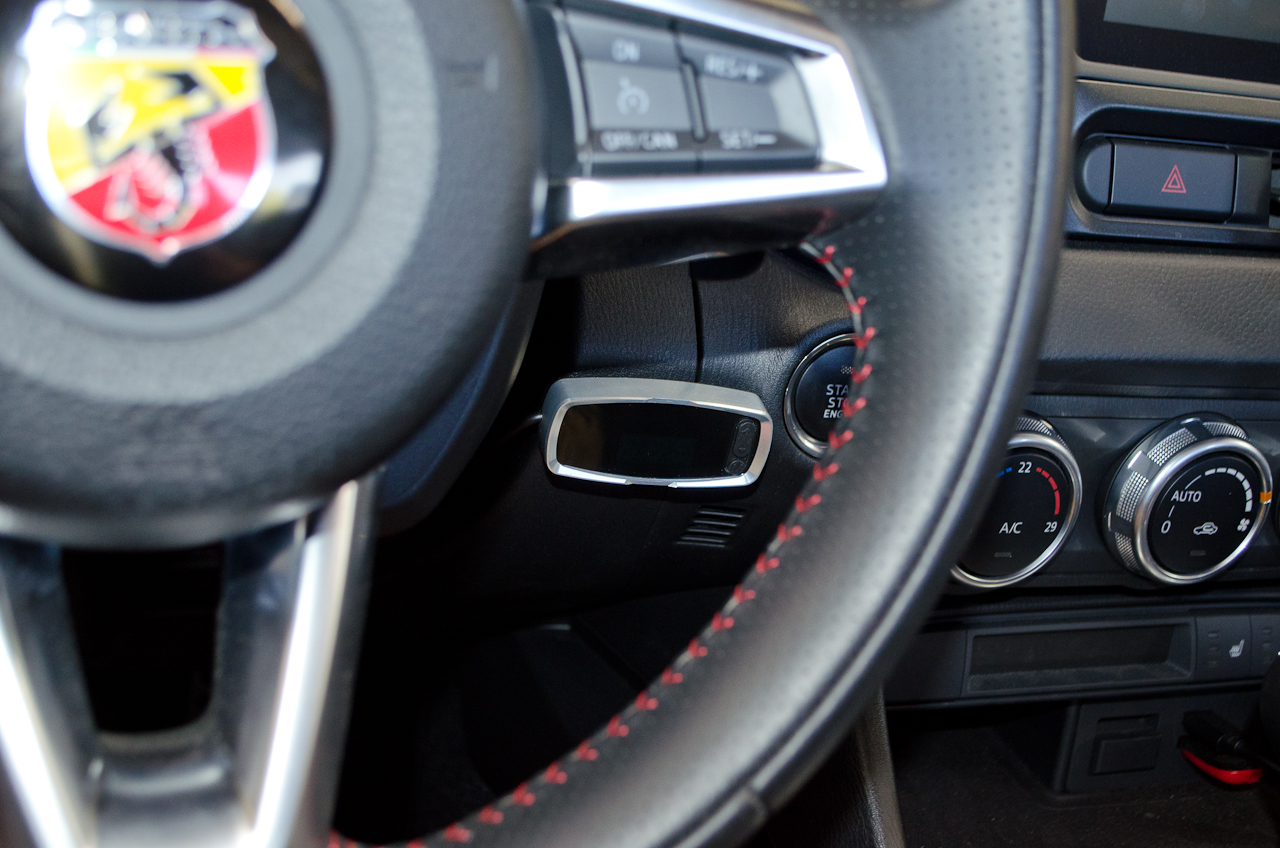
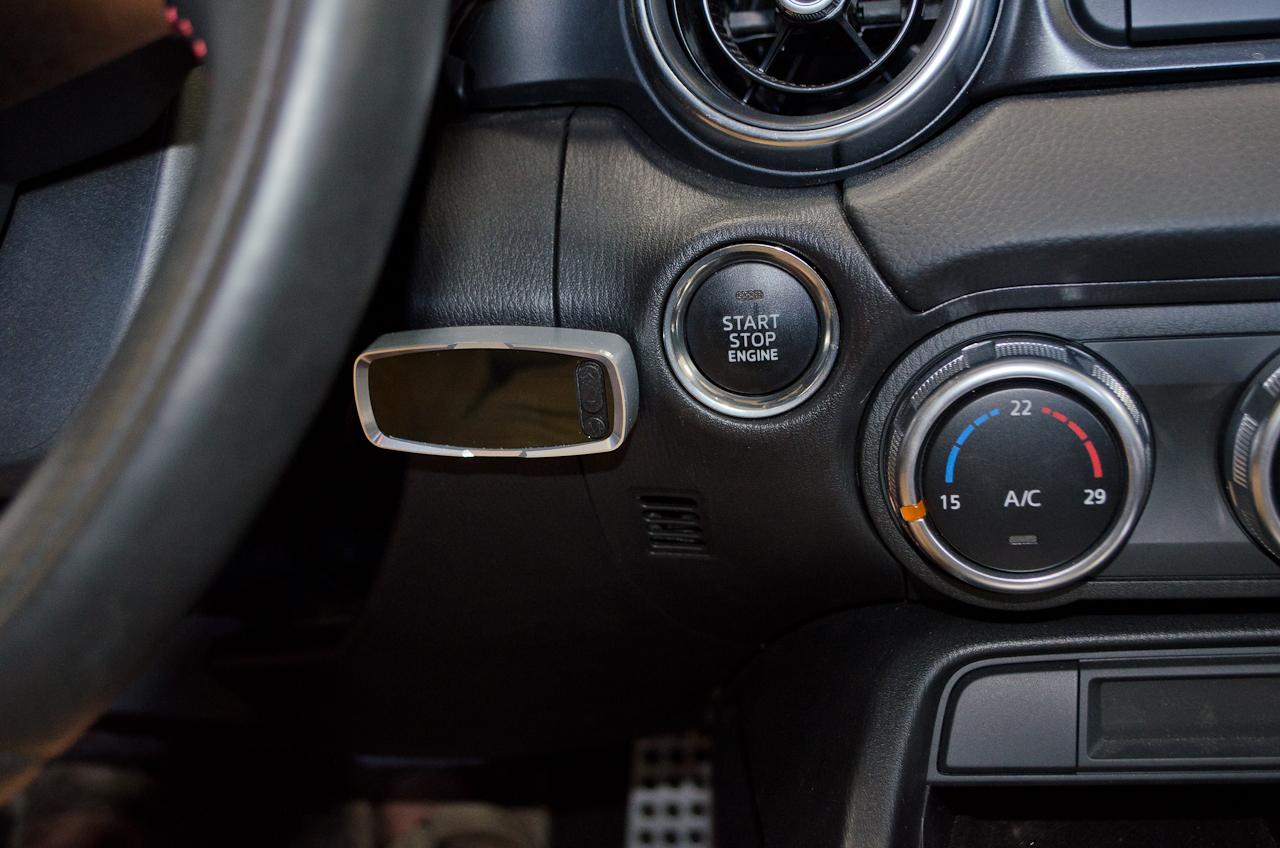 |
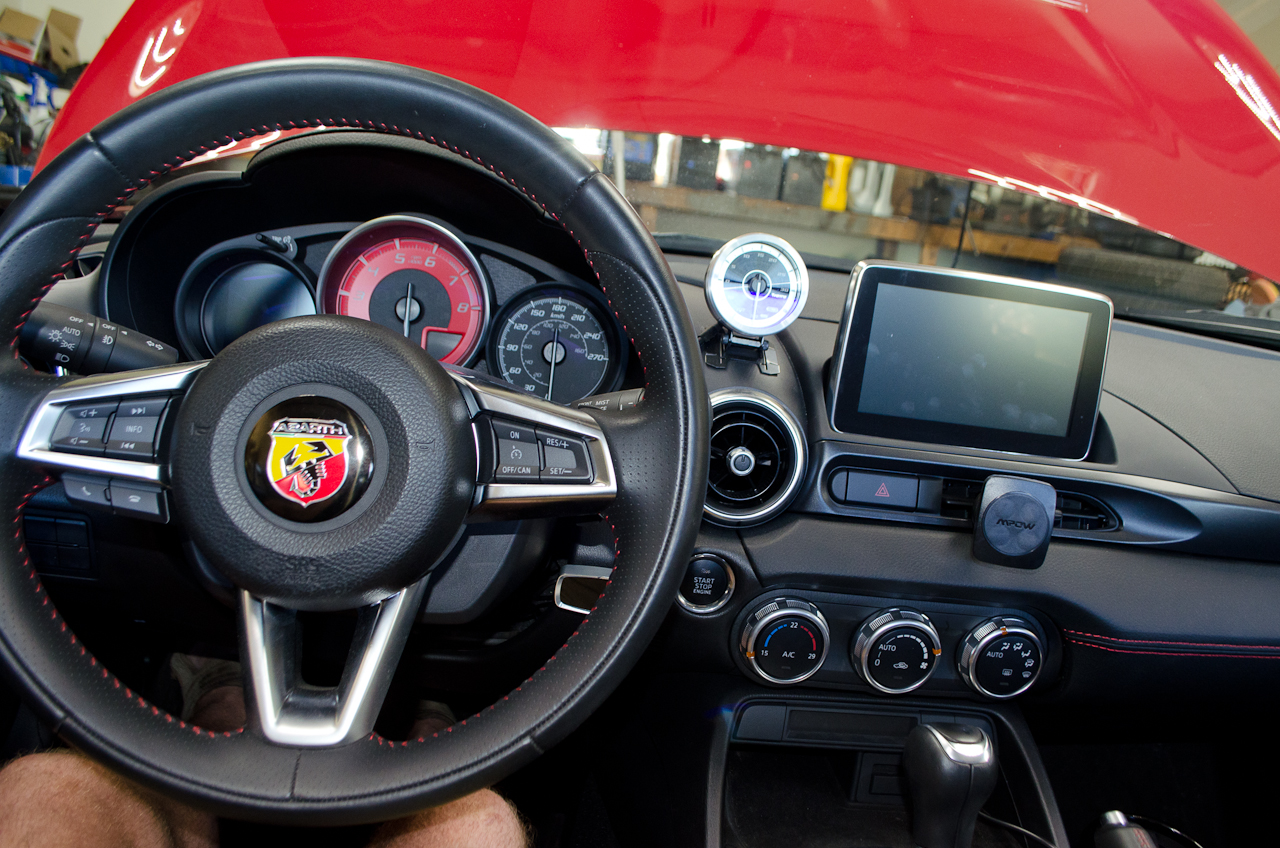
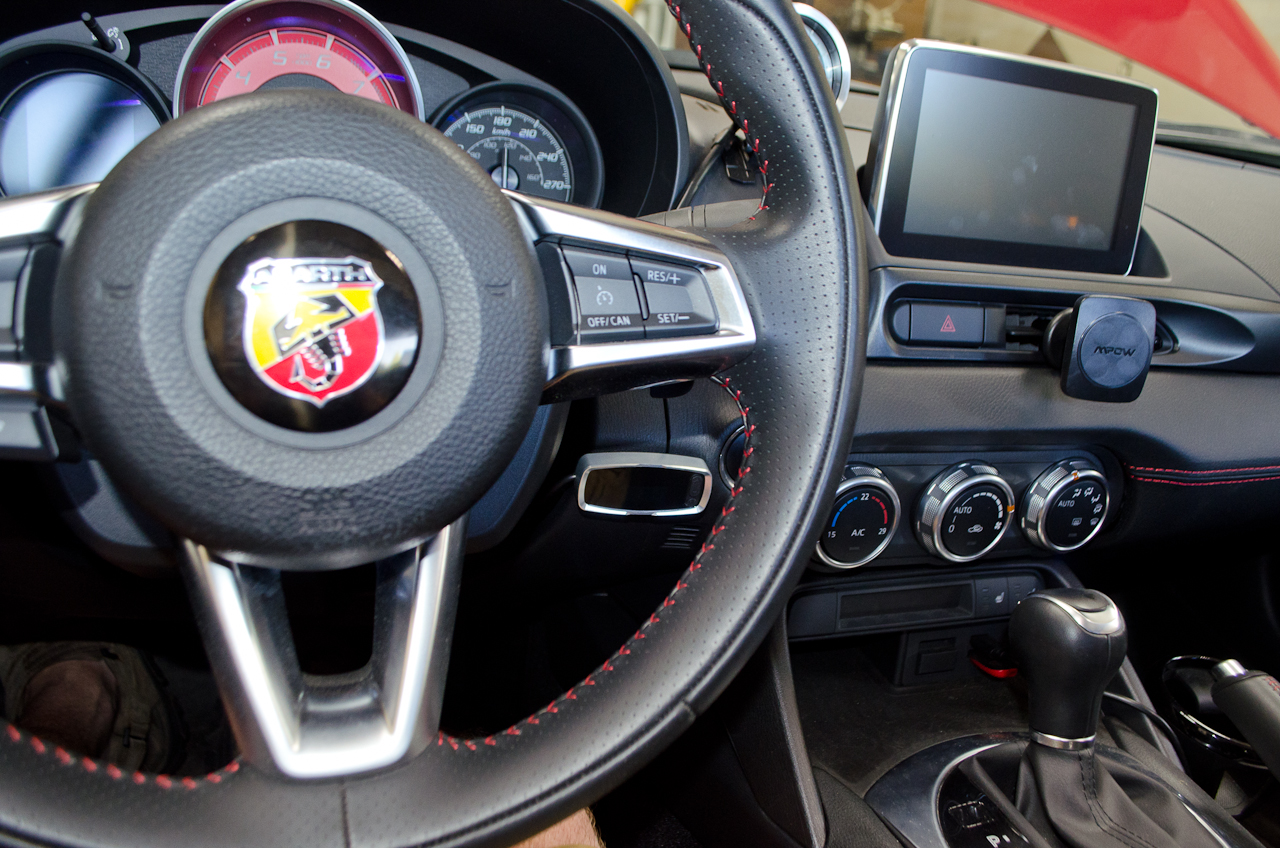
Hiding wires is very important to me, which ultimately led me to mount the controller as shown. I also considered and checked visibility while driving, accessibility while driving, and clearance from the steering wheel/column in all tilt positions. |
||||||
 |
Another view (temporarily mounted for testing). You can use a piece of putty or the like to test potential mounting locations. |
||||||
|
Once you have the location chosen, plug the controller's connector into the control box. |
||||||
Initialization ProcedureDouble-check all connections and then begin the "first use" initialization procedure, as follows:
|
|||||||
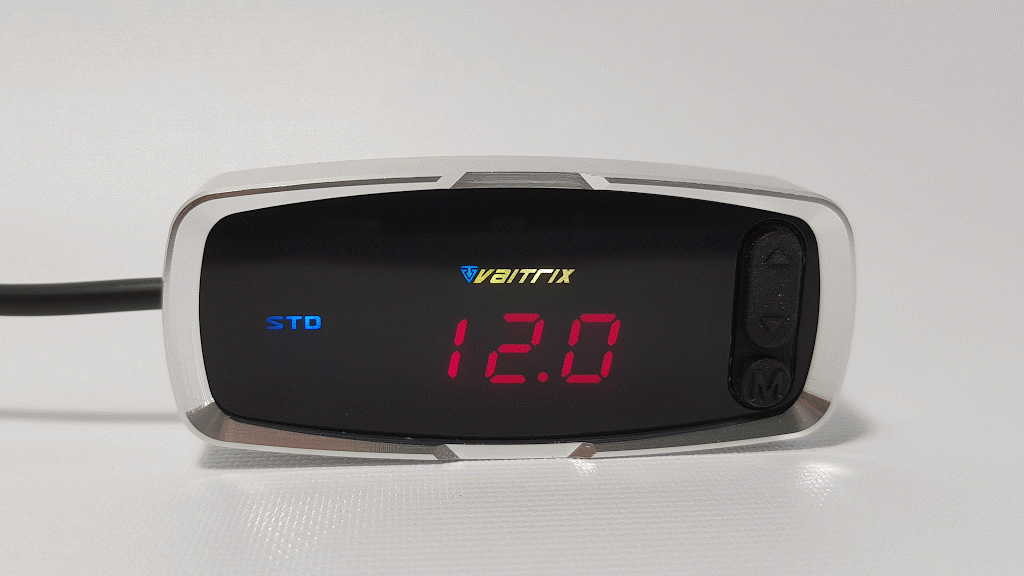 |
4. The controller should power on and display STD in blue in the mode display and either voltage, like this, or... | ||||||
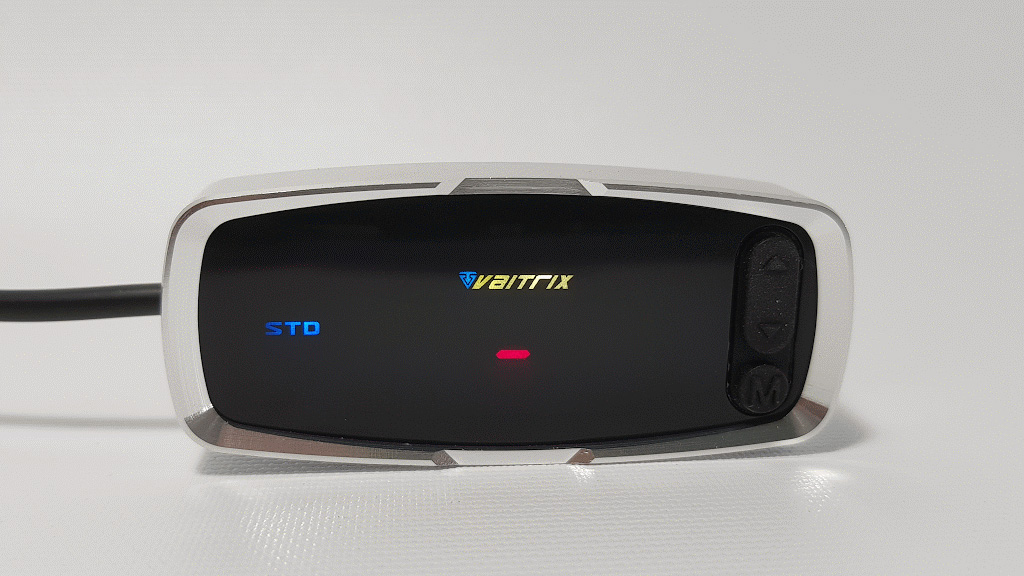 |
...a dash, like this. If this is not the case, click the <Mode> button until the controller is in STD mode. 5. Press and hold the small circular <Mode> button at the bottom of the controls. |
||||||
 |
6. Each of 10 small round lights will light up in sequence, and then all will extinguish. (pic here is in SPORT mode, ignore that, you should be in STD mode - pic to illustrate small red lights only)
|
||||||
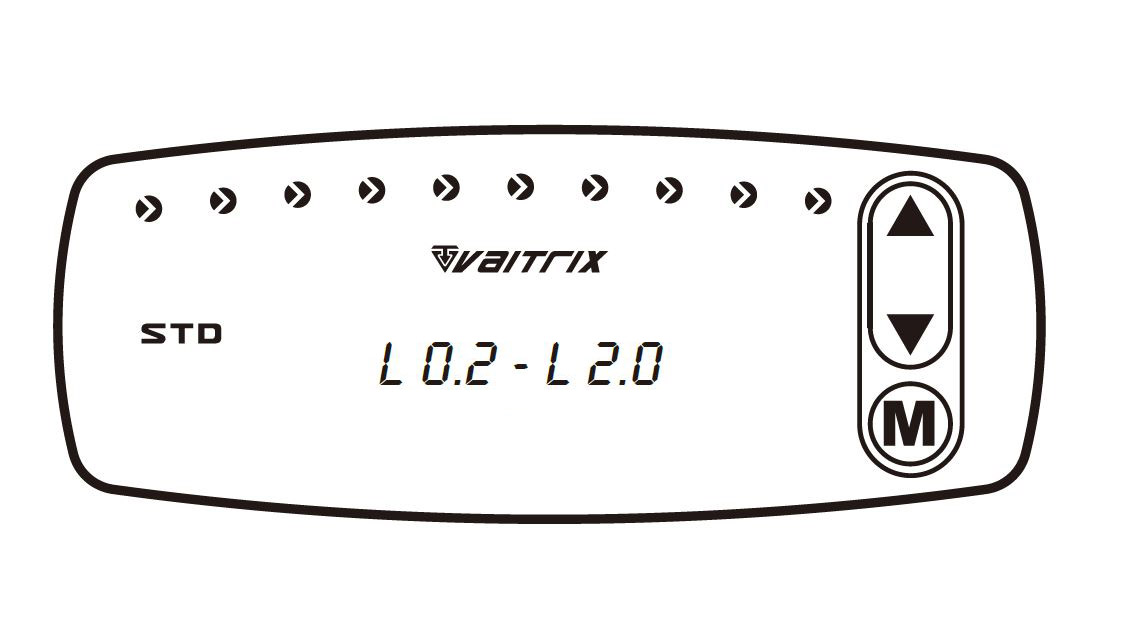 |
7. When all the lights extinguish, release the <Mode> button. The display will now flash an L followed by a value ranging from 0.2 to 2.0, like this. | ||||||
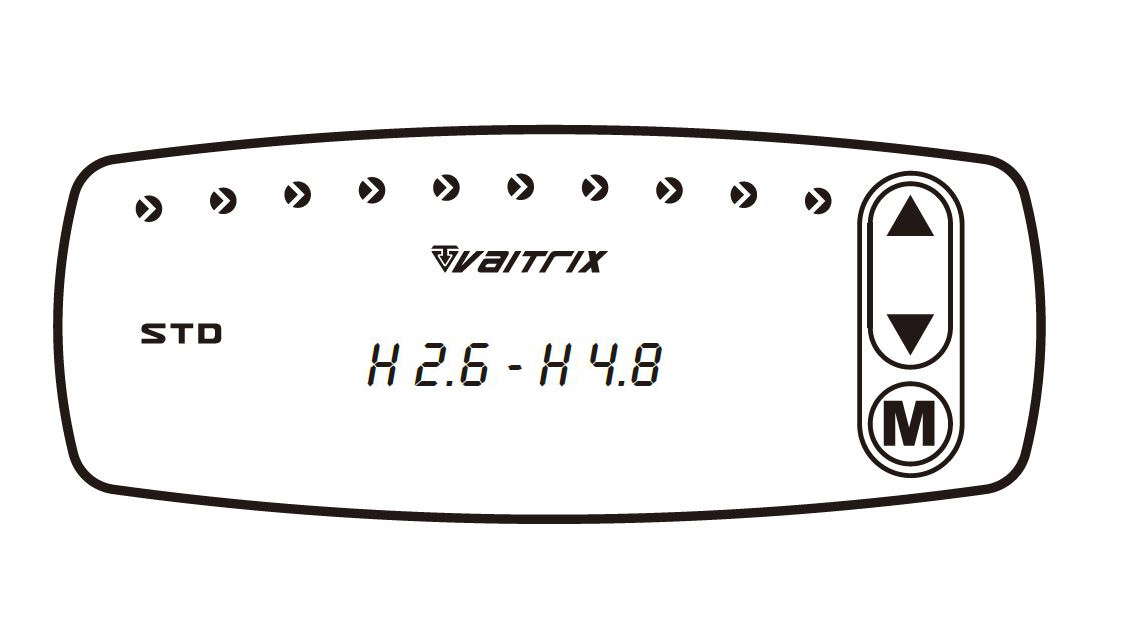 |
8. Click the <Mode> button. The display will now flash an H followed by some numbers. 9. Smoothly press the throttle to the floor. The H value displayed will build to a maximum and flash that value while you hold the throttle to the floor. A value ranging from 2.6 to 5.8 will be the result, like this. MAKE A NOTE OF THE VALUE You will need it for correctly setting the jumpers. |
||||||
|
10. Click the <Mode> button a final time, the display will revert to displaying battery voltage (or possibly the dash, shown above). Unfortunately, the instructions are not clear and my result was different than the instructions showed - they said it would be a dash, but it was in fact battery voltage. I think either are fine). 11. Release the throttle. 12. The Initialization Procedure is now complete. (If something went wrong, the display will instead flash L values again instead of a dash or voltage and you will have to begin again).
|
||||||
Test InitializationTest the setup as follows: |
|||||||
|
1. Feet off pedals 2. Click the <Mode> button until the unit is in SPORT mode. 3. With no throttle input, there should be no small round red lights illuminated. 4. Smoothly press the throttle to the floor. You should observe the 10 round red lights lighting up in sequence as you press the throttle. 5. Release the throttle. No lights should be lit. 6. Press the throttle again and ensure that all 10 lamps do not light until the throttle is at maximum travel. |
||||||
Setting JumpersOnce the initialization is complete and tested OK, the last step is to set the jumpers to the correct position. You will need access to the back of the control box to do this. |
|||||||
|
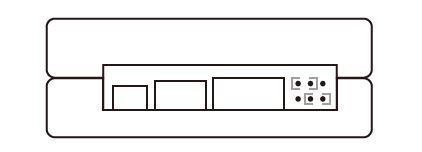
Recall that there are two rows of jumpers with Row 1 on top and Row 2 underneath. |
||||||
 |
Actual photograph. | ||||||
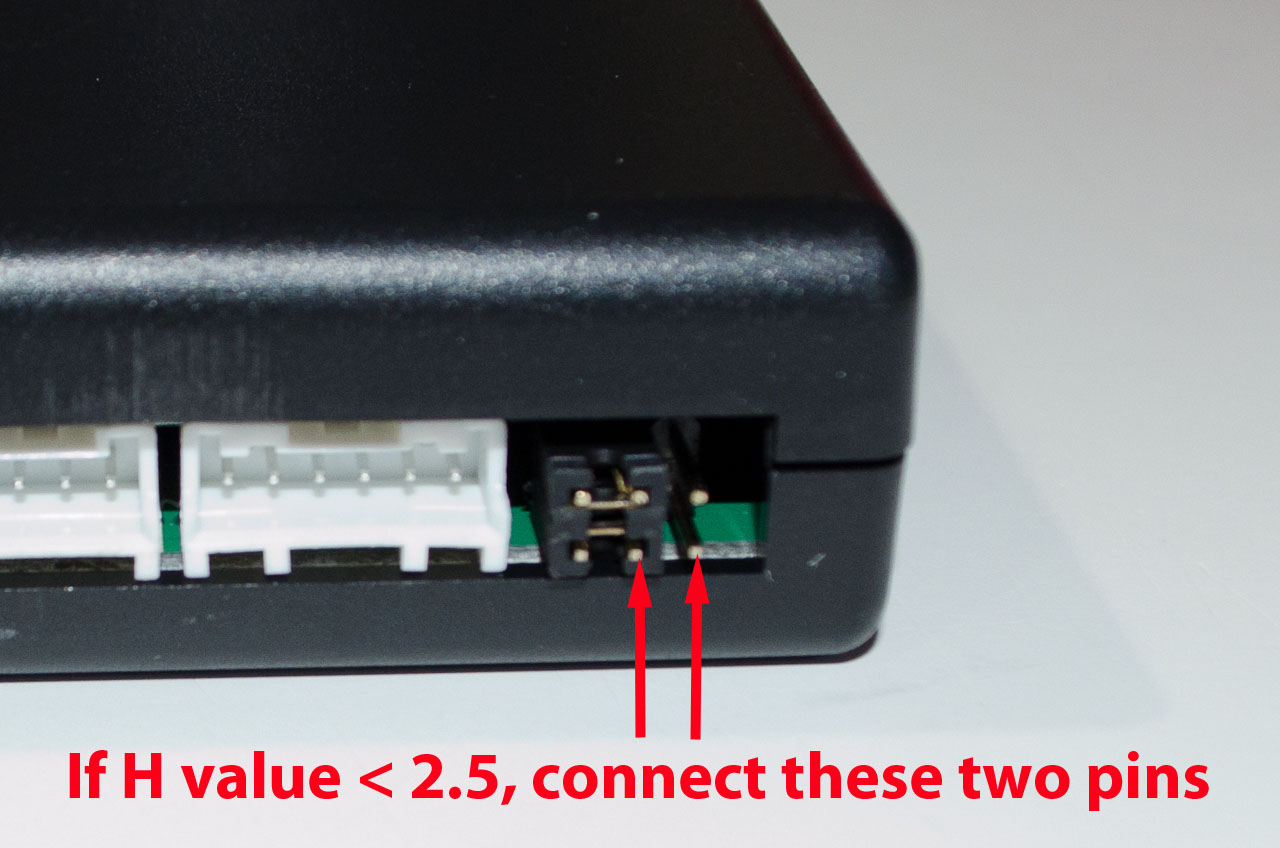 |
If the H value you recorded during initialization is LESS THAN 2.5, move the Row 2 jumper one position to the right... | ||||||
 |
...so that you have this arrangement. | ||||||
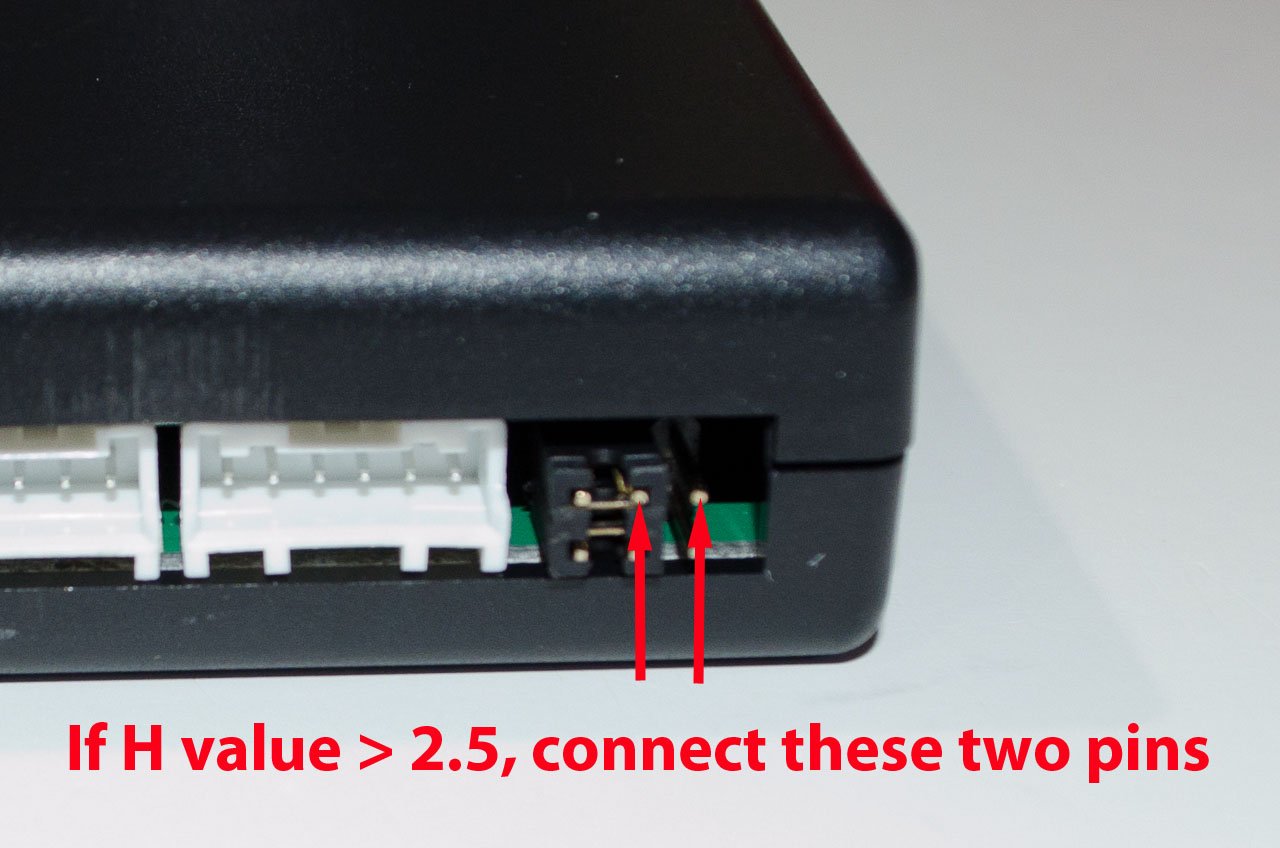 |
If the H value you recorded during initialization is MORE THAN 2.5, move the Row 1 jumper one position to the right... | ||||||
 |
...so that you have this arrangement. | ||||||
 |
With the jumpers set, securely mount the control box and controller and go driving! | ||||||
OperationThe Digipedal Commander has four modes, accessed via subsequent clicks of the <Mode> button, as follows: |
|||||||
|
STD In STD mode the Digipedal has no effect on the throttle. In this mode it displays battery voltage (although, in my experience, rather inaccurately). The display remains on momentarily after the ignition is turned off but turns off after a short time. |
||||||
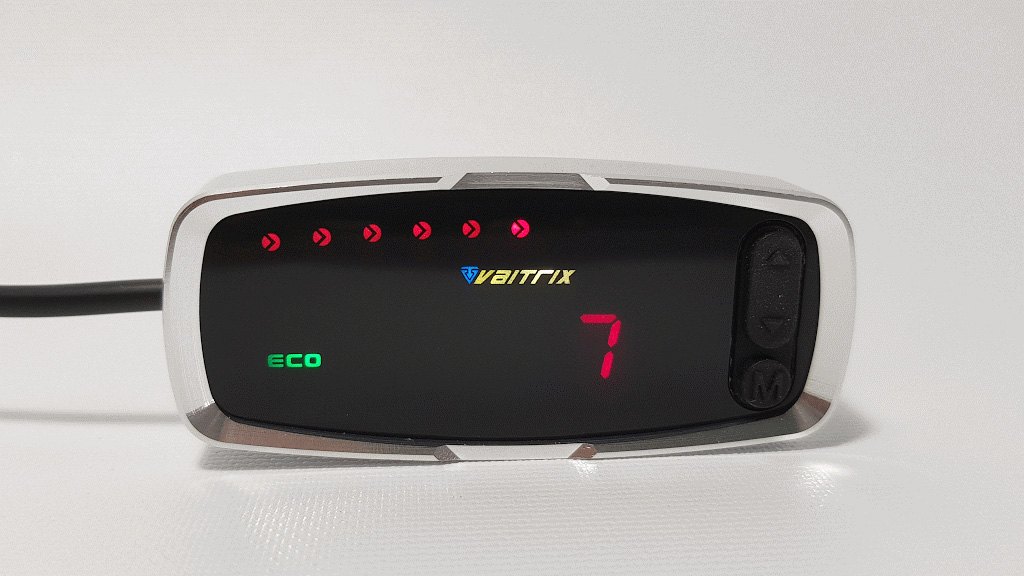 |
ECO In ECO mode throttle responsiveness is decreased. It can be used for economical driving (better fuel mileage), driving in low-traction conditions, or for when an inexperienced driver is driving the car. There are 7 levels in ECO mode where the larger the number the less responsive the throttle. |
||||||
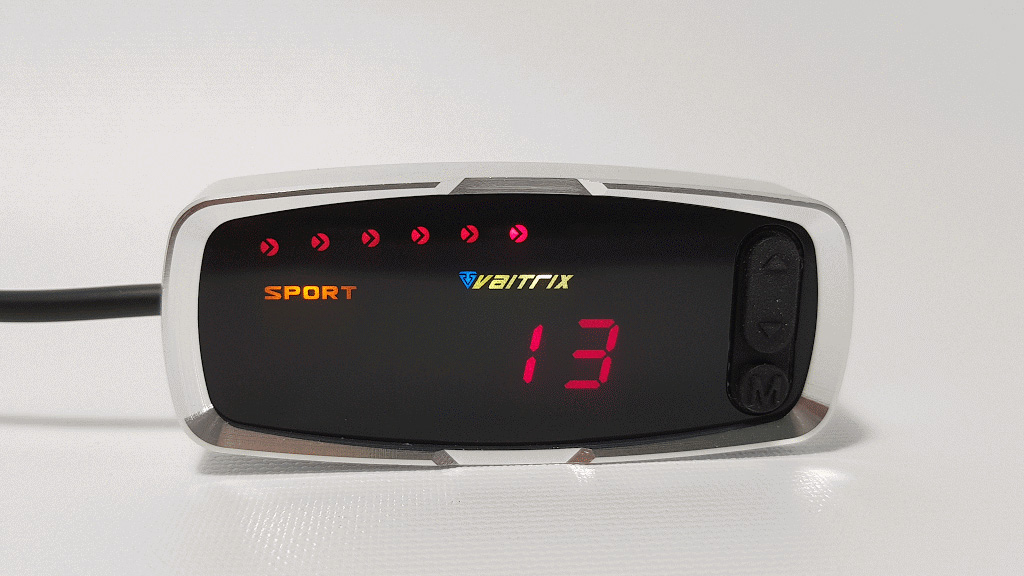 |
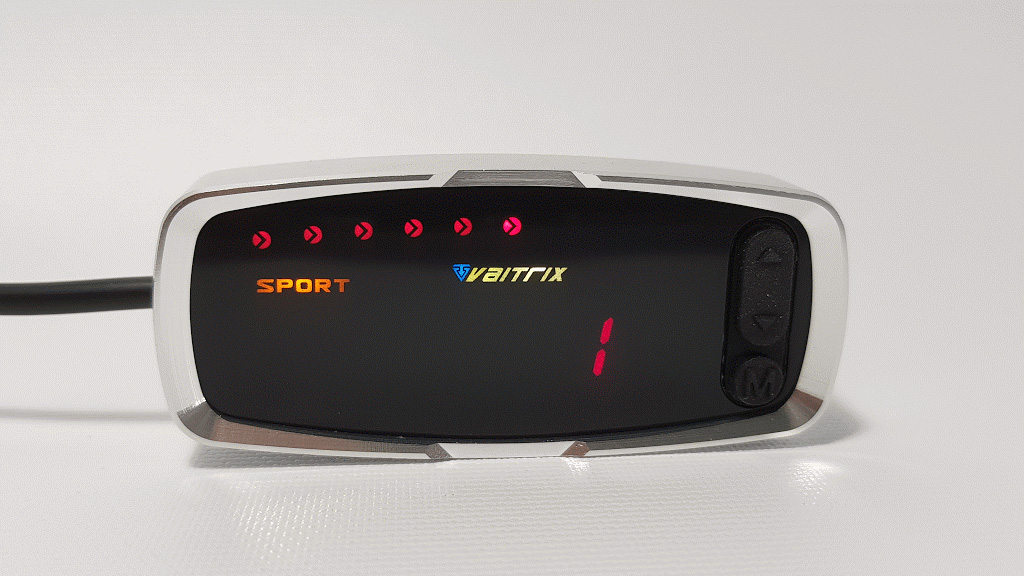
SPORT In SPORT mode there are 13 available levels. As the number increases the throttle becomes progressively more responsive. Level 13 is a hoot, but maybe a bit much for regular daily driving. I find that 8-10 is a pretty sweet spot. Of course, it's entirely subjective and personal which is why there are so many levels available. |
||||||
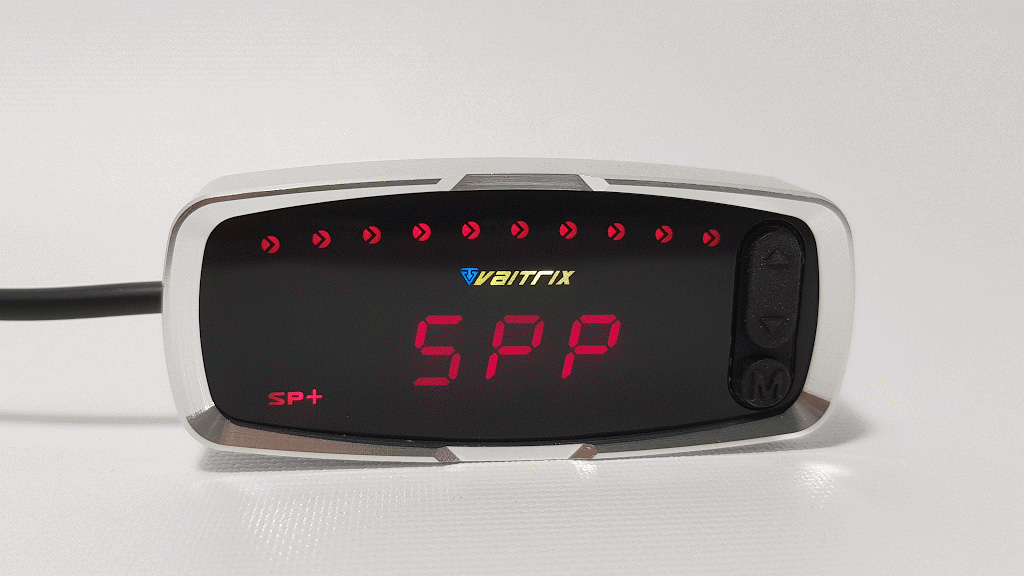 |
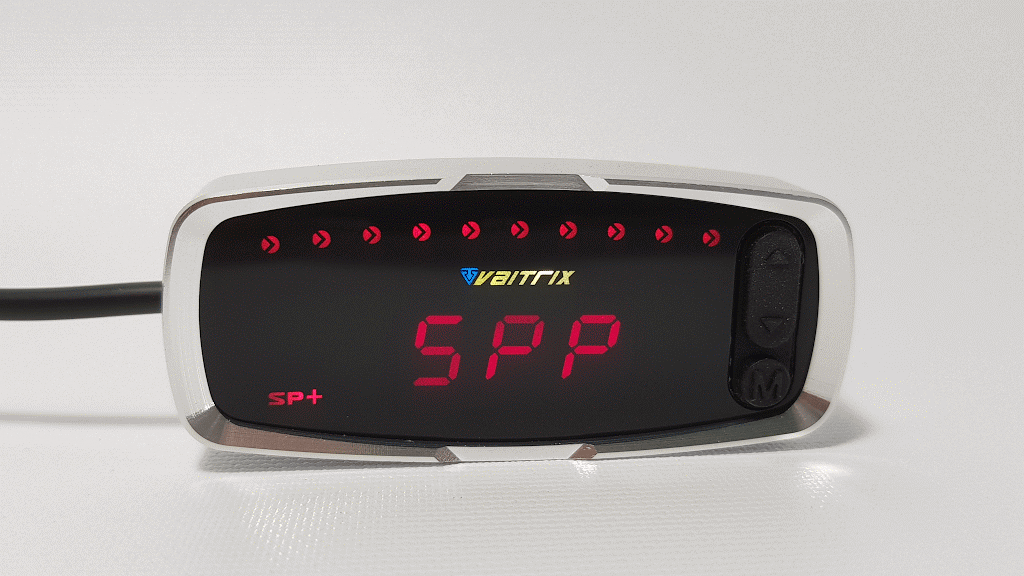
SP+ SP+ or "Sport Plus" mode is a sort-of launch mode. Once selected, a 10 second countdown timer begins (and is depicted by sequentially disappearing red circle lights). During this countdown, the moment the throttle is touched, it sends wide-open throttle signal to the ECU. NOT FOR STREET USE. |
||||||
Here's a .gif of the SP+ countdown.
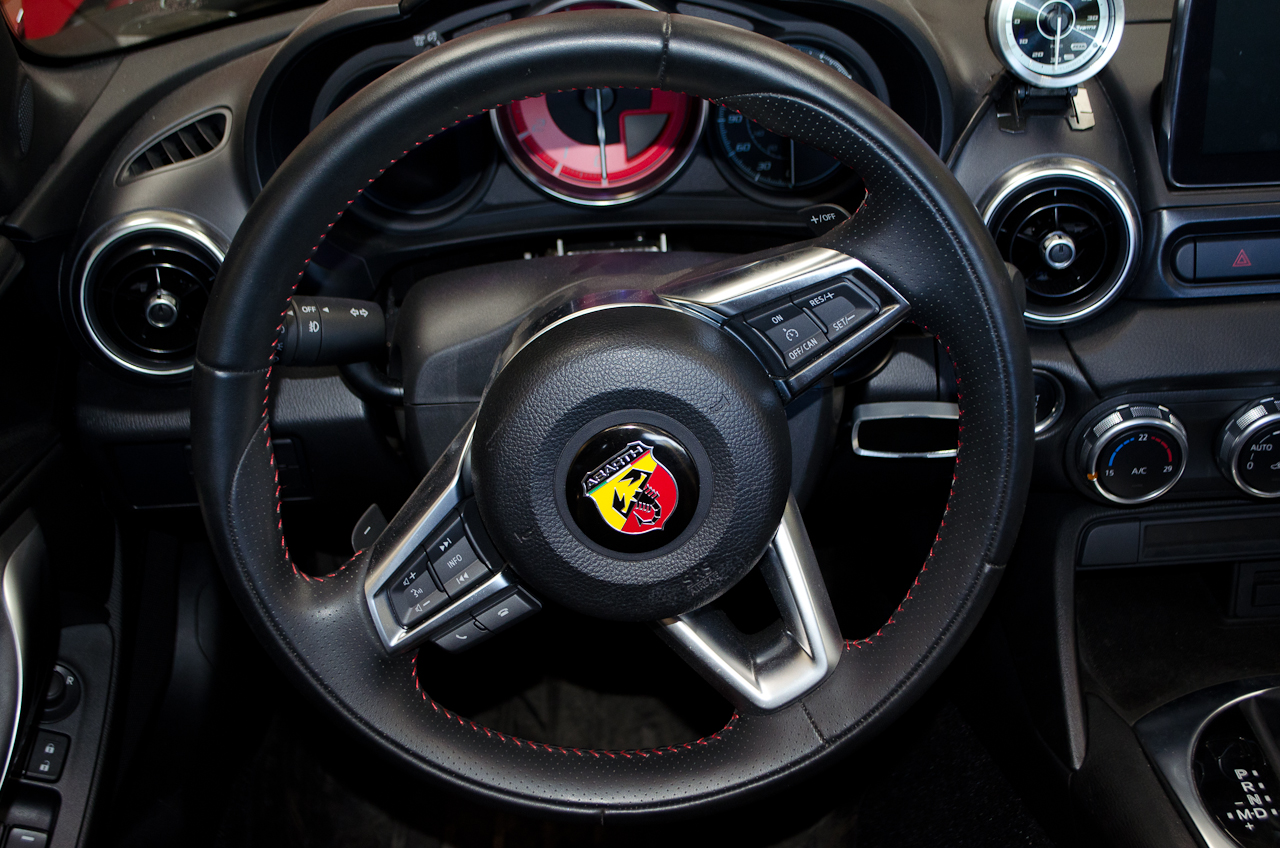
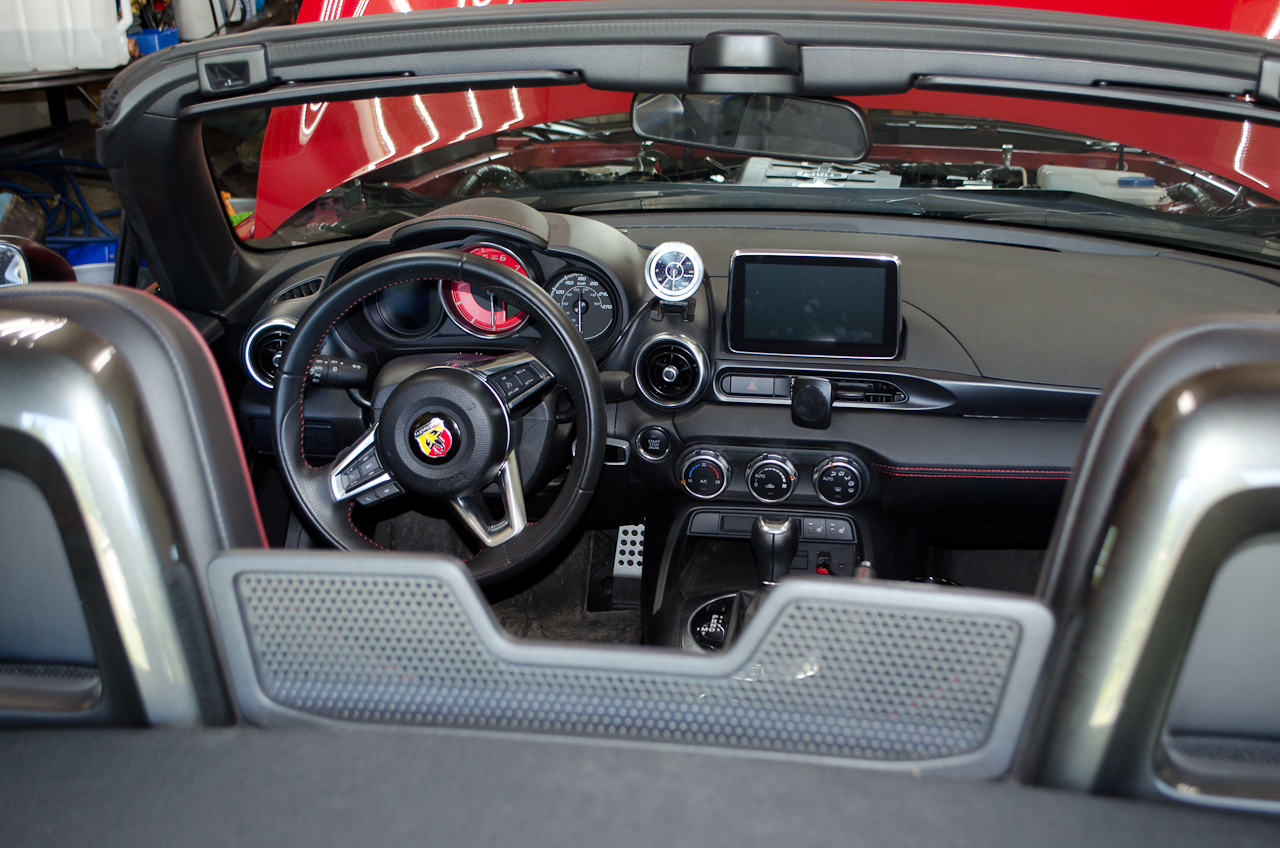
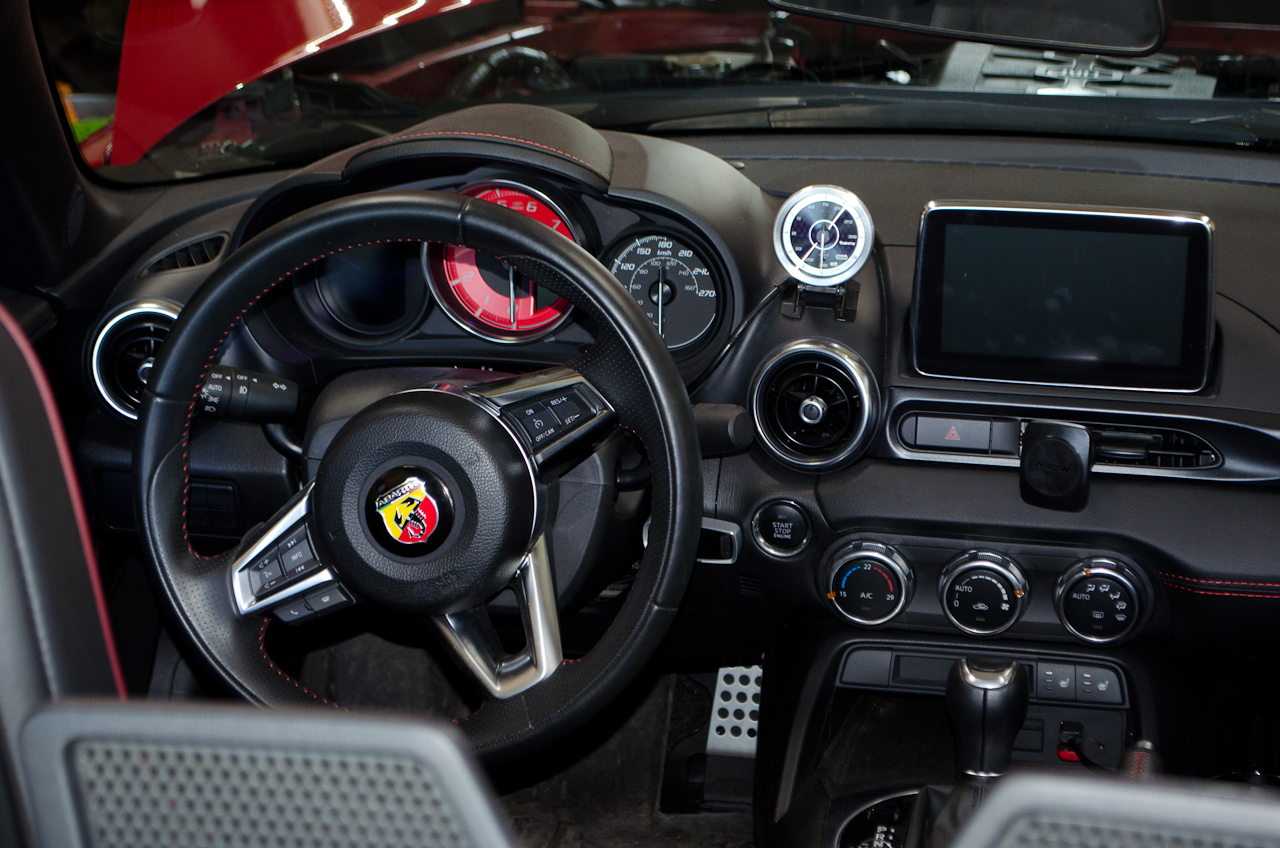
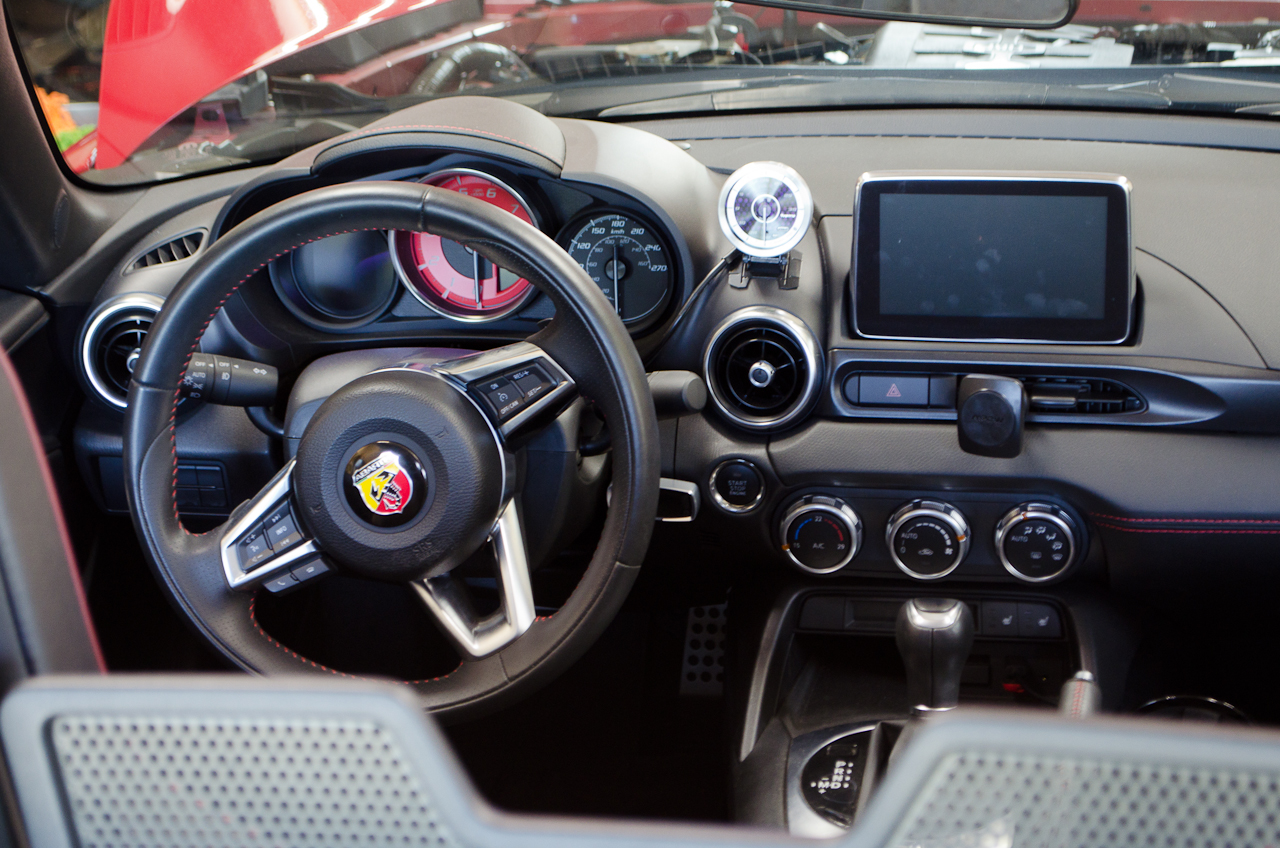
Here is a small gallery of pics showing my chosen mounting location for the controller:
The Verdict!Mounting:The location I chose isn't perfect from an aesthetic point of view due to the seam in the dash panels at that location, but it doesn't look terrible. It is easily manipulated from the driver's seat, does not interfere with anything through full steering wheel and steering column range of motion, and though it's not perfect for legibility, you don't really need to read it once you have your preferred settings dialed in. In just a couple of days I find I can manipulate it without even looking (e.g. switching between SPORT and STD). Performance:I'm not usually one for unabashed fan-boy level foaming at the mouth about a product...but, I just have to rant about how great the Vaitrix Digipedal Commander is. It is my favourite mod by far. BY FAR. It really wakes the car up. It is so much fun. And it pairs perfectly with the exhaust.
|
|||||||
|